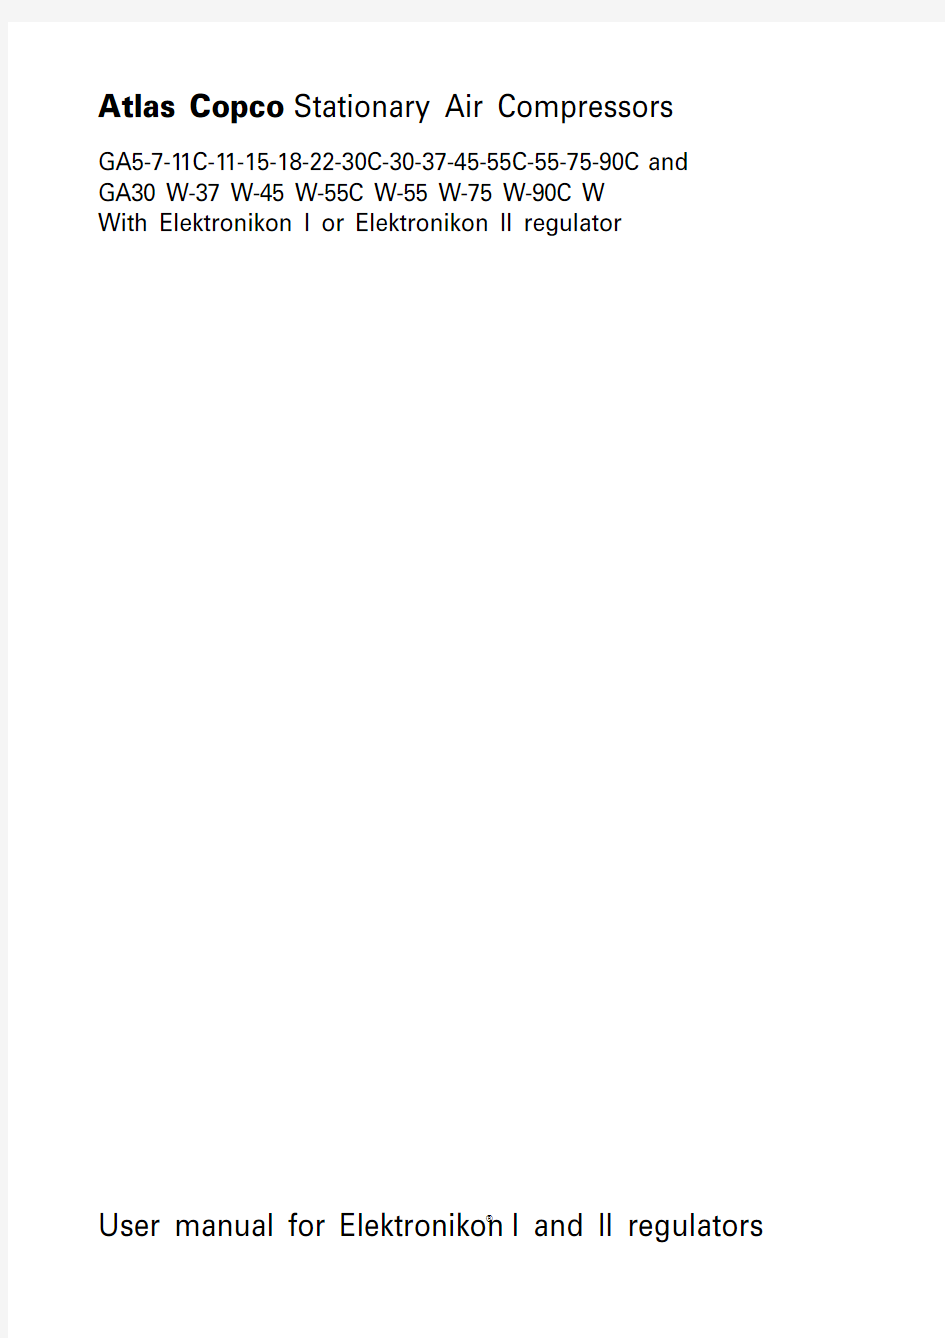

Atlas Copco Stationary Air Compressors
GA5-7-11C-11-15-18-22-30C-30-37-45-55C-55-75-90C and GA30 W-37 W-45 W-55C W-55 W-75 W-90C W
With Elektronikon I or Elektronikon II regulator
User manual for Elektronikon? I and II regulators
Compressor type:. . . . . . . . . . . . . . . . . . . . . . . . . . . . . . . . . . . . . . . . Unit serial No. compressor:. . . . . . . . . . . . . . . . . . . . . . . . . . . . . . . . . . . . Air dryer type:. . . . . . . . . . . . . . . . . . . . . . . . . . . . . . . . . . . . . . . . . . Unit serial No. dryer:. . . . . . . . . . . . . . . . . . . . . . . . . . . . . . . . . . . . . . . . . Motor type:. . . . . . . . . . . . . . . . . . . . . . . . . . . . . . . . . . . . . . . . . . . . . Motor serial No.:. . . . . . . . . . . . . . . . . . . . . . . . . . . . . . . . . . . . . . . . . . . . Delivery date:. . . . . . . . . . . . . . . . . . . . . . . . . . . . . . . . . . . . . . . . . . . First start-up date:. . . . . . . . . . . . . . . . . . . . . . . . . . . . . . . . . . . . . . . . . . . Service Plan:. . . . . . . . . . . . . . . . . . . . . . . . . . . . . . . . . . . . . . . . . . . . Owner's machine No.:. . . . . . . . . . . . . . . . . . . . . . . . . . . . . . . . . . . . . . . . Selected lubricants
Compressor:. . . . . . . . . . . . . . . . . . . . . . . . . . . . . . . . . . . . . . . . . . . . Capacity:. . . . . . . . . . . . . . . . . . . . . . . . . . . . . . . . . . . . . . . . . . . . . . . . . . Bearing grease type, electric motor:. . . . . . . . . . . . . . . . . . . . . . . . . Dryer gearbox. . . . . . . . . . . . . . . . . . . . . . . . . . . . . . . . . . . . . . . . . . . Capacity . . . . . . . . . . . . . . . . . . . . . . . . . . . . . . . . . . . . . . . . . . . . . . . . . . . Printed Matter Nos.
Atlas Copco compressor instruction book:. . . . . . . . . . . . . . . . . . . . Atlas Copco air dryer instruction book:. . . . . . . . . . . . . . . . . . . . . . . . . . Atlas Copco compressor parts list:. . . . . . . . . . . . . . . . . . . . . . . . . . Atlas Copco air dryer parts list:. . . . . . . . . . . . . . . . . . . . . . . . . . . . . . . . Atlas Copco logbook:. . . . . . . . . . . . . . . . . . . . . . . . . . . . . . . . . . . . . Local Atlas Copco Representative
Name:. . . . . . . . . . . . . . . . . . . . . . . . . . . . . . . . . . . . . . . . . . . . . . . . . . . . . . . . . . . . . . . . . . . . . . . . . . . . . . . . . . . . . . . . . . . . . . . . . . . . . . . . . . . . . . . Address:. . . . . . . . . . . . . . . . . . . . . . . . . . . . . . . . . . . . . . . . . . . . . . . . . . . . . . . . . . . . . . . . . . . . . . . . . . . . . . . . . . . . . . . . . . . . . . . . . . . . . . . . . . . . . . Telephone:. . . . . . . . . . . . . . . . . . . . . . . . . . . . . . . . . . . . . . . Contact persons:Service:. . . . . . . . . . . . . . . . . . . . . . . . . . . . . . . . . . . . . . . . . . . . . Telex:. . . . . . . . . . . . . . . . . . . . . . . . . . . . . . . . . . . . . . . . . . Parts:. . . . . . . . . . . . . . . . . . . . . . . . . . . . . . . . . . . . . . . . . . . . . . . E-mail . . . . . . . . . . . . . . . . . . . . . . . . . . . . . . . . . . . . . . . . . . . . . . . . . . . . . . . . . . . . . . . . . . . . . . . . . . . . . . . . . . . . . . . . . . . . . . . . . . . . . . . . . . . . . . .
SAFETY PRECAUTIONS
To be read attentively and acted accordingly before installing, operating or repairing the unit.
These recommendations apply to machinery processing or consuming air or inert gas. Processing of any other gas requires
additional safety precautions typical to the application which are not included herein.
If necessary, install a suction duct. Never obstruct the air inlet. Care shall be taken to minimize the entry of moisture with the inlet air.4.The aspirated air shall be free from flammable fumes or vapours,
e.g. paint solvents, that can lead to internal fire or explosion.5.Air-cooled units shall be installed in such a way that an adequate
flow of cooling air is available and that the exhausted air does not recirculate to the inlet.6.Arrange the air intake so that loose clothing of people cannot be
sucked in.7.Ensure that the discharge pipe from the compressor to the aftercooler,
air dryer or air net is free to expand under heat and that it is not in contact with or close to flammable material.8.No external force may be exerted on the air outlet valve; the connected
pipe must be free of strain.9.If remote control is installed, the unit shall bear an obvious sign
reading:
DANGER: This machine is remotely controlled and may start without warning.
As a further safeguard, persons switching on remotely controlled units shall take adequate precautions to ensure that there is no one checking or working on the machine. To this end, a suitable notice shall be affixed to the start equipment.
10.On units with automatic start-stop system, a sign stating "This
machine may start without warning" shall be attached near the instrument panel.11.In multiple compressor systems manual valves shall be installed to
isolate each compressor. Non-return valves (check valves) shall not be relied upon for isolating pressure systems.12.Never remove or tamper with the safety devices, guards or insulations
fitted on the unit. Every pressure vessel or auxiliary installed outside the unit to contain air above atmospheric pressure shall be protected by a pressure-relieving device or devices as required.13.Pipework or other parts with a temperature in excess of 80 degrees
celsius and which may be accidentally touched by personnel in nor-mal operation shall be guarded or insulated. Other high-temperature pipework shall be clearly marked.
OWNERSHIP DA T A
In addition to normal safety rules which should be observed with stationary air compressors and equipment, the following safety directions and precautions are of special importance.
When operating this unit, the operator must employ safe working practices and observe all related local work safety requirements and ordinances.The owner is responsible for maintaining the unit in a safe operating condition. Parts and accessories shall be replaced if unsuitable for safe operation.
Installation, operation, maintenance and repair shall only be performed by authorized, trained, competent personnel.
Normal ratings (pressures, temperatures, time settings, etc.) shall be durably marked.
Any modification on the compressor or air dryer shall only be performed in agreement with Atlas Copco and under supervision of authorized,competent personnel.
If any statement in this book, especially with regard to safety, does not comply with local legislation, the stricter of the two shall apply.These precautions are general and cover several machine types and equipment; hence some statements may not apply to the unit(s) described in this book.
Installation
Apart from general engineering practice in conformity with the local safety regulations, the following directives are specially stressed:1. A compressor or air dryer shall be lifted only with adequate equipment
in conformity with local safety rules.
Loose or pivoting parts shall be securely fastened before lifting. It is strictly forbidden to dwell or stay in the risk zone under a lifted load.Lifting acceleration and retardation shall be kept within safe limits.Wear a safety helmet when working in the area of overhead or lifting equipment.
2.Any blanking flanges, plugs, caps and desiccant bags shall be
removed before connecting up the pipes. Distribution pipes and connections shall be of correct size and suitable for the working pressure.3.Place the unit where the ambient air is as cool and clean as possible.2920 1377 03
1/2
(continued on inside of cover)
Atlas Copco Stationary Air Compressors
Important
This book applies exclusively to the above-mentioned compressors with Elektronikon I or II regulator from following serial numbers onwards:GA5 up to GA11C:AII-145 000GA11 up to GA30C:AII-268 500GA30 up to GA55C:AII-380 000GA55 up to GA90C:AII-474 000
No. 2920 1461 03Replaces 2920 1461 02
Registration code:APC G5-11C/2002 / 38 / 984
APC G11-30C / 38 / 989APC G30-55C / 38 / 980APC G55-90C / 38 / 9852003-09
GA5-7-11C-11-15-18-22-30C-30-37-45-55C-55-75-90C and GA30 W-37 W-45 W-55C W-55 W-75 W-90C W With Elektronikon I or Elektronikon II regulator User manual for Elektronikon ? I and II regulators
·
Copyright 2003, Atlas Copco Airpower n.v., Antwerp, Belgium.
Any unauthorized use or copying of the contents or any part thereof is prohibited. This applies in particular to trademarks, model denominations, part numbers and drawings.
·
This instruction book meets the requirements for instructions specified by the machinery directive 98/37/EC and is valid for CE as well as non-CE labelled machines.
https://www.doczj.com/doc/852496060.html,
2920 1461 03
2User manual
Page
7
Scrolling through all screens . . . . . . . . . . . . . . . . . . . . . . . . . 77.1Calling up outlet/dewpoint temperatures . . . . . . . . . . . . 97.2Calling up running hours . . . . . . . . . . . . . . . . . . . . . . . . 97.3Calling up loading hours . . . . . . . . . . . . . . . . . . . . . . . . 97.4Calling up motor starts . . . . . . . . . . . . . . . . . . . . . . . . . 107.5Calling up/resetting service timer. . . . . . . . . . . . . . . . . 107.6Automatic r e start aft e r voltag e failur e . . . . . . . . . . . . . 107.7Set of parameters. . . . . . . . . . . . . . . . . . . . . . . . . . . . . . 117.8Calling up/modifying unloading pressure . . . . . . . . . . 117.9Calling up/modifying loading pressure . . . . . . . . . . . . 117.10Calling up/modifying dewpoint warning temperature. 117.11Calling up/modifying service timer setting . . . . . . . . . 127.12Calling up/modifying unit for pressure . . . . . . . . . . . . 127.13Calling up/modifying unit for temperature . . . . . . . . . 127.14Selection between Y-D/DOL starting . . . . . . . . . . . . . . 127.15Activating automatic restart after voltage failure. . . . . 137.16Se le cting local/re mote control . . . . . . . . . . . . . . . . . . . 137.17Modifying parameter set. . . . . . . . . . . . . . . . . . . . . . . . 138
Settings . . . . . . . . . . . . . . . . . . . . . . . . . . . . . . . . . . . . . 148.1Unloading/loading pressures . . . . . . . . . . . . . . . . . . . . 148.2Element outlet temperature. . . . . . . . . . . . . . . . . . . . . . 148.3Dewpoint temperature. . . . . . . . . . . . . . . . . . . . . . . . . . 148.4Service timer . . . . . . . . . . . . . . . . . . . . . . . . . . . . . . . . . 14
Contents
PART 1 - ELEKTRONIKON I REGULATOR
Page
1
General description . . . . . . . . . . . . . . . . . . . . . . . . . . . . . . . . 31.1Automatic control of the compressor . . . . . . . . . . . . . . 31.2Protecting the compressor . . . . . . . . . . . . . . . . . . . . . . . 31.3Automatic restart after voltage failure . . . . . . . . . . . . . . 32Control panel . . . . . . . . . . . . . . . . . . . . . . . . . . . . . . . . . . . . . 33
Display . . . . . . . . . . . . . . . . . . . . . . . . . . . . . . . . . . . . . . . . . . . 43.1Pictographs used on the screen . . . . . . . . . . . . . . . . . . . 43.2Main screen. . . . . . . . . . . . . . . . . . . . . . . . . . . . . . . . . . . 43.3Scrolling through all screens . . . . . . . . . . . . . . . . . . . . .
5
4
Shut-down warning . . . . . . . . . . . . . . . . . . . . . . . . . . . . . . . . 54.1Compressor element outlet temperature. . . . . . . . . . . . . 54.2Dewpoint temperature. . . . . . . . . . . . . . . . . . . . . . . . . . . 55
Shut-down
5.1Compressor element outlet temperature. . . . . . . . . . . . . 65.2Motor overload . . . . . . . . . . . . . . . . . . . . . . . . . . . . . . . . 66
Service warning . . . . . . . . . . . . . . . . . . . . . . . . . . . . . . . . . . . 7
PART 2 - ELEKTRONIKON II REGULATOR
Page
1
General description . . . . . . . . . . . . . . . . . . . . . . . . . . . . . . . 151.1Automatic control of the compressor . . . . . . . . . . . . . 151.2Protecting the compressor . . . . . . . . . . . . . . . . . . . . . . 151.3Automatic restart after voltage failure . . . . . . . . . . . . . 152
Control panel . . . . . . . . . . . . . . . . . . . . . . . . . . . . . . . . . . . . 162.1LEDs/buttons/keys . . . . . . . . . . . . . . . . . . . . . . . . . . . . 162.2Pictographs . . . . . . . . . . . . . . . . . . . . . . . . . . . . . . . . . . 172.3Function keys . . . . . . . . . . . . . . . . . . . . . . . . . . . . . . . . 173
Menu-driven control programs . . . . . . . . . . . . . . . . . . . . . 193.1Function of control programs. . . . . . . . . . . . . . . . . . . . 193.2Main screen. . . . . . . . . . . . . . . . . . . . . . . . . . . . . . . . . . 193.3Calling up other menus. . . . . . . . . . . . . . . . . . . . . . . . .
19
4Quick look at actual compressor status . . . . . . . . . . . . . . . 205
Status data menu . . . . . . . . . . . . . . . . . . . . . . . . . . . . . . . . . 205.1No message exists . . . . . . . . . . . . . . . . . . . . . . . . . . . . . 205.2 A shut-down message exists . . . . . . . . . . . . . . . . . . . . . 205.3 A shut-down warning message exists. . . . . . . . . . . . . . 215.4 A service warning message exists . . . . . . . . . . . . . . . . 215.5 A warning message exists . . . . . . . . . . . . . . . . . . . . . . .
21
6Measured data menu . . . . . . . . . . . . . . . . . . . . . . . . . . . . . . 227Counters menu . . . . . . . . . . . . . . . . . . . . . . . . . . . . . . . . . . . 228
Test menu
. . . . . . . . . . . . . . . . . . . . . . . . . . . . . . . . . . . . . 22
Page
9
Modify params menu . . . . . . . . . . . . . . . . . . . . . . . . . . . . . . 22
10Modifying parameters . . . . . . . . . . . . . . . . . . . . . . . . . . . . . 23
10.1Modifying loading/unloading pressures. . . . . . . . . . . . 2311Modifying protection settings . . . . . . . . . . . . . . . . . . . . . . . 23
11.1Modifying settings for compressor element. . . . . . . . . 2412Modifying service plans . . . . . . . . . . . . . . . . . . . . . . . . . . . . 2413Programming clock function . . . . . . . . . . . . . . . . . . . . . . . .
2513.1Programming start/stop/pressure band commands . . . 2513.2To activate/deactivate the timer . . . . . . . . . . . . . . . . . . 2613.3To modify a command . . . . . . . . . . . . . . . . . . . . . . . . . 2613.4To add a command . . . . . . . . . . . . . . . . . . . . . . . . . . . . 2713.5To delete commands . . . . . . . . . . . . . . . . . . . . . . . . . . .
27
14Configuration menu . . . . . . . . . . . . . . . . . . . . . . . . . . . . . . . 28
14.1Programming compressor control modes. . . . . . . . . . . 2815Service menu . . . . . . . . . . . . . . . . . . . . . . . . . . . . . . . . . . . . . 2816Saved data menu . . . . . . . . . . . . . . . . . . . . . . . . . . . . . . . . . 2917Programmable settings . . . . . . . . . . . . . . . . . . . . . . . . . . . .
3017.1Parameters. . . . . . . . . . . . . . . . . . . . . . . . . . . . . . . . . . . 3017.2Protections. . . . . . . . . . . . . . . . . . . . . . . . . . . . . . . . . . . 3117.3Service plan. . . . . . . . . . . . . . . . . . . . . . . . . . . . . . . . . .
31
2920 1461 03
3
User manual
PART 1
ELEKTRONIKON I REGULATOR
1.3 Automatic restart after voltage failure
For compressors leaving the factory, this function is made inactive. If desired, the function can be activated. Consult Atlas Copco.Warning
If activated and provided the module was in the automatic operation mode, the compressor will automatically restart if the supply voltage to the module is restored.
2Control panel
Ref.Designation Function
1
Stop button
Push button to stop the compressor. LED (10) goes out.The compressor will stop after running in unloaded condition for about 30 seconds.
2Start button
Push button to start the compressor. LED (10) lights up indicating that the regulator is operative (in automatic operation).3Display
Indicates the compressor operating condition, measured values and programmed parameters.
1General description
1.1 Automatic control of the compressor
The regulator maintains the net pressure between programmable limits by automatically loading and unloading the compressor.A number of programmable settings, e.g. the unloading and loading pressures, the minimum stop time and the maximum number of motor starts are taken into account.
The regulator stops the compressor whenever possible to reduce the power consumption and restarts it automatically when the net pressure decreases.
1.2 Protecting the compressor
Shut-down
If the compressor element outlet temperature exceeds the programmed shut-down level, the compressor will be stopped.This will be indicated on display (3). The compressor will also be stopped in case of overload of drive motor (M1) and,for air-cooled compressors, also the fan motor (M2).Shut-down warning
If the compressor element outlet temperature or dewpoint temperature (Full-Feature compressors) exceeds a programmed value below the shut-down level, this will also be indicated to warn the operator before the shut-down level is reached.Service warning
If the service timer exceeds a programmed value, this will be indicated on display (3) to warn the operator to carry out some service actions.
52238F
User manual
52236F
4
2920 1461 03
User manual
Important
Always consult Atlas Copco in case "t" or "test" appears on the display
3.3 Scrolling through all screens
It is possible to scroll downwards and upwards through a number of screens by means of the upwards/downwards arrow keys (12 and 13). See section 7.
4 Shut-down warning
A shut-down warning message will appear in case of:
-too high a temperature at the outlet of the compressor element
-too high a dewpoint temperature (FF compressors)
4.1 Compressor element outlet temperature
1.In case the outlet temperature of the compressor element
exceeds the shut-down warning level (110 °C, not programmable), alarm LED (8) will light up and the related
pictograph will appear blinking:
Blinking
bar
6.6
Warning screen, element outlet temperature
2.Press arrow key (12), r000 (register 000) appears.
3.Press arrow key (12), the actual compressor element
temperature appears:
Blinking
C
111
Warning screen, element outlet temperature
The screen shows that the temperature at the outlet of the compressor element is 111 °C.4.It remains possible to scroll through other screens (using
keys 12 and 13) to check the actual status of other parameters.
5.Press button (1) to stop the compressor and wait until the
compressor has stopped.
6.Switch off the voltage, inspect the compressor and remedy.
7.The warning message will disappear as soon as the warning
condition disappears.
4.2 Dewpoint temperature
1.In case the dewpoint temperature exceeds the shut-down
warning level (programmable), alarm LED (8) will light up
and the related pictograph will appear blinking:
Blinking
bar
6.6
Warning screen, dewpoint temperature
2.Press arrow key (12), r000 (register 000) appears.
3.Press arrow key (12), the actual dewpoint temperature
appears:
Blinking
°C
9
Warning screen, dewpoint temperature
The screen shows that the dewpoint temperature is 9 °C. 4.It remains possible to scroll through other screens (using
keys 12 and 13) to check the actual status of other parameters.
5.Press button (1) to stop the compressor and wait until the
compressor has stopped.
6.Switch off the voltage, inspect the compressor and remedy.
7.The warning message will disappear as soon as the warning
condition disappears.
2920 1461 035
User manual
5 Shut-down
The compressor will be shut down in case:
-the temperature at the outlet of the compressor element exceeds the shut-down level
-of error of the outlet pressure sensor
-of overload of the drive motor and, on air-cooled compressors, also the fan motor
5.1 Compressor element outlet temperature
1.In case the outlet temperature of the compressor element
exceeds the shut-down level (120 °C, not programmable), the compressor will be shut down, alarm LED (8) will blink, automatic operation LED (10) will go out and following screen will appear:
Blinking
Shut-down screen, element outlet temperature
2.Press enter key (5), r000 (register 000) appears.
3.Press arrow key (12), the actual compressor element
temperature appears:
Blinking
°C
122
Shut-down screen, element outlet temperature
The screen shows that the temperature at the outlet of the compressor element is 122 °C.
4.Switch off the voltage and remedy the trouble.
5.After remedying and when the shut-down condition has
disappeared, switch on the voltage and restart the compressor.5.2 Motor overload
1.In case of motor overload, the compressor will be shut down,
alarm LED (8) will blink, automatic operation LED (10)
will go out and following screen will appear:
Blinking
Shut-down screen, motor overload
2.Switch off the voltage and remedy the trouble.
3.After remedying and when the shut-down condition has
disappeared, switch on the voltage and restart the compressor.
52236F
2920 1461 03
6
User manual
2920 1461 037
°C 82
°C
kHrs r001°C
P003
°C
8
L
K L
L
L L L
L L
L
2920 1461 03
8
User manual
Parameter Used for
screens
P001Unload pressure setting
P002Load pressure setting
P003Warning level setting for dewpoint temperature P004Setting of service timer
P005Setting of unit for pressure
P006Setting of unit for temperature
P007Selection between Y-D or DOL starting
P008Selection for function "Automatic restart after voltage failure" (active or not, only for Atlas
Copco)
P009Selection between Local/Remote control
P010Changing set of programmed parameters (only for Atlas Copco)
7.1Calling up outlet and dewpoint
temperatures
Starting from the Main screen:
bar
6.6
1.
Press arrow key (12), the outlet temperature will be shown:
°C
83
The screen shows that the outlet temperature is 83 °C.2.Press arrow key (12), the dewpoint temperature will be
shown:
°C
3
The screen shows that the dewpoint temperature is 3 °C. https://www.doczj.com/doc/852496060.html,e keys (12 and 13) to scroll downwards or upwards
through the screens.
7.2 Calling up running hours
Starting from the Main screen:
bar
6.6
1.Press arrow key (12) until r001 is shown and then press
enter key (5):
kHrs
2.381
The screen shows the unit used ( kHrs or hours x 1000) and the value 2.381 : the running hours of the compressor are 2381 hours.
7.3 Calling up loading hours
Starting from the Main screen:
bar
6.6
52236F
2920 1461 039
User manual
1.Press arrow key (12) until r002 is shown and then press
enter key (5):
kHrs
1.755
The screen shows the unit used ( kHrs or hours x 1000) and the value 1.755 : the loading hours of the compressor are 1755 hours.
7.4 Calling up motor starts
Starting from the Main screen:
bar
6.6
1.Press arrow key (12) until r003 is shown and then press
enter key (5):
3
This screen shows the number of motor starts times 1000. Press enter key (5) to return to the register screens.
2.Press arrow key (12) until r004 is shown and then press
enter key (5):
226
This screen shows the number of motor starts to be added to the reading in register r003. In this example, the number of motor starts is 3226.7.5 Calling up/resetting service timer
Starting from the Main screen:
bar
6.6
1.Press arrow key (12) until r005 is shown and then press
enter key (5):
kHrs
1.191
The screen shows the unit used ( kHrs or hours x 1000) and the value 1.191 : the compressor has run for 1191 hours since previous service.
Resetting the service timer
After servicing (see section 6), the timer has to be reset:
1.Scroll to register screen r005, the reading (e.g. 4.000 )
will appear.
2.Press reset key (4), the reading will blink (indicating that
resetting is possible).
3.Press enter key (5) to reset the timer to "0.000" or press
reset key (4) to cancel the operation.
7.6 Automatic restart after voltage failure
Starting from the Main screen:
bar
6.6
Press arrow key (12) until r006 is shown and press enter key (5):
-if 0 appears, the function Automatic restart after voltage failure is not active
-if 1 appears, the function Automatic restart after voltage failure is active
2920 1461 03
10
User manual
52236F
2920 1461 0311
User manual
52236F
12
2920 1461 03
User manual
1.Press arrow key (12) until P007 is shown and press enter
key (5). The actually used starting mode is blinking: 1
for Y-D (star-delta) or 0 for DOL (direct-on line).
https://www.doczj.com/doc/852496060.html,e arrow keys (12 and 13) to select another starting mode.
3.Press enter key (5) to program the new starting mode and
to return to the parameter screens.
7.15 Activating Automatic restart after
voltage failure
This parameter, accessible in screen P008 , can only be
modified after entering a password. Consult Atlas Copco if
this function should be activated.
7.16 Selecting between Local or Remote
control
Starting from the Main screen:
bar
6.6
1.Press arrow key (12) until P009 is shown and press enter
key (5). The actually used control mode is blinking: 0 for
Local control mode or 1 for Remote control mode.
https://www.doczj.com/doc/852496060.html,e arrow keys (12 and 13) to select another mode.
3.Press enter key (5) to program the new control mode and to
return to the parameter screens.
7.17 Modifying the Parameter set
This parameter, accessible in screen P010 , can only be
modified after entering a password.
2920 1461 0313
User manual 8Settings
8.1Unloading/loading pressures
Minimum Nominal Maximum Unloading pressure
13 bar. . . . . . . . . . . . . . . . . . . . . . . . . . . . . . . . . . . . bar(e) 4.112.513
13 bar Full-feature. . . . . . . . . . . . . . . . . . . . . . . . . . bar(e) 4.112.512.8
10 bar. . . . . . . . . . . . . . . . . . . . . . . . . . . . . . . . . . . . bar(e) 4.19.510
10 bar Full-feature. . . . . . . . . . . . . . . . . . . . . . . . . . bar(e) 4.19.59.8
7.5 bar. . . . . . . . . . . . . . . . . . . . . . . . . . . . . . . . . . . . bar(e) 4.177.5
7.5 bar Full-feature. . . . . . . . . . . . . . . . . . . . . . . . . . bar(e) 4.177.3
100 psi. . . . . . . . . . . . . . . . . . . . . . . . . . . . . . . . . . . bar(e) 4.1 6.97.4
100 psi Full-feature. . . . . . . . . . . . . . . . . . . . . . . . . bar(e) 4.1 6.97.2
125 psi. . . . . . . . . . . . . . . . . . . . . . . . . . . . . . . . . . . bar(e) 4.18.69.1
125 psi Full-feature. . . . . . . . . . . . . . . . . . . . . . . . . bar(e) 4.18.68.9
150 psi. . . . . . . . . . . . . . . . . . . . . . . . . . . . . . . . . . . bar(e) 4.110.310.8
150 psi Full-feature. . . . . . . . . . . . . . . . . . . . . . . . . bar(e) 4.110.310.6
175 psi. . . . . . . . . . . . . . . . . . . . . . . . . . . . . . . . . . . bar(e) 4.11212.5
175 psi Full-feature. . . . . . . . . . . . . . . . . . . . . . . . . bar(e) 4.11212.3
Loading pressure
13 bar. . . . . . . . . . . . . . . . . . . . . . . . . . . . . . . . . . . . bar(e)411.912.9
13 bar Full-feature. . . . . . . . . . . . . . . . . . . . . . . . . . bar(e)411.912.7
10 bar. . . . . . . . . . . . . . . . . . . . . . . . . . . . . . . . . . . . bar(e)48.99.9
10 bar Full-feature. . . . . . . . . . . . . . . . . . . . . . . . . . bar(e)48.99.7
7.5 bar. . . . . . . . . . . . . . . . . . . . . . . . . . . . . . . . . . . . bar(e)4 6.47.4
7.5 bar Full-feature. . . . . . . . . . . . . . . . . . . . . . . . . . bar(e)4 6.47.2
100 psi. . . . . . . . . . . . . . . . . . . . . . . . . . . . . . . . . . . bar(e)4 6.37.3
100 psi Full-feature. . . . . . . . . . . . . . . . . . . . . . . . . bar(e)4 6.37.1
125 psi. . . . . . . . . . . . . . . . . . . . . . . . . . . . . . . . . . . bar(e)489
125 psi Full-feature. . . . . . . . . . . . . . . . . . . . . . . . . bar(e)488.8
150 psi. . . . . . . . . . . . . . . . . . . . . . . . . . . . . . . . . . . bar(e)49.710.7
150 psi Full-feature. . . . . . . . . . . . . . . . . . . . . . . . . bar(e)49.710.5
175 psi. . . . . . . . . . . . . . . . . . . . . . . . . . . . . . . . . . . bar(e)411.412.4
175 psi Full-feature. . . . . . . . . . . . . . . . . . . . . . . . . bar(e)411.412.2
The recommended minimum pressure difference between loading and unloading is 0.6 bar.
8.2Element outlet temperature
The settings for warning (110 °C) and shut-down (120 °C) are
not programmable.
8.3Dewpoint temperature
The nominal warning setting is 8°C.
8.4Service timer
The nominal setting for compressors using Roto-injectfluid is
4000 running hours. If using mineral oil, the setting must be
decreased to 500 or 1000 running hours (see the related
Instruction book).
14
2920 1461 03
2920 1461 03
15
User manual
PART 2
ELEKTRONIKON II REGULATOR
-On GA Workplace FF with ICD the inlet temperature of the compressed air into the dryer exceeds the warning level.-On GA Workplace FF with ICD the pressure in the dryer vessels is lower than the minimum or higher than the maximum limit.
1.3Automatic restart after voltage failure
For compressors leaving the factory, this function is made inactive. If desired, the function can be activated. Consult Atlas Copco.Warning
If activated and provided the module was in the automatic operation mode, the compressor will automatically restart if the supply voltage to the module is restored within a programmed time period.
The power recovery time (the period within which the voltage must be restored to have an automatic restart) can be set between 10 and 600 seconds or to Infinite. If the power recovery time is set to Infinite, the compressor will always restart after a voltage failure, no matter how long it takes to restore the voltage. A restart delay can also be programmed, allowing e.g. two compressors to be restarted one after the other.
1General description
1.1Automatic control of the compressor
The regulator maintains the net pressure between programmable limits by automatically loading and unloading the compressor.A number of programmable settings, e.g. the unloading and loading pressures, the minimum stop time and the maximum number of motor starts are taken into account.
For GA Workplace FF with ICD, the regulator also maintains the pressure dewpoint of the dryer between programmable settings by defining the switching time. A number of programmable settings are taken into account.
The regulator stops the compressor whenever possible to reduce the power consumption and restarts it automatically when the net pressure decreases. In case the expected unloading period is too short, the compressor is kept running to prevent too-short standstill periods.Warning
A number of time-based automatic start/stop commands may be programmed (see section 13).Take into account that a start command will be executed (if programmed and activated), even after manually stopping the compressor.
1.2Protecting the compressor
Shut-down
If the compressor element outlet temperature exceeds the programmed shut-down level, the compressor will be stopped.This will be indicated on display (3-Fig. 2.1). The compressor will also be stopped in case of overload of the drive motor and,on air-cooled compressors, also the fan motor.
Shut-down warning
If the compressor element outlet temperature exceeds a programmed value below the shut-down level, this will also be indicated to warn the operator before the shut-down level is reached.
Service warning
A number of service operations are grouped in plans (called Service plans A,
B and C). Each Service plan has a programmed time interval. If a time interval is exceeded, a message will appear on display (3-Fig. 2.1) to warn the operator to carry out the service actions belonging to that plan. Consult the related Instruction book.
Warning
- A warning message also appears if:
-On water-cooled compressors the cooling water outlet temperature exceeds the warning level.
-On Full-feature compressors the dewpoint temperature exceeds the warning level.
52237F
2920 1461 03
16User manual
2Control panel
2.1LEDs/buttons/keys
Ref.Designation Function
1
Stop button
Push button to stop the compressor. LED (8) goes out.The compressor will stop after running in unloaded condition for about 30 seconds.
2Start button
Push button to start the compressor. LED (8) lights up indicating that the regulator is operative (in automatic operation).The LED goes out after unloading the compressor manually.3Display
Indicates messages concerning the compressor operating condition, a service need or a fault.
4Scroll keys
Keys to scroll through the display.5Tabulator key
Key to select the parameter indicated by a horizontal arrow.Only the parameters followed by an arrow pointing to the right are accessible for modifying.6V oltage on LED
Indicates that the voltage is switched on.
Ref.Designation
Function
7
General alarm LED Is alight if a warning, service
warning or shut-down warning condition exists or if a sensor is out of order.7
General alarm LED Blinks in case of shut-down, if a
sensor with shut-down function is out of order or after an emergency stop.8
Automatic Indicates that the regulator is operation LED
automatically controlling the compressor: the compressor is loaded, unloaded, stopped and restarted depending on the air consumption and the limitations programmed in the regulator.9Function keys Keys to control and program the compressor. See next page.S3
Emergency stop Push button to stop the compressor button immediately in case of emergency.After remedying the trouble,unlock the button by pulling it out.
52239F
User manual
2.2Pictographs
10Alarm
11Automatic operation
12V oltage on
2.3Function keys
The keys are used:
-To manually load/unload the compressor
-To call up or to program settings
-To reset a motor overload, shut-down or service message, or an emergency stop
-To have access to all data collected by the regulator The functions of the keys vary depending on the displayed menu. The actual function is abbreviated and indicated on the bottom line of the display just above the relevant key. The most common abbreviations are listed below.
Abbre-Desig-Function
viation nation
Add Add To add compressor start/stop
commands (day/hour)
Back Back To return to a previously shown
option or menu
Canc Cancel To cancel a programmed setting
when programming parameters Del Delete To delete compressor start/stop
commands
Help Help To find the Atlas Copco internet
address
Lim Limits To show limits for a programmable
setting
Load Load To load the compressor manually Main Main To return from a menu to the main
screen (Fig. 3.2)
Menu Menu Starting from the main screen (Fig.
3.2): to have access to submenus Menu Menu Starting from a submenu, to return
to the previous menu
Mod Modify To modify programmable settings Abbre-Desig-Function
viation nation
Prog Program To program modified settings Rset Reset To reset a timer or message Rtrn Return To return to a previously shown
menu
Unld Unload To unload the compressor
manually
Xtra Exta To find the module configuration
of the regulator
2920 1461 0317
DesignBuilder软件操作手册 注意事项: 1.安装时需要注意的问题:安装目录及整个路径须为全英文,不能出现中文字符,否则安装后不能正常打开。 2.关于证书:由于试用版只有三个月的试用期,因此软件使用三个月后可以将系统日期修改至有效期内以继续使用。 3.基本概念: 1)在DesignBuilder中将模型数据分为6个层次,分别为“场地”、“建筑”、 “块”、“区域”、“表面”、“子表面”。默认数据都是从上一层次 的数据所继承而来,如:“块”数据来自于“建筑”数据,而“区域” 数据则是来自于“块”数据等等,所以如果对上级层次中的数据进行了 变动,那么其下属层次中该数据都得到了修改。这一点可以让使用者输 入更少的数据,提高建模效率。 2)在层次分类中,可以将site看作一个小区,building是一栋建筑,block 可以看作一层楼,zone则是一个房间,这样方便理解。 1.开始界面: 界面左侧为最近使用过的文件,通过双击鼠标或者单击界面右侧“信息,帮助栏”中的“Open selected site(打开已选择的场地)”可以打开该文件。 也可以通过或者界面右侧“信息,帮助栏”中的“Create new site(建立新的位置)”来创建一个新的dsb文件。 1
2.引导界面: 当用户从“开始界面”开始一项新工作时会出现引导界面 从该界面可以修改新任务的文件名(Title),位置(Location),分析类型(Analysis type)。 3.界面:屏幕最上方为菜单栏,下面为工具条,屏幕中央从左至右分为导航界面、编辑界面以及信息板/模型数据界面。 2
3 3.1菜单栏(Menu ) 包括文件(File ),编辑(Edit ),进行(Go ),视图(View ),工具(Tool ),帮助(Help ) 将鼠标停留在菜单栏上的选项上,单击鼠标左键,出现功能下拉菜单。 3.2工具栏 (Toolbar) 包括“新建” ,“打开”,“保存” ,“打印”,“建筑 模型选项”,“将已选择物体的属性回复至默认值” (可以将属性清除至块(Block )级,区域(Zone )级,表面(Surface )级,洞口(Opening )级),“从模板下载数据” ,“选择”,“增加一个新块” ,……“画构造线” ,“测量长度、角度和面积” ,“移动”,“复制”,“旋转”,“拉伸”,“删除”,“旋转观看视角”,“放大/缩小”(也可以通过鼠标滚轮实现缩放操作),“适应屏幕” , “平移”,“窗口缩放”,“导出数据”,“汇编报告”。 3.3导航界面(Navigator Panel) 导航板可以实现“场地”、“建筑”、“块”、“区域”、“表面”、“子表面”等各层之间的切换。 3.4编辑界面(Edit Screen) 使用者通过该区域进行建模,修改模型等操作。 界面上方为模型数据标签:包括“设计(Layout ),活动(Activity ),构造(Construction ),门窗洞口(Openings ),灯光(Lighting ),供热通风与空调工程(HVAC ),计算流体力学(CFD ),选项(Options )。 界面下方为屏幕标签:编辑(Edit ),可视化(Visualise ),供热设计(Heating design ),空调设计(Cooling design ),模拟(Simulation ),计算流体力学(CFD )。 3.5信息板(Info Pane )/模型数据(Model Data ) 当学习模式开启时为信息/帮助板,当学习模式关闭时(可以通过菜单栏Tools 选项中的Program Options ——Interface Style 中将Learning 前面的勾去掉即可)则为模型数据板。
阿特拉斯空压机控制面板操作说明 (阿特拉斯空压机电脑板,阿特拉斯空压机控制面板) 1--启动按钮(此按钮可用来启动压缩机。指示灯(8)点亮,表示EⅡ电脑控制器正在运行。) 2—显示屏(显示有关压缩机的工作状况,保养及故障信息) 3—滚动键(此键可用向上或向下滚动显示屏) 4--制表位键TAB (按此键,可以选择水平箭头标示的参数,只能修改后面有水平箭头的参数.) 5—功能键(功能键可以用来控制和设定压缩机) 6--电源指示灯(指明已接通电源) 7—综合报警指示灯(如果存在报警,保养报警,则该指示灯会亮起) 8—自动运行指示灯(指明电脑控制器正在自动运行) 9---停机按钮(按下此按钮,可以停止运行压缩机.(8)会熄灭。在卸载情况下运行30秒后,压缩机将停止运行) S3—紧急停机按钮(按此按钮,可以在紧急情况下立即停止压缩机,排除故障后拔出按钮以解除锁定。) 开机前 1、检查油位。油位指针必须指在绿色区域的上部或高于该区域。 2、如果空气过滤器保养指示器的彩色部分完全显示出来,更换空气过滤器芯,参考使用说明书复位保养指示器和保养报警时钟。 开机 1、合上电源。检查电源指示灯(6)是否点亮。 2、打开空气出气阀。 3、关闭冷凝液排污阀。 4、按开机按钮I。空压机开始运行,自动运行指示灯(8)点亮,开机后10秒,空压机开始加载运行。 在运行中 1、经常检查油位,在加载中,指针必须位于绿色区域。
2、如果指示灯(8)点亮,电脑控制器正自动控制压缩机的加载,卸载,停机和重新启动。 3、经常检查显示屏(2):空压机的运行状态通过图标显示在显示屏上。 4、如果报警指示灯(7)点亮或闪烁,请排除故障,参考使用说明书。如果需保养,停机并执行保养措施,参考使用说明书。 5、停机 1、按停机按钮O。指示灯(8)熄灭。空压机大约卸载运行30秒后停机。 2、在紧急情况下停机,按控制面板旁的红色紧急停机按钮,报警指示灯(7)闪烁。在重新开机前拨出按钮并按重新设置键解除锁定。 3、关闭空气出气阀并切断电源。 4、打开冷凝液排污阀。润滑油 大修主机头的内容 大修主机及齿轮箱: 1、更换主机转子转动轴承 2、更换主机转子机械轴封、油封 3、更换主机转子调整垫 4、更换主机转子密封垫 5、更换主机转子组合垫 6、调整主机转子精密间隙 7、更换齿轮箱主/付转动轴承 8、更换齿轮箱机械轴封及油封 9、调整齿轮箱精密间隙 10、调整齿轮箱齿轮精密间隙 二、电机轴承加黄油 三、检查或更换联轴器 四、清洁保养空气冷却器 五、清洁保养油冷却器 六、检查或更换止油阀 七、检查或更换卸荷阀 八、清洁水气分离器 九、更换机油 十、清洁机组各散热面
. 精选范本 油过滤器压差 Dp Oil Filter 油分离器压差 Dp Oil Separator 主机喷油压力 Oil Injection Element 油压 Oil Pressure 空气过滤器压差 Dp Air Filter 主机1出口 Element 1 Outlet 压缩机出口 Compressor Outlet 紧急停机 Emergency Stop 远程起动/停机 Remote Start/Stop 远程加载/卸载 Remote Load/Unload 电机过载 Overload Motor 风扇电机过载 Overload Fanmotor 电机/风扇电机过载 Overload Motor/Fanmotor 起动器反馈触点 Starter Feedback Contact 压力带1开 / 压力带2关 PB1 open / PB2 closed 主机1电机过载 Overload Motor Element 1 远程加载/卸载2 Remote Load/Unload 2 电机正在运行 Motor Running 电机正在起动 Motor Starting 卸载/加载 Unloaded / Loaded 加载延时 Load Delay 报警 Warning 保养 Service 停机 Shutdown 远程启动 Remote Start 远程停止 Remote Stop 本地启动 Local Start 油过滤器 Oil Filter 油分离器 Oil Separator 空气过滤器 Air Filter 运行时间 Running Hours 加载时间 Loaded Hours 电机起动次数 Motor Starts 控制器运行时间 Module Hours 累计流量 Accumulated Volume 加载继电器 Load Relay 冷却介质 Cooling Medium 压缩机出口 Compressor Outlet 压缩机停 Compressor Off 电机已停止 Motor Stopped 自动卸载 Automatically Unloaded 自动加载 Automatically Loaded 手动卸载 Manually Unloaded 程序停机 Programmed Stop 起动过程 Startup Process 主页 Home page 停止 Stopped 卸载 Unloaded 运行/加载 Running/Loaded 维护状态 Service State 警告状态 Warning State 关机状态 Shutdown State 维护前警告 Pre-service Warning 维护警告 Service Warning 警告前 Pre-warning 警告 Warning 启动失败 Start Failure 关机 Shutdown 一切正常 No Problem 出口压力 Outlet Pressure 运行时间 Running Hours 密码 Password 压缩机控制模式 C.C.M. 时钟功能 Clock Function 本地通讯暂停 Communication Time-out 保护 Protection 维护保养 Service 起动失败 Start Failures 输入 Inputs 计划 Plan mm mm inch inch 预保养 Pre-Service 预报警 Pre-Warning 传感器故障 Sensor Error 压力单位 Pressure Unit bar bar psi psi MPa MPa kg/cm² kg/cm² 压缩机电机 Compressor Motor 风扇电机 Fan Motor 目录 List 取消 Cancel 程序 Program 限值 Limits 主显示屏 Mainscreen 菜单 Menu 显示更多 Show More 卸载 Unload 加载 Load 选择 Select 返回 Return 重置 Reset 修改 Modify 后退 Back 可以 OK 不可以 NOT OK 压缩机 Compressor 多机控制器 MCC
产品说明书范文英文版 电子产品说明书——媒体音响英文说明书范例(中英) 便携式多媒体音响 Portable Multimedia Acoustics 使用说明书User’s Manual 专注于完美音质的追求?? Concentrate on perfect sound pursuit? 感谢您使用本公司出品的数码产品,为了让您轻松体验 产品,我们随机配备了内容详尽的使用说明,您从中可以获 取有关产品的介绍,使用方法等方面的知识。在您开始使用 本机之前请先仔细阅读说明书,以便您能正确的使用本机, 如有任何印刷错误或翻译失误望广大用户谅解,当涉及内容 有所更改时,恕不另行通知。 Thank you for using this digital product of our company. In order to let you experience the product swimmingly, detailed instruction is provided which you can find the product’s introduction, usage and other information. Before using this product, please read the manual carefully, so that you can correctly use it. In case of any printing or translation error, we apologize for the inconvenience. As for the content change, we are sorry for no further notice. 一、产品概述 General Information 本机是一款外观小巧,设计精美、携带方便多媒体小音响, 适用于家居、户外旅游、办公室等场所,随时随地享受音乐
1.1安全图标说明人身危险警告的重要注意事项1.2一般安全措施一般预防措施1.操作员必须遵守安全操作规则并遵守所有相关的工作安全要求和规定。 2.如果以下任何陈述不符合适用法规,则以更严格的陈述为准。 3.安装,操作,维护和维修工作只能由经过培训的授权专业人员执行。 4.压缩机产生的空气不被认为具有呼吸质量。为了使压缩空气达到呼吸质量,必须根据适用的法律和标准对压缩空气进行充分净化。 5.在进行任何维护,修理,调整或任何其他非常规检查之前,请先停止压缩机,按紧急停机按钮,切断电源,并给压缩机降压。此外,必须打开并锁定电源隔离开关。 6.不要玩压缩空气。请不要让空气接触您的皮肤或将气流引导至人。请勿使用压缩空气对衣服进行除尘。使用压缩空气清洁设备时,请小心并戴防护眼镜。 7.用户有责任将设备维持在安全的工作状态。如果零件和附件不适合安全操作,则应将其更换。 8.禁止在压缩机外壳的顶板上站立或行走。1.3安装时的安全注意事项。因忽视这些注意事项或不遵守安装,操作,维护和修理所需的正常警告和注意事项(即使未指定)而造成的任何损坏或伤害,制造商概不负责。安装期间的注意事项1.只能根据适用的安全法规,使用适当的设备来抬起
机器。抬起之前,必须安全固定松动的零件或旋转的零件。提起重物时,禁止将其悬吊或停留在危险区域中。提升加速度和减速度必须保持在安全范围内。在高海拔或起重设备区域工作时,必须戴好安全帽。2.将机器放置在空气尽可能凉爽和清洁的环境中。如有必要,安装吸油管。不要阻塞进气口。必须采取措施尽可能减少进气中的水分。3.在连接管道之前,必须清除所有盲板法兰,塞子,盖子和干燥剂袋。6 2991 7092 20说明手册4.空气软管的尺寸必须正确并且适合在工作压力下使用。请勿使用磨损,损坏或旧的软管。支管和连接的尺寸必须正确,并且适合在工作压力下使用。5.吸入的空气中不得包含会引起内部火灾或爆炸的可燃气体,蒸气和颗粒(例如油漆溶剂)。6.安排进气口,以防止吸入操作员穿着的宽松衣服。7.确保从压缩机到后冷却器或空气网络的排气管在加热时能自由膨胀,并且不靠近易燃物或与易燃物接触。8.不得对排气门施加外力;连接管不得扭曲或变形。9.如果安装了遥控器,则必须清楚地标记机器以指示危险:机器是远程控制的,可能会启动而不会发出警报。在进行维护或修理之前,操作员必须确保关闭机器,并且隔离开关处于打开和锁定状态。为了进一步确保安全,打开远程控
...../ ...../ SAP生产业务配置及操作手册
目录
SAP生产业务配置及操作手册Overview 业务说明 概念 计划策略介绍 SAP的策略包括: 按库存MTS:40,30,10,11,52,63; 按单M T O:50,60,20; 计划组件:70,59; 带有变量配置的:25,26,55,65,56,89,54; 装配订单:82,81,89。 Table
Configure Master data Define BOM Usages Define BOM Status-OS23 OS23 Define Item Categories BOM中的每个行项目都必须指定一个Item Category,因为有一些行项目是需要进行库存管理,而有一些则只是一些说明性的文档,所以需要对Item Category进行定义。 Define Allowed Material Types for BOM Items 可以指定每个BOM的用途指定允许的物料类型,可以分别指定允许哪些父物料和子物料。 Define work center category
Define control key Define capacity categories Production Planning Define Strategy Define strategy group Material Require Planning Maintain the Plant Parameters Copy the parameters from plant 0001. OPPQ Check the Setting,if the setting is “To maint.”, it must be maintained.
阿特拉斯空压机控制面板操作说明 1--启动按钮 (此按钮可用来启动压缩机。指示灯(8)点亮,表示EⅡ电脑控制器正在运行。) 2—显示屏 (显示有关压缩机的工作状况,保养及故障信息) 3—滚动键 (此键可用向上或向下滚动显示屏) 4--制表位键TAB (按此键,可以选择水平箭头标示的参数,只能修改后面有水平箭头的参数.) 5—功能键 (功能键可以用来控制和设定压缩机) 6--电源指示灯 (指明已接通电源) 7—综合报警指示灯(如果存在报警,保养报警,则该指示灯会亮起)
8—自动运行指示灯(指明电脑控制器正在自动运行) 9---停机按钮(按下此按钮,可以停止运行压缩机.(8)会熄灭。在卸载情况下运行30秒后,压缩机将停止运行) S3—紧急停机按钮(按此按钮,可以在紧急情况下立即停止压缩机,排除故障后拔出按钮以解除锁定。) 开机前 1、检查油位。油位指针必须指在绿色区域的上部或高于该区域。 2、如果空气过滤器保养指示器的彩色部分完全显示出来,更换空气过滤器芯,参考使用说明书复位保养指示器和保养报警时钟。 开机 1、合上电源。检查电源指示灯(6)是否点亮。 2、打开空气出气阀。 3、关闭冷凝液排污阀。 4、按开机按钮I。空压机开始运行,自动运行指示灯(8)点亮,开机后10秒,空压机开始加载运行。 在运行中 1、经常检查油位,在加载中,指针必须位于绿色区域。 2、如果指示灯(8)点亮,电脑控制器正自动控制压缩机的加载,卸载,停机和重新启动。 3、经常检查显示屏(2):空压机的运行状态通过图标显示 在显示屏上。 4、如果报警指示灯(7)点亮或闪烁,请排除故障,参考使用说明书。如果需保养,停机并执行保养措施,参考使用说明书。 停机 1、按停机按钮O。指示灯(8)熄灭。空压机大约卸载运行30秒后停机。 2、在紧急情况下停机,按控制面板旁的红色紧急停机按钮,报警指示灯(7)闪烁。在重新开机前拨出按钮并按重新设置键解除锁定。 3、关闭空气出气阀并切断电源。
ARGOS 操作手册 (操作者用) Mania Pacific Limited 2003年8月
第一章进入、退出Argos系统 1、开机 1、打开机台电源。启动电脑。 2、登陆用户名和密码分别是: user:aoi passward: barco1 3、启动完成后双击桌面Argos图标,随即进入Argos系统。等待系统初始化。 4、此时注意有无异常声响。 2、关机 1、退出Argos,在主界面状态下 单击Tools按钮(图一)——单击Exit Argos(图二) 图一
图二
第二章Argos的基本操作1、读取资料 首先读取比较需要的资料 单击Jobs按钮(图三)――选择需要的料号名称(图四) Argos将自动读取资料并将资料显示 图三
图四 新资料 1、在第一次读入时,将出现一个对话框(如图五),提示创建新参数,击 YES; 3、通常选择与检测板基材名称相同的基材参数(见图六)。完成后单击OK键。
图六 2、设定检测参数 1、检测参数 图七显示的是一个检测料号的基本参数,从上到下分成四个区域。 1、区域一: 区域一中的参数主要是描述线路板的。 参数英文名称参数中文名称设定方法建议设定值Maximum Defects Per Panel 每块最大缺点数100~150 Minimum Defect Size Reported 最小报告缺点的大小 安质量部门的要求 值设定 通常不要小 于1 Maximum Ink Marks Per Panel 每块板最多Ink Marks 的点数 100 Auto Review Defects Delay 进行缺点确认等待的时间 1 s Panel Thickess 板厚用千分尺测量 Defect Review Motion 错误显示等待的时间 1 s
1 显示屏-键 1 典型显示图 显示器有四行:1 前三行:——显示屏显示传感器的名称和实际的读数。 ——测量值的单位和传感器的实际读数。 ——关于空压机运行的信息(空压机停机,等等),保养要求(比如油过滤 器和空气过滤器)或者是故障信息(比如故障停机)
2滚动键(↑↓):——这些滚动键标有垂直的箭头,允许滚动显示屏。 ——只要在显示屏的最右边的位置上有一个指向下面的箭头,其对 应的滚动键就可以用来查阅下面的内容 3 表格键( = ):该键标有两个水平箭头,允许操作者选择标有水平箭头的参数。只有 后面跟着指向右面的箭头的参数才可以修改, 3功能键(F1/F2/F3):——用于查阅或编制设定值, ——复位电机过载,故障停机或保养信息,或紧急停机, ——查看电脑控制器收集到的所有参数, ——(F1/F2/F3)所对应的功能根据显示的菜单变化而变化,它们的 实际功能显示在显示屏的底部,刚好在相应的功能键的上面。最常用的功能中英文对应如下: Automatically Loaded 自动加载 Automatic Operation 自行运行 matically Loaded 自动卸载 Locally controlled 本地控制 Remote controlled 遥控控制 Manual Operation 手动运行 Manual Unloaded 手动卸载 Unioad 卸载 Running hours 运行时间 Loading hours 加载时间 Main Screen 主显示屏 Shutdown 故障停机 Compressor Outlet 压缩机排气口 Show More 更多 Add 增加指令用来增加空压机的自动启动/停机(日期) Back 返回指令返回到的选择或菜单 Cancel 取消当设定参数有误时.用来取消已设定的数 dleete 删除用来删除空压机的自动启动/停机时间 Help 帮助帮助寻找Atlas Copco的内部地址 Limits 上下限显示允许设定的上下极限数据 Load 负载手动操作空压机负载 Main screen 回到主目录从任一画面回到主目录 Menu 菜单 Modify 修改修改设定参数 Status Data 状态参数 Shutdown 故障停机 Shutdown Warning 故障停机报警 Motor overload 电机过载 Running Hours 运行时间 Program 编写输入将新的设定数据编写输入 Reset 重新设定重新设定计时器及信息,定时器或复位 Rtrn 回归回归到前一页或前一目录 Maximum 最大值 Shutdown Maximum 故障停机最大设置值 Reset 复位
200 阿特拉斯*科普柯固定式空气压7 GA55 - GA75 - GA55 W - GA75 W 奉Elektro nikon II 总驕 變訓愿 使用说明书 44 2920 1464 02 No. 2920 Reg Elektro ni ko n I I 2920 1461 Ox 1464 02 0C/2000 / 38 / 988 JL 特阿婷取条*輯普KU 權札林陈介? 优同覗轉轟 备注: 帝机 -GA90C - GA90C
*取乐 ■ fu 匕明H 同t 了 压畑 I* 尸:>j A f O f-4- ■构J. 崎用才 Fiq il 專规* 杆 In f 务 Jri-U .廉?d i. ct jJ <> 4春 ?A [JL £ 車 ★昨 M 舸 内客 1 ........................................ 1.1 ....................................................................... 1.1.1 ................................................................ 3 3.5 . .... ......... ...25 3 3.6...;..,..... .26 4 3.7 ........... ...' .................................. .. ..26 5 6 4 命 ....... ...27 o 8 4.1................ ..27 8 4.2 ............. ..27 8 4.3 ............. (29) 8 4.3.1 Atlas Copco ........... i ........... .............. . .29 8 4.3.2.. .29 8 4.4 ......... . .■L ?W ?K .I W :>I ......... ..29 8 4.5....“....... ...■ ......................................... ...30 9 4.6 ............... ..30 10 10 5 .................. 馭理..書...... ..30 10 5.1......- ......... ................................................ .30 14 5.2 ........... ..30 14 5.3 .......... ;..... ..30 14 14 6 ............. ....... ■...■.…■;...■.... :. J .31 14 7 (32) 7.1 ................ ..32 15 7.2 .......... ...32 15 B L 7.3 ..33 16 7.3.1 ’ GA55/GA55W .....^ ..................... ...33 18 7.3.2 GA75/GA75W ......^ ............... ...33 18 7.3.3 GA90C/GA90CW .....彳....... ...34 18 7.3.4.. ............ .34 19 7.4..,:........ .................. ..34 19 7.5.............■.. - .34 20 7.5.1.. ...■_■.■■..■■ ................................. ..34 21 7.5.2.. - (35) 7.5.3 GA55/GA55 W W orkplace ........................... ...35 21 7.5.4 GA55/GA55 W W orkplace FF ...................... ...35 21 7.5.5 GA75/GA75 W W orkplace ........................... ...36 21 7.5.6 GA75/GA75 W W orkplace FF ...................... ...36 21 7.5.7 GA90C/GA90C W W orkplace ......................... .37 21 7.5.8 GA90C/GA90C W W orkplace FF .... (37) 22 7.6 ......... :..... ...... (38) 22 23 8 ?L :... . ..39 24 24 25
OFM User Operation Manual OFM用户操作手册 一、 Create OFM project建立OFM项目 Learning objectives 学习目标 (一)The data connection数据的连接 (二)Data attribute Definition数据的属性定义 (三)The data connection数据的连接 Create an empty project建立空项目 1. Start the OFM program, expand the File menu, click New Workspace, display as shown in the following illustration shown.启动OFM程序,展开 File 菜单,点击New Workspace,显示如下图所示所示。 2. Click on the button as shown in the graph, and then select the save path, file name (such as Demo_Link).点击图中所示按钮,然后选择保存路径,给出文件名(如 Demo_Link)。 3.The other option is reserved for the default. Click OK.其他选项保留为默认。点击OK。 4.Right click on the OFM Representation frame in HeaderId. Select Delete in the shortcut menu, delete the HeaderId table.右键点击OFM Representation 框中的HeaderId。在快捷菜单中选择Delete,删除HeaderId 表。
MKIV 控制器操作说明 停车按钮 启动按钮 显示器 上下滚动键 制表键 通电指示灯 故障报警指示灯 自动控制运行灯 功能键 报警 运行 电源 紧急停车按钮 1 2 3 4 5 6 7 8 9 10 11 12 S2 1 2 3 S2 $ 9 8 11 10 7 12 6 9
1显示屏-键 1典型显示图 显示器有四行:i前三行:一一显示屏显示传感器的名称和实际的读数。――测量值的单位和传感器的实际读 数。
――关于空压机运行的信息(空压机停机,等等),保养要求(比如油过滤器和空气过滤器)或者是故障信息(比如故障停机)
2滚动键(TJ):这些滚动键标有垂直的箭头,允许滚动显示屏。 ——只要在显示屏的最右边的位置上有一个指向下面的箭头,其对 应的滚动键就可以用来查阅下面的内容 3 表格键( = ):该键标有两个水平箭头,允许操作者选择标有水平箭头的参数。只有后面跟 着指向右面的箭头的参数才可以修改, 3 功能键(F1/F2/F3):——用于查阅或编制设定值, ——复位电机过载,故障停机或保养信息,或紧急停机, ——查看 电脑控制器收集到的所有参数, ――(F1/F2/F3)所对应的功能根据显示的菜单变化而变化,它们的实际功能显示在显示屏的底部,刚好在相应的功能键的上面。最常用的功能中英文对应如下:Automatically Loaded自动加载 Automatic Operation自行运行 matically Loaded自动卸载 Locally controlled本地控制 Remote controlled遥控控制 Manual Operation手动运行 Manual Unloaded手动卸载 Unioad卸载 Running hours运行时间 Loading hours加载时间 Main Screen主显示屏 Shutdown故障停机 Compressor Outlet压缩机排气口 Show More更多 Add增加指令用来增加空压机的自动启动/停机(日期) Back返回指令返回到的选择或菜单 Cancel取消当设定参数有误时.用来取消已设定的数 dleete删除用来删除空压机的自动启动/停机时间 Help帮助帮助寻找Atlas Copco的内部地址 Limits上下限显示允许设定的上下极限数据 Load负载手动操作空压机负载 Main screen回到主目录从任一画面回到主目录 Menu菜单 Modify修改修改设定参数 Status Data状态参数 Shutdown故障停机 Shutdown Warning故障停机报警 Motor overload电机过载 Running Hours运行时间 Program编写输入将新的设定数据编写输入 Reset重新设定重新设定计时器及信息,定时器或复位 Rtrn回归回归到前一页或前一目录 Maximum最大值 Shutdown Maximum故障停机最大设置值 Reset复位
2007 Encyclopedia Britannica Online User guide 不列颠百科全书在线英文版 使用手册 https://www.doczj.com/doc/852496060.html,/ 飞资得信息技术(上海)有限公司 上海市成都北路333号招商局广场南楼13A TEL: (021) 52980395 FAX: (021)52980397 E-mail: info@https://www.doczj.com/doc/852496060.html, https://www.doczj.com/doc/852496060.html,
目 录 不列颠百科全书背景简介 (2) 不列颠百科在线英文版收录内容 (2) 不列颠百科在线英文版产品特色 (3) 不列颠百科在线英文版首页介绍 (4) 范例说明:检索行 (6) 范例说明:高级浏览/研究工具 (7) 标题浏览(A~Z Article Browse) (7) 年鉴(Year in Review Browse) (8) 主题浏览(Subject Browse) (10) 视频资料库(Video Collection ) (10) 时间序列浏览(Timeline Browse) (12) 世界地图(World Atlas) (13) 国家比较〈Compare Countries 〉 (15) 世界各国数据信息〈World Data〉 (16) 名人格言〈Notable Quotation〉 (19) 经典文献〈Gateway to the Classics〉 (20) 范例说明:不列颠每日焦点 (21) 不列颠焦点(Britannica highlight) (21) 今日传记(Biography of the day) (21) 历史上的今天(This day in history) (22) 不列颠主题数据库(Spotlights) (23) 个性化服务功能介绍:WORKSPACE (24) 开创集体智能、互动及分享的知识园地:Britannica Blog (26)
MKIV控制器操作说明1 停车按钮 2启动按钮 3 显示器 4 上下滚动键 5 制表键 6 通电指示灯 7 故障 报警指示灯 8 自 动控制运行灯 9 功能键 10 报警 11 运行
1 显示屏-键 1 典型显示图 显示器有四行:1 前三行: ——显示屏显示传感器的名称和实际的读数。 ——测量值的单位和传感器的实际读数。 ——关于空压机运行的信息(空压机停机,等等),保养要求(比如油过滤器和空气过滤器)或者是故障信息(比如故障停机)
2滚动键(↑↓):——这些滚动键标有垂直的箭头,允许滚动显示屏。 ——只要在显示屏的最右边的位置上有一个指向下面的箭头,其 对应的滚动键就可以用来查阅下面的内容 3 表格键 ( = ):该键标有两个水平箭头,允许操作者选择标有水平箭头的参数。只 有后面跟着指向右面的箭头的参数才可以修改, 3功能键(F1/F2/F3):——用于查阅或编制设定值, ——复位电机过载,故障停机或保养信息,或紧急停机, ——查看电脑控制器收集到的所有参数, ——(F1/F2/F3)所对应的功能根据显示的菜单变化而变化,它 们的实际功能显示在显示屏的底部,刚好在相应的功能键的上 面。 最常用的功能中英文对应如下: Automatically Loaded 自动加载 Automatic Operation 自行运行 matically Loaded 自动卸载 Locally controlled 本地控制 Remote controlled 遥控控制 Manual Operation 手动运行 Manual Unloaded 手动卸载 Unioad 卸载 Running hours 运行时间 Loading hours 加载时间 Main Screen 主显示屏 Shutdown 故障停机 Compressor Outlet 压缩机排气口 Show More 更多 Add 增加指令用来增加空压机的自动启动/停机(日期) Back 返回指令返回到的选择或菜单 Cancel 取消当设定参数有误时.用来取消已设定的数 dleete 删除用来删除空压机的自动启动/停机时间 Help 帮助帮助寻找Atlas Copco的内部地址 Limits 上下限显示允许设定的上下极限数据 Load 负载手动操作空压机负载 Main screen 回到主目录从任一画面回到主目录 Menu 菜单 Modify 修改修改设定参数 Status Data 状态参数 Shutdown 故障停机 Shutdown Warning 故障停机报警 Motor overload 电机过载 Running Hours 运行时间 Program 编写输入将新的设定数据编写输入 Reset 重新设定重新设定计时器及信息,定时器或复位 Rtrn 回归回归到前一页或前一目录 Maximum 最大值
阿特拉斯使用说明 书 1
GA55 - GA75 - GA55 W - GA75 W - GA90C - GA90C W Elektronikon II ? ? 2920 1461 0x 44 2920 1464 ? ?
Elektronikon I I No. 2920 1464 02 Reg 0C/ / 38 / 988 200 .co m
1 (3) 1.1 (3) 1.1.1 (4) 1.1.2 (5) 1.1.3 (6) 1.2 (8) 1.2.1 (8) 1.2.2 (8) 1.3 Elektronikon (8) 1.3.1 (8) 1.3.2 (8) 1.3.3 (8) 1.3.4 (9) 1.4 ..................................................................................... . . 10 1.5 ..................................................................................... . . 10 1.5.1 .............................................................................. . . 10 1.5.2 .............................................................................. . . 14 1.5.3 .............................................................................. . . 14 1.6 GA FF ............................................. . 14 1.6.1 ................................................................................ . 14 1.6.2 ............................................................................ . . . 14 2 ........................................................... . . 15 2.1 ....................................................................................... . 15 2.2 ................................................................................... . . . 16 2. 3 ....................................................................................... . 18 2.3.1 For GA55/GA55 W . . . ..................... . . . 18 2.3.2 For GA75/GA75 W . . . ..................... . . . 18 2.3.3 For GA90C/GA90C W . . . .............. . . . 19 2.4 ................................................................................... . . . 19 2.5 ....................................................................................... . 20 2.6 ..................................................................................... . . 21 3 ........................................................... . . 21 3.1 ....................................................................................... . 21 3.1.1 .............................................................................. . . 21 3.1.2 ............................................................................ . . . 21 3.1.3 ................................................................................ . 21