hp小型机大全
- 格式:doc
- 大小:306.50 KB
- 文档页数:17
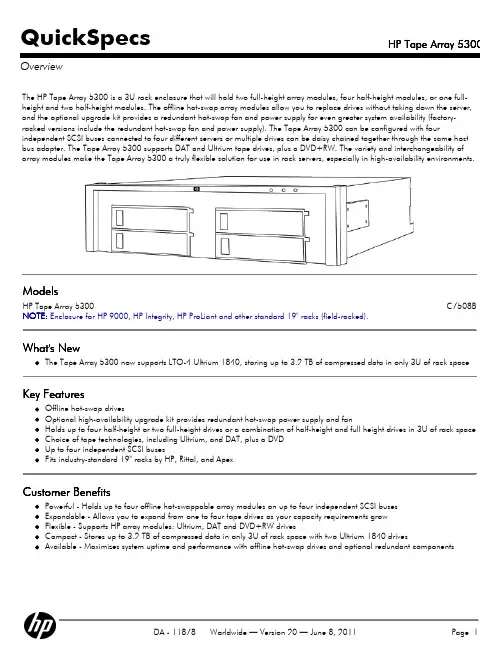

HP小型机及其解决方案介绍1.硬件方案:HP小型机采用了先进的硬件技术,包括多核处理器、大容量内存、高速存储介质等,能够提供高性能的计算能力和存储容量。
此外,HP小型机还支持灵活的扩展,用户可以根据需求进行适当的升级,以满足不断增长的业务需求。
2.操作系统方案:HP小型机可以运行多种操作系统,包括Windows、Linux等,能够提供多样化的操作环境,满足用户的不同需求。
此外,HP还提供了自主开发的专用操作系统HP-UX,针对小型机的特点进行了优化,具有较高的稳定性和安全性。
3.应用软件方案:针对不同行业和企业的需求,HP提供了丰富的软件解决方案。
例如,针对金融行业的需求,HP提供了高性能的交易处理系统;针对制造业的需求,HP提供了供应链管理系统等。
这些软件解决方案能够帮助企业提高效率、降低成本、提供更好的客户服务等。
4.网络方案:HP小型机支持多种网络连接方式,用户可以选择适合自己的网络解决方案。
HP还提供了一系列网络设备和解决方案,如交换机、路由器、防火墙等,帮助用户搭建稳定、安全、高效的网络环境。
5.存储方案:HP小型机具有较大的存储容量,可以满足企业对大量数据的存储需求。
此外,HP还提供了多种存储解决方案,如磁盘阵列、网络存储等,能够提供高可靠性和高可用性的数据存储环境。
总之,HP小型机及其解决方案能够为企业提供高性能、可靠性高的计算和数据处理能力,满足企业不断增长的需求。
无论是在硬件、操作系统、应用软件、网络还是存储方面,HP都提供了一系列的解决方案,能够帮助企业提高效率、降低成本、提供更好的客户服务等。
无论企业处于哪个行业,HP小型机都能够提供适合的解决方案,满足企业的特定需求。
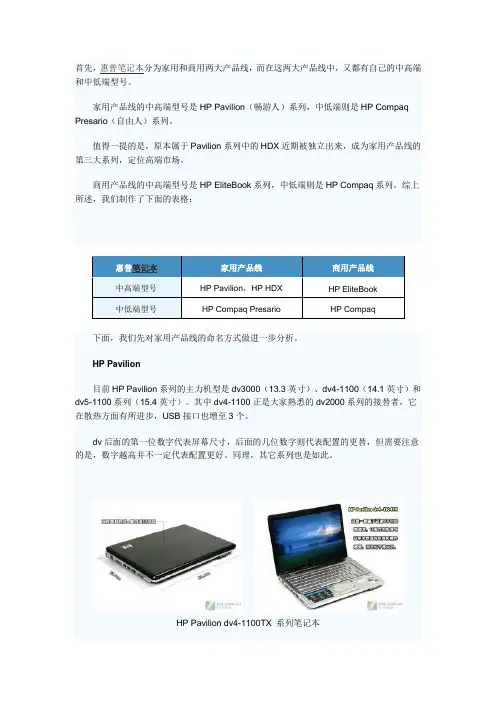
首先,惠普笔记本分为家用和商用两大产品线,而在这两大产品线中,又都有自己的中高端和中低端型号。
家用产品线的中高端型号是HP Pavilion(畅游人)系列,中低端则是HP Compaq Presario(自由人)系列。
值得一提的是,原本属于Pavilion系列中的HDX近期被独立出来,成为家用产品线的第三大系列,定位高端市场。
商用产品线的中高端型号是HP EliteBook系列,中低端则是HP Compaq系列。
综上所述,我们制作了下面的表格:惠普笔记本家用产品线商用产品线中高端型号HP Pavilion,HP HDX HP EliteBook中低端型号HP Compaq Presario HP Compaq 下面,我们先对家用产品线的命名方式做进一步分析。
HP Pavilion目前HP Pavilion系列的主力机型是dv3000(13.3英寸)、dv4-1100(14.1英寸)和dv5-1100系列(15.4英寸)。
其中dv4-1100正是大家熟悉的dv2000系列的接替者,它在散热方面有所进步,USB接口也增至3个。
dv后面的第一位数字代表屏幕尺寸,后面的几位数字则代表配置的更替,但需要注意的是,数字越高并不一定代表配置更好。
同理,其它系列也是如此。
HP Pavilion dv4-1100TX 系列笔记本根据具体型号的不同,这些本本在处理器、内存和硬盘等方面会有区别,但显卡往往都是相同的。
比如dv3都采用了9300M GS显卡、dv4都采用了9200M GS显卡、而dv5则都是9600M GT。
显然,dv5更适合玩游戏,但它的发热量也比较大。
HP Compaq Presario目前HP Compaq Presario系列的主力机型是CQ4系列(14.1英寸),也就是V3000系列的接替者,其中CQ45属于主流机型,而CQ40的定位则更低一些。
HP Compaq Presario CQ4 系列笔记本现在要说重点了。

文档编号:中国移动江苏公司信息技术系统HP小型机安装配置规范(V2.0)中国移动通信集团公司江苏有限公司二〇〇七年四月文档信息文档变更记录审核批准版权说明本文件中出现的任何文字叙述、文件格式、插图、照片、方法等内容,除另有特别注明,版权均属中国移动通信集团公司江苏有限公司和中国HP公司所有,受到有关产权及版权法保护。
任何个人、机构未经中国移动通信集团公司江苏有限公司和中国惠普公司的书面授权许可,不得复制或引用本文件的任何片断,无论通过电子形式或非电子形式。
目录1 总则 (5)2 硬件安装要求 (5)2.1机柜布局 (5)2.2 电源配置 (5)3 操作系统安装 (5)3.1 操作系统版本选择 (5)3.2 安装选项 (5)3.3 其他软件包安装 (5)3.4 补丁安装 (6)4 操作系统配置 (6)4.1 基本配置 (6)4.2 网络配置 (6)4.3 其他配置 (7)5 存储系统配置 (7)5.1 逻辑卷组(VG)配置要求及命名 (7)5.2 逻辑卷(LV)配置要求及命名 (8)5.3 HP UX系统文件配置 (8)5.4 应用软件对存储的要求 (9)6 用户管理 (9)6.1 用户名要求 (9)6.2 组管理要求 (9)6.3 口令管理要求 (9)7 群集软件安装及配置 (9)7.1 MC/SG软件版本 (9)7.2 MC/SG软件安装 (9)7.3 MC/SG补丁安装 (9)7.4 资源组命名要求 (9)7.5 MC/SG配置步骤 (9)8 JA V A安装要求 (10)8.1 软件安装 (10)8.2 安装后检查 (10)9 第三方硬件/软件配合 (11)9.1 与EMC的配合 (11)9.2 与STK的配合 (11)9.3 与ORACLE的配合 (11)9.4 与WEBLOGIC的配合 (11)9.5 与Veritas备份软件NetBackup的配合 (11)10 参数配置表 (11)11 系统监控要求 (11)11.1 ISEE监控 (11)11.2 toptea/tivoli监控 (12)12 系统备份配置 (12)13 时钟同步配置 (12)14 系统安全加固 (13)15 应用软件要求 (13)附件1、操作系统安装操作步骤 (14)附件2、安装配置审核确认单 (16)附件3、HPUX常用参数表 (18)附件4、HPUX系统安全加固 (20)附件5、Lan Console配置 (25)附件6、MC/SG相关的配置文件 (27)1 总则为规范中国移动通信集团公司江苏有限公司信息技术系统HP小型机安装配置实施操作工作,实现HP小型机安装、配置、维护工作的标准化、规范化,特从HP小型机硬件安装、操作系统安装、参数配置等方面进行制定标准,可为以后进行信息技术系统HP小型机设计、安装实施配置作为参考。
SUN(oracle)、IBM、HP小型机的比较资料---solaris、AIX、HP-UX 、CompaqTru64 UnixSun(Oracle) Solaris目前状况:好当前版本:Solaris 10 (x86)历史版本:Solaris 10 SunOS 5.10 2005年1月31日Solaris 9 SunOS 5.9 2002年5月22日Solaris 8 SunOS 5.8 200年2月Solaris 7 SunOS 5.7 1998年11月Solaris 2.6 SunOS 5.6 1997年7月Solaris 2.5.1 SunOS 5.5.1 1996年5月Solaris 2.5 SunOS 5.5 1995年11月主要产品有基于Ultra SPARC 和AMD Opteron 处理器的系列服务器、工作站,Sun Ray 桌面系统、Storage Tek 存储设备等硬件系统,Solaris和Java软件,以及Sun Grid等各类服务,并以其高度灵活性、缩放性、安全性和可用性等优异特性赢得全球各行业客户的青睐。
2005年12月,Sun基于其突破性“酷线程”专利技术推出新的“绿色经济型”服务器产品线,开启了网络计算的新时代。
硬件平台:Sun Sparc、Intel PC工作站和服务器软件:solaris、oracle、java、Mysql支持架构:Solaris支持多种系统架构SPARC、x86和x64。
x64即AMD64及EMT64处理器遵循标准:Unix 98优势:其光辉的市场业绩使Solaris成为了事实上的Unix;Sparc和Intel版是同一个操作系统;对于基于Unix的商业应用系统,Solaris可以提供最广泛的支持。
前景展望:牢固的市场和及时的开发,使得Sun身处领先的位置,Solaris取得了领先的位置是因为Sun保证了所有的应用系统都可以在其上运行。
Sun的顾客从它的训练有素的员工处获益。

十大不建议买的跑步机排行榜虽然质量好的跑步机有很多,但还是有很多朋友后悔买了家用跑步机,因为有些太垃圾了,根本无法满足正常的使用需求,下面我们就来说说十大不建议买的跑步机,希望能帮到大家,避开跑步机的坑。
一、千元机预算1000元的跑步机是真心不建议大家买,多数买这种跑步机的都是交智商税了,用料真的是省到极致,除去运营费用和利润还有多少成本在里面,大家应该也是能想的到的。
买跑步机要考虑比较多的因素在里面,比如马达、跑带宽度、减震效果、静音效果等等,基本上能谈到减震静音的已经在3000价位了。
如果你的体重超过150斤,市面上也没什么1000元的跑步机能适合你,买回去也基本跑不了,跑几分钟马达发热、故障……关键是一点体验都没有!还不如去户外跑跑。
不知道买哪款跑步机好?建议参看《十款性价比高的跑步机推荐》。
二、杂牌机跑步机品牌是非常多的,国际品牌,国内品牌,互联网品牌,甚至山寨杂牌等一应俱全,对于没有知名度的品牌还是要谨慎一些,以免买来后成了晾衣杆……杂牌跑步机典型的减震偷工减料或者直接就没有,有很多黑心健身房使用劣质杂牌跑步机,没有减震措施,给使用者造成膝盖损伤,还拒不负责。
选购的时候我们一定要做好充分的市场调研和品牌分析。
哪些是杂牌机?具体的我就不太方便透露了,毕竟这会引来一些不必要的纷争。
像前两年的某强、启某斯都倒闭了,伊某康也销声匿迹了,这类型品牌我建议大家都要慎重对待。
国际上比较大牌的有爱康、乔山、锐步、司特拉、岱宇等,国内也有很多品质不错的牌子,像舒华、英派斯、汇祥等,无论从材质、性能上都比那些杂牌子要好很多,而淘系品牌或者一些不知名的杂牌子,质量和售后就一言难尽了。
如果你不知道跑步机什么牌子好请参看:《全球跑步机十大品牌排名_口碑最好的家用跑步机排名》品牌的知名度代表了:专业度,研发能力,品质品控,服务能力等,千万擦亮眼睛。
怎么判断专业品牌:看品牌历史,30年以上的品牌,看经销商分布,全国至少要百家以上经销商,看实体店,全国至少要有50家实体店,看产品线,一定要有全线健身器材生产能力,也就是说健身房里面的所有都覆盖,这类品牌都不会差到哪里去。


惠普最新参数一览表(2010.11)目录激光黑白打印机 (2)激光彩色打印机 (10)激光多功能一体机 (19)激光专业型多功能/数码复合机 (24)扫描仪 (32)彩色商用喷墨打印机 (35)喷墨一体机 (37)大幅面打印机 (43)蓝色机型为较新的机型新增Laserjet Pro M1216nfh ;Laserjet Pro M1536dnfColor Laserjet Pro CM1415fn/CM1415fnw CP5525n/dn/xh Scanjet Professional 3000 SCANJET ENTERPRISE 7500 Officejet 6500A eAIO、Officejet 7500A eAIO、Officejet 8500A eAIO Color Laserjet Pro CM4540/f/fskm 即将上市Deskjet 2060(注:除特殊说明,报价均为MAP价格或媒体价)EOL 停产产品1 of 57 Pages激光黑白打印机2 of 57 Pages3 of 57 Pages4 of 57 Pages5 of 57 Pages6 of 57 Pages7 of 57 Pages8 of 57 Pages9 of 57 Pages激光彩色打印机10 of 57 Pages11 of 57 Pages内存:配自动双面打印;月打印负荷:入式网络打印服务器;打印语言:耗材型号:黑色保修:12 of 57 Pages13 of 57 Pages14 of 57 Pages15 of 57 Pages16 of 57 Pages17 of 57 Pages月打印负荷:PCL 5c耗材型号:碳粉,黑色成像鼓,四色保修:A3首页输出时间:大内存:18 of 57 Pages激光多功能一体机19 of 57 Pages20 of 57 Pages21 of 57 Pages22 of 57 Pages23 of 57 Pages激光专业型多功能/数码复合机24 of 57 Pages25 of 57 Pages26 of 57 Pages27 of 57 Pages28 of 57 Pages29 of 57 Pages30 of 57 Pages31 of 57 Pages扫描仪32 of 57 Pages33 of 57 Pages34 of 57 Pages彩色商用喷墨打印机35 of 57 Pages36 of 57 Pages喷墨一体机–达扫描规格:复印规格:12537 of 57 Pages4800 x 1200 dpi扫描规格:复印规格:80Photosmart4800 x 1200 dpi扫描规格:复印规格:HP Deskjet Deskjet 2060 AiO打印速度(草稿模式、分辨率;复印规格:分辨率达扫描规格:传真38 of 57 PagesAIO Printer - 达扫描规格:复印规格:125标配内存打印速度(黑白、草稿模式、页复印规格:黑白传真:调制解调器分辨率;月打印负荷复印规格:黑白传真:调制解调器39 of 57 Pages复印规格:黑白传真:调制解调器32MBCD972AA HP 920XL Officejet复印规格:黑白传真:调制解调器64MBWide Format A3+荷扫描规格:复印规格:黑白40 of 57 Pages扫描规格:复印规格:黑白传真:调制解调器64MBC4907AA HP 940XL Officejet扫描规格:复印规格:黑白传真:调制解调器64MBCD972AA HP 920XL Officejet41 of 57 Pages页扫描规格:复印规格:黑白传真:调制解调器扫描规格:复印规格:黑白传真:调制解调器扫描规格:复印规格:黑白传真:调制解调器42 of 57 Pages大幅面打印机43 of 57 Pages44 of 57 Pages)45 of 57 Pages46 of 57 Pages47 of 57 Pages48 of 57 Pages。
Illustrated Parts & Service MapHP Compaq 6200 Pro Business PC Small Form Factor© 2011 Hewlett-Packard Development Company, L.P. The information con-tained herein is subject to change without notice. HP shall not be liable for tech-nical or editorial errors or omissions contained herein. Intel, Pentium, Intel Inside, and the Intel logo are trademarks or registered trademarks of the Intel Corporation and its subsidiaries in the U. S. and other countries.Document Number 649707-001. 1st Edition March 2011.Key SpecificationsSpare PartsProcessor Type Intel® Core i7, i5, i3RAM Type Non-ECC DDR3 PC3-10600 (1333 MHz) & PC3-8500 (1066 MHz)Maximum RAM 16 GB Expansion Slots (Low profile)•(1) PCIe-x16•(2) PCIe-x1•(1) PCIChipsetIntel Q65 ExpressGraphics Adapter Integrated Intel HD graphics Bays•(1) external 5.25-inch •(1) internal 3.5-inch •(1) external 3.5-inchI/O InterfacesFront: (4) USB, microphone, headphoneRear: (6) USB, PS/2 keyboard and mouse, line in, line out, VGA, DisplayPort v1.1a, RJ-45, serial, parallel (optional), eSATA (optional)Preinstalled Operating Systems•Windows® Vista •Windows 7•FreeDosSystem Unit 1Front bezel646814-0012Power supply, 90% efficient 613762-001*Power supply 613763-0013Chassis Not spared 4Access panel646815-001* Not shownCables 1Front I/O cable and power switch assembly 636926-0012SATA cable, 19.5 inch, 2 straight ends 638813-0013SATA power cable636923-001*SATA cable, 25.2 inch, 1 straight end, 1 angled end 638814-001*DMS-59 to dual VGA cable 463023-001*Adapter, DisplayPort to VGA 603250-001*Adapter, DisplayPort to DVI 484156-001*Adapter, DisplayPort to HDMI 617450-001*DisplayPort cable487562-001*Not shownKeyboards (not illustrated)PS/2, Basic USB, BasicUSB Mini (-001, -121 only)Washable Smartcard 537745-xx1537746-xx1611375-xxx 613125-xxx 631411-xx4Arabic -17x LA Spanish[b]-16xBelgian[b]-18x Norwegian[b]-09x Brazilian Portuguese[b]-20x People’s Republic of China[b]-AAx Bulgaria [c]-26x Portuguese -13x Czech -22x Romanian[c]-27x Danish[b]-08x Russian -25x Finnish[a]-35x Saudi Arabia -DEx French[b]-05x Slovakian -23x French Canadian -12x South Korea[b]-KDx German[b]-04x Spanish[b]-07x Greek[b]-15x Swedish[b]-10x Hebrew -BBx Swiss -11x Hungarian -21x Taiwanese[b]-ABx International[b]-37x Thai[b]-28x International English[b]-L3x Turkish -14x Italian[b]-06x U.S.-00x Japanese[b]-29xU.K.[b]-03x[a] not for 537745[b] not for 613125[c] not for 631411Mass Storage Devices (not illustrated)16X SATA DVD±RW drive with LightScribe 581600-00116X SATA DVD-ROM drive581599-001Blu-ray BD-RW SuperMulti DL Drive with LightScribe 617030-0011 TB, 7200 rpm SATA hard drive 636930-001750 GB, 7200 rpm SATA hard drive 632938-001500 GB, 7200 rpm SATA hard drive 636929-001320 GB, 7200 rpm SATA hard drive, 2.5-inch634824-001300 GB, 10000-RPM SATA3 hard drive 639695-001300 GB, 10000-RPM SATA2 hard drive 648963-001250 GB, 7200 rpm SATA hard drive 636927-001160 GB, 10000-RPM SATA hard drive 639694-001160 GB, 10000-RPM SATA hard drive, 2.5-inch 508312-001160 GB Solid State Drive (SSD)646809-00180 GB Solid State Drive (SSD)607817-001System BoardStandard and Optional BoardsSystem boards with replacement thermal material 1System board, includes Trusted Platform Module (TPM) - worldwide use615114-001*System board, does not include TPM - only for use in EMEA region 649515-001Memory modules (PC3-10600, CL9)21 GB 635802-001*2 GB 635803-001*4 GB 585157-001Other boards *HP WLAN 802.11 b/g/n 538048-001*Antenna for use with 538048-001583345-001*nVidia Quadro NVS295 PCIe x16 graphics card, 256 MB 641462-001*nVidia Quadro NVS300 PCIe x16 graphics card, 512 MB 632486-001*ATI Radeon HD6350 PCIe x16 graphics card, 512 MB 637995-001*ATI Radeon HD6450 PCIe x16 graphics card, 512 MB 637996-001*AMD FirePro 2270 PCIe x16 graphics card, 512 MB 637213-001*Intel PRO/1000CT NIC, includes bracket 635523-001*HP FireWire / IEEE 1394a PCIe x1 Card 637591-001Intel Core i7 processors (include thermal material)*2600, 3.4 GHz, 8-MB L3 cache, 95W 638632-001Intel Core i5 processors (include thermal material)*2500, 3.3 GHz, 6-MB L3 cache, 95W 638631-001*2400, 3.1 GHz, 6-MB L3 cache, 95W 638630-001Intel Core i3 processors (include thermal material)*2120, 3.3 GHz, 3-MB L3 cache, 65W 638629-001*2100, 3.1 GHz, 3-MB L3 cache, 65W638628-001* Not shownCommon POST Error Messages Screen Message Probable Cause Recommended Action 101-Option ROM Error1.System ROM checksumerror.2.Expansion board option ROM checksum1.Verify ROM, reflash if required2.Remove suspected card, reboot3.Clear CMOS memory, reboot4.Replace system board 103-System Board FailureDMA, timers1.Clear CMOS memory.2.Remove expansion boards.3.Replace system board.164-Memory Size Error and201-Memory ErrorIncorrect memory configu-ration1.Run Setup (F10).2.Check DIMMs for proper seating, type, and HP compatibility.3.Remove DIMMs singularly and reboot to isolate faulty DIMM.4.Replace system board.214-DIMM Configura-tion WarningPopulated DIMM configura-tion is not optimized Rearrange the DIMMs so that each channel has the same amountof memory.301-, 304-Keyboard errorKeyboard failure.Check keyboard connection or keys. Check connector for bent of missing pins. Replace keyboard. If 304, possible system board problem.501-Display Adapter FailureGraphics display controller.1.Reseat graphics card.2.Clear CMOS.3.Check monitor connection.4.Replace graphics card.1720-SMART Hard Drive Detects Imminent FailureHard drive is about to fail. 1.Determine if hard drive is giving correct error message. Enter Computer Setup and run the Drive Protection System test under Storage > DPS Self-test .2.Apply hard drive firmware patch if applicable.3.Back up contents and replacehard drive.Miscellaneous Parts 1Chassis fan 645327-0012Fan duct 636921-0013Heatsink 645326-0014Speaker 636925-0015Solenoid lock 641498-0016Printer port, PCI card 638817-0017Hood sensor 638816-001*Serial port, PCI card 638815-001*Card reader, 22-in-1636166-001*Grommet, hard drive isolation, blue 594220-001*USB powered speakers 571536-001*Mouse, PS2, optical, jack black 537748-001*Mouse, USB, BFR-PVC 590270-001*Mouse, washable 619580-001*Mouse, optical, jack black 444740-001*Mouse, laser, jack black 570580-001*USB 3.0 port, PCIe x1 card 616610-001*eSATA port assembly, PCI card645558-001*Clamp lock, includes universal cable (plate not included)508987-001*Not shownSystem Board Connectors and Jumpers (component location may vary)SPKR Speaker connector MEDIA2Media card reader connector FRNT AUD Front panel connector HSENSE Hood sensor connector FRONT_USB22nd USB connector X1PCIEXP1PCIe X1 slot FRONT_USB 1st USB connectorX1PCIEXP2PCIe X1 slot SATA PWR0Optical drive power connector X16PCIEXP PCIe X16 slot SATA PWR1Hard drive power connector PCI1PCI slot SATA01st hard drive (SATA 3.0)CHFAN Fan connector PWR Main power connector PSWD Password header SATA12nd hard drive (SATA 2.0)CMOS CMOS header PWR CMD Power connectorXUI Processor socket SATA21st optical drive (SATA 2.0)PWRCPU CPU power connector ESATA eSATA connector DIMM4Memory socket - Channel A PAR Parallel port connector DIMM3Memory socket - Channel A COMB Serial portDIMM2Memory socket - Channel B MEDIA Media card reader connector DIMM1Memory socket - Channel B CHFAN2System fan connector PB/LEDPower switch connectorHLCKHood lock connectorSystem Setup and BootAccess the Setup Utility during the computer boot sequence by pressing the Esc key while “Press the ESC key for Startup Menu” message is displayed at the bottom of the screen, and then pressing the F10 key. If you do not press Esc at the appropriate time, you must restart the computer and again press Esc when the monitor light turns green to access the utility.Password SecurityEstablishing a Setup or Power-On password:1.Turn on or restart the computer.2.As soon as the computer turns on, press the Esc key while “Press the ESC key for Startup Menu” message is displayed at the bottom of the screen.3.Press the F10 key to enter Computer Setup.4.To establish Setup password, select Security > Setup Password and follow the instructions.- or -To establish a Power-On password, select Security > Power-On Password and follow the instructions on the screen5.Before exiting, click File > Save Changes and Exit .Changing a Setup or Power-On password:1.Turn on or restart the computer.To change the Setup password, go to step 2.To change the Power-on password, go to step 3.2.To change the Setup password, as soon as the computer turns on:- Press the Esc key while “Press the ESC key for Startup Menu” message is displayed. - Press the F10 key to enter Computer Setup.3.When the key icon appears, type your current password, a slash (/) or alternate delimiter character, your new password, another slash (/) or alternate delimiter character, and your new password again as shown:current password/new password/new password.NOTE: Type the new password carefully since the characters do not appear on the screen. 4.Press Enter .The new password will take effect the next time the computer is restarted.Deleting a Power-On or Setup password1.Turn on or restart the computer.To delete the Setup password, go to step 2. To delete the Power-On password, go to step 3.2.To change the Setup password, as soon as the computer turns on:- Press the Esc key while “Press the ESC key for Startup Menu” message is displayed. - Press the F10 key to enter Computer Setup.3.When the key icon appears, type your current password followed by a slash (/) or alternate delimiter character as shown. Example: currentpassword/ 4.Press Enter .Clearing CMOS1.Turn off the computer and disconnect the power cord from the power outlet.2.Remove the access panel.3.On the system board, press and hold the CMOS button for 5 seconds.4.Replace the chassis access panel and reconnect the power cord.5.Turn on the computer and allow it to start. Computer Setup Menu Heading Option/DescriptionFileSystem Information - Lists the following main system specifications:•Product name•SKU number (some models)•Processor type/speed/stepping •Cache size (L1/L2/L3)•Installed memory size/speed/chan •Integrated MAC Address•System BIOS•Chassis serial number •Asset tracking number •ME firmware version •ME Management modeAbout - Displays copyright notice.Set Time and Date - Allows you to set system time and date.Flash System ROM - Allows you to select a drive containing a new BIOS.Replicated Setup - Save to Rmvble Media and Restore from Rmvble Media Default Setup•Save Current Settings as Default •Restore Factory Settings as DefaultApply Defaults and Exit - Applies the selected default settings and clears any established passwords.Ignore Changes and Exit - Exits Computer setup without saving changes.Save Changes and Exit - Saves changes to system configuration or default settings and exits Computer Setup.StorageDevice Configuration - Lists all installed BIOS-controlled storage devices. The following options are available:•CD-ROM - Let you view drive size, model, firmware version, serialnumber, connector color.•Hard Disk - Let you view drive size, model, firmware version, serialnumber, connector color, SMART. Also lets you set Translation Mode (Automatic, Bit-Shift, LBA Assisted, User, and Off).•Diskette Drive - model and firmware version.•SATA Defaults - lets you set Translation Mode (Automatic, Bit-Shift,LBA Assisted, User, and Off).•eSATA port - Allows you to set a SATA port as an eSATA port for usewith an external drive.•SATA Emulation - IDE, RAID (not for USDT), or AHCI.•Removable Media Boot - Enables/disables ability to boot the systemfrom removable media.•Max eSATA Speed - Allows you to choose 1.5 Gbps or 3.0 Gbps as themaximum eSATA speed.DPS Self-Test - Allows you to execute self-tests on ATA hard drives.Boot Order - Allows you to specify boot order.•Shortcut to Temporarily Override Boot OrderSecuritySetup Password - Allows you to set and enable the setup (Admin) password.Power-On Password - Allows you to set and enable power-on password.Password Options - When any password exists allows you to lock legacy resources, enable/disable Setup Browse Mode, set password prompt, enable/disable network server mode, specify password requirement for warm boot, and set stringent passwords.Smart Cover (some models) - Allows you to lock/unlock cover lock and set status of cover removal sensor.Device Security - Allows you to set Device Available/Device Hidden for: embedded security devices, serial and parallel ports, system audio, network controller, and SATA ports.USB Security - Allows you to set Device Available/Device Hidden for front USB ports 1-4, rear USB ports 1-6, accessory USB ports 1-4.Slot Security - Allows you to disable any PCI or PCI Express work Boot - Enables/disables boot from OS (NIC models only).System IDs - Allows you to set Asset tag, Ownership tag, Chassis serial number or UUID, and keyboard locale setting.System Security (some models) - Allows you to enable/disable:•Data Execution Prevention (enable/disable)•Virtualization Technology (VTx) (enable/disable)•Virtualization Technology Directed I/O (VTd) (enable/disable)•Intel TXT (LT) (enable/disable)•Embedded Security Device Support (enable/disable)•OS management of Embedded Security Device (enable/disable)•Reset of Embedded Security Device through OS (enable/disable)DriveLock Security - Allows you to assign or modify a master or user pass-word for hard drives.PowerOS Power Management - Allows you to enable/disable Runtime Power Management, Idle Power Savings, Unique Sleep State Blink Rates.Hardware Power Management - Allows you to enable/disable SATA bus power management and S5 maximum power savings.Thermal - Allows you to control minimum fan speed.AdvancedPower-On Options - Allows you to set:•POST mode-QuickBoot, FullBoot, Clear Memory, FullBoot every x days •POST messages - Enable/disable•Press the ESC key for Startup Menu - Enable/disable •Option ROM prompt - Enable/disable •After Power Loss - Off/on/previous state •POST Delay - None, 5, 10, 15, or 20 seconds •System Recovery Boot Support - Enable/disable•Remote Wakeup Boot Source - Remote server/local hard drive •Bypass F1 Prompt on Configuration Changes - Enable/disableBIOS Power-On - Allows you to set the computer to turn on at a preset time.Onboard Devices - Allows you to set resources or disable Legacy devices.Bus Options (some models) - Allows you to enable/disable PCI SERR# Generation and PCI VGA palette snooping.Device Options - Allows you to set:•Turbo Mode - enable/disable•Printer Mode - Bi-Directional, EPP & ECP, Output Only •Num Lock State at Power-on - off/on •Integrated Video - enable/disable •Internal Speaker - enable/disable•NIC Option ROM Download - enable/disable •Multi-Processor - enable/disable •Hyper-threading - enable/disableComputer Setup Menu (continued )Heading Option/DescriptionAdvanced (cont)VGA Configuration - Displayed only if there are multiple PCI video adapt-ers in the system. Allows you to specify which VGA controller will be the “boot” or primary VGA controller.AMT Configuration - Allows you to set:•AMT-enable/disable functions of the embedded Management Engine(ME) such as Active Management Technology (AMT).•Unconfigure AMT/ME-unconfigure any provisioned management set-tings for AMT.•Watchdog Timer-set amount of time for a operating system and BIOSwatchdog alert to be sent if the timers are not deactivated.Diagnostic LEDs LED Color LED Activity State/Message Power Green OnComputer onPower Green 1 blink every 2 seconds Normal Suspend Mode Power Red 1 blink every second followed by a 2 second pauseCPU thermal shutdown Power Red 3 blinks, 1 blink every second followed by a 2 second pause Processor not installedPower Red 4 blinks, 1 blink every second followed by a 2 second pause Power failure (power supply overload)Power Red 5 blinks, 1 blink every second followed by a 2 second pause Pre-video memory error Power Red 6 blinks, 1 blink every second followed by a 2 second pause Pre-video graphics error Power Red 7 blinks, 1 blink every second followed by a 2 second pause System board failure (ROM Power Red 8 blinks, 1 blink every second followed by a 2 second pause Invalid ROM based on Checksum Power Red 9 blinks, 1 blink every second followed by a 2 second pauseSystem powers on but is unable to bootPower Red 10 blinks, 1 blink every second followed by a 2 second pauseBad option card Power Red 11 blinks, 1 blink every second followed by a 2 second pause Current processor does not support a feature previously enabled.nonenoneSystem does not power on and LEDs are not flashingSystem unable to power on。
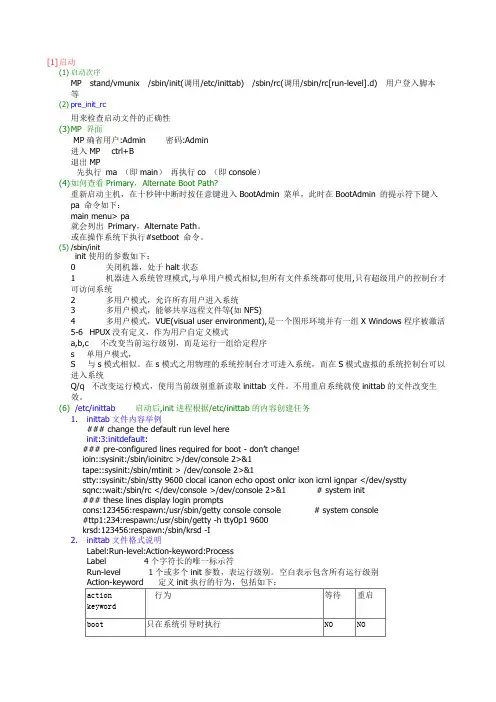
[1]启动(1)启动次序MP stand/vmunix /sbin/init(调用/etc/inittab) /sbin/rc(调用/sbin/rc[run-level].d) 用户登入脚本等(2)pre_init_rc用来检查启动文件的正确性(3)M P 界面MP确省用户:Admin 密码:Admin进入MP ctrl+B退出MP先执行ma (即main)再执行co (即console)(4)如何查看Primary,Alternate Boot Path?重新启动主机,在十秒钟中断时按任意键进入BootAdmin 菜单,此时在BootAdmin 的提示符下键入pa 命令如下:main menu> pa就会列出Primary,Alternate Path。
或在操作系统下执行#setboot 命令。
(5)/sbin/initinit使用的参数如下:0 关闭机器,处于halt状态1 机器进入系统管理模式,与单用户模式相似,但所有文件系统都可使用,只有超级用户的控制台才可访问系统2 多用户模式,允许所有用户进入系统3 多用户模式,能够共享远程文件等(如NFS)4 多用户模式,VUE(visual user environment),是一个图形环境并有一组X Windows程序被激活5-6 HPUX没有定义,作为用户自定义模式a,b,c 不改变当前运行级别,而是运行一组给定程序s 单用户模式,S 与s模式相似。
在s模式之用物理的系统控制台才可进入系统,而在S模式虚拟的系统控制台可以进入系统Q/q 不改变运行模式,使用当前级别重新读取inittab文件。
不用重启系统就使inittab的文件改变生效。
(6)/etc/inittab启动后,init进程根据/etc/inittab的内容创建任务1.inittab文件内容举例### change the default run level herei nit:3:initdefault:### pre-configured lines required for boot - don‘t change!ioin::sysinit:/sbin/ioinitrc >/dev/console 2>&1tape::sysinit:/sbin/mtinit > /dev/console 2>&1stty::sysinit:/sbin/stty 9600 clocal icanon echo opost onlcr ixon icrnl ignpar </dev/systtysqnc::wait:/sbin/rc </dev/console >/dev/console 2>&1 # system init### these lines display login promptscons:123456:respawn:/usr/sbin/getty console console # system console#ttp1:234:respawn:/usr/sbin/getty -h tty0p1 9600krsd:123456:respawn:/sbin/krsd -I2.inittab文件格式说明Label:Run-level:Action-keyword:ProcessLabel 4个字符长的唯一标示符Run-level 1个或多个init参数,表运行级别。
HP小型机及存储巡检手册第一章 1HP 小型机巡检手册2检查机房环境CONTENTS目录第一章检查机房环境:3第二章 HP 小型机巡检42.1系统配置检查 (4)2.2检查系统硬件情况: (8)2.3系统日志检查 (11)2.4LVM 相关检查 (15)2.5集群状态的检查 (18)2.6系统总体性能评估 (20)2.7系统备份检查 (22)第三章 HP PC 服务器巡检233.1检查前面板指示灯 (23)3.2查看SMH(System Management Homepage ) (26)3.3看 iml 日志 (26)3.4查看系统操作日志 (26)3.5看 BOIS 版本号 (27)第四章 HP 磁阵巡检284.1EVA 系列 (28)4.2MSA 系列 (32)第一章检查机房环境第一章 3温度:室内温度应保持在20~25 ℃ ? 湿度:相对湿度应保持在40~60% ? 火线- 零线电压:198~232V ? 零线- 地线电压:应<1V, 最高不超过 3V ? 洁净度:机房应保持清洁,不能有太多的灰尘,如机房太脏应提醒客户注意。
? 维护空间:机柜旁不宜摆放杂物,要根据各机型的规定留有足够的散热空间和维护空间。
? 电话线:机房应该配备电话线(用于紧急拨号维护或及时电话支持)。
? 机房环境( 电源, 空调…) 近期内有没有较大变动4HP 小型机巡检第二章 HP 小型机巡检2.1 系统配置检查2.1.1 检查 HP-UX 操作系统版本在终端上执行以下命令: asogz3:/ # uname -a HP-UX asogz3B.11.11 U 9000/800 1135931517 unlimited-user license2.1.2 检查 PDC 固件版本在 cstm 或 mstm 中看 CPU 设备的 information,以 cstm 为例#cstm cstm>map Dev Last Last Op Num Path Product Active Tool Status === ==================== ========================= =========== 1 system system () Information Successful 2 0 Bus Adapter (582) Information Successful 3 0/0 PCI Bus Adapter (782) Information Successful 4 0/0/0/0 Core PCI 100BT Interface Information Successful 5 0/0/1/0 PCI SCSI Interface (10000 Information Successful 6 0/0/1/0.3.0 SCSI Tape (HPC1537A) Information Successful 7 0/0/1/1 PCI SCSI Interface (10000 Information Successful 8 0/0/1/1.15.0 SCSI Disk (SEAGATEST31840 Information Successful 9 0/0/2/0 PCI SCSI Interface (10000 Information Successful 10 0/0/2/0.3.0 SCSI Disk (HPDVD-ROM) Information Successful 11 0/0/2/1 PCI SCSI Interface (10000 Information Successful 12 0/0/2/1.15.0 SCSI Disk (HP36.4GATLAS10 Information Successful 13 0/0/4/0 RS-232 Interface (103c104 Information Successful 14 0/0/5/0 RS-232 Interface (103c104 Information Successful 15 8 MEMORY (9b) Information Successful 16 160 CPU (5cb) Information Successful第二章 5cstm>select dev 16 cstm>info -- Updating Map -Updating Map... cstm>il Hardware path: 160 Product ID: CPU Module Type: 0 Hardware Model: 0x5cb Software Model: 0x4 Hardware Revision: 0 Software Revision: 0 Hardware ID: 0 Software ID:566770598 Boot ID: 0x1 Software Option: 0x91 Processor Number: 0 Path: 160 Hard Physical Address: 0xfffffffffffa0000 Soft Physical Address: 0 Slot Number: 8 Software Capability: 0x100000f0 PDC Firmware Revision: 41.18 IODC Revision: 0 Instruction Cache [Kbyte]: 512 Processor Speed: N/A Processor State: N/A Monarch: Yes Active: Yes Data Cache [Kbyte]: 10242.1.3 通过 sam 检查 CPU 和内存信息例如检查CPU 信息:hp01:/>#sam Starting the terminal version of sam... T o move around in sam: - use the "Tab" key to move between screen elements - use the arrow keys to move within screen elements - use "Ctrl-F" for context-sensitive help anywhere in sam On screens with a menubar at the top like this: -----------------------------------------------------|File View Options Actions Help| | ---- ---- ------- ------------------------------- ---| - use "Tab" to move from the list to the menubar6HP 小型机巡检- use the arrow keys to move around - use "Return" to pull down a menu or select a menu item - use "Tab" to move from the menubar to the list without selecting a menu item - use the spacebar to select an item in the list On any screen,press "CTRL-K" for more information on how to use the keyboard. Press "Return" to continue... 根据提示按任意键则进到 SAM 界面:在SAM 的界面,可以用tab 键和上下左右箭头方向键来移动光标。
IBM Power系列小型机的概念汇总一、基本概念(一)、Power System服务器POWER AIX RISC/CISC SMT QCM SP Hypervisor LPARPOWER(Performance Optimization With Enhanced RISC)1990年,IBM发布了基于RISC的产品线,RS/6000系列小型机,运行AIX3,这个产品架构IBM给起了一个响亮的名字POWER,一个目前性能最强大的处理器由此诞生。
POWER处理器在大量的服务器,大型计算机,小型机,工作站中广泛使用。
Power小型机,每代产品主要机型:POWER4+ →P615 P630 P650 P655 P670 P690POWER5 →P505 P510 P520 P550 P570 P590 P595POWER5+ →P510+ P510Q P520+ P52A P550+ P550Q P55A P560Q P575 POWER6 →new P520 new P550 new P570 new P575 new P595POWER7 →P710 P720 P730 P740 P750 P760 P770 P780 P775AIX(Advanced Interactive eXecutive)AIX是IBM基于AT&T Unix System V开发的一套类UNIX操作系统,运行在IBM专有的Power系列芯片设计的小型机硬件系统之上。
通过全面集成对32-位和64-位应用的并行运行支持,为这些应用提供了全面的可扩展性,它可以在所有的P系列和RS/6000工作站、服务器和大型并行超级计算机上运行。
RISC/CISC精简指令集与复杂指令集,两种不同的CPU设计模式。
基于RSIC的CPU有Power、PA-RISC、SPARC、DEC、Alpha 基于CISC的CPU有x86、ARMSMT(Simultaneousmulti-threading)SMT一种处理器技术,允许多个指令流(线程)在同一物理处理器上同时运行,提高了整体的吞吐量。