memtester使用说明
- 格式:docx
- 大小:20.80 KB
- 文档页数:8
JMeter使用教程之监视器测试
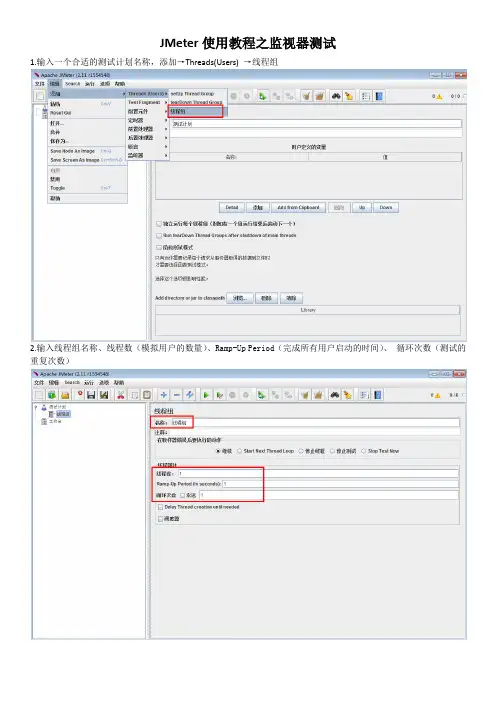
1.输入一个合适的测试计划名称,添加→Threads(Users) →线程组
2.输入线程组名称、线程数(模拟用户的数量)、Ramp-Up Period(完成所有用户启动的时间)、循环次数(测试的重复次数)
3.添加→Sampler→HTTP请求
4.输入名称、服务器名称或IP、端口号、路径、添加参数、用作监视器(依照访问顺序依次添加多个HTTP请求)
5.添加→定时器→固定定时器
6.输入线程延迟(一般使用间隔少于5000毫秒会给服务器添加压力)
7.添加→监听器→Simple Data Writer(监听器中可选择多种测试结果的表现形式)
8.指定一个目录和一个输出文件文件名
9.添加→监听器→监视器结果
10.Health(显示监视器受到的最后取样的状态,一个服务器内存用完或者达到最大线程数则崩溃)、性能(显示服务器性能的历史视图,如果内存线尖峰上升和下降迅速则多半内存泄露);保存测试计划(也可只保存测试元件)
11.点击启动按钮,完成测试计划后点击STOP。

浪潮存储平台主机插件用户手册文档版本发布日期适用版本尊敬的用户:衷心感谢您选用浪潮存储!浪潮存储秉承“云存智用运筹新数据”的新存储之道,致力于为您提供符合新数据时代需求的存储产品和解决方案。
本手册用于帮助您更详细地了解和便捷地使用本存储,涉及的截图仅为示例,最终界面请以实际设备显示的界面为准。
由于产品版本升级或其他原因,本手册内容会不定期进行更新,如有变动恕不另行通知。
除非另有约定,本手册仅作为使用指导,本手册中的所有陈述、信息和建议不构成任何明示或暗示的担保。
浪潮拥有本手册的版权,保留随时修改本手册的权利。
未经浪潮许可,任何单位和个人不得以任何形式复制本手册的内容。
如果您对本手册有任何疑问或建议,请向浪潮电子信息产业股份有限公司垂询。
技术服务电话:4008600011地址:中国济南市浪潮路1036号浪潮电子信息产业股份有限公司邮编:250101在您正式使用本存储之前,请先阅读以下声明。
只有您阅读并且同意以下声明后,方可正式开始使用本存储。
如果您对以下声明有任何疑问,请和您的供货商联系或直接与我们联系。
如您在开始使用本系统前未就以下声明向我们提出疑问,则默认您已经同意了以下声明。
1.请不要自行拆卸本存储的机箱及机箱内任何硬件设备。
在本存储出现任何硬件故障或您希望对硬件进行任何升级时,请您将机器的详细硬件配置反映给我们的客户服务中心。
2.请不要将本存储的设备与任何其他型号的相应设备混用。
本存储的内存、CPU、CPU散热片、风扇、硬盘托架、硬盘等都是特殊规格的。
3.在使用本存储时遇到任何软件问题,请您首先和相应软件的提供商联系。
由提供商和我们联系,以方便我们共同沟通和解决您遇到的问题。
对于数据库、网络管理软件或其他网络产品的安装、运行问题,我们尤其希望您能够这样处理。
4.上架安装本存储前,请先仔细阅读相关产品手册中的快速安装指南。
我们致力于产品功能和性能的持续提升,部分功能及操作与手册描述可能会有所差异,但不会影响使用。
MEMORY BOYANALOG DELAY WITH CHORUS/VIBRATOCongratulations on your purchase of the Electro-Harmonix Memory Boy…a smooth analog delay that takes its heritage from our 1970’s Memory Man and the legendary Deluxe Memory Man. The Memory Boy uses the Deluxe Memory Man as a base, expanding upon it with additional modulation features and an optional Expression Pedal input allowing external control over Delay Time or Modulation Rate.- OPERATING INSTRUCTIONS and CONTROLS -Connect your guitar to the INPUT jack of the Memory Boy and the OUTPUT jack to your amplifier. The Memory Boy can be used in combination with other effectsdevices. Experiment with combinations to develop your own unique sounds. The true bypass footswitch allows you to switch the effect in and out.START UP TIME: The Memory Boy takes approximately 20 Seconds to fully warm up. During this time you will hear the delay time slowly increase for a given DELAY knob setting, especially if the DELAY knob is above 50%. After about 20 Seconds the Memory Boy settles on the delay time set by the DELAY knob.DELAY Knob – Controls the delay time of your Memory Boy. The delay time range is 30 mS to 550 mS with the maximum delay time at the full clockwise position of the knob. Turning the DELAY knob, while listening to your echoes, will bend the pitch of your notes. The DELAY knob is also used to set the maximum delay time for expression pedal control.DEPTH Knob – Sets the amount of modulation that is applied to your delayed signal. Turning the DEPTH knob clockwise will increase the amount of the modulation. To completely turn off the modulation, turn the DEPTH knob down to the full counter-clockwise position.WARNING: Use only the 96DC-200BI adapter that Memory Boy comes supplied with. Do not use any other adapters. Using other adapters, even those made by Electro-Harmonix, could cause harm to the unit, the adapter or you.BLEND Knob– The BLEND knob is a wet/dry control allowing you to vary the mix between direct and delayed signals at the OUTPUT jack of the Memory Boy. Set the BLEND knob to the full clockwise position for an output that is 100% Wet. Set theBlend knob to full counter-clockwise for an output that is 100% dry. Setting BLEND anywhere in between will mix the wet and dry signals together.FEEDBACK – Controls the amount of signal that is circulated from the output of the delay block to its input. Turning the FEEDBACK knob clockwise increases the number of echoes. Setting the FEEDBACK control to its maximum clockwise position will cause the Memory Boy to run-away, or self-oscillate. If instead you only want to hear one echo for each of your notes, turn the FEEDBACK knob down to its full counter-clockwise position. Fairly high feedback with short delay settings produces a reverb type of effect.Triangle / Square Toggle Switch – This two position toggle switch sets the shape of the analog modulation waveform. To hear the effects of this switch, the DEPTH knob must be turned up. When set to Triangle (UP position), Memory Boy’s modulation will be smooth and continuous, similar to the modulation you would hear in many Chorus effects. Set the switch to Square (Down position) and the modulation will jump between two delay times creating a temporary pitch shifting type of effect. CHORUS, VIBRATO & EXP. PEDAL Toggle Switch – This three position, dual function toggle switch has two jobs: it sets the rate of modulation and chooses the parameter for the expression pedal to control.MODULATION RATE: With nothing plugged into the EXP. PEDAL jack, this switch selects three different modulation rates: CHORUS for a slow rate, EXP. PEDAL for a medium rate and VIBRATO for a fast rate. When an expression pedal is plugged into the EXP. PEDAL jack, the CHORUS and VIBRATO settings remain the same; flipping the switch to the middle position, EXP. PEDAL, allows the expression pedal to control the rate of modulation. The full range of the expression pedal extends past the two rates set by CHORUS and VIBRATO.EXPRESSION PEDAL CONTROL: An optional expression pedal can control either the Memory Boy’s delay time or modulation rate. The CHORUS, VIBRATO, EXP. PEDAL toggle switch selects the parameter for the expression pedal to control. When this switch is set to either CHORUS or VIBRATO modes, the expression pedal controls delay time. If the switch is set to EXP. PEDAL, the expression pedal controls the rate of modulation. The modulation rate increases as the expression pedal moves from toe up to toe down.When you control delay time with an expression pedal, the shortest delay time will be in the toe up position; the longest delay time will be in the toe down position. The delay knob works in conjunction with the expression pedal to set the maximum delaytime in the toe down position. As you turn the DELAY knob clockwise, the maximum delay time for the expression pedal will increase. Some expression pedals, such as the M-Audio EX-P, have a knob on the side of the pedal. This knob can be used to set the shortest delay time in the toe up position.FOOTSWICH and STATUS LED – When the status LED is lit, the Memory Boy is in effect mode, when the LED is off the Memory Boy is in true bypass mode. The footswitch below the LED toggles between effect and true bypass modes.- JACKS -INPUT Jack – Connect the output of your instrument or another effects pedal to the ¼” INPUT jack. The input impedance presented at the input jack is 1 M . OUTPUT Jack – Connect the output of the Memory Boy to the input of an amplifier or another effects pedal.EXP. PEDAL Jack – Allows the user to control the delay time or modulation rate with an optional expression pedal or control voltage. The expression pedal should have a Tip-Ring-Sleeve plug attached to it. It is important that the expression pedal have the correct polarity. The tip of the plug must be connected to the wiper of the potentiometer inside the expression pedal. If you are not sure what type of expression pedal to use, try to purchase one with a polarity switch, so that it will work with many different types of instruments. Some suggested Expression Pedals: Moog EP-2, M-Audio EX-P or Roland EV-5. You may also connect a control voltage to this jack. The Control Voltage range is 0 V to 5 V.9V PWR JACK – Connect the output plug of the supplied AC Adaptor into the 9V power jack at the top of the Memory Boy. The Memory Boy requires 45mA at9VDC. The polarity of the power jack is center negative. There is also an optional 9V battery clip inside your Memory Boy. Only use alkaline batteries with the Memory Boy. You should get 3 to 4 hours use out of one battery.- WARRANTY INFORMATION -Please register online at /product-registration or complete and return the enclosed warranty card within 10 days of purchase. Electro-Harmonix will repair or replace, at its discretion, a product that fails to operate due to defects in materials or workmanship for a period of one year from date of purchase. This applies only to original purchasers who have bought their product from an authorized Electro-Harmonix retailer. Repaired or replaced units will then be warranted for the unexpired portion of the originalwarranty term.If you should need to return your unit for service within the warranty period, please contact the appropriate office listed below. Customers outside the regions listed below, please contact EHX Customer Service for********************************************+AandCanadiancustomers:please obtain a Return Authorization Number (RA#) from EHX Customer Service before returning your product. Include with your returned unit: a written description of the problem as well as your name, address, telephone number, e-mail address, and RA#; and a copy of your receipt clearly showing the purchase date.United States & CanadaEHX CUSTOMER SERVICEELECTRO-HARMONIXc/o NEW SENSOR CORP.47-50 33RD STREETLONG ISLAND CITY, NY 11101Tel: 718-937-8300Email:************EuropeJOHN WILLIAMSELECTRO-HARMONIX UK13 CWMDONKIN TERRACESWANSEA SA2 0RQUNITED KINGDOMTel: +44 179 247 3258Email:*********************************This warranty gives a purchaser specific legal rights. A purchaser may have even greater rights depending upon the laws of the jurisdiction within which the product was purchased.To hear demos on all EHX pedals visit us on the web at Email us at ************FCC COMPLIANCENote: This equipment has been tested and found to comply with the limits for a Class B digital device, pursuant to part 15 of the FCC Rules. These limits are designed to provide reasonable protection against harmful interference in a residential installation. This equipment generates, uses and can radiate radio frequency energy and, if not installed and used in accordance with the instructions, may cause harmful interference to radio communications. However, there is no guarantee that interference will not occur in a particular installation. If this equipment does cause harmful interference to radio or television reception, which can be determined by turning the equipment off and on, the user is encouraged to try to correct the interference by one or more of the following measures:•Reorient or relocate the receiving antenna.•Increase the separation between the equipment and receiver.•Connect the equipment into an outlet on a circuit different from that to which the receiver is connected.•Consult the dealer or an experienced radio/TV technician for help.Modifications not expressly approved by the manufacturer could void the user's authority to operate the equipment under FCC rules.。
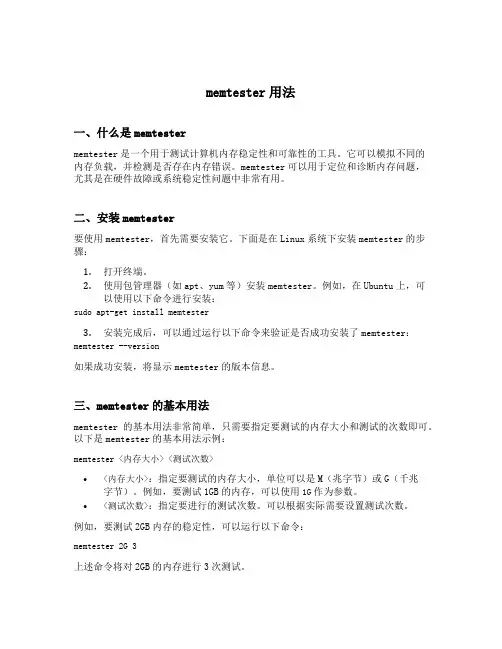
memtester用法一、什么是memtestermemtester是一个用于测试计算机内存稳定性和可靠性的工具。
它可以模拟不同的内存负载,并检测是否存在内存错误。
memtester可以用于定位和诊断内存问题,尤其是在硬件故障或系统稳定性问题中非常有用。
二、安装memtester要使用memtester,首先需要安装它。
下面是在Linux系统下安装memtester的步骤:1.打开终端。
2.使用包管理器(如apt、yum等)安装memtester。
例如,在Ubuntu上,可以使用以下命令进行安装:sudo apt-get install memtester3.安装完成后,可以通过运行以下命令来验证是否成功安装了memtester:memtester --version如果成功安装,将显示memtester的版本信息。
三、memtester的基本用法memtester的基本用法非常简单,只需要指定要测试的内存大小和测试的次数即可。
以下是memtester的基本用法示例:memtester <内存大小> <测试次数>•<内存大小>:指定要测试的内存大小,单位可以是M(兆字节)或G(千兆字节)。
例如,要测试1GB的内存,可以使用1G作为参数。
•<测试次数>:指定要进行的测试次数。
可以根据实际需要设置测试次数。
例如,要测试2GB内存的稳定性,可以运行以下命令:memtester 2G 3上述命令将对2GB的内存进行3次测试。
四、memtester的高级用法除了基本用法外,memtester还提供了一些高级选项,以满足更复杂的测试需求。
以下是一些常用的高级用法:1. 指定模式memtester可以模拟不同的内存访问模式,以更全面地测试内存的稳定性。
可以使用-p选项来指定测试模式。
以下是一些常用的测试模式:•0xff:使用全1模式进行测试。
•0x00:使用全0模式进行测试。
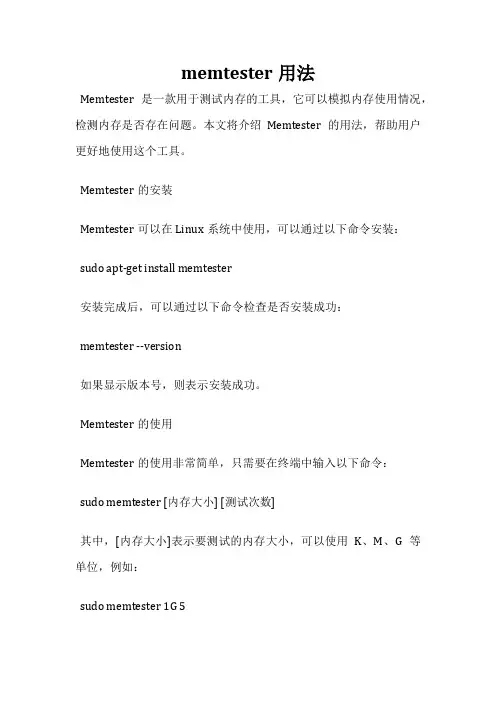
memtester用法Memtester是一款用于测试内存的工具,它可以模拟内存使用情况,检测内存是否存在问题。
本文将介绍Memtester的用法,帮助用户更好地使用这个工具。
Memtester的安装Memtester可以在Linux系统中使用,可以通过以下命令安装:sudo apt-get install memtester安装完成后,可以通过以下命令检查是否安装成功:memtester --version如果显示版本号,则表示安装成功。
Memtester的使用Memtester的使用非常简单,只需要在终端中输入以下命令:sudo memtester [内存大小] [测试次数]其中,[内存大小]表示要测试的内存大小,可以使用K、M、G等单位,例如:sudo memtester 1G 5表示测试1GB内存,测试5次。
Memtester的测试结果Memtester测试完成后,会输出测试结果。
如果内存存在问题,会显示错误信息。
如果内存没有问题,则会显示“OK”。
Memtester的高级用法除了基本用法外,Memtester还提供了一些高级用法,例如:1.测试特定的内存地址可以使用以下命令测试特定的内存地址:sudo memtester [内存大小] [测试次数] [内存地址]其中,[内存地址]表示要测试的内存地址,可以使用16进制表示。
2.测试特定的内存模式可以使用以下命令测试特定的内存模式:sudo memtester [内存大小] [测试次数] [内存模式]其中,[内存模式]表示要测试的内存模式,可以使用以下模式:- seq:顺序写入和读取- rnd:随机写入和读取- bit:随机写入和读取单个位- own:使用自定义模式进行测试3.测试特定的内存速度可以使用以下命令测试特定的内存速度:sudo memtester [内存大小] [测试次数] [内存速度]其中,[内存速度]表示要测试的内存速度,可以使用以下速度:- fast:快速测试- slow:慢速测试- auto:自动测试总结Memtester是一款非常实用的内存测试工具,可以帮助用户检测内存是否存在问题。
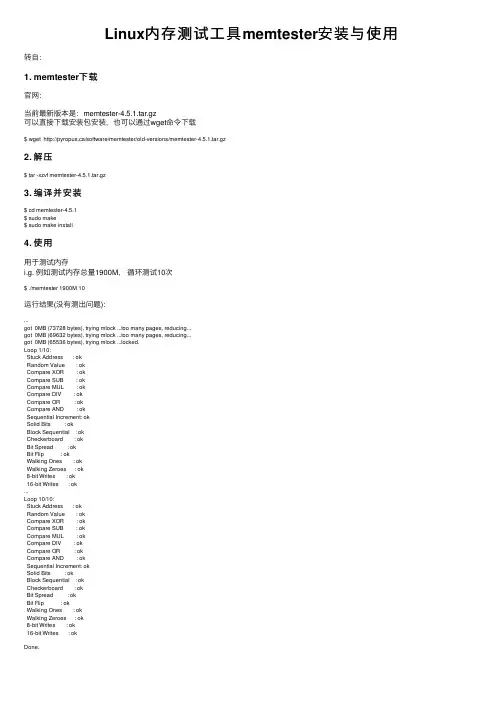
Linux内存测试⼯具memtester安装与使⽤转⾃:1. memtester下载官⽹:当前最新版本是:memtester-4.5.1.tar.gz可以直接下载安装包安装,也可以通过wget命令下载$ wget http://pyropus.ca/software/memtester/old-versions/memtester-4.5.1.tar.gz2. 解压$ tar -xzvf memtester-4.5.1.tar.gz3. 编译并安装$ cd memtester-4.5.1$ sudo make$ sudo make install4. 使⽤⽤于测试内存i.g. 例如测试内存总量1900M,循环测试10次$ ./memtester 1900M 10运⾏结果(没有测出问题):...got 0MB (73728 bytes), trying mlock ...too many pages, reducing...got 0MB (69632 bytes), trying mlock ...too many pages, reducing...got 0MB (65536 bytes), trying mlock ...locked.Loop 1/10:Stuck Address : okRandom Value : okCompare XOR : okCompare SUB : okCompare MUL : okCompare DIV : okCompare OR : okCompare AND : okSequential Increment: okSolid Bits : okBlock Sequential : okCheckerboard : okBit Spread : okBit Flip : okWalking Ones : okWalking Zeroes : ok8-bit Writes : ok16-bit Writes : ok...Loop 10/10:Stuck Address : okRandom Value : okCompare XOR : okCompare SUB : okCompare MUL : okCompare DIV : okCompare OR : okCompare AND : okSequential Increment: okSolid Bits : okBlock Sequential : okCheckerboard : okBit Spread : okBit Flip : okWalking Ones : okWalking Zeroes : ok8-bit Writes : ok16-bit Writes : okDone.。
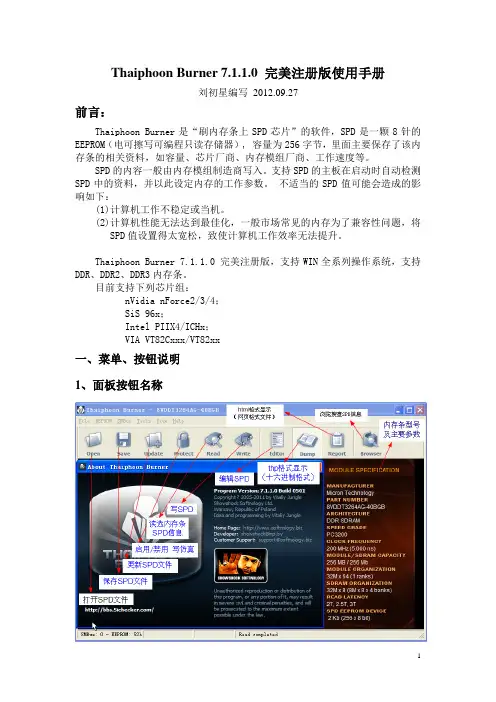
Thaiphoon Burner 7.1.1.0 完美注册版使用手册刘初星编写2012.09.27前言:Thaiphoon Burner是“刷内存条上SPD芯片”的软件,SPD是一颗8针的EEPROM(电可擦写可编程只读存储器), 容量为256字节,里面主要保存了该内存条的相关资料,如容量、芯片厂商、内存模组厂商、工作速度等。
SPD的内容一般由内存模组制造商写入。
支持SPD的主板在启动时自动检测SPD中的资料,并以此设定内存的工作参数。
不适当的SPD值可能会造成的影响如下:(1)计算机工作不稳定或当机。
(2)计算机性能无法达到最佳化,一般市场常见的内存为了兼容性问题,将SPD值设置得太宽松,致使计算机工作效率无法提升。
Thaiphoon Burner 7.1.1.0 完美注册版,支持WIN全系列操作系统,支持DDR、DDR2、DDR3内存条。
目前支持下列芯片组:nVidia nForce2/3/4;SiS 96x;Intel PIIX4/ICHx;VIA VT82Cxxx/VT82xx一、菜单、按钮说明1、面板按钮名称2、“文件”菜单3、“电可擦除只读存储器”菜单4、“内存条公用”菜单5、“工具”菜单6、“查阅”菜单7、“帮肋”菜单二、修改前备份“SPD信息”文件(******·thp ),以便刷错后能恢复。
开机,运行Thaiphoon Burner,点击其菜单工具栏中的“EEPROM”,我们就会看到系统中读取两组内存SPD信息的项目“Read SPD at 50h”、“Read SPD at 51h”,分别对应内存插槽上的“DIMM 1”和“DIMM 2”的内存模组。
选取对应要备份SPD信息的内存条。
SPD信息写入到内存,约要5秒钟通过下拉“File”菜单,点击“Save Dump as...”选项选择保存路径按下图示点击后,可以浏览SPD信息三、编辑修改SPD信息文件按下图示点击后,可以修改SPD信息一般我们只需要更改内存的最高频率参数,所以只需要修改表格上半部分中第一行的参数,为了避免所谓高频低能,我们就需要优化参数,这就牵涉到下半部分表格了。
Memory测试方法及原理memory RAM压力测试QDUTT测试测试目的:用于验证DDR 性能。
测试方法:A.将平台产品分别置于高温75°C,低温-30°C,运行QDUTT软件,并按照如下参数设置:B.测试项:dqlineshmoo; calineshmooMbn文件:ddi文件参数设置:dqROUT/caROUT:4CLKlevel:11Rwtype:默认不更改VREF:对应毫伏,数字表示(如0.6V则对应输入600)Start_address:默认不更改Test_size:默认不更改C.用直流电源给Memory的VREF引脚供电,供电范围为0.45V~0.75V。
D. 根据LOG分析测试结果。
QMVS测试测试目的:用于验证不同温度下DDR的稳定性能。
测试方法:测试环境测试时长测试数量常温48H 2PCS高温12H 2PCS低温12H 2PCS环境搭建:1.安装python工具和vs_Community工具2.在cmd安装swsys-qmvs-1.6.51.运行QMVS确保所有设备在不同设备ID的ADB设备中列出。
在CMD窗口中,输入以下命令来启动QMVS DDR:常温:test-suite –t C:\Auths\UrdNe\AppDATa\ROMAM\NPM\NoDEYMasksSWSyqMVS \TestBysStudio\8909JSON(对应平台)高低温:test-suite –t C:\Users\UserName\AppData\Roaming\npm\node_modules\swsys-qmvs\test_configs\8909_tempchamber.json3.脚本运行48H(常温)/12H(高低温)后自动停止,log自动保存:C:\temp\swsys目录下Memtester测试测试目的:测试不同的温度和电压压力环境下,Memory系统是否会受到影响。
电脑内存测试工具使用方法
电脑内存测试工具使用方法
当用户的计算机经常出现蓝屏、死机现象的时候除了排查必要的软硬件问题以外,内存的`健康状态也不可小视,不过检测内存健康状态需要U盘启动盘的帮助,那是如何使用U盘启动盘进行内存测试的呢?请根据教程中的步骤进行处理。
怎么使用U盘启动盘进行内存测试?
1、将制作好的u盘插入到电脑的USB 插口处,重启电脑,按下相应的启动快捷键进入快启动的主菜单界面后选择“运行硬盘内存检测扫描工具菜单”后按回车键确认。
2、在检测工具菜单下利用键盘上的方向键将光标移至“运行Memtest 内存检测”后按下回车键“Enter”键确认即可。
3、当我们按下回车键时系统便会自动进行内存检测,检测的时间大约会在2小时左右,等待时间可能有点长,耐心等待。
内存检测的过程中的相关数值说明:
Pass:表示检测过程中的整体进度;
Test:表示检测当前进度;
WallTime:检测时长,大约会在2小时左右;
Pass:进行内存检测的次数,经过这一次检测后,下次检测时这里的数值将会是“1”,并且每一次的检测都会累计上去。
Error ECC Errs:检测错误的次数和地点将会在此显示出来。
以上步骤便是关于怎么使用U盘启动盘进行内存测试的方法介绍,其重要使用的工具是MemT est,因为检测的时间非常漫长,建议用户在睡前或者时间空闲时再践行。
RCC11J00130100MARU-Stick调试器用户手册瑞萨16位单片机Rev.1.00Revision Date: Jan 16, 2008 前 言R enesas U SB S tick(简称RU-Stick或易优Stick)是由瑞萨科技(北京)有限公司开发的一款超小型在线调试器。
它使用UART Monitor的方式,可以调试瑞萨M16C/28群、M16C/29群、M16C/62P群、M16C/62A群、M16C/62M群、M16C/80群、M32C/83群和R8C/Tiny系列等单片机(注1)。
注1:所支持产品系列,请留意瑞萨网站上UART监控程序的最新信息。
本使用手册从集成开发环境的安装开始,帮助用户逐步了解RU-Stick的使用方法。
目 录1. HEW (1)1.1 HEW的安装 (1)1.2 HEW窗口说明 (6)1.3 常用设定 (6)1.4 新工作空间的创建 (11)2. 硬件工具 (16)2.1 RU-Stick (16)2.2 RU-Stick调试器的安装 (20)2.3 在演示板中调试演示程序 (25)3. 小结 (32)RU-Stick调试器用户手册1. HEWHEW是高性能嵌入工作空间(H igh-performance E mbedded W orkspace)的缩写。
它是一款集成开发环境,其内嵌了汇编器(Assembler)、文本编辑器(Editer)、调试器(Debugger)等诸多软件工具。
配合功能强大的C 编译器(C Compiler)M3T-NC30WA,在HEW的统一开发环境下,能够仿真和调试绝大部分的瑞萨公司单片机。
下面将从安装开始,逐步介绍如何使用HEW。
1.1 HEW的安装1.1.1 M3T-NC30WA的安装在安装HEW之前,首先需要安装C编译器M3T-NC30WA。
M3T-NC30WA是一款高性能的C编译器,根据瑞萨单片机的指令集特点,它将用户的C语言代码进行优化后转换为汇编语言。
memtester原理
memtester是一种用于测试计算机系统内存的工具。
它通过模拟内存负载和压力,检测系统中的内存错误和故障。
memtester的原理是创建一个临时的内存区域,将其填充为特定的模式,然后对其进行读写操作,以测试内存的稳定性和可靠性。
在memtester的工作过程中,首先会分配一定数量的内存空间,然后将这些空间的内容初始化为特定的模式,例如,连续的0和1。
接下来,memtester会对这些内存空间进行读写操作,以验证内存的正确性。
memtester的测试过程通常分为两个阶段。
首先是“写入”阶段,其中memtester会将指定的模式写入内存中,并且重复这个过程多次,以确保内存中的数据被正确写入。
然后是“读取”阶段,memtester 会读取内存中的数据,并与之前写入的模式进行比较,以确保内存中的数据没有发生错误。
通过反复进行写入和读取操作,memtester可以检测到内存中的错误。
如果发现错误,memtester会生成相应的报告,指出错误发生的位置和类型。
这些报告可以帮助系统管理员或开发人员定位并解决内存问题。
除了测试内存的稳定性和可靠性之外,memtester还可以帮助用户评估系统的内存性能。
通过测试不同大小和类型的内存负载,用户可以了解系统在处理不同工作负载下的表现情况,并进行性能优化。
总之,memtester通过模拟内存负载和压力,以及进行读写操作,可以帮助用户检测和排除计算机系统中的内存错误和故障。
它是一个有用的工具,可以提高系统的稳定性和性能。
Quick GuideMemoryBooster designed for BlackBerry® Wireless HandheldAboutMemoryBooster boosts your device speed by recovering wasted memory. Software only solution. No additional hardware is needed! Other applications are not influenced by using MemoryBooster .InstallationExtract all contents of the .zip file to a single directory and select the .alx in the “Application Loader” of your “BlackBerry Desktop Manager”. Follow the instructions and the program will be installed on your BlackBerry®. A more detailed guide on third party program installation can be found here:●Install Applications using a Microsoft Windows Desktop ●Install Applications using a Mac OS X DesktopWho should use MemoryBoosterEveryone who has a lot of BlackBerry® applications running and notices a reduced in speed. MemoryBooster helps to speed up the BlackBerry dramatically and therefore, it improves productivity.What MemoryBooster doesDue to imperfect memory management of the BlackBerry® Java VirtualMachine (JVM), a lot of memory is wasted which impacts the device performance and stability.MemoryBooster recovers lost memory and makes it available again – for allapplications on your BlackBerry®.Getting StartedBelow are two screenshots of what to expect when you open MemoryBooster . The main screen gives you a full overview of the memory status of your device. It provides essential information which can be visualized in two different ways. The choice of visualization may be switched easily by selecting the appropriate one on the main screen.Key Words●Total Memory: Total amount of available device memory.●Used Memory: Amount of device memory already allocated.●Free Memory: Amount of device memory still free and available for use.●Java Objects: Total amount of objects occupying memory at the moment.MemoryBooster Website/software/memorybooster/Textual – Saves ResourcesThe textual overview of your BlackBerry's current memory usage is the best choice for older devices with less memory and less power.Bar Charts – Fancy but still FastThe bar chart overview of the BlackBerry's current memory usage provides the best visualization than just naked facts. It is recommended on all current devices.Boosting MemoryMemoryBooster designed for BlackBerry® Wireless HandheldBoost Memory!in main screen.Boost Memory! in main screen.Boost Memory! in BlackBerry® Calendar.Background Memory Boost info dialog.How does it work? [The Technical Explanation]MemoryBooster exists for years now. Since the first release it has been a success and we have received a lot of feedback. A very obvious and understandable question comes up very often: “How can this work? The BlackBerry® is such an advanced device, isn't it perfect already?” The answer to this is: “There is always space for improvement; S4BB Limited always tries to close the gap!”How to Boost MemoryThere are four ways to activate a memory boost, which can be easily located on your device.1.Boost Memory! ButtonJust hit the button and your done.2.Boost Memory! Menu Command Hit the BlackBerry® button to open up the menu in MemoryBooster and then just boost the memory.3.Boost Memory! Global Command Once activated in “Options” just bring up the menu in any BlackBerry® app (here in Calendar) and boost the memory directly from there.4.Background Memory Boost!Memory boosts can be performed in background. This does not require any manual interaction and keeps the BlackBerry® memory clean and efficient at all times.Every memory boost can show how much memory has just been recovered.Technical Part The BlackBerry® Operating System (RIM calls that “Device Software”) iswritten in Java and runs in a Java Virtual Machine (JVM). The Java VirtualMachine has an internal memory cleaning mechanism called “GarbageCollection” that constantly clears all unneeded objects and frees upmemory.This garbage collection is not started as often as it should be started. MemoryBooster's intelligent monitoring algorithms detect when the BlackBerry® is going to run out of memory and then fire up a garbagecollection to prevent the device from slowing down.MemoryBooster calls this “free memory based boost” which can beactivated to constantly keep the BlackBerry® at a productive pace.Before Boost 1After Boost 1Before Boost 2After Boost 2Before Boost 3After Boost 3Before Boost 4After Boost 4051015202530Available Memory Used Memory Free Memory BlackBerry Speed Accumulated Freed Memory The chart on the top right shows the effect of boosting memory over time. It basically does not matter whether the boost has been initiated manually (by clickingthe button or menu item) or automatically (free memory or time based). The orange line shows that every memory boost improves the speed of the BlackBerry® dramatically. The green line gives a clue on how much memory is recovered in total over time.Boost LogMemoryBooster designed for BlackBerry® Wireless HandheldTotal # Boast Performed Total Memory RecoveredAverage Memory RecoveredManual Boost Automatic Boost Sum BoostsMemory Recovered (Automatic Boost)Memory Recovered (Manual Boost)Help ScreenClear logs and statisticsMemoryBooster Boost Log Screen with Sample Memory RecoveredWhy View the Boost Log?The boost log gives you an overview on the effectiveness of MemoryBooster . The log records the manual boost as well as background boosts which have been performed by MemoryBooster in background.Statistical SummaryExtensive statistical data is tracked which is supposed to give an overview on the capabilities of MemoryBooster . Top area of the boost log shows a statistical summary of all boosts that have been performed. Because it is possible to manually boost the memory (by hitting the “Boost Memory!” button in the main screen or the menu) or automatically boost the memory in background (time based versus free memory based), the summary area is split up into these two parts.Detailed Log ListThe source for the summary is the full list of all boosts performed. Each time MemoryBooster boosts your device's memory, data is recorded. The following data is gathered:●Free memory before boost ●Free memory after boost ●Memory recovered (free memory before minus free memory after boost)●Date and time of boost ●Type of boost (manual or automatic)The type of boost is indicated by the icon on the left of each entry. The other information about that particular boost is shown on the right, whereas the most important information “Memory recovered” is shown in the first line.Clear Log ListIf necessary, the log list can be cleared from all recorded log entries. This can be done by clicking “Clear Log” in the boost log screen's menu.Options & SchedulingMemoryBooster designed for BlackBerry® Wireless HandheldUser Interface SettingsFont sizeThe font size setting allows to adjust the font size to personal preferences. It is possible to choose between: Small, Normal and Large.Show updates in titleIf activated , this will display information on the top bar of MemoryBooster . The following indicators can be chosen:●Time to Next Auto BoostDisplays the time remaining until the next scheduled boost ●Free MemoryPercentage of free device memory available.Scheduling BoostsIf activated, memory boosts can be performed by MemoryBooster in background without the need to monitor the device performance.There are two ways the automatic memory boost can be triggered:●Periodically (i.e. every 2 minutes)●Low memory (i.e. when free memory is below 30%)If automatic background boost is activated at least one of these two methods needs to be set up so the automatic boost is triggered in background and performance boosts are executed.Time based memory boostMemory boosts can be scheduled for periodic execution in different time spans. The following options are available:●Off ● 2 minutes, 15 minutes, 30 minutes, 45 minutes ● 1 hour, 2 hours, 3 hours ● 1 dayHelp MenuThe Help menu can be accessed nearly anywhere in the program, such as:●The main screen ●The boost log ●OptionsIt provides useful information, tips and guidelines for everything about the program. Each screen's help content is specific to its screen.For example: within the boost log, help information specific to the boost log is provided. This will includeinformation on how to read the boost as well as how to clear it.Free memory boostMemory boosts can be triggered when needed – when the BlackBerry®is about to run out of memory. The following options are available:●Off ●5%, 10%, 15%, 20%, 25%, 30%Example: when set to “30%” a memory boost will be triggered when the free memory runs under 30% of the available memory.Get more for your BlackBerry®Designed for BlackBerry® Wireless HandheldYou can get more for your BlackBerry®!In cooperation with MobileSoftMarketwe are providing discount coupons exclusively for our customers. You can save 25%on all purchases of BlackBerry® software products. The discount coupon can be found at the bottom of this page, and recommended products are listed below.Your personal 25% Discount Code: 97F34MProductivity Software for BlackBerry®!No matter you are a business user or an individual who likes to use the BlackBerry®. Improving your productivity is crucial for all of your life's parts. It is important thatyou can fulfill your tasks at work and at home in an easy and fast way. Productivity software can help you to increase your own productivity while using a BlackBerry®Wireless Handheld. Please find a selection of best selling productivity applications for BlackBerry® here:Games for BlackBerry®!Playing games is a way of relaxing and getting away from stress. Even though it might just happen in your lunch break. Here are the favorites:ZiplorerMemoryBoosterBatteryBoosterMessageForwardMessageScheduleNextAction!TaskMasterNextAction! ProHabitMaster TaskMailerSudoku Expert Martial Arts Edition Sudoku Expert Porsche Arts Edition Sudoku Expert Standard Arts Edition Sudoku Expert Yacht Arts EditionBBtris。
memtester使用2010-08-16 18:20:21| 分类:linux之路 |字号订阅抄录一段官方的解释:A userspace utility for testing the memory subsystem for faults. It's portable and should compile and work on any 32- or 64-bit Unix-like system. (Yes, even weird, proprietary Unices, and even Mac OS X.) For hardware developers, memtester can be told to test memory starting at a particular physical address as of memtester version 4.1.0.操作步骤如下:[root@localhost ~]# wgethttp://pyropus.ca/software/memtester/old-versions/memtester-4.2.0.tar .gz[root@localhost ~]# tar -xvf memtester-4.2.0.tar.gz[root@localhost ~]# cd memtester-4.2.0[root@localhost ~]# make && make install[root@localhost memtester-4.2.0]# vi READMEUsing memtesterUsage is simple for the basic case. As root, run the resulting memtester binary with the following commandline:memtester <memory> [runs]An optional "-p physaddr" argument available to cause memtester to testmemory starting at a specific physical memory address (by mmap'ing /dev/mem starting at an offset of `physaddr`, which is given in hex). #以上是节选,直接跟要测试的内存的大小就可以,默认单位是M,也可以手动指定为B, K, M, or G; -p参数是指定内存物理地址的。
rapid N cube氮分析仪操作步骤一. 开机步骤在未开机前可打开操作程序菜单,检查Options>Maintenance>Intervals中提示的各更换件测试次数的剩余是否还能满足此次测试,通常最应该注意的是还原管、干燥管(可通过观察其颜色变化判断)以及灰份管。
如需检漏请在未开主机前将操作程序中Options>Settings>Parameter中的Comb. tube、Postcomb. tube、Reduct. tube温度都设置为0,退出操作程序后再按照以下步骤进行正常的开机。
1. 开启计算机,进入Windows状态。
2. 拔掉主机后面尾气出口的堵头。
3. 将主机的进样盘拿开后,开启主机电源。
4. 待进样盘底座自检转动完毕(即自转至零位)后,将进样盘样品孔位手动调到0位后放回原处。
5. 启动rapid N cube的操作软件。
6. 打开O2气,将O2气减压阀的输出压力调至:0.22Mpa打开CO2气,通过调节C O2气瓶减压阀(大约0.12MPa),确认操作程序状态栏中的“Press.”显示为1200 – 1250 mbar;Flow CO2约650 ml/min。
二. 操作程序1. 选择标样进入操作程序Options>Setting>Standards的窗口,在出现的对话框中确认要使用标样的名称,如没有需使用的标样请在此对话框中定义,例如:●Aspartic Acid冬胺酸,确认N%的理论值。
●做样品测试时,选择使用Factor and/or monitor sample功能●重新制作标准曲线的标样测试时,选择使用Calibration sample功能2. 炉温设定A) 进入操作程序Options>Settings>ParametersB) 输入和/或确认加热炉设定温度,其中:Comb. tube(中):960℃;Postcomb. tube(左):800℃;Reduct. tube(右):815℃。
3200NT Timer主程序流程图注释:1. 将每日时间设为 12:01 P.M.2. 同时按下Set Up和Set Down键,持续5秒钟.3. 每按循环键一次,显示内容更换一次。
所有内容显示依次显示以后,将回到运行状态。
4. 在显示目录可以由Set Up或Set Down设定。
5. 由于阀门程序的不同,有些选项不会显示,供选择设定. 当时间显示12:01 P.M.时, 同时按下Set Up和Set Down键,并保持5秒钟。
阀的型号:l例如:2750 控制阀[2750] = 默认型号2850 控制阀[2850]2900 控制阀[2900]2930 控制阀[2930]3130 控制阀[3130]3150 控制阀[3150]3900 控制阀[3900]再生流向:例如:顺流[ dF] = 默认状态逆流, 先吸盐[UfbF]逆流, 先注水[UFFF]系统类型例如:: 系统 #4 时间延迟型[ 4tc] = 默认模式系统 #4 流量即时型[ 4FI]系统 #4 流量延迟型[ 4Fd]系统 #5 流量即时型[ 5FI]系统 #6 流量即时型[ 6FI]系统 #7 流量即时型[ 7FI]系统 #9 流量即时型[ 9FI]阀的位置例如:第一颗阀(主阀)[LEAd]第二,三,四颗阀(副阀)[ LAg] = 默认注意:此项只在系统为#5, #6, #7,和 #9 时显示。
远程信号开始再生:例如:不设置需要3分钟时间发信号开始再生注意: 系统容量, 容量安全因素, 供水的硬度,流量计的大小和计量泵的输出设定将不会显示,相应功能不再具有。
.显示形式例如: 加仑M3[RSoF] = 默认[RS-3][U--1] = 默认[U--4]41096 Rev A (2/03)3200NT Timer主程序流程图系统容量例如: 300,000 格令, 美制 [C300]=默认1,500,000 格令, 美制 [Ct1.5]200 m3, 公制 [C200]200,000 m3, 公制 [C12.0]=默认容量安全因素例如: 不设置[cF- 0] = 默认系统容量减少10% [cF10]供水的硬度例如: 15 格令/加仑, 美制 [H-15]=默认30 度, 公制 [H-30]=默认再生时间:例如: 凌晨两点再生 [2:00]=默认注意: The P.M. indicator display must be off for A.M.再生天数:例如: 不设置[AOFF] = 默认[A- -7] = 默认每7天再生注意: [AOFF]是系统4时钟再生控制方式的默认设置。
memtester编译1. 什么是memtester?memtester是一个用于测试内存稳定性和性能的工具。
它可以模拟各种内存负载,并检测系统在压力下的表现。
通过运行memtester,我们可以发现并解决潜在的内存问题,确保系统的稳定性和可靠性。
2. 编译memtester步骤编译memtester需要一些基本的编译工具和库。
下面是编译memtester的详细步骤:步骤1:安装依赖项在编译memtester之前,我们需要安装一些依赖项。
打开终端,并执行以下命令:sudo apt-get updatesudo apt-get install build-essential autoconf automake这将安装所需的编译工具和自动配置工具。
步骤2:下载源代码我们需要从memtester的官方网站上下载源代码。
打开终端,并执行以下命令:wget这将下载最新版本的memtester源代码。
步骤3:解压源代码解压刚才下载的源代码文件。
在终端中执行以下命令:tar -xvf memtester-4.5.0.tar.gzcd memtester-4.5.0这将解压源代码并进入解压后的目录。
步骤4:配置和编译在终端中执行以下命令来配置和编译memtester:./configuremake这将自动配置编译选项并开始编译memtester。
步骤5:安装memtester在终端中执行以下命令来安装memtester:sudo make install这将把编译好的memtester程序安装到系统中。
3. 使用memtester进行内存测试一旦我们成功地编译和安装了memtester,我们就可以使用它来进行内存测试了。
下面是使用memtester的基本用法:语法memtester <memory size> <number of iterations><memory size>:指定要测试的内存大小,可以使用K(千字节)、M(兆字节)或G (吉字节)作为单位。
告别内存枯竭的日子——Mem Watcher使用指南
吴俊
【期刊名称】《电脑》
【年(卷),期】2000(000)012
【摘要】尽管Windows每次升级时都会声称系统的稳定性较以前有很大的提高,但在实际使用中Windows内存管理系统的先天不足。
究其原因,关键还是在于某些应用程序在退出时没有及时释放占用的内存,而Windows系统又不会主动释放这部分内存,久而久之,系统资源自然就不足了。
显然,要解决这个问题,仅仅依靠Windows升级是不可能的,最好的办法还是找一个具有内存管理功能的软件,MemWatcher就是其中的一个。
作为一个内存管理工具,MemWatcher提供了非常全面的功能。
它不仅可以实时检测当前系统中的可用物理内存和虚拟内存,并在可用内存过小的情况下提醒用户或者根据设定自动进行内存的整理。
大家可以直接从http://matrixsoftware.com下载。
完成下载后,直接执行安装程序,可依照安装向导的指示轻松完成整个安装过程。
【总页数】2页(P42-43)
【作者】吴俊
【作者单位】无
【正文语种】中文
【中图分类】TP316.7
【相关文献】
1.告别普条时代体验金士顿HyperX高频内存 [J],
2.第一批资源枯竭代表城市——阜新告别"一煤独大"成功转型 [J], 麦婉华
3.用Mem Test86+考验你的内存 [J], 林毓梁
4.调节内存“小参”的MemSet [J], iMac-ZONE;何骏
5.MEM Monster把内存优化到最佳 [J], 王书琴
因版权原因,仅展示原文概要,查看原文内容请购买。
memtester使用2010-08-16 18:20:21| 分类:linux之路 |字号订阅抄录一段官方的解释:A userspace utility for testing the memory subsystem for faults. It's portable and should compile and work on any 32- or 64-bit Unix-like system. (Yes, even weird, proprietary Unices, and even Mac OS X.) For hardware developers, memtester can be told to test memory starting at a particular physical address as of memtester version 4.1.0.操作步骤如下:[root@localhost ~]# wgethttp://pyropus.ca/software/memtester/old-versions/memtester-4.2.0.tar .gz[root@localhost ~]# tar -xvf memtester-4.2.0.tar.gz[root@localhost ~]# cd memtester-4.2.0[root@localhost ~]# make && make install[root@localhost memtester-4.2.0]# vi READMEUsing memtesterUsage is simple for the basic case. As root, run the resulting memtester binary with the following commandline:memtester <memory> [runs]An optional "-p physaddr" argument available to cause memtester to testmemory starting at a specific physical memory address (by mmap'ing /dev/mem starting at an offset of `physaddr`, which is given in hex). #以上是节选,直接跟要测试的内存的大小就可以,默认单位是M,也可以手动指定为B, K, M, or G; -p参数是指定内存物理地址的。
For example, if you want to test a bank of RAM or device which is 64kbytes in size and starts at physicaladdress 0x0C0000, you would run memtester as follows:memtester -p 0x0c0000 64k [runs][root@localhost memtester-4.2.0]# memtester 256memtester version 4.2.0 (32-bit)Copyright (C) 2010 Charles Cazabon.Licensed under the GNU General Public License version 2 (only).pagesize is 4096pagesizemask is 0xfffff000want 256MB (268435456 bytes)got 256MB (268435456 bytes), trying mlock ...locked.Loop 1:Stuck Address : okRandom Value : okCompare XOR : okCompare SUB : okCompare MUL : okCompare DIV : okCompare OR : okCompare AND : okSequential Increment: okSolid Bits : okBlock Sequential : okCheckerboard : okBit Spread : okBit Flip : okWalking Ones : okWalking Zeroes : ok8-bit Writes : ok16-bit Writes : ok注:测试结果仅仅截取了一部分。
我测试的过程中,使用的机器内存为1G,swap 分区为4G。
首次测试时,将测试的内存大小指为1G,机器死机。
个人认为是由于memtester将内存全部占用导致的。
运行memteste非常简单,作为root ./ memtester <memory> [runs] <memory>:内存大小,单位M [runs]:运行次数这样我们就可以对单颗CPU的机器进行测试,查看内存是否足够稳定。
但如果我有多颗CPU和较大的memory呢?最简单的方法是多开几个终端,同时运行memtester,每个CPU分配同样大小的内存。
还有一种方法可以使用Baif编写的一个脚本memtester-multi.sh,位置放在memtester-4.0.7下就可以了。
这个脚本只在linux下有效!#!/bin/sh# Memory Tester Scripts# by Baif# version = dateVERSION="Fri Oct 19 11:56:57 CST 2007"# trap for irruptionsMEMTESTER=${PWD}/memtesterPPIDKILL=$$SIDKILL=$$trap "pkill -9 -P ${PPIDKILL};kill -9 $$" INTtrap "pkill -9 -P ${PPIDKILL};kill -9 $$" KILLcat <<-EOF_vpps >&2Version: ${VERSION}PID: $$PPIDKILL: ${PPIDKILL}SIDKILL: ${PPIDKILL}EOF_vppsCORE_NUM=$(grep -i ^processor /proc/cpuinfo|wc -l) MEMTESTERCOPY=${CORE_NUM}MEM_TOTAL_K=$(awk '/^MemTotal/{print $2}' /proc/meminfo) MEM_RESERVE_PERCENTAGE=$((1000*50/1024)) # 95%MEM_RESERVED=$((MEM_TOTAL_K/1024*MEM_RESERVE_PERCENTAGE/1000)) MEM_TOTAL_TOBETESTED=$((MEM_TOTAL_K/1024-MEM_RESERVED))MEM_PER_COPY=$((MEM_TOTAL_TOBETESTED/MEMTESTERCOPY))RUN_DURATION_TIME=0RUN_LOOPS=-1RUN_DURATION_TIME_FLAG=0RUN_LOOPS_FLAG=0DDPERCOPY_TIME=6sLOGDIR=/tmp/memtester-log-${$}mkdir -p ${LOGDIR}show_help (){cat <<-EOFshow_HELP >&2Version: ${VERSION}Usage: $(basename ${0})-r Directory: the root location of memtester binary file-c NUMBER: the copies of memtester should be run-m NUMBER: how many memory should be tested totally (in MB) -t TIME: duration mode, how long will the tests go-l NUMBER: loops mode,how many loops will each memtester should goThe option -t and -l are exclusive, which means tests could work only with 1. duration mode or 2. loops modeRUN 4 copies memtester with in 24 hours, to test total 4000 MB memory:$(basename ${0}) -t 24h -c 4 -m 4000RUN 2 copies memtester with in 1 hours, to test total 4000 MB memory:$(basename ${0}) -t 1h -c 4 -m 4000RUN 4 copies memtester with in 2 loops, to test total 3600 MB memory:$(basename ${0}) -l 2 -c 4 -m 3600-V/-h/-H: show this info.EOFshow_HELPexit 0}while getopts :c:m:t:l:r:p:hHVvx OPTIONdocase ${OPTION} inc)#echo "-c ${OPTARG}"MEMTESTERCOPY=${OPTARG};;m)#echo "-m ${OPTARG} MB"MEM_TOTAL_TOBETESTED=${OPTARG}MEM_RESERVED=$((MEM_TOTAL_K/1024-MEM_TOTAL_TOBETESTED));;t)#echo "-t ${OPTARG}"[ 0 -ne ${RUN_LOOPS_FLAG} ] && echo "-t and -l are exclusive." && exit 222RUN_DURATION_TIME=${OPTARG}RUN_DURATION_TIME_FLAG=1;;l)#echo "-l ${OPTARG}"[ 0 -ne ${RUN_DURATION_TIME_FLAG} ] && echo && echo "-t and -l are exclusive." && show_help && echo && exit 223RUN_LOOPS=${OPTARG};RUN_LOOPS_FLAG=1;;d)#echo "-r ${OPTARG}"MEMTESTER=${OPTARG}/memtester;;p)#echo "-p ${OPTARG}"MEMTESTER=${OPTARG};;V|h|H)show_help;;v)set -v;;x)set -x;;?) echo "Error...";echo "?Unknown args..."exit 224;;*) #echo "*Unknown args..."esacdone#exit[ 0 -eq ${RUN_DURATION_TIME_FLAG} ] && [ 0 -eq ${RUN_LOOPS_FLAG} ] && echo && echo "Please specified which mode should we run... -t or -l" && show_help && echo && exit 225MEM_PER_COPY=$((MEM_TOTAL_TOBETESTED/MEMTESTERCOPY))echo "Mem total: " $((MEM_TOTAL_K/1024)) MBecho "Core total: "${CORE_NUM}echo "Memtester copys: " ${MEMTESTERCOPY}echo "Mem per copy: "${MEM_PER_COPY}echo "Mem total to used: "${MEM_TOTAL_TOBETESTED} MBif [ ${MEM_RESERVED} -lt 1 ];thenecho "Mem reserved: -- No more memory reserved..."elseecho "Mem reserved: "${MEM_RESERVED} MBfi#exit# GOGOGOif [ 0 -ne ${RUN_DURATION_TIME_FLAG} ]; thenecho "Run within a duration: ${RUN_DURATION_TIME}"elif [ 0 -ne ${RUN_LOOPS_FLAG} ];thenecho "Run within a loop: ${RUN_LOOPS}"fiecho "Working directory: " $PWDecho "Memtester: " ${MEMTESTER}echo "LOGs directory: " $LOGDIRechoecho -n "Jobs started at date: "date #+%Y/%m/%d\ %H:%Mecho#exit######################### Run testing within a duration time.if [ 0 -ne ${RUN_DURATION_TIME_FLAG} ]then# prepareing the sleeping killerssleep ${RUN_DURATION_TIME}echo -n "End of testing(TIMEOUT)... "echo "KILL CHILD" && kill -9 $(pgrep -P ${PPIDKILL} memtester) && echo "Childen processes - KILLED."# attention to how the memtesters are forked...echo "KILL PARENT" && kill $$ && echo "KILLED." &echo "Finished the memtester"echo -n "Jobs finished at date: "date #+%Y/%m/%d\ %H:%Mfi &echo -n "Waiting (PID: $$) for ${MEMTESTERCOPY} memtesters(${MEM_PER_COPY}MB for each). "if [ 0 -ne ${RUN_DURATION_TIME_FLAG} ];thenecho -n "For time: ${RUN_DURATION_TIME} "fiif [ 0 -ne ${RUN_LOOPS_FLAG} ];thenecho -n "For loops: ${RUN_LOOPS} "fiecho "..."while truedoMEMTESTER_NUM=0echo -n "{"while [ ${MEMTESTER_NUM} -lt ${MEMTESTERCOPY} ]doecho -n " ${MEMTESTER_NUM} "if [ 0 -ne ${RUN_DURATION_TIME_FLAG} ]thenRUN_LOOPS=0fi${MEMTESTER} ${MEM_PER_COPY} ${RUN_LOOPS} 2>&1 >> ${LOGDIR}/${MEMTESTER_NUM}.log &# set loops = 0 to make memtester run loop infinitely... # .pogo version will run only one loop by defaultsleep ${DDPERCOPY_TIME}MEMTESTER_NUM=$(expr $MEMTESTER_NUM + 1)doneecho -n "}"wait[ 0 -ne ${RUN_LOOPS_FLAG} ] && break# memtesters' loops...done########################echoecho -n "End of testing(Excution ended)... "pkill -9 -P ${PPIDKILL}kill $$echo "Finished the memtester"echo -n "Jobs finished at date: "date #+%Y/%m/%d\ %H:%M运行这个脚本sh memtester-multi.sh –c <number> -l <number> -m <memory>-c:运行几个memtester-l: 运行几次-m:测试多大的内存,直接填测试总数即可,程序会自动分配个平均值给每个memtester,这样省去我们自己的计算,也不用多开几个终端了,单位MB 例如我有一个4颗CPU,32G内存的机器,我就可以这样运行sh memtester-multi.sh –c 4 –l 1 –m 3100大家可以看这个脚本中还可以限定时间,例如我想运行24个小时sh memtester-multi.sh –t 24h -c 4 –m 3100。