雷哲集成灶说明书
- 格式:pdf
- 大小:4.13 MB
- 文档页数:12
I-CORE森歌智慧芯,启动智生活浙江森歌电器有限公司ZHEJIANG SENG ELECTRONIC APPLIANCE CO.,LTD.地 址:浙江省绍兴市嵊州市经济开发区(浦口街道)浦东大道138号 P.C.:312400 2021年2月第一版第一次修改全国客服热线售后服务热线400-103-2226400-826-4588手机网站官方微信致谢词感谢您购买并使用本公司的产品,为了您能全面了解并正确使用本产品,请在安装使用前仔细阅读本说明书,并请妥善保管,以备查阅。
对于不遵守本说明书有关要求,进行安装,使用,维修等所造成的损失,本公司概不承认任何责任。
本公司保留更改产品设计及更改相应产品安装使用说明书的权利,如有更改,届时恕不另行通知。
产品使用年限提醒:根据GB17905-2008«家用燃气燃烧器具安全管理规则»的规定:“燃气灶具从售出当日起,其判废年限应为8年。
”目录 (1)主要技术参数 (2)开关、按键操作说明 (3)功能模式介绍4点火、熄火操作和调节方法 (6)产品安装说明 (7)靠近灶体的柜体侧板开孔尺寸参照表 (8)整体安装尺寸参照表 (8)9常见故障的识别与处理 (10)............................................................................蒸烤箱安全注意事项................................................................蒸烤箱日常维护注意事项 (10)蒸烤箱安全使用注意事项 (11)保养与维修 (12)常见故障的识别与处理 (13)服务承诺 (14)随机附件及文件 (15)告用户环境影响书 (16)4、在待机状态或关机状态,按“照明一”键,吸风板照明灯亮,如果此时吸风板处于关闭状态,则同时打 开吸风板。
再按一次,关闭吸风板照明,同时关闭吸风板(如果烟机风机处于关闭状态)。
集成灶使用说明书集成灶使用说明书简介集成灶是一种集炉灶与抽油烟机于一体的厨房电器设备。
它的功能强大且易于操作,可以满足人们对厨房的各种需求。
本使用说明书将详细介绍集成灶的安装、操作和维护,帮助您更好地使用集成灶,享受烹饪的乐趣。
目录1. 安装2. 操作3. 清洁与维护4. 注意事项1. 安装在安装集成灶之前,请先确保您已经具备以下条件:- 厨房有稳定的电源供应,并符合集成灶的电源要求。
- 厨房墙面上有烟囱或合适的排风通道,能够连接抽油烟机。
进行安装时,请按照以下步骤操作:1. 确定安装位置:根据厨房的布局和个人需求,选择一个合适的位置安装集成灶。
确保周围有足够的空间进行操作。
2. 安装抽油烟机:将抽油烟机固定在墙面上的烟囱或排风通道上,并保证牢固稳定。
3. 安装灶具:将集成灶放置在指定位置,将其连接到抽油烟机上,并确保连接牢固。
完成以上步骤后,您的集成灶就已经安装成功。
接下来我们将介绍如何正确操作集成灶。
2. 操作集成灶的操作非常简单。
它提供了多种功能和设置,您可以根据需要进行选择和调整。
2.1 煮食功能集成灶配有多个不同大小和功率的燃烧器,可以满足不同种类和数量的烹饪需求。
在煮食功能中,您可以执行以下操作:- 打开集成灶:将电源开关打开。
- 选择燃烧器:根据需要,选择一个或多个燃烧器进行煮食。
- 调节火力:通过旋转火力调节旋钮,将火力调至适当的大小。
- 放置锅具:将锅具放置在燃烧器上,并确保与燃烧器表面完全贴合。
- 设定时间:根据需要,可以设置烹饪时间。
在操作集成灶时,请务必遵循以下注意事项:- 避免将锅具放置在燃烧器边缘,以防止其倾斜或摔落。
- 使用适当大小的锅具,以确保与燃烧器表面紧密贴合,避免烹饪过程中的安全隐患。
2.2 抽油烟功能集成灶的抽油烟功能可以有效地净化厨房中的烟雾和油烟,保持空气清新。
在使用抽油烟功能时,请遵循以下操作步骤:- 打开抽油烟机:通过按下抽油烟机控制面板上的开关按钮,打开抽油烟机。
威可多集成灶操作方法威可多集成灶是一种集汤炖、煎炒、烘烤、蒸煮、炒炸于一体的全能家电产品。
它集多种功能于一身,方便快捷,广泛适用于中餐、西餐、烘焙等烹饪需求。
下面将详细介绍威可多集成灶的操作方法。
1.开机:将威可多集成灶插入电源,并打开电源开关。
此时控制面板会亮起,显示屏会显示当前的时间和日期。
2.调节功能模式:在控制面板上有各种功能按钮,如汤炖、煎炒、烘烤、蒸煮、炒炸等。
根据需要选择相应的功能模式。
3.调节温度和时间:在控制面板上有温度和时间的增减按钮,可以根据食物的需求来调节温度和时间。
调节温度时一般是以摄氏度为单位,根据所需火力强度来调节温度。
调节时间时可以增减分钟,根据食物的烹饪时间来设定。
4.开始烹饪:当选定功能模式并设定好温度和时间后,按下“开始/停止”按钮来开始烹饪。
此时集成灶会自动启动相应的烹饪模式,加热到设定的温度后开始烹饪。
5.烹饪过程中的操作:在烹饪过程中可能需要对食物进行翻煎、搅拌、加热等操作。
可以根据需要按下对应的功能按钮进行操作。
6.烹饪完成:当设定的时间到达后,威可多集成灶会发出提示音并停止加热,此时可以打开灶具检查食物的烹饪情况。
如果食物还未完全熟透,可以继续烹饪,重新设定好时间和温度,并按下“开始/停止”按钮。
7.清洁维护:在使用完威可多集成灶后,应及时清洁灶具。
可以用湿布擦拭表面,清除食物残渣。
同时,还可以拆除易于拆卸的部件,如炉膛、煎锅等,进行深度清洁。
当然,在清洁过程中一定要注意安全,必须确保灶具已经断电并冷却。
除上述常规操作外,威可多集成灶还有一些特殊的功能和操作方法:1.预约功能:可以在控制面板上设置预约功能,比如凌晨设定好炖汤功能,设定好时间和温度,早晨就可以享受到美味的炖汤了。
2.智能操作:威可多集成灶还具有智能功能,可以通过手机APP远程控制,预设好相应的操作模式,可以随时随地进行操作。
3.多功能转换:威可多集成灶的炉膛可以自动旋转,可以实现烧烤、烤鱼等不同菜品的烹饪,使得烹饪更加方便多样。

JJZT/Y-CB005GJJZT/Y-CB012G 生产厂:绍兴市奥帅电器股份有限公司 生产地址:浙江省嵊州市经济开发区浦南一路88号712171719202122 GB16410-202021JJZT /Y -CB012G天然气热负荷(kW)液化气热负荷(k W )T-天然气 Y-液化气外置JJZT /Y -CB005G 左:40 右:40外置160017972724.84.5装有400-166-6668电磁阀烤箱循环风机烤箱 箱体温度传感器电蒸炉 箱体温度传感器电蒸炉 底盘温度传感器主控板NL烤箱上加热电蒸炉上加热43861蓝红黄/绿M1~热断路器16A250V热断路器16A250V电蒸炉底部加热盘热断路器16A250V慢断型16A250V保险管(管状熔断体)热断路器16A250V烤箱门控蒸箱门控烤箱灯联动5V电蒸炉炉灯烤门锁蒸门锁显示板蒸烤 电源板220V~ 50Hz吸油烟机黑红棕蓝建议使用通断联动方式JJZT/Y-CB012G2018蒸烤搁物架JJZT/Y-CB005G蒸烤搁物架JJZT/Y-CB012G炸篮“E1”箱体温度探头异常箱体底部探头异常防火墙温度探头异常电源板过零电路故障防火墙报警“E2”“E3”“E4”“E5”机器无显示 且无反应主控制板/控制基板故障供水管路故障机器漏水蒸烤一体机(CB005G)Er-1左屏:烤箱箱体温度传感器故障或松动、脱落;右屏:烤箱箱体温度传感器故障或松动、脱落;Er-2蒸箱箱底盘温度传感器故障 或松动、脱落;Er-3左屏:烤箱箱内温度未在规定时间内升至设定温度;右屏:蒸箱箱内温度未在规定时间内升至设定温度;Er-4整张显示板与电源板通讯故障H 跳动左屏:烤箱超温警报;右屏:蒸箱超温警报;Door open 左屏:烤箱门控开关断开(仅在工作状态中有效);右屏:蒸箱门控开关断开(仅在工作状态中有效);end左屏:烤箱工作结束;右屏:蒸箱工作结束;显示显示显示显示显示显示显示显示显示显示显示显示显示单蒸单烤(CB012G)JJZT/Y-CB005G下翻板玻璃蒸烤箱水壶拉手蒸烤箱JJZT/Y-CB012G语音入口蒸烤箱水壶拉手烤箱蒸箱17集成式燃气灶具排风口开墙孔直径为 185mm电蒸箱款必须集成灶安装高度由机脚手动旋转调节,可调节高度为地面到厨具台面(800-820mm)调温设置调节好时间后,再按一次“温度/时间”键进行温度调节,“温度/时间”键按键灯及显示屏时间图标闪烁,按“加”“减”调时时间长短,短按±1调节,长按连续调节;左右腔体操作相同;菜单模式烤炸箱蒸箱图标名称温度℃时间min温度范围℃时间范围min图标名称温度℃时间min温度范围℃时间范围min空气炸20020160-2003-90肉类1004590-1003-90烘焙烤18040140-1803-90鱼类952585-1003-90烧烤16030140-2303-90蛋类953585-1003-90保洁10025100-1203-90面食1003585-1003-90烘干803050-803-90蔬菜903085-1003-90解冻553040-603-90发酵365030-453-90启停设置菜单模式、温度、时间设置完毕后,按“启停”键开始蒸烤功能,照明未开启状态下,照明开启;在蒸烤运行状态下,按“启停”键退出蒸烤运行状态返回菜单设置状态;再按一次“启停”键继续开始工作;左右腔体操作相同;预约功能选择好菜单模式后,长按“温度/时间”键进入预约功能,显示屏预约图标及小时区域闪烁,按“温度/时间”键可切换调整小时和分钟部分,按“加”“减”调节时间,短按±1调节,长按连续调节;时间调节范围:小时0-23,分钟0-59;预约状态下,10S无任何操作或按“启停”键,确认当前预约时间;预约时间到,运行预约菜单模式;左右腔体操作相同;门锁功能确认运行功能2s后门锁自动打开;预约模式下门锁不打开,在所预约的功能模式开始后2s后门锁自动打开;缺水警报、暂停工作及工作结束或直接关机时,自动关闭门锁功能;16按键定义:【电源】【菜单/照明】【加】||【加】【菜单/照明】【电源】【启停】【温度/时间/预约】【减】||【减】【温度/时间/预约】【启停】白按键颜色和显示屏颜色为白色,屏幕进度条颜色为色左侧为烤箱,右侧为蒸箱系统上电系统上电复位,蜂鸣器叮一声,显示屏、按键灯全部点亮后进入关机状态;关机状态开机:按触电源“”键,电源指示灯亮,滑条指示灯白色。
JJZT/Y-BD1005JJZT/Y-A003D6JJZT/Y-005C19生产厂:绍兴市奥帅电器股份有限公司 生产地址:浙江省嵊州市经济开发区浦南一路88号712171719202122 GB16410-2020JJZT/Y-BD1005JJZT/Y-A003D6天然气热负荷(kW)液化气热负荷(kW)/ / // / / / /21T-天然气 Y-液化气JJZT/Y-005C19外置()检查门是否正常关闭机器无显示且无反应主控制板/控制基板故障供水管路故障显示E-01温度传感器(内腔)未接通温度传感器(内腔)故障腔内温度长时间未达到设定温度负载未接通主控基板故障加热管故障蒸汽发生器/温控器故障温度传感器未接通温度传感器故障通讯错误检查腔内烹饪食物是否放置过量显示E-02显示E-03显示E-0418机器漏水蒸烤一体机JJZT/Y -A003D6JJZT/Y-BD1005 /JJZT/Y -005C19蒸烤搁物架开机:按触电源“”键,电源指示灯亮。
关机:待机状态,按触电源“”键,进入关机状态。
:按触模式“”键,一次循环切换功能模式图标,并对应显示功能模式:按触设置“”键,切换调整的温度和时间,按上升“”键和下降“”键调整数值。
步骤3:按触开始/暂停“”键开始工作。
工作过程中,按触开始/暂停“”键,机器暂停工,在按触模式“”键,重新选择模式,再按触开始/暂停“”键确认启动。
,并放回水箱,关上拉门后,按触开始/暂停“”键启动继续工作。
开机:按触电源“”键,电源指示灯亮,滑条指示灯白色。
关机:待机状态,按触电源“”键,进入关机状态。
待机状态:按触照明“”键,开启照明功能。
再次按触照明“”键,则开风机:待机状态,按触滑条“,开启风机,从左到右依次为档,随档位改变,滑条指示灯亮蓝色。
关风机:风机运行中,按触电源“待机状态:按触清洗“”键,进入加热清洗风机功能,清洗时间分钟打开清洗输出,后清洗过程中,按触清洗“”键,则关闭清洗功能。
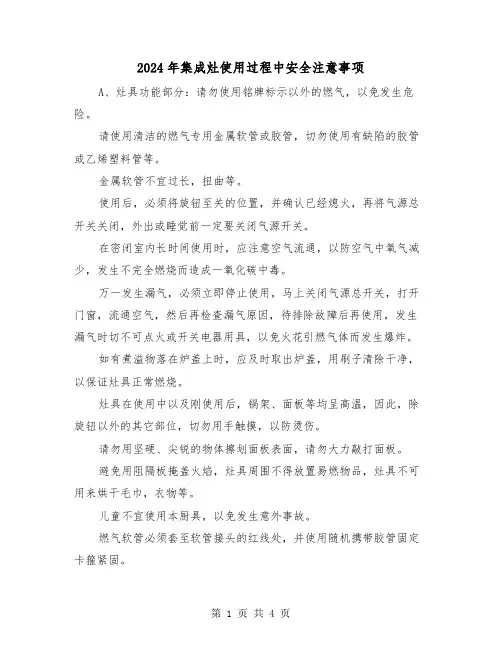
2024年集成灶使用过程中安全注意事项A、灶具功能部分:请勿使用铭牌标示以外的燃气,以免发生危险。
请使用清洁的燃气专用金属软管或胶管,切勿使用有缺陷的胶管或乙烯塑料管等。
金属软管不宜过长,扭曲等。
使用后,必须将旋钮至关的位置,并确认已经熄火,再将气源总开关关闭,外出或睡觉前一定要关闭气源开关。
在密闭室内长时间使用时,应注意空气流通,以防空气中氧气减少,发生不完全燃烧而造成一氧化碳中毒。
万一发生漏气,必须立即停止使用,马上关闭气源总开关,打开门窗,流通空气,然后再检查漏气原因,待排除故障后再使用,发生漏气时切不可点火或开关电器用具,以免火花引燃气体而发生爆炸。
如有煮溢物落在炉盖上时,应及时取出炉盖,用刷子清除干净,以保证灶具正常燃烧。
灶具在使用中以及刚使用后,锅架、面板等均呈高温,因此,除旋钮以外的其它部位,切勿用手触摸,以防烫伤。
请勿用坚硬、尖锐的物体擦划面板表面,请勿大力敲打面板。
避免用阻隔板掩盖火焰,灶具周围不得放置易燃物品,灶具不可用来烘干毛巾,衣物等。
儿童不宜使用本厨具,以免发生意外事故。
燃气软管必须套至软管接头的红线处,并使用随机携带胶管固定卡箍紧固。
B、消毒柜、吸油烟机部分请单独使用额定电流10A以上的插座,必须有可靠接地。
电源不正常时请勿使用,否则会导致火灾、触电。
除专业修理技术人员外,请勿自行进行拆卸和维修改造。
若长时间不适用,请拔去电源插头。
餐具和餐具之间尽可能留一些空隙,这样消毒、烘干效果更佳。
耐温低于70摄氏度的餐具及橡胶物品不可放入消毒柜内。
由于臭氧、紫外线灯管的外壳是玻璃制成的,因此在使用或清洗时要避免硬物碰撞而导致破裂。
如在使用过程中发现可以不经过任何透光物体(如玻璃等)可直接看到臭氧紫外线灯管发出的光线时应马上停止使用,通知专业人员进行维修。
若臭氧、紫外线灯管损坏,必须更换相同功率和波长的高臭氧紫外线灯管,波长253.7mm,功率20W。
如在使用过程中发现臭氧泄露,应马上停止使用,通知专业人员进行维修。
集成灶使用方法
集成灶的使用方法:
(1)操作前:检查排烟管是否接好,检查灶台排气是否完好,灶台边缘和拉手部分处检查是否有围漏烟;
(2)操作时:将燃气阀门打开,然后依次将火候调节器、温控键、火力指示灯依次调整至相应位置;
(3)使用时:将食材放入烹饪锅中,点击做菜按钮,将所选择的加热模式选择完毕后,自动加热;
(4)停止使用时:关掉燃气阀门,点击“停止”按钮,把火候调节器调到温度最低的位置;
(5)操作后:按住拉手,将灶台部分拉出,使用护眼器等设备进行检查,确保无烟漏等情况,再放回原处,关闭灶台;
(6)清洁时:使用湿抹布擦拭灶台,并用刷子等工具清理火盆及火候调节器,最后用清水擦拭干净,定期更换油烟滤网,确保灶台的正常运行状况。
西屋集成式燃气灶具JJZT/Y-WL01安装使用说明书非常感谢您使用西屋集成式燃气灶具请在使用前仔细阅读本说明书并妥善保管西屋厨卫科技(广东)有限公司地址:佛山市顺德区容桂红星居委会文明西路42号领德大厦503号D区制造商:中山市莱普帝斯电器有限公司地址:广东省中山市南头镇永辉路23号生产许可证:XK21-007-02313西屋厨卫服务热线:400-830-013602目 录01名称名称燃气抱箍配件螺丝油杯小锅架主机集烟罩(头部)说明书电源线出风管烟管抱箍火盖,炉架止回阀数量数量2个1包1个2套1件1台1件1本1条1个2个1条1.装箱清单2.技术参数表2.技术参数表1.装箱清单2.技术参数表3.安全及注意事项4.产品结构示意图5.安装方法6.产品功能与使用方法7.操作说明8.维护保养9.常见故障10.产品电路图11.有害物质说明12.保修卡13.致消费者的一封信010102030307080910********产品型号220V ~/50HzJJZT-WL01JJZY-WL01985W 1级额定电压/频率额定输入总功率能效等级执行标准生产许可证号上室保洁柜容积下室保洁柜容积下室保洁方式上室保洁方式紫外线功率加热管功率保洁柜部分50L±5L 50L±5L 中温烘干紫外线+臭氧15W 300W注:因产品改进和技术更新,参数如更改,请以实物为准,恕不另行通知。
GB 16410-2007 GB 30720-2014XK21-007-02313400P a 20±2000Pa2800Pa120W260W ≤5W电机输入功率照明灯功率保温功率适用燃气种类额定燃气压力额定热负荷熄火保护种类左:5.0kW, 右:5.0kW左:4.5kW, 右:4.5kW天然气(12T)液化石油气(20Y)热电偶风量最大风压吸油烟机部分燃气灶部分噪音17±10%m ³/min (爆炒风量:19±10%m ³/min )≤73dB(A)产品外形尺寸开孔尺寸尺寸参数900()×600(宽)1285长×(高)mm 905()×600(宽)800(注:高度长×(高)mm 可调安装高度0-30mm)3.安全及注意事项由专业人员进行安装,安装完毕后试运转后,无异常现象的同时,售后服务人员需向用户说明使用方法,用户不得自行安装。
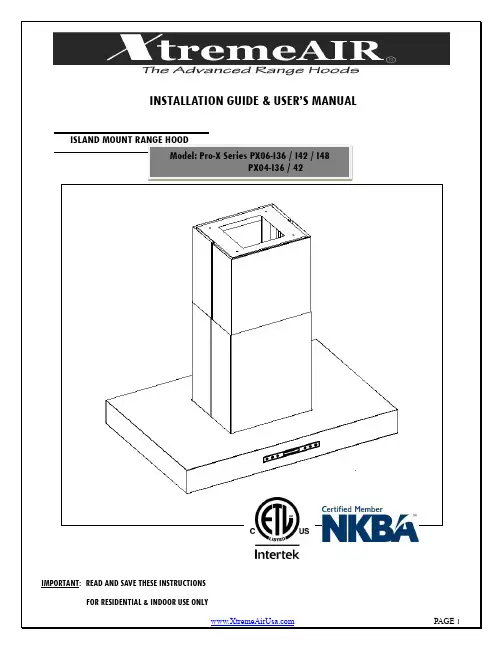
INSTALLATION GUIDE & USER’S MANUAL ISLAND MOUNT RANGE HOODPRODUCT WARRANTYMPORTANT N OTICE: The Important Safety Instructions and warnings in this manual are not meant to cover all possible problems and/or situations that can occur upon installation of this unit. Use extreme caution when installing, maintaining or operating this or any other appliance. Contact the XtremeAir USA, LLC, Support Teamin this manual.To avoid the possibility of an explosion or fire,Min 26” Max 30” 36” BaseCabinet Jack OPTIONALPencil or MarkerPhillip ScrewdriverLevelAluminum TapeWall/Keyhole SawTape MeasurePowered ScrewdriverGUPPER “HOOK”CHIMNEYLOWER “SLOT”CHIMNEYLOWER “HOOK”CHIMNEY MANUAL BOOKIMPORTANT: DUE TO THE WEIGHT AND SIZE OF THIS UNIT, CEILINGBRACKET MUST BE MOUNTED TO A WEIGHT-BEARING CEILING(SUPPORT SYSTEM OR FRAMEWORK BEING USED IS STABLE ANDD1 D2 D3 D4 D5 D6 D7 D9 10.5inch3.8inch12 5/8inch23.0inch19.0inch23.6inch35.4/41.3/ 47.2inch5.75inch CeilingmountbracketdepthCeiling mountbracketperimeterheightCeilingmountbracketwidthUpperchimneylengthLowerchimneylengthBodydepthBody width (I36,I42 , I48)Bodyheight DIMENSION TABLED8: Total bracket length. See formula belowD8= CEILING HEIGHT FROM FLOOR –D11–D10–D9D10:Clearance from bottom of hood to cook top (26” to 30” as per your design)D11:Cook top height from floor (36”)STEP #4: ATTACHING HOOD BODYSTEP #5: INSTALLING CHIMNEYSSet the lower “HOOK”chimney piece into place so it drops into the top of the hood.HINT: Due to the heavy weight of this range hood, use of a vertical jack to lift and support the hood in place is highly recommended.Attach the multi-hole brackets (P2) to the outside 4 corners of the ceiling brackets (P1) IMPORTANTBefore moving to STEP5, do the following:Slide upper “hook” chimney (UHC) in, leave about 1” from the ceiling. tape to hold it up from falling down if you don’t have any helper to hold it.(USC) into place 31TYPE 1 (PX06 Models): SCREEN TOUCH CONTROLImportance Notice:INCORRECTEntire button covered and lightly touched.CORRECTOPEN: While holding a bafflefilter, pull baffle filter lock down.: While a baffle filter is open, use both hand to hold both end of it then useyour index finger (either left or right) to push baffle filter hinge pin toward to middle of baffle filter to release it.: Please reverse the process.Button is NOT completely coveredActivating Smoke Detector Function:Remote Control Sensor:TYPE 2 (PX04 Models): TOUCH BUTTONImportance Notice:4.2 ½ HOUR AUTOMATIC SHUT OFF: this range hood will be shut off for every approx. 2 ½ hour. You can re-startoperation as usual after it was shut off.5.30 HOUR REMINDER: after 30 hours of use, the timer (8) will be flashing. T o clear it, please refer to “G-To ClearCleaning Reminder” on page 7.TYPE 2: TOUCH BUTTON1.(1) To power ON/OFF, and to activate power-off delay timer.9.(9) Indicates the length of time left for delay off function.10.(10) Lights up when auto-shutdown delay timer function is on.A. ACTIVATING BLOWER FUNCTION:∙Option 1: Touch and hold down (+) for 1-2 seconds.∙Option 2: Touch and hold down power sign (1) for 1-2 seconds. (The blower will be running at the same speed as last used).Note: The system saves user configurations, settings such as timer and blower (motor) speed will remain the same the next time it is turned on.B. ADJUSTING BLOWER SPEED:∙Touch and hold down (+) for increase.∙Touch and hold down (-) for decrease.C. TURNING OFF THE BLOWER:∙Touch and hold down power sign (1) for 1-2 seconds.D. TO TURN THE LIGHT ON/OFF:∙Touch Light button (6) once to turn on the lights, and once again to turn off the lights.E. ADJUSTING THE TIMER FUNCTION:∙While the blower (motor) is not running, touch and hold Decrease Value button (2) over 3 seconds (until it’s flashin g) to enter timer mode.∙Adjust to desired period of delay off timer by touching Increase Value or Decrease Value button (minimum 1 minute to maximum 15 minutes).This setting will be saved immediately.F. ACTIVATING THE TIMER FUNCTION:∙While the blow er (motor) is running, touch and hold “Power” button (1) for over 3 seconds to activate delay off timer. Power-Off Delay Timer Indicator(10) will light up and Power-Off Delay Digital Timer (9) will begin to countdown. When it reaches zero, the blower (motor) will shut down.G. TO CLEAR CLEANING REMINDER:∙When blower (motor) starts to rotate, cumulative running time will be shown in Power-On Elapsed Digital Timer (8). This timer icon flashes when 30 hours is up and reminds user to clean the baffle filters.∙After cleaning the filters and when the motor is not in use, touch and hold (+) Increase Value button (7) over 3 seconds to reset the timer. Please note that turning off the system will not reset the Power-On Elapsed Digital Timer (8).12. SPECIFICATIONBody Design Non-Magnetic 1.0 mm Stainless Steel, Satin FinishPower Rating 120V/60Hz (USA & Canada standard)General Input Power 158W (150W + 4x2W)Motor Input Power 150 W eachAmpere 1.3 ALevels Of Speed Control 4 LevelsMaximum Airflow 900CFMNoise Level Approximately 1.5 – 6.0 sones or 33 – 54 dBNumber Of Motors Single MotorMotor Type Single Chamber Ultra QuietFan Type Squirrel Cage blowerFiltration Type Heavy Duty Stainless Steel Baffle FilterIllumination 4 LED lights, 2W Maximum/eachVenting Size Top 6 inches RoundInterference Protection Radio Frequency Interference ProtectedNote Specification subject to change without notice.1. If the range hood or lights does not operate after installation:∙ Check if the range hood has been plugged in. Make sure that all power has been turned back ON. Check if the fuse is not blown and all electrical wiring is properly connected.∙ Swap out light assembly to working ones to deter mine whether it is caused by defective bulbs. See replacing the light bulbs on Page 13. 2. The range hood vibrates when the blower is on:∙ The range hood might not have been secured properly on to the ceiling or wall.∙ Check if the motor is secured in place. If not, then tighten the motor in place. Check if the blower wheel is damaged. 3. The blower or fan seems weak:∙ Check that the duct sized used is at least 6”. Range hood WILL NOT function efficiently with insufficient duct size & loosel y secured.∙ Check if duct is clogged or if damper unit (half-circular flapper) is not installed correctly or opening properly. A tight mesh on a side wall cap unit mightalso cause restriction to the air flow.4. The lights work but the blower is not spinning at all, is stuck or is rattling.∙ The blower might be jammed or scraping the bottom due to shipping damage. Please contact us immediately. ∙The motor is defective, possibly seized - change the motor. 5. The hood is not venting out properly :∙ Make sure the distance between the stove top and the botto m of the hood is within 26” and 30” in distance. Due to different ceiling height configura-tions, recommended height may not be applicable.∙ Reduce the number of elbows and length of ductwork. Check if all joints are properly connected, sealed, and taped. ∙ Make sure the power is on high speed for heavy cooking. 6. The hood is noisier than normal∙ The duct is not secure and causes vibration. ∙ The smaller duct size than required is being used. 7. Control panel is not active∙ Check to make sure the auto function is not on.Operations:∙ Read and understand all instructions and warnings in this manual before operating the appliance. Save these instructions for future reference. ∙ Always leave safety grills and filters in place. Without these components, operating blowers could catch on to hair, fingers and loose clothing. ∙ NEVER dispose cigarette ashes, ignitable substances, or any foreign objects into blowers.∙ NEVER leave cooking unattended. When frying, oil in the pan can easily overheat and catch fire. The risk of self combustion is higher when the oil hasbeen used several times.∙ NEVER cook on “open” flames under the range hood. Check deep -fryers during use: Superheated oil may be flammable. Cleaning:∙ The saturation of greasy residue in the blower and filters may cause increased inflammability. Keep unit clean and free of grease and residue build-up at all times to prevent possible fires.∙ FILTERS MUST BE CLEANED PERIODICALLY AND FREE FROM ACCUMULATION OF COOKING RESIDUE.∙ DO NOT operate blowers when filters are removed. Never disassemble parts to clean without proper instructions. Disassembly is recommended tobe performed by qualified personnel only. Read and understand all instructions and warnings in this manual before proceeding.13. TROUBLESHOOTING14. USE & CARE INFORMATION15. MAINTENANCESAFETY WARNING: Never put your hand into area housing the fan while the fan is operating! For optimal operation, clean range hood and all baffle/spacer /filter/grease tunnel/oil container regularly. Regular care will help preserve the appearance of the range hood.Cleaning Exterior surfaces:∙Clean periodically with stainless steel cleaner or hot soapy water and clean cotton cloth. Do not use corrosive or abrasive detergent (e.g.Comet Power Scrub®, EZ-Off® oven cleaner), or steel wool/scoring pads, which will scratch and damage the stainless steel surface.For heavier soil use liquid degrease such as “Formula 409®” or “Fantastic®” brand cleaner.∙If hood looks splotchy (stainless steel hood), use a stainless steel cleaner to clean the surface of the hood. Avoid getting cleaning solution on or into the control panel. Follow directions of the stainless steel cleaner. CAUTION: Do not leave on too long as this may cause damage to hood finish. Use soft towel to wipe off the cleaning solution, gently rub off any stubborn spots. Use dry soft towel to dry the hood.∙After cleaning, you may use non abrasive stainless steel polish such as 3M ® or ZEP®, to polish and buff out the stainless luster and grain. Always scrub lightly, with clean cotton cloth, and with the grain.∙DO NOT allow deposits to accumulate or remain on the hood.∙DO NOT use ordinary steel wool or steel brushes. Small bits of steel may adhere to the surface and cause rusting.∙DO NOT allow salt solutions, disinfectants, bleaches, or cleaning compounds to remain in contact with stainless steel for extended periods. Many of these compounds contain chemicals, which may be harmful. Rinse with water after exposure and wipe dry with a clean cloth.Cleaning Grease Filter / Stainless Steel Filter less Grill:IMPORTANT: Drain oil from oil containers before oil and residue overflow!∙The metal filters fitted by the factory are intended to filter out residue and grease from cooking. It needs not be replaced on a regular basis but are required to be kept clean.∙Filters should be cleaned after every 30 hours of use. Remove and clean by hand or dishwasher. Use proper degreasing detergent for stainless steel and leave to soak if heavily soiled. Dry filters and re-install before using hood.16. LIMITED WARRANTY。
集成灶说明书集成灶说明书1. 简介集成灶是一种厨房家电产品,它将燃气灶具和排风系统进行了整合。
集成灶的功能较为全面,不仅可以满足烹饪的需求,还具备排烟、照明等功能。
本说明书将为您介绍集成灶的安装、使用和维护等方面的内容。
2. 安装2.1 准备工作在安装集成灶之前,需要进行以下准备工作:- 确保使用环境通风良好。
- 确保燃气管道供应正常并符合安全规范。
- 准备好所需的安装工具,如螺丝刀、榔头等。
2.2 安装步骤1. 将集成灶放置在厨房台面上,确保其稳固。
2. 连接燃气管道。
将燃气管道与集成灶上的燃气接口连接,并使用螺丝刀进行固定。
3. 连接排风管道。
将排风管道插入集成灶背部的排风接口,并使用螺丝刀进行固定。
4. 进行电源连接。
将集成灶插头插入电源插座,并确保电源供应正常。
5. 进行漏气测试。
打开燃气阀门,并使用肥皂水涂抹燃气管道连接处,如果有起泡现象,则表示存在漏气,需要进行修复。
3. 使用3.1 开关机操作集成灶上通常配备了一个开关按钮,用于控制灶具的开关机。
使用时,按下开关按钮,灶具将开始工作;再次按下开关按钮,灶具将停止工作。
3.2 火力调节集成灶上通常配备了多档火力调节功能,可以根据食物的不同需求进行调节。
操作方式如下:1. 打开集成灶的燃气阀门。
2. 按下开关按钮开启灶具。
3. 通过灶具面板上的火力控制按钮,选择合适的火力档位。
3.3 清洁与维护集成灶的清洁与维护对于保持其正常运作和延长使用寿命非常重要。
以下是一些常见的清洁与维护方法:- 将油污和食物残渣及时清除,避免其积累影响使用效果。
- 定期清洗集成灶的表面,使用温和的洗涤剂和软布进行清洁。
- 定期检查燃气管道的连接是否松动,并进行紧固。
- 定期检查排风系统是否正常工作,如有异响或堵塞现象,及时清理或维修。
4. 安全注意事项在使用集成灶时,请务必注意以下安全事项:- 在使用集成灶之前,请先阅读本说明书,并按照说明进行操作。
- 请勿在关闭排风系统的情况下使用集成灶,以免引发一氧化碳中毒。

使用说明书集成式燃气灶具关注樱花,服务更便捷JJZT-M2-ZB011G JJZT-M2-CB010G JJZY-L2-ZB011G JJZY-L2-CB010G感谢您使用樱花集成式燃气灶具!为了使您能正确使用,请在安装及使用、安全的集成式燃气灶具并预防事故发生该系列产品前仔细阅读本说明书妥善保存,以备阅。
,请查本文所示图片仅供用户参考,请以实际产品为准。
本文所提供的信息可不经事先通知进行修改。
樱花卫厨(中国)股份有限公司对本文内容保留解释权。
一、安全注意事项二、使用注意事项三开箱检查、四结构示意图、、五安装说明六使用说明、七清洁保养、八、故障判断与处理九电气配线图、十产品规格参数、十一售后服务与包修、十二、产品中有害物质的名称及含量 (1)56715171919..................................目录15 (3)20 (11)GB 16410 《》家用燃气灶具GB 4706.1 《家用和类似用途电器的安全 第部分:通用要求》1《家用和类似用途电器的安全 驻立式电灶、灶台、烤箱及类似用途器具的特殊要求》GB 4706.22一、安全注意事项为了避免对使用人员及其他人员造成危害及财产损失,特作如下区分及标志。
以下均为有关安全的重要事项,敬请严格遵守,并在充分理解的基础上正确使用。
禁止小心烫伤小心触电禁止触摸禁止湿手操作禁止拆卸!警告禁止严格执行禁止拆卸严格执行禁止严格执行禁止电源插座必须有可靠的接地线,才能通电使用,以确保安全,接地不良将可能引发触电或其它意外伤害。
使用电源线时不得拉伸、扭转、打结、重物扣压、夹击。
如果电源软线损坏,为了避免危险,必须由制造商、维修部或类似部门的专业人员更换专用电源软线。
不要使用粗糙擦洗剂或锋利的金属刮刀清洁灶具面板,电蒸箱、电蒸烤箱的门玻璃,它会擦伤玻璃表面,从而导致玻璃破碎。
拔出电源插头时,必须手握插头的端部将其拔出,请不要手拿电源软线拔插头,否则易发生触电、短路、起火等危害。
tcl集成燃气灶使用说明书1.电源键:在睡眠状态下按电源键,显示电源指示符号、时钟符号及时钟数,时钟数默认为12:00,各操作键被激活。
2.强档键:按强档键一次,强档显示及叶轮图案快速转动,强档工作时再按一次强档键,停止工作,对应的显示全部取消。
3.中档键:按中档键一次,中档显示及叶轮图案快速转动,中档工作时再按一次中档键,停止工作,对应的显示全部取消。
4.弱档键:按弱档键一次,弱档显示及叶轮图案快速转动,弱档工作时再按一次弱档键,停止工作,对应的显示全部取消。
5.照明键:按照明键一次,照明接通,显示屏幕上灯符号动态变化,再按一次照明键,照明指示灯灭,照明关风机使用延时功能时,在结束后一起关掉照明灯。
6.功能键:在待机状态下,方可使用功能键。
A、自动1(80分钟)按功能键一次,自动符号与自动字样亮,时钟显示转换为工作时间显示,进入自动1(自动1模式的工作过程:消毒45分钟暂停5分钟烘干30分钟);B、自动2(120分钟)按功能键两次,自动符号与自动字样亮,时钟显示转换为工作时间显示,进入自动2(自动2模式的工作过程:消毒60分钟暂停5分钟烘干55分钟);C、烘干功能按功能键三次,烘干符号与烘干字样亮,停止按键3秒后进入烘干功能,烘干时间设置按钮时键设置时间(结束前5分钟停止加热);D、消毒功能按功能键四次,消毒符号与消毒字样亮,停止按键3秒后进入消毒功能,消毒时间设置按调时键设置时间(结束前5分钟停止消毒)。
7.调时键:A、调时键时间设置:在待机状态下,按调时键一次,进入时钟设置状态;时钟符号灭,只显示时钟并闪动,同时小时数值闪动,按中档键,小时数值增加,按弱档键,小时数值减小;B、分钟数值的设置:连续按调时键两次,分钟数值闪动;按中档键,数值增加,按弱档键,数值减少;C、烘干功能时间设置:连续按调时键三次,只显示烘干并闪动,时间默认值显示1:30(1时30分钟)分钟数值闪动,按中档键数值增加,按弱档键数值减少,数值在1:30-2:30之间循环;D、消毒功能时间设置:连续按调时键四次,只显示消毒并闪动时间默认值显示1:30(1时30分钟)分钟数值闪动,按中档键数值增加,按弱档键数值减少,数值在1:30-2:30之间循环;E、延时功能时间设置:连续按调时键五次,只显示延时并闪动,设置电动机延时关机时间,时间默认值显示1:00(1分钟)按中档键数值增加,按弱档键数值减少,数值在1:00-30:00分钟之间循环。
集成灶的使用方法
集成灶是一种一体化设计的厨房燃气灶具,使用方法如下:
1. 接通气源和电源:将燃气管道连接至灶具的燃气进气口,并使用适配器将电源插头插入电源插座。
2. 开启燃气阀门:将灶具的燃气控制开关转至“关”位,然后缓慢旋转至“大火”位,同时打开燃气阀门。
3. 点火:按下热源按钮,将火焰点燃。
有些集成灶具可能配备了自动点火功能,可以直接按下热源按钮进行点火。
4. 调节火力:当火焰点燃后,可根据需要调节火力大小。
多数集成灶具的控制面板上有火力大小调节旋钮,您可以根据需要旋转旋钮来调节火力大小。
5. 使用后的关闭:用戶為了消除燃气泄漏的危险,一定要在使用后关闭灶具。
先将集成灶具控制开关转至“关”位,然后关闭燃气阀门。
6. 清洁:使用后,可以使用柔软的抹布沾取少量中性清洁剂擦拭集成灶,如有油渍等顽固污渍,可使用专用清洁剂清洗。
注意事项:
- 使用集成灶时,应确保良好的通风环境,避免积聚过多的燃气。
- 使用时要留意是否有异常现象,如燃气泄漏、异味等,如有异常应立即关闭燃气阀门,并联系维修人员检修。
- 在开启燃气阀门前,应确保没有明火或其他火源附近,并保持灶具周围的物品与面板间有足够的距离。
- 使用集成灶时应注意安全,切勿将易燃物品放置在灶具周围,避免发生事故。
手机网站官方微信6、烘干控制:在待机状态下,关闭柜门,按烘干键, 柜门锁住,执行烘干功能,烘干时间60分钟,工作结束,门锁打开。
7、互锁功能:消毒和烘干键二键互锁,在选择过程中按另一键,即改变选择功能。
如果功能正在执行中,按 二键中的任一键,结束工作,相应功能指示灯灭,门锁打开。
8、联动功能:风机关闭状态下,当有点火信号(或电磁灶工作信号)持续保持一秒以上,自动开启风机,慢档 运行。
当信号消失,进入延时关风机状态,延时结束,风机停止。
在延时过程中按风速键则退出延时状 态,风机切换到相应风速。
9、防火墙功能:当防火墙功能触发时,自动关闭炉火和风机,并且发出声音报警。
需继续按压3-5开关旋钮。
(图3)u u OFF ”位置,再重新按点火方法开启即可。
u 火力调节:请参照开关旋钮的火力调节标记调整至您需要的火力。
(图4)(图5)3)4)(图5)11)(图2)u且熄火时无严重爆鸣声。
(图6)(图6)u 片,稍后重新点火。
u 为了安全使用燃气,在您使用燃气完毕后请将阀门关闭,晚睡前,请将煤气表的总阀门关闭。
-6-1、安装说明:本机安装由所在地区的经销机构提供专业服务。
2、安装方法:整体安装示意图如下:灶体底面灶体背面灶体风管孔注:不同产品的l 值、w 值、h 值、A 值、B 值、Φ1值、a 值、b 值、φ值、都不尽相同,具体产品的具体值请 参照“整体安装尺寸参照表”和“靠近灶体的柜体侧板开孔尺寸参照表”。
3、柜体侧板开孔示意图如下:温馨提示:目前市面上大致有两种深度规格的橱柜:一种是500mm 深度的柜体(即台面550mm 深度的那种),另一种是550mm 深度的柜体(即台面600mm),如果您的柜体比较特殊,请咨询橱柜设计师。
如果厨房出风口在集成灶的背面,则柜体不必开孔。
4、由安装人员进行安装后调试。
柜体背面柜体底面注:不同产品对柜体侧板的开孔要求不同,具体产品按照具体要求开孔,如图所示是对靠近灶体的柜体侧板的开孔示意图,其中下开孔用来穿过排风管,上开孔用来穿过电源线和燃气管,具体产品的具体值请参照“靠近灶体的柜体侧板开孔尺寸参照表”。
金帝集成灶的使用方法
金帝集成灶的使用方法主要包括以下步骤:
1. 插电开启:将电源插头插入插座,并按下电源开关,屏幕会显示“WELCOME”,表示开机成功。
2. 手动开启:手动开启需要先打开锁紧开关(左下角开关),随后按下对应的炉灶操作按钮,旋钮选择正确的火力,即可使用。
3. APP遥控开启:下载金帝集成灶的官方APP,将手机连接到集成灶的Wifi,打开APP并登陆账号,即可通过APP对集成灶进行控制和操作。
4. 语音开启:金帝集成灶可以通过语音控制开启,只需要说出指令即可。
集成灶支持多种语言,如普通话、粤语、英语等,可以根据自己的需求进行设置。
5. 使用过程:首先,确保集成灶连接好电源和燃气管道,并打开天然气阀门。
按下开关按钮,点火器会自动点火。
同时,在控制面板上选择所需的烹饪模式(如煮、炒、蒸等)以及相应的时间和功率。
当炉头被点亮后,可以调整火力大小。
大多数金帝集成灶都有多个火力档位可供选择。
在使用过程中,注意安全,避免将手指或其他物体放在火焰附近。
同时要保持通风良好,以排出产生的废气。
请注意,以上步骤仅供参考,具体操作请根据实际情况和产品说明书进行调整。
如果遇到问题,建议联系专业技术人员进行维修或指导。