siebel开发客户端安装手册
- 格式:doc
- 大小:4.35 MB
- 文档页数:19


IBM SPSS Modeler15Client Installation(Network License)The following instructions are for installing IBM®SPSS®Modeler Client version15usinga network license.This document is for end users who are installing IBM SPSS ModelerClient on their desktop computers.If you are a network administrator,see the Network LicenseAdministrators Guide for information about setting up the network license and distributing theproduct to end users.IBM®SPSS®Modeler Client is a functionally complete version of the product,which is installedand run on the user’s desktop computer.The Client can be run in local mode as a standaloneproduct,or in distributed mode along with IBM®SPSS®Modeler Server for improvedperformance on large data sets.Additional options are also available for purchase,includingIBM®SPSS®Modeler Text Analytics,IBM®SPSS®Modeler Entity Analytics,IBM®SPSS®Modeler Social Network Analysis,IBM®SPSS®Modeler Solution Publisher,and others.During installation,you will be prompted for the following information.Contact your siteadministrator if you do not have the following information.Name:Organization:License Manager Server Name or IP Address:System Requirements for IBM SPSS Modeler ClientThe minimum hardware and software requirements for IBM®SPSS®Modeler Client are asfollows:Note:IBM®SPSS®Modeler Text Analytics is a Microsoft Windows-only client,but can connectto a remote server running Microsoft Windows,Sun®Solaris™,Linux Red Hat®,HP-UX®,or IBM AIX®.Operating system.Microsoft Windows7(Professional and Enterprise)x32and x64Editions;Microsoft Windows Vista(Business and Enterprise)with Service Pack1x32and x64Editions;Microsoft Windows XP Professional with Service Pack3x32and x64Editions.Hardware.Intel Pentium or Intel Pentium-class processor or higher(for32-bit Microsoft Windows);x64(AMD64and EM64T)processor family(for64-bit Microsoft Windows)running at1GHz or faster.A monitor with1024x768resolution or higher.A disk drive is alsorequired if you are installing from a disk.Minimum free disk space.10GB of available hard-disk space on Microsoft WindowsIBM®SPSS®Modeler client machine and additional space for data created.Minimum RAM.2GB RAM minimum;4GB,or more,recommended.©Copyright IBM Corporation1994,2012.12IBM SPSS Modeler15Client Installation(Network License)Software.SPSS Modeler version15and Microsoft Internet Explorer7.0or higher for online help.Virtual environment.The following virtual environments support SPSS Modeler Text Analytics :-Windows2008®Terminal Services and R2-Windows2003®Terminal Services and R2-Citrix XenApp5–Standard,Advanced and Enterprise-Citrix Presentation Server4.5–Standard,Advanced and Enterprise-VMWare ESX Server3.5-VMWare vSphere4.0Note:For additional information or recent updates,you can log on to the IBM Support website at/support.Operating system.-Microsoft®Windows®7(Professional and Enterprise)with Service Pack132-bit and64-bit Editions-Microsoft Windows Vista(Business and Enterprise)with Service Pack232-bit and64-bitEditions-Microsoft Windows XP Professional with Service Pack332-bit(x86and x64)Editions Hardware.-Intel®Pentium®or Pentium-class processor or higher(for32-bit Windows)-x64(AMD64and EM64T)processor family(for64-bit Windows)-Monitor with1024x768resolution or higher-DVD-ROM drive(if installing from the installation disk)Minimum free disk space.10GB of available hard-disk space.Minimum RAM.2GB of RAM minimum;4GB or more recommended.Browser.Mozilla Firefox3.x or higher,or Microsoft®Internet Explorer®7or higher,for online help.Virtual environment.The following virtual environments support IBM®SPSS®Modeler.-Citrix XenApp5–Standard,Advanced and Enterprise-Citrix Presentation Server4.5–Standard,Advanced and Enterprise-Remote Desktop Services for Windows Server2008and Windows Server2008R2-VMWare ESX Server4.1-VMWare vSphere4.03IBM SPSS Modeler15Client Installation(Network License) Installing IBM SPSS Modeler ClientYour administrator might have given you an installation disk or identified a network location fromwhich to install.Check with your administrator if you do not know how you are supposed toinstall IBM®SPSS®Modeler Client.Note:To install IBM SPSS Modeler Client,you must be logged on to your computer withadministrator privileges.Installing from a Downloaded FileWindows XPE Double-click thefile that you downloaded and extract thefiles to some location on your computer.E Using Windows Explorer,browse to the location where you extracted thefiles and double-clicksetup.exe.E Follow the instructions that appear on the screen.See Notes for Installation for any specialinstructions.Windows Vista or Windows7You must run the installer as administrator:E Double-click thefile that you downloaded and extract all thefiles to some location on yourcomputer.E Using Windows Explorer,browse to the location where you extracted thefiles.E Right-click setup.exe and choose Run as Administrator.E Follow the instructions that appear on the screen.See Notes for Installation for any specialinstructions.Installing from the DVDWindows XPE Insert the DVD into your DVD drive.The AutoPlay feature presents a menu.E On the AutoPlay menu,click Install IBM SPSS Modeler,and then follow the instructions that appearon the screen.See Notes for Installation for any special instructions.Windows Vista or Windows7You must run the AutoPlay as administrator:E Close the AutoPlay window that automatically appeared when you inserted the DVD into yourDVD drive.4IBM SPSS Modeler15Client Installation(Network License)E Using Windows Explorer,browse to the DVD drive.E Right-click setup.exe at the root of the DVD and choose Run as Administrator.E On the AutoPlay menu,click Install IBM SPSS Modeler,and then follow the instructions that appearon the screen.See Notes for Installation for any special instructions.Invoking the Setup Program ManuallyYou can also invoke the Setup program manually:E From the Windows Start menu,choose Run.E In the Run dialog box,type D:\setup.(If you are not using D as the DVD drive,enter theappropriate drive location.)E Follow the instructions that appear on the screen.See Notes for Installation for any specialinstructions.Installing from a Network LocationE Using Windows Explorer,browse to the location that your administrator provided for the setup.exefile.E If your computer is running Windows Vista or7,right-click setup.exe and choose Run asAdministrator.Otherwise,double-click thefile.E On the AutoPlay menu,click Install IBM SPSS Modeler,and then follow the instructions that appearon the screen.See Notes for Installation for any special instructions.Notes for InstallationThis section contains special instructions for this installation.License type.Be sure to select Network License.Older versions of SPSS Modeler.The installation does not automatically overwrite earlierinstallations of IBM®SPSS®Modeler.You will need to uninstall older versions using theWindows Control Panel.License manager server name or IP address.This is the IP address or the name of the server onwhich the network license manager is running.Contact your administrator if you do not havethis information.5IBM SPSS Modeler15Client Installation(Network License) Troubleshooting an InstallationInvalid digital signature on installationSPSS Modeler products use IBM-issued certification for digital signing.In certain circumstancesyou may see the following error on trying to install SPSS Modeler products:Error1330.A file that is required cannot be installed because the cabinet file filename has an invalid digital signature...Windows XP or Windows Server usersYou may see this message when installing under Windows XP or Windows Server2003,typicallywith a cabinetfile greater than500MB.To correct this problem,install the following Windowsupdate:For Windows XP:/kb/960554/en-usFor Windows Server:/kb/888303/en-usAll Windows usersYou see this message if you try to install SPSS Modeler products on a machine that has no Internetconnection and does not have the correct certificate e the following procedure tocorrect this problem.1.Click OK to acknowledge the message.2.Click Cancel to exit from the installer.3.If the machine on which you want to install has no Internet connection,perform the next step onan Internet-connected machine and copy the.cerfile to the machine where you want to install.4.From /support/roots.html,scroll down to locate the VeriSign Class3Primary CA-G5root Certification Authority(CA).Download this root CA and save it as a.cerfile.5.Double-click the.cerfile.6.On the General tab,click Install Certificate.7.Follow the instructions in the Certificate Import Wizard,using the default options and clickingFinish at the end.8.Retry the installation.IBM SPSS Modeler Server AccessIBM®SPSS®Modeler Server is available as an optional upgrade,and offers improved scalabilityand performance on large datasets.If SPSS Modeler Server is available at your site,contact yoursystem administrator for information about servers,user IDs,and passwords.6IBM SPSS Modeler15Client Installation(Network License)For more information,see the IBM SPSS Modeler Server Administration and Performance Guide,available in thefile ServerandPerformanceGuide.pdf under the\Documentation\<language>folder on the SPSS Modeler Server DVD.Installation documents can also be downloaded from the web at/support/docview.wss?uid=swg27023172.Documentationis also available from the SPSS Modeler Information Center at/infocenter/spssmodl/v15r0m0/.Configuring IBM SPSS Modeler to Work with IBM SPSS Statistics To enable IBM®SPSS®Modeler to use the Statistics Transform,Statistics Model,and StatisticsOutput nodes,you must have a copy of IBM®SPSS®Statistics installed and licensed on thecomputer where the stream is run.If running SPSS Modeler in local(standalone)mode,the licensed copy of SPSS Statistics mustbe on the local computer.When you havefinished installing this copy of SPSS Modeler Client,you will also need toconfigure it to work with SPSS Statistics.From the main client menu,choose:Tools>Options>Helper Applicationsand on the SPSS Statistics tab,specify the location of the local SPSS Statistics installation youwant to use.For more information,see the Source,Process and Output Nodes guide or the onlinehelp for Helper Applications.In addition,if running in distributed mode against a remote IBM®SPSS®Modeler Server,youalso need to run a utility at the SPSS Modeler Server host to create the statistics.inifile,whichindicates to SPSS Statistics the installation path for SPSS Modeler Server.To do this,from thecommand prompt,change to the SPSS Modeler Server bin directory and,for Windows,run:statisticsutility-location=<IBM SPSS Statistics_installation_path>/Alternatively,for UNIX,run:./statisticsutility-location=<IBM SPSS Statistics_installation_path>/binIf you do not have a licensed copy of SPSS Statistics on your local machine,you can still runthe Statistics File node against a SPSS Statistics server,but attempts to run other SPSS Statisticsnodes will display an error message.Database AccessTo read or write to a database,you must have an ODBC data source installed and configured for therelevant database,with read or write permissions as needed.The IBM®SPSS®Data Access Packincludes a set of ODBC drivers that can be used for this purpose,and these drivers are availableon the IBM SPSS Data Access Pack DVD or from the download site.If you have questions aboutcreating or setting permissions for ODBC data sources,contact your database administrator.7IBM SPSS Modeler15Client Installation(Network License) Database support in IBM®SPSS®Modeler is classified into three tiers,each representing a different level of support for SQL pushback and optimization,depending on the database vendor. The different levels of support are implemented by means of a number of system settings,which can be customized as part of a Services engagement.The three tiers of database support are:Table1-1Database support tiersSupport tier DescriptionTier1All possible SQL pushback is available,with database-specific SQL optimization.Tier2Most SQL pushback is available,with non-database-specific SQL optimization.Tier3No SQL pushback or optimization—only reading data from,and writing data to,the database.Supported ODBC DriversFor the latest information on which databases and ODBC drivers are supported and tested for use with SPSS Modeler15,see the product compatibility matrices on the corporate Supportsite(/support).Where to Install DriversNote that ODBC drivers must be installed and configured on each computer where processing may occur.If you are running IBM®SPSS®Modeler in local(standalone)mode,the drivers must be installed on the local computer.If you are running SPSS Modeler in distributed mode against a remote IBM®SPSS®Modeler Server,the ODBC drivers need to be installed on the computer where SPSS Modeler Server is installed.For SPSS Modeler Server on UNIX systems,see also“Configuring ODBCdrivers on UNIX systems”later in this section.If you need to access the same data sources from both SPSS Modeler and SPSS Modeler Server,the ODBC drivers must be installed on both computers.If you are running SPSS Modeler over Terminal Services,the ODBC drivers need to be installed on the Terminal Services server on which you have SPSS Modeler installed.If you are using the IBM®SPSS®Modeler Solution Publisher Runtime to run published streams on a separate computer,you also need to install and configure ODBC drivers on that computer.Note:If you are using SPSS Modeler Server on UNIX to access a Teradata database you must use the ODBC Driver Manager that is installed with the Teradata ODBC driver.In order to make this change to SPSS Modeler Server please specify a value for ODBC_DRIVER_MANAGER_PATH near the top of the modelersrv.sh script where indicated by the comments.This environment variable needs to be set to the location of the ODBC Driver Manager that is shipped with the Teradata ODBC driver(/usr/odbc/lib in a Teradata ODBC driver default installation).You must restart SPSS Modeler Server for the change to take effect.For details of the SPSS Modeler Server8IBM SPSS Modeler15Client Installation(Network License)platforms that offer support for Teradata access,and the Teradata ODBC driver version that issupported,see the corporate Support site at /support.Configuring ODBC drivers on UNIX systemsBy default,the DataDirect Driver Manager is not configured for SPSS Modeler Server onUNIX systems.To configure UNIX to load the DataDirect Driver Manager,enter the followingcommands:cd modeler_server_install_directory/binrm-f libspssodbc.soln-s libspssodbc_datadirect.so libspssodbc.soDoing so removes the default link and creates a link to the DataDirect Driver Manager.In-Database ModelingIBM®SPSS®Modeler supports integrated modeling,allowing you to make the most of the powerof your database by using native algorithms provided by the database vendor.You can build,score,and store models inside the database—all from within the SPSS Modeler application,combiningthe analytical capabilities and ease-of-use of SPSS Modeler with the power and performanceof a database.For specific requirements to support database modeling,see the SPSS ModelerIn-Database Mining Guide,available under the\documentation folder on the installation disk. Checking Out/In a Commuter LicenseNetwork licenses normally require that you are connected to the network to run IBM®SPSS®Modeler Client.If your administrator enabled commuter licenses,you can check out a commuterlicense to use the network license when you are not connected to the network.For example,youmay want to run IBM SPSS Modeler Client on the train when you don’t have a network connection.Before disconnecting from your network and catching the train,you could check out a commuterlicense for a limited amount of time.You will need to reconnect to the network and check thelicense back in before the time expires.Otherwise,IBM SPSS Modeler Client will stop working.Network licenses are enabled and configured by your administrator.If you would like to use this feature and can’t,check with your administrator.Important!Even if you are able to run IBM SPSS Modeler Client because you are reconnectedto the network,be sure to check the license back in.Doing so will allow other users to takeadvantage of the commuter license.Check Out a LicenseE Choose Commuter License in the Windows Start menu program group for IBM SPSS ModelerClient.E Select the license that you want to check out.E In the Duration box,enter the number of days for which you want to check out the license.Thereis a limit that your administrator configures.9IBM SPSS Modeler15Client Installation(Network License)E Click Check Out.The commuter license will expire after the number of days specified by Duration.You can alsomanually check the license back in at any time.You may receive a message in the following format:Error while checkout with error code:<code>Common codes are as follows.Code Meaning77All available licenses have been checked out.1402Attempt to check out license that has been reserved for another user.Check In a LicenseE Choose Commuter License in the Windows Start menu program group for IBM SPSS ModelerClient.E Select the license that you want to check in.License(s)that you checked out are indicated bya check mark.E Click Check In.Uninstalling IBM SPSS Modeler ClientTo completely uninstall IBM®SPSS®Modeler Client:E Use the Windows Control Panel to remove IBM SPSS Modeler Client.。

日出东方CRM项目客户端程序安装操作文档操作手册作者:HAND创建日期:2014-9-26最后更新日期:2014-9-26版本:V1.0编写说明系统用户通过IE浏览器的方式进行系统首次登陆时需要安装Siebel HighInteractivity Framework插件,以保证系统的正常使用。
本操作文档主要针对上述插件安装的流程进行详细说明,包含以下几个部分:•信任站点设置:叙述在IE浏览器端将系统加入信任站点,以保证插件可正常下载•浏览器设置:叙述如何设置以保证系统界面可以正常使用•插件安装流程:叙述首次登陆用户如何安装插件•常见问题解决:叙述在插件安装过程中可能遇到的一些常见问题及解决办法使用对象全体用户Contents编写说明 (ii)使用对象 (ii)CRM主系统-信任站点的设置 (1)流程描述 (1)操作说明 (1)操作过程 (1)CRM主系统-针对IE8或更高版本的兼容性设置 (9)流程描述 (9)操作说明 (9)操作过程 (9)CRM主系统-选项卡设置 (11)流程描述 (11)操作说明 (11)操作过程 (11)CRM主系统-浏览器插件的下载 (14)流程描述 (14)操作说明 (14)操作过程 (14)Reip中CRM账号维护 (19)业务简述 (19)操作说明 (19)操作过程 (19)CRM主系统用户密码修改 (21)流程描述 (21)操作说明 (21)操作过程 (21)CRM门户系统用户密码修改 (23)流程描述 (23)操作说明 (23)操作过程 (23)录入用户名及密码,并点击常见问题及解决办法 (27)⏹无法登陆到系统操作页面 (27)⏹无法添加系统网址至“可信网站”列表 (28)⏹无法进入或点击Siebel系统的菜单栏选项的问题 (28)⏹无法看到系统登陆页面或其他登入、下载插件的问题 (29)CRM主系统登录-信任站点的设置流程描述1. 需使用IE8浏览器,将正式环境地址加入IE浏览器的信任站点中,并将安全等级设置为“低”操作说明操作过程1.首次访问系统登陆界面及网址记录•首次进入登陆界面•正式环境网址:/2.添加网址至可信任的站点•选择,IE浏览器菜单上的“工具——>Internet选项”•选择,IE点击“安全”选项卡,选择“受信任的站点”•点击“站点”按钮,弹出安全站点添加界面•在“将该网站添加到区域中”下的录入框中填入刚刚记录下的网址,并将下方的“对该区域中的所有站点要求服务器验证(http: )”的选项去掉•点击“添加”,将键入的网址添加到可信站点的“网站”列表中•点击“确定”按钮,添加可信站点的操作完毕3.更改可信任站点的安全性设置•点击“自定义级别”按钮,弹出“受信任的站点区域对话框”•将“重置为”选择为“安全级–低”•检查“下载未签名的ActiveX控件”是否选为“启用”,若为“禁用”请选为“启用”•检查“文件下载自动提示”是否为“启用”,若为“禁用”请选为“启用”•点击“确定”按钮•返回登陆页面,查看右下角的状态栏,如果前述设置正确,网站状态为“可信站点”CRM主系统登录-针对IE8或更高版本的兼容性设置流程描述1. 对兼容性视图进行设置操作说明操作过程1.进入“兼容性视图设置”界面•在IE的命令栏中选择“页面”选项,在下拉菜单中选择“兼容性视图设置”,进入“兼容性视图设置”界面2.对兼容性视图进行设置•在“兼容性视图设置”界面中,勾选“在兼容性视图中显示所有网站”选项CRM主系统登录-选项卡设置流程描述1. 对选项卡进行设置操作说明操作过程1.进入“Internet选项”设置界面•打开IE浏览器。
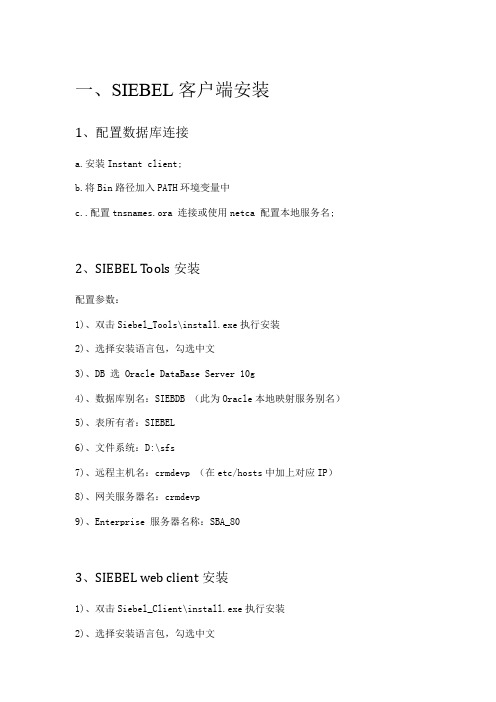
一、SIEBEL客户端安装1、配置数据库连接a.安装Instant client;b.将Bin路径加入PATH环境变量中c..配置tnsnames.ora 连接或使用netca 配置本地服务名;2、SIEBEL Tools安装配置参数:1)、双击Siebel_Tools\install.exe执行安装2)、选择安装语言包,勾选中文3)、DB 选 Oracle DataBase Server 10g4)、数据库别名:SIEBDB (此为Oracle本地映射服务别名)5)、表所有者:SIEBEL6)、文件系统:D:\sfs7)、远程主机名:crmdevp (在etc/hosts中加上对应IP)8)、网关服务器名:crmdevp9)、Enterprise 服务器名称:SBA_803、SIEBEL web client安装1)、双击Siebel_Client\install.exe执行安装2)、选择安装语言包,勾选中文3)、选择开发人员客户机4)、DB 选 Oracle DataBase Server 10g5)、数据库别名:SIEBDB (此为Oracle本地映射服务别名)6)、表所有者:SIEBEL7)、文件系统:D:\sfs8)、远程主机名:crmdevp (在etc/hosts中加上对应IP)9)、网关服务器名:crmdevp10)、Enterprise 服务器名称:SBA_8011)、请求服务器名称:crmdevp4、补丁安装安装siebel8.0.0.4补丁,分别双击Siebel_Tools\installs.exe,Siebel_Client\install.exe,再双击下去即可完成补丁安装。
二、开发环境配置1)、以SADMIN/SADMIN登录到SERVER端,新建一个员工LUOYAO,选择可视职责。
2)、在数据库中创建对应的数据库用户及授权e.g.:Create user LUOYAO identify by LUOYAOGrant sse_role to LUOYAO3)、以创建的用户ID来配置移动客户机,Siebel – Remote4)、在服务器端发布作业,生成数据库文件Generate Database 创建数据库快照文件(只有对象结构,没有数据)Extract Database 从数据库中抽取对象对应的合适数据,最终生成dobjinst.dbf数据库文件在${siebsrv}\LUOYAO\目录下。


eSiebel数据导入工具用户手册汉得信息技术股份有限公司—黄安邦版本号:V1.6版序言Siebel数据导入工具软件是基于Microsoft .NET Framework开发的一个Siebel的外挂工具,使用siebel提供的标准API,针对Siebel本身的Business Component进行操作,用户只需在首次使用时进行简单的配置,即可进行数据导入。
该工具最初的使用时在青啤项目,比较成型并且大规模使用时在阿胶项目,阿胶项目的所有的数据导入均采用此小工具,没有耗费额外的人天去开发EIM、Import等功能。
在阿胶中所导入的对象有:值列表、视图、预定义查询、职位、职责、组织、部门、仓库、地址、雇员、订单、价格表、客户、联系人、期初库存、客户信用额度等,其中客户约7万条记录,订单行约20万记录。
Siebel各种数据导入方法比较:EIM操作方式:Excel数据收集-->转为CSV-->使用SQLLDR导入到自己创建的临时表-->运行存储过程进行校验数据工作-->运行存储过程将临时表的数据写入到EIM中间表中-->运行siebel中的EIM工作流进行导入(编写ifb配置文件)--运行存储过程进行后处理(更新一些字段、关联等)。
优点:⏹导入速度较快⏹可以处理较大数据量缺点:⏹技术含量比较高,需要全程技术顾问参与⏹需要编写SQLLDR的配置文件⏹需要编写复杂的存储过程,且每个项目只能参照,不能直接使用其他项目的成果⏹需要编写ifb配置文件⏹出现错误非常难以找到原因,通常查找错误的方式只能是通过数据库的trace文件查询sql,方能知道错误原因,(错误原因进程是外键关联、值列表等原因)⏹每一个类型的操作必须编写一套不同的ifb文件,比如新建、更新、删除等Siebel导入工具操作方式:Excel数据收集-->使用小工具直接导入(只需要编写简单的一个配置文件即可)优点:⏹方便可靠,采用的是siebel提供的API直接操作BC层(业务组件层),类似于最终用户在页面创建记录的操作(UI-->BC-->Table)。
1.SIEBEL TOOLS 安装及配置1.安装ORACLE 客户端选择管理员,然后点击“下一步”选择安装目录(尽量选择跟目录,且选择英文路径)系统会自动监测系统是否满足需求。
若有不满足项应修改系统配置。
使其监测通过。
单击安装直至安装完成2.安装SIEBEL TOOLS单击下一步选择 BUSINESS APPLICATION开发版指定SIEBEL TOOLS 的安装目录系统会自动监测系统是否满足需求。
若有不满足项应修改系统配置。
使其监测通过。
选择语言选项选择数据库类型选择目录,先在安装目录建立一个文件夹(ERP_TEMP)并将其设置为共享文件夹然后选择该文件夹。
单击下一步直至安装完成。
3.安装SIEBEL WEB CLIENT选择安装路径。
一般保持默认。
选择是用的语言。
选择开发模式选择要连接的数据库此处保持默认选项此处选择在上面建立的共享文件夹此处保持默认选项此处保持默认选项此处保持默认选项单击安装直至安装完成。
4.配置ORACLE 客户端启动ORACLE CLIENT的 NET MANGER 点击绿色加号。
输入服务器名称单击下一步输入服务器IP地址输入数据库名称点击测试点击更改登录输入用户名和密码测试成功后关掉窗口。
点击完成点击文件菜单选择保存网络配置5.配置数据源选择系统DSN配置第一项SEAW_CHANGEME 输入SERVER NAME(在ORACEL CLIENT NET MANGER 中配置的网络服务器名) 选择 CLIENT CERSION将SERVER NAME STARTLINE DATANASE NAME清空DATABASEFILE 填入内容可在F:\Siebel\8.1\Tools_1\BIN\ENU\tools中的local标记中找到此配置同上此处配置和第一项配置完全相同此处配置和第二项配置完全相同6.配置SIEBEL TOOLS的配置文件配置F:\Siebel\8.1\Tools_1\BIN\ENU\tools文件。
Siebel脚本助手软件用户手册汉得信息技术股份有限公司版本号:V1.0 Beta版序言Siebel脚本助手软件主要是为了提高Siebel技术顾问的脚本开发效率和脚本写作规范。
其主要功能有:自动生成简单的eScript脚本。
自动格式化eScript脚本。
自动对脚本eScript添加注释。
添加自己的脚本库,便于以后类似脚本的简单生成。
查看脚本中的变量情况。
自动保存脚本。
可以多窗口同时编写脚本,组合脚本。
其它待发现功能。
第一章软件安装与初始化Siebel脚本助手是一个免安装工具,双击运行目录下的SDI.exe即可运行。
但是前提是您的电脑中安装有Microsoft .NET Framework,否则程序无法打开启动页面,可能会报如下错误:/downloads/zh-cn/details.aspx?FamilyID=39C8B6 3B-F64B-4B68-A774-B64ED0C32AE7可通过以上地址下载安装Microsoft .NET Framework。
若可以成功打开,则能看到如下界面:第二章操作说明2.1 配置参数文件2.2 功能说明2.2.1菜单说明2.2.2 编辑框工具栏介绍2.2.3 脚本设置模块说明2.2.4 模板使用2.2.5 变量查看2.1 配置参数文件在软件目录下面有文件夹config有文件Config.ini打开该文件该文件的内容比较简单,下面对其中的内容进行简单的说明:⏹CommentUserName:该参数为生成的脚本的注释中的创建者以及更新者,如下图⏹ScriptTempatepath:模板文件的路径,该路径下已经有不少的现成模板⏹FILE_PATH_EXTTYPE:模板文件的类型,该类型的文件被软件识别⏹PublicProjectName:项目前缀标示,这个的作用是为了获取变量名字的时候去掉前缀,比如:⏹DEVPODBCDCN:连接开发环境的odbc信息,可不填,用于详细的注释⏹DEVPODBCDataBase:连接开发环境的odbc信息,可不填,用于详细的注释⏹DEVPODBCUID:连接开发环境的odbc信息,可不填,用于详细的注释⏹DEVPODBCPWD:连接开发环境的odbc信息,可不填,用于详细的注释⏹CommentsLevel:注释的级别,一般选择0,2.2.1菜单说明【开始】--【新建会话】:创建一个新的脚本编辑框,与原有编辑框并列【开始】……其它简单功能可以自己测试……2.2.2编辑框工具栏介绍该图中的按钮分别代表:✧执行格式化:将对于文本框中的脚本进行格式化,去除空行,括号对齐等功能。
Siebel 8.1.1 安装指导目录SIEBEL 8.1.1 安装指导 (1)1系统软件安装准备和流程 (3)2软件安装 (3)2.1安装JDK (3)2.2数据库服务器 (3)2.2.1安装数据库客户端 (3)2.2.2建立数据库实例 (3)2.2.3建立表空间 (3)3安装SIEBEL 8.1.1 (4)3.1安装前准备 (4)3.2S IEBEL G ATEWAY S ERVER的安装 (4)3.3安装S IEBEL S ERVER (27)3.4安装S IEBEL 数据库 (29)3.5配置S IEBEL S ERVER (37)3.6安装配置S IEBEL W EB 服务器扩展 (45)4SIEBEL WEB CLIENT安装 (49)5SIEBEL 配置 (58)6.1添加许可 (58)6.2修改时区 (58)6.3修改M AXIMUM T ASKS参数 (58)1系统软件安装准备和流程系统的准备与软件的安装请参照如下顺序进行:首先安装各服务器的操作系统,并根据需要打上的操作系统补丁。
windows 2003 serve安装SP2以及其他安全补丁。
根据应用的需要分配各服务器的IP地址,设定服务器的名字。
安装siebel 网关服务器。
安装Siebel服务器安装Web 服务器2软件安装2.1 安装JDK安装JDK1.5版本以上,开发环境使用jdk1.6.0_10版本。
并添加如下环境变量:PATH=E:\tools\Java\jdk1.6.0_10\bin;E:\tools\Java\jre6\bin2.2 数据库服务器由于开发环境数据库为Oracle 10.2.0.4版本,在安装Siebel 8.1.1的服务器上必须安装Oracle 11g 客户端,版本为11.1.0.7。
详细安装过程,请参考Oracle安装文档2.2.1安装数据库客户端在将要安装Siebel应用系统的服务器上,安装数据库客户端,并确认能连接到数据库服务器。
一、准备工作:1、修改计算机名为:ibmx3650。
2、将虚拟内存扩至6144M。
3、安装Office和JDF文件阅读器。
4、安装JDK1.5版本以上。
5、安装IIS。
6、安装Oracle数据库服务器。
7、安装Oracle数据库客户端。
二、Oracle数据服务器相关信息:1、全局数据库名:orcl。
2、系统标识符(SID):orcl。
3、侦听端口:1521。
4、密码:jewim。
三、Oracle数据库客户端相关信息:1、主机字符串:siebeltrain。
四、Windows系统相关信息:1、IP:10.6.50.175。
2、用户名:Allan。
3、密码:last。
4、控制面板——性能和维护——管理工具——本地安全策略——本地策略——安全选项——本地帐户的共享和安全模式(右键点击——属性)——改为(经典,本地用户以自己的身份验证)。
五、Windows和Oracle系统配置:1、在数据库中创建一个表空间,名为:SIEBELDB;大小为:2GB。
2、扩展数据库表空间:UNDOTBS1:1G;SYSAUX:512M;USERS:2G;SYSTEM:1G;TEMP:2G。
六、Siebel安装1、执行Siebel_Enterprise_Server的Setup.exe;安装Siebel Enterprise Server和Siebel Systems。
2、安装目录为:d:\sba80。
3、选择安装的产品为:Gateway Name Server、Siebel Server、Database Configuration Utilities。
4、选择安装类型为:Custom。
5、选择要安装的“Siebel Enterprise Server”功能部件,其中不选的有:HandheldSynchronization、Data Quality Connector、PIM Server Intrgration、Microsoft SQL Server (用什么数据库保留之,而取消选择其他的,此处使用的是Oracle数据库)、IBM DB2 UDB for Unix and Windows、IBM DB2 UDB for z/OS。
siebel开发客户端安装手册
Siebel 开发人员客户端安装配置手册
Oracle 客户端的安装及配置
1、访问服务器安装目录\\192.168.50.131\oracle9i \oracle92010\Disk1
2、然后点击setup.exe
3、系统进入欢迎界面
4、点击下一步选择目标路径,可以更改路径到自己指定的位置,然后点击下一
步。
5、进入产品选择界面,选择安装Oracle Client。
6、以下默认安装即可。
7、安装完,进行配置。
8、输入目录服务器的名字:192.168.50.131
9、然后选择以后配置目录服务。
10、加入主机名。
11、服务名添入:siebeldb。
12、主机名为:192.168.50.131。
13、用SADMIN/SADMIN进行测试,如果测试成功,则配置完成。
14、然后安装Patch 9.2.0.7,进入\\10.0.2.243\oracle9i\p4163445_92070_WINNT\Disk1目录,点击setup.exe。
15、注意在选择目标路径时一定要选择已经安装的路径,而且在安装之前要停止以下两个服务:
Distributed Transaction Coordinator
OracleMTSRecoveryService
16、然后执行安装即可。
Siebel Dedicated Web Client的安装及配置
1、访问服务器安装目录\\192.168.50.131\Siebel_Install_Image\7.8.2.0\Windows\Client\Siebel_Web_Client 点击install.exe。
2、安装语言选“中文(简体)”。
3、目的地文件夹可以自己定义,但文件目录中不能有空格。
4、选择语言包中、英文都要选上。
5、选择开发人员Web客户机。
6、选择Oracle数据库。
7、文件系统目录路径为:\\192.168.50.131\siebfile。
9、siebel 远程服务器主机名:nbcrm。
10、数据库别名:siebeldb,表格所有者:SIEBEL。
10、网关名称服务器地址:NBCRM,Enterprise服务器名称:NBESVR。
11、请求服务器名称默认。
12、搜索服务器信息默认。
13、执行安装。
14、访问服务器安装目录
\\192.168.50.131\Siebel_Install_Image\7.8.2.6\Windows\Client\Siebel_Web_Cl ient,点击install.exe文件进行7.8.2.6的安装。
15、执行默认安装即可。
16、安装完成后,进行ODBC连接测试,输入SADMIN/SADMIN用户进行
验证,如连接建立则可以进行客户端登陆到服务器上了。
Siebel Tools的安装及配置
1、访问服务器目录\\192.168.50.131\Siebel_Install_Image\7.8.2.0\Windows\Client\Siebel_Tools,然后点击install.exe。
2、选择中文(简体)安装语言进行安装。
3、目的地文件夹选择跟Web客户端安装系统的目录进行安装。
4、选择中、英文两个语言的安装包,其他都不变,然后执行安装。
5、访问服务器目录:\\192.168.50.131\Siebel_Install_Image\7.8.2.6\Windows\Client\Siebel_Tools,点击install.exe,然后执行安装即可。
本地开发库的初始化
1、以本地用户登录到Siebel Tools 的Local,用户名/密码是本人的大写全拼字
母,例如:WANGLIJUN/WANGLIJUN、WANGDIANXING/WANGDIANXING、LIYONG/LIYONG,系统提示没有本地库。
2、点击“是”进行远程连接。
3、初始化完成后登录到Siebel Tools中,进入Development Tools Options界面,
在Language Settings中将语言设置成CHS,在Visualization中将Font设成中文相应字体,例如:仿宋_GB2312。
4、进入Check Out界面,点击Get按钮执行本地数据的Get动作。