金陵科技学院ppt模板
- 格式:pptx
- 大小:1.09 MB
- 文档页数:22


金陵科技学院课程设计一、课程目标知识目标:1. 学生能掌握《金陵科技学院》本章节所讲述的基本科学原理和概念,如物质的组成、能量转换等;2. 学生能理解并描述科技发展对社会进步的重要性,特别是在我国的历史背景下;3. 学生能了解金陵科技学院在科技创新方面的贡献和特色。
技能目标:1. 学生通过实践操作,提升观察、分析、解决问题的能力;2. 学生能运用所学知识,设计简单的科技制作或实验,提高动手操作能力;3. 学生能在团队中有效沟通、协作,培养团队合作精神。
情感态度价值观目标:1. 学生培养对科学的兴趣和好奇心,激发探索未知世界的热情;2. 学生树立科技创新的信心,认识到科技对国家和社会发展的意义;3. 学生在学习过程中,培养严谨、务实、创新的学习态度,提高自我要求;4. 学生通过了解金陵科技学院的优秀传统和科技成果,增强民族自豪感,培养爱国主义情怀。
本课程目标具体、可衡量,旨在使学生在掌握知识、技能的同时,培养积极情感态度和正确的价值观,为我国科技事业的发展贡献力量。
在教学过程中,将根据学生的特点和教学要求,分解课程目标为具体的学习成果,以便进行教学设计和评估。
二、教学内容本章节教学内容紧密结合课程目标,选择以下内容进行组织:1. 科学原理与概念:物质的组成、能量转换、科技发展历程等;- 教材章节:第一章“科技与生活”第1-3节;2. 实践操作与技能培养:简单科技制作、实验设计与操作;- 教材章节:第二章“动手动脑,学科技”第4-6节;3. 科技创新与人物事迹:金陵科技学院优秀科技成果及贡献;- 教材章节:第三章“科技创新,引领未来”第7-9节;4. 团队合作与沟通:以小组形式开展实践活动,培养团队协作能力;- 教材章节:第四章“合作共进,科技的力量”第10-12节。
教学大纲安排如下:1. 引言:介绍本章节学习目标和要求,激发学生兴趣;2. 理论学习:讲解科学原理与概念,结合教材内容进行深入剖析;3. 实践操作:指导学生进行简单科技制作和实验操作,培养动手能力;4. 科技创新分享:介绍金陵科技学院的优秀科技成果和人物事迹,激发学生创新意识;5. 团队合作:组织小组活动,培养学生团队合作精神和沟通能力;6. 总结与反思:对本章节所学内容进行总结,引导学生进行自我反思。
课程设计报告题 目 Learning about Power Point 2002课 程 名 称 Add it io na l Le ar ni ng on we bs it e 1院 部 名 称 信息技术学院专 业 计算机科学与技术班 级 10NIIT学 生 姓 名 崇殿洋学 号 1005104033课程设计地点 校 内课程设计学时 1周(20学时)指 导 教 师 刘 钰金陵科技学院教务处制课程设计报告目录一、实验目的和要求 (1)二、实验仪器和设备 (1)三、实验过程 (1)四、学习报告 (2)一、实验目的和要求The curriculum is the new software course after class in NIIT Teaching methodology, but it is the base of the courses of the next module, which make NIIT courses fulfill the parameters of scientific training system. Additional Learning Material on Website is the important part of CBT (Computer Based Training) Courses, it introduces the new software technology in IT industry.The students need to grasp the knowledge meticulously, and hand in the course report about the individual learning.二、实验仪器和设备Hardware: PC ComputerSoftware: Windows Internet Explorer,Search engines, meta-search engines and subject/virtual directories.三、实验过程The students need to learn the knowledge on the Website, .The students may also find some more information available on the Internet using Search engines tools or look up some books in library.Guidelines for Searching Information on the Net1.Learning the knowledge.2.Analyzing Vital Information.3.Abstraction, summarizing and presenting conclusions about the material on web site.4.Hand in the course report about the individual learning.四、学习报告Learning about Power Point 2002Abstract: Microsoft Power Point has changed the way that professors teach and how workers share knowledge. The ease of producing visual presentations has saved untold millions ofwork-hours that would have otherwise been spent drawing on white boards with smelly markers. Keywords:Power Point 2002;introduction;features;applicationsI.THE INTRODUCTION of POWER POINTMicrosoft Power Point has changed the way that professors teach and how workers share knowledge. The ease of producing visual presentations has saved untold millions of work-hours that would have otherwise been spent drawing on white boards with smelly markers.Before Power point came along, anyone who wanted a visual aid for their presentation would have to spend substantial amounts of time either scrawling on a board of some sort or in creating transparencies or slides to transmit information. Although Power point has been maligned by some for encouraging lazy speaking styles, the alternative is much worse. It saves millions of man-hours every year that would otherwise be spent cleaning boards off or switching slides.The first version of Power point - first called Presenter, but later renamed because of copyright issues - was developed by Bob Gaskins and Dennis Austin, a University ofCalifornia-Berkeley PhD student in 1984. The startup he worked for at the time was acquired by Microsoft soon after in 1987, and the first version of the software under the Microsoft banner wasreleased for Windows 3.0 in 1990. When Microsoft purchased it, Power point was already a mass success, selling more on its first day of release for the Macintosh OS than any other program in history at the time.Power point integrated the use of graphics and animations early on in its development, with more recent versions allowing the user to embed entire videos. The most effective Power point presentations are used to highlight important points in a presentation, rather than to have the presenter simply read off of the slide. It's also very useful for presenting graphs and other visual data representations. As the software package became more popular, a market for specialized projection equipment grew up along side it, making it so that Power point would be used for more than just creating slides and transparencies.Unlike most of the other software products that have made their way into the Office suite, Power point has never had significant market competition. Hypercard for the Macintosh was used for presentations in fair numbers, but never approached Power point in terms of market penetration for professional users. That software package was discontinued in the mid-1990s.Version History∙1988 Power point Version 1∙1990 Power point Version 2∙1993 Power point Version 3∙1994 Power point Version 4∙1995 Power point 95∙1997 Power point 97∙1999 Power point 2000∙2001 Power point 2002∙2003 Power point 2003∙2007 Power point 2007However, in this paper, I will study on Power point 2002 of the content.II.THE FEATURES of POWER POINT 2002Presentations can be an effective way to request funds for a research project, demonstrate a new learning concept to the class, share student research data, and more. Microsoft® PowerPoint® 2002 offers several new features to help you create captivating presentations. Whether you are creating a professional presentation for administrators or facilitating a student research project, PowerPoint enables you to work collaboratively and communicate ideas creatively.Suppose you and your students have been studying shipwrecks that took place in the Great Lakes region. Students are collecting data from experts by using e-mail and online chat sessions, and some students visited the Great Lakes Shipwrecks Museum to collect information. At the end of the study, your students present their findings on the wreck of the Edmund Fitzgerald tothe rest of the class, and publish their presentation to the Web for parents to view.The following features of PowerPoint 2002 help you create unique and dynamic presentations:• Send for e the automated Send for Review tool in e-mail to request a review of your presentation, merge reviewer comments and changes from several reviewers, and accept or reject changes one at a time or all at once.• Insert clip art.Enhance the look of your presentation by adding clip art from the Microsoft Clip Gallery.• Add animation. Create dynamic presentations by adding animations and transitions.• Import data.Import data from other applications, including charts, tables, graphs, and more.PowerPoint 2002 offers several new features that make it easier than ever to create dynamic presentations.• Outline and Slide thumbnail views.New view tabs in the left column of your screen enable you to view your presentation at a glance. The Slides view displays your presentation slides in thumbnail format, and the Outline view provides a hierarchical view of the information on your slides. As you work on your presentation, you can alternate between the Outline and Slides views. Although the tabs are part of Normal view, you can close the view tab pane.• Multiple design templates.You can now have more than one design template in your presentation at a time. Take advantage of existing PowerPoint templates or use Web templates.• Picture compression and rotation.Select the resolution you want for pictures in a presentation, and set additional options to achieve the best balance between picture qualities and file size to prevent sending presentations by e-mail that are too large.• Grids and guidelines. Display grids and guidelines to help you align placeholders, shapes, and pictures.III.HOW to USE POWER POINT 2002Before you begin developing your presentation, become familiar with the new features in PowerPoint 2002. The illustration shows a slide with the New Presentation task pane visible.Fig.1A. Creating a New PresentationWhether you are creating a presentation for colleagues or administrators or helping students develop an extensive research presentation, you can take advantage of PowerPoint tools, such as templates and the AutoContent Wizard, to develop a creative and professional presentation in less time. You can choose from a variety of templates, both in PowerPoint and on the Web, to create the look you want, and even customize the slide master for a unique look. Templates help students get the basic presentation formatting in place so that they can focus their time on developing the content of the presentation.B. Using design templatesThe design templates of PowerPoint 2002 offer an array of design options and other features for formatting your presentation. You can change the background design and color, alter font size and type, and even modify the slide master. In addition, the design template determines other aspects of the presentation, such as the location of text and object placeholders and the style and size of bullet points.After your students decide which design template to use, they can begin to create their presentation about the Edmund Fitzgerald. They will create the presentation by using the design template, and then modify the slide layout if they want.To create a new presentation using a design template:1. On the File menu, click New.2. In the New Presentation task pane, under New, click From Design Template.3. In the Slide Design task pane, under Available For Use, click to select the Globe design template.Note: If you place your pointer over the template, the name appears. The Slide Design task pane places the templates in alphabetical order.4. In the Globe design template drop-down menu, click Apply to All Slides. You can change the template later if you want.5. You can keep the default title layout for the first slide, or you can change it. To change the layout, on the Format menu, click Slide Layout to open the Slide Layout task pane, and then click to select the text or content layout you want. If you do not want to modify the slide layout, you can skip this step.6. Click in the upper text box, and type the report title, such as The Edmund Fitzgerald.7. Click in the lower text box, and type a subtitle, such as History and Preservation.8. On the File menu, click Save As. Browse to the Edmund Fitzgerald folder that you created earlier, or create a new folder called Edmund Fitzgerald, type Edmund Fitzgerald Presentation, and then click Save.9. To insert the next slide, click the New Slide icon on the toolbar. Continue these steps to develop your presentation.You can modify the layout of additional slides by using the design template. Because Apply to All Slides is selected, the default template is the Globe design template. If you want to apply another design template to one or more slides, you can use the slide thumbnails in the Slides view to select the slides that you want, and then apply the template to the selected slides.C. Using task panesBy using the Slide Layout and Slide Design task panes, you can organize slide layouts, design templates, and color schemes in a gallery that displays all of your slides. Selecting an item from these panes updates any selected slides immediately with the design that you want. The Slide Layout task pane provides a variety of text and content layouts for your slides. For example, you can add a title above several supporting bullet points, or add a title, bullet points, and a picture on the slide. The Slide Layout task pane makes it easy to select the layout you want. The default setting enables this task pane to appear each time you insert a new slide. Similar to the design templates, the slide design can be changed for one or more slides at any time. Your students decide to modify the color scheme of the presentation to make it more effective and unique. To alter the color scheme, students use the Slide Design task pane. By using this task pane, they can also modify design templates and animation schemes.To use the Slide Design task pane:1. Open Edmund Fitzgerald Presentation.ppt.2. On the Format toolbar, click Slide Design to open the Slide Design task pane. In the Slide Design task pane, you can select Design Templates, Color Schemes, or Animation Schemes. The default view is Design Templates.3. In the Slide Design task pane, click Color Schemes.Fig.24. Click to select the color scheme of your choice. In the color scheme slide drop-down menu, click Apply to All Slides. As with the design template, you can modify the color scheme for some slides or for all slides later on.D. Using Web templatesWeb templates provide additional template selections for you to choose from. By simply using the New File task pane, you can select templates from . The Microsoft Template Gallery includes templates from a variety of categories, such as “Publications and Education.” There are also templates available for board and committee letters, fundraising activities, and some for personal use, such as building an address book database. You can compile your own list templates from different Web sites by using the Templates on My Web Sites menu in the New Presentation task pane. This way you can select templates that are specific to your needs, such as a student evaluation form, a syllabus, or an academic calendar. Students want to explore additional template options for their presentation. To do so, they review the Web templates that are available from the Template Gallery at . To download a template, students can simply use the Save As command on the File menu.To view Web templates:1. Open PowerPoint.2. If the New Presentation task pane is not visible, on the View menu, click Task Pane.3. In the New Presentation task pane, under New from template, click Templates on .Fig.3E. Using the AutoContent WizardThe AutoContent Wizard helps you develop content and organize your ideas for your presentation. When you begin a new presentation, you can use the AutoContent Wizard to guide you step by step. Some categories in the wizard include “Brainstorming Session” and “Projec t Overview,” but you may find other categories helpful, such as “Introducing and Thanking a Speaker.” The AutoContent Wizard provides the tools you need to get a strong start on your presentation. You can opt to accept the content that is provided, or you can modify the text suggestions with your own content. For more information, refer to PowerPoint Help, or In and Out of the Classroom with Office 2000.F. Using content layoutsPowerPoint 2002 provides new options for working with the layout of your slides. The layout is the arrangement of the slide, including titles, bulleted lists, and content such as tables, pictures, or clip art. Each time you add a new slide, you can select a layout for it from the Slide Layout task pane. If your text does not fit the layout that you selected, PowerPoint automatically adjusts the layout. You also have the option of changing the new layout by using the Automatic Layout Options button, which appears on the bottom right of your screen.Students want to use the preset content layouts to give the presentation a consistent style, making it easier to read and understand. With readability and accessibility in mind, studentsexperiment with the various options to determine the most effective layout for the EdmundFitzgerald presentation.To apply a slide layout:1. Open Edmund Fitzgerald.ppt.2. On the Format menu, click Slide Layout. The Slide Layout task pane appears.3. Open the Slides tab while in Normal view. Select the slides to which you want to apply a layout. You can select more than one slide by holding the CTRL key as you click the slides.4. In the Slide Layout task pane, point to the layout you want, and then click to select it.Fig.4G. Customizing the slide masterThe slide master is an element of the design template that stores information for the template such as font styles, placeholder positions, and background design.You can make global changes to all of your slides—for example, changing the font—by simply changing the slide master. Each time you apply a design template to your presentation, a slide master is applied.In addition to the slide master, the design template includes a title master. The title master stores information pertaining to only the title slides. Changes made to the title master affect the slides that use the Title Slide layout. These slides are the first slides shown in the Slide Layout task pane.Students can use the slide master specifically to insert art to appear on multiple slides, such as the icon of a ship, or just to alter the overall look of the Presentation.To customize the slide master:1. Open Edmund Fitzgerald.ppt.2. On the View menu, point to Master, and click Slide Master.Fig.53. Click in the text boxes to edit the appropriate slide master text.H. Changing the color schemeChanging the color scheme of your presentation is a simple yet creative way to alter the appearance of a presentation. The design template determines the color scheme for your presentation or provides you with color scheme alternatives to choose from.Students experimented with changing the color scheme of the presentation by using the Slide Design task pane, but now they want to customize their own color scheme by using different colors. They can do so by using the Slide Design task pane again to add and display up to eight new colors, and the colors they select are added to the design template automatically. Students want to explore different shades of blue for their presentation to represent the underwater research they are tracking.To add colors that are not in the color scheme:1. On the Format menu, click Slide Design.2. In the Slide Design pane, click Color Schemes.3. Click Edit Color Schemes at the bottom of the Slide Design task pane.4. In the Edit Color Scheme dialog box, click the Custom tab. If Background is not selected, click to select it.5. Click Change Color. In the Background Color dialog box, click the Custom tab.6. The Color model should be set on RGB. Adjust the Red, Green, and Blue menus to the color you want by using the arrows, and then click OK.7. Click Apply to apply the new shade and close the Edit Color Scheme dialog box.8. On the Slide Master View toolbar, click Close Master View.I. Inserting pictures from the Media GalleryInserting photographs, drawings, sounds, and video is made simple by the Microsoft Clip Organizer. You can browse clip collections, add clips, and organize clips in a way that best meets your needs. Create your own collection of clips that you use most frequently, or use the Clip Organizer to add and catalog media files on your computer.Students can use many different types of media clips to enhance their presentation. For example, students can add video from a Web site about the exploration of the site, drawings of the ship, or a scanned picture of a log entry. Almost any type of media clip can be used in a PowerPoint presentation.To insert a clip from the Clip Organizer:1. Open Edmund Fitzgerald Presentation.ppt.2. On the Insert menu, point to Picture, and then click Clip Art.3. The Insert Clip Art task pane opens. In the Search text box, type a word or phrase that best describes the clip you want, such as Nautical. You can type the file name of the clip if you know it.Fig.6Note: New to PowerPoint 2002 is the Other Search Options feature. You can use the menu to search your computer or school network. You can indicate which media file type you are searching for. To refine your search, you can specify the clip collections that you want to search. You can also select the types of media clips you want to find.4. Click the Search button. To refine your search, you can specify the clip collections that you want to search. You can also select the types of media clips you want to find.5. Click to select the ship’s wheel art, located at the top of the middle column. In the drop-down menu for the graphic, click Insert. From this menu, you can also copy the art to your collection. You can also click the picture to insert it into the slide.J. Compressing picturesAdding graphics to your presentation can increase the size of your PowerPoint file. The Compress Pictures feature of PowerPoint 2002 saves room on your computer and reduces download time when you are working with pictures. By using the Compress Pictures feature, you can compress the picture size, reduce resolution to 96 dpi (dots per inch) for Web and 200 dpi for print, and discard unnecessary information, such as cropped sections of the photo. Note that compressing pictures can sometimes decrease the quality. If you are simply using your presentation as a printed document, compressing may not be necessary.After doing some Web research on the preservation of the Edmund Fitzgerald, students discover some pictures from the recovery of the ship’s bell. They decide to download and compress the files to add them to their presentation.To reduce the size of your pictures:1. Select a picture from your folder—for example, a picture of the Edmund Fitzgerald from a Web site.2. On the View menu, point to Toolbars, and then click Picture.3. On the Picture toolbar, click Compress Picture.Fig.74. Select the options you want.You can discard the cropped sections of your picture by selecting the Delete cropped areas of pictures check box.K. Adding animationPowerPoint 2002 becomes a more powerful learning tool by letting you add animation to your presentation. Animation is a way to illustrate concepts or ideas that are difficult to explain verbally. It provides visual cues to clarify information or acts as a simple pointer for specific areas that you want to emphasize. For example, you can build custom path animations to guide a user through complex steps in a process. Or, you can enhance the entrance and exit of your presentation by animating clip art item or text on specific slides.An animation can be as simple as a series of text boxes that explain a process step by step or display a timeline. For example, you can illustrate the chronology of the Edmund Fitzgerald from first to final sailing and major post-wreckage recovery efforts. A more complicated animation might be a map that builds with each step, adding weather data, shipping routes, container contents, and other information in successive layers.L. Adding soundThe options for enhancing presentations with music and sound are unlimited. You can add music and sound from files on your computer, the Internet, or the Microsoft Clip Organizer. You can even record your own sounds for an audio track, or add music from a CD.Naturally, your students are enthused about using Gordon Lightfoot’s song, “The Wreck ofthe Edmund Fitzgerald,” as a logical conclusion to their presentat ion. A student finds the song on a music Web site intended for public use, and downloads the song to the school computer. Students can then insert it into their Presentation.M. Inserting a movieCollaborating on presentations has never been more convenient. Office XP has automated its review process for every application, including PowerPoint 2002.Whether you are facilitating a student research project by providing direction or giving a presentation with colleagues, you’ll find all the tools you need for a successful and efficient collaboration process.N. Sending your presentation for reviewOffice XP offers new tools for sending your documents for review. You can send your presentation to colleagues or students by using the new Send for Review feature. By using this feature with Microsoft Outlook, your presentation is automatically attached to an e-mail message that includes a review request message. The message also includes a flag for follow-up so that reviewers will be aware of any time constraints.After the reviewers have completed the review process and the presentation is returned to you, you can combine the reviewed copies with your original presentation immediately, or you can look at the changes suggested by each reviewer. You can then use the reviewing tools of PowerPoint 2002 to accept or reject changes.Now that their presentation is in its final stages, students can send it for peer review. Have students send the presentation to at least two additional students.O. Publishing to the WebYou can make a Web copy of your presentation available for others to review, you can publish copies of your presentation to different Web locations you can customize your presentation so that it is optimized for a particular browser, and much more. If you want others to have access to your Web presentation, you must specify a Web server or other available computer when you choose a location for the file.When you publish it to the Web or save it as Web page, your presentation automatically includes the following features:• A navigation frame, which displays the presentation outline• Options to show or hide the outline and the notes pane• A full-screen viewing optionNow that students have shared their presentation with the class, they can publish it to the Web for parents and other classmates to view. They can also post the presentation to the school’s Web site.To publish a presentation to the Web:1. Open your presentation.2. On the File menu, click Save as Web Page.3. In the File name box, type the name for the Web page, such as History of Shipwrecks.4. In the Save as type box, click Web page. This creates an associated folder that contains supporting files such as bullet points, background colors, and graphics.5. In the Save as type box, click Web archive. This saves your presentation in a format that integrates the supporting information, such as graphics and other files, into a single file.6. Click Change Title to set the title bar for your Web page.7. Click Publish to open the Publish as Web Page dialog box.Fig.88. In the Publish what? Text box, select an option. To display speaker notes, select the Display speaker notes check box.9. In the Browser support text box, select an option.10. Click Web Options, set any additional Web page formatting and display options that you want, and then click OK.11. In the File name list, select a location and type a name for the Web page.12. Click Publish.To view your published Web presentation immediately, in the Publish as Web Page dialog box, select the Open published Web page in browser check box.P. Broadcasting presentations onlineBroadcasting presentations is an innovative and exciting way to share your work by using the Web. When you broadcast a presentation, your entire presentation— including slides, audiotracks, music, movie clips, and so on—is posted to the Web. Options for broadcasting include setting up a recorded broadcast, so the viewer can watch at any time, or running a live broadcast, which is run at a published time and therefore requires viewers to tune in at that time.Before setting up a broadcast, be sure to:• Review the hardware requirements for Microsoft Windows Streamin g Media.• Check the number of viewers that you expect to view the broadcast and ensure that the volume will not place too much strain on your system resources.• Complete a practice session.Q. OthersOf course, there are many other useful, but now is not to clear. If you have enough interest and you can find it by yourself.IV.TAKING IT FURTHERAs you explore the new features of PowerPoint 2002, you will continue to think of new ways to develop effective, professional presentations. You can try the following activities to experiment further:• Have students experiment with speaker notes to help them refine their presentation delivery. Students in a Public Speaking class can give two presentations, one using speaker notes and another without. Then, they can complete peer evaluations, comparing the effectiveness of the two presentations.• As an alternative, have students run their presentations from one monitor and let the audience view it on another monitor. This allows them to keep other programs running that the audience will not see. In addition, students can then access the presenter view, which offers a variety of tools for easier presentation delivery. Before you can turn on dual monitor support, you must have the proper hardware installed according t o the manufacturer’s instructions. For more information, type “multiple monitors” in the Type a question for help box.• Organize an end-of-the-year class presentation with students to present to parents. Students can work together to create the presentation, which includes slides for each student in the class. The students can create and narrate their own personal slides, inserting movie clips, art, and photographs. They can also create a presentation as a photo album if they simply want to add a large group of their favorite pictures to a presentation without needing customizing each picture. PowerPoint 2002 allows you to add multiple pictures from your hard disk, scanner, digital camera, or Web camera to your photo album. For more information, type “photo album” in the Type a question for help box.• Have students prepare a live broadcast presentation regarding a community issue to local area politicians. Using the templates in Microsoft Word, Environmental Science students can write a professional letter to politicians and community members to inform them of the time and location of the live broadcast. Students can graph statistical data, insert pictures, and even include audio clips from local officials who support the main point of the presentation.。
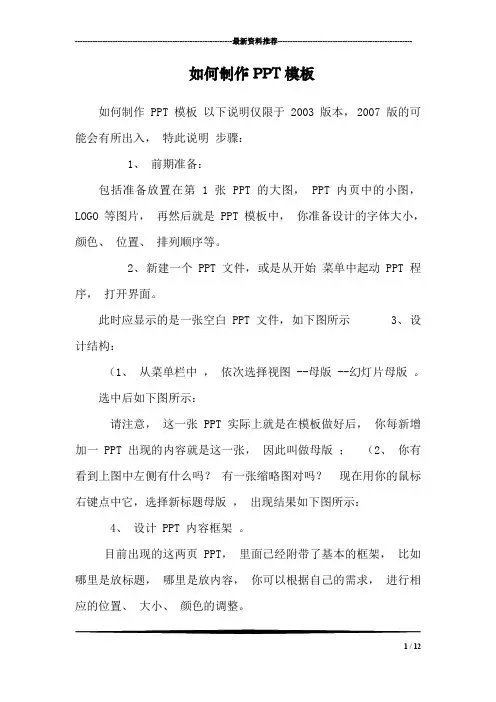
---------------------------------------------------------------最新资料推荐------------------------------------------------------如何制作PPT模板如何制作 PPT 模板以下说明仅限于 2003 版本, 2007 版的可能会有所出入,特此说明步骤:1、前期准备:包括准备放置在第 1 张 PPT 的大图, PPT 内页中的小图,LOGO 等图片,再然后就是 PPT 模板中,你准备设计的字体大小,颜色、位置、排列顺序等。
2、新建一个 PPT 文件,或是从开始菜单中起动 PPT 程序,打开界面。
此时应显示的是一张空白 PPT 文件,如下图所示 3、设计结构:(1、从菜单栏中,依次选择视图 --母版 --幻灯片母版。
选中后如下图所示:请注意,这一张 PPT 实际上就是在模板做好后,你每新增加一 PPT 出现的内容就是这一张,因此叫做母版;(2、你有看到上图中左侧有什么吗?有一张缩略图对吗?现在用你的鼠标右键点中它,选择新标题母版,出现结果如下图所示:4、设计 PPT 内容框架。
目前出现的这两页 PPT,里面已经附带了基本的框架,比如哪里是放标题,哪里是放内容,你可以根据自己的需求,进行相应的位置、大小、颜色的调整。
1 / 12做 PPT 模板更重要的意义,是希望这个模板个性化,能显示比如公司的 LOGO,某某会议主题及背景等相关内容,那么接下来将你前期准备好的素材向这 2 页 PPT 做粘贴调整吧。
如果你放置的图片当前把一些要写字的框框给覆盖了,没有关系,你用右键选中该图片,然后选择层叠次序 ---置于底层即可。
5、保存设计。
这一步很重要很重要!许多朋友设计好了之后是直接点保存而保存的,这是错误的。
正确的方法是:在菜单栏,选中文件 --另存为,在打开的界面中进行如下设置:保存位置,可以放在桌面,文件名在这里暂定义为我的模板. ppt 。
附件1:金陵科技学院优秀多媒体教学课件评选推荐表学院名称作品名称所属专业一级门所属专业二级类课件第一制作人所属系科联系电话(办)(宅)(手机)电子信箱金陵科技学院制二○○八年填写说明1.填写《推荐表》必须认真负责,实事求是。
2.为便于及时联系,请务必将第一制作人的联系方式填写齐全。
3.《推荐表》请计算机填写打印,第一作者签名,加盖学院公章,同时提交电子稿。
4.所属专业门类请按照文件提供的分类方式填写。
5.参评课件类型分为:多媒体课件、网络课程、专题学习网站;命名规则:《课程名称》+类型附件2:参考专业分类目录(本科)门类二级类01哲学0101哲学类02 经济学0201经济学类03 法学0301法学类0302马克思主义理论类0303社会学类0304政治学类0305公安学类04 教育学0401教育学类0402体育学类05 文学0501中国语言文学类0502外国语言文学类0503新闻传播学类0504艺术类06 历史学0601历史学类07 理学0701数学类0702物理学类0703化学类0704生物科学类0705天文学类0706地质学类0707地理科学类0708地球物理学类0709大气科学类0710海洋科学类0711力学类0712电子信息科学类0713材料科学类0714环境科学类0715心理学类0716统计学类08 工学0801地矿类0802材料类0803机械类0804仪器仪表类0805能源动力类0806电气信息类0807土建类0808水利类0809测绘类0810环境与安全类0811化工与制药类0812交通运输类0813海洋工程类0814轻工纺织食品类0815航空航天类0816武器类0817工程力学类0818生物工程类0819农业工程类0820林业工程类0821公安技术类09 农学0901植物生产类0902草业科学类0903森林资源类0904环境生态类0905动物生产类0906动物医学类0907水产类10 医学1001基础医学类1002预防医学类1003临床医学与医学技术类1004口腔医学类1005中医学类1006法医学类1007护理学类1008药学类11 管理学1101管理科学与工程类1102工商管理类1103公共管理类1104农业经济管理类1105图书档案类参考专业分类目录(高职高专)类别代码及名称51农林牧渔大类5101农业技术类5102林业技术类5103畜牧兽医类5104水产养殖类5105农林管理类52交通运输大类5201公路运输类5202铁道运输类5203城市轨道运输类5204水上运输类5205民航运输类5206港口运输类5207管道运输类53生化与药品大类5301生物技术类5302化工技术类5303制药技术类5304食品药品管理类54资源开发与测绘大类5401资源勘查类5402地质工程与技术类5403矿业工程类5404石油与天然气类5405矿物加工类5406测绘类55材料与能源大类5501材料类5502能源类5503电力技术类56土建大类5601建筑设计类5602城镇规划与管理类5603土建施工类5604建筑设备类5605工程管理类5606市政工程类5607房地产类57水利大类5701水文与水资源类5702水利工程与管理类5703水利水电设备类5704水土保持与水环境类58制造大类5801机械设计制造类5802自动化类5803机电设备类5804汽车类59电子信息大类5901计算机类5902电子信息类5903通信类60环保、气象与安全大类6001环保类6002气象类6003安全类61轻纺食品大类6101轻化工类6102纺织服装类6103食品类6104包装印刷类62财经大类6201财政金融类6202财务会计类6203经济贸易类6204市场营销类6205工商管理类63医药卫生大类6301临床医学类6302护理类6303药学类6304医学技术类6305卫生管理类64旅游大类6401旅游管理类6402餐饮管理与服务类65公共事业大类6501公共事业类6502公共管理类6503公共服务类66文化教育大类6601语言文化类6602教育类6603体育类67艺术设计传媒大类6701艺术设计类6702表演艺术类6703广播影视类68公安大类6801公安管理类6802公安指挥类6803公安技术类6804部队基础工作类69法律大类6901法律实务类6902法律执行类6903司法技术类。