天锦收音机说明书
- 格式:docx
- 大小:14.41 KB
- 文档页数:1
INSTALLATION/OWNER'S MANUALAM/FM Receiver with Bluetooth and Fixed FaceMXD339BTMXD339BT INSTALLATIONPreparationPlease read entire manual before installation.Before You Start • D isconnect negative battery terminal. Consult a qualified technician for instructions.• A void installing the unit where it would be subject to high temperatures, such as from direct sunlight, or where it would be subject to dust, dirt or excessive vibration.Using the existingbrackets or the brackets supplied with the installation kit, mount the brackets to the sides of the head unit with the screws supplied with the head unit.Mounting the Head Unit: ISO mountingStep 1:Insert the mounting sleeve into the installation kit or dashboard.Step 2:Bend multiplemounting tabs around the mounting sleeve until the mounting sleeve is secure.Mounting the Head Unit: Typical DIN mountingSingle DINSingle DINMXD339BT INSTALLATION Wiring DiagramMode Reset Tune Up Tune DownPower Band Mute Volume Knob Automatically Store USB Port15Preset 6 / Folder Up Preset 5 / Folder DownPreset 4 / Random Preset 3 / Repeat Preset 2 / Intro4893101415161Preset 6 / Folder Up Mute AS/PSPreset 5 / Folder Down Preset 4 / RandomPreset 1 / Play / Pause Bluetooth Talk Tune DownMode Volume Up Power Audio Tune Up Volume Down BandPreset 3 / Repeat Preset 2 / IntroMXD339BT OPERATIONPress the button to turn the unit on. Press again to turn the unit off.Press MODE to select between Radio, USB, Auxiliary Input and Bluetooth. Modes of operation are shown in the display. Adjust volume using the volume knob (00-43).Press to silence the audio. Press again to resume listening at the previously selected volume.Insert a 3.5mm cable in the unit's front AUX port.Press the RESET button to reset the unit back to the factory settings if abnormal operation occurs. The reset button is located on the front panel.With the unit on, press DISP to display clock time. Press and hold DISP until the hours begins to flash, then release. Press the TUNE nnand TUNE llto adjust the hours, then press the DISP , the minutes begins to flash, press the TUNE nnand TUNE llbutton to adjust the minutes.Press DISP momentarily to save the selected time.Press DISP to toggle display between various displayed information.Press the volume knob momentarily to select between audio functions.Press and hold the volume knob for more than two seconds to select between the menu functions.Rotate the volume knob left/right to adjust or activate the desired function/audio.Power On/Off Changing ModesVolume MuteAuxiliary InputsResetSetting the ClockDisplay Audio / MenuGeneral OperationMXD339BT OPERATIONAM/FM Tuner OperationSeek TuningManual TuningBand Storing PresetsRecalling Presets Automatically Store Preset Scan Stations Press TUNE nn or TUNE ll to seek to the previous or next strong station.Press and hold TUNE nn or TUNE ll to enter manual tuning mode, then press TUNE nn or TUNE ll momentarily to change radio frequency up or down one step at a time. Press and hold TUNE nn or TUNE ll to advance quickly.Press BAND to select between FM1, FM2, FM3, AM1 and AM2 bands. Up to six presets can be programmedfor each band, enabling up to 18 FM stations and 12 AM stations to be stored in memory.Up to 18 FM and 12 AM stations can be stored. To storea station, select the desired band and station. Press and hold the desired preset button (1-6) for more than two seconds. When stored, the preset number will appear in the display.Preset stations can be recalled any time by pressing the corresponding preset button.Press and hold AS/PS for more than 2 seconds to store18 FM stations and 12 AM stations automatically.Press AS/PS to recall each preset staion that stored in the memories in each band.MXD339BT OPERATIONTo play MP3 files, insert a USB device containing MP3 files.Press TUNE ll to skip to the beginning of the next track. Press TUNE nn to skip to the beginning of the previoustrack.Press and hold TUNE ll or TUNE nn to fast forward orreverse a track.Press l / II to temporarily stop USB playback.Press l/ II again to resume playback.Folders can be found by pressing Folder Up or Folder Down.About one second after the folder name is displayed, the first file under the selected folder will be displayed and playback will begin.Press RPT to toggle between RPT ALL, RPT FLR and RPT ONE.• RPT ALL - Plays all tracks on USB device.• RPT ONE - Continuously repeats selected track.• RPT FLR - Continuously repeats all files in current folder.Press RDM to play tracks in random order; press again to cancel the RDM function.Press INT to play the first 10 seconds of each track; press again to cancel the INT function.Playing MP3 FilesTrack SelectFast Forward and ReversePauseFolder AccessRepeatRandomIntroUSB OperationMXD339BT OPERATIONPreparationPairing a NewDeviceStreaming Audio Troubleshooting Before using a Bluetooth device, it must be paired and connected. Ensure that Bluetooth is activated on your device before beginning the pairing process.The head unit broadcasts the pairing signal constantly when no devices are connected. Complete the pairing sequence from your Bluetooth device. Refer to the owner’s manual for your device for more details.The device name is “Dual Media Player”.The Bluetooth passcode is "1234”.Note: The head unit can be in any mode of operation when pairing is performed.The head unit supports A2DP wireless streaming audio from a Bluetooth mobile device directly to your head unit. The following functions can be used to control the music:• Press ll to skip to the next available audio track.• Press nn to skip to the previous audio track.• Press l/II to toggle between play and pause during playback.Bluetooth OperationMXD339BT OPERATION Troubleshooting MXD339BT OPERATIONLimited One Year WarrantyThis warranty gives you specific legal rights. You may also have other rights which vary from state to state.Dual Electronics Corp. warrants this product to the original purchaser to be free from defects in material and workmanship for a period of one year from the date of the original purchase.Dual Electronics Corp. agrees, at our option, during the warranty period,to repair any defect in material or workmanship or to furnish an equal new, renewed or comparable product (whichever is deemed necessary) in exchange without charges, subject to verification of the defect or malfunction and proof of the date of purchase. Subsequent replacement products are warranted for the balance of the original warranty period. Who is covered? This warranty is extended to the original retail purchaser for products purchased from an authorized Dual dealer and used in the U.S.A.What is covered? This warranty covers all defects in material and workmanship in this product. The following are not covered: software, installation/removal costs, damage resulting from accident, misuse, abuse, neglect, product modification, improper installation, incorrect line voltage, unauthorized repair or failureto follow instructions supplied with the product, or damage occurring during return shipment of the product. Specific license conditions and copyright notices for the software can be found via www.dualav. com.What to do?1. Before you call for service, check the troubleshooting guide in your owner’s manual. A slight adjustment of any custom controls may save you a service call.2. If you require service during the warranty period, you must carefully pack the product (preferably in the original package) and ship it by prepaid transportation with a copy of the original receipt from the retailer to an authorized service center.3. Please describe your problem in writing and include your name, a return UPS shipping address (P.O. Box not acceptable), and a daytime phone number with your shipment.4. For more information and for the location of the nearest authorized service center please contact us by one of the following methods:• Call us toll-free at 1-866-382-5476•*********************** Exclusion of Certain Damages: This warranty is exclusive and in lieu of any and all other warranties, expressed or implied, including without limitation the implied warranties of merchantability and fitness for a particular purpose and any obligation, liability, right, claim or remedy in contract or tort, whether or not arising from the company’s negligence, actualor imputed. No person or representative is authorized to assume for the company any other liability in connection with the sale of this product. In no event shall the company be liable for indirect, incidental or consequential damages.MXD339BT OPERATIONFCC ComplianceThis device complies with Part 15 of the FCC Rules. Operation is subject to the following two conditions:(1) this device may not cause harmful interference, and(2) this device must accept any interference received, including interference that may cause undesired operation.Warning: Changes or modifications to this unit not expressly approved by the party responsible for compliance could void the user’s authority to operate the equipment. Note: This equipment has been tested and found to comply with the limits for a Class B digital device, pursuant to Part 15 of the FCC Rules. These limits are designed to provide reasonable protection against harmful interference in a residential installation. This equipment generates, uses and can radiate radio frequency energy and, if not installed and used in accordance with the instructions, may cause harmful interference to radio communications. However, there is no guarantee that interference will not occur in a particular installation. If this equipment does cause harmful interference to radio or television reception, which can be determined by turning the equipment off and on, the user is encouraged to try to correct the interference by one or more of the following measures:• Reorient or relocate the receiving antenna.• Increase the separation between the equipment and receiver.• Connect the equipment into an outlet on a circuit different from that to which the receiver is connected.• Consult the dealer or an experienced radio/TV technician for help.MXD339BT OPERATIONSpecificationsTuning range: 87.5MHz-107.9MHzUsable sensitivity: 8.5dBf50dB quieting sensitivity: 10dBfStereo separation @ 1kHz: >30dBFrequency response: 30Hz-13kHzTuning range: 530kHz-1710kHzUsable sensitivity: <42dBuFrequency response: 30Hz-2.2kHzSpeaker output impedance: 4~8 ohmsLine output voltage: 2 Volts RMSDimensions: 7" x 3.8" x 2" (178 x 97 x 50 mm)Design and specifications subject to change without notice.FM Tuner AM Tuner GeneralNotes。

---------------------------------------------------------------------------------------------------------------------------------------------------User Manual RX-4MHCS433.92 MHz OOK (AM) Receiver - 4 output channelsDescription Array The mono-stable and bi-stable mode and the opencollector outputs make it ideal for telecontrol ofappliances like gate door openers,burglar alarmsystems and wherever it’s requested encoding ofradio link. Furthermore it’s able to learn the code ofHCS transmitters.Compatible with AUREL keyfobs:HCS-TX-1/2/3(OVO),TX1/2/3-HCS-433(HCS),TX-2/4/6 M-HCS, TX-12 CH.Connection Pin-Out:2) GND3) Antenna7) GND8) Test Point – RX analog output9) Programming push button10) Ch1 output - Open collector (Triggered by pushing button 1 in the keyfob)11) Ch2 output- Open collector (Triggered by pushing button 2 in the keyfob)12) Ch3 output- Open collector (Triggered by pushing button 3 in the keyfob)13) Ch4 output- Open collector (Triggered by pushing button 4 in the keyfob)14) LED output – Connected to anode of LED15) Vcc (+5Volt)Technical features are subject to change without notice. AUREL S.p.A. does not assume responsibilities for any damages caused by the device’s misuse.------------------------------------------------------------------------------------------------------------------------------------------------------------------------------------------------------------------------------------------------------------------------------------------------------------------------User ManualHow to get startedThe voltage supply to the module (pin 15) shall be 5Vdc. Pin 9 shall be connected to the push button for programming the receiver, pin 14 shall be connected to the anode of LED to control that programming has been carried out (output current is internally limited to around 20 mA by a 180 ohm resistor). External antenna shall be connected, by utilizing for example a piece of wire 17 cm long and a surrounding widespread ground plane.Every output of RX-4MHCS is driven by a transistor in open collector configuration, able to bear max current of 100 mA. In stand-by mode transistor is cut off while when triggered is in saturation region. Output can be programmed to work in mono-stable or bi-stable mode, every one independent from the others.In mono-stable mode output is active for all the time the corresponding push button is pressed in the keyfob, releasing the button output switches off.In bi-stable mode output switches its state every time the corresponding push button is pressed in the keyfob (from active to inactive and vice versa). The two operative modes are independent each other, that means it’s possible to program some outputs as mono-stable and some others as bi-stable.If an inductive load is connected to the output (i.e. a relay) it’s necessary to prevent voltage transients by putting a diode in parallel to the inductive load. LED anode shall be connected towards the output of the module.In order to enable the receiver to activate its outputs it’s necessary to store in the RX-4MHCS the keyfobs codes. To carry out this operation it’s necessary to approach the keyfob to the receiver. By pressing a push button (it doesn’t matter which one) of the keyfob during the auto-learning phase, the receiver RX-4MHCS recognises the button pressed and all other channels automatically.Only the keyfobs with HCS encoder shall be recognised by the receiver RX-4MHCS. Keyfobs not programmed or programmed with manufacturer code different from the one used by AUREL would not be recognised.Based on reasonable demand, Aurel is willing to program the receiver RX-4MHCS with specific manufacturer code indicated by the customer.Ground planeThe circuit must be double layer. Ground plane must surround at the best the welding area of the receiver. For further info please refer to the user manuals of AUREL’s receivers.Ca pa c ità di disa c c oppia mento L inea 50 ohm +5VConnessi oneA nt ennaTechnical features are subject to change without notice. AUREL S.p.A. does not assume responsibilities for any damages caused by the device’s misuse. ------------------------------------------------------------------------------------------------------------------------------------------------------------------------------------------------------------------------------------------------------------------------------------------------------------------------User Manual ProgrammingHow to erase the memoryIn order to reset the RX-4MHCS, press the push button connected to pin 9 and release it when LED starts blinking. Now press again the push button and hold it pressed for around 5 seconds until it switches off again. As you release the push button the LED blinks 5 times indicating that memory has been erased.After carrying out the reset, no HCS encoded keyfob shall be recognised and all outputs shall be set up in mono-stable mode.Auto-learning procedureBy pressing and soon releasing the programming push button the auto-learning procedure is initiated. LED blinks quickly for 10 seconds: for this time long, every time a push button of a keyfob, located near the RX-4MHCS, is pressed, such keyfob would be learnt. Programming of RX-4MHCS is confirmed by LED with steady red light, afterwards it switches off.When programmed all push buttons of the keyfob are learnt and each of them activate the corresponding output. Outputs will be mono-stable.It’s possible to repeat this procedure to allow the receiver RX-4MHCS to learn up to 10 keyfobs.Bi-stable mode programmingIn order to get the output bi-stable, press and release the push button. LED blinks quickly for 10 seconds: for this time long it must be pressed the push button again. LED turns from blinking to steady light. In the next 10 seconds it’s possible to press the button corresponding to the output to make bi-stable, getting the keyfob close to RX-4MHCS. The receiver shows that operations has been successfully carried out by 3 blinks of LED.To turn back to mono-stable mode repeat the above described procedure; in this case LED blinks just twice to indicate the operation was successful.Change of output functionality mode can be executed only after the receiver learns the keyfob code.Technical features are subject to change without notice. AUREL S.p.A. does not assume responsibilities for any damages caused by the device’s misuse.---------------------------------------------------------------------------------------------------------------------------------------------------------------------。

• Please read these instructions (including “Limited Warranty” and “Customer Services Directory”) carefully before using this product and keep this manual for future reference.VolumeTurn the knob clockwise to increase volume,and counterclockwise to decrease volume.Volume level (0 to 40)to mute the sound completely.From line output of external sound/audioSQ (Sound Quality)SQ is a function that can call up various sound types at the touch of button in accordance with your listening music type.for more than 2 seconds to select the sound type as follows:(FLAT) flat frequency response:does not emphasize any part. (default)pushTurn [VOLUME]clockwise or counterclockwise tochange each level.Bass:Adjustable range: –12 to +12 dB (by 2 dB step)Volume:Adjustable range: 0 to 40Treble:turn[{TUNE],[}TUNE](Hours, Minutes)Initial Time(CLOCK) for more than 2seconds to active the time setting mode to reset the to y [DISP](CLOCK).“Adj” is displayed when the clock is not adjusted.Hold down [DISP](CLOCK) for more than 2 seconds.(Hour blinks)Adjust the hour.[}]: sets the hour ahead.{]: sets the hour back.Band[BAND]to change the band.Seek TuningManual TuningTUNE]: Higher frequency TUNE]: Lower frequencyFM1FM2AM162(Weather Band)Band FrequencyPreset buttons from [1]to [6] Auto Preset Memory (APM)Hold down [BAND](APM: auto preset memory) for more than 2 seconds.• The 6 stations with good reception will be automatically saved in the memory under preset buttons fromOnce set, the preset stations are sequentially scanned for 5 seconds each.• To stop scanning, press one of the buttons from . Manual Preset MemoryUse manual or seek tuning to find a station. (Hold down one of the preset buttons fromTuning in a Weather Band Station• Press [BAND](APM)to select WB (Weather Band). (a page 11)• Press any of the buttons [1]to [6]to monitor the preset station.WB Weather Band Frequency (channel) Number Note:The weather band (CH1-6) has been preset. CH7 is selected by pressingNational Weather Radio Broadcasts from over 380 Iocations throughout the Tune to weather band to receive continuous weather information 24 hoursDisplay changeto change the display.Clock displayRandom/Repeat indicatorDISC indicator Play timeTrack SelectionPress [d TUNE]: Advance to the next track.Press [s TUNE]: Back to the beginning of the currenttrack.Back to the previous track. (Presstwice.)Repeat play The current track is repeated.again to cancel.lights Random playlights“AU In” will be displayed whenswitch to the AUX mode.Display changeto change the display.AUX input mode (default)• If you disconnect the mini-plug cable and connect it again in AUX mode, noise is generated and may cause。


五十铃收音机说明书第一章:引言感谢您购买五十铃收音机。
本说明书将提供详细的操作指南和必要的安全注意事项,以确保您能正确使用和享受该产品。
第二章:产品特点1.多功能收音机:支持AM/FM频段,可收听广播节目,提供更多的音乐和资讯选择。
2.数字显示屏:清晰的数字显示屏,便于选择频道和调节音量。
3.喇叭输出:内置高质量喇叭,提供清晰、饱满的音质。
4.外部设备连接:支持外部音源输入,如MP3播放器、手机等。
5.电池供电:采用便携式电池供电,方便携带和使用。
第三章:安全注意事项1.请在正常使用环境下操作,避免阳光直射、高温或潮湿的地方。
2.请勿触摸电器内部零件,避免触电风险。
3.请勿将收音机放置在易燃物品附近或堵塞通风孔。
5.请勿将收音机放在高处或接近边缘,以防止掉落造成人身伤害。
第四章:使用指南1.接通电源:将电池正确安装到收音机背部的电池仓,根据极性方向安装,然后插入电源插头,按下电源按钮,收音机即可启动。
2.选择频道:按下频道按键,可以切换AM/FM频段,然后通过音量加减按键选择所需频道。
3.调节音量:使用音量加减按键可以调节收音机的音量大小。
调节时,请从低音量开始,逐渐增加音量,以避免突如其来的大声音乐。
4.选择模式:通过模式选择按键,可以切换不同的播放模式,如收音、外部设备输入等。
5.连接外部设备:将外部设备(如MP3播放器、手机等)通过音频线连接到收音机的音频输入接口,然后按下模式选择按钮,即可选择外部设备输入模式。
第五章:故障排除1.收音机无法启动:检查电池是否正确安装,确认电池是否有电。
2.收音不清晰:尝试调整天线的方向,以获取更好的信号接收。
若室内信号较差,可尝试将收音机放在窗边或室外接收。
4.外部设备无法连接:检查音频线是否插好,确保设备音源输出正常,重试连接。
第六章:注意事项1.在清洁收音机之前,请先将电源插头拔下,并使用柔软的布或纸巾擦拭外壳。
请勿使用含有化学物质的溶剂清洁收音机。
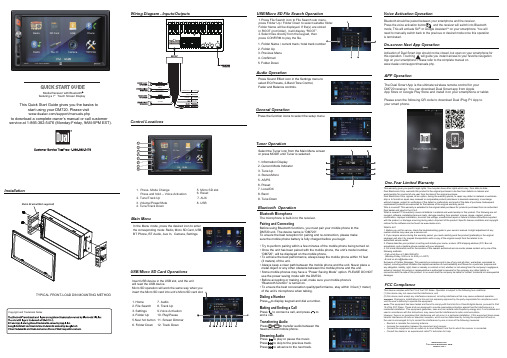
Copyright andTrademark NotesThis Quick Start Guide gives you the basics tostart using your DM720. Please visit/support/manuals.phpto download a complete owner’s manual or call customer service at 1-866-382-5476 (Monday-Frida y , 9AM-5PM EST).Media Receiver with Bluetooth featuring a 7” Touch Screen DisplayDM720InstallationWiring Diagram - Inputs/Outputs Control LocationsGeneral OperationAudio Operation1. Press- Mode ChangePress and hold -- Voice Activation 2. Tune/Track Up3. Volume/Power/Mute4. Tune/Track Down6. Reset 5. Micro SD slot7. AUX8. USB1. Information Display2. Current Mode Indicator3. Tune Up4. Stereo/Mono5. AS/PS6. Preset7. Local/DX 8. Band 9. Tune DownTuner OperationSelect the Tuner icon from the Main Menu screen or press MODE until Tuner is selected.This warranty gives you specific legal rights.You may also have other rights which vary from state to state. Dual Electronics Corp. warrants this product to the original purchaser to be free from defects in material and workmanship for a period of one year from the date of the original purchase.Dual Electronics Corp. agrees, at our option, during the warranty period, to repair any defect in material or workman-ship or to furnish an equal new, renewed or comparable product (whichever is deemed necessary) in exchange without charges, subject to verification of the defect or malfunction and proof of the date of purchase. Subsequent replacement products are warranted for the balance of the original warranty period.Who is covered?This warranty is extended to the original retail purchaser for products purchased from an authorized Dual dealer and used in the U.S.A.What is covered?This warranty covers all defects in material and workmanship in this product.The following are not covered: software, installation/removal costs, damage resulting from accident, misuse, abuse, neglect, productmodification, improper installation, incorrect line voltage, unauthorized repair or failure to follow instructions supplied with the product, or damage occurring during return shipment of the product. Specific license conditions and copyright notices for the software can be found via .What to do?1. Before you call for service, check the troubleshooting guide in your owner’s manual.A slight adjustment of any custom controls may save you a service call.2. If you require service during the warranty period, you must carefully pack the product (preferably in the original package) and ship it by prepaid transportation with a copy of the original receipt from the retailer to an authorized service center.3. Please describe your problem in writing and include your name, a return UPS shipping address (P .O. Box not acceptable), and a daytime phone number with your shipment.4. For more information and for the location of the nearest authorized service center please contact us by one of the following methods:• Call us toll-free at 1-866-382-5476(Monday-Friday, 9:00 a.m. to 5:00 p.m. EST)• E-mail us at cs@duala Exclusion of Certain Damages:This warranty is exclusive and in lieu of any and all other warranties, expressed or implied, including without limitation the implied warranties of merchantability and fitness for a particular purpose and any obligation, liability, right, claim or remedy in contract or tort, whether or not arising from the company’s negligence, actual or imputed. No person or representative is authorized to assume for the company any other liability inconnection with the sale of this product. In no event shall the company be liable for indirect, incidental or consequential damages.©2019 Dual Electronics Corp.NSC0719-V01One-Year Limited WarrantyFCC ComplianceThis device complies with Part 15of the FCC Rules.Operation is subject to the following two conditions: (1)this device may not cause harmful interference,and(2)this device must accept any interference received,including interference that may cause undesired operation.Warning:Changes or modifications to this unit not expressly approved by the party responsible for compliance could void the user’s authority to operate the equipment.Note:This equipment has been tested and found to comply with the limits for a Class B digital device, pursuant to Part 15 of the FCC Rules. These limits are designed to provide reasonable protection against harmful interference in a residential installation. This equipment generates, uses and can radiate radio frequency energy and, if not installed and used in accordance with the instructions, may cause harmful interference to radio communications.However,there is no guarantee that interference will not occur in a particular installation.If this equipment does cause harmful interference to radio or television reception,which can be determined by turning the equipment off and on,the user is encouraged to try to correct the interference by one or more of the following measures: :•Reorient or relocate the receiving antenna.•Increase the separation between the equipment and receiver.•Connect the equipment into an outlet on a circuit different from that to which the receiver is connected. •Consult the dealer or an experienced radio/TV technician for help.TYPICAL FRONT-LOAD DIN MOUNTING METHODUSB/Micro SD Card OperationsUSB/Micro SD File Search OperationVoice Activation OperationOn-screen Navi App Operation1. Folder Name / current track / total track number2. Folder Up3. Previous Menu4. Confirmed5. Folder DownInsert USB device in the USB slot, and the unit will read the USB device.Micro SD operation will work the same way when you insert the Micro SD card into unit’s Micro SD card slot.In the Menu mode, press the desired icon to enter the corresponding mode: Radio, Micro SD Card, USB,BT Phone, BT Audio, Aux In, Camera, Settings.Press the function icons to select the setup menu.Press Sound Effect icon in the Settings menu to select EQ Presets, 2-Band Tone Control, Fader and Balance controls.Pairing and ConnectingBefore using Bluetooth functions, you must pair your mobile phone to the DM720 unit. The device name is "DM720".To ensure the best reception for pairing and re-connection, please make sure the mobile phone battery is fully charged before you begin.• Try to perform pairing within a few minutes of the mobile phone being turned on.• Once the unit has been paired with the mobile phone, the unit’s model number, “DM720”, will be displayed on the mobile phone.• To achieve the best performance, always keep the mobile phone within 10 feet (3 meters) of the unit.• Always keep a clear path between the mobile phone and the unit. Never place a metal object or any other obstacle between the mobile phone and the unit.• Some mobile phones may have a “Power Saving Mode” option. PLEASE DO NOT use the power saving mode with the DM720.• Before accepting or making a call, make sure your mobile phone’s “Bluetooth function” is turned on.• To ensure the best conversation quality/performance, stay within 3 feet (1 meter) of the unit’s microphone when talking.Dialing a NumberPress to display keypad and dial a number.Making and Ending a CallPress to connect a call, and press to end a call.Streaming AudioPress to play or pause the music. Press to skip to the previous track. Press to advance to the next track.Bluetooth OperationAPP OperationBluetooth MicrophoneThe microphone is built-in to the receiver.Transferring AudioPress to transfer audio between the head unit and mobile phone.REVERSE GRAYGRAY/BLACKVIOLETVIOLET/BLACKMain Menu1.Press File Search icon to File Search sub menu,press Folder Up / Folder Down to select suitable folder. Folder Name will be displayed. If file(s) are stored in ROOT (not folder), it will display “ROOT”.2.Select files directly from the keypad, thenpress CONFIRM to play the file.AMP/ANT(+)BLUE ORANGEGREEN/WHITEMetal Bracket(Not supplied)The Dual Smart App is the ultimate wireless remote control for your DM720 receiver. You can download Dual Smart app from AppleApp Store or Google Play Store and install it on your smartphone or tablet.Please scan the following QR code to download Dual iPlug P1 App to your smart phone.1. Home2. File Search3. Settings4. Folder Up 6. Folder Down5.Navi hot button 8. Track Up10. Play/Pause 11. Screen Dimmer12. Track Down7. Audio9.Voice Activation Bluetooth should be paired between your smartphone and the receiver.Press the voice activation button , and the receiver will switch into Bluetooth mode, This will activate Siri ® or Google Assistant TM on your smartphone. You will need to manually switch back to the previous or desired mode once this operation is terminated.Activation of Dual Smart App should not be closed, but open on your smartphone for this operation. Touching will guide you instant access to your favorite navigation App on your smartphone. Please refer to the complete manual on /support/manuals.php.32418765。
一、选择波段收音机开机后,您可以按调频/中波转换按键(15),选择调频或中波波段,按短波·米波段转换键(16)可选择短波波段,屏幕上会显示您按键后选择的波段。
在选择短波波段后,可用短波·米波段转换键 (16)选择不同的短波米波段,每按一下此键,则从当前米波段跳到下一个米波段的最低频率。
当利用短波·米波段转换键切换到短波米波段后,并在 3 秒钟内按上、下(9、10)调节键,可向上或向下选择短波米波段。
利用短波·米波段选择按键(16)切换到短波米波段时,显示屏右上方同时显示米波段数字,停止米波段切换操作 3 秒钟后,自动返回到时间显示状态。
这时,上、下键也从短波米波段选择切换状态返回到调整频率状态。
本机短波米波段频率扫描范围,比国际标准短波米波段范围稍宽。
二、搜索电台pl-550 有七种搜索电台的方法: 1.手动搜索电台;2.自动搜索电台;3.直接输入电台频率;4.调频/中波的自动存台(ats)功能; 5.直接输入2位存储地址数字,调出当前页面下的地址频率;6.进入搜索存储器状态,手动或自动搜索已存储的电台频率;7.用旋转式调谐钮调出已存储的电台。
(1)手动搜索【方法一】手动搜索电台:利用向上或向下调节键(9或10)或用旋转式调谐旋钮(28)搜索电台,搜索过程中,可按调台快慢键(8)选择快速或慢速调谐步进,各波段频率按下表规定的步长标准变化,直到找到电台为止。
手动调谐适合于:——搜索那些比较弱的电台信号;——搜索密集拥挤的强电台信号;——搜索那些频率不在米波段范围内的短波电台信号,而且可以从1711到 29999 khz 频率范围内逐点搜索电台信号。
旋转式频率微调旋钮的其它重要用途:当相邻的频率有很强电台,其声音隐隐约约地串入您正在收听的电台频率时,您可以利用旋转式调谐旋钮,把频率故意微调偏离正常收听的频率,以避开干扰,fm微调,mw和sw微调1-2khz。
【方法二】自动搜索电台:按住向上或向下调节键(9或10),直到显示频率自动变化即松手,当收到电台时会自动停止搜索。
收音机的使用方法收音机是一种用于接收无线电广播信号的电子设备,它具有非常广泛的使用范围。
下面是使用收音机的一般步骤:第一步:确认收音机的电源是否正常。
有一些收音机是使用电池供电,需要确认电池是否装好,并且电池是否有足够的电量。
有些收音机也支持使用电源适配器,需要确认适配器是否正常连接和供电。
第二步:打开收音机。
大多数收音机都有一个电源开关或旋钮按钮,将其打开即可。
第三步:选择波段。
不同的收音机可能支持不同的波段,例如AM(调幅)波段和FM(调频)波段。
通常在收音机的前面板上会有一个切换按钮或旋钮,用于选择不同的波段。
第四步:调节频道。
用于选择不同广播台的频道或频率的控件通常位于收音机的前面板上。
可以通过按下或旋转控件来逐渐调整频道,直到找到想要接收的广播台。
第五步:调节音量。
收音机通常都有一个音量控制按钮或旋钮,用于调节音量大小。
可以根据个人需要将音量调成舒适的水平。
第六步:调节声音效果。
一些收音机还支持调节音色等声音效果。
这些控件通常位于收音机的前面板上,可以通过旋转或按下控件来调节音效。
第七步:调谐。
如果接收到的广播信号不够清晰,可以尝试调谐功能。
收音机上通常有一个调谐按钮或旋钮,用于微调接收的信号,以获得更好的接收效果。
第八步:保持天线正常。
天线是接收无线电信号的重要组成部分,所以要确保天线完好无损并正确放置。
可以根据具体情况调整天线的方向和长度,以获得更好的信号接收效果。
第九步:关闭收音机。
当使用完毕后,记得关闭收音机,尤其是使用电池供电时,以节省电力并延长电池的使用寿命。
同时,还有一些其他注意事项可以帮助提高收音机的使用体验:1. 远离干扰源。
在使用收音机时,尽量远离可能会干扰信号接收的设备,例如电视、电脑或电磁辐射较大的电器等。
2. 寻找信号强度较好的地方。
如果在室内使用收音机,可以尝试靠近窗户或者室外,以获得更好的信号接收效果。
3. 清理收音机。
定期清理收音机的表面,可以使用柔软的干布轻轻擦拭,不要使用湿布或者有腐蚀性的清洁剂。
无线电收音机使用说明书欢迎使用我们的无线电收音机!本使用说明书将为您提供关于无线电收音机的详细信息和操作指南,以帮助您正确且方便地使用该产品。
一、产品概述无线电收音机是一种便携式的音频设备,能够接收广播电台发出的无线电信号,并将其转换成声音输出。
该产品具有以下特点:1. 简洁易用:外观小巧,按钮布局合理,操作简单。
2. 多频道收听:支持广播电台多频道的接收,满足您的不同收听需求。
3. 优质音效:采用高品质扬声器和放大器,确保音质清晰、音量适宜。
二、产品组成和功能介绍1. 收音机主体:包括天线、调频旋钮和频道选择按钮。
2. 电池仓:用于安装电池,提供电源支持。
3. 音量控制按钮:用于调节音量大小。
4. 耳机插孔:可插入耳机,实现个人收听。
5. 电源开关:用于打开或关闭收音机。
三、使用方法1. 安装电池:打开电池仓盖,依照正负极要求正确安装电池。
2. 开启收音机:将电源开关调至“ON”位置。
3. 调频收听:旋转调频旋钮,可调整到不同的频道。
4. 调节音量:通过音量控制按钮,向上或向下调节音量大小。
5. 使用耳机:若需要个人收听,可插入耳机至耳机插孔。
6. 关闭收音机:将电源开关调至“OFF”位置。
四、注意事项1. 请勿在高温、潮湿或尘土严重的环境中使用收音机,以免影响其正常运行。
2. 请勿将收音机放置在挤压或摔落的情况下,以免造成损坏。
3. 当您长时间不使用收音机时,建议将电源开关调至“OFF”位置,以延长电池寿命。
4. 请勿尝试自行拆卸或修理收音机,如有故障,请联系售后服务部门进行维修。
5. 为了遵守相关法律法规,请勿在禁止使用无线电设备的场所使用收音机。
五、常见问题解答1. 为什么无线电收音机收不到信号?答:可能是由于信号源较弱或当前位置信号不稳定。
请尝试在开阔的地方或更换位置再次尝试。
2. 收音机如何调节到喜欢的电台频道?答:通过旋钮或频道选择按钮逐个尝试不同频道,直到找到您喜欢的电台频道。
3. 收音机没有声音怎么办?答:首先请确认音量是否调至适当位置,其次请检查耳机是否正确插入。
smart收音机使用说明页
描述
1.开/关按钮
按住按钮打开或关闭设备
2.音量+按钮
3.音量–按钮
按下按钮增大音量
按下按钮降低音量
4.调音+按钮
5.Tuning–按钮
按下按钮手动调谐至所需频率按住按钮可自动搜索电台6.模式按钮
按下按钮设置模式:FM/USB/存储卡
7.预设+按钮
下一步按钮(USB)
8.Preset–按钮
上一个按钮(USB)
FM:按此按钮可预设电台
按住按钮可观看电台列表
USB:按下按钮选择曲目
9.播放/暂停按钮程序按钮
按下按钮播放或暂停曲目
按下按钮确认存储位置
10.数字按钮
按其中一个按钮选择预设电台
11.电池仓
打开电池仓
将电池(3.7V锂离子)插入电池仓
关闭电池仓
12.天线
延长天线以获得最佳的无线电接收效果
使用方法
手动预设:
按编程按钮进入编程模式
调到您想要的电台
按程序按钮确认所选电台
按预设+/-按钮选择存储位置
按程序按钮确认选择的存储位置
自动预设:
按住程序按钮直到显示屏上的频率开始运行。
天锦收音机说明书
1、插上电源适配器,并连接到收音机。
2、旋动功能开关,再旋TIME或MINUTE钮,分别可以设置时钟或闹钟时间。
3、功能开关旋到CLK档位,按RADIO 键,开机并收听上次关机时电台。
4、按SOURCE键,转换FM/DAB功能。
5、在收音模式,长按UP/DOWN键,向上或向下自动搜索电台并停台;短按UP/DOWN键,向上或向下微调。
6、旋转hour/tuning,向上或向下微调电台频率,旋动minute/vol,可调节音量。
7、按info键,查看电台相关信息。
8、按Menu键,进入系统设置,配合UP/DOWN键进行选择,按SEL键确认。
9、按RAEPEAT/SELSET键,确认存储搜到的电台。
10、按SLEEP键,选择睡眠时间,对应图标显示。
11、按SCAN键,全频段自动搜台并存储签10个电台。