联想云终端系统部署说明材料
- 格式:doc
- 大小:6.82 MB
- 文档页数:74
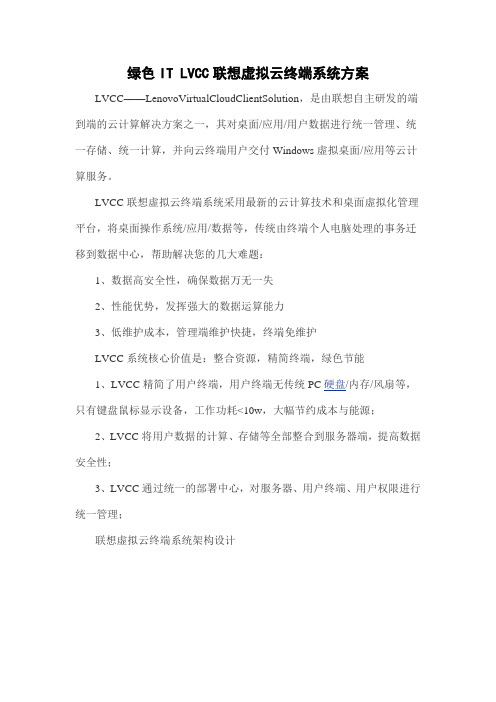
绿色IT LVCC联想虚拟云终端系统方案LVCC——LenovoVirtualCloudClientSolution,是由联想自主研发的端到端的云计算解决方案之一,其对桌面/应用/用户数据进行统一管理、统一存储、统一计算,并向云终端用户交付Windows虚拟桌面/应用等云计算服务。
LVCC联想虚拟云终端系统采用最新的云计算技术和桌面虚拟化管理平台,将桌面操作系统/应用/数据等,传统由终端个人电脑处理的事务迁移到数据中心,帮助解决您的几大难题:1、数据高安全性,确保数据万无一失2、性能优势,发挥强大的数据运算能力3、低维护成本,管理端维护快捷,终端免维护LVCC系统核心价值是:整合资源,精简终端,绿色节能1、LVCC精简了用户终端,用户终端无传统PC硬盘/内存/风扇等,只有键盘鼠标显示设备,工作功耗<10w,大幅节约成本与能源;2、LVCC将用户数据的计算、存储等全部整合到服务器端,提高数据安全性;3、LVCC通过统一的部署中心,对服务器、用户终端、用户权限进行统一管理;联想虚拟云终端系统架构设计LVCC虚拟云终端系统在其云计算架构设计理念的指导下,为了更好的配合客户应用环境,并尽可能保障多因素的平衡,推出更为灵活的三种架构配置模式供用户选择,它们分别为:A.会话架构,B.VDI架构,C.会话+VDI的混合架构。
*标准版不支持、企业版支持**LVCC全面兼容性支持LVCC方案彻底改变了传统B/S架构体系,适合多用户大规模应用部署,规模成本优势越明显,为用户带来实际CTO收益。
LVCC联想虚拟云终端系统方案自上市不到一年时间,累计销售5000余套,案例逾300余例,客户群覆盖教育、政府、企业、能源、军工、金融、电信等行业。
典型应用环境LVCC联想虚拟云终端系统兼容性佳,灵活适用于多种网络应用环境。
尤其适合分布式规模化部署桌面应用。
教育机构(电教、阅览室)办公室行政(OA)医疗机构(多媒体培训)酒店(客房、餐吧、数码e房)数字图书馆企业培训中心企业呼叫中心商务预订中心物流数据录入iNet咖啡厅研发测试环境工厂车间和仓库联想虚拟云终端系统的特点/优势集中管理工具集中管理的系统架构设计大大提升了管理员对大量服务器和终端的统一管理能力,本系统通过WEB界面轻易完成服务器管理/终端管理/用户管理/安全权限管理四个模块的统一管理。

目录1云终端简介............................................................................................................................... - 2 -1.1云终端............................................................................................................................ - 2 -1.2云终端产品参数............................................................................................................ - 2 -1.3云终端的部署................................................................................................................ - 3 -1.4系统需求........................................................................................................................ - 4 -1.5 服务器软件安装........................................................................................................... - 5 -2 启动云终端............................................................................................................................ - 14 -2.1 启动前的准备............................................................................................................. - 14 -2.2 安装云终端................................................................................................................. - 15 -2.2.1 安装前准备...................................................................................................... - 15 -2.2.2云终端的快速安装........................................................................................... - 15 -2.3 使用云终端................................................................................................................. - 17 -2.4 模式切换..................................................................................................................... - 18 -2.4.1 共享计算模式到MiniPC 模式 ..................................................................... - 18 -2.4.2 MiniPC 模式到共享计算模式 ........................................................................ - 19 -3 共享计算模式........................................................................................................................ - 19 -3.1 连接服务器................................................................................................................. - 20 -3.2 互联网浏览器............................................................................................................. - 21 -3.3 办公软件..................................................................................................................... - 21 -3.4 媒体播放器................................................................................................................. - 22 -3.5 系统设置..................................................................................................................... - 22 -3.6本地桌面...................................................................................................................... - 29 -4.MiniPC模式........................................................................................................................... - 29 -4.1 远程桌面连接............................................................................................................. - 29 -4.2 移动硬盘或U盘........................................................................................................ - 30 -4.3 显示属性..................................................................................................................... - 31 -4.4 屏幕键盘..................................................................................................................... - 31 -4.5 手写设置..................................................................................................................... - 32 -5. 常见问题解答....................................................................................................................... - 32 -1云终端简介1.1云终端图1-1泛联云终端外观云终端是一种精巧别致的网络计算机,其外观如图1-1 所示。

云终端管理系统实施方案一、引言。
随着云计算技术的不断发展和普及,云终端管理系统作为一种新型的信息化管理模式,正逐渐受到企业和机构的重视和青睐。
云终端管理系统可以帮助企业实现对终端设备的集中管理、安全监控和远程维护,提高了信息系统的安全性、稳定性和管理效率,为企业的信息化建设带来了新的机遇和挑战。
本文将围绕云终端管理系统的实施方案展开讨论,旨在为企业和机构提供一套可行的实施方案,以期达到更好的管理效果和运营效率。
二、云终端管理系统的概述。
云终端管理系统是一种基于云计算技术的终端设备管理系统,它通过云端服务器对终端设备进行集中管理、监控和维护。
云终端管理系统可以实现对终端设备的远程开关机、软件安装、更新和升级、安全策略设置、性能监控和故障诊断等功能,大大提高了终端设备的管理效率和运维水平。
三、云终端管理系统的实施方案。
1. 硬件设备选型。
在实施云终端管理系统时,首先需要对硬件设备进行选型。
根据企业规模和需求,选择适合的服务器和终端设备,保证系统的稳定性和可靠性。
同时,还需要考虑设备的扩展性和兼容性,以满足未来业务发展的需求。
2. 网络环境建设。
云终端管理系统需要依托稳定、高速的网络环境进行运行。
因此,在实施方案中需要对企业的网络环境进行评估和规划,确保网络带宽和稳定性能够支撑云终端管理系统的正常运行和数据传输。
3. 系统软件部署。
选择适合的云终端管理系统软件,并进行部署和配置。
在部署过程中,需要根据企业的实际需求进行定制化设置,包括用户权限管理、安全策略配置、终端设备监控参数设置等。
4. 培训和推广。
在系统部署完成后,需要对企业员工进行系统的培训和推广工作,使其能够熟练操作和管理云终端管理系统,提高系统的使用率和管理效率。
5. 运维和优化。
系统实施完成后,需要建立健全的运维体系,定期对系统进行优化和升级,保证系统的稳定性和安全性。
同时,还需要建立完善的故障处理和应急预案,保障系统的正常运行。
四、总结。

Lenovo ThinkAgile CP Series Cloud PlatformProduct Guide (withdrawn product)Lenovo ThinkAgile CP Series is an all-in-one, composable cloud with an integrated application marketplace and end-to-end automation, delivering a turn-key cloud experience in your own data center. ThinkAgile CP Series uses modular compute, storage, and networking components paired with the cloud virtualization software to create pools of IT resources, independently scaling and allocating capacity, and automatically configuring resources to fulfill application requirements.Due to its software-defined modular architecture, the ThinkAgile CP Series platform can be scaled easily by adding more compute and storage resources independently of each other as your needs grow. Suggested workloads for the ThinkAgile CP Series include web services, virtual desktop infrastructure (VDI), enterprise applications, OLTP and OLAP databases, data analytics, application development, cost-optimized virtualization, containers, and other back-office applications.The following figure shows the ThinkAgile CP Series hardware components.Figure 1. Lenovo ThinkAgile CP Series hardware componentsDid you know?Lenovo professional deployment services are included in ThinkAgile CP Series to get customers up and running quickly. Also included is the ThinkAgile Advantage lifecycle management with a single point of support for the entire ThinkAgile CP platform with the nodes, networking, and software components, for quicker problem determination and minimized downtime.Lenovo offers additional professional services that can be purchased for the ThinkAgile CP Series deployments, including hardware installation, software deployment, workload migration, cloud assessment and design, and ongoing managed services to help achieve optimal operations and performance. ThinkAgile CP is designed to minimize downtime with all of the components engineered to work together, and with tested, standardized and automated code updates.Click here to check for updatesFigure 2. ThinkAgile CP Interconnect port-side viewThe following figure shows the non-port-side view of the ThinkAgile CP Interconnect. Figure 3. ThinkAgile CP Interconnect non-port-side viewThe following figure shows the rear view of the ThinkAgile CP Compute Block.Figure 5. ThinkAgile CP Compute Block rear viewFigure 6. ThinkAgile CP Storage Block front viewThe following figure shows the rear view of the ThinkAgile CP Storage Block.Figure 7. ThinkAgile CP Storage Block rear viewThe following figure shows the port-side view of the RackSwitch G7052.Figure 8. RackSwitch G7052 port-side viewThe following figure shows the non-port-side view of the RackSwitch G7052.Figure 9. RackSwitch G7052 non-port-side viewThe following figure shows the port-side view of the NE0152T RackSwitch.Figure 10. NE0152T RackSwitch port-side viewThe following figure shows the non-port-side view of the NE0152T RackSwitch.Figure 11. NE0152T RackSwitch non-port-side viewSystem specificationsThe following table lists the system specifications of the ThinkAgile CP Series. Table 1. ThinkAgile CP Series system specificationsAttribute SpecificationCP4000CP6000Warranty and support Three-, four-, or five-year customer-replaceable unit and onsite limited hardware warranty with ThinkAgile Advantage Support and selectable service levels: 9x5 next business day (NBD) parts delivered (base warranty), 9x5 NBD onsite response (Foundation Service), 24x7 coverage with 4-hour onsite response or 24-hour committed repair (select areas), (Essential Service), or 2-hour onsite response or 6-hour committed repair (select areas) (Advanced Service). Also available are YourDrive YourData, Premier Support, and Enterprise Software Support.Software Guardian Edition Software for ThinkAgile CP.Figure 12. ThinkAgile CP network connectivity topologyNote: When only one Interconnect is deployed with the CP4000 model, all ports on the Compute Block and Storage Block are connected to the same Interconnect network device.The following table lists the ThinkAgile CP Interconnect model.Table 2. Interconnect for CP SeriesDescription Machine Type/ModelThinkAgile CP Interconnect (CP-I-10)7Y67CTO1WW ThinkAgile CP Interconnect Expansion (CP-I-10E)7Y67CTO2WWConfiguration notes:Table 5. Transceivers and cables for customer network uplinksDescription FeaturecodeMaximum quantityper Interconnect10 GbE SFP+ DAC cables1.5m Passive DAC SFP+ Cable A51N2 2m Passive DAC SFP+ Cable A51P2 3m Passive DAC SFP+ Cable A1PJ2 5m Passive DAC SFP+ Cable A1PK2 7m Passive DAC SFP+ Cable A3RH2 10 GbE SFP+ active optical cablesLenovo 3m SFP+ to SFP+ Active Optical Cable ATYY2 Lenovo 5m SFP+ to SFP+ Active Optical Cable ATYZ2 Lenovo 7m SFP+ to SFP+ Active Optical Cable ATZ02 Lenovo 15m SFP+ to SFP+ Active Optical Cable ATZ12 Lenovo 20m SFP+ to SFP+ Active Optical Cable ATZ22 40 GbE QSFP+ transceivers and optical cablesLenovo 40GBASE-SR4 QSFP+ Transceiver A1DR2 Lenovo 10m QSFP+ MPO-MPO OM3 MMF Cable AT2U2 Lenovo 30m QSFP+ MPO-MPO OM3 MMF Cable AT2V2 40 GbE QSFP+ active optical cablesLenovo 3m QSFP+ to QSFP+ Active Optical Cable ATZ32 Lenovo 5m QSFP+ to QSFP+ Active Optical Cable ATZ42 Lenovo 7m QSFP+ to QSFP+ Active Optical Cable ATZ52 Lenovo 15m QSFP+ to QSFP+ Active Optical Cable ATZ62 Lenovo 20m QSFP+ to QSFP+ Active Optical Cable ATZ72 40 GbE QSFP+ to 4x10 GbE SFP+ active optical breakout cablesLenovo 1m QSFP+ to 4xSFP+ Active Optical Cable ATZ82 Lenovo 3m QSFP+ to 4xSFP+ Active Optical Cable ATZ92 Lenovo 5m QSFP+ to 4xSFP+ Active Optical Cable ATZA2 40 GbE QSFP+ direct-attach copper cablesLenovo 1m Passive QSFP+ DAC Cable A1DP2 Lenovo 3m Passive QSFP+ DAC Cable A1DQ2 Lenovo 5m Passive QSFP+ DAC Cable A2X82 Lenovo 7m Passive QSFP+ DAC Cable A2X92 40 GbE QSFP+ to 4x 10 GbE SFP+ breakout cablesLenovo 1m Passive QSFP+ to SFP+ Breakout DAC Cable A1DL2 Lenovo 3m Passive QSFP+ to SFP+ Breakout DAC Cable A1DM2 Lenovo 5m Passive QSFP+ to SFP+ Breakout DAC Cable A1DN2Intel Xeon Silver 4214 12C 85W 2.2GHz Processor B4HR Intel Xeon Silver 4214Y 12/10/8C 85W 2.2GHz Processor B4NW Intel Xeon Silver 4215 8C 85W 2.5GHz Processor B4HQ Intel Xeon Silver 4216 16C 100W 2.1GHz Processor B4HP Intel Xeon Gold processorsIntel Xeon Gold 5215 10C 85W 2.5GHz Processor B4HN Intel Xeon Gold 5215M 10C 85W 2.5GHz Processor B4P1 Intel Xeon Gold 5215L 10C 85W 2.5GHz Processor B4P9 Intel Xeon Gold 5217 8C 115W 3.0GHz Processor B4HM Intel Xeon Gold 5218 16C 125W 2.3GHz Processor B4HL Intel Xeon Gold 5218B 16C 125W 2.3GHz Processor B6BS Intel Xeon Gold 5218T 16C 105W 2.1GHz Processor B4P3 Intel Xeon Gold 5220 18C 125W 2.2GHz Processor B4HK Intel Xeon Gold 5220S 18C 125W 2.7GHz Processor B6CW Intel Xeon Gold 5220T 18C 105W 1.9GHz Processor B6CQ Intel Xeon Gold 6222V 20C 115W 1.8GHz Processor B6CV Intel Xeon Gold 6226 12C 125W 2.7GHz Processor B6CL Intel Xeon Gold 6230 20C 125W 2.1GHz Processor B4HJ Intel Xeon Gold 6230N 20C 125W 2.3GHz Processor B5RY Intel Xeon Gold 6230T 20C 125W 2.1GHz Processor B6CP Intel Xeon Gold 6234 8C 130W 3.3GHz Processor B6CK Intel Xeon Gold 6238 22C 140W 2.1GHz Processor B6CJ Intel Xeon Gold 6238M 22C 140W 2.1GHz Processor B6CM Intel Xeon Gold 6238L 22C 140W 2.1GHz Processor B6CR Intel Xeon Gold 6238T 22C 125W 1.9GHz Processor B4P2 Intel Xeon Gold 6240 18C 150W 2.6GHz Processor B4HH Intel Xeon Gold 6240M 18C 150W 2.6GHz Processor B6CN Intel Xeon Gold 6240L 18C 150W 2.6GHz Processor B6CS Intel Xeon Gold 6240Y 18/14/8C 150W 2.6GHz Processor B4NV Intel Xeon Gold 6242 16C 150W 2.8GHz Processor B4HG Intel Xeon Gold 6244 8C 150W 3.6GHz Processor B4HF Intel Xeon Gold 6246 12C 165W 3.3GHz Processor B6PD Intel Xeon Gold 6248 20C 150W 2.5GHz Processor B4HE Intel Xeon Gold 6252 24C 150W 2.1GHz Processor B4HC Intel Xeon Gold 6252N 24C 150W 2.3GHz Processor B6CT Intel Xeon Gold 6254 18C 200W 3.1GHz Processor B4HD Intel Xeon Gold 6262V 24C 135W 1.9GHz Processor B6CU Intel Xeon Platinum processorsIntel Xeon Platinum 8253 16C 125W 2.2GHz Processor B5RZ Intel Xeon Platinum 8260 24C 165W 2.4GHz Processor B4HB Intel Xeon Platinum 8260M 24C 165W 2.4GHz Processor B4NZManagement switchThe management network switch is a 1 GbE RJ-45 switch that connects SMM management ports on the Compute Blocks and management ports on the Storage Blocks. The management switch also provides one management uplink to the first Interconnect. The management switch can be purchased from Lenovo or provided by the customer.The following table lists the management switches that are available from Lenovo.Table 13. Management switchesDescription Machine Type-ModelFeaturecode QuantityRackSwitch G7052 (Rear to Front) for ThinkAgile CP7159-HCS B2ZC1 ThinkSystem NE0152T RackSwitch (Rear to Front) for ThinkAgile CP7Y81CTO4WW BAEU1The following tables list cables that are available for selection for the management switch.Table 14. 1 GbE UTP cables for management links to Compute Blocks and Storage BlocksDescription FeaturecodeMaximum quantityper switchQuantity perCompute BlockQuantity perStorage Block0.75m Blue Cat5e Cable AVFT16121.0m Blue Cat5e Cable AVFU1612 1.25m Blue Cat5e Cable AVFV1612 1.5m Blue Cat5e Cable38021612 3m Blue Cat5e Cable38031612 10m Blue Cat5e Cable38041612 25m Blue Cat5e Cable38051612Table 15. 10 GbE SFP+ cables for management uplink to InterconnectDescription FeaturecodeQuantityper switch10 GbE SFP+ DAC cables1.5m Passive DAC SFP+ Cable A51N1 2m Passive DAC SFP+ Cable A51P1 3m Passive DAC SFP+ Cable A1PJ1 5m Passive DAC SFP+ Cable A1PK1 7m Passive DAC SFP+ Cable A3RH1 10 GbE SFP+ active optical cablesLenovo 3m SFP+ to SFP+ Active Optical Cable ATYY1 Lenovo 5m SFP+ to SFP+ Active Optical Cable ATYZ1 Lenovo 7m SFP+ to SFP+ Active Optical Cable ATZ01 Lenovo 15m SFP+ to SFP+ Active Optical Cable ATZ11 Lenovo 20m SFP+ to SFP+ Active Optical Cable ATZ21Power cablesPower cablesThe following table lists the power cable options that can be selected for the ThinkAgile CP Series components. Two power cables are required per each Compute Block, Storage Block, Interconnect, and NE0152T management switch. One power cable is required for the G7052 management switch.Table 16. Power cablesDescription Feature codeRack power cables1.0m, 10A/125-250V, C13 to IEC 320-C14 Rack Power Cable A4VP1.5m, 10A/100-250V, C13 to IEC 320-C14 Rack Power Cable62012.0m, 13A/125V-10A/250V, C13 to IEC 320-C14 Rack Power Cable6570 2.8m, 10A/100-250V, C13 to IEC 320-C14 Rack Power Cable6311 2.8m, 13A/125V-10A/250V, C13 to IEC 320-C14 Rack Power Cable6400 2.8m, 10A/100-250V, C13 to IEC 320-C20 Rack Power Cable6204 4.3m, 10A/100-250V, C13 to IEC 320-C14 Rack Power Cable6263 4.3m, 13A/125V-10A/250V, C13 to IEC 320-C14 Rack Power Cable6583 Line cordsAustralia/New Zealand 2.8m, 10A/250V, C13 to AS/NZS 3112 Line Cord6211 Australia/New Zealand 4.3m, 10A/250V, C13 to AS/NZS 3112 Line Cord6574 Denmark 2.8m, 10A/250V, C13 to DK2-5a Line Cord6213 Denmark 4.3m, 10A/250V, C13 to DK2-5a Line Cord6575 Europe 2.8m, 10A/250V, C13 to CEE7-VII Line Cord6212 Europe 4.3m, 10A/250V, C13 to CEE7-VII Line Cord6572 India 2.8m, 10A/250V, C13 to IS 6538 Line Cord6269 India 4.3m, 10A/250V, C13 to IS 6538 Line Cord6567 Israel 2.8m, 10A/250V, C13 to SI 32 Line Cord6218 Israel 4.3m, 10A/250V, C13 to SI 32 Line Cord6579 Italy 2.8m, 10A/250V, C13 to CEI 23-16 Line Cord6217 Italy 4.3m, 10A/250V, C13 to CEI 23-16 Line Cord6493 South Africa 2.8m, 10A/250V, C13 to SABS 164 Line Cord6214 South Africa 4.3m, 10A/250V, C13 to SABS 164 Line Cord6576 Switzerland 2.8m, 10A/250V, C13 to SEV 1011-S24507 Line Cord6216 Switzerland 4.3m, 10A/250V, C13 to SEV 1011-S24507 Line Cord6578 United Kingdom 2.8m, 10A/250V, C13 to BS 1363/A Line Cord6215 United Kingdom 4.3m, 10A/250V, C13 to BS 1363/A Line Cord6577 United States 2.8m, 10A/250V, C13 to NEMA 6-15P Line Cord A1RF United States 4.3m, 10A/250V, C13 to NEMA 6-15P Line Cord6373Rack cabinetsThe following table lists the rack cabinets that are offered by Lenovo that can be used with the ThinkAgile CP Series.Table 20. Rack cabinetsDescription Part number25U S2 Standard Rack (1000 mm deep; 2 sidewall compartments)93072RX 25U Static S2 Standard Rack (1000 mm deep; 2 sidewall compartments)93072PX 42U S2 Standard Rack (1000 mm deep; 6 sidewall compartments)93074RX 42U 1100mm Enterprise V2 Dynamic Rack (6 sidewall compartments)93634PX 42U 1100mm Enterprise V2 Dynamic Expansion Rack (6 sidewall compartments)93634EX 42U 1200mm Deep Dynamic Rack (6 sidewall compartments)93604PX 42U 1200mm Deep Static Rack (6 sidewall compartments)93614PX 42U Enterprise Rack (1105 mm deep; 4 sidewall compartments)93084PX 42U Enterprise Expansion Rack (1105 mm deep; 4 sidewall compartments)93084EXFor more information, see the list of Product Guides in the Rack Cabinets category:/servers/options/racks#rt=product-guidePower distribution unitsThe following table lists the power distribution units (PDUs) that are offered by Lenovo that can be used with the ThinkAgile CP Series.Table 21. Power distribution unitsDescription Part number0U Basic PDUs0U 36 C13/6 C19 24A/200-240V 1 Phase PDU with NEMA L6-30P line cord00YJ776 0U 36 C13/6 C19 32A/200-240V 1 Phase PDU with IEC60309 332P6 line cord00YJ777 0U 21 C13/12 C19 32A/200-240V/346-415V 3 Phase PDU with IEC60309 532P6 cord00YJ778 0U 21 C13/12 C19 48A/200-240V 3 Phase PDU with IEC60309 460P9 line cord00YJ779 Switched and Monitored PDUs0U 20 C13/4 C19 Switched and Monitored 24A/200-240V/1Ph PDU w/ NEMA L6-30P cord00YJ781 0U 20 C13/4 C19 Switched and Monitored 32A/200-240V/1Ph PDU w/ IEC60309 332P6 cord00YJ780 0U 18 C13/6 C19 Switched and Monitored 32A/200-240/346-415V/3Ph PDU w/ IEC60309 532P6 cord00YJ782 0U 12 C13/12 C19 Switched and Monitored 48A/200-240V/3Ph PDU w/ IEC60309 460P9 cord00YJ783 1U 9 C19/3 C13 Switched and Monitored DPI PDU (without line cord)46M4002 1U 9 C19/3 C13 Switched and Monitored 60A 3Ph PDU with IEC 309 3P+Gnd cord46M4003 1U 12 C13 Switched and Monitored DPI PDU (without line cord)46M4004 1U 12 C13 Switched and Monitored 60A 3 Phase PDU with IEC 309 3P+Gnd line cord46M4005 Ultra Density Enterprise PDUs (9x IEC 320 C13 + 3x IEC 320 C19 outlets)Ultra Density Enterprise C19/C13 PDU Module (without line cord)71762NXUltra Density Enterprise C19/C13 PDU 60A/208V/3ph with IEC 309 3P+Gnd line cord 71763NU C13 Enterprise PDUs (12x IEC 320 C13 outlets)DPI C13 Enterprise PDU+ (without line cord)39M2816DPI Single Phase C13 Enterprise PDU (without line cord)39Y8941C19 Enterprise PDUs (6x IEC 320 C19 outlets)DPI Single Phase C19 Enterprise PDU (without line cord)39Y8948DPI 60A 3 Phase C19 Enterprise PDU with IEC 309 3P+G (208 V) fixed line cord 39Y8923Front-end PDUs (3x IEC 320 C19 outlets)DPI 30amp/250V Front-end PDU with NEMA L6-30P line cord 39Y8939DPI 32amp/250V Front-end PDU with IEC 309 2P+Gnd line cord 39Y8934DPI 60amp/250V Front-end PDU with IEC 309 2P+Gnd line cord 39Y8940DPI 63amp/250V Front-end PDU with IEC 309 2P+Gnd line cord 39Y8935Universal PDUs (7x IEC 320 C13 outlets)DPI Universal 7 C13 PDU (with 2 m IEC 320-C19 to C20 rack power cord)00YE443Line cords for PDUs that ship without a line cord DPI 30a Line Cord (NEMA L6-30P)40K9614DPI 32a Line Cord (IEC 309 P+N+G)40K9612DPI 32a Line Cord (IEC 309 3P+N+G)40K9611DPI 60a Cord (IEC 309 2P+G)40K9615DPI 63a Cord (IEC 309 P+N+G)40K9613DPI Australian/NZ 3112 Line Cord (32A)40K9617DPI Korean 8305 Line Cord (30A)40K9618DescriptionPart number For more information, see the list of Product Guides in the Power Distribution Units category:/servers/options/pdu#rt=product-guideUninterruptible power supply unitsUninterruptible power supply unitsThe following table lists the uninterruptible power supply (UPS) units that are offered by Lenovo that can be used with the ThinkAgile CP Series.Table 22. Uninterruptible power supply unitsDescription Part numberRT1.5kVA 2U Rack or Tower UPS (200-240VAC) (8x IEC 320 C13 10A outlets)55941KX RT2.2kVA 2U Rack or Tower UPS (200-240VAC) (8x IEC 320 C13 10A, 1x C19 16A outlets)55942KX RT3kVA 2U Rack or Tower UPS (200-240VAC) (8x IEC 320 C13 10A, 1x C19 16A outlets)55943KX RT5kVA 3U Rack or Tower UPS (200-240VAC) (8x IEC 320 C13 10A, 2x C19 16A outlets)55945KX RT6kVA 3U Rack or Tower UPS (200-240VAC) (8x IEC 320 C13 10A, 2x C19 16A outlets)55946KX RT8kVA 6U Rack or Tower UPS (200-240VAC) (4x IEC 320-C19 16A outlets)55948KX RT11kVA 6U Rack or Tower UPS (200-240VAC) (4x IEC 320-C19 16A outlets)55949KX RT8kVA 6U 3:1 Phase Rack or Tower UPS (380-415VAC) (4x IEC 320-C19 16A outlets)55948PX RT11kVA 6U 3:1 Phase Rack or Tower UPS (380-415VAC) (4x IEC 320-C19 16A outlets)55949PXFor more information, see the list of Product Guides in the Uninterruptible Power Supply Units category: /servers/options/ups#rt=product-guideLenovo Financial ServicesLenovo Financial Services reinforces Lenovo’s commitment to deliver pioneering products and services that are recognized for their quality, excellence, and trustworthiness. Lenovo Financial Services offers financing solutions and services that complement your technology solution anywhere in the world.We are dedicated to delivering a positive finance experience for customers like you who want to maximize your purchase power by obtaining the technology you need today, protect against technology obsolescence, and preserve your capital for other uses.We work with businesses, non-profit organizations, governments and educational institutions to finance their entire technology solution. We focus on making it easy to do business with us. Our highly experienced team of finance professionals operates in a work culture that emphasizes the importance of providing outstanding customer service. Our systems, processes and flexible policies support our goal of providing customers with a positive experience.We finance your entire solution. Unlike others, we allow you to bundle everything you need from hardware and software to service contracts, installation costs, training fees, and sales tax. If you decide weeks or months later to add to your solution, we can consolidate everything into a single invoice.Our Premier Client services provide large accounts with special handling services to ensure these complex transactions are serviced properly. As a premier client, you have a dedicated finance specialist who manages your account through its life, from first invoice through asset return or purchase. This specialist develops an in-depth understanding of your invoice and payment requirements. For you, this dedication provides a high-quality, easy, and positive financing experience.For your region-specific offers please ask your Lenovo sales representative or your technology provider about the use of Lenovo Financial Services. For more information, see the following Lenovo website:Related publications and linksTrademarksLenovo and the Lenovo logo are trademarks or registered trademarks of Lenovo in the United States, other countries, or both. A current list of Lenovo trademarks is available on the Web athttps:///us/en/legal/copytrade/.The following terms are trademarks of Lenovo in the United States, other countries, or both:Lenovo®Lenovo ServicesRackSwitchThinkAgile®ThinkSystem®TruDDR4XClarity®The following terms are trademarks of other companies:Intel® and Xeon® are trademarks of Intel Corporation or its subsidiaries.Linux® is the trademark of Linus Torvalds in the U.S. and other countries.Microsoft® is a trademark of Microsoft Corporation in the United States, other countries, or both.Other company, product, or service names may be trademarks or service marks of others.Lenovo ThinkAgile CP Series Cloud Platform (withdrawn product)31。

LVCC联想虚拟云终端系统介绍LVCC联想虚拟云终端系统LVCC——Lenovo Virtual Cloud Client Solution,是由联想自主研发的端到端的虚拟云运算解决方案之一,其对桌面/应用/用户数据进行统一治理、统一储备、统一运算,并向云终端用户交付Windows虚拟桌面/应用等云运算服务应用领域LVCC联想虚拟云终端系统兼容性佳,灵活适用于多种网络应用环境。
专门适合分布式规模化部署应用中小学电子教室/电教中心电子阅览室/数字图书馆企业/政府办公信息查询机/电子商务酒店客房上网企业生产线呼叫中心等联想虚拟云终端系统核心价值高安全、易治理集中治理:远程可通过WEB界面轻易完成服务器治理/终端治理/用户治理/安全权限治理四个模块的统一治理高效部署:2小时可完成200个终端和5台服务器的快速部署。
通过统一的部署中心系统治理软件,治理操作系统补丁/应用安装/安全治理的时刻减少90%使用便利:云终端易爱护、桌面快速登录,最快10秒启动虚拟桌面,带来良好的Windows7体验,用户只需一个口令,在任何一台终端登录,就可享用自己的桌面应用信息安全:对用户的应用、数据和外设进行统一储备与授权治理,保证数据安全。
安全级别达到可信运算机评估标准〝B2〞级高性能视频LVCC具备杰出的多媒体应用体验,专门针对高清视频,最高可支持40路720p高清视频的流畅播放绿色节能系统智能节能治理,包括服务器自动均衡负载,服务器定时开关机,桌面会话超时退出,终端超时自动休眠等机制,关心治理员至少再节约30%的系统功耗仅7w超低功耗云终端设备,零噪音设计,比传统电脑能耗降低80%,不可回收材料减少90%系统折旧率低,正常使用情形下至少能工作5-10年轻松扩容,只需将增加的高性能服务器、云终端加入到原有部署环境即可联想虚拟云终端系统治理中心:联想自主开发的云终端系统治理中心,具有部署和治理两大基础功能,其中包括:基础服务部署、数据库部署、应用部署;服务器集群治理、虚拟桌面及会话治理、用户权限、终端治理等功能;还包括对系统数据的备份和还原,以及对用户数据〔漫游配置文件〕的备份云治理服务器:支持域治理/DHCP/DNS/储备文件服务和云治理中心云服务器集群:提供基于Windows 2020 R2展现虚拟化RDS服务的服务器集群联想云终端:联想自主研发的云运算终端,连接虚拟桌面系统或应用虚拟化系统,应用本地显示器、键盘、鼠标操作远程虚拟桌面专门声明:·联想会尽全力为您提供准确、全面的信息,但不对信息中可能显现的错误或遗漏承担责任。
XXX系统安装部署说明书_模版
XXX公司XXX产品/项目
安装部署说明书
目录
1. 运行环境 3
1.1. 硬件环境 3
1.2. 软件环境 3
1.3. 网络环境 3
1.4. 数据与安装包 3
2. 软件安装与配置 3
3. 数据导入 3
4. 系统部署与配置 3
5. 系统启动 4
1. 运行环境
【描述系统部署的运行环境,包括硬件环境、软件环境、网络环境、所需数据与安装包】
1.1. 硬件环境
【描述系统部署的硬件环境,包括应用服务器配置、数据库服务器配置、负载均衡器配置(如果有的话)、文件服务器配置(如果有的话)】
1.2. 软件环境
【描述系统部署的软件环境,包括操作系统,需要的支持软件及版本】
1.3. 网络环境
【描述系统部署的网络环境(企业内网、外网),并以网络拓扑图展示】
1.4. 数据与安装包
【描述系统提供的数据文件和安装文件】
2. 软件安装与配置
【描述系统运行所需软件的安装与配置过程,例如oracle、webspere、其他软件,如果涉及到集群环境,还需要进行集群配置的描述。
每一软件的安装步骤以一个小节的形式描述,保证描述清晰有序】
3. 数据导入
【描述系统数据的导入过程,需要将数据的导入步骤进行详细的描述,以及导入过程中可能遇到的问题及解决方案。
描述详细且有序】
4. 系统部署与配置
【描述系统的安装部署与配置过程,需要将每一步以截图加描述的形式进行详细的描述,并对一些注意事项单独列出或者以醒目的形式标出】
5. 系统启动
【启动系统】。
联想虚拟云终端系统云终端部署( 方案书)目录1、前言 (3)2、联想虚拟云终端系统核心价值: (3)3、方案介绍 (4)目标客户: (4)联想虚拟云终端系统结构: (5)4、联想虚拟云终端系统技术特点: (6)高安全、易管理: (6)自动快速部署 (6)集中管理工具 (8)桌面便捷管理 (9)安全管理策略 (10)桌面快速登录 (10)终端易维护 (11)Windows 7用户体验 (11)绿色节能: (12)高性能视频体验: (13)5、设备配置清单及报价明细: (14)1、前言精简管理, 绿色IT——联想虚拟云终端系统随着信息化普及, 电脑终端数量快速增加, 我们不得不面对大量的电脑软硬件维护工作, 用户本地使用限制和灵活的平衡, 网络信息安全管理, 能耗管理等等繁杂的工作, 这导致各行各业终端电脑的管理成本高居不下, 如何才能有效破解困扰?联想虚拟云终端系统采用最新的桌面虚拟化技术和管理平台, 将桌面操作系统/应用/数据等由终端个人电脑迁移到数据中心, 并经过网络为用户交付虚拟Windows7的桌面和应用的终端电脑服务, 大幅降低计算机系统的管理难度,并提高计算机应用的业务安全性,从而实现了全新的计算机终端管理方法和更低的计算机使用成本。
2、联想虚拟云终端系统核心价值:高安全、易管理: 终端系统高效集中管理, 同时保障学校数据安全; 绿色节能: 比传统电脑能耗降低90%, 零噪音设计, 不可回收材料减少90%;高性能视频: 最大支持20路720p高清视频点播和40路高清广播;随着企业信息化的普及, 电脑终端数量快速增加, 我们不得不面对大量的电脑软硬件维护, 用户使用管理, 信息安全管理, 能耗管理等等繁杂的工作, 这导致企业终端电脑的管理成本高居不下, 如何才能有效破解困扰?联想虚拟云终端系统采用最新的桌面虚拟化技术和管理平台, 为企业的基础IT系统设计了基于云计算架构的终端系统平台, 将桌面操作系统/应用/数据向数据中心迁移, 并经过网络为用户交付虚拟桌面/应用的云服务, 从而实现了高效安全的终端管理方法, 同时有效地降低IT系统的TCO和能耗。
System x Lab Services Flex & x86 OfferingsCloudDirectorHPCKey Flex and System x value playsFocus the key directionsCloudCommunity OpenStackFlex/PureFlexKVM HANA GPFS HPCPublic and Private trainingVirtual’xDBHANABOFM Migration咨询内容⏹对客户搭建OpenStack 整体运行架构进行分析和评估⏹为客户提供OpenStack 部署架构咨询⏹评估在客户环境中部署OpenStack 云环境的可行性,并且对成本和收益进行分析⏹为客户提供硬件配置,管理建议⏹评估客户需要使用的应用环境的场景(Web 2.0, Dev, Test )⏹为客户提供OpenStack 配置的最佳实践建议⏹为客户提供OpenStack 运维管理设计⏹提供OpenStack 环境HA, 切换,迁移,升级咨询▪帮助客户快速部署和配置企业级别的OpenStack 云环境对客户的帮助⏹快速部署OpenStack 环境⏹节省客户OpenStack 的部署,配置,管理成本⏹OpenStack 环境的安装配置自动化⏹降低部署OpenStack 的技术门槛⏹企业级别的OpenStack 部署,配置,运维设计服务流程⏹方案介绍研讨会(1天) - 方案介绍 - 现场演示⏹部署设计研讨会(1天) - 客户需求讨论- OpenStack 工作量评估 - OpenStack 部署架构设计⏹现场部署服务 (2天)- 帮助客户在Openstack 上部署应用环境 - 测试⏹技术培训(1天)- OpenStack 操作培训 - Asset Operation training- Asset error recovery and disaster recovery training目标客户⏹对OpenStack 云环境感兴趣,希望快速部署OpenStack 环境并得到架构设计,专业建议,最佳实践分享。
云终端系统部署手册v1.9.8特别说明:云终端系统的脚本化部署以及实际使用存在一定的局限性。
为了保证部署的顺利进行和后期的正常使用,请严格按照本手册进行部署。
部署前务必按照手册第一部分对用户环境进行检查。
手册中标明“注意”的部分,请特别关注。
目录目录 (1)1. 检查用户环境 (3)1.1 环境检查 (3)1.2 部署规划 (3)2. 部署前的准备 (6)2.1 更改密码 (6)2.2 识别网卡 (6)2.3 更改主机名 (9)2.4 文件存储地址 (10)2.5 软件 (11)3. 部署云终端系统 (14)3.1 域控制器部署 (14)3.2 域控制器宿主机部署 (18)3.3 文件服务器部署 (20)3.4 远程桌面服务器部署 (24)3.5 场内其他远程桌面服务器的部署 (27)3.5.1 部署前的准备 (27)3.5.2 远程桌面服务器角色安装 (29)4. 更改云终端系统的IP设置 (34)4.1 修改前要确认的信息 (34)4.2 更改虚拟机及远程桌面服务器的网络设置 (34)4.3 更改场的IP地址 (38)4.4 更改DHCP的作用域 (39)4.5 设置DNS转发 (50)4.6 将DHCP服务器的IP地址加入数据库 (52)5. 配置远程桌面授权 (54)5.1 激活授权服务器 (54)5.2 安装许可 (60)5.3 配置远程桌面会话主机 (64)6. 常见问题及解决方法 (68)6.1 终端列表中无法看到终端 (68)6.2 软件的安装 (69)6.3 用户文件的存放 (69)6.4 文件服务器的管理 (70)6.5 关于无法管理的配置文件 (71)1.检查用户环境联想云终端系统的部署利用Windows Server 2008 R2操作系统的自动化工具和脚本工具,实现部署自动化,可以加快部署效率,但也造成一定局限性,特别是对初始部署环境有一定的要求。
因此在部署前,一定要检查用户的实际环境是否符合要求并进行部署规划。
1.1环境检查网络环境:云终端系统部署时使用的网段是192.168.0.0/20(255.255.240.0)(该网段在自动部署过程中不可更改,如需修改请在部署完成后进行),并且在部署过程中要使用到192.168.0.1~192.168.0.20范围内的IP。
因此,部署前如果已将服务器接入网络,请确认该网段可用。
注意:部署时,建议服务器不接网线,待部署完成且IP地址等修改完成后再将服务器接入客户网络。
另外云终端系统要启用Windows的DHCP和DNS 服务,为了避免同客户原有的网络环境冲突,请同用户提前确认云终端系统的最终使用环境,特别是需要使用该系统访问Internet的情况。
域环境:云终端系统的管理基于Windows域服务,并且暂时无法使用客户已有的域环境,部署过程中会建立一个新的域林。
1.2部署规划请提前同客户确认部署过程中需要的以下参数:注意:域名、计算机名、场名不能重复,最多包含15个字符,可以使用的字符包括:字母“a-Z”、数字“0-9”、减号“-”,请不要使用其它非法字符。
①域名:根据需要确认。
注意:如果客户的环境中已有域环境,云终端系统的域不能作为原有域的子域使用。
部署过程中会自动建立全新的域林,因此必须使用全新的域名,具体的命令规则见前面的描述。
②域管理员密码:根据需要确认。
建议先将虚拟机的密码改成客户要使用的管理密码,这也是域管理员密码,拥有对该套系统最高的管理权限,且部署过程中要多次用到。
注意:密码中不能包含“*”、“&”等特殊字符。
③计算机名:为了便于后期的管理,建议对计算机名进行修改。
注意:预装OEM操作系统的云终端服务器出厂前使用的是镜像安装方式,且没有进行sysprep操作,会出现计算机名重复,如果不进行更改,部署过程会造成难以预估的后果。
注意:计算机名必须是唯一的。
具体的命名规则见前面描述。
更改服务器名建议使用容易记忆且与其各自的功能相关联的名称。
例如可以使用如下名称:域1名-RDSH1、域2名-RDSH1即可将服务器区分开,虚拟机的名字可以使用域名-DC。
这样可以根据计算机名区别不同服务器的功能。
仅在此举例,请根据客户的具体环境进行更改。
④场名:根据需要使用。
注意:具体的命名规则见前面描述。
⑤部署软件:云终端系统部署光盘随服务器出厂。
注意:必须将部署软件拷贝至物理服务器和虚拟机的C盘根目录下,随后的部署在本地执行。
⑥操作系统序列号:虚拟机的操作系统需要激活,2008 R2的OEM序列号已经随服务器出厂,请客户妥善保管。
⑦RDS CAL:云终端系统基于Windows Server 2008 R2的RDS服务,需要客户购买2008 R2版本的客户端访问许可(CAL),并进行激活,否则整套系统只有120天的试用期。
⑧SQL Server 2008 Express:该软件为必需软件,但不随服务器提供,请到以下地址/downloads/details.aspx?displayl ang=en&FamilyID=01af61e6-2f63-4291-bcad-fd500f6027ff下载,选择的版本为SQLEXPR_x64_ENU。
建议提前下载并刻录成光盘以方便后面的部署操作。
注意:云终端系统必须使用该版本的数据库软件,并新建自己的数据库。
不能使用客户原有的数据库。
2.部署前的准备2.1更改密码物理服务器和虚拟机出厂的默认密码是Aa1(只针对出厂预装过系统的云终端服务器),第一次开机建议根据客户需要进行修改。
注意:如果部署前系统提示密码过期,如图2-1,一定要先更改密码再进行部署,否则后续部署脚本会执行失败。
图2-12.2识别网卡服务器添加成功Hyper-V角色后,网卡状态如下图2-2。
图2-2上图中,本地连接4是本地连接2被虚拟化后出现的虚拟网卡,打开本地连接2的属性如下图2-3,可以看到已经不能再对其进行配置,以后所有要对本地连接2上进行的修改都要在本地连接4上进行。
注意:为了保证系统的正常部署以及后期的维护,请确认好物理网卡与系统内识别的网卡的对应顺序,确保是本地连接4所对应的物理网口接入云终端系统所在的网络。
图2-3打开Hyper-V管理器,如图2-4。
图2-4在弹出的管理页面,点击最右边操作里的“虚拟网络管理器”,如图2-5。
图2-5弹出“虚拟网络管理器”页面,确认虚拟网络的设置都正常,如图2-6。
图2-62.3更改主机名确认前面的信息后,接下来,要根据前面已经规划的计算机名对服务器、虚拟机进行更改,具体操作如下。
打开“开始”菜单,在计算机上右键单击属性,如下图2-7。
图2-7在弹出的“系统属性”页面单击“更改”,弹出“计算机名/域更改”页面,在“计算机名”处填写规划好的计算机名,如下图2-8所示,单击两次“确定”。
该操作需要重启服务器。
图2-8在虚拟机中进行同样的操作,按照前面的规划对计算机名进行修改。
2.4文件存储地址为了保证用户界面的一致性以及便于管理,云终端系统采用漫游配置文件和文件夹重定向技术,需要使用单独的文件服务器角色。
自动化部署默认安装在虚拟机宿主机上,因此部署前需要在虚拟机宿主机上规划一个磁盘分区,分配盘符并格式化,后续的部署需要用到。
注意:如果是重新部署云终端系统,必须将文件存储盘原来的文件删除。
2.5软件将部署光盘中的内容分别拷贝至虚拟机和物理服务器C盘根目录下。
注意:必须在根目录下执行。
部署光盘是不可引导光盘,虚拟机默认是从光驱启动,请将虚拟机开机后,再放入部署光盘。
拷贝完成后,请将光盘取出。
如果虚拟机光驱没有加载成功,可以采取以下操作。
在虚拟机页面工具栏选择“媒体”→“DVD驱动器”→“取消捕获”,如下图2-9。
图2-9再次选择“媒体”→“DVD驱动器”→“捕获”,如图2-10所示。
图2-10将前面下载的SQL Server安装软件拷贝至虚拟机中,可以使用光盘或者通过网络共享实现。
3.部署云终端系统注意:部署过程的每一步安装,不管是否成功,结束后都会在C盘根目录的“installationlog”文件夹下生成日志文件和脚本日志,并且会自动打开IE 浏览器显示安装结果。
如果没有自动打开,且目录下没有对应的日志文件,该步操作已经失败,请根据提示查找错误原因,再进行后面的部署。
3.1域控制器部署注意:第一步的部署是在虚拟机内进行,脚本会自动将网卡的IP地址设置为192.168.0.1,请确认该地址没有被使用。
以administrator账号(为了保证部署的顺利进行,请不要使用其他用户)登录到虚拟机,打开部署工具所在的文件夹,双击“LADeployment.exe”,出现部署页面,如图3-1。
图3-1单击“域控制器部署”,出现界面如图3-2。
图3-2“域名”处填写前面确认的域名,“管理员密码”即为前面修改的虚拟机密码,云终端服务器出厂默认密码是Aa1。
“服务器场名”为前面确认的场名。
“数据库文件路径”请选中前面拷贝到虚拟机中的SQL Server安装软件,正确填写各项,如下图3-3。
图3-3点击“部署”,弹出确认页面,如图3-4。
图3-4检查输入无误后,点击“确定”。
随后系统开始自动部署,如下图3-5,此过程为全自动部署,虚拟机要多次重启,不需要人工干预。
请等待安装完成。
图3-5安装完成后,会在“C:\Installationlog\”目录下生成该阶段的部署报告和脚本日志,并会自动打开报告页面,如图3-6。
请确认各组件部署结果都为成功,且脚本日志中无报错。
图3-63.2域控制器宿主机部署注意:进行该步操作前,请确认域控制器部署已经完成,且虚拟机处于运行状态。
脚本会自动将本地连接4的IP设置为192.168.0.2,请确认该地址没有被占用。
登录到物理机,打开部署软件,选择“域控制器宿主机部署”,如图3-7。
图3-7弹出的页面如图3-8。
图3-8点击“部署”,开始自动部署过程,如图3-9。
图3-9部署完成后,会在物理机的“C:\Installationlog”目录生成该步的部署报告,并自动打开报告页面,如图3-10,请确认各组件部署结果都为成功。
图3-103.3文件服务器部署以administrator账号登录物理服务器,打开部署软件,选择“文件服务器部署”,填出部署界面,如图3-11。
图3-11“域名”即为在第一步中建立的域的名称,“管理员密码”为虚拟机密码,“服务器场名”为第一步建立的场的名称,“IP地址”请输入192.168.0.2(注意:此处必须填写该IP地址,不可以更改),“文件存储盘符”请填写前面已经划分好的用做文件存储的磁盘盘符,填写完成后,如图3-12所示。
图3-12点击“部署”,出现确认页面,如图3-13。
图3-13确认输入无误后,点击“确认”,开始自动部署,如图3-14,此过程服务器会多次重启。