三星洗衣机WF-C860-C863-C963说明书
- 格式:pdf
- 大小:6.94 MB
- 文档页数:18
DISCLAIMERSAMSUNG ELECTRONICS RESERVES THE RIGHT TO CHANGE PRODUCTS, INFORMATION AND SPECIFICATIONS WITHOUT NOTICE.Products and specifications discussed herein are for reference purposes only. All information discussed herein may change without notice and is provi ded on an “AS IS” basis, without warranties of any kind. This document and all information discussed herein remain the sole and exclusive property of Samsung Electronics. No license of any patent, copyright, mask work, trademark or any other intellectual property right is granted by one party to the other party under this document, by implication, estoppels or otherwise. Samsung products are not intended for use in life support, critical care, medical, safety equipment, or similar applications where product failure could result in loss of life or personal or physical harm, or any military or defense application, or any governmental procurement to which special terms or provisions may apply. For updates or additional information about Samsung products, contact your nearest Samsung office.COPYRIGHT © 2018This material is copyrighted by Samsung Electronics. Any unauthorized reproductions, use or disclosure of this material, or any part thereof, is strictly prohibited and is a violation under copyright law. TRADEMARKS & SERVICE MARKSThe Samsung Logo is the trademark of Samsung Electronics. Adobe is a trademark and Adobe Acrobat is a registered trademark of Adobe Systems Incorporated. All other company and product names may be trademarks of the respective companies with which they are associated.For more information, please visit /ssd and .To download the latest software & manuals, please visit /samsungssdRevision HistoryTHE SAMSUNG SSD 860 PROThe Samsung SSD 860 PRO is the new Samsung’s Client-PC SATA SSDs, specially designed for high-end computing devices. Building on the reputation of the Samsung SSD 850 PRO, the world’s first V-NAND SSD for Client PCs, the new Samsung SSD 860 PRO drives achieve top class performance for SATA SSDs, offering improvements in speed, reliability, and compatibility. The 860 PRO comes equipped with Samsung’s newly designed MJX controller along with the latest 2bit MLC V-NAND architecture.Professional PerformanceThe legacy Serial-ATA (SATA) interface faces the theoretical bandwidth limitation of 600MB/s which many SSD manufacturers have tried to reach over the years. Among them, Samsung, which first brought V-NAND technology to the market through the 850 PRO, continuously strives to improve product reliability and performance, even with the SATA interface limitations. Powered by Samsung’s latest 64-layer 2bit MLC V-NAND technology, the 860 PRO, the successor of the 850 PRO, delivers best-in-class sequential read (up to 560 MB/s) and write (up to 530 MB/s) speeds and along with high sustainable performance for the professionals who always pursue best achievement Ultimate ReliabilityThe 860 PRO offers guaranteed endurance and ultimate reliability, with up to approximately 8 times higher Total Bytes Written (TBW) than the 850 PRO and an industry-leading 5-year limited warranty. Up to 4,800 TBW powered by the latest V-NAND technology, which is the highest TBW rating industry-wide, will give you absolute confidence in your SSD*.*All documented endurance test results are obtained in compliance with JESD218 standards. Please visit for detailed information on the standard. Furthermore, the 860 PRO assures long-term dependable performance with minimal performance degradation. The 860 PRO provides up to 25% better sustained performance compare to that of its predecessor. This means you can experience the high performance of the SSD even with heavy daily workload.Smart Compatibility with a Refined ControllerThe 860 PRO delivers expanded system compatibility. The refined ECC algorithm and revamped controller generate strong sustainable performance near SATA’s limits, and the improved queued trim provides for better Linux compatibility. The 860 PRO is uniquely designed for not only Client-PCs but also NASs (Network Attached Storages) and workstations thanks to its Samsung 2bit MLC V-NAND composition.Advanced Data EncryptionThe 860 PRO provides multiple advanced data encryption features. Self-Encrypting Drive (SED) security technology will help keep data safe at all times. The 860 PRO includes an AES 256-bit hardware-based encryption engine to ensure that your personal files remain secure. Being hardware-based, the encryption engine secures your data without the performance degradation that you may experience with software-based encryption. Also, the 860 PRO is compliant with various advanced security management solutions (TCG Opal and Encrypted Drive-IEEE1667). Samsung Data Migration and Magician SoftwareThe 860 PRO comes with Samsung Data Migration and Magician software, which is easy to install and makes management of you SSD simple.* Samsung Data Migration software is easy to use, yet provides a very powerful “Custom Cloning”feature that makes migration effortless even when the source data is greater than the SSD’s capacity. Magician provides personalized firmware checks and additional functions tailored for individual users’drives. It even updates the firmware automatically to make sure that the drives’ performance stays up to date.*To download Samsung Data Migration and Magician, please visit /samsungssdTECHINCAL SPECIFICATIONSmay differ from the labeled total capacity.2)Sequential performance measurements are based on CrystalDiskMark v. 5.0.2. Random performance measurements are based on IOmeter1.1.0.Performance may vary based on SSD’s firmware version, system hardware & configuration. Test system configuration: Intel®****************** GHz, DDR3 1333MHz 4GB, OS-Windows 7 Ultimate 64bit, Chipset-ASUS P8H77-V3)Power consumption is measured with IOmeter1.1.0 version with Intel Core i7-7700K @ 4.2GHz, SAMSUNG DDR4 16GB, Gigabyte GA-Z270X, OS –Windows 10 PRO K x644)All documented endurance test results are obtained in compliance with JESD218 Standards. Please visit for detailed information onJESD218 Standards5)TBW means Total Bytes Written.6)Please refer to the detailed warranty statement here at /samsungssd.7)Warranty provides coverage for the stated time period or the TBW, whichever comes first.PRODUCT LINEUPto the warranty provided for this product, please visit /ssd and .。

现在家里的双缸洗衣机,都被淘汰了,都用上了滚筒洗衣机,那么三星滚筒洗衣机和普通的洗衣机用的时候有什么差别呢?大家都会用普通的双缸洗衣机,可是对于三星滚筒洗衣机就不知道怎么使用了,下面就和大家详细的讲解一下三星滚筒洗衣机如何操作及故障维修。
三星滚筒洗衣机如何操作一、滚筒洗衣机如何操作—滚筒洗衣机操作方法1滚筒洗衣机每次都洗涤容量不要太多或者太少,最好在80%-90%左右的衣服最能达到有效的清洁作用。
滚筒洗衣机很多都是金属外壳,因此最好不要将洗衣机放在潮湿的地方。
每次洗衣后应该将门打开一会,等里面自然风干。
2.滚筒洗衣机门洞那里有阻水橡胶圈,每次使用后,应该用毛巾将其擦干净,否则留下发粘的东西,容易发霉;这也是滚筒洗衣机清洁的重点位置。
3.滚筒洗衣机右下角右过滤网,宜定期清洗,防止堵塞;同时,滚筒洗衣机的缸里,容易产生黏液状的污垢,为防止二次污染,建议定期用洗衣机专用的清洁液清洗一次机器;二、滚筒洗衣机如何操作—滚筒洗衣机故障维修1.排水管放置过低,滚筒洗衣机进水不停。
首先应检查排水管是否已挂起来。
滚筒洗衣机的排水是靠排水泵来实现的,属上排水方式。
如果排水管放置在地面上或放置过低,洗衣机进水时,流入内筒的水便会顺排水管自动流出机外,机内不存水,水位达不到规定高度,水位开关不动作,洗衣机将一直进水。
只要将排水管按照说明书的要求挂起来,便会正常工作。
2.水位开关与盛水桶之间的连通器接口处脱落。
由于长途运输的振动或洗衣机使用过程中振动等原因,造成水位开关与盛水筒之间的透明塑料管在水位开关口处脱落,使盛水筒内的压力不能通过连通器控制水位开关动作,断开进水电路,故洗衣机进水不止滚筒洗衣机现在已经走进了千家万户,滚筒洗衣机不仅能让我们一边看电视,一边洗衣服,而且洗出来的衣服和手洗的还是一样干净,可平时大家洗衣服的时候有没有注意到,滚通洗衣机的使用也是很有讲究的,如果你能够使用得当,那么您的滚筒洗衣机的寿命就会延长。
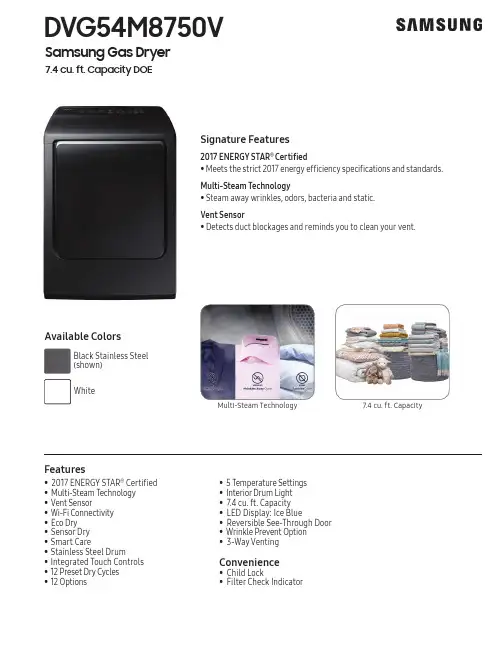
DVG54M8750VSamsung Gas Dryer7.4 cu. ft. Capacity DOESignature Features2017 ENERGY STAR ® Certifi ed • M eets the strict 2017 energy efficiency specifications and standards. Multi-Steam Technology • S team away wrinkles, odors, bacteria and static.Vent Sensor • D etects duct blockages and reminds you to clean your vent.Multi-Steam Technology7.4 cu. ft. Capacity• 2017 ENERGY STAR ® Certifi ed • M ulti-Steam Technology • V ent Sensor • W i-Fi Connectivity • E co Dry • S ensor Dry • Smart Care• Stainless Steel Drum• Integrated Touch Controls • 12 Preset Dry Cycles • 12 Options• 5 Temperature Settings• I nterior Drum Light • 7.4 cu. ft. Capacity • LED Display: Ice Blue• Reversible See-Through Door • Wrinkle Prevent Option • 3-Way VentingConvenience• Child Lock• Filter Check IndicatorAvailable ColorsBlackActual color may vary. Design, specifications, and color availability are subject to change without notice. Non-metric weights and measurements are approximate.©2018 Samsung Electronics America, Inc. 85 Challenger Road, Ridgefield Park, NJ 07660. Tel: 800-SAMSUNG. . Samsung is a registered trademark of Samsung Electronics Co., Ltd.3-Way Venting12 Preset Dry Cycles:Steam Refresh, Steam Sanitize, Steam Wrinkle Away, Normal, Heavy Duty, Permanent Press, Bedding, Delicates, Active Wear, Time Dry, Air Fluff, Quick Dry 12 Options:Mixed Load Bell, Wrinkle Prevent, Adjust Time (Up), Adjust Time (Down), My Cycle, Child Lock,Sound On/Off, Anti-Static, Eco Dry, Smart Care, Drum Light, Smart Control5 Temperature Settings:High, Medium, Medium Low, Low, Extra Low 5 Dry Levels:Very Dry, More Dry, Normal Dry, Less Dry, Damp Dry2 Sound Level Settings: On/OffWarrantyOne (1) Year Parts and LaborProduct Dimensions & Weight (WxHxD)Dimensions: 27" x 427/16" x 301/4"Weight: 121.3 lbsShipping Dimensions & Weight (WxHxD)Dimensions: 299/16" x 455/8" x 313/16"Weight: 130.1 lbsGas Model # UPC Code Black Stainless Steel DVG54M8750V 887276197043White DVG54M8750W 887276197050 ElectricBlack Stainless Steel DVE54M8750V 887276197005White DVE54M8750W 887276196893Matching WasherBlack Stainless Steel WA54M8750AV 887276196466 White WA54M8750AW 887276196473DVG54M8750VSamsung Gas Dryer7.4 cu. ft. Capacity DOERecessed AreaSide View Confined22Sides – 1" Top – 21"Rear – 6"Closet Front – 2"Minimum clearances for closets and alcoves:If the washer and dryer are installed together , the closet front must have at least a 72-inch 2 unobstructed air opening. Your washer alone does not require a specific air opening.*Required spacing (External exhaust elbow may require additional space.)DimensionsAlcove or closet installationInstallation Specifications**Adjustable height depending on leveling feet.。

滚筒洗衣干衣机使用说明书微信服务二维码目录快速入门使用说明服务指南控制面板介绍 ...........................................洗涤剂盒介绍............................................程序/功能介绍 ..........................................智能配网介绍 ...........................................清洁保养..................................................故障现象及处理方法...................................规格及技术参数.........................................售后服务..................................................包修卡.....................................................快速入门..................................................安全警示安全警示 .................................................235 5 10 1011 13 14 15 15执行标准:GB/T4288 GB4706.1 GB4706.24 GB4343.1 GB17625.1 GB19606 GB12021.4 GB4706.20快速入门安全警示使用说明服务指南快速入门注意:.在您使用本机器前,请确保机器已经按照安装说明正确安装好。
2.首次使用,建议您在没有衣物的情况下完成一次“筒自洁”或其他高温程序 洗涤。
1二.开始洗衣三.洗衣结束注意:如果选择默认参数无需操作"设置参数/功能"步骤, 4.关闭机门 插头打开电源设置参数/功能启动当洗衣结束后洗衣机会有声音提示; 显示屏显示"End"字样。
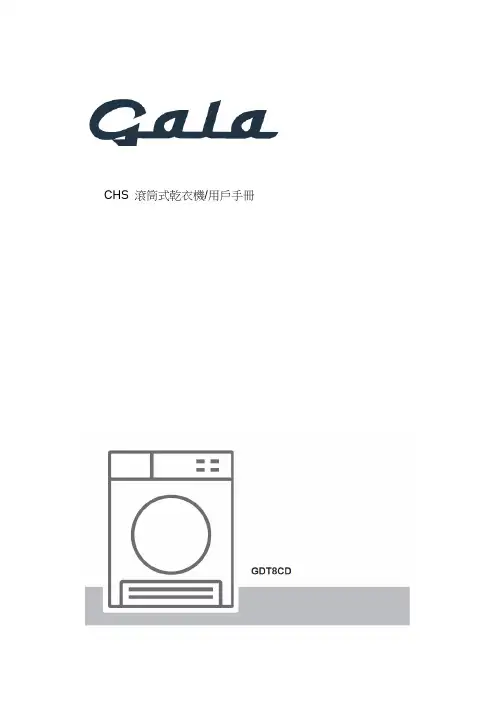
CHS 滾筒式乾衣機/用戶手冊感謝您選擇本產品。
此使用者手冊包含重要的安全資訊以及有關電器的操作和維修說明。
在使用本電器之前, 請花些時間閱讀本用戶手冊並保存以供將來參考。
圖示圖片說明 說明警告嚴重人身傷害或者死亡風險電擊風險危險電壓火災火災風險小心導致人身傷害或材料損壞的危險重要注意事項系統正確操作資訊請仔細閱讀本說明書。
灼熱表面目錄1. 安全說明 (2)1.1. 電器安全 (2)1.2. 兒童安全 (3)1.3. 產品安全 (4)1.4. 正確使用 (5)1.5. 在洗衣機上安裝 (7)2. 安裝 (9)2.1. 拆下安全性群組件 (9)2.2. 出水口連接(附帶選配排水軟管) (9)2.2.1. 連接排水軟管 (9)2.3. 調節支腳 (10)2.4. 電氣連接 (10)2.5. 檯面下安裝 (10)3. 簡述 (10)4. 準備好要洗的衣服 (11)4.1. 分類整理待烘乾的衣服 (11)4.2. 準備好要烘乾的衣服 (12)4.3. 負荷量 (12)5. 使用滾筒式乾衣機 (13)5.1. 控制台 (13)5.1.1. 程式選擇旋鈕 (13)5.1.2. 電子指示器和附加功能 (13)5.2. 程式選擇和能源消耗表 (14)5.2.1. 協助工具 (15)5.2.2. 啟動程式 (16)5.2.3. 程式進度 (17)6. 清潔和護理 (19)6.1. 清潔隔層網 (19)6.2. 排水箱 (19)6.3. 清潔冷凝器 (20)6.4. 清潔濕度感測器 (20)6.5. 清洗玻璃門的內表面 (21)7. 技術參數 (22)8. 故障排除 (23)9. 環保包裝資訊 (25)9.1. 包裝資訊 (25)10. 描述能源標籤與節能 (25)10.1. 能源標籤 (25)10.2. 能源效率 (26)主要注意事項♦如果有人負責提供有關安全使用本設備的監督或指導並瞭解相關危險,本設備可以供8 歲以上的兒童以及體力、感知力或腦力下降或經驗和知識缺乏的人士使用。

1.簡介主要優勢6功能(依機型)8好用資訊10關於此使用者指南11安全資訊12機器總覽17控制面板概覽20開啟機器21瞭解 LED 22顯示螢幕與有用的按鈕25瞭解快顯鍵盤29安裝驅動程式31重新安裝驅動程式34網路環境37存取網路設定38透過網路安裝驅動程式45無線網路設定(選用)51準備原稿64裝入原稿65選擇列印媒體68將紙張裝入紙匣中69在特殊紙材上列印73設定紙張大小與類型78輸出位置79印表機驅動程式功能81基本列印82開啟列印喜好設定84特殊列印功能91使用直接列印公用程式98變更預設列印設定100將您的機器設定為預設機器101列印到檔案(PRN)102 Mac 列印103 Linux 列印105 Unix 列印107瞭解影印畫面110基本影印112快速影印114 ID 卡片影印115使用特殊影印功能117使用程式設定122瞭解掃描方法125掃描並透過電子郵件傳送126透過 SMB/FTP 掃描與傳送129掃描並傳送到您的電腦133掃描並傳送到 USB/共用資料夾134變更掃描功能設定136使用程式設定139使用啟用 TWAIN 的軟體掃描140利用 Samsung Easy Document Creator 掃描141 MAC 掃描142 Linux 掃描143準備傳真145透過電腦發送傳真146瞭解傳真畫面148發送傳真150接收傳真155調整文件設定157列印傳真報告159使用程式設定160從控制面板設定通訊錄163從 SyncThru™ Web Service 設定通訊錄16710.透過行動裝置使用機器支援的行動應用程式 185Mopria™ 187AirPrint189Samsung Cloud Print 191Google Cloud Print™194關於 SmarThru Workflow197瞭解 SmarThru Workflow 畫面 198工作表單建立畫面 199瞭解共用資料夾畫面 200使用共用資料夾 201瞭解儲存的文件畫面203在 Stored Document 中儲存文件 204瞭解 USB 畫面 205關於 USB 記憶體裝置 206從 USB 記憶體裝置列印207掃描至 USB 記憶體裝置209功能表總覽 212機器設定217存取管理工具237SyncThru™ Web Service 238Easy Capture Manager 244Samsung AnyWeb Print 245Easy Eco Driver246使用 Samsung Easy Document Creator 247使用 Samsung Printer Center 248使用 Samsung Easy Printer Manager 251使用 Samsung 印表機狀態 253使用 Samsung Printer Experience255訂購耗材與配件262可用的耗材263可用的配件264可用的維護零件265儲存碳粉匣266搖勻碳粉267更換碳粉匣269更換廢碳粉盒272安裝配件274監視耗材壽命279清潔印表機280移動和儲存機器的秘訣285避免卡紙的秘訣287清除卡紙288瞭解螢幕訊息302送紙問題307電源與纜線連接問題308列印問題309列印品質問題312影印問題319掃描問題320傳真問題321作業系統問題323規格328法規資訊339著作權3501.簡介這些是機器的主要元件:•主要優勢6•功能(依機型)8•好用資訊10•關於此使用者指南11•安全資訊12•機器總覽17•控制面板概覽20•開啟機器21•瞭解 LED22•顯示螢幕與有用的按鈕25•瞭解快顯鍵盤29友善的環境介面•此機器支援「環保」功能以節省碳粉和紙張(請參閱第 88 頁上的「環保標籤」)。

CLEANING STAINLESS STEELThis brochure provides information and practical tips on how to clean stainless steel surfaces, considering the three main types of soiling. The appropriate cleaning method and materials are specified for each type. Clean utensils immediately after use to preserve the original shine of the steel surface.HOW TO PREVENT CAUSING DAMAGE TOSTAINLESS STEEL SURFACESAlways clean the surface with – never against – the grain of the finishwhen using creams and detergents. In the case of polished stainlesssteel, never exert excessive pressure when cleaning.Never use products containing the following:1Hydrochloric acid or its derivatives;2Sulphuric acid or its derivatives;3Hydrofluoric acid or its derivatives.These substances (contained for example in anti-scale products orbleach) have a corrosive effect.Never use sharp or pointed metallic objects (e.g. knives, scissors,screwdrivers) to remove grime or dirt from the surface.Avoid using abrasive pastes, creams or pads on printed information onthe steel surface.REGULAR GRIMEExample:- Stains, fingerprints, dullness caused by daily use of the utensil.WHAT TO USE- For light stains: regular detergents used to clean windows, mirrors and polished surfaces in general.- For stubborn stains: special steel cleaning products.METHOD1Spray the product directly on the stain, or apply it with a clean cotton rag or kitchen paper.2Remove the product with dry kitchen paper, then wipe with a damp chamois.OXIDISED GRIMEExample:- Yellowing of the steel surface:on kitchen steel burners;bottom of oven.Oxidation is a phenomenon common to all metals (such as aluminium, iron, gold and silver) and is perfectly normal.At fairly high working temperatures, the surface of the stainless steel used for the manufacture of cooking appliances also oxidises, causing the phenomenon known as "blueing". This normally occurs on specific components such as pan stands, burner caps and all surfaces in direct contact with the heat.This blueing is only superficial and does not affect the characteristics of the material at lower levels; it can virtually be removed with the products available for this purpose, to restore all the original cleanliness and shine.WHAT TO USE- For yellowing of the steel surface: non-abrasive liquids or pastes for steel or metals.- For cooking residues: regular detergents for light stains, or specific steel and metal cleaning products for stubborn residues.Only use abrasive pads to clean griddle and caps.METHOD1Apply the cleaning product with a cloth or towel paper.2After a few seconds, rub the surface vigorously with towel paper until clean.3Remove all product residues with a clean cloth or towel paper.4Wipe over with a damp chamois to give shine to the surface.BAKED-ON GRIMEExample- Residues that have been baked on to the surface.WHAT TO USE- Specific detergents for cleaning steel and other metals able to soften and remove baked-on grime.(Read the product label carefully to check that the product is appropriate for the intended purpose).METHOD1Spray the product onto the steel surface (always follow the instructions on the product label);2Leave the product on the surface for the recommended time;3then wipe off with a damp sponge;4Wipe the surface over with a damp chamois to remove all product odour and residues and to give extra shine.Turn on the oven to the maximum temperature and leave on for 15-20 minutes to ensure that cleaning product residues have been eliminated before reuse.。
MARQUE: SAMSUNG REFERENCE: SR-37NMACODIC: 0327158Sommairex C ONSIGNES DE SÉCURITÉ (2)x F AMILIARISEZ -VOUS AVEC VOTRE NOUVEAU RÉFRIGÉRATEUR /CONGÉLATEURs Principales fonctionnalités.............................................................................4sSpécificités des différents modèles (4)x I NSTALLEZ VOTRE NOUVEAU RÉFRIGÉRATEUR /CONGÉLATEURs Choisissez l’emplacement de votre appareil.................................................5s Mettez votre réfrigérateur/congélateur à la masse........................................5s Préparez votre réfrigérateur/congélateur.......................................................6s Réglez la hauteur des pieds..........................................................................6sPlacez les accessoires à votre convenance..................................................7x U TILISEZVOTRE RÉFRIGÉRATEURsRéglez la température de votre réfrigérateur (8)sEntreposez des aliments (8)sUtilisez le bac congélation (OPTION) (9)sUtilisez le tiroir multifonction (9)sUtilisez le bac à légumes (9)x U TILISEZ VOTRE CONGÉLATEURsRéglez la température de votre congélateur (10)sCongelez des aliments (10)sFabriquez des glaçons (OPTION) (11)x E NTRETENEZ VOTRE RÉFRIGÉRATEUR /CONGÉLATEURsNettoyez votre réfrigérateur/congélateur (12)sRemplacez l’ampoule (13)sProblèmes et solutions...................................................4F14x V UE DE VOTRERÉFRIGÉRATEUR /CONGÉLATE UR .......................................... (15)x C HANGEZ LE SENSD ’OUVERTURE DES PORTES (MOD ÈLES RMB SEULEMENT ) (16)Lorsqu’une quantité suffisante de glace s’est accumulée dans le réfrigérateur/congélateur,la fonction de dégivrage automatique démarre d’elle-même. La glace fond et l’eau de dégivrage est récupérée dans un bac qui lui permet de s’évaporer.Cette opération est entièrement automatique et ne requiert aucune intervention de votre part.H75%:––––––––––FType:––––––––––Date d’achat:––––––––––ImportantCes appareils sont prévus pour une utilisation domestique uniquement.Si vous voulez vous en servir à des fins industrielles ou commerciales,vérifiez que vous respectez toutes les normes et règles en vigueur.6Placez les accessoires à votre convenanceVous pouvez organiser à votre convenance les clayettes et les compartiments situés dans le réfrigérateur.Pour déplacer...alors...une clayette enx tirez la clayette vers vous jusqu’à ce polystyrène translucide/qu’elle atteigne la butée,une clayette en verre x faites basculer l’avant de la clayette vers trempé,le haut et continuez à la tirer vers vous,x insérez la clayette dans son nouvel emplacement.une clayette x faites basculer l’avant de la grille vers le de type grille,haut,x tirez la grille vers vous,x insérez la grille dans son nouvel emplacement.un balconnet x levez le balconnet afin de détacher réglable,les languettes,x retirez le balconnet de la porte,x alignez les languettes en fonction de la nouvelle position,x poussez le balconnet vers le bas afin de le mettre en place.Exemple d’organisation du réfrigérateur Accessoire Utilisation proposée Clayette supérieure Desserts (yaourt, etc.)Bac congélation Viandes et poissons Clayette inférieure Plats préparés Bac à légume Fruits et légumes Bac à œufs ŒufsBalconnet réglable Fromage, beurrePorte-bouteillesLait, sodas, autres boissons10FC O LD C O L DE R123456teurLorsque vous réglez la température du réfrigérateur, vous devez tenir compte des facteurs suivants:x la quantité d’aliments devant être entreposés,x la température de la pièce dans laquelle se trouve le réfrigérateur/congélateur.Pour entreposer...réglez la température...une grande quantité d’aliments sur COLDER.(réfrigérateur plein),une quantité moyenne d’aliments,entre COLDER et COLD.une petite quantité d’aliments sur COLD.(réfrigérateur relativement vide),x Selon la température de la pièce, vous pouvez êtreamené à légèrement augmenter ou diminuer latempérature du réfrigérateur. Si la température de lapièce est très peu élevée, réglez la température duréfrigérateur sur COLD.x Si le bac congélation contient beaucoup d’aliments, surtout en été, réglez le termosthat du congélateur sur2~3 pour diriger plus d’air frais vers le bac, et lethermostat du réfrigérateur sur 7~9. Si vous réglezuniquement la température du congélateur sur 5~6,le bac congélation ne sera pas assez froid.F réfrigéraRéglez la température de votre11Entreposez des alimentsFSuivez les recommandations ci-après pour entreposer des alimentsdans votre réfrigérateur.1Placez les aliments dans des boîtes munies de couvercles, dansdes sacs en plastique ou recouvrez-les d’un film plastique pouréviter que:x les aliments sèchent,x les odeurs imprègnent d’autres aliments.2Laissez les aliments ou les boissons refroidir avant de les entre-poser dans le réfrigérateur.3Laissez suffisamment d’espace entre les aliments et devant lesfentes d’aération pour permettre à l’air de circuler librement.4Faites en sorte que le thermostat soit toujours facilement acces-sible, afin de pouvoir ajuster la température si nécessaire.5Si vous avez lavé des fruits ou des légumes, séchez-les avant deles entreposer dans le bac à légumes.1214Le bac à légumes permet de conserver l’humidité et la fraîcheur des fruits et légumes en :x protégeant les aliments des courants d’air froids directs,x maintenant suffisamment d’humidité pour empêcher les fruits et les légumes de se dessécher,x mettant à votre disposition une cloison permettant d’entreposer séparément les fruits et leslégumes (option).Le bac à légumes n’est pas adapté aux fruits tropicaux (bananes, ananas, etc.) qui sont trop fragiles : les fruits sont endommagés et perdent leur saveur.Pour...alors...ouvrir le bac à légumes,tirez-le vers vous.fermer le bac à légumes,poussez-le pour le remettre à sa place.FUtilisez le bac à légumesF grandes quantités sur COLDER,d’aliments (congélateur plein),x fabriquer des glaçons,x congeler rapidement des aliments,entreposer une quantité moyenne entre COLDER et COLD,d’aliments,entreposer une petite quantité d’aliments sur COLD.(congélateur relativement vide),Selon la température de la pièce, vous pouvez être amenéà légèrement augmenter ou diminuer la température ducongélateur.16Congelez des alimentsF Suivez les recommandations ci-après pour entreposer des alimentsdans votre congélateur.1Entreposez les aliments en petites quantités ou en parts indivi-duelles, afin de pouvoir décongeler les quantités voulues.2Ne recongelez jamais des aliments ayant déjà été congelés puisdécongelés.3Placez les aliments devant être congelés dans des boîtes muniesde couvercles ou dans des sacs de congélation en plastiquehermétiquement clos et vide d’air.4Respectez les durées de conservation maximales indiquées surles aliments congelés pré-emballés.5Ne placez pas d’aliments sur les fentes d’aération.6Faites en sorte que le thermostat soit toujours facilement acces-sible, afin de pouvoir ajuster la température en cas de besoin.7Laissez la porte ouverte le moins longtemps possible. Vérifiezqu’elle est hermétiquement fermée après utilisation.17。
三星洗衣机的使用说明三星是电子和家电两个行业中都比较出名的品牌,它的影响力想必也是有目共睹的。
而就单论家电而言,三星比较常见的就是电视和洗衣机了,不过三星洗衣机的使用也有一些必须要注意的事情。
下面就由我们来对三星洗衣机的使用说明进行详细的介绍吧。
三星洗衣机的使用说明安装篇1、我们在使用洗衣机的时候,有的时候为了让它发挥到一个新的性能,必须要把洗衣机放置在一种坚硬而且平坦的地面上。
一旦我们把它安装于不平或者是不干净地面上,那么相关的设备运行时就会有噪音甚至振动。
因此我们为了降低振动甚至不平衡负荷,就必须加固。
2、安装洗衣机位置的选择:要保持洗衣机放置的平台要稳定;务必降低日光直射,还需要良好的通风,且室温要大于0C。
注意洗衣机远离碳火甚至煤气炉等相关热源。
电源插座没有安装地线或地线安装不可靠。
3、没有安装地线保护装置的应安装地线,已安装地线的应检查接地装置是否可靠,如地线断开应重新接好。
地线接在暖气管等不可靠的地方的。
应重新将地线接在地线棒上.并深埋地下。
三星洗衣机的使用说明洗涤篇1、插好电源插头,打开三星滚筒洗衣机玻璃门,把你要洗的东西放进三星滚筒洗衣机;注意不能够装入太多的衣物,相关类型衣物的最大洗衣量我们可以在说明书里有相应的规定。
2、关好三星滚筒洗衣机门,切记,要关牢,否则三星滚筒洗衣机不会运作;3、翻开左上方的“抽屉”,放入洗衣粉或洗衣液等清洁剂在最大的那格;当我们在进行使用液体洗涤剂的时候,一定要把液体洗涤剂配件进行正确的使用,不可乱倒洗衣液。
4、按程式设计按钮选择你需要的洗涤方式,一般预设就都有。
选择洗涤时间和脱水时间、选择水位高度。
旋动三星滚筒洗衣机控制台的旋钮,依据衣物脏度来设定。
5、最后按电源按钮,启动三星滚筒洗衣机。
水到了你预设的位置就会自动转起来。
开始洗涤了。
6、停止之后就可以拿出衣服了。
上面就是三星洗衣机的使用说明的一些详细的介绍,希望对朋友们有一定的帮助。
再有就是我们在进行洗衣服的时候,一般的洗衣机都会带有说明书,所以一定要注意首先阅读使用说明,避免出错。
PRODUCT MODEL NUMBERSKCED606GKCED600G30" (76.2 cm) and 36" (91.4 cm) Electric Downdraft CooktopELECTRICAL REQUIREMENTSTo properly install your cooktop, you must determine the type of electrical connection you will be using and follow the instructions provided for it here.■A 4-wire or 3-wire, single-phase, 120-/240-volt, 60 Hz., AC-only electrical supply on a separate, 40-amp circuit breaker is required for both 30" (76.2cm) and 36" (91.4 cm) models. If a fused system is used, fuse both sides of the line. ■The cooktop should be connected directly to the junction box through the flexible metal conduit. The flexible, armored cable extending from the fusebox or circuit breaker box should be connected directly to the junction box.PRODUCT DIMENSIONSA. 221/16" (56.0 cm) without stainless steel trim or 221/2" (57.2 cm) or 23" (58.5 cm) with stainless steel trim (depending on model)B. Model/serial/rating/clearance plate locationC. 203/4" (52.7 cm) screw head to screw headA. 307/8" (78.4 cm)B. 123/16" (31.0 cm)C. 2813/64" (72.3 cm)D. 1423/32" (37.4 cm)E. 2" (5.1 cm) recommended minimum cabinet to motor clearanceF . 1823/32" (47.6 cm)G. 321/32" (9.3 cm)30" (76.2 cm) Cooktop - for standard and electric models36" (91.4 cm) Cooktop - for standard and electric modelsA. 203/4" (52.7 cm) screw head to screw headB. Model/serial/rating/clearance plate locationC. 221/16" (56.0 cm) without stainless steel trim or 221/2" (57.2 cm) or 23" (58.5 cm) with stainless steel trim (depending on model)A. 365/16" (92.3 cm)B. 1119/32" (29.4 cm)C. 3411/64" (86.8 cm)D. 1423/32" (37.4 cm)E. 2" (5.1 cm) recommended minimum cabinet to motor clearanceF . 1823/32" (47.6 cm)G. 321/32" (9.3 cm)CABINET DIMENSIONSA. 30" (76.2 cm) on 30" (76.2 cm) models36" (91.4 cm) on 36" (91.4 cm) modelsB. Combustible area above countertop (shown by dashed box above)C. 30" (76.2 cm) minimum clearance between top of cooktop platformand bottom of uncovered wood or metal cabinet (24" [61 cm]minimum clearance if bottom of wood or metal cabinet is covered bynot less than 1/8" [0.6 cm] flame retardant millboard covered with notless than No. 28 MSG sheet steel, 0.015" [0.04 cm] stainless steel,0.024" [0.06 cm] aluminum, or 0.020" [0.05 cm] copper)D. 13" (33 cm) recommended upper cabinet depthE. 2" (5.1 cm)F. 211/8" (53.7 cm)G. 18" (45.7 cm) minimum clearance from upper cabinet to countertopwithin minimum horizontal clearances to cooktopH. Junction box or outlet: 12" (30.5 cm) minimum from bottom ofcountertopI. Junction box or outlet: 10" (25.4 cm) from right-hand side of cabinetJ. 287/8" (73.3 cm) on 30" (76.2 cm) models349/16" (87.8 cm) on 36" (91.4 cm) modelsK. 21/8" (6.4 cm) minimum distance to nearest left and right sidecombustible surface above cooktopL. 11/2" (3.8 cm) minimum clearance between back wall and countertopNOTE: After making the countertop cutout, some installations may require notching down the base cabinet side walls to clear the cooktop base. To avoid this modification, use a base cabinet with sidewalls wider than the cutout.■A minimum side clearance of 6" (15.2 cm) is recommended between side of cooktop and side wall for maximum ventilation performance. CUTOUT DIMENSIONSA. 287/8" (73.3 cm) maximum on 30" (76.2 cm) models349/16" (87.8 cm) maximum on 36" (91.4 cm) modelsB. 211/8" (50.6 cm) maximum on both 30" (76.2 cm) and 36" (91.4 cm)modelsC. 819/32" (21.8 cm) on 30" (76.2 cm) models157/16" (39.2 cm) on 36" (91.4 cm) modelsD. 619/64" (16.0 cm) on both 30" (76.2 cm) and 36" (91.4 cm) modelsE. 2" (5.1 cm) minimum space to front edge of cooktopF. Floor exhaust optionG. 61/8" (15.6 cm) for 6" (15.2 cm) vent system51/8" (13 cm) for 5" (12.7 cm) vent systemH. 819/32" (21.8 cm) on 30" (76.2 cm) models157/16" (39.2 cm) on 36" (91.4 cm) modelsI. 16" (40.6 cm) on both 30" (76.2 cm) and 36" (91.4 cm) modelsJ.Wall exhaust option。