VMWARE 配置说明(简)
- 格式:xls
- 大小:41.50 KB
- 文档页数:6

Vmware 7.0使用说明撰写 whiteleaf目录1.安装系统 (2)2.网络配置 (14)3.数据备份 (15)4.其他 (16)1.安装系统从主界面菜单的File->New进入安装阶段通常我们选择默认的6.5-7.0兼容方式就可以了。
此处选择是以物理光驱还是光盘映像(.iso)安装.Vmware支持的系统主要是windows和linux。
在7.0版的vmware中,已能支持windows 3.1,95,2000,xp, 7等版本,可以满足除硬件设备调试以外的各种功能。
Linux主要支持2.4,2.6版本的各种发布系统。
Linux安装的各种发布比较多,vmware针对不同发行版,订制了一些默认的自动完成操作,简化了用户选择过程,在7.0上多次安装红帽企业版5系列(5.0,5.1,5.4)及6系列(6.0,6.1)均十分顺畅,当安装ubuntu,LFS或其他自行生成的嵌入式linux系统时,可选择”other linux 2.6 x kernel”.选择虚拟机的名字,该名字仅用来作为制定虚拟机的配置目录名称。
内存配置,这个内存大小值不会直接从内存中划分,更多的是一个缓冲概念,但也建议够用就好。
网络配置是vmware使用里稍微麻烦点的地方,它所支持的方式包括桥接,nat,仅主机,以及不使用网络这四种。
桥接:相当于将虚拟机放在与宿主机(安装vmware的计算机)相同的网络位置,需要和宿主机同一个网段的独立ip和相同掩码,网关配置也需要一样。
桥接使用的vmware 虚拟网卡为vmnet0.NAT:nat通常指一种伪装,使用NAT的设备将通过vmnet8设备将自身ip伪装成宿主机ip与外网通讯,网关为vmnet8这个虚拟设备的ip.Host-only:这种方式使用虚拟网卡vmnet1。
用此方式安装后,虚拟机只能与宿主机通讯,也无法连接外网。
对于windows和linux的安装,通常用默认即可。

虚拟机VMware的安装与配置一、软件准备1.VMware Workstation5.53完整汉化版下载虚拟机注册码EREA9-7AZ4E-P2JFA-4YXZK P148H-RPW0H-QA4DY-4PWX32.Windows XP Professional with SP3 MSDN 简体中文vol原版ISO镜像(601MB)二、安装虚拟机第一步:运行已经下载到你本地硬盘的虚拟机安装程序。
第二步抄写序列号(可以不抄写,在下面步骤中粘贴即可)第三步出现安装向导,点“Next”(下一步)第四步可以修改虚拟机程序的默认安装路径(分步:1,2,3)第五步更改安装路径后,点“Next”(下一步)第六步选择安装选项后,点“Next”(下一步)(依据个人习惯选择)第七步开始安装,点“Install”(安装)第八步填写注册信息第九步安装完成,点“Finish”(完成)第十步完成汉化,点“确定”三、启动虚拟机第一步双击桌面上的虚拟机图标(分步:1,2,3)第二步新建虚拟机(分步:1,2)第三步选择虚拟机配置(仔细阅读两个选项文字说明后,如果还看不懂,那就选“典型”吧)第四步选择打算在虚拟机里安装的操作系统(分步:1,2,3)第五步设置虚拟机名称和位置提示:虚拟机名称:给你自己建立的虚拟机起一个名字(任意命名,但最好起有意义的名字)位置:决定你建立的虚拟机占用的硬盘位置(就是指定一个文件夹)第六步配置虚拟机网络提示:此步骤用来配置虚拟机访问网络,按你的实际情况选择第七步为虚拟机指派磁盘空间提示:即为第五步中指定文件夹下占用的磁盘空间第八步配置虚拟机的光盘驱动器(分步:1,2,3,4)提示:如果在虚拟机中用映像文件(ISO文件)安装系统,选择“使用ISO镜像”;如果用光盘安装系统,选择“使用物理驱动器”第九步虚拟机配置完毕,启动虚拟机。
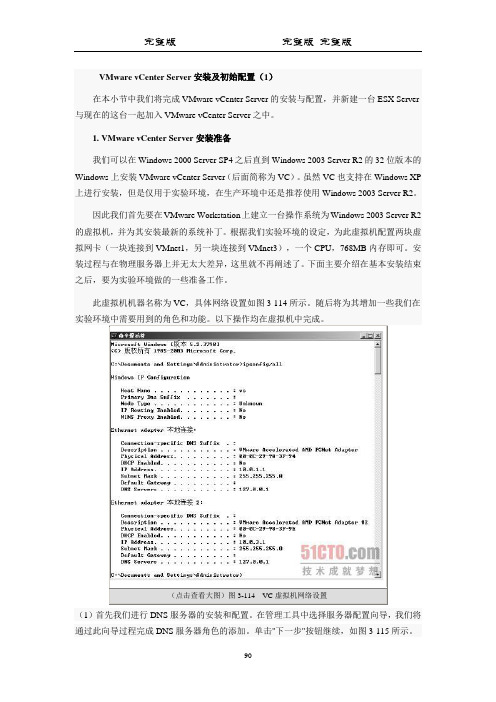
接下来我们需要在DNS服务器中建立实验环境中各个主机的DNS记录。
首先我们来建立VC的DNS记录。
(15)在DNS管理工具中右击我们刚才建立的区域,在弹出的快捷菜单中选择"新建主机"项,如图3-131所示。
(16)在"新建主机"对话框中输入VC的名称和IP地址,然后单击"添加主机"按钮完成VC的DNS记录建立。
随后再继续为ESX1 Server建立对应的DNS记录()。
我们还需要更改VC的DNS后缀,否则在DNS事件中总会出现如图3-133所示的警告信息。
(17)在"系统属性"对话框中选择计算机名选项卡,单击其中的"更改"按钮对主机DNS 后缀进行更改,如图3-134所示。
完成更改并重启VC后,我们的DNS设置工作就告一段落了。
此外,要记得在完成DNS 设置后,修改实验主机连接到VMnet1的虚拟网卡设置,将10.0.1.1设置为它的DNS服务器。
下面还需要为VC的运行安装并配置数据库。
VC支持SQL Server 2000~2005以及Oracle 9i R2和Oracle 10g R2的各个版本。
在VC的早期版本中,甚至还支持Microsoft Access 作为其后台数据库。
既然VC支持如此之多的数据库平台软件,我们应该选择哪一款作为它的后台数据库呢?根据作者实践经验,选用SQL Server 2000的标准版本是最为合适的,不论是软件成本还是硬件成本以及拥有成本,它都是目前最佳的选择。
这是为什么呢?首先,SQL Server 2000相对于SQL Server 2005可以节省大量的磁盘空间以及内存资源。
对于SQL Server 2000,我们分配给它512MB的内存通常就可以很好地运行了;而对于SQL Server 2005,则最好分配给它1GB以上的内存才可保证其流畅运行。
而SQL Server相对于Oracle的产品,其管理界面更简单,维护也相对简单得多。


VMware Workstation V10绿色版安装配置简介1.将所有的杀毒软件和安全软件(如:360杀毒、360安全卫士)退出,再进行下列安装操作,安装完成后,可恢复杀毒软件和安全软件的运行。
2.将VMware Workstation V10绿色版解压,并进入解压后的文件夹。
3.安装VMware。
在Windows中,以管理员administrator的身份运行“!)安装VMware.cmd”。
4.在下列屏幕提示下按任意键继续。
5.在下列屏幕提示下按任意键继续。
6.在下列屏幕提示下按“1”键,然后按“回车”键。
7.在下列屏幕提示下按“3”键,然后按“回车”键。
8.在下列屏幕提示下按“2”键,然后按“回车”键。
9.稍等一会,屏幕出现如下内容。
10.按任意键返回,并关闭该窗口。
11.在网络连接窗口中能看到出现了一块虚拟网卡,名为“VMware Network Adapter VMnet1”,如下图所示。
以后还可以修改该虚拟网卡的IP地址。
12.在桌面上能看到VMware的图标,如下图所示。
双击它即可启动VMware Workstation。
13.新建虚拟机。
在VMware Workstation“主页”选项卡中,选择“创建新的虚拟机”,按照向导提示即可创建基于某个操作系统的虚拟机。
14.打开虚拟机。
如果VMware Workstation没有出现某个虚拟机的选项卡,在VMware Workstation“主页”选项卡中,选择“打开虚拟机”,然后再选择原来安装的或从其他计算机上复制过来的虚拟机文件夹中“.vmx”类型文件,即可打开并使用已创建的虚拟机。
15.删除虚拟机。
右击某个虚拟机的选项卡,再在弹出的快捷菜单中依次选择“管理/从磁盘中删除”命令,即可将某虚拟机在磁盘中的文件干净的删除。
16.卸载VMware。
运行“!)卸载VMware.cmd”。
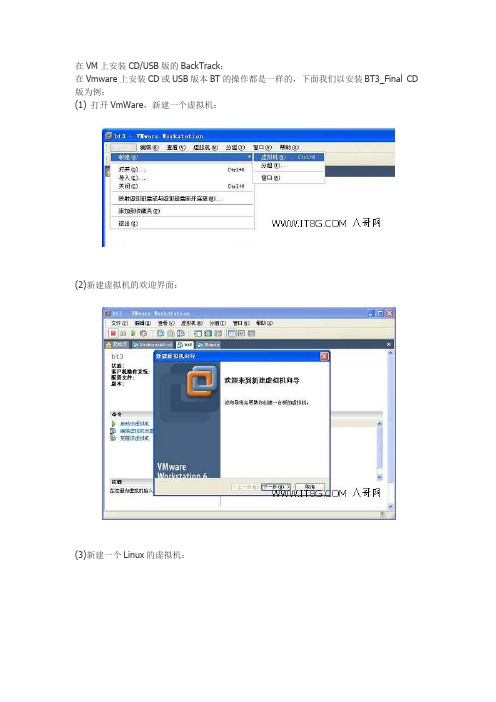
在VM上安装CD/USB版的BackTrack:
在Vmware上安装CD或USB版本BT的操作都是一样的,下面我们以安装BT3_Final CD 版为例:
(1) 打开VmWare,新建一个虚拟机:
(2)新建虚拟机的欢迎界面:
(3)新建一个Linux的虚拟机:
(4)修改虚拟机配置:
上述设置完成后,看到如下界面,现在需要设置这个虚拟机使用BT3 CD映像来启动。
进入虚拟机设置:
OK,大功告成,点工具栏绿色小三角按钮就可以启动BT啦。
3.在VM中加载USB无线网卡:
VM启动BT3后,默认是没有加载USB设备的。
这时需要我们手工加载:
1)找到VM菜单—虚拟机—可移动设备—USB设备,这里列出了所有USB设备,点击USB 无线网卡,如下图:
提示要先移除Windows下该USB设备的使用,不用理它,确定:
这时,屏幕右下角会提示找到新硬件,不用理会,静待它安装完成。
再来看看上面的菜单,可以发现前面已经打勾啦:
打开BT3的shell,用ifconfig ‐a命令查看网卡即可以看到加载成功。
注意:有许多朋友的USB网卡不能在VM下加载,经过论坛许多朋友亲身经历,可能是以下原因造成的:
1) 不要安装精简版的Vmware;
2) 按本文Backtrack高级应用相关方法解决。
1.使用SpoonWEP破解:
下文所讲破解方法为该教程下载的ISO镜像版本,如您使用的是附带光盘虚拟的镜像,请参照附带光盘的破解教程进行操作。
点击LANUCH进行破解,出现下图WS DUMP窗口,即表示破解进行,接下来就是耐心等待了
直到如下图显示即表示破解成功!
其他破解方法请参照光盘说明书。
VMware下配置Linux系统局域网和教程Linux继承了Unix以网络为核心的设计思想,是一个性能稳定的多用户网络操作系统。
本文分步骤给大家详细介绍了VMware下配置Linux系统局域网和图文教程,非常不错,具有参考借鉴价值,需要的朋友参考下吧第一步:翻开VMware虚拟机,点击网络适配器,将网络适配器改为桥接模式(B):直接连接物理网络,勾上复制物理网络连接状态(P)第二步:开启自己的虚拟机,也就是运行Linux操作系统,如果不会在虚拟机下安装Linux系统的,可以在小Alan的随笔Linux 分类中找到相关的文章,点击开启此虚拟机然后等上一会第三步:输入LInux系统的用户名和密码登录Linux操作系统,简单的验证一下是否能够访问文件和目录第四步:输入ifconfig命令查看当前网络设备当前的设置,记住网卡地址,假设此时你还不能访问网络,那么可能需要在网络配置中配置这个网卡地址,ether后面那一串就是第五步:测试一下网络是否能够访问局域网和外网(互联网),使用ping命令,先测试一下内网(访问自己正在使用的电脑ip地址),再测试一下外网(访问百度之类的),大家可以看到我的网络传输是没有问题的,那就更验证了小Alan的配置应该是没有多大问题的对吧,所以继续往下看,假设此时网络不通又该如何解决呢?第六步:通过cd命令来到/etc/sysconfig/work-scripts目录下,注意目录下的第一个文件第七步:通过vi命令翻开此文件,按enter键进入文件,按i 进入模式,按照如下图内容配置好网络参数,记住通过桥接模式配置的信息一定要和自己的电脑在同一个网段,然后按esc键,输入:wq保存并退出第八步:通过service work restart命令重启网络设备,配置好网络参数后记得要重启网络设备,不然可能导致配置不生效第九步:通过ifconfig命令查看配置是否生效,ip地址是否变成了自己配置的ip地址最后再通过ping命令测试内网环境以及外网环境是否能够接通,使用Ctrl+z可以断开测试,继续执行其它操作:这样就可以成功的访问局域网和外网了。
目录ESXI 服务器安装 (2)VI CLIENT 客户端安装 (10)NTP 服务器安装 (11)AD 域服务器安装 (14)VCENTER 数据库服务器安装 (31)VCENTER 安装 (45)ESXi 服务器安装硬件要求确保主机符合ESXi 5.0 支持的最低硬件配置。
必须具有以下硬件和系统资源,才能安装和使用ESXi 5.0:ESXi 5.0 将仅在安装有64 位x86 CPU 的服务器上安装和运行。
ESXi 5.0 要求主机至少具有两个内核。
至少 2 GB 的内存。
一个或多个千兆或10GB 以太网控制器。
一个或多个以下控制器的任意组合:基本SCSI 控制器。
Adaptec Ultra-160 或Ultra-320、LSI Logic Fusion-MPT 或者大部分NCR/SymbiosSCSI。
RAID 控制器。
Dell PERC(Adaptec RAID 或LSI MegaRAID)、HP Smart Array RAID 或IBM(Adaptec) ServeRAID 控制器。
SCSI 磁盘或包含未分区空间用于虚拟机的本地(非网络)RAID LUN。
ESXi 为多个64 位客户机操作系统提供支持。
使用64 位客户机操作系统运行虚拟机的主机有下列硬件要求:对于基于AMD Opteron 的系统,处理器必须为Opteron Rev E 或更高版本。
对于基于Intel Xeon 的系统,处理器必须包括对Intel 的Virtualization Technology (VT) 的支持。
许多CPU 支持VT 的服务器可能默认禁用VT,因此必须手动启用VT。
如果CPU 支持VT 但在BIOS 中看不到此选项,请联系供应商以获得可启用VT 支持的BIOS 版本。
安装ESXI SERVER在安装之前,首先检查物理服务器CPU 的Virtualization Technology (VT)是否打开,本次使用的DELL M910 刀片服务器,默认情况下,VT 是关闭的。
VMware虚拟机使用方法什么样配置的电脑适合建立虚拟机?当硬件配置达不到要求时,虚拟机运行速度会很慢,甚至不能运行,VMware的配置要求如下。
CPU:最低主频266MB,建议P3 1GHz以上;内存:最小128MB,建议512MB;硬盘:最小空闲空间600MB,建议空闲空间5GB;操作系统:必须是Windows NT内核操作系统,建议Windows 2000 SP2以上版本。
第一步:启动VMware,在其主界面“主页”标签页中点击“新建虚拟机”按钮打开新建向导(因英汉字符的差异,汉化版此处文字显示不全,见图1)。
第二步:单击“下一步”按钮,进入虚拟机配置界面,这里有两个选择:一是“典型”方式,它根据虚拟机的用途自动调整配置;二是“自定义”方式,它允许用户自行设置虚拟机的主要参数。
典型方式要比自定义方式简单,但缺少一定的灵活性。
方便起见,这里我们选择典型方式。
第三步:单击“下一步”按钮进入虚拟机操作系统选择界面,可以看到Windows、Linux、Novell 等多种不同的系统,这里我们点选“Linux”。
Linux又分为多种版本,笔者手头有一套红帽子Linux 8.0,自然要选择“Red Hat Linux”项了。
第四步:单击“下一步”,在接下来的界面中,可以为这个新的虚拟机取一个名称(本例为“RedHat Linux”),并在“定位”中选择虚拟机的保存位置(见图2)。
老鸟支招每个虚拟机都会产生多个特别格式的文件,所以最好为每个虚拟机创建一个单独的文件夹,如Linux就放到“Linux”文件夹、Windows 98就放到“Win98”文件夹中,这样便于以后备份和恢复虚拟机。
第五步:单击“下一步”,在网络类型界面中共有四个选项:“使用桥接网络”,“使用网络地址翻译(NAT)”,“仅使用主机网络”,“不使用网络连接”。
网络连接方式以后可以随时修改,因此在这里可先任意选一种。
第六步:单击“下一步”,接下来会要求用户设置硬盘的大小,软件默认大小为4GB,可根据硬盘现有空间的实际情况增大或减小。
NEC Express5800/R320g Configuration GuideIntroductionThis document contains product and configuration information that will enable you to configure your system. The guide will ensure fast and proper configuration of your NEC Express5800 server.July 2019Revision 1.0NEC CorporationContentsTECHNICAL SPECIFICATION (3)Specification (3)EXTERNAL VIEWS (4)Front and Rear Views (4)Dimensions (mm) (7)CONFIGURATION DIAGRAM (8)SERVER CONFIGURATION (10)1Base Models (10)22nd Processor (10)3Memory (10)4Internal Hard Disk Drives (11)5Optical Drive (11)6PCI Card (12)6.1LAN Controller (12)6.2Fibre Channel Controller (12)7Other Add-in Components (13)7.1Input Devices (13)8Add-on Components (13)8.117-inch LCD Console Drawer (13)8.2KVM Switch (13)8.3Flash FDD (13)8.4Operating System (14)8.5ft Server Control Software (14)8.6ft Server Control Software Support Service (14)8.7Tower Conversion Kit (15)8.8Dust Proof Filter (15)8.9Boot Mode Setup Option (15)REFERENCES (16)Server Management (16)Supported PCI Cards and Installable Slots (17)Notes for using VMware vSphere 6.7 Update1 on Express5800/R320g (18)Copyright Notice and Liability Disclaimer (19)REVISION HISTORY (20)Technical SpecificationSpecificationModel R320g-E4R320g-M4Part Number N8800-240F N8800-241FProcessor Type Intel® Xeon® processorSilver 4114 Intel® Xeon® processor Gold 6127MClock speed 2.20 GHz 2.20 GHzLogical Number ofProcessors1 or 2Cache 13.75MB 22MBCores and Threads 10C / 20T 16C / 32T Chipset Intel® C621 Chipset / GeminiEngine TMMemory Type DDR4-2666 Registered DIMM (16/32 GB DIMM) Memory Clock 2400 MHzLogical Standard Capacity 0 GBLogical Maximum Capacity 640GB (20 x 32 GB)Memory protection ECC, x4 SDDCInternal Storage Standard Capacity 0GBMaximum Logical Capacity HDD : SAS 9.6 TB (8x 1.2TB)SSD : SAS 3.2 TB (8x 400GB)Disk Controller SAS: 12Gb/s (Standard)RAID SAS : RAID 1 (Standard)Hot Plug SupportedOptical Disk Drive DVD Super Multi drive (Standard) 1Optical Drive Bays 1Logical Disk Drive Bays 8Expansion Slots Total: 2 slots available2 PCIe 3.0 x8 (x8 connector) Total: 4 slots available4 PCIe 3.0 x8 (x8 connector)Video Controller (VRAM) Integrated in Server Management Controller (32MB)Resolution / ColorSupported800 x 600,1024 x 768, 1280 x 1024, 1,600x1,200/ 16.7MInterfaces 1 VGA (15-pin mini D-sub, 1 rearper system)4 USB2.0 (1 front, 3 rear persystem)4 1000BASE-T LAN connector(RJ-45, 2 rear per module)2 Management LAN connector(RJ-45, 1 rear per module) 1 VGA (15-pin mini D-sub, 1 rear per system)4 USB2.0 (1 front, 3 rear per system)4 10GBASE-T LAN connector (RJ-45, 2 rear per module)4 1000BASE-T LAN connector (RJ-45, 2 rear per module)2 Management LAN connector (RJ-45, 1 rear per module)Server Management EXPRESSSCOPE Engine 3Power Supply 2x 800W 80 Plus® Platinum 2x 1200W 80 Plus® Platinum100-240 VAC ± 10% 50 / 60 Hz ± 3 HzPower Consumption (Max. Config, Operating)1,274 VA / 1,272 Watt 1,463VA / 1,465 WattDimensions (W x D x H ) 483.0 x 734.0 x 176 mm / 19.0 x 29.0 x 7.0 in (4U) Weight (Minimum / Maximum) 46 kg / 53 kg,101 lbs. / 116 lbs.Temperature, Relative Humidity (non-condensing) Operating: 10° to 40° C / 50° to 104° F, 20 to 80%Non-Operating: -10° to 55° C / 14° to 131° F, 20 to 80% Regulatory and Safety FCC, CE, BSMI, CCC, UL, CB, RoHSOperating Systems VMware® ESXi TM 6.7 update11Writing software is not provided for this DVD drive.External ViewsFront and Rear ViewsFront ViewB. UID Button N. UID ButtonC. Optical Disk Drive O. Module Power LEDD. System Power LED P. SAFE TO PULL LEDE.System Status LED Q. PRIMARY LEDF. System FT LED R. IO Module Fault LEDG.UID LED S. Fan Fault LEDH. USB Connector T. PSU Fault LEDI.Pull-out Tab U. DC Power Fault LEDJ. Power Button V. Temperature FaultK. Module ID LED W. NMI ButtonL. CPU Fault LEDB. USB Connectors (option, for backup use) 2G. Management LAN ConnectorC. PCI Slots (Low-Profile) H. VGA ConnectorD. Power supply unit I. Serial Port Connector 2 1E. Data LAN Connector J. Serial Port Connector 1 11For service personnel only.2Backup devices are not supported on VMware model.B. USB Connectors (option, for backup use) 2H. VGA ConnectorC. PCI Slots (Low-Profile) I. Serial Port Connector 2 1D. Power supply unit J. Serial Port Connector 1 1E. Data LAN Connector K. Data LAN Connector (10GBase-T)F. Module ID LED L. PCI Slots (Full-height)1For service personnel only.2Backup devices are not supported on VMware model.Dimensions (mm)Rack mountTower Conversion (Optional)220804592 327Configuration Diagram ServerCPU/IO ModuleR320g-E4Legend:Mandatory components Standard components CHASSIS FRONTCHASSIS REARR320g-M4Legend: Mandatory components Standard componentsServer Configuration1 Base Modelsno RAM, no 2.5-inch HDDIncluding:Intel Xeon Processor Silver 4114, 1 x DVD Super Multi, EXPRESSBUILDER DVDExpress5800/R320g-M4(16C/Gold 6127M)N8800-241F no RAM, no 2.5-inch HDDIncluding:Intel Xeon Processor Gold 6127M, 1 x DVD Super Multi, EXPRESSBUILDER DVD2 2nd ProcessorAvailable logical sockets: 1Xeon Gold 6127M Processor Kit : 2.20 GHz / 16C-32T / 22 MB, 2 processors included N8801-053 NOTE:●The 2nd processor must be the same as what is used in the base model3 MemoryAvailable logical slots:1CPU: 8slots, 2CPU: 20slots128GB DDR4-2666 REG Memory Kit : 2 x 4 x 32GB DIMM included N8802-070 NOTE:●Minimum one memory kit must be installed.Memory Configuration GuidelineSee the table below for the number of memory kits required in accordance with logical main memory size and number of logical processors. Memory configurations which are not listed below are not supported in the system.Number of Logical Processors Logical Main Memory SizeNumber of MemoryKits Required 16GB 128GB116GB 1 1 - 32GB 2 - 48GB 3 - 64GB 4 - 96GB 6 - 128GB 8 -- 1 256GB - 2 2 16GB 1 1 - 32GB 1 2 - 48GB 1 3 - 64GB 4 - 96GB 6 - 128GB 8 - 192GB 12 - 256GB 16 -- 2 320GB 20 512GB - 4640GB -51Interleave is not supported.4 Internal Hard Disk DrivesAvailable bays: 8600GB 15K Hot Plug 2.5-inch SAS HDD : 1 x 600GB N8850-064 900GB 10K Hot Plug 2.5-inch SAS HDD : 1 x 900GB N8850-0651.2TB 10K Hot Plug2.5-inch SAS HDD : 1 x 1.2TB N8850-066 SAS SSD (ME)400GB Hot Plug 2.5-inch SSD: 1 x 400GBN8850-068NOTE:●Hard drives must be installed in identical pairs to configure RAID 1.● The 300GB HDD or 400GB SSD is recommended to install as the system drive in order to reduce the time toresynchronize.5 Optical DriveAvailable bays: 11 x DVD Super Multi drive, not including writing software6 PCI Card6.1 LAN ControllerIntel® Ethernet Server Adapter I350-T2V2N8804-01310GBASE-T 2ch Adapter Kit : 2 x 10GbE NICIntel® Ethernet Converged Network Adapter X550NOTE:- Up to one controller per module- Installation in full height slots only supported on R320g-M4- FCoE functionality is not supportedNOTE:●When additional LAN controller is required, it is recommended to use 10GBASE-T adapter kit for R320g-M4 with VMware. If youwould like to choose 1000BASE-T 2ch board kit, please consult with your sales representative.●For iSCSI (data) connection, NEC Storage M12e, M120, M320, M320F are supported. For NEC Storage, contact your salesrepresentative or refer to the NEC Storage WEB site. (/global/prod/storage/)6.2 Fibre Channel ControllerQLogic QLE2670 16Gbps Fibre Channel AdaptersNOTE:- Installation in full height slots only supported on R320g-M4NOTE:●For FC connection, NEC Storage M12e, M120, M320, M320F are supported. For NEC Storage, contact your salesrepresentative or refer to the NEC Storage WEB site. (/global/prod/storage/)7 Other Add-in Components7.1Input DevicesMouse USB Optical Wheel MouseN8870-012 CableUSB cable : 1.5m USB extension cableK410-177(1A)8 Add-on Components8.117-inch LCD Console Drawerw/ KVM Switch 17-inch LCD, US 83-keys Keyboard, Optical mouse, 8 port KVM switch, 1U height, blackCable Switch Unit Connection Cable Set (USB, 1.8m)1.8 m, 1 x 15-pin mini D-SUB to 1 x 15-pin mini D-SUB / 1 x 4-pin USB AK410-118(1A)Switch Unit Connection Cable Set (USB, 3m)3 m, 1 x 15-pin mini D-SUB to 1 x 15-pin mini D-SUB / 1 x 4-pin USB A K410-118(03)Switch Unit Connection Cable Set (USB, 5m)5 m, 1 x 15-pin mini D-SUB to 1 x 15-pin mini D-SUB / 1 x 4-pin USB A K410-118(05) Drawer w/o KVM Switch Drawer17inch LCD Console Unit 1U17-inch LCD, US 83-keys Keyboard, Optical mouse, 1U height,4-pin USB B to 4-pin USB A cable 2 m, PS/2 Y-splitter cable 2m, 15-pin mini D-sub VGA cable 2 m, black N8143-105F17inch LCD Console Drawer (1port)17-inch LCD, US 103-keys Keyboard with 10-key, Touch pad with 3-button, 1U height, 4-pin USB B to 4-pin USB A cable 1.8 m, Two PS/2 cable 1.8 m, 15-pin mini D-sub VGA cable 1.8 m, black N8143-108FKeypad Keyboard Unit (JP)JP 108-keys Keyboard with 10-key for N8143-108F 17inch LCD Console Drawer (1port) N8143-109Keyboard Unit (UK)UK 104-keys Keyboard with 10-key, for N8143-108F 17inch LCD Console Drawer (1port)N8143-1118.2 KVM Switch1U USB 8 port KVM switch, blackCableKVMSwitch Unit Connection Cable Set (USB,1.8m)1.8 m, 1 x 15-pin mini D-sub to 1 x 15-pin mini D-sub / 1 x 4-pin USB A K410-118(1A) Switch Unit Connection Cable Set (USB,3m)3 m, 1 x 15-pin mini D-sub to 1 x 15-pin mini D-sub / 1 x 4-pin USB A K410-118(03)Switch Unit Connection Cable Set (USB,3m)5 m, 1 x 15-pin mini D-sub to 1 x 15-pin mini D-sub / 1 x 4-pin USB A K410-118(05)CascadingSwitch Unit Connection Cable 1.8 m1.8 m, 1 x 15-pin mini D-sub - 1x 15-pin mini D-Sub / 2x PS/2K410-119(1A)8.3 Flash FDDOrder the Flash FDD if you need to prepare an alternative for a floppy drive.USB flash emulating USB floppy disk, Native capacity 1.44 MB8.4 Operating SystemThe R320g VMware models support VMware ESXi 6.7update1. For installation, please download the image data from VMware website. Please note that the Part Number differs by the end user’s country.VMware vSphere 6 Essentials for 3 hostsESX license for up to 3 Physical servers (Max 2 CPUs each) and VMware vCenter Server license for 3 ESX servers. UL1560-2A1E-I*1UL1560-2K1E-IUL1560-2G1E-IPPSupportPack(VMware vSphere 6 Essentials for 3 hosts)(1year)ULH1S1560109E-I *1 ULH1S1560133E-I ULH1S1560117E-I VMware vSphere 6 Essentials Plus for 3 hostsESX license for up to 3 Physical servers (Max 2 CPUs each) and VMware vCenter Server license for 3 ESX servers. Also, Data Recovery and HA license for 6 CPUs included.UL1560-2A2E-I*1UL1560-2K2E-IUL1560-2G2E-IPPSupportPack(VMware vSphere 6 Essentials Plus for 3 hosts)(1year)ULH1S1560110E-I *1 ULH1S1560134E-I ULH1S1560118E-I VMware vSphere 6 license for Medium and Large-sized BusinessVMware vSphere 6 Standard for 1processorNote: VMware vCenter Server license is not included. UL1560-2A3E-I*1 UL1560-2K3E-I UL1560-2G3E-I PPSupportPack(VMware vSphere 6 Standard for 1processor)(1year)ULH1S1560111E-I *1 ULH1S1560135E-I ULH1S1560119E-I VMware vSphere 6 Enterprise Plus for 1processor Note: VMware vCenter Server license is not included. UL1560-2A5E-I *1 UL1560-2K5E-I UL1560-2G5E-I PPSupportPack(VMware vSphere 6 Enterprise Plus for 1processor)(1year)ULH1S1560113E-I *1 ULH1S1560137E-I ULH1S1560121E-I VMware vSphere 6 vCenter ServerVMware vCenter Server 6 FoundationUL1560-2A7E-I *1UL1560-2K7E-I UL1560-2G7E-I PPSupportPack(VMware vCenter Server 6 Foundation)(1year) ULH1S1560115E-I *1 ULH1S1560139E-I ULH1S1560123E-I VMware vCenter Server 6 StandardUL1560-2A8E-I *1 UL1560-2K8E-I UL1560-2G8E-I PPSupportPack(VMware vCenter Server 6 Standard)(1year)ULH1S1560116E-I *1ULH1S1560140E-IULH1S1560124E-I*1: Contact your sales representative for the part number.8.5 ft Server Control SoftwareUL1377-009ENOTE:ft Server Control Software for VMware is not included in the base model N8800-240F/241F. Be sure toorder UL1377-009E to install VMware ESXi 6.7 on R320g series.8.6 ft Server Control Software Support ServiceFor R320e/R320f VMware model, please also order below support product for ft Server Control Software support.Software support service for ft Server Control Software for vSphere 6.7ULH1S-1377-006F8.7 Tower Conversion Kit23 inch height pedestal with front bezel , for R320g-E4Tower Conversion KitN8843-00623 inch height pedestal with front bezel , for R320g-M48.8 Dust Proof FilterThe server supports the dust resistant feature. Choose the following kit to install the system in dusty places.For R320g Dust Proof filter 10 pcs, attachment brackets for the frontbezel included8.9 Boot Mode Setup OptionNo need of Boot Mode Setup Option (Legacy Mode) for R320g/VMware model.ReferencesServer ManagementThe EXPRESSSCOPE Engine 3, integrated into the server, provides superior remote control and system management features listed in the table below.fan /degeneration (memory/hard drive)Hardware event log collection ✓Boot monitoring Booting, BIOS/POST stall, OS stall, shutdown ✓✓Alerting HW error, Boot error and OS panic(by SNMP, E-Mail)Remote KVM POST/BIOS setup, DOS utility ✓(via LAN) Panic screen, Boot screen ✓Text-based screen (OS console) ✓GUI-based screen (OS console) ✓Remote control Remote reset/power on-off/ dump ✓(via LAN) OS shutdown ✓Remote media (CD/DVD/FD) ✓✓Server Management Command Line Protocol(DMTF compliant)✓Remote control via Web browser(without dedicated app)Remote batch ✓Scheduling (without UPS) ✓Others Set automatic IP address via DNS/DHCP ✓Remote wakeup Wake On LAN, Wake On Ring ✓CentralizedMonitoring and control of multiple servers ✓managementIndustry standard IPMI 2.0Supported PCI Cards and Installable SlotsR320g-E4PCI Slot: X8 X8Card height: LP LPSlot type: x8 x8N8804-012 1000BASE-T 2ch board kit ✓✓*1,3N8804-013 10GBASE-T 2ch board set ✓✓*1,2,3N8803-040AF Fibre Channel board kit ✓✓*1,41Install same board, same slot on each CPU/IO module.2Max.1board per CPU/IO module. If you need 2board per CPU/IO module, please consult with your sales representative.3Cannot mix N8804-012 & N8804-013 same time. If you need, please consult with your sales representative.4Not installable when using Tower Conversion Kit.R320g-M4PCI Slot: X8 X8 X8 X8Card height: LP LP FH FHSlot type: x8 x8 x8 x8 N8804-012 1000BASE-T 2ch board kit - - - - *1,3,4N8804-013 10GBASE-T 2ch board set - - ✓✓*1,2,3N8803-040AF Fibre Channel board kit - - ✓✓*1,3,51Install same board to same slot on each CPU/IO module.2Max.1board per CPU/IO module. If you need 2board per CPU/IO module, please consult with your sales representative.3 The priority on slots #3 & #4 is N8803-040A>N8804-013>N8804-0124 If you need N8804-012, please consult with your sales representative.5 Not installable when using Tower Conversion Kit.Notes for using VMware vSphere 6.7 Update1 onExpress5800/R320gFunctional LimitationsThe following features of VMware ESXi are not supported.- VMware Fault Tolerance(FT)- VMware Distributed Power Management (DPM)- Fibre Channel N-Port ID Virtualization (NPIV)- Modifying the DVSwitch Configuration- RAW Device Mapping (RDM) (Internal HDDs only)- VMDirectPath- Single-Root I/O Virtualization- VMware vSphere Flash Read Cache- vCenter Server lockdown mode- LACP- Web Client performance chart (power)Supported Guest OSGuest Operating Systems supported on NEC Express5800/ft series are the same as other generalpurpose servers. Refer to the VMware web site for the Supported Guest Operating Systems on VMware vSphere ESXi 6.7 Update1.VMware Host ClientFor maintenance of VMware ESXi on the NEC Express5800/ft series, a dedicated terminal (e.g. aWindows PC) is requiredBackupA dedicated server for data backup is recommended.Network Adapter TypesDo not choose E1000 or E1000E for the virtual machines on the NEC Express5800/ft series. If youchoose E1000 or E1000E, the CPU modules may not synchronize.Copyright Notice and Liability DisclaimerThe information contained herein is subject to change without notice.Microsoft and Windows Server are either registered trademarks or trademarks of Microsoft Corporation in the United States and/or other countriesIntel and Xeon are registered trademarks or trademarks of Intel Corporation or its subsidiaries in the United States and othercountries.Linux is a trademark of Linus Torvalds.Red Hat is a registered trademark of Red Hat, Inc. in the U.S.All other products, brands, or trade names used in this document are trademarks or registered trademarks of their respectiveholders.NEC shall not be liable for technical or editorial errors or omissions contained herein.For hard drive capacity measurements, 1 GB = 1 billion bytes. Actual formatted capacity is less.Revision History。