跑步机说明书英文翻译
- 格式:doc
- 大小:37.50 KB
- 文档页数:4
宇晟走步机操作指南一、窗口显示:1、“SPEED”窗口:在待机状态下显示“0.8km/h”,在运行状态下显示当前速度值,速度显示范围: 0.8-10KM/h。
2、“TIME”窗口:显示运动时间,正向计时从0:00-99:59,计时到99:59时跑步机平稳降速停止运行且显示“End”,完全停止后5秒进入待机状态;倒计时则从设定的时间递减至零,当倒计至0:00时跑步机平稳降速停止运行且显示“End”, 完全停止后5秒进入待机状态。
3、“DIS.”显示运动距离,正向计数从0.00-99.9,溢出清零并从0开始正向计数,反向计数则从设定值递减至零,当倒计至0时跑步机平稳降速停止运行且显示“End”, 完全停止后5秒进入待机状态。
4、“CAL.”窗口:显示运动者的心跳值和消耗热量值,显示消耗热量值时,正向计数时从0-999,溢出清零并从0开始正向计数,反向计数时,则从设定值倒计至0,当倒计至0时跑步机平稳降速停止运行且显示“End”, 完全停止后5秒进入待机状态。
二、按键功能:1、“MODE”为模式选择键:按此键可以循环选择“0.8”、“15:00”、“1.00”、“50.0”、“P0-P1-P2-P3”(“0.8”为手动模式,“15:00”为时间倒计模式,“1.00”为距离倒计模式,“50.0”为卡路里倒计模式,P0-P3为内置程式)在选择各种模式时均可使用速度加减键来设定相关倒计数值,设定完成后按“START”键即可启动跑步机。
2、“START”为启动键:在电源开启并且安全锁吸合的情况下,任何时候按此键,可启动跑步机的运行。
3、“STOP”为停止键: 在运动过程中可通过此按键来停止跑步机的运行并复位清零。
4、“SPEED+”、“SPEED-”为速度加减键:待机状态,用以调整设定值。
启动后用于调整速度,其调整幅度值为0.1公里/次,当持续按住超过0.5秒时自动持续递增或递减。
三、快速启动(手动模式):1、打开电源开关,将磁性安全锁正确吸附在面板下方的安全锁位置。
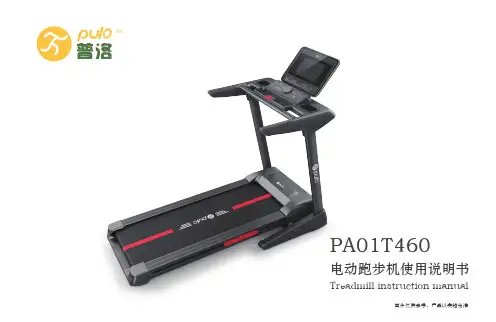
PA01T460电动跑步机使用说明书Treadmill instruction manual图片仅供参考,产品以实物为准目 录使用产品前请仔细阅读本说明书,并妥善保管。
一、产品介绍01...........................................................四、入门指南06...........................................................三、安全使用须知04...........................................................二、安装步骤03...........................................................五、操作指南(LCD)08........................................................... 操作指南(彩屏)16...........................................................六、维护指南47...........................................................七、常见故障及排除50...........................................................八、保修说明52...........................................................九、产品保修53...........................................................一、产品介绍01 跑步机主体01显示屏按键板喇叭口心率片安全扶手防滑条跑带安全锁USB接口电源开关过载保护器电源接口前护角盖后护角盖mp3接口LCD 彩屏双重缓冲减震马达上盖杯槽旋钮按键02 装箱清单合格证电源线整 机说明书螺丝包左右侧前护角盖mp3电源线安全锁02-----------------------------------------------------------------------------------------------------------------------03 产品参数润滑油二、安装步骤提示:待所有配件组装完成后,请确保所有螺丝都已经拧紧,才可以使用。
产品说明书跑步机的功能和运动计划产品说明书:跑步机的功能和运动计划一、产品概述跑步机是一种常见的家用健身设备,通过模拟户外跑步的方式,帮助用户进行身体锻炼和减脂运动。
本产品说明书将详细介绍跑步机的功能和运动计划,以帮助用户更好地了解和使用该设备。
二、跑步机的功能1.速度控制:本跑步机设有调速装置,可根据个人需求调节跑步机的运行速度,以满足不同锻炼强度的要求。
2.坡度调节:跑步机配备坡度调节功能,用户可根据需要调整坡度,模拟户外跑步的不同路况,提升训练效果。
3.计时器显示:跑步机上设有计时器显示屏,用户可以实时监控跑步时间,便于合理安排锻炼计划。
4.心率监测:跑步机配备心率监测装置,通过手柄或腕带等方式监测用户的心率变化,帮助用户有效控制锻炼强度。
5.多功能面板:跑步机的面板上配备多种功能按钮,包括预设模式、音乐播放、紧急停止等,方便用户进行个性化配置和操作。
三、运动计划为了帮助用户更好地使用跑步机进行运动,以下是一周的运动计划推荐。
周一:有氧耐力训练运行时间:20分钟速度:中等速度坡度:平路步数:10000步周二:爬坡训练运行时间:15分钟速度:慢速坡度:30°步数:8000步周三:间歇训练运行时间:30分钟速度:快速坡度:平路步数:15000步周四:慢跑训练运行时间:30分钟速度:中速坡度:平路步数:12000步周五:力量训练运行时间:20分钟速度:中速坡度:平路步数:10000步重量:适合个人承受范围的负重周六:速度训练运行时间:15分钟速度:最快速度坡度:平路步数:8000步周日:休息日注:以上仅为运动计划的示例,具体计划可根据个人体质和需求进行适当调整。
四、使用注意事项1.在使用跑步机前,请仔细阅读产品说明书,并确保了解各个按键和功能的使用方法。
2.使用跑步机时,建议穿着合适的运动鞋,并确保身体状态良好,避免在饱食或饥饿状态下进行锻炼。
3.使用跑步机时,注意保持正确的姿势,站稳双脚,身体保持直立,手柄握持舒适。
JXFITNESS说明书
总的来讲,使用跑步机分为以下几步:1、打开电源;2、按start 键;3、调节倾斜度;4、调节速度;5、关闭跑步机。
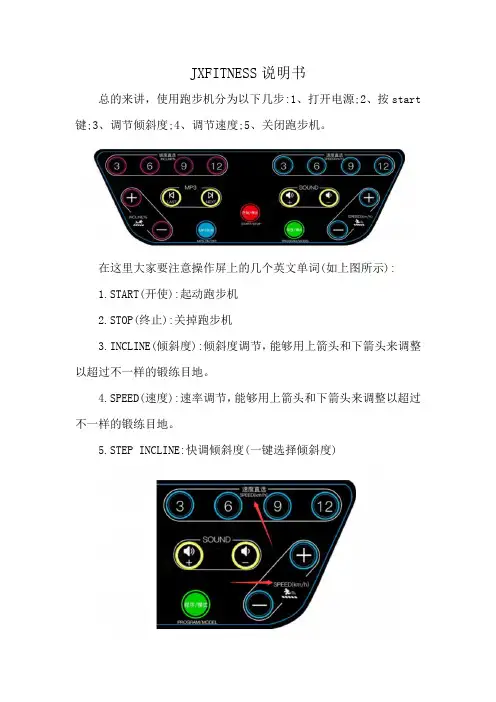
在这里大家要注意操作屏上的几个英文单词(如上图所示):
1.START(开使):起动跑步机
2.STOP(终止):关掉跑步机
3.INCLINE(倾斜度):倾斜度调节,能够用上箭头和下箭头来调整以超过不一样的锻练目地。
4.SPEED(速度):速率调节,能够用上箭头和下箭头来调整以超过不一样的锻练目地。
5.STEP INCLINE:快调倾斜度(一键选择倾斜度)
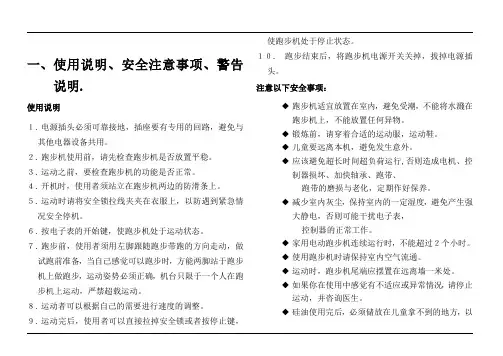
速度的调节方式
1、图示,速度旁边有“+””—”符号,通过图示符号,缓慢调节速度。
2、图里面的数字表示的是速度,比如按数字4,跑步机速度会直接调整为4,无需通过加减符号来调节。
建议:(1)慢走,提议用4km/h~6km/h的。
(2)6km/h~8km/h速率合适快步走的人。
(3)8km/h左右的速率比较适合常常运功的人群。
坡度的调节方式
坡度的调节方式与速度的一样,根据仪表盘调整即可。
注意:调整倾斜度为2°-5°的跑步机上开展健身跑,能防止、降低膝盖骨长久劳损!。
一、使用说明、安全注意事项、警告说明.使用说明1. 电源插头必须可靠接地,插座要有专用的回路,避免与其他电器设备共用。
2. 跑步机使用前,请先检查跑步机是否放置平稳。
3. 运动之前,要检查跑步机的功能是否正常。
4. 开机时,使用者须站立在跑步机两边的防滑条上。
5. 运动时请将安全锁拉线夹夹在衣服上,以防遇到紧急情况安全停机。
6. 按电子表的开始键,使跑步机处于运动状态。
7. 跑步前,使用者须用左脚跟随跑步带跑的方向走动,做试跑前准备,当自己感觉可以跑步时,方能两脚站于跑步机上做跑步,运动姿势必须正确,机台只限于一个人在跑步机上运动,严禁超载运动。
8. 运动者可以根据自己的需要进行速度的调整。
9. 运动完后,使用者可以直接拉掉安全锁或者按停止键,使跑步机处于停止状态。
10. 跑步结束后,将跑步机电源开关关掉,拔掉电源插头。
注意以下安全事项:◆跑步机适宜放置在室内,避免受潮,不能将水濺在跑步机上,不能放置任何异物。
◆锻炼前,请穿着合适的运动服,运动鞋。
◆儿童要远离本机,避免发生意外。
◆应该避免超长时间超负荷运行,否则造成电机、控制器损坏、加快轴承、跑带、跑带的磨损与老化,定期作好保养。
◆减少室内灰尘,保持室内的一定湿度,避免产生强大静电,否则可能干扰电子表,控制器的正常工作。
◆家用电动跑步机连续运行时,不能超过2个小时。
◆使用跑步机时请保持室内空气流通。
◆运动时,跑步机尾端应摆置在远离墙一米处。
◆如果你在使用中感觉有不适应或异常情况,请停止运动,并咨询医生。
◆硅油使用完后,必须储放在儿童拿不到的地方,以免误食而产生严重后果。
◆运动完后,使用者不能直接从跑步机上跳下,以免产生危险的后果。
◆电源插头必须轻轻拔出。
◆当跑步机在运行过程中,发生任何异常事情时,必须立即终止使用,切断所有电源。
◆跑步机发生异常时,需通知当地的经销商,派专业人士进行处理和维修,禁止私自拆跑步机任何零不见。
警告说:为减少事故发生或伤及他人,请遵守以下规定;◆使用跑步机前请检查服装是否扣好或拉上拉链。
健身英语词汇大全掌握健身器材运动技巧和健康饮食的英文表达健身英语词汇大全:掌握健身器材、运动技巧和健康饮食的英文表达健身器材(Fitness equipment)1. 擦汗巾(Towel)- A towel for wiping sweat2. 健身垫(Exercise mat)- A padded mat used for floor exercises3. 跑步机(Treadmill)- A machine for running or walking in one place4. 器械组(Weight machine)- Equipment with various weights for strength training5. 哑铃(Dumbbell)- A short bar with weights at either end for resistance training6. 杠铃(Barbell)- A long bar with weights at either end for weightlifting exercises7. 弹力带(Resistance band)- A stretchy band used for resistance training8. 健身球(Exercise ball)- A large inflatable ball used for balance and core exercises9. 跳绳(Jump rope)- A rope used for cardiovascular exercise and coordination training10. 瑜伽垫(Yoga mat)- A non-slip mat used for yoga and stretching exercises运动技巧(Sports techniques)1. 举重(Weightlifting)- The sport of lifting heavy weights2. 跑步(Running)- The act of moving quickly on foot3. 游泳(Swimming)- The sport or activity of moving through water4. 健身操(Aerobics)- A type of exercise that combines rhythmic movements with stretching and strength training5. 瑜伽(Yoga)- A physical, mental, and spiritual practice that includes meditation and various postures6. 跆拳道(Taekwondo)- A Korean martial art that emphasizes kicks, punches, and blocks7. 跳舞(Dancing)- The act of moving rhythmically to music8. 自行车(Cycling)- The sport or activity of riding a bicycle9. 跑步机训练(Treadmill training)- Using a treadmill for cardiovascular exercise and endurance training10. 有氧运动(Cardio workout)- Exercises that increase the heart rate and improve cardiovascular health健康饮食(Healthy diet)1. 蛋白质(Protein)- A nutrient that is essential for building and repairing tissues2. 碳水化合物(Carbohydrates)- A nutrient that provides energy for the body3. 蔬菜(Vegetables)- Plants or parts of plants that are used as food4. 水果(Fruits)- The sweet or savory product of a tree or plant that contains seeds5. 坚果(Nuts)- Hard-shelled fruits or seeds that are edible6. 脂肪(Fat)- A nutrient that provides energy and helps the body absorb vitamins7. 纤维(Fiber)- A type of carbohydrate that aids digestion and helps prevent constipation8. 维生素(Vitamins)- Organic compounds that are essential for normal growth and nutrition9. 矿物质(Minerals)- Inorganic substances that are essential for the normal functioning of the body10. 健康饮食习惯(Healthy eating habits)- Choosing nutritious foods and controlling portion sizes for overall health总结(Conclusion)掌握健身器材、运动技巧和健康饮食的英文表达对于学习和实践健身至关重要。
跑步机用英语怎么说跑步机是家庭及健身房常备的健身器材,而且是当今家庭健身器材中最简单的一种。
那么你知道跑步机用英语怎么说吗?下面来跟店铺一起学习一下有关跑步机的英文知识吧。
跑步机的英语说法treadmillrunning machine跑步机的相关短语场景式跑步机 Voyager Treadmill超级跑步机 Super Treadmill实验鼠跑步机 experiment mice treadmill智能电动跑步机 intelligent electric treadmill水中跑步机 wter tredmill跑步机的英语例句1. Got aching knees after running on the treadmill yesterday.昨天被跑步机搞得膝盖酸痛.2. The treadmill test will show the doctors how exercise affects your heart.这项跑步机测试结果会告诉医生运动对你的心脏影响多少.3. Theoretically there is no limit to the size of treadmill.理论上是没有限制的规模跑步机.4. Treadmill will stop immediately if the safety key is pulled off.7跑步机立即停止,如果安全的关键是脱离.5. Clerk: Sure. Then what about trying the treadmill or the skipping rope.职员: 当然. 那么要不要试试跑步机或者是跳绳?6. The exercise including walking, using a treadmill or exercise bike.所进行的锻炼包括步行, 使用跑步机或健身车.7. The Gym has several treadmills an X - trainer machine, bicycles, weights and mats for floor work.体育馆里配备了:跑步机、教练机、自行车、哑铃和专为做地板运动准备的垫子.8. Fitness Center gym treadmill, etc. to provide fitness equipment, swimming pool area of 300 square meters.健身中心健身房提供跑步机等健身器材, 游泳池面积300平方米.9. This helps control the velocity of the treadmill and interactions with the virtual environment.这有助于控制速度的跑步机及互动虚拟环境.10. It's time to off the treadmill and get into nature to squeeze in a little exercise.该离开你的跑步机到大自然中去放松一下了.户外运动有很多的好处.11. In good gyms the treadmills will include preset programs as well as having manual settings.在好的健身房中,跑步机既有预设程序,也可以手动设置.12. A. If you want to tone up your legs, I recommend using the treadmill.如果想锻炼腿部, 我推荐你使用跑步机.13. It provides the same benefits as the treadmill but it's a much smoother work - out.它与跑步机的功效是一样的,不过却是一种更加舒缓的锻炼方式.14. Half of the rats had also been trained to run on a treadmill.其中二分之一的老鼠也做过跑步机训练.15. Jenkins lowers the treadmill back to zero, and I cool down at a slow walk.Jenkins降低跑步机到零度, 我慢速步行冷静下来.跑步机的英文相关阅读:室外跑步与跑步机哪个更消耗卡路里Do I Burn More Calories Running Outside or on a Treadmill?室外跑步,跑步机跑步,哪个消耗的卡路里多?Question: Do I Burn More Calories Running Outside or on a Treadmill?问题:室外跑步,跑步机跑步,哪个消耗的卡路里多?I've heard that running outside burns more calories than running on a treadmill. Is that true?我听说在室外跑步比起在跑步机上跑步能消耗更多的卡路里。
PRECOR C956I跑步机快速操作指南本中文操作手册仅供参考所有操作说明以设备附带的英文手册为准版权所属巍得健身器材有限公司PRECOR C956I跑步机快速操作指南一、使用快速启动模式开机1、打开跑步机的电源开关;2、站到跑步机的跑步皮带上,扣好安全扣;3、按“QUICK START”键,跑步皮带在“3、2、1”的提示后启动,启动的初速度为1MPH(1KM/H),消耗热量的计算基准为150LB(68KG);4、在使用中,用“SPEED ▼”和“SPEED ▲”键调节合适的速度;5、用“INCLINE ▼”和“INCLINE ▲”键调节合适的坡度;6、用面板上切换键切换各项显示参数。
二、使用程式设置模式开机1、打开跑步机的电源开关;2、站到跑步机的跑步皮带上,扣好安全扣;3、按“PROGRAM”键对应下的程式选择键,按显示提示依次设置以下参数(可以使用键盘输入);——时间,设置完成按“OK”键确认;——体重,设置完成按“OK”键确认;——年龄,设置完成按“OK”键确认;4、参数设置全部完成后,按“SPEED ▲”键,跑步皮带开始启动;5、在使用中,用“SPEED ▼”和“SPEED ▲”键调节合适的速度;6、用“INCLINE ▼”和“INCLINE ▲”键调节合适的坡度;7、用面板切换键切换各项显示参数。
三、关机1、使用结束后,按“STOP”键;2、待跑步皮带停止后,取下安全扣;3、下跑步机;4、关掉跑步机的电源开关;在设备使用过程中,选择OPTIONS操作键,根据设备提示选择输入运动者的体重/年龄,及进行另时公英制的切换。
用OK键进行输入确定。
使用程式说明1、MANUAL:手动训练程式;使用Manual (手动)方案时可以控制坡度和速度设置。
图示最初显示为一条水平线。
使用箭头键更改速度或调整坡度。
方案图示反映之后所有列中的变化。
闪烁的栏将指出您在方案中的位置。
2、HEART RATE(REQUIRES CHEST STRAP):心率控制训练程式(需要佩带POLAR HEARTRATE胸带)。
星驰S-TRx跑步机使用手册介绍非常感谢您选择使用星驰(Star Trac)健身器材。
这本用户手册会使您了解星驰S系列跑步机的使用方法和日常维护,这将有助于您更好的达到您的训练目标。
星驰S系列跑步机最大限度的把用户的需要和健身俱乐部的需要结合在一起,是一款适合决大多数健身房使用的有氧健身器材。
S系列跑步机的显示控制面板会以其独特的设计和实用性赢得客户的喜爱。
在它上面设置的随身听支架、阅读架、水壶架和毛巾挂杆充分体现了以客户为中心的设计理念。
我们强烈建议您在使用此跑步机前仔细阅读此手册,以下内容会使您更快捷和安全的学会使用这款跑步机。
读次手册有1.25米的空间以保证安全使用。
跑步机尽量避免放置在潮湿的环境中,跑步机周围不要设置尖锐物品以避免意外发生。
第一章:安全提示以下是针对星驰S系列跑步机使用的安全注意事项,请确保您的会员和俱乐部员工在使用中遵循如下规定。
是否在使用跑步机前阅读此注意事项请建议您的会员在训练前向专业健身人士咨询,以确保其身体情况适合进行锻炼。
尤其是在他(她)中断训练很长时间或年龄超过35岁时。
按照使用手册中的方法使用跑步机。
在使用跑步机前确保跑步带是静止的。
保持跑步带表面清洁和干燥。
如果感到头晕,无力请停止使用跑步机。
在身体感到舒适和安全前,跑步机的速度要慢。
要明确紧急停止开关的位置和使用方法。
不要让儿童使用跑步机,伤残人士或病人使用跑步机时要有人照料。
使用者的体重不能超过跑步机的最大承载量。
(159公斤)跑步机不使用时、更换零件前要拔掉插头。
使用跑步机时要穿运动鞋。
使用跑步机时不要穿过于宽松的衣服。
不要将跑步机至于露天或开放空间。
跑步带转动时不要跳下或跳上跑步机。
不要在跑步机下或跑步机的任何开放空间放置杂物。
按照使用手册上的方法对跑步机进行日常保养。
电源线要远离热源。
跑步机空开要远离毛发。
保养前要拔掉电源插头。
训练前要热身,训练结束后要做放松。
除非专用运动水壶,不要把其他水瓶和茶杯放在跑步机上。
(诺德士)本产品符合 CE 认证的适用要求。
组装手册/用户手册关于安全的重要注意事项 3安全警示标签/序列号 6接地须知 7急停操作程序 7规格 8组装前须知 8零部件 9五金件 10工具 10组装 11移动机器 21展开机器 22校平机器 23特性和功能 24电子表特性和功能 25操作 31开始锻炼 31启动/空闲模式 32快速启动程式 32用户档案 33运动程式 35暂停或停止 39结果/放松模式 39目标跟踪统计数据 39电子表设置模式 41维护 42清洁 42跑带张紧度调节 43调节跑带居中 43润滑跑带 44零部件维护 46故障排除 48为确保保修有效,请妥善保管原始购买凭证并记录以下信息:序列号 __________________________购买日期 ____________________要注册产品保修信息,请联系当地经销商。
有关产品保修的详细信息或者对产品有任何疑问或问题,请联系当地 Nautilus(诺德士)经销商。
要查找当地经销商,请前往: 或 Nautilus, Inc., - 客服电邮:*********************|Nautilus,Inc.,18225NERiversideParkway,Portland,OR97230USA|中国印刷 | © 2014 Nautilus, Inc. | ® 表示美国国内注册商标。
以下商标可能已在其他国家进行了注册或受到通用法律的保护。
Nautilus(诺德士)、Cam logo (鹦鹉螺徽标)、Nautilus T684、Nautilus Connect、Bowflex(搏飞)、Schwinn 以及 Universal 均为 Nautilus, Inc. 公司所有或授权商标。
Polar®、 OwnCode®、MyFitnessPal®、WD-40®和 Lube-N-Walk®为其所有者的注册商标。
说明书常用字词及例句1.遇有apparatus、device、means三字或其特征是任两个字出现在同一份说明书中时,建议其译名分别如下:(i) apparatus;arrangement:装置(ii) device:器件(iii) means:构件*** 但若未出现在同一份说明书中时,则均可译成装置2. et al.:等人3. 翻译means for V+ing时在means前面加适当的中译修饰词,以免同一份中文说明书中出现多个 "装置" 时,不知究竟指的是那一个。
4. this invention, the subject invention, the instant invention, the present invention 一律译成"本发明"5. substantially:应视前后文译为"实质上"、"几乎完全"、"相当"、或"大体上",例如:a. the barrier layer contains a material that is substantially impervious to laser ablation—屏障层包含的物质大体上(or 实质上)不会被激光切除b. tablet has a substantial surface and a second substantial surface—锭剂有一实质表面和第二实质表面6. preferred, preferential,可译成"优选"7. those skilled in the art——所属领域的技术人员those of ordinary skill in the art——所属领域的技术人员8. methods known in the art——此项技术中已知的方法9. are well known——已为我们所熟知10.these include, but are not limited to——其包括(但不限于)11. alternative embodiment——替代(具体)实施例;另一实施例alternatively——或者;另一选择为12. aspect 可译成"方面"、"观点"及"特点",例如:in one embodiment of this aspect—在此方面的一实施例中in one aspect—一方面in a further aspect—另一方面in still a further aspect—另一方面13. 请参考以下的译法:it should be noted—请注意it is to be noted—应注意的是it is expected—我们预期it will be appreciated—应了解it is understood—当然it should be understood—请了解;应了解it is intended—希望例如: Although, in principle, it is intended that all of the isocyanatefunctionality of the polyisocyanate be reacted, it should be understood that 100 percent complete reaction cannot always be attained.—虽然原则上希望所有聚异氰酸酯的异氰酸酯官能度皆可反应,但应了解100%完全反应本人有如何进行英文专利翻译的资料,但是网站上传不了附件,所以只能以这种方式发给大家共享,希望对大家有用。
PART #: F-WXAQJG330 LB. [150 kg] MAXIMUM WEIGHT CAPACITYMANDATORY – LEAVE THIS MANUAL WITH TREADMILL OWNERAquaJoggHydro Treadmill• To assemble your equipment read entire manual and follow all instructions.• Consult your doctor before beginning any sports or exercise program. Patients with hypertension use extreme caution and consult your doctor prior to using this equipment.• It is important to stretch and warm up prior to using this equipment.• Check contents of all packages against the parts diagrams and report any damaged and/or missing parts immediately.• This device is designed for individual, adult use only. Children using this device should be supervised.• This product is to be used in a pool environment where the pH level of the water is maintainedbetween 6.7ppm and 7.6ppm.AquaJogg Hydro TreadmillPAGE DESCRIPTION3EXPLODED VIEW3TOOLS4PARTS LIST5-6OPERATING INSTRUCTIONS6USING THE TREADMILL7MAINTENANCE8WARRANTYExploded ViewTools• Note: The use of these tools is reserved for the assembly of the treadmill • Warning: Keep tools out of reach of childrenParts ListOperating InstructionsOpen the box and take out the treadmill. Lay the treadmill flat on the ground. Make sure all the screws are tightened then put the treadmill in the pool for use.To increase the resistance of the treadmill, tighten the bolt (see picture) with the supplied allen key.Changing Resistance:Opening Treadmill:1. Put the treadmill into the pool using the wheels to assist the transfer.2. Push down on the top of the folding lever to unlock the treadmill. It is recommended to open the treadmill directly in water in order to avoid being crushed by the weight of thedevice.Folding LeverClosing Treadmill:Still in the pool, push on the top of the folding lever while raising the treadmill with your foot. Push the treadmill to the handle bar until you hear the click, meaningit is securely locked.Using the TreadmillWarm Up Phase:Cool Down Phase:The warm up phase is important because it helps your blood flow and will reduce the risk of cramps and muscle injury. It is advisable to stretch during this phase. Do not force your muscles. If you feel pain, stop exercising immediately.The cool down phase helps your cardiovascular system and muscles relax. Repeat the movements performed during the warm up without traumatizing your muscles. Be sure to reduce speed and resistance during this phase. Once you have gained experience, increase the duration and intensity of your regular workout.Consult with a physician before starting any exercise regimenTreadmill Maintenance1. Remove the treadmill once a week and rinse it thoroughly with soft water, not pool water.2. Regularly check the pH of your swimming pool.3. Remove the treadmill during manual dosages of chemical products or chlorine stock treatments. Keep the treadmill away from chemicals to avoid any splashing which can stain or cause deposits.4. Deposits of powder, salt, and other corrosive products will speed up the corrsion process.5. When cleaning the surfaces of the swimming pool it is advised to remove the treadmill from the pool in order to avoid any risk of stains or deposits.6. When you are not using the treadmill, it must be rinsed thoroughly with soft water, then dried and stored in a location away from chemical products.7. If there are lime-scale deposits or stains, they can be removed with a polishing cleaner for stainless steel and a non-abrasive soft cloth. Then wash the treadmill with clean water and dry it completely.The AquaJogg is made of marine quality AISI 316L stainless steel. Its anti-corrosion treatment makes it suitable for chlorinated water, seawater and thermal waters. It does not require any special care in pH-controlled water (6.7 / 7.6).Revised_9.14.2017AQUA CREEK PRODUCTS, LLC LIMITED TWO (2) YEAR WARRANTY:WATER RIDER AQUATIC EXERCISE EQUIPMENT(ITEM #’s F-WXF, F-WX4S, F-WX5, F-WXEL, F-WXAQJG)Aqua Creek Products, LLC (a.k.a. Aqua Creek) warrants to the original end user purchaser that products manufactured by Aqua Creek when properly installed in accordance with assembly and installation instructions, and properly used and maintained, shall be free from defects in material and workmanship for a period of two (2) years from the date of original purchase, provided that Aqua Creek receives prompt notice in writing of any defect or failure and satisfactory proof thereof, with the following exception(s):Exception(s):All non-frame components, i.e. plastic feet, etc… shall be warrantied for six (6) months from the date of original purchase.IMPORTANT: User is not to exceed the rated weight capacity of this product. It is the responsibility of the product owner to verify the weight of the patron for warranty claim purposes and to ensure that the product is not overloaded.This warranty specifically excludes reimbursement for labor to remove, repair, or install the product and any freight charges. These warranties do not cover any damages due to accident, force majeure, act of nature, misuse, abuse, negligence or failure to properly maintain any products, or normal wear and tear from day to day operations. In the event that any products are altered, repaired, or improperly installed or improperly used by anyone without the prior written approval by Aqua Creek, all warranties are void. Non-payment for product to Aqua Creek may void warranty.To initiate a warranty claim, the owner of an Aqua Creek product must provide the place of purchase, in writing, with a full description of the product, its serial number, the dates of purchase and installation, and the exact nature of the defect. Within thirty (30) days after receipt of a written warranty claim by Aqua Creek, and barring any unforeseen delays, the place of purchase will be notified of Aqua Creek’s decisio n regarding the claim.If requested by Aqua Creek, any defective product must be returned, freight prepaid by customer, to Aqua Creek’s designated factory location or duly appointed distributor for inspection and/or repair. Aqua Creek will, at its option, repair or replace the failed or defective item, and deliver the repaired product or replacement to the customer. All freight charges are the responsibility of the customer. Products returned to Aqua Creek for which Aqua Creek provides replacement under this limited warranty shall become the property of Aqua Creek. A new warranty period shall NOT be established for the repaired or replaced products. Such products shall remain under warranty only for the remainder of the original warranty period on the original products purchased.This written limited warranty constitutes the final, complete and exclusive statement of warranty terms. No person or organization is authorized to make any other specific or implied warranties or representations on behalf of Aqua Creek.THE WARRANTIES SET FORTH HEREIN ARE IN LIEU OF ALL OTHER WARRANTIES, EXPRESSED OR IMPLIED, WHICH ARE HEREBY DISCLAIMED AND EXCLUDED, INCLUDING WITHOUT LIMITATION ANY WARRANTY OF MERCHANTABILITY OR FITNESS FOR A PARTICULAR PURPOSE OR USE.THE SOLE AND EXCLUSIVE REMEDIES FOR BREACH OF ANY AND ALL WARRANTIES WITH RESPECT TO THE PRODUCTS SHALL BE LIMITED TO REPAIR OR REPLACEMENT AT AQUA CREEK’S DESIGNATED FACTORY LOCATION, OR DULY APPOINTED DISTRIBUTOR, OR IN PLACE AT AQUA CREEK’S OPTION. I N NO EVENT SHALL AQUA CREEK’S LIABILITY EXCEED THE ENTIRE AMOUNT PAID TO AQUA CREEK BY THE ORIGINAL PURCHASER FOR THE FAILED OR DEFECTIV E PRODUCT.IN NO EVENT SHALL AQUA CREEK PRODUCTS, LLC BE LIABLE FOR ANY INCIDENTAL, CONSEQUENTIAL, SPECIAL, INDIRECT, PUNITIVE OR EXEMPLARY DAMAGES OR LOST PROFITS FROM ANY BREACH OF THIS LIMITED WARRANTY OR OTHERWISE.THIS WARRANTY GIVES YOU SPECIFIC LEGAL RIGHTS AND YOU MAY ALSO HAVE OTHER RIGHTS, WHICH MAY VARY FROM STATE TO STATE. SOME STATES DO NOT ALLOW THE EXCLUSION OR LIMITATION OF INCIDENTAL, SPECIAL OR CONSEQUENTIAL DAMAGES, SO SOME OF THE ABOVE LIMITATIONS OR EXCLUSIONS MAY NOT APPLY TO YOU.Aqua Creek Products, LLC。
GOLD’S GYM is a registered trademark of Gold’s Gym International, Inc. This product is manufactured anddistributed under license from Gold’s Gym Merchandising, Inc.WARNING DECAL PLACEMENTTABLE OF CONTENTSWARNING DECAL PLACEMENT . . . . . . . . . . . . . . . . . . . . . . . . . . . . . . . . . . . . . . . . . . . . . . . . . . . . . . . . . . . . . . .2IMPORTANT PRECAUTIONS ..................................................................3BEFORE YOU BEGIN. . . . . . . . . . . . . . . . . . . . . . . . . . . . . . . . . . . . . . . . . . . . . . . . . . . . . . . . . . . . . . . . . . . . . . . .5PART IDENTIFICATION CHART. . . . . . . . . . . . . . . . . . . . . . . . . . . . . . . . . . . . . . . . . . . . . . . . . . . . . . . . . . . . . . . .6ASSEMBLY. . . . . . . . . . . . . . . . . . . . . . . . . . . . . . . . . . . . . . . . . . . . . . . . . . . . . . . . . . . . . . . . . . . . . . . . . . . . . . . .7OPERATION AND ADJUSTMENT . (13)H OW TO FOLD AND MOVE THE TREADMILL . . . . . . . . . . . . . . . . . . . . . . . . . . . . . . . . . . . . . . . . . . . . . . . . . . .19TROUBLESHOOTING ......................................................................20EXERCISE GUIDELINES ....................................................................23PART LIST. . . . . . . . . . . . . . . . . . . . . . . . . . . . . . . . . . . . . . . . . . . . . . . . . . . . . . . . . . . . . . . . . . . . . . . . . . . . . . . .24EXPLODED DRAWING. . . . . . . . . . . . . . . . . . . . . . . . . . . . . . . . . . . . . . . . . . . . . . . . . . . . . . . . . . . . . . . . . . . . . .25ORDERING REPLACEMENT PARTS. . . . . . . . . . . . . . . . . . . . . . . . . . . . . . . . . . . . . . . . . . . . . . . . . . . Back Cover LIMITED WARRANTY. . . . . . . . . . . . . . . . . . . . . . . . . . . . . . . . . . . . . . . . . . . . . . . . . . . . . . . . . . . . . . . Back CoverIMPORTANT PRECAUTIONS1. B efore beginning any exercise program, con-sult your physician. This is especially impor-tant for persons over age 35 or persons with pre-existing health problems.2. I t is the responsibility of the owner to ensurethat all users of this treadmill are adequately informed of all warnings and precautions.3. Use the treadmill only as described.4. K eep the treadmill indoors, away from mois-ture and dust. Do not put the treadmill in agarage or covered patio, or near water.5. P lace the treadmill on a level surface, withat least 8 ft. (2.4 m) of clearance behind itand 2 ft. (0.6 m) on each side. Do not placethe treadmill on any surface that blocks airopenings. To protect the floor or carpet from damage, place a mat under the treadmill. 6. D o not operate the treadmill where aerosolproducts are used or where oxygen is being administered.7. K eep children under age 12 and pets awayfrom the treadmill at all times.8. T he treadmill should be used only by per-sons weighing 300 lbs. (136 kg) or less.9. N ever allow more than one person on thetreadmill at a time.10. W ear appropriate exercise clothes while us-ing the treadmill. Do not wear loose clothesthat could become caught in the treadmill.Athletic support clothes are recommendedfor both men and women. Always wear ath-letic shoes. Never use the treadmill with bare feet, wearing only stockings, or in sandals.11. W hen connecting the power cord (see page13), plug the power cord into a surge sup-pressor (not included) and plug the surgesuppressor into a grounded circuit capableof carrying 15 or more amps. No other appli-ance should be on the same circuit. Do notuse an extension cord.12. U se only a single-outlet surge suppressorthat meets all of the specifications described on page 13. To purchase a surge suppressor call the telephone number on the front cover of this manual.13. F ailure to use a properly-functioning surgesuppressor could result in damage to thecontrol system of the treadmill. If the control system is damaged, the walking belt mayslow, accelerate, or stop unexpectedly, which may result in a fall and serious injury.14. K eep the power cord and the surge suppres-sor away from heated surfaces.15. N ever move the walking belt while the poweris turned off. Do not operate the treadmill ifthe power cord or plug is damaged, or if thetreadmill is not working properly. (See TROU-BLESHOOTING on page 20 if the treadmill is not working properly.)16. R ead, understand, and test the emergencystop procedure before using the treadmill (see HOW TO TURN ON THE POWER on page 15).17. N ever start the treadmill while you are stand-ing on the walking belt. Always hold thehandrails while using the treadmill.18. T he treadmill is capable of high speeds. Ad-just the speed in small increments to avoidsudden jumps in speed.19. T he heart rate monitor is not a medicaldevice. Various factors, including the user’smovement, may affect the accuracy of heartrate readings. The heart rate monitor is in-tended only as an exercise aid in determining heart rate trends in general.WARNING: To reduce the risk of serious injury, read all important precations and in-structions in this manual and all warnings on your treadmill before using your treadmill. ICON as-sumes no responsibility for personal injury or property damage sustained by or through the use of this product.20. N ever leave the treadmill unattended whileit is running. Always remove the key, unplug the power cord, and press the power switch into the off position when the treadmill is not in use. (See the drawing on page 5 for thelocation of the power switch.)21. D o not attempt to raise, lower, or move thetreadmill until it is properly assembled. (See ASSEMBLY on page 7, and HOW TO FOLDAND MOVE THE TREADMILL on page 19.)You must be able to safely lift 45 lbs. (20 kg) to raise, lower, or move the treadmill. 22. W hen folding or moving the treadmill, makesure that the storage latch is holding theframe securely in the storage position. 23. N ever insert any object into any opening onthe treadmill.24. I nspect and properly tighten all parts of thetreadmill regularly.25. D ANGER: Always unplug the powercord immediately after use, before clean-ing the treadmill, and before performing the maintenance and adjustment proceduresdescribed in this manual. Never remove the motor hood unless instructed to do so by an authorized service representative. Servic-ing other than the procedures in this manual should be performed by an authorized ser-vice representative only.26. T his treadmill is intended for home use only.Do not use this treadmill in a commercial,rental, or institutional setting.27. O ver exercising may result in serious injuryor death. If you feel faint or if you experience pain while exercising, stop immediately and cool down.SAVE THESE INSTRUCTIONSThank you for selecting the new GOLD’S GYM®TRAINER 410 treadmill. The TRAINER 410 treadmill provides an impressive selection of features designed to make your workouts at home more effective and enjoyable.For your benefit, read this manual carefully before you use the treadmill. If you have questions after reading this manual, please see the front cover of this manual. To help us assist you, note the product model number and serial number before contacting us. The model number and the location of the serial number decal are shown on the front cover of this manual.Before reading further, please familiarize yourself with the parts that are labeled in the drawing below.BEFORE YOU BEGINPART IDENTIFICATION CHARTUse the drawings below to identify small parts used for assembly. The number in parentheses below each draw-ing is the key number of the part, from the PART LIST near the end of this manual. The number following the key number is the quantity used for assembly. Note: If a part is not in the hardware kit, check to see if it is preat-tached. Extra hardware may be included.#8 x 3/4" Screw(4)–103/8" x 3 1/4" Screw (2)–65/16" x 3" Screw (7)–23/8" Star Washer (3)–6#10 Star Washer (23)–45/16" Star Washer (6)–45/16" x 3/4"Screw (5)–2#10 x 3/4" Screw(8)–6touch of a button. As you exercise, the console will display continuous exercise feedback. You can even measure your heart rate using the built-in handgrip heart rate monitor.The console also features four preset weight-loss workouts designed to help you to burn calories and enhance your cardiovascular system while toning and strengthening your muscles. Note: The weight-loss workouts require the use of dumbbells. To purchase additional dumbbells, call the telephone number on the front cover of this manual.In addition, the console offers four preset performance workouts. Each workout controls the speed and incline of the treadmill as it guides you through an effective exercise session.The first time sary (see page 22).Note: The console can display speed and distance in either miles or kilometers. To find which unit of mea -surement is selected, see THE INFORMATION MODE on page 18. For simplicity, all instructions in this man-ual refer to miles.ETGG39610(GGTL39610)H OW TO FOLD AND MOVE THE TREADMILLTROUBLESHOOTINGEXERCISE GUIDELINESThese guidelines will help you to plan your exercise program. For detailed exercise information, obtain a reputable book or consult your physician. Remember, proper nutrition and adequate rest are essential for successful results.EXERCISE INTENSITYWhether your goal is to burn fat or to strengthen your cardiovascular system, exercising at the proper inten-sity is the key to achieving results. You can use your heart rate as a guide to find the proper intensity level. The chart below shows recommended heart rates for fat burning and aerobic exercise.heart rate for maximum fat burning, and the highest number is the heart rate for aerobic exercise.Burning Fat—To burn fat effectively, you must exer-cise at a low intensity level for a sustained period of time. During the first few minutes of exercise, your body uses carbohydrate calories for energy. Only after the first few minutes of exercise does your body begin to use stored fat calories for energy. If your goal is to burn fat, adjust the intensity of your exercise until your heart rate is near the lowest number in your training zone. For maximum fat burning, exercise with your heart rate near the middle number in your training zone.Aerobic Exercise—If your goal is to strengthen your cardiovascular system, you must perform aerobic exercise, which is activity that requires large amounts of oxygen for prolonged periods of time. For aerobic exercise, adjust the intensity of your exercise until your heart rate is near the highest number in your training zone.WORKOUT GUIDELINESWarming Up—Start with 5 to 10 minutes of stretch-ing and light exercise. A warm-up increases your body temperature, heart rate, and circulation in preparation for exercise.Training Zone Exercise—Exercise for 20 to 30 min-utes with your heart rate in your training zone. (During the first few weeks of your exercise program, do not keep your heart rate in your training zone for longer than 20 minutes.) Breathe regularly and deeply as you exercise—never hold your breath.Cooling Down—Finish with 5 to 10 minutes of stretch-ing. Stretching increases the flexibility of your muscles and helps to prevent post-exercise problems. EXERCISE FREQUENCYTo maintain or improve your condition, complete three workouts each week, with at least one day of rest between workouts. After a few months of regular exer-cise, you may complete up to five workouts each week, if desired. Remember, the key to success is to make exercise a regular and enjoyable part of your everyday life.WARNING: Before beginning this or any exercise program, consult your physi-cian. This is especially important for persons over age 35 or persons with pre-existing health problems.The heart rate monitor is not a medical device. Various factors may affect the accuracy of heart rate readings. The heart rate monitor is intended only as an exercise aid in determin-ing heart rate trends in general.1 8 #8 x 1/2" Ground Screw2 6 3/8" x3 1/4" Screw3 6 3/8" Star Washer4 34 #8 x 3/4" Screw5 2 5/16" x 3/4" Screw6 4 5/16" Star Washer7 2 5/16" x 3" Screw8 6 #10 x 3/4” Screw9 2 3/8" x 2 1/2" Bolt10 4 3/8" Nut11 2 M6 x 55mm Screw12 2 3/8" x 1" Bolt13 3 Hood Clip14 19 #8 x 3/4" Truss Head Screw15 1 3/8" x 1 3/4" Bolt16 2 3/8" Jam Nut17 2 1/4" x 3/8" Screw18 4 #8 x 1/2" Screw19 4 5/16" x 1 1/2" Bolt20 4 5/16" Nut21 2 #8 x 1/2" Pan Head Screw22 2 #8 Star Washer23 4 #10 Star Washer24 2 Drive Roller Washer25 2 1/4" x 1 1/4" Screw26 2 Incline Frame Washer27 1 Left Foot Rail28 2 Platform Cushion29 1 Caution Decal30 2 Belt Guide31 1 Drive Roller/Pulley32 1 Magnet33 1 Reed Switch34 1 Reed Switch Clamp35 1 Drive Motor36 1 Controller37 1 Controller Plate38 1 Frame39 1 Walking Platform40 1 Walking Belt41 1 Right Foot Rail42 1 Idler Roller43 1 Left Rear Foot44 1 Hex Key45 1 5/32" Hex Key46 1 Right Rear Foot47 1 Hood Accent48 1 Motor Hood49 1 Incline Motor50 2 Lift Frame Bushing51 1 Lift Frame52 1 Belly Pan53 1 Power Cord Grommet54 1 Power Cord55 1 Power Switch56 1 Access Door57 1 Console58 1 Console Base59 1 Left Handrail60 2 Handrail Cap61 1 Console Crossbar62 1 Key/Clip63 1 Upright Wire64 1 Right Handrail65 2 Dumbbell66 1 Left Upright67 1 Latch Housing68 1 Latch Pin Assembly69 2 Warning Decal70 4 Base Cap71 2 Thick Base Pad72 2 Thin Base Pad73 1 Upright Grommet74 1 Base75 2 Wheel76 1 Right Upright77 2 Lift Frame Pin78 8 #8 x 3/4" Tek Screw79 2 1/4" Star Washer80 1 3/8" x 1 1/2" Bolt81 4 Wire Tie82 1 Drive Motor Belt83 2 Round Handrail Cap84 1 French Latch Decal85 8 #10 Flat Washer* – User’s ManualK ey No. Qty. Description K ey No. Qty. DescriptionPART LIST Model No. GGCTL39611.0 R0911ANote: Specifications are subject to change without notice. For information about ordering replacement parts, see the back cover of this manual. *These parts are not illustrated.ORDERING REPLACEMENT PARTSTo order replacement parts, please see the front cover of this manual. To help us assist you, be prepared to provide the following information when contacting us:• the model number and serial number of the product (see the front cover of this manual)• the name of the product (see the front cover of this manual)• t he key number and description of the replacement part(s) (see the PART LIST and the EXPLODED DRAWING near the end of this manual)Part No. 321069 R0911A Printed in China © 2011 ICON IP, Inc.。
跑步机操作步骤英文作文英文:As a fitness enthusiast, I often use the treadmill as part of my workout routine. The operation steps for the treadmill are quite simple and straightforward. Here's a detailed guide on how to use the treadmill effectively.Step 1: Start by adjusting the speed and inclinesettings to your preference. Most treadmills have buttonsor a touchscreen display that allows you to control these settings. For example, if I want to do a brisk walk, Iwould set the speed to around 3.5 mph and the incline to 1%.Step 2: Once the settings are adjusted, I step onto the treadmill and start walking or jogging. It's important to maintain proper form and posture while using the treadmillto prevent injury. I usually keep my back straight, shoulders relaxed, and arms swinging naturally.Step 3: As I continue my workout, I often like to change the speed and incline settings to add variety to my routine. For example, I might increase the speed for a short sprint interval, and then decrease it for a recovery period.Step 4: When I'm finished with my workout, I gradually reduce the speed and incline settings before coming to a complete stop. This helps to prevent dizziness or lightheadedness that can occur when abruptly stopping a workout.Step 5: Finally, I take a few minutes to cool down by walking at a slower pace and doing some gentle stretching exercises. This helps to gradually lower my heart rate and prevent muscle soreness.Overall, using the treadmill is a great way to get in a cardio workout, and by following these simple steps, I can maximize the benefits of my treadmill workout.中文:作为一个健身爱好者,我经常使用跑步机作为我的健身锻炼的一部分。
跑步机说明书英文翻译将电源插头插入家用AC 220V电源插座。
.The plug should be inserted into the AC 220V household power outlet.2、仔细检查各连线,确认无误后通电,电子表蓝光显示“----”。
放上安全开关系统进入待机状态,电子表窗口显示为:心率显示“P”,其它均显示为“0”。
2.Check and confirm every wires are connected wellthen electrify the machinethe top computer will display “----”in blue light.Put the safety keythe system will enter the standby modethe window of the top top computer will display:Ppulse and 0others.3、待机状态下,按“启动暂停”键,系统进入手动运行状态,“时间”显示窗开始3秒倒数后启动,系统将以1.0km/h的速度开始运行。
按“加速”或“减速”键来变换运行的速度,且伴有蜂鸣器的叫声。
按住“加速”或“减速”键2秒钟可以连续动作,来调整速度。
本系统最高运行速度为12km/h最长运行时间99.59分钟,循环计时。
3.Press the “start/pause”key in the standby modethe system will enter the manually operation modethe machine will start in the speed 1.0km/h after 3 seconds count backwards which displayed in the time window.Press FAST or SLOW could change the speed with buzzing. Press and hold down the key for more than 2 seconds could adjust the speed continuously.The highest speed of this system is 12km/hthe longest displayed time is 99.59 minutes diaplayed in circularly.4、在运行状态下,按“停止”键或拿下安全开关,系统将会减速直到停止。
4.When pressing STOP or take down the safety key in the operating conditionthe system will slow down to stop.5、在待机状态下,按“模式”键,即“时间、距离、卡路里”三种模式的设置(各小窗口显示在闪动),按“加速”“减速”键来设置相应的运动量参数。
最后按“启动”键系统进入模式运行状态。
当你设置的运动量参数“SET”递减到0时,速度显示窗口显示“2.0”,系统会发出“Bi”警报,速度会快速下降,系统就进入2.0km/h速度。
5.Pressing MODE key in the standby mode could set three modes:TIME/DIATANCE/CALORIEwhich would twinkling in the each small windowspress FAST/SLOW could set the sports parameterthen pressing START key enter the mode.When the sports parameter descending to zerothe speed window will display 2.0 and the system willalarm in “Bi”alarm soundthe speed will down to 2.0km/h.6、在待机状态下,按“程式”键,会有12种自动程式可供用户选择。
P1为手动模式白色,再按“加速”“减速”键来设置运动时间,最后按“启动/暂停”键开始运行。
6.Pressing PROGRAM in the standby modethere are 12 automatic program for users choice.P1 is Manual Modein white colorpress FAST and SLOW to set exercise timethen press START/PAUSE to start running.P2-P12为自动模式,其中P2、P3、P4适合青少年橙色:P5、P6、P7适合家庭妇女、老年人绿色:P8、P9、P10适合成年人黄色:P11、P12适合运动、专业型的人员;能全面满足全家人健身的需求。
选择适合的程式进入后:P2-P12 are automatic modeP2P3P4 in orange colorare appropriate to teen-agersP5P6P7in green color are appropriate to housewife and old peopleP8P9P10in yellow color are appropriate to adultP11P12 are appropriate to professional athlete.All these program could meet the need of the whole familywhen choose and enter the appropriate mode:P1速度以1KM/H运行,按“SPEED”、“SPEED-”进行调节,时间、距离、卡路里,从零开始,正向计数并循环。
P1:operating in the speed 1KM/Hpress “SPEED”、“SPEED-”could adjust the speedtime/distance/calorie are displayed from zero forward counting in circularly. P2,距离窗口显示“1.5”KM,时间窗口显示“12:00”分钟,开始倒计时,速度窗口默认为“7.5”KM/H。
按“SPEED”、“SPEED-”可进行速度调节,但在“Bi”一声后,恢复到7.5KM/H。
P2:distance window display 1.5KMtime window display 12:00 minutesthen the system begin to count downspeed window display “7.5”KM/H.Pressing “SPEED”、“SPEED-”to adjust speedthe speed return to 7.5KM/H when the system sound“Bi”. P3距离窗口显示“3.0”KM,时间窗口显示“26:00”分钟,开始倒计时,速度窗口默认为“7.0”KM/H。
按“SPEED”、“SPEED-”可进行速度调节,但在“Bi”一声后,恢复到7.0KM/H。
P3:distance window display“3.0”KM time window display“26:00”minutesthen the system begin to count downspeed window display “7.0”KM/H.Pressing “SPEED”、“SPEED-”to adjust speedthe speed return to “7.0”KM/H when the system sound “Bi”.P4距离窗口显示“5.0”KM,时间窗口显示“50:00”分钟,开始倒计时,速度窗口默认为“6.0”KM/H。
按“SPEED”、“SPEED-”可进行速度调节,但在“Bi”一声后,恢复到6.0KM/H。
P4:distance window display“5.0”KM time window display“50:00”minutesthen the system begin to count downspeed window display “6.0”KM/H.Pressing “SPEED”、“SPEED-”to adjust speedthe speed return to “6.0”KM/H when the system sound “Bi”.P5距离窗口显示“1.0”KM,时间窗口显示“7:00”分钟,开始倒计时,速度窗口默认为“8.6”KM/H。
按“SPEED”、“SPEED-”可进行速度调节,但在“Bi”一声后,恢复到8.6KM/H。
P5:distance window display“1.0”KM time window display“7:00”minutesthen the system begin to count downspeed window display “8.6”KM/H.Pressing “SPEED”、“SPEED-”to adjust speedthe speed return to “8.6”KM/H when the system sound “Bi”.P6距离窗口显示“1.0”KM,时间窗口显示“9:00”分钟,开始倒计时,速度窗口默认为“4.2”KM/H。
按“SPEED”、“SPEED-”可进行速度调节,但在“Bi”一声后,恢复到4.2KM/H。
P6:distance window display“1.0”KM time window display“9:00”minutesthen the system begin to count downspeed window display “4.2”KM/H.Pressing “SPEED”、“SPEED-”to adjust speedthe speed return to “4.2”KM/H when the system sound “Bi”.P7-P12六个自动程式进入后,“TIME”窗口闪烁,显示预设时间30:00,按“SPEED”、“SPEED-”可进行时间调节,时间的调节的范围为:5:00-99:59。
设定所需的运动时间,按“START”键即可启动内置程式。