标准版U阅通使用手册
- 格式:docx
- 大小:711.71 KB
- 文档页数:12
优学通简便操作手册一、班主任互连网发送短信说明登陆网站下载优学通客户端,安装后设置服务器域名:,端口设为808,如果出现不能登录的,请将“我的文档”中“my .youxuetong”文件夹删除,输入用户名与密码即可,(可以进行短信群发、单发等功能)。
二、班主任手机发送短信说明群发:手机编辑短信内容,发送到1065596000055单发:学生姓名#短信内容,发送到1065596000056多发:学生姓名#学生姓名#短信内容,发送到1065596000056 三、班主任网上发送短信说明登录优学通后,点击“家校互动管理”→“班主任管理”→“班级短信”,班主任在文本框中输入短信内容,点击发送按钮,将短信发送给全班学生家长。
四、班主任怎么添加、修改本班学生登录优学通后,点击“学校办公管理”→“校园办公平台”进入本校的校园办公平台。
进入后,点击左侧菜单列表中的“学生管理”→“班主任管理”,点击右上角的“新增”文字链接,输入新增学生姓名、家长手机,点击“邀请开通”按钮即可。
如果修改学生信息,找到要调整的学生,点击后面的“编辑”、“换班”等文字链接,进行信息的调整和班级的调换。
五、班主任怎样给本班学生发作业登录优学通后,点击“家校互动管理”→“班主任管理”→“班级作业”,班主任在文本框中输入作业内容(支持附件的上传),点击发送按钮,学生家长会通过手机短信和互联网两种方式收到老师布置的作业。
六、班主任怎样使用教育教学资源登录优学通后,点击“教育教学资源”→“省基础教育资源”,进入省基础教育资源中心查找相关的教育教学资源。
六、管理员怎样添加、修改学校部门信息登录优学通后,点击“学校办公管理”→“校园办公平台”进入本校的校园办公平台。
进入后,点击左侧菜单列表中的“教师管理”→“部门管理”→“添加部门”。
如果修改部门名称,找到相应的部门,点击后面的“编辑”文字链接,进行修改,修改完成后点击“保存”按钮即可。
七、管理员怎样添加、修改学校老师信息登录优学通后,点击“学校办公管理”→“校园办公平台”进入本校的校园办公平台。
用友通标准版10.3plus1发版说明目录:用友通标准版10.3plus1发版说明 (1)一、产品概述 (2)二、产品应用特色 (2)三、目标用户 (3)四、产品名称及版本号 (3)五、产品主要功能变化 (3)5.1系统管理 (3)5.2基础档案 (4)5.3业务通 (4)5.3.1采购 (5)5.3.2销售 (6)5.3.3库存 (7)5.4核算 (7)5.5工资 (8)5.6固定资产 (8)5.7总账 (9)5.8财务分析 (10)5.9老板通 (10)5.10系统工具 (10)5.11跨账套查询工具 (11)5.12门户 (11)5.13移动商务 (11)六、运行环境 (11)七、数据升级 (14)八、注意事项 (16)一、产品概述从客户实际需求出发,面向成长型企业开发设计,提高管理水平、优化运营流程,实现全面、精细化财务管理与业务控制的一体化管控信息平台,帮助企业快速、准确应对市场变化,支持稳定、安全、成熟的长期可持续性发展;同时满足企业决策者和管理者随时对内部信息的需求,提供方便快捷、高效率的实时动态信息交互,实现实时企业随时管理;功能模块包括账务(往来管理、现金银行、项目管理)、出纳、报表、工资、固定资产、财务分析、业务通(采购、销售、库存)、核算、老板通、移动商务、票据通模块。
开发目标:为了适应成长型企业财务业务一体化处理的需要,同时实现产品简便性操作,统一登陆、流程导航。
主要改进:在用友通标准版10. 3产品基础上进行了一些功能改进:在标准流程下增加了参照采购入库单生成发货单、材料出库单的功能。
增加了单据编号可以由用户根据本企业情况进行设置的处理,增加了跨账套查询工具,满足用户多角度分析报表的需要。
系统工具中增加了账套基础信息复制的工具、提供基本单据的导入导出功能,满足用户同时建立多套账的需要。
增加了采购发票核销明细表、销售发票核销明细表,使用户能对发票的核销情况一目了然。
客户期间对账单增加了按订单小计功能,更加贴近企业的实际应用。

锐捷U空间(UWS基础版)客户端文档版本V1.2归档日期2022-09-30版权声明copyright © 2022 锐捷网络保留对本文档及本声明的一切权利。
未得到锐捷网络的书面许可,任何单位和个人不得以任何方式或形式对本文档的部分或全部内容进行复制、摘录、备份、修改、传播、翻译成其他语言、将其部分或全部用于商业用途。
、、和其他锐捷网络商标均为锐捷网络的商标。
本文档提及的其他所有商标或注册商标,由各自的所有人拥有。
免责声明您所购买的产品、服务或特性等应受商业合同和条款的约束,本文档中描述的部分或全部产品、服务或特性可能不在您的购买或使用范围之内。
除非合同另有约定,锐捷网络对本文档内容不做任何明示或默示的声明或保证。
由于产品版本升级或其他原因,本文档内容会不定期进行更新。
锐捷网络保留在没有任何通知或者提示的情况下对文档内容进行修改的权利。
本手册仅作为使用指导。
锐捷网络在编写本手册时已尽力保证其内容准确可靠,但并不确保手册内容完全没有错误或遗漏,本手册中的所有信息也不构成任何明示或暗示的担保。
前言读者对象本书适合下列人员阅读●普通用户●网络管理员技术支持●锐捷网络官方网站:●锐捷网络官方网站服务与支持版块:/fw/●锐捷网络7*24h智能客服闪电兔:●锐捷网络7*24h技术服务热线:4008-111-000●锐捷网络售后服务工具——小锐云服:/special/fw/tool/xryf/●锐捷网络技术支持与反馈信箱:*********************.cn●锐捷网络文档支持与反馈信箱:**************.cn小锐云服APP 锐捷服务公众号本书约定1. 图形界面格式约定2. 各类标志本书还采用各种醒目标志来表示在操作过程中应该特别注意的地方,这些标志的意义如下:警告表示用户必须严格遵守的规则。
如果忽视此类信息,可能导致数据丢失或设备损坏。
注意表示用户必须了解的重要信息。
如果忽视此类信息,可能导致功能失效或性能降低。
1目的:建立一个指南帮助培训操作员操作UP35002范围适用于所有操作UP3500的员工3开机准备○1开机使用前,请确认机器状态是否完好:--检查并确认电源连接完好,电源配置正确--检查并确认电脑,显示器,主机连接正确--检查并确认各运动部件处于自由状态--检查并确认工作台上未放置异物○2开机程序请按照下程序启动测试系统--打开主电源--打开主机电源--打开电脑--双击桌面上的测试系统快捷键,启动操作系统4用户登录进入测试系统后,系统会要求用户首先验证身份及用户权限:键入正确的用户名及密码后方可执行操作。
5系统复位○1在进行测试和其他操作以前,需要让系统复位以保证测量的正常进行。
点击工具栏的Home按钮,系统自动进行复位操作,并弹出复位状态界面。
○2系统校准:每次开机,请于测试前使用标准高度块,对系统进行校准。
把校准块平整地放于工作台上,调节位置使标准快显示在屏幕上,调节激光微调旋钮,将光线调到基准线位置。
这时点击界面的Mastet按钮,系统将进行Master核对。
核对完后程序会弹出成功或失败的对话框,如果成功就表示系统校准完成,如果失败就需要执行校准修正点击菜单是的Calibration选项,如下图所示,校准对话框弹出在Gauge height 中输入实际标准块的高度,默认是0.15mm。
点击执行校准,系统将自行记录校准结果用于测量数据处理6操作使用○1校准完成后,即可点击选择产品并切换到Auto模式,点击测试键,机器自动完成全部测试过程。
○2本机提供两种程序选择模式,点击左边Select Product,可以在测试程序列表中选择待测试产品,点击右边下拉条,可以选择当日已测试过的产品7紧急停止及复位○1操作过程中发生紧急状况时,可以点击Pause按钮或手动急停按钮,停止一切动作--紧急停止后,必须确认故障已经排除,并重新检查机器状态完好,才能重开机使用--紧急停止可能对机器的软件造成损害,应尽量避免使用○2关机程序机器使用完毕,请按照以下步骤关机:--清理台面样品--机器复零位--退出测试系统--关电脑--关主机电源--关主电源8注册新产品信息○1在本机上进行编程测试前,应先行注册产品信息--点击菜单文件中的新建选项,在Add Product界面中添加产品信息--添加完产品后,产品就会出现在产品选择的下拉列表中。
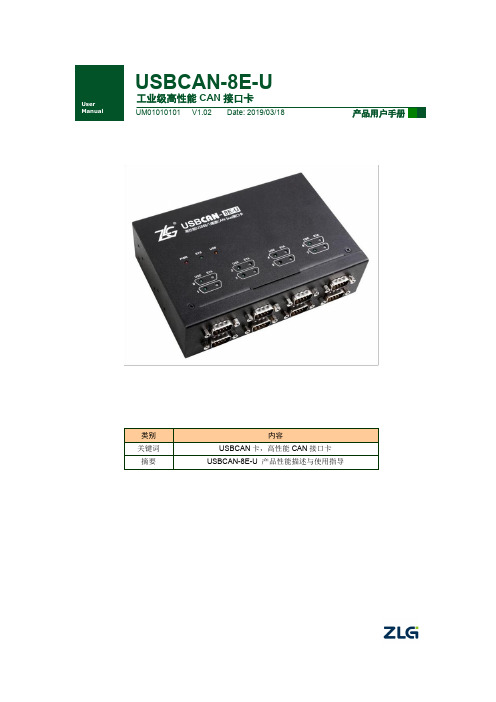
USBCAN-8E-U工业级高性能CAN 接口卡修订历史目录1. 产品简介 (1)1.1产品概述 (1)1.2产品外观 (1)1.3功能特点 (2)1.4产品规格 (3)1.4.1电气参数 (3)1.4.2工作温度 (3)1.4.3防护等级 (3)1.5机械安装尺寸 (4)1.6典型应用 (5)2. 设备硬件接口说明 (6)2.1电源接线 (6)2.2终端电阻拨码开关 (6)2.3CAN通讯接口 (7)2.4信号指示灯 (8)2.5系统连接 (9)3. 驱动程序安装 (10)3.1驱动安装 (10)3.2卸载驱动 (14)4. 快速使用指南 (15)4.1CANTest基本操作 (15)4.1.1设备类型选择 (15)4.1.2转发设置 (16)4.1.3滤波设置 (17)4.2发送接收实验 (18)4.2.1搭建测试环境 (18)4.2.2打开设备 (18)4.2.3发送数据 (18)4.2.4实时保存与停止保存 (19)4.2.5总线利用率 (19)4.2.6错误信息显示 (20)5. 设备重启和升级操作指导 (21)5.1.1设备重启 (21)5.1.2设备升级 (21)6. 上位机二次开发指导 (22)6.1前期准备资料 (22)6.2接口函数使用常见问题 (22)6.3接口库函数使用流程 (24)7. 检查和维护 (25)8. 装箱清单 (26)9. 免责说明 (27)1. 产品简介1.1 产品概述USBCAN-8E-U是广州致远电子开发的一款高性能CAN接口卡,其兼容USB2.0总线规范,集成8路CAN-bus接口,CAN通道集成独立的电气隔离保护电路。
接口卡使PC通过USB端口连接至CAN网络,构成CAN-bus控制节点。
USBCAN-8E-U高性能CAN接口卡是CAN-bus产品开发、CAN-bus数据分析的强大工具;USBCAN-8E-U接口卡上自带电气隔离模块,使接口卡避免由于地环流的损坏,增强系统在恶劣环境中使用的可靠性。

INSTALLATION AND OPERATIONUSER MANUALUM980BDS/GPS/GLONASS/Galileo/QZSS全系统全频高精度RTK定位模块修订记录权利声明本手册提供和芯星通科技(北京)有限公司(以下简称为“和芯星通”)相应型号产品信息。
和芯星通保留本手册文档,及其所载之所有数据、设计、布局图等信息的一切权利、权益,包括但不限于已有著作权、专利权、商标权等知识产权,可以整体、部分或以不同排列组合形式进行专利权、商标权、著作权授予或登记申请的权利,以及将来可能被授予或获批登记的知识产权。
和芯星通拥有“和芯星通”、“UNICORECOMM”以及本手册下相应产品所属系列名称的注册商标专用权。
本手册之整体或其中任一部分,并未以明示、暗示、禁止反言或其他任何形式对和芯星通拥有的上述权利、权益进行整体或部分的转让、许可授予。
免责声明本手册所载信息,系根据手册更新之时所知相应型号产品情形的“原样”提供,对上述信息适于特定目的、用途之准确性、可靠性、正确性等,和芯星通不作任何保证或承诺。
和芯星通可能对产品规格、描述、参数、使用等相关事项进行修改,或一经发现手册误载信息后进行勘误,上述情形可能造成订购产品实际信息与本手册所载信息有差异。
如您发现订购产品的信息与本手册所载信息之间存有不符,请您与本公司或当地经销商联系,以获取最新的产品手册或其勘误表。
UM980 User Manual前言本手册为用户提供有关和芯星通UM980模块的硬件组成信息。
适用读者本手册适用于对GNSS模块有一定了解的技术人员使用。
目录1产品简介 (1)1.1产品主要特点 (2)1.2技术指标 (2)1.3模块概览 (4)2硬件组成 (5)2.1机械尺寸 (5)2.2引脚功能描述(图) (7)2.3电气特性 (10)2.3.1最大耐受值 (10)2.3.2工作条件 (10)2.3.3IO阈值特性 (11)2.3.4天线特性 (11)3硬件设计 (11)3.1推荐的最小系统设计 (11)3.2天线馈电设计 (12)3.3接地与散热 (13)3.4模块上电与下电 (13)4生产要求 (14)5包装 (15)5.1标签说明 (15)5.2包装说明 (15)UM980 User Manual1产品简介UM980是和芯星通自主研发的新一代BDS/GPS/GLONASS/Galileo/QZSS全系统全频高精度RTK定位模块,基于和芯星通自主研发的新一代射频基带及高精度算法一体化GNSS SoC芯片—NebulasⅣTM设计。
yono Business – User Manualyono Business – DashboardTable of ContentsTable of Contents (2)List of Figures (3)3.Post Login Features (4)3.1 Dashboard (5)List of FiguresFigure 3.1: yono Dashboard: Overview – Total Credits (7)Figure 3.2: yono Dashboard: Overview – Total Debits (8)Figure 3.3: yono Dashboard: Overview – Payments Pending for Approval (9)Figure 3.4: yono Dashboard: Overview – LC expiring in next 7 days (10)Figure 3.5: yono Dashboard: Account Summary – Assets (11)Figure 3.6: yono Dashboard: Account Summary – Liabilities (12)Figure 3.7: yono Dashboard - Alerts (13)Figure 3.8: yono Dashboard: Upcoming Payable - Trade (14)Figure 3.9: yono Dashboard: Upcoming Payable – Term Loan (15)Figure 3.10: yono Dashboard: Upcoming Payable – Schedule Payments (16)Figure 3.11: yono Dashboard: Non-Fund Limit Summary (17)Figure 3.12: yono Dashboard – Hamburger Settings (18)Figure 3.13: yono Dashboard – Without widgets (19)3. Post Login FeaturesPost successful login to yono Business, system will redirect the corporate user to yono Business landing page. Corporate User will be able to:•View Dashboard analytics:View the insight full analytics of corporate accounts3.1 DashboardDashboard is applicable for corporates (e.g. Vyaapar, Vistaar, and Saral) and to all user group having any accounts map:Dashboard consist of following five widgets:1. Overviewa. Total creditsb. Total debitsc. Pending approval for authorizationd. Import LC expiring in next 7 days2. Account Summarya. Assetsb. Liabilities3. Alerts4. Upcoming Payable5. Non Fund Limit SummarySummary for each dashboard widget as:Note:1. System will show the amount in Figure (refer to Figure 1) and crore (refer to Figure 3) ondashboard widgets. User will be able to toggle the amount between Figure and crore2. System will show the amount in Figure and rounded off numbers in crore along withdecimal in second place for all widgets excluding alerts3. Toggle button will not be applicable if amount in any widget/card less than ‘1000000’ (10Lac)E.g.1. If amount shown in Figure i.e. 22, 15, 00,000.00 and user has toggle from Figure tocrore then amount will display as 22.15 Crore2. If amount shown in crore i.e. 22.15 Crore and user has toggle from crore to Figurethen amount will display as 22, 15, 00,000.003.1.1 OverviewThe Overview widget gives the insightful view of corporates debits/credits, pending approval count and import LC expiring details so that corporate can manage its remittance & liquidityTotal Credits: Total amount credited on previous dayTotal Credit is the aggregate credit summary of all the ‘Current’ and ‘Cash Credit’ account mapped to the user.User will be able to view the summation of amount credited to the user account(s) on previous date Figure 3.1: yono Dashboard: Overview – Total CreditsTotal Debits: Total amount debited on previous dayTotal Debit is the aggregate debit summary of all the ‘Current’ and ‘Cash Credit’ account mapped to the user.User will be able to view the summation of amount debited to the user account(s) on previous date Figure 3.2: yono Dashboard: Overview – Total DebitsPending Approval: Transactions pending for approvalThis widget in YONO will provide the below details to the logged in user on the dashboard1. Number of transactions pending for authorization2. Consolidated Amount of the transactions pending for authorizationFigure 3.3: yono Dashboard: Overview – Payments Pending for ApprovalLC expiring in next 7 days: Import LC expiring in next 7 daysThis widget will show the aggregate count and amount of import LC which are expiring in coming next 7 daysThis widget is applicable for trade customers onlyFigure 3.4: yono Dashboard: Overview – LC expiring in next 7 days3.1.2 Account SummaryProvide an overview of the account balance split by different account type with details of balance amount, sanctioned limit and outstanding amountAssets: Aggregate balance for assets accountsThis widget will show the aggregate balance of the following assets accounts map:1. Current Account2. Savings Account3. FD AccountIf any account is not map then, respective account detail will not displayFigure 3.5: yono Dashboard: Account Summary – AssetsLiabilities: Aggregate limit amount for liabilities accountsThis widget will show the Limit and Utilized amount of the following accounts map:1. Cash Credit Account2. Overdraft Account3. Term Loan AccountIf any of the above account is not map then, respective account detail will not display Figure 3.6: yono Dashboard: Account Summary – Liabilities3.1.3AlertsWidget show the alerts for key data elements which are due for payments or renewal etc. The user can collapse or expand the widget to view specific details. Also, the widget would have a calendar viewing capability which allows to view data based on a specific date.Alerts: Alerts for next 7 daysWidget will show the following alerts item:1. Alerts for next 7 days2. Alerts for Term Loan installments due3. Alerts for import LC expiringFigure 3.7: yono Dashboard - Alerts3.1.4Upcoming PayableThe purpose of the widget is to give an overview of the payables which are due and overdue. Trade: Due and overdue import LC bills for 7 daysWidget will show the details of upcoming payable amount due for import LC bills in trade. If user is not an eTrade customer, then trade details will not be displayedFigure 3.8: yono Dashboard: Upcoming Payable - TradeTerm Loan: Due and overdue of term loan amountWidget will show the details of upcoming payable amount due/overdue for term loan installments. If there is no term loan account mapped to the user then, term loan details will not be displayedFigure 3.9: yono Dashboard: Upcoming Payable – Term LoanSchedule Payments: Due payment in next 7 daysWidget will show the all authorized payments (e-cheques) in CINB/CMP scheduled for payments in next 7 days with debit accounts mapped to the user, included in as a part of schedule paymentsFigure 3.10: yono Dashboard: Upcoming Payable – Schedule Payments3.1.5 Non Fund Limit SummaryNon-Fund Limit Summary widget give an overview of the non-fund limits for letter of credits and bank guaranteeNon-Fund Limit Summary: Trade Summary of Non Fund, LC and BG1. User will be able to view the overall Non-Fund Sanctioned, Utilized and Available limit2. Non Fund limit(s) will be at corporate CIF level and total of all limitary3. Widget will show the consolidated LC sanctioned, utilized and available Limit amountissued for all LC’s against corporate CIF4. Widget will show the consolidated BG sanctioned, utilized and available Limit amountissued for all BG’s against corporate CIFFigure 3.11: yono Dashboard: Non-Fund Limit Summary3.1.6 Hamburger MenuThe purpose of the hamburger menu is to personalize the dashboard widgets.Hamburger Setting: Personalize the dashboard widgets1. User can toggle→off any widget then, same widget will not be available on dashboard2. User can toggle→on any widget, and click on ‘Apply, same widget will display again ondashboardFigure 3.12: yono Dashboard – Hamburger Settings3. User can toggle→off all widget then system will show the dashboard image in-place ofwidgets as below:Figure 3.13: yono Dashboard – Without widgets。
U8+V12.0产品发版说明U8产品事业本部2014年8月目录U8+V12.0产品发版说明...............................................一、产品概述.......................................................二、产品范围及新业务特性...........................................2.1产品范围.........................................................2.2多语言的支持.....................................................2.3演示期控制规则...................................................2.4新业务特性.......................................................2.4.1平台及工具.................................................2.4.2财务管理...................................................2.4.3CRM.........................................................2.4.4供应链管理.................................................2.4.5生产制造...................................................2.4.6人力资源...................................................2.4.7零售管理...................................................2.4.8分销管理...................................................2.4.9商业分析...................................................实施导航.........................................................U8+远程..........................................................iSD用友绿色服务桌面.............................................U8+移动应用......................................................微信会员服务平台.................................................2.5报价说明.........................................................三、重要注意事项...................................................3.1安装及环境注意事项...............................................3.2U8+WEB产品使用注意事项...........................................3.2.1WEB产品范围及支持的浏览器..................................3.2.2U8+V12.0WEB产品使用注意事项 ................................3.3关于U8+OAV12.0版本的重要说明....................................四、主要功能变化...................................................4.1平台及工具.......................................................4.1.3企业应用平台...............................................4.1.4系统管理与服务.............................................4.1.5工作流.....................................................4.1.6UAP表单....................................................4.1.7UAP报表....................................................4.1.8B/S门户....................................................4.1.9实施导航...................................................U8+运行监测平台..................................................UU...............................................................4.2财务管理.........................................................4.2.1总账.......................................................4.2.2应收应付...................................................4.2.3固定资产...................................................4.2.4网上报销...................................................4.2.5网上银行...................................................4.2.6实际成本...................................................4.2.7分项成本...................................................4.2.8标准成本...................................................4.2.9出纳管理...................................................预算管理.........................................................费用预算.........................................................4.3CRM..............................................................4.3.1CRM基础档案及公共........................................4.3.2系统配置..................................................4.3.3营销管理..................................................4.3.4服务管理..................................................4.3.5注意事项..................................................4.4供应链管理.......................................................4.4.1供应链公共.................................................4.4.2会员管理...................................................4.4.3电商订单中心...............................................4.4.4销售管理...................................................4.4.5采购管理...................................................4.4.8库存管理...................................................4.4.9库存条码(PC版、无线版) ..................................存货核算.........................................................4.5生产制造.........................................................4.5.1基础设置及公共.............................................4.5.2主生产计划(MPS)..........................................4.5.3需求规划(MRP)............................................4.5.4生产订单...................................................4.5.5车间管理...................................................4.5.6车间报工管理...............................................4.5.7工序委外...................................................4.5.8设备管理...................................................4.5.9工程变更...................................................4.6人力资源.........................................................4.6.1人事管理...................................................4.6.2薪资管理...................................................4.6.3计件工资...................................................4.6.4绩效管理...................................................4.6.4考勤管理...................................................4.6.5自助应用...................................................4.6.6招聘管理...................................................4.6.7人事风险管控...............................................4.7零售管理.........................................................4.7.1零售管理端.................................................4.7.2零售门店端.................................................4.8分销管理.........................................................4.8.1机构业务端.................................................4.9商业分析.........................................................4.9.1新增功能...................................................4.9.2改进功能...................................................4.10U8+远程..........................................................4.10.1新增功能..................................................4.11I SD用友绿色服务桌面.............................................4.11.3知识中心..................................................4.11.4用友工具..................................................4.11.5补丁中心..................................................4.11.6消息盒子..................................................4.11.7投诉建议..................................................4.12U8+移动应用......................................................4.12.1U8+移动销售................................................4.12.2U8+移动营销................................................4.12.3U8+移动审批................................................4.12.4U8+移动薪资................................................4.12.5U8+移动考勤................................................4.12.6U8+移动服务................................................4.12.7U8+移动报表................................................4.12.8U8+移动UU..................................................4.12.9U8+移动报销................................................U8+移动分析......................................................移动网关.........................................................U8+服务器-显示配置模版...........................................4.13微信会员服务平台.............................................五、系统特点.......................................................5.1应用特点.........................................................5.2技术特点.........................................................六、其他集成应用及合作.............................................6.1有关产品的合作伙伴...............................................6.1.1领域合作伙伴...............................................6.1.2行业合作伙伴...............................................6.1.3网络应用合作伙伴...........................................6.1.4硬件合作伙伴...............................................6.1.5Epson打印机与应用功能模块适配推荐..........................6.1.6U8+网上银行已支持的银行列表.................................七、系统配置.......................................................7.1U8+环境系统配置...................................................7.1.2硬件配置...................................................7.2商业分析系统配置.................................................7.3零售管理系统环境要求.............................................7.3.1零售管理端.................................................7.3.2零售门店端.................................................7.3.3数据挖掘系统管理...........................................7.4I SD用友绿色服务桌面系统配置......................................7.5U8+OA环境系统配置................................................7.5.1服务器配置.................................................7.5.2客户端配置.................................................7.6U8+移动应用环境系统配置...........................................7.6.1网络拓扑...................................................7.6.2移动应用服务器.............................................7.6.3手机客户端.................................................7.7微信会员服务平台环境系统配置.....................................7.7.1服务器硬件环境.............................................7.7.2服务器软件环境.............................................八、产品安装说明...................................................8.1安装光盘目录结构和文件说明.......................................8.2安装说明.........................................................8.2.1安装说明...................................................8.2.2U8+V12.0服务列表 ...........................................8.3UU安装说明.......................................................8.3.1服务端.....................................................8.3.2PC客户端...................................................8.3.3移动客户端.................................................8.4商业分析安装说明.................................................8.4.1安装盘目录结构及说明.......................................8.4.2安装说明...................................................8.4.3注意事项...................................................8.5零售管理系统安装说明.............................................8.5.1安装配比...................................................8.5.2安装内容及步骤.............................................8.5.4加密方式说明...............................................8.6U8+远程安装说明...................................................8.6.1安装环境准备...............................................8.6.2简要安装过程说明...........................................8.6.3发布B/S程序...............................................8.7I SD用友绿色服务桌面安装说明......................................8.7.1安装盘目录及结构说明.......................................8.7.2加密方式说明...............................................8.7.3安装说明及步骤.............................................8.8U8+OA基础版安装说明..............................................8.8.1安装盘目录结构及说明.......................................8.8.2安装说明...................................................8.8.3加密方式说明...............................................8.9U8+运行监测平台安装说明...........................................8.10移动应用安装说明................................................8.10.1移动应用客户端安装说明....................................8.10.2移动应用服务器安装说明....................................8.11微信会员服务平台安装及加密说明..................................8.11.1安装步骤..................................................8.11.2加密说明..................................................8.12加密方式说明....................................................九、数据升级.......................................................9.1平滑升级部分.....................................................9.2U8+V12.0不支持直接升级的产品.....................................9.3升级过程.........................................................9.4注意事项.........................................................9.4.1环境数据库升级.............................................9.4.2账套升级...................................................9.5低版本T系列升级.................................................9.5.1概述.......................................................9.5.2升级步骤...................................................9.5.3对低版本T3原有功能的支持范围..............................9.5.4对低版本T6原有功能的支持范围..............................9.6零售系统升级步骤及注意事项.......................................9.6.1老版本升级到12.0版的步骤..................................9.6.2升级零售管理端的注意事项...................................9.6.3升级零售门店端的注意事项...................................9.7商业分析升级方案.................................................9.7.1商业分析平台升级...........................................9.7.2U8+升级后,商业分析的操作步骤...............................9.8U8+OA基础版升级步骤及注意事项....................................9.8.1支持升级的版本.............................................9.8.2升级方法...................................................9.8.3升级注意事项...............................................十、U8行业插件安装盘及补丁获取 .................................... 十一、系统接口说明.................................................一、产品概述2014年,互联网精神在中国企业中掀起了巨大的管理模式、商业模式、运营手段的变革挑战。
山东省会计从业资格考试1. 考试软件的安装1.1. 安装前的注意事项1.安装此模拟考试系统软件的计算机,计算机名称中不能带有“-”、汉字或者用数字开头,建议改为8 位以下纯字母。
修改方法:右键点桌面我的电脑-属性-计算机名-更改,按照提示重启后即修改成功。
2.用友通教学软件不能和用友其他版本或类似功能软件安装在同一个操作系统中。
3.安装产品之前关闭防火墙和实时监控系统。
4.先安装MSDE2000 ,然后才能安装用友通,最后注册模拟考试系统。
1.2. MSDE2000RELA 的安装注:若已经安装了MS SQL Server 2000,则不必再安装MSDE2000 r ela。
1.打开“MSDE2000rela”文件夹,双击“setup.exe”,进行安装。
2.程序文件路径和数据文件路径,默认或者修改均可。
单击“确定”,将出现下图:3.安装完后,点击开始-程序-启动里的服务管理器,在电脑屏幕右下角任务栏将出现图标,这表明MSDE2000 已经安装启动成功。
4.安装过程中出现错误的处理(1)情况一:进行到第2 步时,计算机似乎长时间都没反应,请耐心等待。
(2)情况二:出现“指定的实例名称无效”错误提示信息,如下图提示:这种情况可能是因为先前安装过MSDE2000,处理方法:a.将已安装的部分删除卸载,打开“开始”—“设置”--“控制面版”—“添加或删除程序”,查找“Microsoft SQL Server Desktop Engine ”,若有,则单击“删除”将其删除。
b.打开“我的电脑—C 盘—program files ”,检查有无“MS SQL”文件夹,若有,将其删除。
c.重新启动计算机,再次尝试安装MSDE2000 。
(3)情况三:反复尝试几次都无法成功安装,很可能是Window sXP 及已经安装的其他软件等软件环境导致MSDE2000 无法成功安装,处理方法:建议重新安装Window s XP,再尝试安装MSDE2000。
Features Android Auto TMWhen you connect an Android phone to the audio system via the USB port, AndroidAuto is automatically initiated. When connected via Android Auto, you can use theaudio/information screen to access the Phone, Google Maps (Navigation), andGoogle Now functions. When you first use Android Auto, a tutorial will appear onthe screen.We recommend that you complete this tutorial while safely parked before usingAndroid Auto.2USB Port(s) P.2492Auto Pairing Connection P.2801Android Auto TMWe recommend that you update Android OS to thelatest version when using Android Auto.Bluetooth A2DP cannot be used while your phone isconnected to Android Auto.To use Android Auto on a smartphone with Android9.0 (Pie) or earlier, you need to download theAndroid Auto app from Google Play to yoursmartphone.Park in a safe place before connecting your Androidphone to Android Auto and when launching anycompatible apps.When your Android phone is connected to AndroidAuto, it is not possible to use the Bluetooth® Audio.However, other previously paired phones can streamaudio via Bluetooth® while Android Auto isconnected.2Phone Setup P.415Apple CarPlay and Android Auto cannot run at thesame time.Android Auto is a trademark of Google LLC.Features•MapsDisplay Google Maps and use the navigation function just as you would with your Android phone. When the vehicle is in motion, it is not possible to make keyboard entries. Stop the vehicle in a safe location to undertake a search or provide other inputs.•PhoneMake and receive phone calls as well as listen to voicemail.•Exit •Operate Android Auto with your voice.■Android Auto Menu1Android Auto TMFor details on countries and regions where Android Auto is available, as well as information pertaining to function, refer to the Android Auto homepage.Screens may differ depending on the version of the Android Auto app you are using.Android Auto Operating Requirements & LimitationsAndroid Auto requires a compatible Android phone with an active mobile connection and data plan. Your carrier’s rate plans will apply.Changes in operating systems, hardware, software, and other technology integral to providing Android Auto functionality, as well as new or revisedgovernmental regulations, may result in a decrease or cessation of Android Auto functionality and services. Honda cannot and does not provide any warranty or guarantee of future Android Auto performance or functionality.It is possible to use 3rd party apps if they arecompatible with Android Auto. Refer to the Android Auto homepage for information on compatible apps.To adjust the ringtone volume, the guidance volume of the navigation or voice recognition, or the audio volume, turn the VOL / AUDIO (Volume/Power) knob while the sound you want to adjust is playing.CONNECT ButtonPress to display Android Auto screenGo back to the AndroidAuto menu screenFeatures •You can check Android notifications.•(Android Auto Home)Display useful information organized by Android Auto into simple cards thatappear just when they’re needed.When you connect an Android phone to the unit via the USB port, Android Auto isautomatically initiated.To enable Android Auto after connecting an Android phone to the system, selectYes on the screen.You may change the consent settings under the Smartphone Settings menu.■Auto Pairing Connection■Connecting Android Auto Using the USB Cable to the USB Port1Connecting Android Auto Using the USB Cable to the USB PortOnly initialize Android Auto when you are safelyparked. When Android Auto first detects your phone,you will need to set up your phone so that autopairing is possible. Refer to the instruction manualthat came with your phone.You can use the following procedure to disconnect ordelete the devices connecting Android Auto after youhave completed the initial setup:Press the MENU button →Select Smartphone Settings → Android Auto →Select deviceUse of user and vehicle informationThe use and handling of user and vehicle informationtransmitted to/from your phone by Android Auto isgoverned by the Google’s Privacy Policy.Features■Operating Android Auto with Voice Recognition1Operating Android Auto with Voice RecognitionBelow are examples of commands you can give with voice recognition:•Reply to text.•Call my wife.•Navigate to Honda.•Play my music.•Send a text message to my wife.•Call flower shop.For more information, please refer to the Android Auto homepage.You can also activate the voice recognition function by selecting the icon in the lower-right corner ofthe screen.To adjust the guidance volume of voice recognition, turn the VOL / AUDIO (Volume/Power) knob while the guidance is playing.(Talk) button:Press to operateFeatures Android Auto TMWhen you connect an Android phone to the audio system via the USB port orwirelessly, Android Auto is automatically initiated. When connected via AndroidAuto, you can use the audio/information screen to access the Phone, Google Maps(Navigation), and Google Now functions. When you first use Android Auto, atutorial will appear on the screen.We recommend that you complete this tutorial while safely parked before usingAndroid Auto.2USB Port(s) P.2492Auto Pairing Connection P.347•MapsDisplay Google Maps and use the navigation function just as you would with yourAndroid phone. When the vehicle is in motion, it is not possible to make keyboardentries. Stop the vehicle in a safe location to undertake a search or provide other■Android Auto Menu1Android Auto TMWe recommend that you update Android OS to thelatest version when using Android Auto.Bluetooth A2DP cannot be used while your phone isconnected to Android Auto.To use Android Auto on a smartphone with Android9.0 (Pie) or earlier, you need to download theAndroid Auto app from Google Play to yoursmartphone.Park in a safe place before connecting your Androidphone to Android Auto and when launching anycompatible apps.When your Android phone is connected to AndroidAuto, it is not possible to use the Bluetooth® Audio.However, other previously paired phones can streamaudio via Bluetooth® while Android Auto isconnected.2Phone Setup P.435Apple CarPlay and Android Auto cannot run at thesame time.Android Auto is a trademark of Google LLC.Android Auto iconGo back to thehome screenGo back to the AndroidAuto menu screenFeatures•PhoneMake and receive phone calls as well as listen to voicemail.•Exit •Operate Android Auto with your voice.•You can check Android notifications.•(Android Auto Home)Display useful information organized by Android Auto into simple cards that appear just when they’re needed.When you connect an Android phone to the unit via the USB port or wirelessly, Android Auto is automatically initiated.■Auto Pairing Connection1Android Auto TMFor details on countries and regions where Android Auto is available, as well as information pertaining to function, refer to the Android Auto homepage.Screens may differ depending on the version of the Android Auto app you are using.Android Auto Operating Requirements & LimitationsAndroid Auto requires a compatible Android phone with an active mobile connection and data plan. Your carrier’s rate plans will apply.Changes in operating systems, hardware, software, and other technology integral to providing Android Auto functionality, as well as new or revisedgovernmental regulations, may result in a decrease or cessation of Android Auto functionality and services. Honda cannot and does not provide any warranty or guarantee of future Android Auto performance or functionality.It is possible to use 3rd party apps if they arecompatible with Android Auto. Refer to the AndroidAuto homepage for information on compatible apps.Features 1.Connect the Android phone to the USB port using the USB cable.2USB Port(s) P.249u The confirmation screen will be displayed.2.Select Yes.u If you do not want to connect Android Auto, select No.You may change the consent settings under the Smartphone Connection settings menu.■Connect Android Auto wirelessly on the home screen1.Press the button.2.Select Smartphone Connection.3.Select + Connect New Device.4.Pair the Android phone to the vehicle’s Bluetooth® HandsFreeLink® (HFL) system.2Phone Setup P.4355.Select Yes.u If your Android phone asks for permission to accept an Android Autoconnection, accept to connect. A confirmation message for HondaLink Assistappears.6.Select Yes or No.■Connecting Android Auto Using the USB Cable to the USB Port■Connect Android Auto Wirelessly1Connecting Android Auto Using the USB Cable to the USB PortOnly initialize Android Auto when you are safelyparked. When Android Auto first detects your phone,you will need to set up your phone so that autopairing is possible. Refer to the instruction manualthat came with your phone.You can use the following procedure to disconnect ordelete the devices connecting Android Auto after youhave completed the initial setup:Press the button → Select General Settings →Smartphone Connection → Android Auto →Select deviceUse of user and vehicle informationThe use and handling of user and vehicle informationtransmitted to/from your phone by Android Auto isgoverned by the Google’s Privacy Policy.Features■Connect Android Auto wirelessly on the Android Auto device list1.Press the button.2.Select General Settings .3.Select Smartphone Connection .4.Select Android Auto .5.Select + Connect New Device .6.Pair the Android phone to the vehicle’sBluetooth ® HandsFreeLink ® (HFL) system.2Phone Setup P.4357.Select Yes .u If your Android phone asks for permission to accept an Android Autoconnection, accept to connect. A confirmation message for HondaLink Assist appears.8.Select Yes or No .■Connect Android Auto wirelessly on the Bluetooth ® device list1.Press thebutton.2.Select General Settings .3.Select Connections .4.Select Bluetooth .5.Select + Connect New Device .6.Pair the Android phone to the vehicle’s Bluetooth ® HandsFreeLink ® (HFL) system.2Phone Setup P.4357.Check the box on Android Auto .u If you select Android Auto , you cannot select Audio and Phone .8.Select Connect .9.Select Yes .u If your Android phone asks for permission to accept an Android Autoconnection, accept to connect. A confirmation message for HondaLink Assist appears.Features ■Connect Android Auto wirelessly with the steering wheel1.Press and hold the (talk) button on the steering wheel.2.Pair the Android phone to the vehicle’s Bluetooth® HandsFreeLink® (HFL) system.2Phone SetupP.4353.Check the box on Android Auto.u If you select Android Auto, you cannot select Audio and Phone.4.Select Connect.5.Select Yes.u If your Android phone asks for permission to accept an Android Auto connection, accept to connect. A confirmation message for HondaLink Assist appears.6.Select Yes or No.■Connect Android Auto wirelessly at start-up (when there is no phone paired to the system)1.Set the power mode to ACCESSORY or ON.2.Select OK.u If there is no registered device, the Bluetooth® pairing screen will be displayed. u If you check the box with Do not show this again, this screen will not be displayed.3.Pair the Android phone to the vehicle’s Bluetooth® HandsFreeLink® (HFL) system.2Phone Setup P.4354.Check the box on Android Auto.u If you select Android Auto, you cannot select Audio and Phone.5.Select Connect.6.Select Yes.u If your Android phone asks for permission to accept an Android Auto connection, accept to connect. A confirmation message for HondaLink Assist appears.FeaturesPress and hold the(talk) button to operate Android Auto with your voice.■Operating Android Auto with Voice Recognition1Operating Android Auto with Voice RecognitionBelow are examples of commands you can give with voice recognition:•Reply to text.•Call my wife.•Navigate to Honda.•Play my music.•Send a text message to my wife.•Call flower shop.For more information, please refer to the Android Auto homepage.You can also activate the voice recognition function by selecting the icon in the lower-right corner ofthe screen.(Talk) button:Press and hold to operate Android Auto with your voice.Press and release to activate standard voice recognition system.Models with A-type meterModels with B-type meter。
U阅通使用手册一、登陆主界面
进入程序后,会显示图书信息列表,如图1.1
1---菜单栏
2---图书分类
3---搜索
4---图书展示列表
5---翻页功能
图1.1
二、菜单栏
2.1 后退
如图2.1 系统自动打开上一本阅览图书
图2.1
2.2 前进
图2.2,系统自动打开下一本图书
图2.2
2.3 首页
图2.3 系统自动打开图书展示区所示的第一本图书。
图2.3
2.4 退出
图2.4 退出系统
图2.4
2.5 在线更新
图2.5,如果系统有升级,该功能将会自动更新升级
图2.5
三、分类
图3.1,点击不同分类,右侧图书分类将显示该分类下图书列表
图3.1
四、搜索
图4.1。
图书搜索,输入书名关键字,进行图书搜索
图4.1
五、帮助
图5.1 该功能将启动帮助文档。
图5.1
六、图书展示区
图6.1,点击具体的图书将会启动阅读器打开图书
图6.1
七、阅读器基本功能
7.0 打开
点击其中的一本会打开阅读器浏览电子书内容。
图7.0
图7.1
7.1 定位搜索
阅读器右侧搜索定位功能,图7.2
图7.2
7.2 注释
图7.3-7.5,用户可以根据需要给文章添加注释功能
图7.3
7.3 添加注释
图7.4 7.4 单击可隐藏注释
图7.6图7.5双击显示注释描述
7.6 划矩形框功能
图7.6所示
图7.6画框7.7 划直线
图7.7所示
图7.7 划直线7.8 高亮显示
图7.8 高亮7.9 添加下划线
图7.9 添加下划线
图7.9,下划线功能7.10 单页显示
图7.10
图7.10 单页显示7.11 连续显示
图7.11 连续显示7.12 页面
图7.12,页面显示7.13 书签
图7.13 书签7.14 标注
图7.14 标注列表。