欧姆龙电子体温计MC-510中文说明书
- 格式:pdf
- 大小:3.52 MB
- 文档页数:2
?详细资料?详细资料数字显示干湿温度计,数字干湿温度计,电子干湿温度计,数显干湿温度计,液晶显示干湿温度计,大屏幕干温计大屏幕电子温度计_大屏幕电子温度计批发_大屏幕电子温度计价格_HTC-1大屏幕显示温湿度计数字显示干湿温度计价格,数字干湿温度计价格,电子干湿温度计价格,数显干湿温度计价格婴儿房温度计价格,婴儿房用数字显示温度计价格,婴儿房用数字显示温湿度计,儿童房数字温湿度计表价格婴儿房温度表,婴儿房温度计,婴儿房用数字显示温度计,婴儿房用数字显示温湿度计,儿童房数字温湿度计表产品规格:温度测量范围:-50℃~+70℃(-58℉~+158℉)温度测量精度:±1℃(1.8℉)温度分辨率:0.1℃(0.2℉)温度测量范围:20%RH~99%RH湿度测量精度:±5%RH温度分辨率:1%使用电池:AAA 1.5V(低功耗)产品尺寸:100*108*20mm产品质量:160g基本功能:1、温度/湿度显示2、℃/℉温度切换显示3、/最低温度记忆功能4、12/24小时制时钟5、整点报时功能6、每日闹钟功能6、日历显示功能具体操作方法:1、依机背指示方向推开电池门,取出电池隔片,然后装回电池门,该机即可用。
2、按键功能:(MODE)切换时钟与闹钟显示模式/设定当前时间、闹钟、12或24小时制、日期(ADJ)调整被设项目的数值;(MEMORY)显示记忆中的/最低温湿度值/清除记忆的/最低温湿度值;(℃/oF)切换温度单位以℃(摄氏度)或oF(华氏度)显示;(RESE T)清除所有设定/记忆值,返回初始状态。
3、在初始状态下按住(MODE)1秒,当前时间的分钟数开始闪动,按(ADJ)可以调节分钟数,连续按(MODE)可以分别设定“时钟”、“12/24”、“月(M)”、“日(D)”4、在当前时钟模式下,(时钟与分钟之间的两点每秒闪动一次)切换显示为闹钟模式(时钟与分钟之间的两点不闪动),此时按(ADJ)可以切换“闹钟”(Alarm)功能/“整点报时”()功能的开与关,再按住(MODE)2秒,可以设定闹铃时间,同时启动“整点极时”功能,()符号出现。
OMEGAHH505Digital ThermometerOMEGAnet On-Line Service Internet e-mail **************Servicing North America:USA: ISO 9001 Certified Canada:One Omega Drive, Box 4047976 Bergar Stamford, CT 06907-0047Laval (Quebec) H7L5A1 Tel: (203) 359-1660Tel: (514) 856-6928 FAX: (203)359-7700FAX: (514) 856-6886e-mail:**************e-mail:**************INTRODUCTIONThis instrument is a 4½ digit, compact-sized portable digital thermometer designed to use external 100W Platinum RTD as temperature sensor. Tem-perature indication follows Reference Temperature/Resistance Tables (Pt385 for European Curve, Alpha=.00385 and Pt3926 for American Curve, Al-pha=.003926).SAFETY INFORMATIONIt is recommended that you read the safety and operation instructions before using the thermometer.WARNINGTo avoid electrical shock, do not use this instrument when working voltages at the measurement surface over 24V AC or DC.WARNINGTo avoid damage or burns, do not make temperaturemeasurement in microwave ovens.The symbol on the instrument indicates that the operator must refer to an explanation in this manual.SPECIFICATIONSELECTRICALTemperature Scale: Celsius or Fahrenheit user-selectable. Measurement Range:Pt385(100W) -200°C to 800°C, (-328°F to 1472°F)Pt3926(100W) -200°C to 630°C, (-328°F to 1166°F) Resolution: 0.1°C or 0.2°FAccuracy: Accuracy is specified for operating temperatures over the range of 18°C to 28°C (64°F to 82°F), for 1 year, not including RTD probe error.±(0.05% rdg + 0.2°C) on °C scale±(0.05% rdg + 0.4°F) on °F scaleTemperature Coefficient: 0.1 times the applicable accuracy specification per °C from 0°C to 18°C and 28°C to 50°C (32°F to 64°F and 82°F to 122°F). Input Protection: 24V dc or 24V ac rms maximum input voltage on any combination of input pins.Maximum Differential Common Mode Voltage (Maximum Voltage be-tween T1 and T2 during measurement): 1volt.Reading Rate: one time per second.Input Connector: MTP miniature RTD 3 prong connector.ENVIRONMENTALAmbient Operating Ranges: 0°C to 50°C (32°F to 122°F) <80% R.H. Storage Temperature: -20°C to 60°C (-4°F to 140°F) <70% R.H. GENERALDisplay: 4½ digit liquid crystal display (LCD) with maximum reading of 19999. Overload: "----.-" is display.Battery: Standard 9V battery.Battery Life: 100 hours typical.Auto power off: The meter key switch inactive for more than 30 minutes, press power key to resume operation.Dimensions: 192mm(H) x 91mm(W) x 52.5mm(D).Weight: 365g.OPERATING INSTRUCTIONS Power Switch The key turns the thermometer on or off. In the data SET mode, can not power off, must leave data SET mode then power off.°C/°F Selecting the Temperature Scale (Main display)Reading the main displayed in either degrees Celsius(°C) or degrees Fahrenheit(°F). When the thermometer is turned on, it is set to the temperature scale that was in use when the thermometer was last turned off. To change the temperature scale, press the °C/°F key.HOLD Mode (only Main display)Pressing the HOLD key to enter the Data Hold mode, the"HOLD" annunciator is displayed. When HOLD mode is selected, the thermometer held the present readings and stops all further measure-ments.Pressing the HOLD key again to cancel HOLD mode causing thermometer to resume taking measurements.In the MIN/MAX recording mode, press HOLD key to stop the recording.Press HOLD key again to resume recording. (Previously recorded reading are not erased).Relative value Recall display mode.Press REL RECALL key to display the Relative set value on second display.Press REL RECALL key again to exit this mode.23145 6Pt385/Pt3926 T1 Input RTD Probe SelectThe Pt385/Pt3926 key switch the T1 input selects the Pt385 or Pt3926 RTD probe as input.When the thermometer is turned on, it is set to the probe selected that was in use when the thermometer was last turned off.MIN MAX with Time record ModePress MIN MAX key to enter the MIN MAX Recording mode, (displays the Maximum reading with time, Minimum reading with time and Average reading stored in record mode). In the this mode the automatic power-off feature is disabled and key, °C/°F key, REL key, SET key, Hi/Lo LIMITS key, Pt385/Pt3926 and all RECALL keys are disabled.The beeper emits a tone when a new minimum or maximum value is recorded.Present temperature reading displayed on second display.Push MIN MAX key to cycle through the MAX, MIN and AVG readings. If an overload is recorded, the averaging function is stopped and average value display"----.-".The true average of all the reading taken over at least 22 hours preiod can be displayed. If 22 hours is exceeded, new averages are no longer calculated. The last calcalated value is retained as the average reading, but the actual minimum and maximum reading will continue to be captured. In the this mode, press HOLD key to stop the recording of readings, all values are frozen, press again to restart recording.To prevent accidental loss of MIN, MAX and AVG data, in this mode can only be cancelled by pressing and hold down the MIN MAX key for 2 seconds to exit and erased recorded readings.REL Relative modePressing REL key to enter the Relative mode, zero the display, and store the displayed Reading as a reference value and annunciator REL is displayed. Present temperature reading displayed on second display.Press REL key again to exit the relative mode.The relative value can also be entered by the user. (See "SET mode" later in this manual.)When the desired Relative value has been entered, press REL key to enter the Relative mode, press SET key use set Relative value as a reference value. Press REL key again to exit the relative mode.In the Relative mode, the value (can not >±3000.0 counts) shown on the LCD is always the difference between the stored reference and the present reading.°C/°F Selecting the Temperature Scale (Second display)Readings the second displayed in either degrees Celsius(°C) or degrees Fahrenheit(°F). When the thermometer is turned on, it is set to the temperature scale that was in use when the thermometer was last turned off. To change the temperature scale, press the °C/°F key.789SET mode (Relative value set, Time set and Hi/Lo Limits value set) 1. Press SET key to enter Relative valuse SET mode (Press ENTER key canescape relative valuse set mode), REL set mode. = = = =.= is displayed in main display.Relative value is entered via overlay numbers, then press overlay ENTER key, stored the relative value, enter Time set mode.2. Time set mode, (Press ENTER key can escape Time set mode)=.= = = : = = is displayed in second and third display. Time (hours, minutes, seconds) value is entered via overlay numbers, then press overlay ENTER key. Time start from set time value, enter Hi/Lo Limits value set mode. 3. Hi Limit value set mode, is displayed (Press ENTER key can escape HiLimit value set mode), = = = =.= is displayed in main display, Hi Limit value is entered via overlay numbers, then press overlay ENTER key, stored the Hi Limit value, enter Lo Limit value set mode (Press ENTER key can escape Lo Limit value set mode). = = = =.= is displayed in main display, Lo Limit value is entered via overlay numbers, then press overlay ENTER key, stored the Lo Limit value and exit SET mode.4. When the thermometer is turned on. The Relative set value and Hi/Lo Limitsset value that was in use when thermometer was last turned off set values.10 11 12Hi Limit value Recall display modePress Hi RECALL key to display the Hi set Limit value on second display. Press Hi RECALL key again to exit this mode.Lo Limit value Recall display modePress Lo RECALL key to display the Hi set Limit value on second display. Press Lo RECALL key again to exit this mode.Hi/Lo Limits mode (only Main display)Press Hi/Lo Limits key to enter the Hi/Lo Limits comparative mode, when input temperature value exceed Hi or Lo Limits value. The beeper emits a continuity pulse tone. Press Hi/Lo Limits key again to exit the Hi/Lo Limits mode.WARNINGTo avoid possible electrical shock, disconnect the thermocouple connectors from the rmometer before removing the cover.Battery ReplacementPower is supplied by a 9 volt "transistor" battery. The "display when replacement is needed. To replace the battery, remove the two screws from the back of the meter and lift off the battery cover. Remove the battery from battery contacts.OPERATOR MAINTENANCERTD PROBE CONNECTIONP/N : 17650-0505RW1=RW2=RW3RW= WIRE RESISTANCEG+-RTD 100W Pt385(Pt3926)RW2RW3RW1+-GTEMPERATURE VS RESISTANCE TABLE(ITS90)°C Pt385Pt3926 -200°C18.521W16.996W -100°C60.256W59.479W 0°C100.000W100.000W 100°C138.505W139.272W200°C175.856W177.362W300°C212.052W214.275W400°C247.092W250.018W500°C280.977W284.591W600°C313.708W317.994W700°C345.280W-800°C375.700W-HH 504 / HH 505 CALIBRATION PROCEDURENote: The following calibration procedure should perform only by qualified technicianswho have access to the items as following.Equipment: The class of calibrator had better 10 times greater than the measured meter.1. Turn off the meter then set the adjusted jumper to J1.2. Insert the 383.00Ω calibrator to the T1 then turn on the meter, the maindisplay reading reads 1830.0 then press " ENTER " key.3. The second display is stabilized (about 5sec.), then press " ENTER " keywhen the meter auto power off then set the jumper back to J3 position.4. Turn on the meter then Insert the 100.00Ω calibrator. The display readingreads 0°C if the calibration procedure is right.℃Pt385Pt3926-200℃18.521Ω16.996Ω-100℃60.256Ω59.479Ω0℃100.000Ω100.000Ω100℃138.505Ω139.272Ω200℃175.856Ω177.362Ω300℃212.052Ω214.275Ω400℃247.092Ω250.018Ω500℃280.977Ω284.591Ω600℃313.708Ω317.994Ω700℃345.280Ω―800℃375.700Ω―383.00W CALIBRATORRW1=RW2=RW3RW=WIRERESISTANCEWWARRANTY / DISCLAIMEROMEGA ENGINEERING, INC. warrants this unit to be free of defects in materials and workmanship for a period of 13 months from date of purchase. OMEGA Warranty adds an additional one (1) month grace period to the normal one (1) year product warranty to cover handling and shipping time. This ensures that OMEGA's customers receive maximum coverage on each product.If the unit should malfunction, it must be returned to the factory for evaluation. OMEGA's Customer Service Department will issue an Authorized Return (AR) number immediately upon phone or written request. Upon examination by OMEGA, if the unit is found to be defective it will be repaired or replaced at no charge. OMEGA's WARRANTY does not apply to defects resulting from any action of the purchaser, including but not limited to mishandling, improper interfacing, operation outside of design limits, improper repair, or unauthorized modification. This WARRANTY is VOID if the unit shows evidence of having been tampered with or shows evidence of being damaged as a result of excessive corrosion; or current, heat moisture or vibration; improper specification; misapplication; misuse or other operating conditions outside of OMEGA's control. Components which wear are not warranted, including but not limited to contact points, fuses, and triacs.OMEGA is pleased to offer suggestions on the use of its various products. However, OMEGA neither assumes responsibility for any omissions or errors nor assumes liability for any damages that result from the use of its products in accordance with information provided by OMEGA, either verbal or written. OMEGA warrants only that the parts manufactured by it will be as specified and free of defects. OMEGA MAKES NO OTHER WARRANTIES OR REPRESENTATIONS OF ANY KIND WHATSOEVER, EXPRESSED OR IMPLIED, EXCEPT THAT OF TITLE AND ALL IMPLIED WARRANTIES INCLUDING ANY WARRANTY OF MERCHANTABILITY AND FITNESS FOR A PARTICULAR PURPOSE ARE HEREBY DISCLAIMED. LIMITATION OF LIABILITY: The remedies of purchaser set forth herein are exclusive and the total liability of OMEGA with respect to this order, whether based on contract, warranty, negligence, indemnification, strict liability or otherwise, shall not exceed the purchase price of the component upon which liability is based. In no event shall OMEGA be liable for consequential, incidental or special damages.CONDITIONS: Equipment sold by OMEGA is not intended to be used, nor shall it be used: (1) as a "Basic Component" under 10 CFR 21 (NRC), used in or with any nuclear installation or activity; or (2) in medical applications or used on humans. Should any Product(s) be used in or with any nuclear installation or activity, medical application, used on humans, or misused in any way, OMEGA assumes no responsibility as set forth in our basic WARRANTY / DISCLAIMER language, and additionally, purchaser will indemnify OMEGA and hold OMEGA harmless from any liability or damage whatsoever arising out of the use of the Product(s) in such a manner.RETURN REQUESTS / INQUIRIESDirect all warranty and repair requests/inquiries to the OMEGA Customer Service Department. BEFORE RETURNING ANY PRODUCT(S) TO OMEGA, PURCHASER MUST OBT AIN AN AUTHORIZED RETURN (AR) NUMBER FROM OMEGA'S CUSTOMER SERVICE DEP ARTMENT (IN ORDER TO AVOID PROCESSING DELAYS). The assigned AR number should then be marked on the outside of the return package and on any correspondence.The purchaser is responsible for shipping charges, freight, insurance and proper packaging to prevent breakage in transit.FOR WARRANTY RETURNS, please have the following information available BEFORE contacting OMEGA:1.P.O. number under which the product was PURCHASED.2.Model and serial number of the product under warranty, and3.Repair instructions and/or specific problems relative to theproduct.FOR NON-WARRANTY REPAIRS, consult OMEGA for current repair charges. Have the following informationavailable BEFORE contacting OMEGA:1.P.O. number to cover the COST of the repair.2.Model and serial number of product , and3.Repair instructions and/or specific problems relative to theproduct.OMEGA's policy is to make running changes, not model changes, whenever an improvement is possible. This affords our customers the latest in technology and engineering. OMEGA is a registered trademark of OMEGA ENGINEERING, INC. © Copyright 1999 OMEGA ENGINEERING,Where Do I Find Everything I Need for Process Measurement and Control?OMEGA...Of Course!TEMPERATUREþThermocouple, RTD & Thermistor Probes, Connectors, Panels & Assemblies þWire: Thermocouple, RTD & Thermistor þCalibrators & Ice Point ReferencesþRecorders, Controllers & Process Monitors þInfrared PyrometersPRESSURE/STRAIN AND FORCEþTransducers & Strain GaugesþLoad Cells & Pressure GaugesþDisplacement TransducersþInstrumentation & AccessoriesFLOW/LEVELþRotameters, Gas Mass Flowmeters& Flow ComputersþAir Velocity IndicatorsþTurbine/Paddlewheel SystemsþTotalizers & Batch ControllerspH/CONDUCTIVITYþpH Electrodes, Testers & AccessoriesþBenchtop/Laboratory MetersþControllers, Calibrators, Simulators& PumpsþIndustrial pH & Conductivity Equipment DATA ACQUISITIONþData Acquisition &Engineering SoftwareþCommunications-Based Acquisition SystemsþPlug-in Cards for Apple, IBM& CompatiblesþDatalogging SystemsþRecorders, Printers & Plotters HEATERSþHeating CableþCartridge & Strip HeatersþImmersion & Band HeatersþFlexible HeatersþLaboratory Heaters ENVIRONMENTAL MONITORING AND CONTROL þMetering & Control Instrumentation þRefractometersþPumps & TubingþAir, Soil & Water MonitorsþIndustrial Water & Wastewater TreatmentþpH, Conductivity & Dissolved Oxygen Instruments。
基础体温计使用说明书1.轻按屏幕旁的白色按钮,屏幕显示188.88E,然后显示预设温值36.50℃,此时正在启动。
2.待屏幕显示L0℃时,即可开始测量;口腔、腋下均可。
因为本体温计采用金属探头,所以口腔测量时舌根下尽量深一些,使金属探头能充分接触;一般口腔是最真实体温,而腋下容易接触不充分,不推荐腋下测量。
3.通常测量1-2分钟,温度值6秒钟内无持续变化,体温计就会发出蜂鸣声音。
(该蜂鸣功能是为快速测量有无发烧症状而设置的)4.要求记录基础体温的女性需要持续口腔测量5分钟左右,然后读取温度值并及时记录下来。
(这里说明一下,因为基础体温要求高精确度,所以测量时间不宜过短,建议测量时间5分钟左右为好。
即蜂鸣提示后要继续测量。
读取温度可以测定后立即读取,也可以利用温度记忆功能读取。
)5.用后关闭开关,可用酒精或净水清洗金属探头部分,并妥善存放。
6.正常使用的情况下,机芯中纽扣电池寿命1.5—2年。
一般电子修配店都有此电池销售,可以购买更换。
注:本品采用更科学的金属传导式温度测量方法,与传统的水银膨胀式玻璃体温计相比,因为原理不同,测量结果会有点差异,但更接近真实体温,更能体现体温的精确变化,请放心使用。
关于女士排卵测温时段,建议早起时6—8点钟测量,因为这时没有活动或饮食,体温相对稳定,更接近基础体温。
※记忆功能:开机时持续按住开关3-5秒钟,即可显示记忆的前次测定温度。
基础体温(BBT)记录表(可打印下表并手工记录) 姓名: 年龄: 200 年 月 *方法要求: 1、预先将体温计准备好,置床头或枕边随手可取到之处。
2、睡眠6小时以上,醒后即把体温计含入口中至少5分钟(通常于清晨5-7点进行),取出体温计观察温度,并在表格内相应位置划圆点“●”标记。
测量体温时,要尽量保持体态安静,不要起床,说话等。
将各小圆点用线段连接起来,即成为基础体温曲线。
3、通常于月经周期第5天开始测量记录体温。
而在行经期间,注意观察记录月经量:经量适中正常时,用1个叉号“×”标记;经量较多时,记“××”;经量特别少时,用顿号“、”标记。
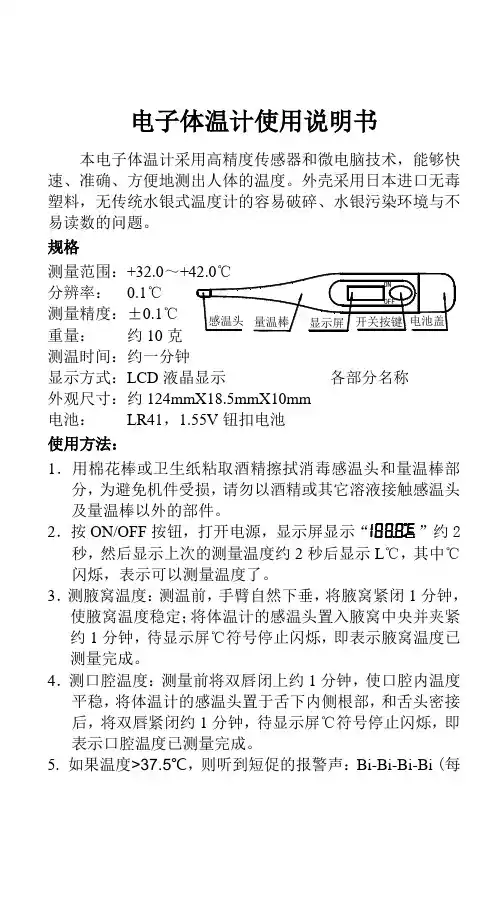
电子体温计使用说明书本电子体温计采用高精度传感器和微电脑技术,能够快速、准确、方便地测出人体的温度。
外壳采用日本进口无毒规格测量范围:分辨率: 0.1测量精度:±重量: 约显示方式:外观尺寸:约电池: 使用方法:1.用棉花棒或卫生纸粘取酒精擦拭消毒感温头和量温棒部分,为避免机件受损,请勿以酒精或其它溶液接触感温头及量温棒以外的部件。
2.按ON/OFF2秒,然后显示上次的测量温度约2闪烁,表示可以测量温度了。
3.测腋窝温度:测温前,手臂自然下垂,将腋窝紧闭1分钟,使腋窝温度稳定;将体温计的感温头置入腋窝中央并夹紧约1分钟,待显示屏℃符号停止闪烁,即表示腋窝温度已测量完成。
4.测口腔温度:测量前将双唇闭上约1分钟,使口腔内温度平稳,将体温计的感温头置于舌下内侧根部,和舌头密接后,将双唇紧闭约1分钟,待显示屏℃符号停止闪烁,即表示口腔温度已测量完成。
5. 如果温度>37.5℃,则听到短促的报警声:Bi-Bi-Bi-Bi (每0.125秒响一次),表示测量完成并警示已发烧了。
如果温度≤37.5℃,则听到较慢的声音:Bi-Bi-Bi-Bi (每0.5秒响一次),表示测量完成并且体温正常。
6. 如果测量温度小于32.0℃,则显示L℃;大于等于42.0℃,则显示H℃。
7. 按ON/OFF按钮,关闭电源,否则,体温计会在8分40秒后自动切断电源。
电池更换1力不足必须尽快更换电池,以确保测量之准确性。
2.更换电池时,把体温计的显示屏朝下,拉出电池盖,再轻轻地拉出体温计机芯约5-15mm(切勿用力过猛、拉出过多,以免损坏元器件),将旧电池取出,负极朝上装入一颗新电池,把机芯推回原位,装上电池盖即可。
注意事项:电子体温计属精密电子产品,故请注意:1.请勿从高处掉下及扭曲机体。
2.感温头至显示屏前端可以用酒精消毒,显示屏及以后部分因无防水装置,只可用干布擦拭,切不可放入水中或在热水中煮沸消毒。
3.除更换电池外请勿打开任何部件。
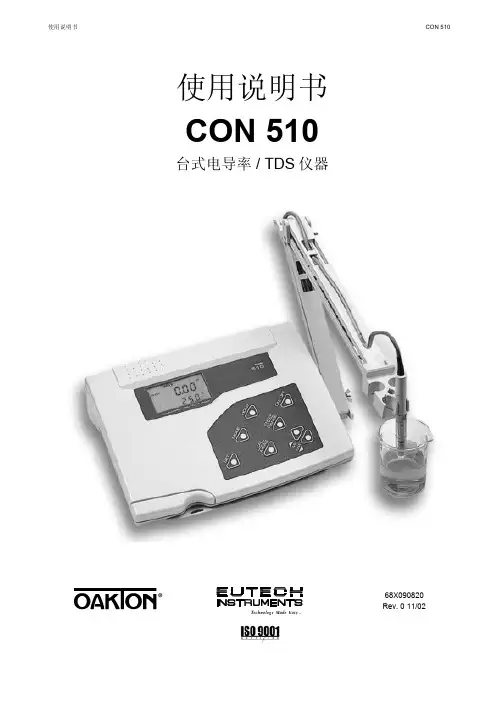
使用说明书CON 510台式电导率 / TDS 仪器Technology MadeEasy...68X090820 Rev. 0 11/02前言本手册说明了台式CON 510仪器的使用方法。
它有两种功能:首先是循序渐进的帮助用户学会如何去操作仪器,其次它可作为一本方便的使用指南。
本手册涵盖了仪器的多种应用,如果您在使用仪器中有任何疑问,请立即与离您最近的Eutech授权经销商联系。
Eutech/Oakton仪器公司将不承担由于使用不当引起损坏和故障的任何责任。
本手册的内容将随着科技进步而改变,此种情况Eutech/Oakton仪器公司将不专门通知客户并不承担由此引起的任何责任。
注意:Eutech/Oakton仪器有限公司在改进仪器的设计,配置和外观方面,具有最终解释权。
© 2002 Eutech/Oakton仪器有限公司版权所有版本 0 11/02目录1序言 (1)2显示和键盘功能 (1)2.1显示 (1)2.2键盘 (2)3准备工作 (3)3.1电导率电极相关信息 (3)3.2连接电极 (3)3.3连接AC/DC适配器 (3)3.4连接电极固定物 (4)4校正 (5)4.1仪器校正的重要信息 (5)4.2仪器校正的准备工作 (6)4.3电导率标准液和TDS因子的校正 (6)4.4直接校正TDS标准 (6)4.5选择自动和手动校正 (6)4.6自动校正(只适合电导率模式) (7)4.7手动校正(电导率/TDS) (8)4.8温度校正 (9)5测量 (10)5.1自动温度补偿 (10)5.2手动温度补偿 (11)5.3进行测量 (11)5.4使用手动量程切换功能 (12)5.5锁定功能 (12)6记忆和数据输入功能 (13)6.1记忆输入 (13)6.2调用记忆 (13)7设置功能 (14)7.1设置模式 (14)7.2P1.0: 查看校正数据 (15)7.3P2.0: 查看电极诊断 (16)7.4P3.0: 仪器的配置 (16)7.5P4.0: 温度 (18)7.6P5.0校正模式 (20)7.7P6.0 选择电池常数 (21)7.8P7.0: 恢复出厂设置 (22)8电极的维护和保养 (23)9故障维修指南 (24)10错误信息 (24)11规格 (25)12配件 (26)13注意:电导率和TDS标准液,在25°C时具有±1%的精度,请参见附件1: 校正要点 (27)14附录2: 计算tds转化因子 (27)15附录3: 计算温度系数 (28)16附录4: 仪器出厂设置 (29)17质量保证 (30)18返还条款 (30)1 简介感谢您选购了台式CON510仪器。
1MC-510目录快速测量方法 (2)安全注意事项 (3)商品构成 (6)体温的基本常识 (8)测量方法 (9)电池更换方法 (17)有疑问时 (18)显示出错时 ................20保养与保管 ................22规格 ..........................23咨询 .. (24)产品保证书 (25)保修卡 .......................26非常感谢您购买欧姆龙速测体温宝,为了正确使 ⏹用本产品,请务必在使用之前阅读本产品说明书。
为了安全正确地使用本产品,请阅读并充分理解 ⏹本说明书中的“安全注意事项”。
敬请经常把说明书放在身边以便查阅。
⏹本说明书兼作产品质量保证书,故请妥善保管勿 ⏹丢失。
快速测量方法3说明书中所表示的警告记号和警告图例,其目的 ⏹是为了使您能够安全、正确地使用本产品,并防止对您及他人造成伤害。
警告记号、图例及其含义如下:⏹※ 所谓物品损坏是指有关房屋、家产及家畜、宠物的损害。
安全注意事项45建议• 当您把所测体温告诉医生时,请说明您是用耳式体温计进行测量的。
• 请不要用于人体耳部以外的体温测量。
• 请不要强行碰撞、摔落、踩踏和摇动本体。
•请勿在测量过程中在体温计附近使用移动电话。
• 请勿拆卸、修理和改造本体。
• 本产品不防水。
请注意不要让液体(酒精、水滴、热水等)进入本体内部。
6☆ 探测器保护罩是消耗品,使用完结后请购买新的探测器保护罩。
☆ 探测器保护罩脏污破损时,请更换探测器保护罩,因为表面的脏污和破损会影响测量精度。
78体温的基本常识测量腋下和舌下的体温易受外界温度、汗水和唾液等的影响,所以较之所测的温度偏低,而测量耳温可更好地反映脑部温度,快速测得正确的体温值。
为了正确判断发烧的状态,请了解正常情况下家庭成员的耳温。
耳温和腋下温度分布了解家庭成员正常状态时耳温。
耳温与腋下温度存在差异,通过正常状态时耳部与腋下的「温度差」可以大致比较出发烧时的「温度差」。
欧姆龙耳温计使用方法2篇欧姆龙耳温计使用方法(一)欧姆龙耳温计是一款方便易用的家用体温计。
使用欧姆龙耳温计可以快速、准确地测定人体体温,特别适合于小孩子和老人使用。
本文将介绍欧姆龙耳温计的使用方法。
第一步:准备工作在使用欧姆龙耳温计之前,需要准备好以下物品:1. 欧姆龙耳温计2. 消毒棉球或消毒酒精3. 纸巾或毛巾4. 操作说明书第二步:操作步骤1. 清洁耳朵在测量体温之前,需要将耳朵清洁干净。
使用消毒棉球或消毒酒精擦拭耳垢和耳朵周围的皮肤。
2. 安装耳探头将耳探头插入欧姆龙耳温计,然后按照说明书的指示安装。
3. 打开欧姆龙耳温计按下欧姆龙耳温计上的电源按钮,电源指示灯将亮起。
4. 放置耳探头将耳探头插入耳朵内,并轻轻地按下触发按钮,耳温计将自动启动测量体温。
5. 等待结果在耳朵中持续几秒钟,欧姆龙耳温计将自动测量体温并显示结果。
一般情况下,测量需要2-3秒钟,显示屏将显示出温度值。
6. 清洁欧姆龙耳温计使用纸巾或毛巾擦拭欧姆龙耳温计的耳探头和外壳,并将其放回盒子中保存。
欧姆龙耳温计使用方法(二)欧姆龙耳温计测量人体温度是一种准确、方便的方法。
本文将介绍欧姆龙耳温计的一些注意事项,帮助您正确使用欧姆龙耳温计。
1. 温度测量位置欧姆龙耳温计是通过测量耳道温度来测量人体温度的。
当温度计被插入耳朵时,必须确保耳道没有外部物质的干扰,这些物质可能会影响测量结果。
因此,在使用欧姆龙耳温计测量体温时,请确保耳朵周围没有发炎、水肿或其他异物。
2. 阅读说明书在使用欧姆龙耳温计之前,请确保阅读完全并理解操作说明书中的使用说明。
3. 每次使用前进行消毒由于欧姆龙耳温计需要插入耳朵,因此一定要确保在每次使用前彻底清洁和消毒。
您可以使用消毒棉球或消毒酒精擦拭耳垢和周围的皮肤。
4. 不要共用耳探头为了避免传播疾病,不要共用耳探头,并定期更换耳探头。
5. 确保欧姆龙耳温计处于正确的状态在测量温度之前,请确保欧姆龙耳温计完全处于开启状态。
HH309AData Logger Thermometer e-mail:**************For latest product manuals:Shop online at ®User’s Guide®MADE IN TAIWAN®It is the policy of OMEGA Engineering, Inc. to comply with all worldwide safety and EMC/EMI regulations that apply. OMEGA is constantly pursuing certification of its products to the European New Approach Directives. OMEGA will add the CE mark to every appropriate device upon certification.The information contained in this document is believed to be correct, but OMEGA accepts no liability for any errors it contains, and reserves the right to alter specifications without notice. WARNING: These products are not designed for use in, and should not be used for, human applications.目录项目页次一.简介 (1)二.规格 (1)三.符号定义及按键位置 (2)四.操作说明 (5)4.1 开/关机与背灯功能. (5)4.2 连接温度热电偶 (5)4.3 温度单位选择 (5)4.4 锁定温度读值 (5)4.5 T1-T2功能 (6)4.6 记忆及清除记忆功能 (6)4.7 时间设定 (6)4.8 记录时间间隔设定 (7)4.9 最大、最小读值功能 (7)4.10 自动关机 (8)4.11 电池不足指示 (8)4.12 校正点 (8)4.13 数字输出 (8)五.软件安装说明 (9)附录 (9)一.简介:OMEGA HH309A(DataLogger)是一具以K-type 热电偶温度传感器为Sensor的数字温度表, OMEGA HH309A具有内存装置,最多可连续记忆16000笔(注一),可以不接计算机直接将温度值先记录在电表中,然后经由计算机将内存读出,供做分析,打印或存档等用途。