地板说明
- 格式:doc
- 大小:30.50 KB
- 文档页数:4

木地板的拼法-概述说明以及解释1.引言1.1 概述引言部分是文章的开端,是向读者介绍文章内容和目的的重要部分。
在“木地板的拼法”这篇文章中,我们将探讨木地板的不同种类和拼法技巧,以及其在地板装修中的重要性和实用建议。
通过对木地板拼法的研究和总结,我们可以更好地了解如何选择合适的拼法技巧,使家居装修更加美观和实用。
让我们一起来深入探讨木地板的拼法,为家居装修增添更多的魅力和个性。
1.2 文章结构:本文将分为引言、正文和结论三个部分。
在引言部分,将概括介绍木地板的拼法以及本文的结构安排。
接着在正文部分,将详细介绍木地板的种类、拼法的重要性以及常见的拼法技巧。
最后在结论部分,将总结木地板拼法的优缺点,并给出实用建议,对未来的发展进行展望。
通过这样的结构安排,读者可以系统全面地了解木地板的拼法,并获得相关的实用信息和建议。
文章1.3 目的部分的内容如下:目的部分旨在明确本文的写作目的和意义,主要包括以下几点:1. 引导读者了解木地板拼法的重要性和实用性,帮助读者意识到不同拼法对于整体装修效果的影响。
2. 探讨不同拼法的优缺点,帮助读者在选择木地板拼法时,可以根据自身需求和装修风格做出明智决策。
3. 激发读者对于木地板拼法的兴趣,启发读者在实际装修中更加注重细节和设计,提升整体装修品质和舒适度。
通过对木地板拼法的深入探讨和分析,本文旨在为读者提供全面的装修指南,帮助他们在家居装修中更加专业和理性地选择合适的木地板拼法,实现个性化装修效果,提升居住舒适度和美感。
2.正文2.1 木地板的种类木地板是室内装饰中常见的地面材料,根据不同的木材和处理方法,木地板可以分为多种种类。
其中常见的木地板种类包括实木地板、复合木地板和强化木地板。
实木地板是由整块天然木材制成,具有自然的纹理和色泽,给人一种质朴、大气的感觉。
实木地板具有良好的减震效果和保温性能,但易受湿度变化的影响,需要定期保养和维护。
复合木地板由胶合板或高密度纤维板作为底层,表面覆盖一层薄木皮,外观和质感类似实木地板,但价格更为经济实惠。
homogeneous vinyl星际 元素同质透芯弹性地板sphera®elementsphera®element星际 元素创新、科技、完美的商用地面材料星际系列是福尔波品牌、技术和设计的结晶。
我们的欧洲产品团队以最新的生产技术,最先进的工艺和最具前瞻性的设计成就了这款产品。
“星际”共包括三个风格迥异的子系列:元素、灵动和传奇;这三个微妙联系的系列提供了三种差异化的美学设计,覆盖了整个现代化室内地面设计所能涉及的所有审美。
纵观星际 元素系列,其整体基色清新鲜亮,充满当代情感,遍布的隐约碎花又增添了整个设计的趣味性。
福尔波星际同质透芯弹性地板的有害物质排放量极低(铺装28天后,低于10ug/每平方米 ),生产过程中不添加邻苯二甲酸酯,通透的表面光泽和丰富的色彩设计旨在于打造清新欢快的室内氛围。
SMART表面涂层确保极高的耐污和抗刮擦性能,带来更易打理、更卫生的功能表现。
50008 | silver grey 50044 | turquoise星际品牌同质透芯弹性地板是由最先进的工艺水平和前瞻性的设计风格相结合而诞生出的地面材料。
共包括有三大子产品系列,分别是:元素(Element)、灵动(Energetic)及传奇(Evolution),每个子系列的设计之间关联微妙,但更注重差异化的审美设计。
科技,引领创新。
以先端设备打造的全新生产线意味着我们能以不一样的见解和手法来呈现“精锐”、“创新”的产品。
聚焦于高标准商用市场。
计62款产品选择,尖端工艺水平实现了诸多的花色品类:约占一半的中性色设计和各类冷暖色选择,色彩饱满,识别度高。
包括诸多高光反射值的色彩设计,擅于营造欢快明亮的氛围。
推荐应用领域:医疗、零售、工业及教育环境••••先进的钢带高压及热固工艺保证材料的高密度、长久的热稳定及尺寸稳定。
绿色能源和“积极降低浪费”理念确保生产流程运行在高效和可持续生产模式下。
摈弃添加邻苯二甲酸酯;极低的有害物释放量。
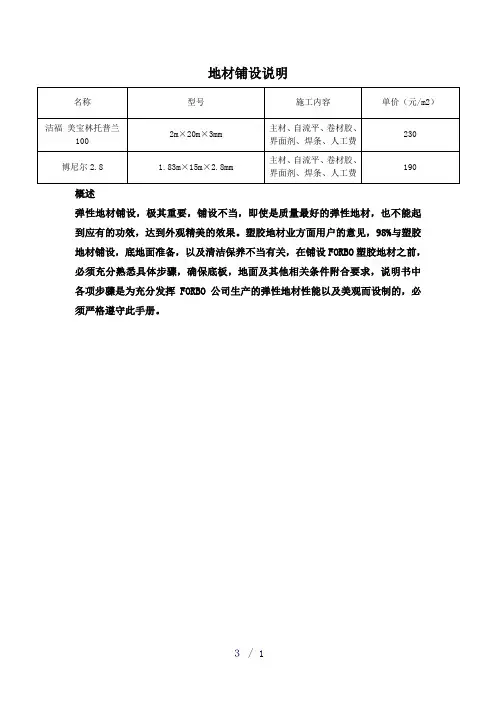
地材铺设说明概述弹性地材铺设,极其重要,铺设不当,即使是质量最好的弹性地材,也不能起到应有的功效,达到外观精美的效果。
塑胶地材业方面用户的意见,98%与塑胶地材铺设,底地面准备,以及清洁保养不当有关,在铺设FORBO塑胶地材之前,必须充分熟悉具体步骤,确保底板,地面及其他相关条件附合要求,说明书中各项步骤是为充分发挥FORBO公司生产的弹性地材性能以及美观而设制的,必须严格遵守此手册。
一、准备工作在铺设弹性地材前的地面情况最为重要,地面好坏,影响并决定弹性地材的功效和外观。
地面必须干燥,紧密,平整。
表面光滑,无类似灰尘,油漆,化学品,硫化物或固化物,封条带,沥青及其他粘合残留物。
二、木质底板新铺的木地板,表面一般比较平整光滑,但不同于旧地板,还没有完全定型,因此平整新旧地板,方法不同。
首先,无论新旧地板,必须充分通风。
地层房间,更为重要。
在地板上铺设硬质板,胶合板或纤维板。
板材含湿度定位8%,即气温在摄氏18度(华氏65度)时相对湿度(RH)为40%,保证日后的伸缩不损坏木板。
2.1 木质旧地板·用水泥整平剂平整地面,待干后,平整不平处。
·或用砂磨砂平地板。
·在硬质板中央,用钉子顺纹钉入,也可用宽边螺丝,注意不要太深,硬质板粗糙面向上。
接缝稍留余地,以便伸缩。
板材不能浸水受潮,板材厚度和铆钉间距,根据各地不同标准而定。
·仔细砂平硬质板之间的连接。
·硬质板横跨地板条。
除高压硬质外,也可用胶质板,或厚度为14毫米的纤维板,有无契口,均可,用钉子或螺铆与底板固定,契口纤维板可以铺成架空地板。
2.2 木质新地板木质新地板没有完全定形,水泥整平剂平整,没有效果。
仍可使用与旧地板相同的步骤,但无须使用平整胶合剂,须采用硬质板,胶合板或纤维板进行平整,有无契口均可。
2.3 木质楼梯踏板铺设木质楼梯踏板,必须考虑到,即使幅度很小的伸缩,也会导致凹凸或缝隙。
三、混凝土地面用水泥整平剂修平地面,混凝土地面伸缩缝设计必须精确。
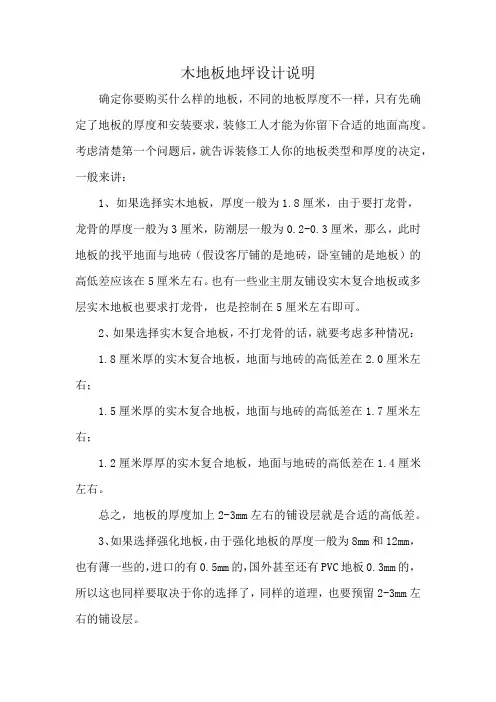
木地板地坪设计说明确定你要购买什么样的地板,不同的地板厚度不一样,只有先确定了地板的厚度和安装要求,装修工人才能为你留下合适的地面高度。
考虑清楚第一个问题后,就告诉装修工人你的地板类型和厚度的决定,一般来讲:1、如果选择实木地板,厚度一般为1.8厘米,由于要打龙骨,龙骨的厚度一般为3厘米,防潮层一般为0.2-0.3厘米,那么,此时地板的找平地面与地砖(假设客厅铺的是地砖,卧室铺的是地板)的高低差应该在5厘米左右。
也有一些业主朋友铺设实木复合地板或多层实木地板也要求打龙骨,也是控制在5厘米左右即可。
2、如果选择实木复合地板,不打龙骨的话,就要考虑多种情况:1.8厘米厚的实木复合地板,地面与地砖的高低差在2.0厘米左右;1.5厘米厚的实木复合地板,地面与地砖的高低差在1.7厘米左右;1.2厘米厚厚的实木复合地板,地面与地砖的高低差在1.4厘米左右。
总之,地板的厚度加上2-3mm左右的铺设层就是合适的高低差。
3、如果选择强化地板,由于强化地板的厚度一般为8mm和12mm,也有薄一些的,进口的有0.5mm的,国外甚至还有PVC地板0.3mm的,所以这也同样要取决于你的选择了,同样的道理,也要预留2-3mm左右的铺设层。
木地板对地坪的要求:地面找平主要有三种方法:自流平找平、水泥砂浆找平、石膏找平。
当然这几种找平方法也是各有利弊,大家可以根据自己家实际情况来做一下比较,然后再选择找平方法。
1.水泥砂浆找平优势:适合各种地面、各种地板铺设前的地面找平。
缺点:找平厚度太厚在25~35mm,如果水泥砂浆配比不对会使面层粉化起砂,起灰及裂纹。
地板(复合地板)与找平层形成一些间隙,人踩上去以后压迫地面灰尘向四周分散,然后从伸缩缝窜出.透过踢脚板缝隙扩散出来,形成了扬灰的现象。
另外就是水泥砂浆找平不细致的地方会出现空鼓现象。
适用环境:房子举架高,暖气片采暖、实木地板铺设前找平、复合地板铺设前找平。
2、石膏找平优势:可用于局部找平,不增高地面,找平厚度大概在5~20mm 左右,对房间高度几乎没有影响,干燥速度快,价格相对便宜,施工方便。
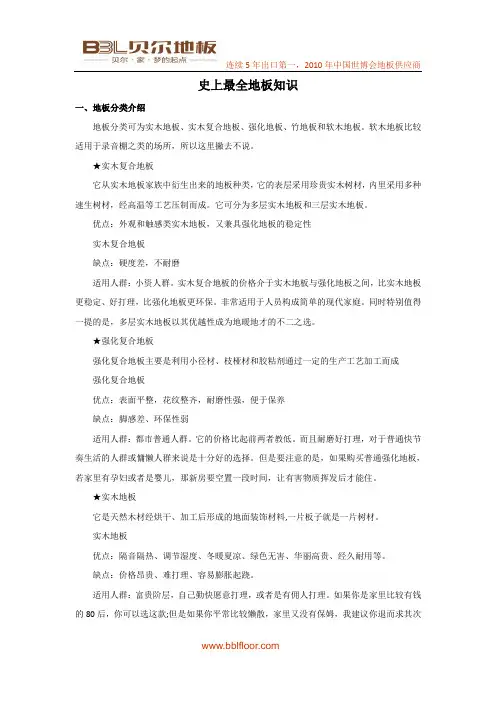
史上最全地板知识一、地板分类介绍地板分类可为实木地板、实木复合地板、强化地板、竹地板和软木地板。
软木地板比较适用于录音棚之类的场所,所以这里撇去不说。
★实木复合地板它从实木地板家族中衍生出来的地板种类,它的表层采用珍贵实木树材,内里采用多种速生树材,经高温等工艺压制而成。
它可分为多层实木地板和三层实木地板。
优点:外观和触感类实木地板,又兼具强化地板的稳定性实木复合地板缺点:硬度差,不耐磨适用人群:小资人群。
实木复合地板的价格介于实木地板与强化地板之间,比实木地板更稳定、好打理,比强化地板更环保。
非常适用于人员构成简单的现代家庭。
同时特别值得一提的是,多层实木地板以其优越性成为地暖地才的不二之选。
★强化复合地板强化复合地板主要是利用小径材、枝桠材和胶粘剂通过一定的生产工艺加工而成强化复合地板优点:表面平整,花纹整齐,耐磨性强,便于保养缺点:脚感差、环保性弱适用人群:都市普通人群。
它的价格比起前两者教低。
而且耐磨好打理,对于普通快节奏生活的人群或慵懒人群来说是十分好的选择。
但是要注意的是,如果购买普通强化地板,若家里有孕妇或者是婴儿,那新房要空置一段时间,让有害物质挥发后才能住。
★实木地板它是天然木材经烘干、加工后形成的地面装饰材料,一片板子就是一片树材。
实木地板优点:隔音隔热、调节湿度、冬暖夏凉、绿色无害、华丽高贵、经久耐用等。
缺点:价格昂贵、难打理、容易膨胀起跷。
适用人群:富贵阶层,自己勤快愿意打理,或者是有佣人打理。
如果你是家里比较有钱的80后,你可以选这款;但是如果你平常比较懒散,家里又没有保姆,我建议你退而求其次选用实木复合地板,不然实木地板打理起来会让你很纠结。
★竹地板竹板拼接采用粘胶剂,施以高温高压而成。
优点:冬暖夏凉、色差较小、稳定性强、环保。
缺点:花纹单一、怕虫蛀、怕划伤。
适用人群:小资阶层。
竹地板的国内市场不大,主要外销。
国内市场推广,上层喊得响,但是价格降不下来,和中低档实木地板一个价,市场反应很冷。
安装指南LVT 模块化弹性地板June 2020安装前注意事项安装前请先进行现场检查储存和管理18°C - 29°C (65°F ~ 85°F )48 小时18°C - 29°C (65°F ~ 85°F )48 hours在完成其他所有工艺流程前,建议不要开始铺设弹性地板。
所有铺设LVT 的基层都需进行适当的含水率试验。
只可使用以硅酸盐为原料的修补和自流平材料。
切勿在以石膏为原料的修补和/或自流平材料上铺设弹性地板。
安装前,承包商有责任检查所提供的材料是否符合业主规范,确保产品样式、颜色和数量正确。
每个纸箱上的标签所含的重要信息包括:产品样式、颜色和生产批次。
不建议在同一区域使用混合批次。
铺设的材料如存在任何视觉缺陷不应视为合法索赔。
在移动任何类型的家具或重型设备时,应在地板上铺设胶合板、纤维板或其他硬质材料,以防止剐蹭或永久损坏地板。
家具底应放置适当的地板保护物。
可以是毡制品或其他专门用于防止剐蹭硬质表面或损坏硬质表面耐磨层的其他软质材料。
本安装指南涵盖大部分铺设流程。
若您遇到本指南未提及的情况,或需要更详细的帮助信息,请联系当地英特飞客户经理或英特飞客户服务部门。
若您在安装过程中遇到可能危及安装或影响安装程序的任何情况或缺陷,请您立即停止安装,并致电当地英特飞客户经理或英特飞技术服务部门。
LVT产品应按照《英特飞标准LVT产品质保》进行保修。
若您没有《英特飞标准LVT产品质保》,并希望获得一本,请联系当地英特飞客户经理或客户服务部,或登录我们的网站www. 。
警告:如果在安装过程中遇到任何含石棉的材料或其他危险材料,请您立即停止安装,并向具备资质的修复顾问或承包商请求协助。
温馨提示 - LVT 不得在户外环境中铺设。
在理想情况下,新浇混凝土变干至少需要90天。
轻质混凝土和浇筑在金属板上的混凝土变干需要更长时间。
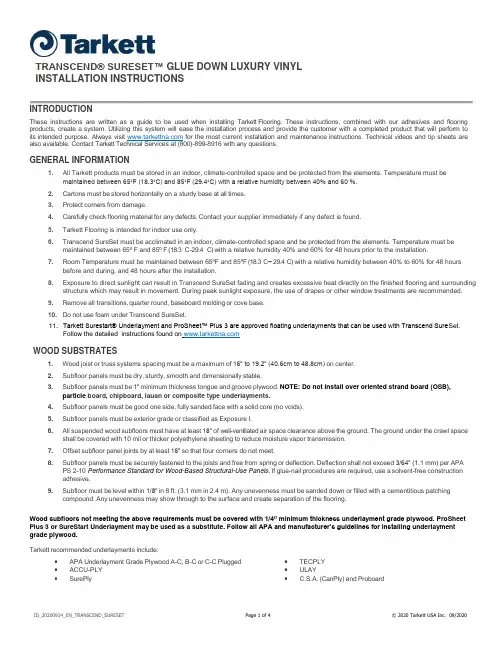
TRANSCEND® SURESET™ GLUE DOWN LUXURY VINYLINSTALLATION INSTRUCTIONSINTRODUCTIONThese instructions are written as a guide to be used when installing Tarkett Flooring. These instructions, combined with our adhesives and flooring products, create a system. Utilizing this system will ease the installation process and provide the customer with a completed product that will perform to its intended purpose. Always visit for the most current installation and maintenance instructions. Technical videos and tip sheets are also available. Contact Tarkett Technical Services at (800)-899-8916 with any questions.GENERAL INFORMATION1. All Tarkett products must be stored in an indoor, climate-controlled space and be protected from the elements. Temperature must bemaintained between 65˚F (18.3˚C) and 85˚F (29.4˚C) with a relative humidity between 40% and 60 %.2. Cartons must be stored horizontally on a sturdy base at all times.3. Protect corners from damage.4. Carefully check flooring material for any defects. Contact your supplier immediately if any defect is found.5. Tarkett Flooring is intended for indoor use only.6. Transcend SureSet must be acclimated in an indoor, climate-controlled space and be protected from the elements. Temperature must bemaintained between 65º F and 85º F (18.3° C -29.4° C) with a relative humidity 40% and 60% for 48 hours prior to the installation.7. Room Temperature must be maintained between 65ºF and 85ºF (18.3°C– 29.4°C) with a relative humidity between 40% to 60% for 48 hoursbefore and during, and 48 hours after the installation.8. Exposure to direct sunlight can result in Transcend SureSet fading and creates excessive heat directly on the finished flooring and surroundingstructure which may result in movement. During peak sunlight exposure, the use of drapes or other window treatments are recommended.9. Remove all transitions, quarter round, baseboard molding or cove base.10. Do not use foam under Transcend SureSet.11. Tarkett Surestart® Underlayment and ProSheet™ Plus 3 are approved floating underlayments that can be used with Transcend Sure Set.Follow the detailed instructions found on WOOD SUBSTRATES1. Wood joist or truss systems spacing must be a maximum of 16”to 19.2” (40.6cm to 48.8cm) on center.2. Subfloor panels must be dry, sturdy, smooth and dimensionally stable.3. Subfloor panels must be 1” minimum thickness tongue and groove plywood. NOTE: Do not install over oriented strand board (OSB),particle board, chipboard, lauan or composite type underlayments.4. Subfloor panels must be good one side, fully sanded face with a solid core (no voids).5. Subfloor panels must be exterior grade or classified as Exposure I.6. All suspended wood subfloors must have at least 18” of well-ventilated air space clearance above the ground. The ground under the crawl spaceshall be covered with 10 mil or thicker polyethylene sheeting to reduce moisture vapor transmission.7. Offset subfloor panel joints by at least 16” so that four corners do not meet.8. Subfloor panels must be securely fastened to the joists and free from spring or deflection. Deflection shall not exceed 3/64” (1.1 mm) per APAPS 2-10 Performance Standard for Wood-Based Structural-Use Panels. If glue-nail procedures are required, use a solvent-free constructionadhesive.9. Subfloor must be level within 1/8” in 8 ft. (3.1 mm in 2.4 m). Any unevenness must be sanded down or filled with a cementitious patchingcompound. Any unevenness may show through to the surface and create separation of the flooring.Wood subfloors not meeting the above requirements must be covered with 1/4” minimum thickness underlayment grade plywood. Pro Sheet Plus 3 or SureStart Underlayment may be used as a substitute. Follow all APA and manufacturer’s guidelines for installing und erlayment grade plywood.Tarkett recommended underlayments include:∙APA Underlayment Grade Plywood A-C, B-C or C-C Plugged ∙ACCU-PLY∙SurePly ∙TECPLY∙ULAY∙ C.S.A. (CanPly) and ProboardCONCRETE SUBSTRATES1. Transcend SureSet may be installed over properly constructed and prepared on-grade, above-grade, or below-grade concrete subfloors.2. Concrete subfloors must be constructed as recommended by the American Concrete Institute’s ACI 302.2 Guide for Concrete Slabs thatReceive Moisture-Sensitive Flooring Materials.3. Prepare concrete subfloors according to ASTM F710 Standard Practice for Preparation of Concrete Floors to Receive Resilient Flooring. Thesurface of the concrete must be dry, clean, smooth, and structurally sound. The slab must be swept, damp mopped and/or vacuumed to remove any dust. Any surface materials present such as loose paint, wax, grease, oil, adhesive residues, crayon, pen marking, etc., that may preventa proper adhesion or migrate to the surface of the flooring causing discoloration, must be removed. Fill and level any cracks, construction joints,control joints, depressions, grooves or other irregularities with a high-quality, non-shrinking, latex-fortified, Portland Cement-based patching compound.4. Do not install Tarkett flooring over expansion joints or other moving joints in the substrate. These joints must be respected and should not befilled with products that are not intended for that purpose. Contact an expansion joint cover manufacturer to meet specific flooring conditions.5. Moisture testing of concrete subfloors must be performed in accordance with ASTM F1869 Standard Test Method for Measuring MoistureVapor Emission Rate of Concrete Subfloor Using Anhydrous Calcium Chloride and ASTM F2170 Standard Test Method for Determining Relative Humidity in Concrete Floor Slabs Using in situ Probes. Do not install Transcend SureSet if the values are greater than 9 lbs. /1000 ft²/24hrs per ASTM F1869 or 95 %RH per ASTM 2170. If the tests results exceed the limitations, the installation must not proceed until the problem has been corrected. Tarkett does not recommend or warrant any particular product or procedure for the remediation of high moisture in concrete substrates. There are several companies that manufacture products suitable for moisture remediation. We suggest you refer to the current ASTM F710 Standard Practice for Preparing Concrete Floors to Receive Resilient Flooring and ASTM F 3010 Standard Practice for Two Component Resin Based Membrane-Forming Moisture Mitigation Systems for Use Under Resilient Flooring Systems. ADDITIONAL SUBFLOOR GUIDELINESMany installations over existing floors produce satisfactory results. However their success is dependent upon the condition of the existing floor covering. Installing over existing flooring increases the possibility of indentations and telegraphing of the old floor. NOTE: The final decision to cover an existing floor with new flooring rests with the flooring contractor, installer, and/or end user. Tarkett will not accept responsibility for floor failures where the condition, type or improper preparation of the existing floor is the cause for the failure. When installing Transcend SureSet Luxury Vinyl Planks over an existing flooring follow the recommended guidelines below.1. Minimum temperature of the substrate must be 60˚F (15.6 ˚C). Substrate temperature should be a minimum of 5˚F higher than the dew pointtemperature.2. Heated flooring systems must be installed 2’’below concrete and the operating temperature must not exceed 85º F (29.4ºC). Duringinstallation, lower the radiant heated floor temperature to a minimum 65ºF (18.3ºC). This temperature should be maintained for at least 24 hours before and during the installation, and for 48 hours after completion of the installation. Gradually increase the temperature in increments of 5°F (2.8°C) every 24 hours but do not exceed 85° F (29.4° C).3. Residual adhesives should be mechanically removed to trace amounts and encapsulated with an approved Portland Cement-basedpatching compound.Do not use chemical adhesive removers or solvents. Always follow Res ilient Floor Covering Institute’s (RFCI’s) Recommended Work Practices for Removal of Resilient Floorcoverings. Caution: Some resilient flooring and adhesives contain "asbestos fibers" and special handling of this material is required.4. Refer to ASTM F 2419 Standard Practice for Installation of Thick Poured Gypsum Concrete Underlayments and Preparation of the Surfaceto Receive Resilient Flooring for guidelines when pouring gypsum underlayments or preparing for use as an underlayment under Tarkett Transcend SureSet. Follow the gypsum underlayment manufacturer’s recommendations for proper application and preparation.SUBSTRATE PREPARATION1. All substrates must be dry, clean, structurally sound, smooth and free from all existing adhesive residues.2. The substrate must be flat within 1/8” in 8’ (3.17 mm in 2.4 m).3. Fill and level concrete cracks, construction joints, control joints, depressions, grooves and other irregularities. Use a latex fortified,cementitious patching compound. Follow the manufactures recommendation for preparing.4. Sweep and vacuum or damp mop substrate to remove all dust and debris.5. Surestart & ProSheet Plus 3 can be used if needed. Follow the detailed installation instructions found at GETTING STARTED1. Install product out of multiple cartons from matching batch numbers.2. Inspect all planks for visible defects and damage before and during installation. Contact your supplier immediately if any defect is found.Do not install damaged planks. Tarkett will not accept responsibility for claims on flooring installed with obvious defects.3. Transcend SureSet must be acclimated at room temperature for 48 hours prior to the installation.4. Room Temperature must be maintained between 65ºF and 85ºF (18.3°C– 29.4°C) with a relative humidity between 40% to 60% for 48 hoursbefore and during, and 48 hours after the installation.5. Remove quarter round, baseboard molding, or cove base.6. Undercut doorway moldings the thickness of the flooring.7. Cartons must be stored horizontally on a sturdy base at all times.8. Protect carton corners from damage.9. Tarkett floors are intended for indoor use only.10. Determine in which direction the planks will be installed. To make the room appear larger or if installing in a very small room or hallway, it ispreferable to lay the planks parallel to the longest room direction.11. Do not use foam padding under Transcend SureSet.12. Surestart & ProSheet Plus 3 can be used if needed. Follow the detailed installation instructions found at PLANK LAY-OUTSquare Layout-center pointTo square the area to be covered, first find the center of one wall of the main rectangle of the room. Locate the same point at the direct opposite wall. Snap a chalk line between these points. Measure this center line to find the middle of the room and mark. A right angle must be established off this center mark. Use the following method to establish a right angle.3-4-5 METHODAt the center point, mark off a line across the room at exactly right angles to the first line. This may be accomplished by the 3-4-5 triangle method (Figure 1)1. Using a tape measure find the center of the room and mark points onto the substrate, one at each end of the room using a pencil.2. Strike a chalkline on these two points.3. Measure this center line to find the middle of the line and mark the substrate using a pencil.4. A right angle to this centerline needs to be created by using the 3-4-5 method.5. From the center point measure 3 feet down the center line and mark the substrate.6. From the center point measure 4 feet out from the centerline, while slightly swinging the tape measure mark the substrate simultaneouslywith a pencil.7. Measure from the 3 foot mark on the center line to the 4 foot mark on the substrate.8. Place a mark where the 4 foot on the floor and the 5 foot mark on the tape measure intersect.9. Using a chalkline connect the center point to the intersecting mark established in step 8 above. This new line will be a right angle to theoriginal centerline.Measuring from the line that is parallel to the longest wall using units of measure equal to full planks determine the size of the border planks at the wall. Generally, the width of the border planks should be at least one half the size of a full plank. Make sure to snap a new guide line at the first row of full-sized planks near the longest wall. Once installation begins it will be critical that the first row of planks are installed perfectly on this guideline. The guideline is represented by the red line in the figure below.NOTE: For larger rooms, multiples of 6-8-10 or 9-12-15 may be used to obtain greater accuracy.After the room has been squared, determine the width of the border planks. For a consistent aesthetic, the width of the border planks should all be at least one half the size of a full plank. This can be done simply by measuring across the room and dividing that by the width of a full plank. It will be necessary to adjust the starting line and center point to achieve equal sized border planks. Make sure to snap new guide lines.INSTALLATION1. Adhesive Application: For application in areas subject to heavy point loads, rolling loads, or topical moisture, Tarkett 975 Two-Part UrethaneAdhesive™ should be used. Follow the adhesive label instruction for proper use. Issues associated with the use of non-recommended adhesives (including peaking, gapping, adhesion, bubbling, discoloration, indentation, etc.) are excluded from Tarket t’s limited warranty. See complete Limited Warranty for details..2.A. Installing Transcend SureSet Luxury Flooring with Pre-Applied Adhesive:Important: To insure the best color match when installing luxury plank flooring from two or more cartons, make sure the runnumbers or date code on each carton are the same.a. During the installation of plank material, install product out of multiple cartons from matching batch numbers.b. Square the area and establish reference points on the substrate as explained above.c. Remove the release paper and use established reference points along the guideline and install the flooring material. WARNING: Onceremoved, release paper may be slippery. Please keep work area clean and free of release paper.d. Install planks in the same direction, in a random pattern, and offset plank end joints by a minimum 6" (15.24 cm).e. Once all flooring is installed, roll floor in both directions with a 100 lbs., three-section roller. Use a small hand roller in areas that cannot bereached with a large roller.2.B. For Adhesive installations:f. Following adhesive label instructions, apply the adhesive to the substrate and allow proper open time.Open and working times aredependent on the ambient temperature, humidity, substrate porosity and temperature, and air movement. It is the installer’sresponsibility to modify the open and working time for jobsite conditions.g. Remove release paper prior to laying into wet adhesive.h. Planks and Tiles should be lightly butted together when placing the flooring into the adhesive.i. Do not force Planks or Tiles together creating a ledge condition at the seams and corners. Sliding tiles will result in forcing the adhesiveout between the seams.j. When using Tarkett 975 Two-Part Urethane Adhesive™, the installer MUST work off the flooring. Use kneeling boards to avoid displacement of adhesive.k. Periodically, lift the corner of an installed tile or plank to ensure proper transfer of adhesive.l. While installing and before the adhesive dries, inspect the floor surface, especially seams, and remove any adhesive on the surface. NOTE: Removing dried adhesive may cause irreparable damage to the flooring surface.m. Once all flooring is installed, roll floor in both directions with a 100 lbs., three-section roller. Use a small hand roller in areas that cannot be reached with a large roller.n. Inspect the floor 2.5 hours later and roll again if necessary. Walk on kneeling boards to prevent adhesive displacement.3. Adhesive clean upExcess adhesive should be removed during the installation process.975 Two-Part Urethane Adhesive∙Before the adhesive sets, remove excess adhesive from flooring and clean tools with denatured alcohol applied to a clean white cloth.(Follow manufacturer's precautions when using denatured alcohol.)∙Do not allow adhesive to dry on the flooring surface.∙Removing dried adhesive may cause irreparable damage to the flooring surface.4. Finishinga. Sweep up scrap material and any loose debris.b. Replace all wood molding or cove basec. Install appropriate transition molding at the doorwaysd. If wet set application was used, do not replace furniture, allow foot traffic, or perform any initial maintenance for at least 72hours.e. Do not slide or roll furniture or appliances across the newly installed floor. To prevent damage, these items should be carried or slid intoplace using sheets of plywood.f. Use proper floor protectors under the legs of furniture.g. Post installation site conditions should be controlled by HVAC and maintained between 55ºF and 95ºF (12°C and 35°C). Ambient relativehumidity should be maintained between 40% and 70%.Tarkett North AmericaTechnical Services Department30000 Aurora RoadSolon, OH 44139800.899.8916 Fax 440.632.5643******************。

复合重竹地板安装说明书 第1页 共4页复合复合重重竹地板安装说明书安装地板前请仔细阅读安装说明书,按照说明书的指引进行安装。
本安装说明书只适用于复合重竹地板的安装。
安装之前安装之前::1、打开纸箱,将地板逐片从纸箱中取出,纵横交叉的将地板堆叠在平整干净的地面上。
堆叠高度以地板堆叠后叠层不会垮塌为极限。
堆叠时每层地板之间要留有足够的空隙,空隙越大,平衡时间会越短。
在堆叠地板的同时,对每块板进行基本目测(请保证目测环境日光或者灯光的光亮度),如发现有明显质量缺陷的板,请将其挑出,并与经销商联系调换。
我们对在安装前就发现有明显质量缺陷的板在安装后不负赔偿责任的板在安装后不负赔偿责任。
2、地板堆叠时需小心操作,避免人为导致的地板破损与划伤。
同时请避免将地板堆叠在靠近墙角的地方,也不要直接将地板堆叠在水泥地面上。
3、在堆叠地板进行水分平衡时,请对地板进行含水率抽检,并记录其含水率数据,同时请测定安装环境的空气湿度,并进行记录与对比。
当地板含水率与安装环境空气湿度接近时,地板在堆叠后水分平衡两三天即可进行安装作业;如地板含水率与安装环境空气湿度相差比较大,比如地板含水率偏高而安装环境空气比较干燥,或者地板含水率低而安装环境比较潮湿,那么就需要对地板进行比较长时间的水分平衡。
平衡期间,要不定时的对地板含水率以及安装环境空气湿度进行对比检测,只有在地板含水率平衡至与安装环境空气湿度接近时,才能进行安装作业。
4、特别注意特别注意特别注意::地板安装应该是所有工程建设的最后一项工作地板安装应该是所有工程建设的最后一项工作,,其它任何墙面漆施工等工作都应该在地板安装前就已经完工施工等工作都应该在地板安装前就已经完工。
这样是为了避免其它施工对安装好的地板造成损坏。
施工用水等不能与地板接触,地板长时间接触水会将地板彻底毁坏。
5、本地板为室内地板,不能安装于户外,也不建议安装于有地热系统的房间里。
6、横交叉复合结构的地板不能安装于特别干燥的环境中,对于特别干燥的地区,我们推荐使用实心重竹地板或者普通平侧压实心竹地板。
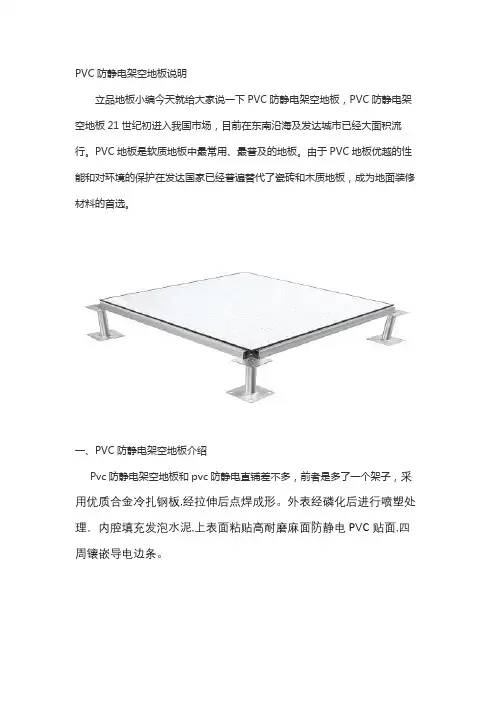
PVC防静电架空地板说明
立品地板小编今天就给大家说一下PVC防静电架空地板,PVC防静电架空地板21世纪初进入我国市场,目前在东南沿海及发达城市已经大面积流行。
PVC地板是软质地板中最常用、最普及的地板。
由于PVC地板优越的性能和对环境的保护在发达国家已经普遍替代了瓷砖和木质地板,成为地面装修材料的首选。
一、PVC防静电架空地板介绍
Pvc防静电架空地板和pvc防静电直铺差不多,前者是多了一个架子,采用优质合金冷扎钢板,经拉伸后点焊成形。
外表经磷化后进行喷塑处理,内腔填充发泡水泥,上表面粘贴高耐磨麻面防静电PVC贴面,四周镶嵌导电边条。
二、PVC防静电架空地板特点
1、全钢组件,机械强度高、承载能力强、防火性能好;
2、表面静电喷塑,柔光、耐磨、防腐蚀;
3、粘贴的装饰高压层板,耐磨性及防静电性能优良、抗污染、便于清洗、装饰性强;
4、尺寸精度高、互换性能好、组装灵活、维护方便。
三、PVC防静电架空地板应用范围
PVC防静电架空地板广泛应用于电子计算机房、卫星地面站机房、电台控制室、电视发射台控制室、微波通信站机房、程控交换机房、洁净厂房、电子仪器厂装配车间、机密光学仪器制造车间、医院、学校等有防静电要求的场合
立品从创建开始就明确了市场定位,用品质赢得市场,赢得消
费者的口碑。
PVC防静电架空地板,就选东莞立品地板!。
pvc卷材地板产品说明书
PVC卷材地板是一种常见的地板材料,具有防水、耐磨、易清
洁等特点。
产品说明书通常包括以下内容:
1. 产品介绍,介绍PVC卷材地板的基本特性、适用范围和优势。
2. 规格参数,包括地板的厚度、宽度、长度、颜色、纹理等规
格信息,以及相关的技术指标。
3. 安装方法,详细说明PVC卷材地板的安装步骤、注意事项和
施工要求,确保安装质量。
4. 使用与保养,介绍PVC卷材地板的日常使用注意事项、清洁
方法和保养建议,延长地板的使用寿命。
5. 质量保证,说明产品的质量保证期限、售后服务政策和相关
联系方式,让用户放心购买和使用。
此外,产品说明书还可能包括公司简介、产品认证、环保标准
等内容,以及相关的图片、图表和实例。
通过产品说明书,用户可
以全面了解PVC卷材地板的特性和使用方法,以便做出正确的选择和使用。
防静电地板安装说明一、对铺设场地的要求1、地板的铺设应在室内土建及装修施工完毕后进行;2、地面应平整、干燥、无杂物、无灰尘;3、地板下可使用空间,布置敷设电缆、电路、水路、空气等管道及空调系统应在安装地板前施工完毕;4、大型重设备基座固定应完工,设备安装在基座上,基座高度应同地板上表面完成高度一致;5、施工现场备有220V/50HZ电源及水源。
二、地板安装铺设工具1、云石切割锯;2、激光水平测定仪、网络激光扫描仪;3、水泡水平仪、卷尺、墨线;4、吸板器、螺母调整搬手、十字螺丝刀;5、吸尘器、笤帚、拖布;三、施工步骤1、认真检查地面平整度及墙面垂直度,如发现有重大缺陷或需要局部改造,应向甲方有关部门提出;2、拉水平线,并将地板安装高度用墨线弹到墙面上,保证铺设后的地板在同一水平内,测量室内的长度、宽度及选择基准位置,并在地面弹出安装支座的网络格线,以保证铺设整齐、美观,同时尽量减少地板的切割;3、将要安装的支座调整到同一需要的高度并将支座摆到地面网格线的十字交点处;4、用安装螺钉将桁梁固定到支座上,并用水平尺、直角尺逐一校正桁梁,使之既在同一平面内,又相互垂直;5、用吸板器在组装好的桁梁上放置活动地板;6、若靠近墙面处剩余尺寸小于活动地板的长度,可以用切割地板的方法进行拼补;7、在铺设地板时,用水泡水平仪逐块找平,活动地板的的高度靠可调支座调节,铺设过程中应轻拿轻放,防止划伤地板及损坏边条,同时应边铺设边打扫,避免将杂物、灰尘遗留在地板下面;8、在机房设置较重设备时,可在设备基座的地板下加装支座,以防地板变形;9、HPL装饰板需要切割或开口加工时,其开口凹角处应制φ6~φ8止裂孔,以防止加工后的地板装饰面开裂。
防静电地板的维护使用要求1、使用环境:铺设防静电地板的房间环境控制要求温度:15℃~35℃,相对湿度:45%RH~75%RH;2、装饰面地板:2.1 禁用尖锐、锋刃的器具在活动地板的装饰面上直接施工操作,防止破坏装饰面的防静电性能和美观程度;2.2 使用过程中禁止人员从高处直接跳落到防静电地板上,及在移动物品时野蛮搬运,砸伤地板;2.3 在活动地板上搬运物品时,禁止直接在板面上推动物体,使物体与地面之间直接摩擦,造成板面划伤;2.4 在搬运物品时,应用带有胶轮的推车进行搬运或在物体的轮廓与地板之间铺设隔离垫,防止板面损伤;2.5 在防静电活动板面上放置较重物品时,应平稳摆设,以免砸伤防静电地板;2.6 对地板下部空间的设备进行维护时,应用地板吸板器进行地板安装,拆装地板要轻拿轻放,以免损伤防静电地板;2.7 使用中可用干净的拖布和抹布保持板面的清洁,注意不要把大量的水、清洁剂等液体撒在地板上,以免影响防静电地板使用寿命及影响防静电地板下面的线路及设备的正常运行;3、裸地板和通风地板3.1 使用中应防止活动地板的防静电喷塑层划伤,如发现划伤应用灰色的漆进行补刷,保证涂层完整。
FOR BEST VISUAL REPRESENTATION OF YOUR FLOORThis flooring replicates the look of a natural product which has natural variations in color, texture, and sheen/gloss. For best visual effect, shuffle planks or tiles from several cartons and do not install similar planks or tiles next to one another.Subfloor PreparationSubfloor should be dry and level to 3/16” per 10 ft. radius for best installation results.Angle-Tap Installation Instructions for COREtec Brand FloorsREAD THESE INSTRUCTIONS THOROUGHLY BEFORE BEGINNING INSTALLATION.If the following instructions leave any unanswered questions or if additional information is required, please call COREtec toll free at 844-743-7429.Flooring Material Should Be InspectedPrior to InstallationResponsibility for the suitability of COREtec® flooring and accompanying products for each individual installation cannot be assumed by COREtec, since COREtec has no control over the installer’s proper application. Should an individual plank or tile be doubtful as to appearance or dimension the installer should not use this piece. COREtec will send a replacement in a timely fashion.NOTE: COREtec Pro Plus floors may be installed with a direct glue-down method on approved wooden (or) concrete substrates that are on or above grade only. Use only COREtec Cork Underlayment Adhesive (or) comparable premium multi-purpose adhesives. Please consult with adhesive manufacturer to determine if suitable for use with this material.Read Before InstallingWhile COREtec Pro Plus is waterproof, it’s not a moisture barrier. It’s still a good idea to make sure concrete is cured and tested for moisture and that a moisture barrier is installed in the crawl space and even under a COREtec Pro Plus floor over a concrete subfloor. Moisture won’t damage COREtec Pro Plus, but it can get in the walls and structure of the home.A couple of extra dollars and a few minutes is a small investment for the added protection and peaceof mind.Because houses and buildings, as well as adjacent hardwood or laminate floors, expand and contract, COREtec recommends to leave a ¼” expansiongap between the perimeter walls and any adjacent hardwood floor.Do not install COREtec Pro Plus floors as a floating floor where it will be exposed to temperatures greater than 150° F. In areas where the floor may be exposed to direct, intense sunlight resulting in excessive heat to the floor, use the glue down method.Use good common sense installation practices, and you’ll have a successful installation that results in a beautiful floor.Pre-Installation Jobsite Requirements COREtec cannot be held responsible for site conditions. Carefully examine the flooring prior to installationfor color, finish, sheen, and quality. Ensure adequate lighting for proper inspection. If flooring is not acceptable, contact your supplier immediatelyand arrange for a replacement. COREtec cannot accept responsibility for flooring installed with visible defects. Prior to installation of any flooring, the installer must ensure that the jobsite and subfloor meet the requirements of these instructions. COREtec is not responsible for flooring failure resulting from unsatisfactory jobsite and/or subfloor conditions. Flooring should be one of the last items installed in any new construction or remodel project.Crawl spaces must be a minimum of 18” (46 cm) from the ground to the underside of the joists. A ground cover of 6–20 mil black polyethylene film is essential as a vapor barrier. Joints must be lapped 6” (15 cm) and sealed with moisture resistant tape. The crawl space should have perimeter venting equal to a minimum of 1.5% of the crawl space square footage. These vents should be properly located to foster cross ventilation. Where necessary, local regulations prevail.Room temperature and humidity of installation areas should be consistent with normal, year-round living conditions for at least one week before installation of flooring. Maintaining an optimum room temperature of 70° F and a humidity range of 30-50% is recommended.COREtec Pro Plus® Plank & Tile Floating Installation InstructionsPRE-INSTALLATION SUBFLOOR REQUIREMENTSAll Subfloors must be:• Dry• Structurally sound• Clean: Thoroughly swept and free of all debris• Level: Flat to 3/16” per 10-foot radiusWood subfloors must be dry and well secured. Nail or screw every 6” along joists to avoid squeaking. If not level, sand down high spots and fill low spots with a Portland-based leveling patch.Concrete subfloors must be fully cured, at least 60 days old, and 6-mil polyfilm is recommended between concrete and ground. Subfloor should be flat and level within 3/16” per 10’ radius. If necessary grind high spots down and level low spots with a Portland- based leveling compound.Ceramic tile, resilient tile and sheet vinyl must be well-bonded to subfloor, in good condition, clean, and level. Do not sand existing vinyl floors, as they may contain asbestos.Installation ToolsFor all installation methods:• Tape measure• Chalk Line• 3M Scotch Blue™ 2080 Tape• Hammer• Pull Bar• Pencil• Crosscut Power Saw• ¼” Spacers• Tapping Block Acceptable Subfloor Types:• CDX Underlayment Grade Plywood (at least ½” thick)• Underlayment Grade Particleboard• OSB (at least ¾” thick)• Existing Wood or Laminate Floor• Resilient Tile• Concrete Slab• Ceramic Tile• Non-Cushioned Sheet VinylSTARTING YOUR INSTALLATIONBecause houses and buildings, as well as adjacent hardwood or laminate floors, expand and contract, COREtec recommends leaving a ¼” expansion gap between the perimeter walls and any adjacent hardwood floor.Work from several open boxes of flooring and “dry lay” the floor before permanently laying the floor.This will allow you to select varying textures, colors, and sheens, and to arrange them in a harmonious pattern. Remember, it is the installer’s responsibility to determine the expectations of what the finished floor will look like with the end user first and then to cull out pieces that do not meet those expectations.Begin installation next to an outside wall. This is usually the straightest and best reference for establishing a straight working line. Establish this line by measuring an equal distance from the wall at both ends and snapping a chalk line. The distance you measure from the wall should be the width of a plank or tile. You may need to scribe cut the first row of planks or tiles to match the wall in order to make a straight working line if the wall is out of straight.You may want to position a few rows before starting installation to confirm your layout decision and working line. When laying flooring, stagger end joints from row to row by at least 8” (20 cm) for planks, and equal to 12”(51 cm or a half piece) for tiles. For plank installations, you can use the cut-off end to begin the next row when cutting the last plank in a row to fit. If cut-off end is less than 8”, discard it and instead cut a new plank at a random length (at least 8” in length) and use it to start the next row. For tile installations, always begin a row with either a full tile or a half tile so that the joints are consistently staggered in a “brick work” type pattern. Always begin each row from the same side of the room.Installation InstructionsPRE-INSTALLATION GUIDELINESThese installation guidelines apply to the COREtec Angle Tap product. All instructionsand recommendations should be followed for a successful installation.Required Tools: Tape Measure, Utility Knife, Jigsaw, Tapping Block or Rubber Mallet, Pull Bar, ¼” Spacers,T-Square, Safety Glasses, Broom or Vacuum and, if necessary, tools for subfloor repair.Frequently moved furniture should be equipped with felt pads to avoid scratching the floor. Heavy furniture and appliances should be equipped with non-staining large surface floor protectors. Furniture with castersor wheels must be easy swiveling, large surface non- staining and suitable for resilient floors. Do NOT use ball type casters as they can damage the floor.• T his product can be installed on, above, orbelow grade.• T his product is warranted for installation into environments (such as “three season rooms and dwellings”) that experience extended periods where the ambient environment is either not controlled or minimally controlled allowing seasonal fluctuationsin temperature and relative humidity. For such installations, the product must be acclimated and installed into a controlled environment where temperatures are kept between 55°F & 85°F or 13° & -29°C for a period of 72 hours prior to, during and 72 hours after installation. Failure to comply with these installation parameters will disallowwarranty coverage.• E xcessive moisture in the subfloor could promote mold, mildew, and other moisture related issues that will contribute to an unhealthy indoor environment. COREtec is not responsible for damages related to these moisture issues. COREtec recommends a 6 mil polyfilm when installing over concrete subfloors.• A void prolonged exposure to direct sunlight as this will result in discoloration. The use of drapes, blind systems or protective window film is required.• F looring should be installed after all other trades have completed work that could damage the flooring.• A ll subfloor patching must be completed with a Portland based compound and fully dried/cured prior to installation.• I nspect all planks for damage prior to installation. If you have any concerns about the product fit or finish, call COREtec Tech Services at 844-743-7429. Claims/ Returns will not be accepted for any flooring that has been cut to size and/or installed.• Blend and install planks from several cartons.SUBFLOOR PREPARATIONAll subfloors must be clean, flat, dry and structurally sound. Proper subfloor preparation is a major part of a successful installation. Subfloor must be flat – 3/16” in 10’ or 1/8” in 6’. Moisture emissions should not exceed 5.0 lbs per 1000 sq. ft. for 24 hours and should not exceed a relative humidity of 85%. We also recommend a 6 mil polyfilm moisture barrier to help prevent the growth of mold and mildew. When installing below grade, a 6 mil polyfilm is required.Over Existing Floors• Installation is NOT allowed over any type of carpet.• C OREtec flooring can be installed over most existing hard–surface floor coverings, provided that the existing floor surface is clean, flat, dry and structurally sound.• E xisting sheet vinyl floors should not be heavily cushioned. Soft underlayment and soft substrates will diminish the product’s inherent strength.• N ever use solvents or citrus adhesive removers to remove old adhesive residue. Solvent residue left in and on the subfloor may affect the new floor covering.Radiant HeatRadiant heat systems must have a minimum of 1/2” separation from the product. Maximum operating temperature should never exceed 85°F (30°C). Use of an in-floor temperature sensor is recommended to avoid overheating.INSTALLATIONCOREtec is engineered to be installed utilizing the floating method. Do not install cabinets or fixed objects on top of the COREtec. Proper expansion space is required. Undercut all doorjambs. Do not fasten wall moldings and or transition strips to the floorand planks.See Following Pages for Step-by-Step Illustrations23112” for proper appearance. the groove.In-floor Radiant HeatCOREtec Pro Plus can be installed over 1/2” embedded radiant heat using the floating or glue down method. When gluing floor, use only COREtec cork underlayment adhesive over manufacturer’s recommended substrate.• T urn the heat off for 24 hours before, during and 24 hours after installation when installing over radiant heated subfloors.• F ailure to turn the heat off may result in significantly shortened working time of the adhesive.• F loor temperature must not exceed 85°F (30°C). Once the installation has been completed, the heating system should be turned on and increased gradually (5 degree increments) until returning to normal operating conditions.• F ailure to strictly follow adhesive manufacturer’s guidelines may result in failure and voidthe warranty.Warning:Electric heating mats that are not embedded in to the subfloor are not recommended for use underneath COREtec Pro Plus floors. Using electric heating mats that are not embedded and applied directly underneath COREtec Pro Plus floors could void the warranty for your floor in case of failure. It is best to install COREtec Pro Plus flooring over embedded radiant floor heating systems and adhere to the guidelines listed above.AFTER INSTALLATION• F looring should be one of the last items installed in a project. In order to protect the floors while other trades are finishing their work prior to final cleanup and turnover to the owner, use rosin paper and only use 3M Scotch-Blue™ 2080 Tape to hold the rosin paper to the floor (other blue tapes may damagethe finish). Clean the floor thoroughly before laying the rosin paper to ensure that no debris is trapped underneath. DO NOT USE plastic film or other non-breathing coverings as this can cause the floor to become damaged from humidity buildups.• D ust-mop or vacuum your floor to remove any dirt or debris.• I t is suggested that you clean the floor using a recommended pH neutral cleaner available at /usflcoplevp.html.• I nstall any transition pieces that may be needed (reducers, T-moldings, etc.).Protection and Maintenanceof Your FloorLasting beauty can be achieved through purchasinga quality floor covering and providing properon-going maintenance.• F urniture should be moved onto the newly installed floor using an appliance hand truck over hardboard runways.• A void prolonged exposure to direct sunlight as this will result in discoloration and expansion. The use of drapes, blind systems or protective window filmis required.• D o not expose COREtec Pro Plus floors to temperatures below -20° F or above 150° F.• O il or petroleum-based products can result in surface staining. Do not track asphalt driveway sealer or automobile oil drips onto the vinyl floor covering.• C aster wheeled chairs should have wide, rubber casters. Protective mats are required underoffice chairs.• U se non-staining mats. Rubber may discolorthe floor.• F requently moved furniture should be equipped with felt pads to avoid scratching the floor. Heavy furniture and appliances should be equipped with non-staining large surface floor protectors. Furniture with casters or wheels must be easy swiveling, large surface non-staining and suitable for resilient floors. Do NOT use ball type casters as they can damage the floor.• U se walk off mats at entrances to prevent dirt and grit from being tracked on to the floor.• S weep or vacuum the floor regularly to remove loose dirt. Do NOT use vacuums that use a beater bar or turn beater bar off.• D o NOT use electric brooms with hard plastic bottoms with no padding.• Clean up spills immediately.• D amp mop as needed using clean water and a diluted pH Neutral cleaner (Bona Stone Tile and Laminate Cleaner, Hilway Direct HD pH Neutral Cleaner, etc.). Do NOT use harsh cleaners or chemicals on the floor. Do NOT use abrasive scrubbing tools. Do NOT use detergents, abrasive cleaners or “mop and shine” products.• V inyl flooring, like other types of smooth floors, may become slippery when wet. Allow time for floor to dry after cleaning. Immediately wipe up wet areas from spills, foreign substances or wet feet.。
实木地板使用说明书《木地板使用说明书》共分6部分,分别为《实木地板使用说明书》、《多层实木复合地板使用说明书》、《三层实木复合地板使用说明书》、《强化木地板使用说明书》、《竹地板使用说明书》、《软木类地板使用说明书》。
本部分为《实木地板使用说明书》,涉及内容为:适用范围、主要特征、执行标准、铺装前准备、铺装监督及验收、使用与保养、保修期内质量要求、铺装及使用引起的常见问题与预防措施等。
本使用说明书自2010年11月21日发布。
为了您更好地使用实木地板,维护您的合法权益,请在铺装及使用前认真阅读。
1、适用范围本使用说明书适用于实木地板的铺装前准备、铺装及使用过程。
2、主要特征2.1定义实木地板是用实木直接加工而成的地板。
2.2分类•按拼接方式分:榫接实木地板(企口实木地板I平接实木地板。
•按表面状态分:平面实木地板、仿古实木地板。
•按表面有无涂饰分:涂饰实木地板、未涂饰实木地板(俗称素板)。
•按表面涂饰类型分:漆饰实木地板、油饰实木地板。
2.3产品特征•具备天然木材的特征,如天然色泽色差,天然气味,天然纹理,环保健康。
•有良好的保温、隔热、隔音、吸音、绝缘性能等。
•脚感舒适。
•可循环利用,修复使用。
3、执行标准•GB/T15036-2009《实木地板》。
•GB/T20238-2006《木质地板铺装、验收和使用规范》。
4、铺装前准备4.1室内环境•空气湿度以40%~80%为宜。
•室内温度10℃~30℃为宜。
•墙面含水率要求W30%。
•地面含水率要求W20%。
4.2地面要求•地面平整度要求W5mm/2m。
•根据消费者房屋已铺设的管道、线路布置情况,标明各管道、线路的位置,以便于施工。
•彻底清理地面,确保地面无浮土、无明显凸出物和施工废弃物。
•地面基础的强度和厚度应符合房屋验收规定。
•卫生间、阳台、厨房防水合格。
•若铺装在楼房底层,建议对地面作防水处理或增加铺设防潮层。
4.3安装须知•.3.1地板铺装前,消费者应对产品的名称、数量、质量状况、品牌等进行验收并确认。
恒利全钢防静电活动地板全钢组成,钢板壳结构,底面采用ST14拉伸板,表面选用优质合金冷轧硬质钢板(产地均为上海宝钢),经拉伸后点焊成形。
外表经磷化后进行静电喷塑处理,中间用发泡水泥填充,高耐磨防静电三聚氰胺或PVC、陶瓷(玻化石)贴面:支座采用钢板模压成型,丝杆高度可任意调节。
横梁选用22×26㎜方管制作。
功能特点:1.全钢组成,机械强度高、承载能力强、耐冲击性能好;全钢地板科学的力学结构使它的承载能力比同等规格的其它地板高30%。
2.进口胶水粘贴的装饰高压层板,耐磨及防静电性能优良、抗污染、便于清洗、装饰性强,不起泡,不脱胶。
3.钢壳采用静电喷塑,阻燃、防尘、防滑、防锈、耐化学腐蚀。
4.尺寸精度高,超强承重耐压;对超重设备而言,只要在地板下增加支架,即能解决承载问题。
5.四周支撑,安装方便,组装灵活,下部空间可作为空调通风,维修方便。
6.地板可任意切割,安装辅件(地插座、出线口)方便,便于布线检查。
7.使用寿命长,环保,只需更换装饰贴面就能重复使用,适用范围:全钢防静电活动地板是防静电活动地板中最普遍常用的一种,广泛用于程控机房、计算机房、控制室、实验室、电教室、微电子生产安装车间及管线铺设较集中,有防静电要求的地方,还可以用于智能化办公楼、银行、邮电、电力调度室等场所。
比如有大型服务器和机柜的主机房。
大、中、小型的计算机机房,以交换机为代表的通信中心机房、各种电气控制机房、邮电枢纽和用计算机控制的军事、经济、国家安全、航空、航天及交通指挥调度和信息管理中心等环节。
技术指标:名称规格mm 集中载荷N均布载荷(N/平米)系统电阻(欧姆)防火性能全钢防静电板600*600*30 >2500 >115001.0x105-8 A级全钢防静电板600*600*35 >3200 >15400恒利陶瓷(玻化石)全钢防静电活动地板产品说明:陶瓷(玻化石)防静电地板,又成为瓷砖面层防静电地板,是根据市场需要而开发的一种防静电地板,由于其铺装美观,经久耐用,使用寿命明显优于其它贴面地板,因此将陶瓷面层的防静电地板单独归为一类——陶瓷(玻化石)防静电地板。
SUPERIOR QUALITY SPORTS FLOORING INTERIOR FLOORING EXTERIOR FLOORINGSUNFLEX a company that is completely based on honesty and trust, headquartered in Mumbai, India, has more than two decades of experience in the sports industry of providing all kind of sports infrastructure facilities and helping to develop a quality and passionable sports culture in India.SUNFLEX is truly the industry leader in providing sports infrastructure in India using the best materials and the best technology and also concentrating on developing quality products with extraordinary passion and conviction. has set the standard for sportsSUNFLEX surface design, leading the industry with an unmatched commitment to product enhancement and technical innovation. SUNFLEX provides all sports users at amateur and professionals levels, the most comfortable and high performance surfaces in the market.SUNFLEX specializes in the production and procurement of reliable quality products for everybody.OVERVIEW COMPANYSUNFLEX products are manufactured with workmanship precision and surveyed by experienced and skilled staff, brilliantly engineered at our STATE-OF-THE-ART FACTORY and also manufactured and imported from world renowned international partners.All activities are designed to offer our customers real advantages with our products and services. Our services are designed to meet the demands of our customers and we also ensure that our offer is to the best for the individual person and the community.INDOORSPORTS OUTDOORSPORTS INTERIOR & EXTERIORFLOORINGSPORTS INFRASTRUCTURE SUNFLEX is an ISO-9001-2015 Certified, SME Rated and NSIC Registered company established in the year of 1998 and managed by a team of young, dynamic and dedicated people totally involved in developing, manufacturing, marketing and installing superior quality sports floorings, sports infrastructure and interior flooring products from a vast field of technical and practical knowledge in technology, designing and manufacturing in the various engineering and industrial field.SUNFLEXABOUTPg1SUNFLEX WOODEN SPORTS FLOORINGThe free floating resilient wooden sports flooring system designed for Indoor Multipurpose Halls, Badminton Halls, Squash Courts, Basketball Courts, Gymnasium Halls etc. made of imported timbers and floorings. The system ensures that there is no impact on the knees, feet, shins and ankles. A number of medical studies on athletes, both in India and internationally have revealed that surface elastic flooring induces a far smaller number of sports related injuries. This type of floor construction is also results in consistent resilient throughout the playing area. Using timber that is fully seasoned and treated the surface boards are machined to a special tongue and grooved design for concealed screwing and finished with non-skid polyurethane lacquer.The Sports Floor Safety: Keeping athletes healthy, safe and as free from injury as possible is a direct result of the design and performance of the sub-floor system, specifically the Force Reduction, Vertical Deflection, and Area Deflection of the surface. These are specific performance characteristics that are individually and independently tested.The company manufactures and imports various types of Hardwood Sports Floor systems namely Maple flooring (American Maple, Canadian Maple and European Maple Floorings), T eak wood and Oak wood flooring to meet the quality, needs and budgets of any sports & recreational projects. We have covered everything, from Olympic Games, National and International Championships, including Schools, Colleges, Universities, Sports Clubs, fitness centers and even individual (personal) sports courts all over the country using all types of sports floorings.Pg2SUNFLEX offers various sports floor systems for different facilities For Squash Courts, Badminton Courts,Multipurpose Indoor Halls Etc.BIO CUSH/AIR-CUSHFor Heavy Duty Floor and Multifunctional use.MEGA FLOOR SYSTEMS U N F L E X B I O -C U S H A N D AIR-CUSH SPORTS FLOOR SYSTEM The No.1 floating floor system that gives better shock absorption and ball bounce for Squash Courts, Badminton Courts, Basketball Courts, Multipurpose Indoor Halls Etc. SUNFLEX SMART SUNFLEX ENGINEERED FOAM FLOOR S U N F L E X P R E -F I N I S H E D AND ENGINEERED SPORTS FLOORING SYSTEM Made of fully imported floor board with UV finished T echnology. The SUNFLEX Engineered and Smart flooring are offered with the most consistent Micro-V in the industry. Beveling all four faces of each board makes it impossible to distinguish an Engineered floor from a solid hard wood floor once installed.S U N F L E X F O A M F L O O R SYSTEM A Floating Floor System using c l o s e d c e l l , l i n e a r l i n k e d Polyethylene foam to cover all minor slab imperfection and recommended for retro fit projectsbecause of its low profile and cost.S U N F L E X M E G A F L O O R SYSTEM A Heavy duty floor system for a true multipurpose and multi-functional solutions. A floor that is installed using Hard Maple floor boards, Plywood and SYP battens. The Sunflex Mega Flooring system is truly at the vanguard of stability Screwed Stapled Floating Glued SandedPg3HARD PLASTER SYSTEM FOR SQUASH COURT WALLSThe WS F(World Squash Federation)certified and approvedBOUNCEWELL-REBOUND Hard Plaster System fully imported from UKconsisting of two layers one base coat and finish coat plaster coated withspecial washable paint system. The hard plaster system can be applied directlyover the brick wall thereby saving considerable cost of initial cement plaster.The hard plaster surface provides the toughest, most durable and easy tomaintain squash court wall finish available. The surfaces are available in whiteand series of pasted colours to meet the customer's requirement.Pg4THE GLASS BACK WALL SYSTEM FOR SQUASH COURTCLEARTOUGH The most practical and popular choice, which offers greatest flexibility for easy transit & installation - A four panel, one door freestanding type, with full height glass support fins.Materials and components:12 mm toughened (tempered) glass with all exposededges smoothed, exposed corners are radiused. Thelower 600 mm of all panels have vertical 3 mm widewhite lines with 25 mm clear space applied to the playsurface.Safety and Integrity:Safety is our first concern. Each integral part of our wall system is tested and reviewed for safety. The tempered safety glass is tested to meet high load bearing impact and is designed to crumble into small, dull pieces in the unlikely event that a panel or fin should break. T empered Glass has a very high static load resistance (3 to 5 times) as well as a very high impact resistance (5 to 10 times) compared to ordinary glass. In the very rare event of breakage, however, tempered glass will shatter into tiny dice-like particles which minimize serious or fatal injuries, unlike the case of ordinary glass.Pg5SUNFLEX FITNESS WORLD AEROBIC, DANCE AND GYMNASIUMSUNFLEX Aero-Floor and Foam Floor Systems similar to Sports Flooring Systemdesigned especially for high impact AEROBICS, DANCE FLOOR & GYMNASIUMROOM as Aero-Floor and Foam Floor provides crucial cushioning so important tosafeguard ankle, knee and hip joints, as well as leg, thigh and back muscles.Pg8PVC FLOORINGSUNFLEX is one of the leading importers of PVC floorings for Indoor and Outdoor sports, Cardio flooring, 3D flooring, Wet mats for swimming pool areas and Commercial flooring.Selected PVC floorings are being imported from various world famous top brand manufactures with approval and certifications from world sports organizations like BWF, ITTF, ITF, FIVB, IHF, FIBA etc.Product Usage: Badminton, Basketball, Volleyball, T able T ennis, T ennis and commercial flooring for Malls, Hospitals, swimming pool areas and kids flooring.Pg9SUNFLEX INTERIOR WORLDTHE REAL 100% HARD WOODINTERIOR FLOORINGSThe company manufactures and imports various types of interior Hard Wood floorings to meet the needs, quality and budgets when think of providing the natural Hard Wood flooring system for your House, Bungalows, Office, Auditoriums, Restaurants Etc. Our Unique Collection Hard Wood floorings are like a vintage wine that gets better with time. A room with a floor from the unique collection will increase in value in the eyes of those who recognize the beauty of collector pieces. Flooring from the unique c o l l e c t i o n c o m b i n e s n a t u r a l elements, organic materials, technological assembly and the colours of tomorrow. This collection is ideal for consumers looking for the latest trends.ACRYLIC SYNTHETIC SPORTS FLOORINGSFor Indoor & outdoor Badminton, Basketball, Volleyball, Tennis and Multipurpose Sports Courts, Roller Skating Rink, Running Track, Pathways etc.SUNFLEX along with its international partner SPORT-MASTER, USA provides Sport-Master brand of world famous all weather synthetic surface systems the finest 100% acrylic sports floor coatings available today for outdoor T ennis Courts, Basketball Courts, Volleyball Courts, Multipurpose Sports Areas, Pathways, Roller Skating Rink, Running Tracks etc. The Cushion-Master system when surfaced with acrylic colour system, provides an all weather, shock absorbing surface that will provide the player years of comfortable and enjoyableA surface that offering more than what appears on the surface and also assures the player both sure-footedness and a consistent ball bounce.SUNFLEX offer two alternate surface systems (Soft courts and Hard courts) to meet the customer's budget. The surfaces are also available in various colours, so your choice is virtually unlimited.Pg10PU (POL YURETHANE) SYNTHETIC SPORTS FLOORINGFor Indoor and outdoor Badminton, Basketball, Volleyball, Tennis and Multipurpose Sports Courts A seamless full polyurethane system installed with or without rubbershock-pad base-mat and rubber granulated base surface. This systemgives the resilient characteristics that make a very pleasant surface toplay.A seamless wet pouring system for indoor and outdoor BadmintonCourts, Basketball Courts, Volleyball Courts, T ennis Courts, JoggingTrack, Roller Skating Rink, Health Clubs, T able T ennis Rooms, Parking lots,Bicycle Tracks, Infant classrooms etc.The Full Polyurethane System SUNFLEX-NEOThe new seamless elastic synthetic floor covering system for Indoor and Outdoor sports courts like Basketball, Badminton, Volleyball, T ennis, Multipurpose Sports Hall etc., manufactured by the SOUTH KOREAN Partners of according to ISO and other world SUNFLEX renowned sports organizations like ITF, FIBA, WBF Etc. to ensure the quality and environmental care.Characteristics and advantages of Polyurethane (PU)synthetic System SurfacesGood durability and beautiful appearance due to a seamless structureExcellent impact resistance and abrasion resistanceFreely coloured and partial repair possibleEasy to perform a surface treatmentPleasant feeling of walking and playingPg11SYNTHETIC ARTIFICIAL TURFSSUNFLEX along with its EUROPEAN partners offers internationally certified Artificial TURF for all kind of sports and landscaping areas especially for Football, Hockey, Rugby, Soccer, Tennis, Volleyball, Cricket, Golf, Futsal etc.Football TurfA product manufactured by FIFA Preferred and approved Producer.Why should you choose FIFA Preferred Producer?FIFA quality programFactory audit by FIFAFIFA quality Pro & QualityInstallation & Maintenance guideProfessional consulting services & field designsHockey TurfInternational Hockey Federation (FIH) approved systemUnder FIH (International Hockey Federation) approved system, Hockey field is dividedinto 2 level: Global level (water-based) and National Level (Sand-dressed).SUNFLEX offers systems for both Global level and National level according to differentdemands. The Turf procured from FIH registered companies meet all FIH standards inball roll, ball rebound, impact response, etc. The global level system is qualified to playtop level hockey games, such as Olympic Games and World Cup Games.GRASS FOR LAWNSPg12SYNTHETIC ARTIFICIAL TURFSRugby Grass - World Rugby Regulation 22Rugby is extremely demanding on the playing surface's performace as he players encounter ahigh level of physical contact. provide rugby glass system which incorporates longSUNFLEXpile, in-fills and shock pad to ensure the high HIC value and good energy restitution to playerswho will be delighted to play on artificial grass surface.Tennis Grass - ITF CertifiedAccording to Court Pace Rating there are 5 Categories for T ennis Courts: Slow, Medium-slow,SUNFLEXMedium, Medium-Fast and Fast. provides ITF (International T ennis Federation)certified T ennis Turf for Medium-slow and Fast T ennis Court. Its T ennis system also featuresattractive look and comfortable feel that adds value to your community or commercial area.Multipurpose Grass - Maximized function from one single investmentSUNFLEXOver the years, multi-purpose systems of high performance have served a greatnumber of playgrounds to fulfill the owners and players needs to maximize function from singleinvestment.In addition, to help clients avoid the complexity of a multi-purpose field. handles theSUNFLEXtime-consuming designing process for our clients and provides guidance that guarantees easyinstallation and strong playability.Pg13SUNFLEX RUBBER FLOORINGSEPDM RUBBER FLOORING:SUNFLEX offers PLAYFLEX EPDM playgrounds especially for children's playgrounds. The two layer system in various thicknesses provides optimum fall protection and is extraordinary durable. PLAYFLEX is an especially flexible system in which the installed depth depends on the degree of safety and critical fall height required. Soft, porous, two layer design with a high degree of durability and attractive appearance with various colours and designs.RUBBER TILES, SHEETS & PAVER BLOCKS:SUNFLEX offers premium quality and cost effective Rubber Tiles, Rubber Sheets and Rubber Paver Blocks in different thicknesses of 3mm to 100mm and available in various colors to meet your choices.Applications: Gym, Fitness Centre, Health Clubs, Play Grounds, Jogging Tracks, Walkways, Race Track etc.Pg14SUNFLEX EXTERIOR FLOORINGSJOGGING TRACK:The full polyurethane (PU) seamless floor coating system in a thickness of 6mm.The all weather EPDM flooring with UV resistant aliphatic PU top coating system in a thickness of 15mm.The most durable, cushioned and seamless floor surface made of rubber granulated base and PU coating layers with attractive UV resistant top coating in a thickness of 14mm.SKATING RINK:The SkateMaster System - A 100% Acrylic specialized surfacing system fully imported from the US for inline Roller Hockey, Skate boarding and more.The full polyurethane (PU) seamless floor coating system especially made for Skating.BICYCLE TRACK:The Safe Ride System - A 100% Acrylic and highly durable cross linking polymer technology. The bright green color provides a safe zone for bicyclists.Eco friendly MMA paving system - A long lasting polyurethane coating system.PATHWAYS & PARKING LOTS:The Colorpave - A 100% Acrylic Emulsion Color Coating for pavement surfaces including Driveways, Parking Lots, Walkways and more.Eco friendly MMA paving system - A polyurethane coating system .Pg15SYNTHETIC ATHLETIC RUNNING TRACKSSUNFLEX along with its KOREAN AND US Partners jointly offers the IAAF (International Association of Athletic Federation) certified Running Track systems already used at Olympic stadiums.A surface that is suitable for school level sports to international tournaments, good spike resistance, flexible, non-porous, wear resistant, secure and elastic, they provide the ideal foundation for sports success.SUNFLEX offers all four alternate systems to construct Running Tracks and to meet and fit in the budget of the customer: The Polyurethane (PU) spray coating system An economical system of IAAF StandardThe Polyurethane based Sandwich Type system -A very suitable and durable system for the Indian climateThe full Polyurethane (full PUR) system The international standard system for high level performances and tournamentsTrack-Master Plus -A 100% acrylic running track system very suitable for schools and Athletic beginners.Pg16BASE CONSTRUCTION & INFRASTRUCTURE FOR SPORTS GROUNDSEarthwork is possibly the most vital component in the construction of any new facility and it is crucial that a professionaland experienced contractor who is familiar with the specific requirements of sports facility construction is used to undertakethe work.SUNFLEX has trained a very specialized team heading many civil engineers to carryout base construction works for all kind ofsports fields including Running Tracks, T ennis Courts, BasketballCourts, Football and Hockey Grounds all as per international standards and norms.SUNFLEX SPORTS INFRASTRUCTURE PVT. LTD.B-605,C i t y M a l l(M a y u r e s h T r a d e C e n t e r),S e c t o r-19,V a s h i,N a v i M u m b a i-400703,I n d i a.Te l.:+912227831141/42/41315108E-m a i l:i n f o s u n f l e x@s u n f l e x i n d i a.n e t W e b s i t e:w w w.s u n f l e x i n d i a.n e tCUSTOMER SATISFACTION & QUALITYOur task is not only to satisfy the customers but also to inspire them to recommend our various products and services to others in need. For us quality means not only delivering the right product or Service to the customers but also providing them right advice to procure and use the right products. We offer our customers not only an added value through our high Quality products and services but also a consultation in the field of Sports and floorings through our many years of work experience.。
一、塑胶地板的施工流程施工前准备工作→清理原地面基础上的浮尘和砂粒→专用界面剂处理找平层→清理、修整→自流平水泥浆涂刷→水泥浆面打磨平→清扫灰尘→定号、弹点、试铺→涂刷地板粘合剂→卷材铺贴→开缝与焊缝→收头处理→清理、检查、修整、压平→维护保养.二、塑胶地板的施工工艺、方法及质量控制1、塑胶地板施工禁止交叉施工,安排所有前期工序均已完工退场后进行或最后涂装前进行.2、施工前准备工作:保证施工现场必要的水、电、照明和设有安全可靠的材料仓库.3、地面要求:〔1〕、地下室或较潮湿的地面必须于土建时备置适当的防水处理.基层采用设计强度不低于C20的细石混凝土层或1:1的水泥砂浆找平层,表面做压光处理,找平高度比地面设计高度低5mm;〔2〕、基层表面硬度要大于1.2兆帕〔可使用硬度测试仪检测〕,故混凝土或砂浆找平层须用木屑或薄膜蓄水养护,且养护期不得少于7天,凝固期达到28天;〔3〕、根据《建筑地面工程施工及验收规范》〔GB50209-2002〕对铺贴地板面层的基层〔找平层〕的验收标准,基层面表面平整度2米直尺平整误差不大于2毫米;〔4〕、根据塑胶地板的施工工艺要求,其基层面含水率须小于8%;〔使用含水率测试仪检测或简单测试方法:将15厘米见方的塑料四周用胶带粘贴在地面上,24小时后撤去,如该区变色,则说明下面还有潮气,须等待进一步干燥,不能施工〕.在基层强度达到后,室内要通风,保持室内干燥;〔5〕、基层表面无麻面、裂纹〔收缩自然裂缝除外〕现象,在基层养护过程中,不得上人,受压,在细石砼施工过程中使用平板震动器震动密实,避免出现空鼓;〔6〕、若出现油脂,油漆等污渍,须用清洗剂进行清理干净;基层面凹凸不平的应即使修补,有大面积不平的需用打磨机打磨;〔7〕施工环境温度不低于5℃,湿度不高于75%;〔8〕地面须彻底清洁,须用大功率吸尘〔吸水〕器全面清洁;4、自流平施工工艺:〔1〕自流平水泥的性能特点:1〕产品性能稳定,不受时间、温度、湿度等的影响;2〕具有优良的流动性,自动找平地面;3〕无缝地面,低收缩性,防止开裂;4〕提供基层密实度,提高均质性并起隔音作用;5〕快凝早强,1-2天后即可铺设饰面材料;〔2〕自流平水泥的施工:1〕施工用料:界面处理剂、自流平水泥.2〕施工工具:金刚石磨地机、手提磨地机、大功率工业吸尘器、自流平刮板、消泡滚筒、羊毛滚毛滚筒、钉鞋、电钻、搅拌器、搅拌桶、量水容器.3〕涂界面处理剂:吸收性地面用界面处理剂按1:1兑水稀释后用羊毛滚毛滚筒充分滚涂,对高吸收性基层须涂刷两遍.根据地面状况及施工现场、温度、湿度,晾干约0.5—2小时,待表面湿润无积液即可使用自流平;非吸收性地面用界面处理剂,无须兑水,用羊毛滚毛滚筒充分滚涂.根据地面状况及施工现场、温度、湿度,晾干约4—6小时,待表面湿润无积液即可使用自流平.涂界面剂的目的是降低基层吸收性能和增强界面附着力. 4〕自流平水泥的施工:①待自流平施工12小时后进行,用砂皮机进行修整打磨,目的在于清除自流平施工后遗留在表面的微小颗粒,使施工后的自流平表面更加平整、光洁.②将搅拌好的浆料分批倾倒在地坪上,让其像水一样流开自动找平,用专用刮板将自流平推刮均匀,并控制所需的厚度.③用自流平消泡滚筒单方向滚轧地面以排除因搅拌时带入的空气,避免气泡、麻面及接口高差.④自流平施工完毕后,请关好门窗,避免强风及直接日晒,12小时内禁止在上面行走,24小时后可铺贴饰面材料,冬季施工地板的铺设应在自流平施工48小时后进行.⑤按容量比三分自流平加一分清水〔一包25千克装自流平约需6.5升清水〕,用电钻加搅拌器边倒边搅拌至均匀无结块〔约3分钟〕,停止搅拌3—4分钟,让高聚物材料充分熟化.空气跑出后再进行搅拌成可流淌稀糊状〔约1分钟〕.5、塑胶地板铺设施工:1〕严格根据铺设地板施工图要求进行铺设,施工人员进入铺设场地,确保施工过程中不划伤地材表面和防止地板表面起毛.〔2〕铺装前应将整卷的地材全部张开平放,待2~3小时后才能使用,以便卷材尺寸完全稳定及消除卷曲引致的起伏,还要对预铺的塑胶地板根据现场实际情况,观察房膜退色是否一致,因塑胶地板在生产阶段中,表面会产生一层微黄的薄膜,一旦暴露在自然光和灯光下,这层薄膜便会迅速的消失.〔3〕根据设计要求、卷材宽度和房间尺寸,进行弹线、分格和定位,卷材应扣除接缝宽度,有花纹的卷材应考虑拼花对缝,与其他材料交界处应考虑高差.4〕将卷材按控制线铺平后,根据房间形状和设计图案安排材料布局,确定材料的裁剪尺寸及形状,先做拼花,再做满铺,先复杂、后简单.5〕从一边墙身开始,用锯齿刮板或刮刀按地面上的控制线刮胶,待胶水表面干至不粘手〔5至15分钟〕即可铺贴.地板粘合剂涂刷厚度一般不宜超过1mm,涂刷面积不宜过大<应在45分钟內铺完>.每次涂胶应从屋內涂至门口或已铺上地板位置再从已铺地板处向外铺出.使用胶水时应参考供应厂家的使用手则;〔6〕先粘贴已刮胶的面积,完成后再刮胶粘贴剩余面积,粘贴时不断加压铺平,排除空气.粘贴时若发现沙粒等杂物,应立即清除.〔7〕粘贴完成后,采用圆角木板将已铺贴地板表面进行全面压刮,使地板表面不出现任何气泡,并用金属滚筒于胶浆未干透前在地板上均匀碾压,以保证地板与基层的密实黏接,多余胶浆应立即用湿布抹掉.〔8〕地板和基础地面完全粘接后,采用开槽设备开缝,再用热风焊接设备将同个颜色的焊线进行无缝焊接,然后用专用的铲刀铲平整.〔9〕在胶水完全粘合后,应立即进行首次保养.完工后彻底清扫或使用吸尘器,将地面所有残留物清除干净,最后使用高品质的商用蜡水进行耐污处理.全部完成后24小时内,不要使用场所.6、质量验收〔1〕根据现场实际情况,查看是否平整、光洁,并根据相关规范及质量标准进行验收[可参照《建筑地面工程施工及验收规范》〔GB50209-2002〕的塑料板面层及厂家标准等进行验收].〔2〕铺设质量验收要求如下:1〕平整,表面无损伤,接缝线横平竖直、无缝隙、无翻边、无翘角、无气泡;2〕沿墙边缘吻合,上墙顺直,踢脚线高度一直平齐、牢固,无漏胶、脱胶现象,焊缝平齐牢固.三、塑胶地板的使用保养〔一〕塑胶地板的日常使用中的须知:1、塑胶地板是不同于其它硬质地坪的弹性地板,应避免锐器在地板表面勾划和重物拖拉,以免刮伤地板表面.2、在外部环境较脏的情况下,入口处最好放置擦鞋垫,以减少污染物带入对地板造成磨损,同时对清洁也带来方便.3、勿用肥皂粉和去污粉清洁,这样既不能有效清洁地板,反面皂化物更容易滞留脏物.4、切勿将强酸、强碱、甲苯和香蕉水等溶剂置于地板表面.〔二〕塑胶地板的日常保洁保养1、干洗法:可使用干地拖清洁地板,遇到难去除的污渍可以用去污剂协助清除;2、湿洗法:用拧干水份的地拖清洁地板,并可加入地板清洁剂于水中以加强清洁效果,不可用冲洗石质地面的方法大量用水冲洗.3、锐器划痕,可用细砂皮轻轻打磨去除划痕后,打腊上光即可.〔三〕塑胶地板的周期保养只需用带抛光垫的单盘机抛光.把喷剂喷在污点、污迹或暗晦的地方,然后立即抛光即可.。
木地板介绍:
·1 实木地板:是木材经烘干,加工后形成的地面装饰材料。
它具有花纹自然,脚感舒适,使用安全的特点,是卧室、客厅、书房等地面装修的理想材料。
实木的装饰风格返璞归真,质感自然,在森林覆盖率下降,大力提倡环保的今天,实木地板则更显珍贵。
而实木地板的弱点在于对潮湿及阳光的耐久性差,潮湿令天然木材膨胀,而干透反而会收缩,因而导致隙缝甚至是屈曲翘起。
地暖使用对实木地板的加工选材要求极大,所以市场上,实木地暖专用不是没有,而是很少。
实木地板的优劣,价格之分,不仅仅从树种的不同来判断,还可以从漆膜硬度、漆板表面耐磨、漆膜附着力以及含水率指标等等各个方面来看待。
环保等级:国家未做相应标准划分。
耐磨等级:优等品实木地板漆板表面耐磨指标≤0.08g/100r;一等品≤0.10g/100r;合格品≤0.15g/100r。
漆膜硬度:是反映实木地板表面漆膜的强度,和实木地板的材质和漆膜的本身的厚薄、材质有密切关系,国家标准规定优等品实木地板漆膜硬度指标为2H级;一等品和合格品≥H。
漆膜附着力:反映的是油漆对实木地板的附着强度,该项指标不合格也说明地板的油漆质量较差,在使用中可能造成油漆开裂甚至剥落,同样影响地板的使用寿命。
国家标准规定优等品实木地板漆膜附着力指标为0~1级;一等品≤2级;合格品≤3级。
含水率指标:是指实木地板在销售地区未拆封或刚除去包装状态下的含水率。
该项指标不合格将造成在使用中地板变形、翘曲、起拱或离缝等现象,影响美观和使用性能。
国家标准规定实木地板的含水率指标为7%至销售地点的平衡含水率。
·2强化复合木地板:是近几年来流行的地面材料。
官方学名:浸溃纸层压木质地板。
它是在原木粉碎后,填加胶、防腐剂、添加剂,经热压机高温高压压制处理而成,因此它打破了原木的物理结构,克服了原木稳定性差的弱点。
复合地板的强度高、规格统一、耐磨系数高、防腐、防蛀而且装饰效果好,克服了原木表面的疤节、虫眼、色差问题。
强化地板和多层实木地板的环保等级划分,国家规定最为严格。
(国家新标准GB/T18102-2007)为E1和E0两个等级,JAS星级标准的F3星地板 F4星地板为目前世界最为严格地检测甲醛方式,但这是日本政府设立的日本国家标准。
F4星地板可以达到接近实木的甲醛释放量。
国内大部分地板厂家生产有一定难度,暂未加入我国国家标准。
·3实木复合木地板:分为三层实木复合地板、多层实木复合地板、新型实木复合地板三种,由于它是由不同树种的板材交错层压而成,因此克服了实木地板单向同性的缺点,干缩湿胀率小,具有较好的尺寸稳定性,并保留了实木地板的自然木纹和舒适的脚感。
实木复合地板兼强化复合木地板的稳定性与实木地板的美观性于一体,而且具有环保优势,性能价值比较高的新型实木复合地板。
实木复合地板的环保等级划分和强化地板等级相同,分为E1和E0两个等级。
因为市场售价介于强化和实木价格之间,环保做到E0成本就会接近实木地板的价格,所以市场以环保E1等级为主。
实木复合地板的其他标准,和实木地板相同。
大家做好鉴别。