apache多域名配置
- 格式:docx
- 大小:152.02 KB
- 文档页数:5
CentOS7Apache服务的安装与配置⼀、Apache简介Apache 是⼀个知名的开源Web服务器。
早期的Apache服务器由Apache Group来维护,直到1999年6⽉Apache Group在美国德拉⽡市成⽴了⾮盈利性组织的公司,即Apache软件基⾦会(Apache Software Foundation,ASF)。
⽹站需要web服务器来架构,⽹页设计美⼯⼈员(flash,dreamweaver,firework,photoshop等),⽹页开发⼈员(php,.net,jsp等),⽹站建⽴好后,需要我们维护,优化,排错,架构延伸扩容等。
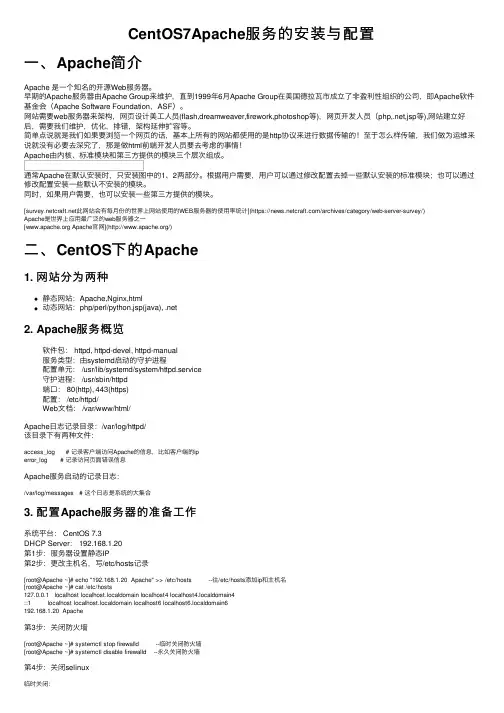
简单点说就是我们如果要浏览⼀个⽹页的话,基本上所有的⽹站都使⽤的是http协议来进⾏数据传输的!⾄于怎么样传输,我们做为运维来说就没有必要去深究了,那是做html前端开发⼈员要去考虑的事情!Apache由内核、标准模块和第三⽅提供的模块三个层次组成。
通常Apache在默认安装时,只安装图中的1、2两部分。
根据⽤户需要,⽤户可以通过修改配置去掉⼀些默认安装的标准模块;也可以通过修改配置安装⼀些默认不安装的模块。
同时,如果⽤户需要,也可以安装⼀些第三⽅提供的模块。
[此⽹站会有每⽉份的世界上⽹站使⽤的WEB服务器的使⽤率统计](https:///archives/category/web-server-survey/)Apache是世界上应⽤最⼴泛的web服务器之⼀[ Apache官⽹](/)⼆、CentOS下的Apache1. ⽹站分为两种静态⽹站:Apache,Nginx,html动态⽹站:php/perl/python,jsp(java), .net2. Apache服务概览软件包: httpd, httpd-devel, httpd-manual服务类型:由systemd启动的守护进程配置单元: /usr/lib/systemd/system/httpd.service守护进程: /usr/sbin/httpd端⼝: 80(http), 443(https)配置: /etc/httpd/Web⽂档: /var/www/html/Apache⽇志记录⽬录:/var/log/httpd/该⽬录下有两种⽂件:access_log # 记录客户端访问Apache的信息,⽐如客户端的iperror_log # 记录访问页⾯错误信息Apache服务启动的记录⽇志:/var/log/messages # 这个⽇志是系统的⼤集合3. 配置Apache服务器的准备⼯作系统平台: CentOS 7.3DHCP Server: 192.168.1.20第1步:服务器设置静态IP第2步:更改主机名,写/etc/hosts记录[root@Apache ~]# echo "192.168.1.20 Apache" >> /etc/hosts --往/etc/hosts添加ip和主机名[root@Apache ~]# cat /etc/hosts127.0.0.1 localhost localhost.localdomain localhost4 localhost4.localdomain4::1 localhost localhost.localdomain localhost6 localhost6.localdomain6192.168.1.20 Apache第3步:关闭防⽕墙[root@Apache ~]# systemctl stop firewalld --临时关闭防⽕墙[root@Apache ~]# systemctl disable firewalld --永久关闭防⽕墙第4步:关闭selinux临时关闭:[root@Apache ~]# setenforce 0setenforce: SELinux is disabled永久关闭:[root@Apache ~]# vim /etc/selinux/configSELINUX=disabled # 将enforcing改为disabled[root@Apache ~]# reboot --重启系统永久⽣效三、Apache服务的搭建与配置1. 使⽤yum包安装Apache软件[root@Apache ~]# yum -y install httpd*[root@Apache ~]# rpm -qa | grep httpd --查看安装的http包httpd-manual-2.4.6-67.el7.centos.6.noarchhttpd-tools-2.4.6-67.el7.centos.6.x86_64httpd-2.4.6-67.el7.centos.6.x86_64httpd-devel-2.4.6-67.el7.centos.6.x86_64安装成功后,会产⽣下⾯两个⽂件/etc/httpd/conf/httpd.conf # 主配置⽂件/var/www/html # 默认⽹站家⽬录2. 认识配置⽂件⾥的主要参数[root@Apache ~]# vim /etc/httpd/conf/httpd.conf31 serverRoot "/etc/httpd" # 存放配置⽂件的⽬录42 Listen 80 # Apache服务监听端⼝66 User apache # ⼦进程的⽤户67 Group apache # ⼦进程的组86 ServerAdmin root@localhost # 设置管理员邮件地址119 DocumentRoot "/var/www/html" --⽹站家⽬录# 设置DocumentRoot指定⽬录的属性131 <Directory "/var/www/html"> # ⽹站容器开始标识144 Options Indexes FollowSymLinks # 找不到主页时,以⽬录的⽅式呈现,并允许链接到⽹站根⽬录以外151 AllowOverride None # none不使⽤.htaccess控制,all允许156 Require all granted # granted表⽰运⾏所有访问,denied表⽰拒绝所有访问157 </Directory> # 容器结束164 DirectoryIndex index.html # 定义主页⽂件,当访问到⽹站⽬录时如果有定义的主页⽂件,⽹站会⾃动访问316 AddDefaultCharset UTF-8 # 字符编码,如果中⽂的话,有可能需要改为gb2312或者gbk,因你的⽹站⽂件的默认编码⽽异3. 启动Apache⽹站[root@Apache ~]# systemctl start httpd.service[root@Apache ~]# lsof -i:80 --查看httpd服务是否启动COMMAND PID USER FD TYPE DEVICE SIZE/OFF NODE NAMEhttpd 20585 root 4u IPv6 402909 0t0 TCP *:http (LISTEN)httpd 20586 apache 4u IPv6 402909 0t0 TCP *:http (LISTEN)httpd 20587 apache 4u IPv6 402909 0t0 TCP *:http (LISTEN)httpd 20588 apache 4u IPv6 402909 0t0 TCP *:http (LISTEN)httpd 20589 apache 4u IPv6 402909 0t0 TCP *:http (LISTEN)httpd 20590 apache 4u IPv6 402909 0t0 TCP *:http (LISTEN)启动成功后使⽤浏览器:输⼊⾃⼰的IP地址会看到⼀个红帽的欢迎页⾯:[root@Apache ~]# firefox 192.168.1.20每次打开浏览器不是很⽅便,因此我们可以使⽤⽂本浏览器,⽅便测试。
Apache下关于虚拟主机的配置关于虚拟主机的概述:配置虚拟主机主要应用场景:多站点访问,一个服务器放置了多个站点服务。
主要的三种配置方法:1、基于IP 2、基于端口3、基于主机名步骤详解:1.虚拟主机使用的话,必须将中心服务关闭,在/etc/httpd/conf/httpd.conf文件里,将DocumentRoot一行注释掉来关闭中心服务。
2.可以在httpd.conf文件最后面直接添加虚拟主机的配置内容,也可以在/etc/httpd/conf.d/下面创建一个自己的配置文件,如:my.conf文件。
3.my.conf文件配置详解1)基于IP配置<VirtualHost 192.168.0.112:80>ServerName DocumentRoot "/www/"</VirtualHost><VirtualHost 192.168.0.113:80>ServerName DocumentRoot "/www/"</VirtualHost>以上2个虚拟主机配置的IP分别为192.168.0.113和192.168.0.112,端口同为80端口。
这样在浏览器分别输入不同的ip或域名时就会访问到不同的站点。
Tips:如果只有一块网卡可以同过ipaddr add 192.168.0.112 dev eth0来添加辅助ip。
如果是域名方式访问,还需要在windows和linux下的hosts文件里面自行添加域名解析。
关于辅助ip的设置:ipaddr add 192.168.0.112/24 dev eth0这是为网卡设置一个辅助ip。
假如一个网卡的ip地址为192.168.0.22,执行上面的命令,在用ifconfig 查看,会发现有两个ip地址,而192.168.0.22称为主地址(Primary IP address),而192.168.0.112称为辅助地址(secondary IP address),一块网卡是允许有多个IP地址的,所以就算再多添加几个secondary IP 也是合法行的。


Apachehttpd.conf配置详解常⽤配置指令说明1. ServerRoot:服务器的基础⽬录,⼀般来说它将包含conf/和logs/⼦⽬录,其它配置⽂件的相对路径即基于此⽬录。
默认为安装⽬录,不需更改。
语法:ServerRoot directory-path如: ServerRoot "/usr/local/apache-2.2.6"注意,此指令中的路径最后不要加 / 。
2. Listen:指定服务器监听的IP和端⼝。
默认情况下Apache会在所有IP地址上监听。
Listen是Apache2.0以后版本必须设置的指令,如果在配置⽂件中找不到这个指令,服务器将⽆法启动。
语法:Listen [IP-address:]portnumber [protocol]Listen指令指定服务器在那个端⼝或地址和端⼝的组合上监听接⼊请求。
如果只指定⼀个端⼝,服务器将在所有地址上监听该端⼝。
如果指定了地址和端⼝的组合,服务器将在指定地址的指定端⼝上监听。
可选的protocol参数在⼤多数情况下并不需要,若未指定该参数,则将为443端⼝使⽤默认的https 协议,为其它端⼝使⽤http协议。
使⽤多个Listen指令可以指定多个不同的监听端⼝和/或地址端⼝组合。
默认为:Listen 80如果让服务器接受80和8080端⼝上请求,可以这样设置:Listen 80Listen 8080如果让服务器在两个确定的地址端⼝组合上接受请求,可以这样设置:Listen 192.168.2.1:80Listen 192.168.2.2:8080如果使⽤IPV6地址,必须⽤⽅括号把IPV6地址括起来:Listen [2001:db8::a00:20ff:fea7:ccea]:803. LoadModule:加载特定的DSO模块。
Apache默认将已编译的DSO模块存放于4.1⽬录结构⼩节中所⽰的动态加载模块⽬录中。
Apache配置详解Apache的配置由httpd.conf文件配置,因此下面的配置指令都是在httpd.conf文件中修改。
主站点的配置(基本配置)(1) 基本配置:ServerRoot "/mnt/software/apache2" #你的apache软件安装的位置。
其它指定的目录如果没有指定绝对路径,则目录是相对于该目录。
PidFile logs/httpd.pid #第一个httpd进程(所有其他进程的父进程)的进程号文件位置。
Listen 80 #服务器监听的端口号。
ServerName :80 #主站点名称(网站的主机名)。
ServerAdmin admin@ #管理员的邮件地址。
DocumentRoot "/mnt/web/clusting" #主站点的网页存储位置。
以下是对主站点的目录进行访问控制:<Directory "/mnt/web/clusting">Options FollowSymLinksAllowOverride NoneOrder allow,denyAllow from all</Directory>在上面这段目录属性配置中,主要有下面的选项:Options:配置在特定目录使用哪些特性,常用的值和基本含义如下:ExecCGI: 在该目录下允许执行CGI脚本。
FollowSymLinks: 在该目录下允许文件系统使用符号连接。
Indexes: 当用户访问该目录时,如果用户找不到DirectoryIndex指定的主页文件(例如index.html),则返回该目录下的文件列表给用户。
SymLinksIfOwnerMatch: 当使用符号连接时,只有当符号连接的文件拥有者与实际文件的拥有者相同时才可以访问。
其它可用值和含义请参阅:/Apache/ApacheManual/mod/core.html#options AllowOverride:允许存在于.htaccess文件中的指令类型(.htaccess文件名是可以改变的,其文件名由AccessFileName指令决定):None: 当AllowOverride被设置为None时。

apache单ip多域名多目录配置自己的vps上放了别人的网站,那怎么样让自己的网站和别人的网站能同时被访问呢?需要使用apache的虚拟主机配置。
配置httpd.conf文件比如原来是这种只是指向一个目录的配置DocumentRoot "/opt/lampp/htdocs/ppe112"<Directory "/opt/lampp/htdocs/ppe112">## Possible values for the Options directive are "None", "All",# or any combination of:# Indexes Includes FollowSymLinks SymLinksifOwnerMatch ExecCGI MultiViews## Note that "MultiViews" must be named *explicitly* --- "Options All" # doesn't give it to you.## The Options directive is both complicated and important. Please see# /docs/trunk/mod/core.html#options# for more information.##Options Indexes FollowSymLinks# XAMPPOptions Indexes FollowSymLinks ExecCGI Includes## AllowOverride controls what directives may be placed in .htaccess files.# It can be "All", "None", or any combination of the keywords:# Options FileInfo AuthConfig Limit##AllowOverride None# since XAMPP 1.4:AllowOverride All## Controls who can get stuff from this server.#Require all granted</Directory>把这段话变成<VirtualHost 198.199.107.XXX> #这里填主机的ip地址ServerName DocumentRoot "/opt/lampp/htdocs/AAA"<Directory "/opt/lampp/htdocs/AAA">## Possible values for the Options directive are "None", "All", # or any combination of:# Indexes Includes FollowSymLinks SymLinksifOwnerMatch ExecCGI MultiViews## Note that "MultiViews"must be named *explicitly* --- "Options All"# doesn't give it to you.## The Options directive is both complicated and important. Please see# /docs/trunk/mod/core.html#options# for more information.##Options Indexes FollowSymLinks# XAMPPOptions Indexes FollowSymLinks ExecCGI Includes## AllowOverride controls what directives may be placedin .htaccess files.# It can be "All", "None", or any combination of the keywords: # Options FileInfo AuthConfig Limit##AllowOverride None# since XAMPP 1.4:AllowOverride All## Controls who can get stuff from this server.#Require all granted</Directory></VirtualHost><VirtualHost 198.199.107.XXX> #这里填主机的ip地址ServerName DocumentRoot "/opt/lampp/htdocs/BBB"<Directory "/opt/lampp/htdocs/BBB">## Possible values for the Options directive are "None", "All", # or any combination of:# Indexes Includes FollowSymLinks SymLinksifOwnerMatch ExecCGI MultiViews## Note that "MultiViews"must be named *explicitly* --- "Options All"# doesn't give it to you.## The Options directive is both complicated and important. Please see# /docs/trunk/mod/core.html#options# for more information.##Options Indexes FollowSymLinks# XAMPPOptions Indexes FollowSymLinks ExecCGI Includes## AllowOverride controls what directives may be placedin .htaccess files.# It can be "All", "None", or any combination of the keywords: # Options FileInfo AuthConfig Limit##AllowOverride None# since XAMPP 1.4:AllowOverride All## Controls who can get stuff from this server. #Require all granted</Directory></VirtualHost>。

阿帕奇服务器的配置摘要:Apache技术是目前互联网上的主要应用之一,它是实现信息发布、资料查询、数据处理、视频点播等诸多应用服务的基本平台,并采用超级的方式,将信息透过internet在世界围开展信息传递,本课题就Linux上安装与配置Apache、Php、tomcat,等详细地说明了在安装过程中。
在linux中安装Apache后能很好支持动态网页。
关键词:Linux apache1.apahce的介绍:根据著名的服务器公司所做的调查,世界上百分之五十的服务器都在使用apache,是世界上排名第一的服务器。
Apache的诞生富有戏剧性。
但NCSA 服务器的人们开始交换他们勇于该服务器的补丁程序,他们也很快认识到成立管理这些补丁程序的论坛是必要的。
就这样,诞生了apache group,后来这个团体在NCSA 的基础上创建了apache。
2.Apahce的主要特征:可以运行上所有计算机平台;支持最新的HTTP1.1协议;简单而强有力的基于文件的配置;支持通用网关接口CGI;支持虚拟主机;支持HTTP认证;集成per 脚本编程语言;集成代理服务器;具有可定制的服务器日志;支持服务器端包含命令;支持安全socket层;用户会话过程的跟踪能力;3.Apache服务器的常用命令(1)启动Apache服务器:service httpd start(2)重启Apache服务器:service httpd restart(修改了配置文件后要执行此命令) (3)停止Apache服务器:service httpd stop(4)打开“Apache配置”:redhat-config-httpd(注:有时为system-config-httpd) 4.主服务器设置Apache服务器需要各种设置,以定义自己使用各种参数以提供Web服务。
对于使用虚拟主机的情况,除了在虚拟主机的定义项中覆盖的设置之外(有的设置必须重新定义),这里的设置也是虚拟主机的缺省设置。

apache的配置步骤讲解说明主讲人:杨海艳示例:设置apache服务器。
设置虚拟主机。
要求配置第二个IP为192.168.10.101/24ifconfig eth0:0 192.168.10.101 netmask 255.255.255.0ifconfig查看创建基于端口的虚拟主机。
响应IP为192.168.10.101。
其中一个监听80端口,一个监听8080端口,vim /etc/httpd/conf/httpd.conflisten 80 后面再加一行listen 8080把上面的改成如下然后复制示例7行7yy 在粘贴p 修改相应配置。
mkdir /yhycd /yhymkdir web1 web2echo “welcome to web1 homepage” > web1/index.htmlecho “welcome to web2 homepage” > web2/index.htmlservice httpd restart创建基于域名的虚拟主机。
域名分别为和 创建以上4个虚拟主机的默认文档文件。
写入恰当内容。
以验证配置。
四个网站:基于ip基于端口,基于多域名的:实例参考文件用户认证①单个用户的认证首先需要建立一个密码文件。
这个文件应该放在不能被网络访问的位置,以避免被下载,同时也要给上相应的权限,让没有权限的用户不用读取。
建立密码文件htpasswd -c /usr/local/apache/passwd/passwords authtest按提示输入密码#第一次创建用户要用到-c 参数第2次添加用户,就不用-c参数#如果你们想修改密码,可以如下htpasswd -m /usr/local/apache/passwd/passwords authtest修改httpd.conf或.htaccess文件AuthType Basic #对用户实施认证的方法AuthName "just test,please Login:"#对这个访问的描述AuthUserFile /usr/local/apache/passwd/passwords#指定密码文件的位置,也就是刚才我们用htpasswd建立的文件Require user authtest #允许访问的用户②多个用户的认证首先建立一个组文件以确定组中的用户。
apache2服务器的搭建和配置步骤详解前⾔这篇⽂章主要给⼤家介绍了在linux下apache2服务器的搭建和配置的相关资料,具有⼀定的参考价值,下⾯来⼀起学习学习吧。
步骤如下⾸先当然是下载包包:myths@myths-X450LD:~$ sudo apt-get install apache2装完后就可以⽤了,在地址栏输⼊本地回送地址127.0.0.1或者localhost就可以进⼊到默认的界⾯了。
默认的界⾯当然就是apache2的说明界⾯了。
其实很多情况下并不需要在⽹上寻找帮助⽂档,⼏乎所有的软件都会⾃带使⽤说明,只是略长,我们⼀般都懒得看。
但是其实很多重要的东西就在这当中,⽐如apache2的默认界⾯⾥:Ubuntu Logo Apache2 Ubuntu Default PageIt works!This is the default welcome page used to test the correct operation of the Apache2 server after installation on Ubuntu systems. It is based on the equivalent page on Debian, from which the Ubuntu Apache packaging is derived. If you can read this page, it mea If you are a normal user of this web site and don't know what this page is about, this probably means that the site is currently unavailable due to maintenance. If the problem persists, please contact the site's administrator.Configuration OverviewUbuntu's Apache2 default configuration is different from the upstream default configuration, and split into several files optimized for interaction with Ubuntu tools. The configuration system is fully documented in /usr/share/doc/apache2/README.Debian.gz. Refe The configuration layout for an Apache2 web server installation on Ubuntu systems is as follows:/etc/apache2/|-- apache2.conf| `-- ports.conf|-- mods-enabled| |-- *.load| `-- *.conf|-- conf-enabled| `-- *.conf|-- sites-enabled| `-- *.confapache2.conf is the main configuration file. It puts the pieces together by including all remaining configuration files when starting up the web server.ports.conf is always included from the main configuration file. It is used to determine the listening ports for incoming connections, and this file can be customized anytime.Configuration files in the mods-enabled/, conf-enabled/ and sites-enabled/ directories contain particular configuration snippets which manage modules, global configuration fragments, or virtual host configurations, respectively.They are activated by symlinking available configuration files from their respective *-available/ counterparts. These should be managed by using our helpers a2enmod, a2dismod, a2ensite, a2dissite, and a2enconf, a2disconf . See their respective man pages for The binary is called apache2\. Due to the use of environment variables, in the default configuration, apache2 needs to be started/stopped with /etc/init.d/apache2 or apache2ctl. Calling /usr/bin/apache2 directly will not work with the default configuration. Document RootsBy default, Ubuntu does not allow access through the web browser to any file apart of those located in /var/www, public_html directories (when enabled) and /usr/share (for web applications). If your site is using a web document root located elsewhere (such as i The default Ubuntu document root is /var/www/html. You can make your own virtual hosts under /var/www. This is different to previous releases which provides better security out of the box.Reporting ProblemsPlease use the ubuntu-bug tool to report bugs in the Apache2 package with Ubuntu. However, check existing bug reports before reporting a new bug.Please report bugs specific to modules (such as PHP and others) to respective packages, not to the web server itself.Valid XHTML 1.0 Transitional仅仅从这个⽂件中,我们就可以⾄少得到以下的重要信息:当访问本机的时候,默认进⼊的页⾯是/var/www/html/index.html。
Ubuntu下apache配置
时间:2010.11.12 15:00-16:00
地点:大会议室
主讲:李建波
1.配置文件介绍
apache2.conf:apache的主配置文件,apache启动时会加载
其他文件。
httpd.conf:用户配置文件。
Ports.conf:端口配置文件
sites-enabled:存放虚拟主机配置文件的软连接
sites-available:存放虚拟主机配置文件
mods-enabled:存放模块软连接
mods-available :模块存放处
2.添加文件支持类型和添加首页文件
文件:apache2.conf
添加文件支持:
AddType application/x-httpd-php .php .htm .html 添加首页文件:
<IfModule dir_module>
DirectoryIndex index.htm index.html index.php
</IfModule>
3.添加多域名支持
单台机器上设置多个域名或主机名时,我们就要用到基于名称的虚拟主机。
主配置文件apache2.conf,在该文件中我们可以看到下列字段:
3.1设置步骤
修改文件:/etc/apache2/sites-available/default
修改内容:
分析设置语句:
●NameVirtualHost 10.39.6.59:80:表示我们要做的是一个基于
名称的虚拟主机,其IP为:192.168.0.173
●<VirtualHost 10.39.6.59> 和 </VirtualHost>:表示在其中的
是一个虚拟主机的配置
●ServerName :设置虚拟主机的域名
●DocumentRoot /var/www/han:设置该虚拟主机的主目录路径
●ErrorLog /var/log/apache2/error.log:设置该虚拟主机的出
错信息
3.2进一步说明
我们再添加一个虚拟主机站点 ,首先到
/etc/apache2/sites-available/ 目录中建立一个文件 li,编
辑该文件:
<VirtualHost 192.168.0.173:80>
ServerName
ServerAdmin ubuntu.firehare@
DocumentRoot "/var/www/li/"
ErrorLog "/var/log/apache2/edunuke_errors.log"
CustomLog "/var/log/apache2/edunuke_accesses.log" common </VirtualHost>
设置的具体含义同上面的相似,然后再运行命令:
sudo a2ensite li
这样,虚拟主机站点 就已经安装好了。
这时可以在
/etc/apache2/sites-enabled/ 目录中发现多了一个到
/etc/apache2/sites-available/li 的软链接。
然后注释ports.conf里这行字段:
否则apache重启时会包这样的错误:
报错原因:
NameVirtualHost语法错误,对于同一主机支持多个虚拟主机的情况,只需要命名一次NameVirtualHost。
接下来将 Apache2 重启来使虚拟主机站点运行起来
3.3注意事项
●NameVirtualHost字段的端口号不能忽略,否则起
apache时报错:VirtualHost 220.231.32.*:80 --
mixing * ports and non-* ports with a
NameVirtualHost address is not supported,
proceeding with undefined results——apache不
能起动。
●如果VirtualHost 字段的端口号确实,起apache时
报错:VirtualHost 220.231.32.28:0 -- mixing *
ports and non-* ports with a NameVirtualHost
address is not supported, proceeding with
undefined results——但apache可以启动,访问也
正常。