apache网页服务器配置-课件(PPT·精·选)
- 格式:ppt
- 大小:2.15 MB
- 文档页数:42
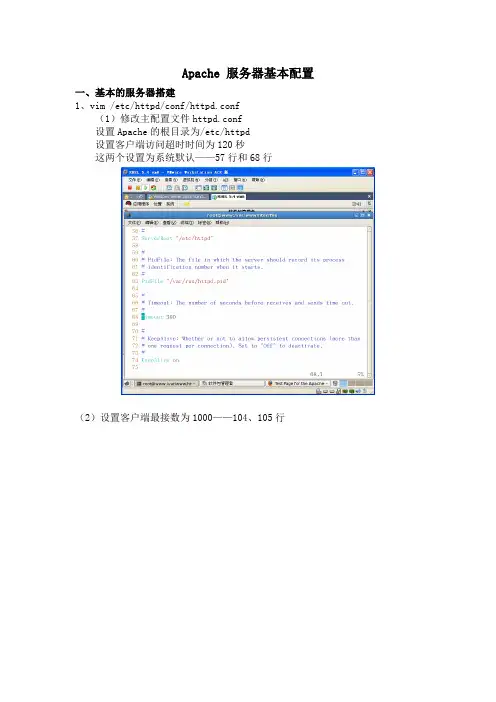
Apache 服务器基本配置一、基本的服务器搭建1、vim /etc/httpd/conf/httpd.conf(1)修改主配置文件httpd.conf设置Apache的根目录为/etc/httpd设置客户端访问超时时间为120秒这两个设置为系统默认——57行和68行(2)设置客户端最接数为1000——104、105行(3)设置httpd监听端口80,默认——134行(4)设置管理员E-mail地址为rootbenet.——251行设置WEB服务器的主机名和监听端口为www.benet.:80——265行(5)设置文档目录为/——281行(6)允许所有人访问/var//html/file目录——306、333行(此行可不配置)(7)设置主页文件为index.html——391行(8)设置服务器的默认编码为GB2312——747行(9)重新启动httpd[rootdns Server]# mkdir / (重要一步,不然不能启动) [rootdns Server]# vim / /index.html[rootdns Server]# service httpd restart停止 httpd: [确定]启动 httpd: [确定][rootdns Server]# setup设置防火墙二、多个站点的搭建1、基于ip地址的站点搭建[root ~]# vim /etc/httpd/conf/httpd.conf其次在主配置文件的最后加上如下配置<VirtualHost 192.168.0.223:80>ServerAdmin webmasterdummy-host.example.DocumentRoot //1ServerName dummy-host.example.ErrorLog logs/dummy-host.example.-error_logCustomLog logs/dummy-host.example.-access_log common </VirtualHost><VirtualHost 192.168.0.253:80>ServerAdmin webmasterdummy-host.example.DocumentRoot //2ServerName dummy-host.example.ErrorLog logs/dummy-host.example.-error_logCustomLog logs/dummy-host.example.-access_log common </VirtualHost>配置完成后重启服务[root ~]# service httpd restart然后在IE浏览器进行访问测试2、基于端口的站点搭建[root ~]# vim /etc/httpd/conf/httpd.conf首先加上如下配置,监听端口:Listen 801Listen 802其次在主配置文件的最后加上如下配置<VirtualHost 192.168.0.223:801>ServerAdmin webmasterdummy-host.example.DocumentRoot //1ServerName dummy-host.example.ErrorLog logs/dummy-host.example.-error_logCustomLog logs/dummy-host.example.-access_log common </VirtualHost><VirtualHost 192.168.0.223:802>ServerAdmin webmasterdummy-host.example.DocumentRoot //2ServerName dummy-host.example.ErrorLog logs/dummy-host.example.-error_logCustomLog logs/dummy-host.example.-access_log common </VirtualHost>配置完成后重启服务[root ~]# service httpd restart然后在IE浏览器进行访问测试3、基于域名的站点搭建首先必须保证DNS服务器正常运行[root ~]# vim /etc/httpd/conf/httpd.conf首先把#NameVirtualHost *:80改为如下配置:NameVirtualHost 192.168.0.223:80其次在主配置文件的最后加上如下配置<VirtualHost 192.168.0.223:80>ServerAdmin webmasterdummy-host.example.DocumentRoot //1ServerName www1.zzptc.ErrorLog logs/dummy-host.example.-error_logCustomLog logs/dummy-host.example.-access_log common </VirtualHost><VirtualHost 192.168.0.223:80>ServerAdmin webmasterdummy-host.example.DocumentRoot //2ServerName www2.zzptc.ErrorLog logs/dummy-host.example.-error_logCustomLog logs/dummy-host.example.-access_log common </VirtualHost>配置完成后重启服务[root ~]# service httpd restart然后在IE浏览器进行访问测试。


实验六 APACHE服务器配置1、实验目的要求(1)掌握APACHE服务器的安装(2)使用APACHE服务器的配置2、实验主要内容(1)APACHE服务器的安装与启动(2)简单APACHE服务器基本配置(3)配置个人WEB站点(4)配置APACHE虚拟主机(5)配置APACHE虚拟目录3、实验仪器设备网络实验室,Linux操作系统4、实验步骤(1)APACHE服务器的安装与启动A、利用软件包管理器安装若当前Linux系统安装了X-Windows图形界面系统,则可以利用软件包管理器来直接安装Apache Web服务器,同时还可以安装与Web服务应用紧密相关的PHP解释器,Perl解释器和支持PHP访问连接MySQL数据库的软件包。
启动进入Linux的图形界面,然后在“红帽子”→System Settings→Add/Remove Applications,打开Linux的软件包管理器,然后在Servers栏目中选中Web Server 服务,然后单击右边的Details,打开Web Server服务软件包的详细选项,其中的Standard packages用于安装Apache服务,extra pachages选项用于安装与Web服务紧密相关的PHP、Perl和MySQL的支持包,单击extra packages左边的箭头,展开选项列表,一般可以选择安装mod_auth_mysql、mod_perl、php、php_mysql和php_odbc 等软件包。
B、利用RPM软件包安装如果服务器上没有安装X-Windows图形界面,可以直接利用RPM软件包和源代码来安装Apache Web服务。
第一步:查询Apache服务是否安装rpm –q httpd若有输出信息,则说明Apache服务已经安装,其版本号为2.0.40-21第二步:安装Apache RPM软件包若经查询当前Linux系统还示安装Apache服务器,则可使用以下方法来安装。