RENLEASE QZ 5111
- 格式:pdf
- 大小:397.88 KB
- 文档页数:7

RENA清洗设备中文版说明书RENA清洗设备中文版说明书仅操作部分6、操作6.1 开机6.1.1 步骤1:开机前准备第一步:打开药液供给侧的手动阀第二步:关闭所有后侧门第三步:关闭所有服务和维修窗口的盖板第四步:解锁所有急停按钮6.1.2步骤2:给机器上电第一步:将机器的主开关打到ON的状态此时机器有电第二步:移走UPS电源的盖板第三步:将UPS的主开关打到ON的状态第四步:将主机的主开关打到ON的状态此时操作系统启动6.1.3步骤3:给CHILLER上电第一步:将CHILLER的主开关打到ON的状态此时CHILLER启动6.1.4步骤4:登录Windows第一步:选择Operator用户第二步:输入Operator密码,点击确定6.1.5步骤5:启动应用软件6.1.5.1 启动SPS软件第一步:双击WINLC RTXSPS软件启动SPS软件开始自动运行,直到ON和RUN显示为绿色第二步:将WINLC RTX最小化6.1.5.2 启动Server第一步:双击Server第二步:点击Open Project第三步:选择Project Path第四步:点击[+]第五步:点击[Configuration]第六步:点击OK第七步:点击RUN第八步:点击Start Tag Provider第九步:最小化服务器程序6.1.5.3 启动用户界面第一步:双击[Client]6.1.6步骤6:用户登入第一步:登入Process6.1.7步骤7:控制系统上电第一步:按动ON按钮6.2 工艺初始化准备第一步:登入Service第二步:了解所有报警信息第三步:将机器打到Manual状态第四步:对所有的功能单元下载Recipe第五步:冷却系统补液第六步:清洗槽补液第七步:所有dosage tanks补液第八步:所有Pump tanks补液此时机器用于工艺已准备好6.3 自动生产第一步:登入Operator用户第二步:确认所有的功能单元都处在Ready状态第三步:点击Start production6.3.3 停止自动生产6.3.3.1 停止预定的自动生产第一步:点击Scheduled stop弹出一个窗口第二步:点击YES仍在机器内的硅片跑出后停止6.3.3.2 停止未预定的自动生产第一步:点击Unscheduled stop弹出一个窗口第二步:点击YES仍在机器内的硅片将过刻6.3.3.3 停止自动生产—关闭步骤1:停止预定的自动生产第一步:点击Scheduled stop第二步:点击YES仍在机器内的硅片跑出后停止步骤2:点击Unscheduled time 6.3.4 手动补液6.3.4.1 工艺槽补液第一步:点击Process bath第二步:点击欲加液的dosage tank. 第三步:点击dosage第四步:输入欲加液的体积第五步:点击Start manual dosage 补液开始停止补液第一步:点击Stop manual dosage 补液停止6.3.4.2 碱槽补液与以上相似6.3.4.3 酸槽补液与以上相似6.3.5 滚轮操作6.3.5.1 停止滚轮第一步:点击Drives break滚轮停止转动6.3.5.2 启动滚轮第一步:点击Drives continue滚轮开始转动6.3.6 机器保护门的操作6.3.6.1 解锁保护门第一步:点击Unlock pane保护门解锁6.3.6.2 锁保护门第一步:点击Lock pane保护门锁上6.3.7硅片计数器清零第一步:点击Reset wafer counter硅片计数器清零6.4 手动操作6.4.1 将机器打到Manual状态第一步:点击Manual第二步:等到所有功能单元都切换到Manual状态6.4.2 冷却系统补液第一步:将机器打到Manual状态第二步:点击Cooling System第三步:点击Manual functions第四步:点击Fill with City Water冷却系统开始补液中断冷却系统补液第五步:点击Stop正补液的冷却系统停止补液6.4.3 清洗槽补液第一步:将机器打到Manual状态第二步:点击欲加液的清洗槽第三步:点击Manual functions第四步:点击Fill with DI清洗槽开始补液6.4.4 dosage tank补液6.4.4.1 工艺槽dosage tank补液第一步:将机器打到Manual状态第二步:点击Process bath第三步:点击Manual functions第四步:点击欲加化学药品的Dosage T ank Fill dosage tank开始补液第五步:对所有的dosage tank重复第四步的操作中断补液第六步:点击Stop补液被中断6.4.4.2 碱槽的dosage tanks补液与以上相似6.4.4.3 酸槽的dosage tanks补液与以上相似6.4.5 Pump tanks 补液6.4.5.1 工艺槽Pump tanks 补液第一步:将机器打到Manual状态第二步:点击Process bath第三步:点击Manual functions第四步:对所有的dosage tanks补液第五步:点击Fill chemistryPump tank将按照recipe的设定补液中断补液第六步:点击Stop补液被中断6.4.5.2碱槽Pump tanks 补液与以上相似6.4.5.2酸槽Pump tanks 补液与以上相似6.4.6 Bath槽补液第一步:将机器打到Manual状态第二步:冷却系统补液第三步:所有清洗槽补液第四步:所有dosage tanks补液第五步:所有pump tanks补液第六步:点击InOxSide第七步:点击Start production Bath槽开始补液6.4.7 冷却系统排液第一步:将机器打到Manual状态第二步:点击Cooling system第三步:点击Manual functions第四步:点击Drain冷却系统开始排液中断排液第五步:点击Stop排液被中断6.4.8清洗槽排液与以上相似6.4.9 将Baths的药液排到pump tank 第一步:将机器打到Manual状态第二步:选择欲操作的功能单元第三步:点击Manual functions第四步:点击Drain bath to pump tankBath开始排液到Pump tank中断排液第五步:点击Stop排液被中断6.4.10 对baths and pump tank排液第一步:将机器打到Manual状态第二步:选择欲操作的功能单元第三步:点击Manual functions第四步:点击DrainBath和Pump tank将被排空6.4.11 对dosage tanks排液第一步:将机器打到Manual状态第二步:选择欲操作的功能单元第三步:点击Manual functions第四步:点击DrainBath和Pump tank将被排空第五步:点击欲操作的dosage tank的Drain dosage tank dosage tank的药液被排到pump tank.pump tank.的药业被排空中断排液第六步:点击Stop排液被中断6.4.12 换液Changing the bath第一步:将机器打到Manual状态第二步:选择欲操作的功能单元第三步:点击Manual functions第四步:点击Bath change6.4.13 启动自动清洗清洗周期和清洗时间由recipe的参数预设第一步:将机器打到Manual状态第二步:选择欲操作的功能单元第三步:点击Manual functions第四步:点击Clean开始清洗中断清洗第五步:点击Stop清洗被中断6.4.14 启动手动清洗6.4.14.1 工艺槽的手动清洗第一步:将机器打到Manual状态第二步:点击Process bath第三步:点击Manual functions第四步:点击Start manual rinseBath槽的排液阀门打开用水枪冲洗bath槽中断清洗第五步:点击StopBath槽的排液阀门关闭手动清洗被中断6.4.14.2 酸槽的手动清洗与以上相似6.4.15 停止手动清洗6.4.15.1 工艺槽的手动清洗第一步:将机器打到Manual状态第二步:点击Process bath第三步:点击Manual functions第四步:点击stop manual rinseBath槽的排液阀门关闭6.4.15.2酸槽的手动清洗与以上相似6.4.16 初始化第一步:将机器打到Manual状态第二步:选择欲操作的功能单元第三步:点击Init功能单元开始初始化中断初始化第四步:点击Stop初始化被中断6.4.17 dosage tanks的余量置零第一步:将机器打到Manual状态第二步:点击Process bath第三步:点击Manual functions第四步:点击Bath changeThe bath is changed.The rest volume dosage tank is reseted 6.4.18 检测第一步:登入Process用户第二步:打开检测单元的盖子第三步:将检测容器与检测软管连接第四步:关闭检测单元的盖子第五步:点击sampling按钮5秒第六步:打开检测单元的盖子第七步:取出检测容器第八步:锁上检测容器第九步:关闭检测单元的盖子第十步:登入Operator用户6.5 设置6.5.1 改变温度6.5.1.1 在生产过程中改变温度第一步:点击Inoxside第二步:点击Bath temperature第三步:改变温度值第四步:点击OK6.5.1.2 在Recipe里改温度第一步:点击Inoxside第二步:点击Process bath第三步:点击Recipe第四步:双击pump tank temperature or bath temperature的数值第五步:更改数值第六步:点击OK6.5.2 更改带速6.5.2.1在生产过程中改变速度第一步:点击Inoxside第二步:点击Speed setpoint第三步:改变速度值第四步:点击OK6.5.2.2在Recipe里改速度第一步:点击Inoxside第二步:点击Transport第三步:点击Recipe第四步:双击欲改变的数值第五步:更改数值第六步:点击OK6.5.3 设置第一次补液的比例第一步:点击Inoxside第二步:点击欲操作的功能单元第三步:点击Recipe第四步:双击Concentration for first fill'.的数值第五步:更改数值第六步:点击OK6.5.4 设置自动补液第一步:点击Inoxside第二步:点击欲操作的功能单元第三步:点击Recipe第四步:双击Dosage V olume'的数值第五步:更改数值第六步:点击OK6.5.5 设置自动清洗6.5.5.1设置清洗周期的编号第一步:点击Inoxside第二步:点击欲操作的功能单元第三步:点击Recipe第四步:双击Numbers of Cleaning Cycles'.的数值第五步:更改数值第六步:点击OK6.5.5.2设置清洗时间第一步:点击Inoxside第二步:点击欲操作的功能单元第三步:点击Recipe第四步:双击Cleaning time'.第五步:更改数值第六步:点击OK6.5.6设置流动时间第一步:点击Inoxside第二步:点击欲操作的功能单元第三步:点击Recipe第四步:双击Setpoint flow'第五步:更改数值第六步:点击OK6.5.7设置dryer第一步:点击Inoxside第二步:点击dryer第三步:点击Recipe第四步:双击要改变的参数第五步:更改数值第六步:点击OK6.6 关机6.6.1 步骤1:机器排液第一步:点击Scheduled stopNo new wafers are conveyed into the machine.The mode of the machine is? changed to 'Standby'.Processing of any wafers that are still in the? machine is carried out to the end. The baths are drained into the pump? tank.The mode of the machine is changed to? 'Manual'.6.6.2步骤2:结束工艺准备就绪第一步:登入Process用户第二步:所有的Pump tanks排液第三步:所有的Dosage tanks排液第四步:清洗所有的Dosage tanks第五步:清洗所有的Pump tanks第六步:将机器状态改为Off6.6.3步骤3:关闭控制电源第一步:在控制面板上点击Off按钮机器将不再能从界面上控制6.6.4步骤4:关机准备第一步:关闭所有的药液提供侧的手动阀6.6.5步骤5:关闭总电源第一步:将主开关打到Off状态6.7 急停按下后的开机6.7.1步骤1:开机准备第一步:处理急停原因第二步:解锁所有的急停按钮6.7.2步骤2:打开控制电源第一步:点击ON按钮6.7.3步骤3:启动准备就绪第一步:登入Service用户第二步:将机器打到manual状态第三步:了解所有的报警信息6.7.4步骤4:开始自动生产第一步:登入Operator用户第二步:确保所有的功能单元都处于Ready状态第三步:点击InOxside第四步:点击Start production该按钮键变绿状态显示变为InitBaths槽开始补液状态显示变为Auto机器开始生产The Semi E10状态改为Start production 6.8断电后的开机6.8.1断电断于10分钟的开机6.8.1.1步骤1:开机前准备第一步:重启电源6.8.1.2步骤2:打开控制电源第一步:按动ON按钮控制电源上电该按钮键显示为绿色6.8.1.3步骤3:启动准备就绪第一步:登入Service用户第二步:将机器打到manual状态第三步:了解所有的报警信息6.8.14步骤4:开始自动生产第一步:登入Operator用户第二步:确保所有的功能单元都处于Ready状态第三步:点击InOxside第四步:点击Start production该按钮键变绿状态显示变为InitBaths槽开始补液状态显示变为Auto机器开始生产The Semi E10状态改为Start production 6.8.2大于10分钟断电后的开机6.8.2.1步骤1:开机前准备第一步:重启电源6.8.2.2步骤2:打开控制电源第一步:按动ON按钮控制电源上电该按钮键显示为绿色6.8.2.3步骤3:windows登入第一步:点击operator第二步:输入密码Operator点击OK6.8.2.4步骤4:启动准备就绪第一步:登入Service用户第二步:将机器打到manual状态第三步:了解所有的报警信息第四步:对所有的功能单元下载Recipe第五步:冷却系统补液第六步:所有清洗槽补液第七步:所有的dosage tanks 补液第八步:所有的pump tanks 补液此时设备准备好6.8.2.5步骤5:开始自动生产第一步:登入Operator用户第二步:确保所有的功能单元都处于Ready状态第三步:点击InOxside第四步:点击Start production该按钮键变绿状态显示变为InitBaths槽开始补液状态显示变为Auto机器开始生产The Semi E10状态改为Start production。
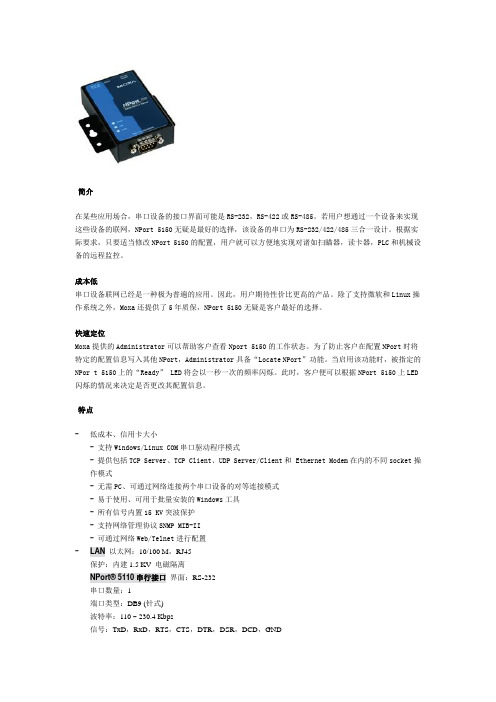
简介在某些应用场合,串口设备的接口界面可能是RS-232,RS-422或RS-485。
若用户想通过一个设备来实现这些设备的联网,NPort 5150无疑是最好的选择,该设备的串口为RS-232/422/485三合一设计。
根据实际要求,只要适当修改NPort 5150的配置,用户就可以方便地实现对诸如扫瞄器,读卡器,PLC和机械设备的远程监控。
成本低串口设备联网已经是一种极为普遍的应用。
因此,用户期待性价比更高的产品。
除了支持微软和Linux操作系统之外,Moxa还提供了5年质保,NPort 5150无疑是客户最好的选择。
快速定位Moxa提供的Administrator可以帮助客户查看Nport 5150的工作状态。
为了防止客户在配置NPort时将特定的配置信息写入其他NPort,Administrator具备“Locate NPort”功能。
当启用该功能时,被指定的NPor t 5150上的“Ready” LED将会以一秒一次的频率闪烁。
此时,客户便可以根据NPort 5150上LED 闪烁的情况来决定是否更改其配置信息。
特点-低成本、信用卡大小- 支持Windows/Linux COM串口驱动程序模式- 提供包括TCP Server、TCP Client、UDP Server/Client和 Ethernet Modem在内的不同socket操作模式- 无需PC、可通过网络连接两个串口设备的对等连接模式- 易于使用、可用于批量安装的Windows工具- 所有信号内置15 KV突波保护- 支持网络管理协议SNMP MIB-II- 可通过网络Web/Telnet进行配置-LAN以太网:10/100 M,RJ45保护:内建1.5 KV 电磁隔离NPort® 5110串行接口界面:RS-232串口数量:1端口类型:DB9 (针式)波特率:110 ~ 230.4 Kbps信号:TxD,RxD,RTS,CTS,DTR,DSR,DCD,GND串口保护:15 KV ESDNPort® 5130串行接口界面:RS-422/485串口数量:1端口类型:DB9 (Male)波特率:50-921.6 Kbps信号RS-422:Tx+,Tx-,Rx+,Rx-,GNDRS-485 (2线):Data+,Data-,GNDRS-485 (4线):Tx+,Tx-,Rx+,Rx-,GND串口保护:15 KV ESDRS-485数据流向:ADDC® (专利保护的数据流向自动控制功能)NPort® 5150串行接口界面:RS-232/422/485串口数量:1端口类型:DB9 (Male)波特率:50 ~ 921.6 Kbps信号RS-232:TxD,RxD,RTS,CTS,DTR,DSR,DCD,GND RS-422:Tx+,Tx-,Rx+,Rx-,GNDRS-485 (2线):Data+,Data-,GNDRS-485 (4线):Tx+,Tx-,Rx+,Rx-,GND串口保护:15 KV ESDRS-485数据流向:ADDC® (专利保护的数据流向自动控制功能)电源线保护:4 KV EFT保护,EN61000-4-4,2 KV电涌保护,EN61000-4-5内嵌高级功能:看门狗时钟串行通讯参数校验位:None,Even,Odd,Space,Mark数据位:5,6,7,8停止位:1,1.5,2流控:RTS/CTS,DTR/DSR (仅RS-232),XON/XOFF软件特点协议:ICMP,IP,TCP,UDP,DHCP,BOOTP,Telnet,DNS,SNMP,HTTP,SMTP工具:NPort® Administrator for Windows 95/98/ME/NT/2000/XP/2003/Vista驱动支持:Windows Real COM driver (for Windows 95, 98, ME,NT, 2000, XP, 2003, Vista, XP x64, 2003 x64, Vista x64),Linux Real TTY driver, Fixed TTY driver (for SCO Unix,SCO OpenServer, UnixWare 7, UnixWare 2.1, SVR 4.2,QNX 4.25, QNX 6, Solaris 10, FreeBSD, AIX 5.x, HP-UX11i)配置:Web浏览器/Telnet console,Windows工具,或串口console 口电源需求电源输入:12 ~ 48 VDC电源功耗:NPort® 5110:128.7 mA@12V,72 mA@24VNPort® 5130:200 mA@12V,106 mA@24VNPort® 5150:200 mA@12V,106 mA@24V机械特性材料:铝质(1 mm)尺寸:50 x 80 x 22 mm (2.05 x 3.15 x 0.87 in)总重量:0.580 kg工作环境工作温度:0 ~ 55 °C (32 ~ 131 °F),5 ~ 95%RH-40 ~ 75 °C (-40 ~ 167 °F),宽温型号(NPort 5110-T)存储温度:-20 ~ 85 °C (-4 ~ 185 °F),5 ~ 95%RH通过认证EMC:CE (EN55022 Class A, EN55024), FCC Part 15 Subpart B Class A安全:UL (UL60950-1), CUL, TüV (EN60950-1)MTBF:NPort® 5110:279122 hrsNPort® 5130:246505 hrsNPort® 5150:246034 hrs保修期5 年可选型号产品编号描述NPort IA5150 1口RS-232/422/485串口设备联网服务器, 2个10/100BaseT(X)(RJ45, Single IP)NPort IA5150I 1口RS-232/422/485串口设备联网服务器, 2个10/100BaseT(X)(RJ45, Single IP), 带2KV光电隔离保护NPort 5150-US1口RS-232/422/485设备联网服务器, 110 VAC, US插头NPort 5150-CN1口RS-232/422/485设备联网服务器, 240 VAC, US插头安装配件产品编号描述DK-35A导轨DIN-Rail 安装套件(35 mm)-。


HR-1151、3051差压/压力变送器概述用途HR-1151、3051系列电容式变送器可应用于石化、冶金、电力、食品、医药、造纸和纺织等工业部门,用来检测流体的差压、压力、液位、界面和密度等参数,与节流孔板配用,还可用于测量流量。
它将被测信号转换成4~20mA.DC,传送给显示、计算、调节或控制等仪表,可组成各种自控系统。
开发背景虹润精密仪器有限公司借鉴国外先进技术,组织了国内变送器设计和制造的专业技术人员,经过多年的不懈努力,研制和开发成功了这一系列精度高、性能稳定与可靠性好的电容式变送器。
公司的开发思路:“在保持和发扬国外同类产品优良性能的基础上,根据用户多年来的反映要求,不断完善产品结构、工艺和性能检测技术,以确保变送器在线运行中,具备满意的综合精度和可靠性。
”公司还根据不同的用户需要,开发不同技术层面的产品,如采用模拟放大器的普通型产品;采用按键调整和微处理器的数字型产品;以及采用HART协议通讯的智能型产品。
我公司生产的电容式变送器自96年投放市场以来,出厂产品的开箱和一次投运合格率均达100%,产品的高性价比和良好的售后服务,已被国内的众多大中企业所认可。
产品特点●精度高,性能稳定●二线制,4~20mA输出。
●采用固体δ室元件,接插式印刷电路板,抗振性强。
●量程、零点大范围连续可调。
●单向过载保护性能好。
●零部件互换性、通用性好,经久耐用。
●品种规格齐全。
●安装方便,使用场合广泛,户外、防爆、高温和强腐蚀环境均可。
针对HR-3051型智能压力/差压变送器还具备以下特点:●微处理器的使用智能变送器的灵活性增大、功能增强。
●智能电子部件仅由一块线路板组成,优越性更强,可靠性更高。
●量程比为10:1或15:1。
●量程范围宽:0-25Pa~42Pa。
●就地按键调整零点和量程。
●可更新现成的各种3051模拟式变送器为智能变送器。
●符合HART协议,可用HART通讯器与本智能表进行双向通讯而不中断输出信号。

REVISION HISTORYDECLARATIONTABLE OF CONTENTS5.3. DC Electrical Characteristics2.6.Memory Subsystem&Touch G-SENSORSPI1_CLK UART3_RX42 DDR3_D743 VCC3_DRAM79 AGND80 VRPSDC0_CMD 111PF3PE9 CSI_D6LCD_D10 141PD10PC19 163 VCC4function 0);3)Type: signal directionPC7 Input PC8 InputPE4 Input PE5 InputSignal Name DescriptionOthersVRP Reference voltageV IH High-Level Input Voltage V IL Low-Level Input VoltageFigure 5-1. Power Up Sequence5.5.2.Power Up Reset Sequence RequirementsThe device has a system reset signal to reset the board. When asserted, the following steps give an example of power up reset sequence supported by the R8 device.•AVCC ,VDD_CPU and VCC_DRAM can be powered up simultaneously.•VDD_INT can be powered up after VDD_CPU is powered up, the time difference is T1ms.•VCC can be powered up after VDD_INT is powered up, the time difference is T2ms.Figure 5-2. Power Up Reset Sequence5.5.3.Resume Power Up Sequence from Super Standby ModeTo resume a power up sequence when the device is in Super Standby mode:•VCC_DRAM and AVCC remains powered up always.•VDD_CPU can be powered up firstly.•VDD_INT can be powered up after VDD_CPU is powered up, the time difference is T1ms.•VCC can be powered up after VDD_INT is powered up, the time difference is T2ms.Figure 5-3. Exit Super Standby and Resume Power Up Sequence5.5.4.Power Down Sequence RequirementsTo reduce power consumption,the R8 can be partially powered down.The section lists the power down requirements in each mode.In Super Standby mode,•VCC_DRAM and AVCC must be kept powered up.•VDD_CPU,VDD_INT and VCC are powered down simultaneously.•VCC voltage fall time is more longer than VDD_INT.VDD_CPUVDD_CPU6.PIN ASSIGNMENT6.2.PACKAGE DIMENSIONThe following diagram shows the package dimension of R8.。

MGate5111系列1埠Modbus/PROFINET/EtherNet/IP轉PROFIBUS從屬裝置閘道器特色與優點•將Modbus、PROFINET或EtherNet/IP轉換為PROFIBUS•支援PROFIBUS DP V0從屬裝置•支援Modbus RTU/ASCII/TCP主控裝置/用戶端和從屬裝置/伺服器•支援EtherNet/IP轉接頭•支援PROFINET IO裝置•透過網頁式設定精靈輕鬆配置•輕鬆佈線的內建乙太網路串接•嵌入式流量監控/診斷資訊,便於故障排除•狀態監控和故障保護,可輕鬆維護•microSD卡可用於備份/複製配置與儲存事件日誌•支援冗餘DC電源輸入與1點繼電器輸出•串列內建埠2kV隔離保護•提供-40至75°C寬溫度操作型號可供選用•基於IEC62443的資安防護功能認證簡介MGate5111工業乙太網路閘道器能夠將數據從Modbus RTU/ASCII/TCP、EtherNet/IP或PROFINET轉換為PROFIBUS通訊協定。
所有型號均有強固的金屬外殼加以保護,可使用DIN軌道安裝,而且提供內建串列隔離。
Modbus是最普遍使用的工業通訊協定之一,EtherNet/IP、PROFINET和PROFIBUS普遍用於工廠自動化和製程自動化。
MGate5111支援Modbus RTU/ASCII/TCP主控裝置和從屬裝置模式,因此很容易就能將Modbus裝置連接到PROFIBUS PLC或DCS(例如Siemens PLC)。
對於系統整合,MGate5111可連接到EtherNet/IP PLC/SCADA系統(例如Rockwell Automation PLC)、連接到PROFIBUS PLC/DCS系統,或在對於現有PROFIBUS系統支援PROFINET的新型Siemens PLC系統之間連接。
MGate5111閘道器有助於輕鬆配置和快速維護。
版本2.1修订日期:03/17/2017SDS编号:1090284-00002前次修订日期: 11/24/2016最初编制日期: 04/20/20111. 化学品及企业标识产品名称: 测漏喷剂 5L产品代码: 890201制造商或供应商信息制造商或供应商名称: 伍尔特(中国)有限公司地址: 上海浦东新区康桥东路1159弄51号5 号楼邮编:201315电话号码:应急咨询电话:电子邮件地址:推荐用途和限制用途推荐用途: 裂纹检测材料2. 危险性概述紧急情况概述GHS危险性类别非危险物质或混合物。
GHS标签要素非危险物质或混合物。
物理和化学危险根据现有信息无需进行分类。
健康危害根据现有信息无需进行分类。
环境危害版本2.1修订日期:03/17/2017SDS编号:1090284-00002前次修订日期: 11/24/2016最初编制日期: 04/20/2011GHS未包括的其他危害未见报道。
3. 成分/组成信息物质/混合物: 混合物危险组分不含有害成分4. 急救措施吸入: 如吸入,移至新鲜空气处。
如有症状,就医。
皮肤接触: 谨慎起见用水和肥皂清洗。
如有症状,就医。
眼睛接触: 谨慎起见用水冲洗眼睛。
如果刺激发生并持续,就医。
食入: 如吞咽:不要引吐。
如有症状,就医。
用水彻底漱口。
最重要的症状和健康影响: 未见报道。
对保护施救者的忠告: 对于急救员,不需要特定的预防措施。
对医生的特别提示: 对症辅助治疗。
5. 消防措施灭火方法及灭火剂: 水喷淋耐醇泡沫二氧化碳(CO2)化学干粉不合适的灭火剂: 未见报道。
特别危险性: 接触燃烧产物可能会对健康有害。
有害燃烧产物: 已知无有害燃烧产物特殊灭火方法: 根据当时情况和周围环境采用适合的灭火措施。
版本2.1修订日期:03/17/2017SDS编号:1090284-00002前次修订日期: 11/24/2016最初编制日期: 04/20/2011在安全的情况下,移出未损坏的容器。
Data Sheet FUJITSU Notebook LIFEBOOK E5411Fujitsu recommends Windows 11 Pro.Data SheetFUJITSU Notebook LIFEBOOK E5411Your Powerful and Modern Business DeviceThe FUJITSU Notebook LIFEBOOK E5411 is designed for office workers needing a powerful, fully-equipped notebook. Thanks to the 11th generation Intel® Core™ processor you can work efficiently wherever you are. The advanced security features like PalmSecure™ are protecting your business data against unauthorized access. Modern Standby provides you an instantly ready and always connected notebook.Modern and robust designReliable mobility, ease of use and modern good looks for everyday business demands Slim 23.9 mm entry notebook starting at 1.79 kg with a solid designEnjoy an ergonomic viewing experience with a 14.0-inch outdoor friendly anti-glare FHD display With optional touch or non-touch screen Long Lifecycle with 24 monthsReliable and secure performanceProtect your business data from unauthorized access at all times Integrated PalmSecure™ or finger print sensorInfrared Camera: Allows face recognition with Windows Hello Intel® Iris® Xe GraphicsBuilt-in Privacy Camera Shutter: Protecting your privacy SmartCard reader and TPM 2.0Best in class connectivityBe flexible and stay productive anywhere, anytimeCompact and versatile Intel® Thunderbolt™ 4 USB Type-C connector to charge your laptop, transfer files at fast speeds, connect external monitors and other peripherals Full set of ports with a full-sized HDMI, VGA and LAN connector and USB Type-C Based on the latest QuadCore Intel processor, enabling data to be processed faster Convenient serviceability and upgradeabilityEasy access to key components reduces upgrade time and costsBattery, memory, internal storage and connectivity components can be changed with ease Long-term stable platformProtect your investments and be ready for shared desk conceptsThis LIFEBOOK E5 Series provides an extraordinary guaranteed product lifecycle of 24 months.ComponentsBase unit LIFEBOOK E5411Operating systemsOperating system pre-installed Windows 11 Pro. Fujitsu recommends Windows 11 Pro for business.Windows 11 HomeWindows 10 ProOperating system compatible FREE Upgrade to Windows 11. Timing varies by device.Certain features require specific hardware (see https:///windows/windows-11-specifications) Operating system notes After the end of the product life Fujitsu will continue to test and support all upcoming Windows releases for a periodof maximum 5 years, depending on the available extension of hardware services through Fujitsu Warranty topups. For details please see “Fujitsu Service Statement for Windows General Availability Channel” at https://support./IndexProdSupport.asp?lng=com&OpenTab=Processor Intel® Core™ i7-1185G7 processor (4 Cores / 8 Threads, up to 4.8 GHz)Intel® Core™ i7-1165G7 processor (4 Cores / 8 Threads) *Intel® Core™ i5-1145G7 processor (4 Cores / 8 Threads)Intel® Core™ i5-1135G7 processor (4 Cores / 8 Threads) *Intel® Core™ i3-1125G4 processor (4 Cores / 8 Threads) *Intel® Core™ i3-1115G4 processor (2 Cores / 4 Threads) **Processor only for retail, SMB, education and governmentMemory modules 4 GB (1 module(s) 4 GB) DDR4, 3,200 MT/s, SO DIMM8 GB (1 module(s) 8 GB) DDR4, 3,200 MT/s, SO DIMM16 GB (1 module(s) 16 GB) DDR4, 3,200 MT/s, SO DIMM32 GB (1 module(s) 32 GB) DDR4, 3,200 MT/s, SO DIMMHard disk drives (internal)PCIe-SSD, 512 GB M.2 NVMe module, SEDPCIe-SSD, 256 GB M.2 NVMe module, SEDPCIe-SSD, 256 GB M.2 NVMe modulePCIe-SSD, 1 TB M.2 NVMe module, SEDHard disk notes Accessible capacity may vary, also depending on used software.Interface add on cards/components(optional)3G/4G (optional)LTE Sierra Wireless EM7421 (Cat.7) (Downlink speed up to 300 Mbit/s, Uplink speed up to 150 Mbit/s)Display35.6 cm (14.0-inch), (Full HD), Anti-glare IPS touchscreen, 1,920 x 1,080 pixel, 700:1 (Touch), 300 cd/m² (Touch)35.6 cm (14.0-inch), (Full HD), Anti-glare IPS display, 1,920 x 1,080 pixel, 700:1 (FHD), 220 cd/m² (FHD)MultimediaCamera Built-in webcam (HD) with Status LED Built-in Infrared webcam (HD) with Status LED Camera notes720p, 1 megapixels, 1280 x 720, with Privacy Camera ShutterMicrophone dual digital array microphoneBase unitBase unit LIFEBOOK E5411General system informationChipset IntegratedSupported capacity RAM (min.) 4 GBSupported capacity RAM (max.)64 GBGeneral system informationMemory slots 2 SO DIMM (DDR4, 3200 MHz)Memory notes Dual channel supportLAN10/100/1,000 MBit/s Intel® I219LMIntegrated WLAN Intel WiFi 6 AX201BIOS version UEFI Specification 2.7BIOS features InsydeH2O BIOSAudio type On boardAudio codec Realtek ALC255Audio features2x built-in speakers (stereo)MIL-STD tested Yes, selected MIL-STD-810H tests passed.MIL-STD-810H test results are not a guarantee of future performance under identified test conditions.Accidental damage is not covered under standard international limited warranty.DisplayDisplay notes FHD - Viewing angle: Left/Right 80°, Top 80°, Bottom 80°; Color Gamut: 45% NTSC, response time 25 ms* HD Display option available in LIFEBOOK E5411/HD baseunit *GraphicsBase unit LIFEBOOK E5411TFT resolution (HDMI)Up to 4,096 x 2,160 pixel (30 Hz)TFT resolution (VGA)up to 1,920 x 1,200Graphics brand name Intel® UHD Graphics (with Single channel memory), Intel® Iris® Xe Graphics (with Dual channel memory) Graphics features 3 Display SupportDirectX® 12OpenGL® 4.5Graphics notes Shared memory depending on main memory size and operating systemInterfaces (Base unit specific)DC-in1Audio: line-in / line-out1Internal microphones2x digital array microphones (optional)USB 3.2 Gen1 (5 Gbps) total2x Type-A (1 with Anytime USB charge functionality)USB 4.0 Gen3 (20 Gbps) total1x Type-C Intel® Thunderbolt™ 4 (40Gbps), Power Delivery (15W), DP outVGA1DisplayPort no interface but via USB Type-C adapter (v1.2b)HDMI 1 supports resolutions as specified in HDMI 1.4bEthernet (RJ-45)1Memory card slots 1 SD 3.0 StandardSD/microSD cardSDHC/microSDHC cardSDXC/microSDXC cardSpeed Class: up to UHS-ISmartCard slot 1 (optional)SIM card slot 1 (Micro-SIM, only for models with integrated 4G/LTE module)Docking connector for Port Replicator1Kensington Lock support1Port Replicator interfaces (optional)Thunderbolt™ 4 PR Model: NPR46 (mech. PR)USB Type-C PR Thunderbolt™ 3 PRModel: NPR48DC-in 1 (20V/170W required) 1 (19V/90W required) 1 (19V/90W required) 1 (20V/170W required) Power on switch1111Audio: headphone---1------Audio: microphone---1------Audio: comments 1 Combo jack for headsetusage --- 1 Combo jack for headsetusage1 Combo jack for headsetusagePort Replicator interfaces (optional)USB 3.2 Gen1 (5 Gbps) total---4x Type-A2x Type-C------DisplayPort2x V1.4++ 2 (up to 2x 3840x2160 60Hz)1x V1.2 2x V1.4 VGA--- 1 (up to 1920x1200 60Hz)1---DVI--- 1 (up to 1920x1200 60Hz)------HDMI text V 2.0b---1 1 x 2.0bInterface Notes2x Type-A - 5V/0.9A, 4.5W1x Type-A - 5V/2.4A, 12W2x Type-C - 5V, 1.5A/4.5Wcharging port1x Type-C - TBT4 up to 60W (PD v2.0-1.1), 5-20V/3.0Aupstream (PC), Intel AMTsupport (vPRO)1x Type-C - TBT4 up to 15W (PD v2.0-1.1), 5V/3.0Adownstream, power outputto client ---3x Type-A - 5V/0.9A, 4.5W1x Type-C - 15W1x Type-C - Up to 60 W (PDv2.0-1.1) power output toclient or 4.5W input2x Type-A - 5V/0.9A, 4.5W1x Type-A - 5V/2.4A, 12W2x Type-C - 5V/1.5A, 4.5Wcharging port1x Type-C - TBT3 up to 60W (PD v2.0-1.1), 5-20V/3.0Aupstream (PC)1x Type-C - TBT3 up to 15W (PD v2.0-1.1), 5V/3.0Adownstream, power outputto clientKensington Lock support1 1 (Portrep only, Portrepoption with key lock tosecure Portrep & System)no1Ethernet (RJ-45) 1 (10/100/1000 Mbit/s, 2,5Gbps)---11Notes Number of simultaneousused displays and itspossible resolutions andfrequencies depend onmobile system and displayinterface type.Please consult alwaysalso the manual of theconnected client.1 RJ45 (10/100/1000)Number of simultaneousused displays and itspossible resolutions andfrequencies depend onmobile system and displayinterface type.Please consult alwaysalso the manual of theconnected client.Number of simultaneousused displays and itspossible resolutions andfrequencies depend onmobile system and displayinterface type.Please consult alwaysalso the manual of theconnected client.Keyboard and pointing devicesKeyboard w/o touchstick (spill-resistant), Keyboard w/ touchstick, Backlight keyboard w/o touchstickNumber of keyboard keys: 85, Keyboard pitch: 18.4 mm, Keyboard stroke: 1.7 mmMulti gesture touchpad with two mouse buttonsWireless technologiesAntennas 2 Dual band WLAN antennas, 2 LTE antennas optionalBluetooth v5.1Integrated WLAN Intel WiFi 6 AX201WLAN encryption WPA/WPA2/WPA3 (Wi-Fi Protected Access)WLAN notes Import and usage according to country-specific regulations.Integrated LTE or UMTS LTE Sierra Wireless EM7421 (cat.7)LTE/UMTS/GPS notes OptionalGPS Embedded in 4G module if configured with WWANPower supplyAC Adapter20 V / 65 W (3.25 A), 100 V - 240 V, 50 Hz - 60 Hz, 3-pin (grounded) Type-C AC-Adapter standardAC Adapter19 V / 90 W (4.74 A), 100 V - 240 V, 50 Hz - 60 Hz, 3-pin (grounded) DC-in AC-Adapter (for PR)AC Adapter19 V / 65 W (3.42 A), 100 V - 240 V, 50 Hz - 60 Hz, 3-pin (grounded) DC-in AC-AdapterAC Adapter20 V / 65 W (3.25 A), 100 V - 240 V, 50 Hz - 60 Hz, 3-pin (grounded) Type-C AC-Adapter slim&light Notes65W AC Adapter for usage with system/ 90W AC Adapter for usage with Port Replicator1st battery Lithium polymer battery 4-cell, 50 Wh, 3,490 mAhBattery features Quick Charge: 80% in 1hRuntime 1st battery9 h 10 minBattery notes Battery runtime information is based on worldwide acknowledged BAPCo® MobileMark® 2018. Refer to www.bapco.com for additional details.The BAPCo® MobileMark® Benchmark provides results that enable direct product comparisons betweenmanufacturers. It does not guarantee any specific battery runtime which actually can be lower and may varydepending on product model, configuration, application and power management settings. The battery capacitydecreases slightly with every re-charge and over its lifetime.Noise emissionNoise emission Please refer to the Eco DeclarationDimensions / Weight / EnvironmentalDimensions (W x D x H)333.6 x 234 x 23.9 mm13.13 x 9.21 x 0.94 inchWeight 1.79 kgWeight (lbs) 3.94 lbsWeight notes Weight may vary depending on actual configurationOperating ambient temperature 5 - 35 °C (41 - 95 °F)Operating relative humidity20 - 80 %ComplianceProduct LIFEBOOK E5411Model5E14A2Germany GS (Full HD Display only)Europe CECBUSA/Canada FCC (depending on configuration) (planned)Global RoHS (Restriction of hazardous substances)WEEE (Waste electrical and electronic equipment)Microsoft Operating Systems (HCT / HCL entry / WHQL)TCO Certified 8.0 (depending on configuration)EPEAT® Silver (dedicated regions), depending on configurationENERGY STAR® 8.0MIL-STD-810H testedIndia BISRussia EACChina CCC (depending on configuration)Compliance link https:///sites/certificatesAdditional SoftwareAdditional software (preinstalled)Fujitsu Plugfree Network (network management utility)Fujitsu Anytime USB Charge UtilityFujitsu Battery UtilityFujitsu Function ManagerFujitsu DeskUpdate (driver and utility tool)Additional software (optional)Recovery DVD for Windows®Drivers & Utilities DVD (DUDVD)Microsoft® Office Professional 2019Microsoft® Office Home and Business 2019(A Microsoft Account is required to activate each copy of these products. For purchase and activation only in theregion in which it was acquired.)Additional software (notes)Use of additional software is subject to proactive acceptance of the respective End User License Agreement asapplicable for the relevant software whether preinstalled or optional. This also applies for any available patchesthereof.ManageabilityManageability technology DeskUpdate Driver managementPXE 2.1 Boot codeWake up from S5 (off mode)WoL (Wake on LAN)Intel® vPro™ technologyManageability software DeskView ClientDeskView Instant BIOS ManagementDeskView components Inventory ManagementBIOS ManagementDriver ManagementSecurity ManagementAlarm ManagementSupported standards WMI (Windows Management Instrumentation)PXE (Preboot Execution Environment)DMI (Desktop Management Interface)SMBIOS (System Management BIOS)CIM (Common Information Model)BootP (made4you)Manageability link /fts/manageabilitySecuritySystem and BIOS Security EraseDiskTrusted Platform Module (TPM 2.0)User Security Embedded PalmSecure™ sensor (optional)Embedded fingerprint sensor (optional)Access protection via internal SmartCard reader (optional)Hard disk passwordUser and supervisor BIOS passwordSecurity Notes The security features included in the product alone cannot protect from any and all intrusion attempts andcyberattacks. For an adequate overall level of IT security, further IT security measures (e.g. supplementary virusscanner settings, firewall, access rights management, encryption etc.) must be adopted independently of theavailable system configuration options. Hence the overall IT security for the product is within the sole responsibilityof the respective user/administrator of the product.WarrantyWarranty period 1 year (for countries in EMEIA)Warranty type Bring-in Service / Collect & Return Service (depending on country)Warranty Terms & Conditions /warrantyDigital bug fixes Subject to availability and following their generic release for the product, bug fixes and function-preserving patchesfor product-related software (firmware) can be downloaded from the technical support at: https://support.ts.fujitsu.com/ free of charge by entering the respective product serial number. For application software supplied togetherwith the product, please directly refer to the support websites of the respective software manufacturer.Product Support Services - the perfect extensionRecommended Service9x5, Onsite Response Time: Next Business DaySpare Parts availability 5 years after end of product lifeService Weblink /emeia/products/product-support-services/ Recommended AccessoriesPort Replicator for LIFEBOOK U7 and E5 family with key lock(2020)Flexibility, expandability, desktop replacement, investment protection – toname just a few benefits of Fujitsu’s docking options.Order Code:S26391-F1607-L219USB Type-C Port Replicator 2Connect to your peripherals. Adapt to the task on demand. The universal USB Type-C interface supports you to get your peripheral devicesconnected easily. Multiply your USB ports to connect your peripherals as well as your external display via HDMI, DisplayPort or VGA.You also can charge your external USB devices without the need of any additional charger.Order Code:S26391-F3327-L100Thunderbolt™ 3 Port ReplicatorWith Thunderbolt™ 3 you can connect almost everything with only on cable. Enhance your USB connection options, connect your displays via Thunderbolt™ 3, HDMI or DisplayPort while charging your device.Order Code:S26391-F3357-L100Battery 4 cell 50 WhThe 4 cell 50 Wh battery requires a voltage of 14.4 V and has a capacity of 3490 mAh. The weight of the battery is 300 gms and the recharge time of the cell is 60 minutes for a 80% charge and 150 minutes for a complete 100% charge.Order Code:S26391-F1616-L100Wireless Notebook Mouse WI660The Wireless Notebook Mouse WI660 uses wireless 2.4 GHz technology, and an ultra-high resolution switchable sensor to give you the precision and reliability you need (1000/1600/2000 dpi). Sporting a stylish silver-black finish, the WI660 wireless mouse is well suited to all environments.Order Code:S26381-K471-L100ContactFujitsu Technology Solutions GmbH Website: 2022-02-01 EM-ENworldwide project for reducing burdens on the environment.Using our global know-how, we aim to contribute to the creation of a sustainable environment for future generations through IT.Please find further information at http://www./global/about/environmentdelivery subject to availability. Any liability that the data and illustrations are complete, actual or correct is excluded. Designations may be trademarks and/or copyrights of the respective owner, the use of which by third parties for their own purposes may infringe the rights of such owner.More informationAll rights reserved, including intellectual property rights. Designations may be trademarks and/or copyrights of therespective owner, the use of which by third parties for their own purposes may infringe the rights of such owner. For further information see /emeia/resources/navigation/terms-of-use.html Copyright 2021 Fujitsu Technology Solutions GmbH。
ID115Plus HRFitness TrackerUser ManualThank you for purchasing our products. This manual addresses the safety guidelines, warranty and operating instructions. Please review this manual thoroughly before operating yourSAFETY AND WARRANTY Important Safety InstructionsThe device contains electrical equipment that may cause injury if not used properly. For example, prolonged contact may contribute to skin allergies for some users. To reduce irritation, please read the safety guidelines on the following pages to ensure proper use and care.● Do not expose your device to liquid, moisture, humidity or rain while charging; do not charge your device when it is wet, as it may result in electric shock and injury.● Keep your device clean and dry. Do not use abrasive cleaners to clean your device.● Consult your doctor before use if you have any preexisting conditions that might be affected by using this device.● Don’t wear it too tight. If your device feels hot or warm, or if it causes any skin irritation or discomfort, please discontinue using your device and consult your doctor.● Do not expose your fitness tracker to extremely high or low temperatures.● Do not leave your fitness tracker near open flames such as cooking stoves, candles, or fireplaces.● This product is NOT a toy – never allow children or pet to play with this product. Always store the product out of reach from children. The devices themselves or the many small parts they contain may cause choking if ingested.● Never try to abuse, crush, open, repair or disassemble this device. Doing so will void the warranty and can result in a safety hazard.● If any parts of your product require replacement for any reason, including normal wear and tear or breakage, please contact us.● Do not use your device in a sauna or steam room.● Do not bring your device into contact with any sharp objects, as this could cause scratches and damages.● For light colored arm bands, minimize direct contact with dark-colored clothing, as color transfer could occur.● Dispose of this device, the device’s battery and its package in accordance with local regulations.● Don’t not check any notifications, GPS, or any information on your device’s display while driving or in other situations where distractions could cause injury or hazardous. Always be aware of your surroundings while exercising.A lithium-ion battery is used in this device. If these guidelines are not followed, batteries may experience a shortened life span or may cause fire, chemical burn, electrolyte leak, and/or injury.● Do NOT disassemble, modify, remanufacture, puncture or damage the device or batteries.● Do NOT remove or attempt to remove the non-user-replaceable battery.● Do NOT expose the device or batteries to fire, explosion, or other hazard.● If you have a pacemaker or other internal electronic device, consult your physician before using a heart rate monitor.● The optical wrist heart rate monitor emits green light and flashes occasionally. Consult your physician if you have epilepsy or are sensitive to flashing lights.● Always consult your physician before beginning or modifying any exercise program.● The device, accessories, heart rate monitor, and related data are intended to be used only for recreational purposes and not for medical purposes, and are not intended to diagnose, monitor, treat, cure, or prevent any disease or condition.● The heart rate readings are for reference only, and no responsibility is accepted for the consequences of any erroneous readings.Battery WarningsHealth Warnings● While the optical wrist heart rate monitor technology typically provides the best estimate of a user's heart rate, there are inherent limitations with the technology that may cause some of the heart rate readings to be inaccurate under certain circumstances, including the user's physical characteristics,fit of the device, and type and intensity of activity.● The activity tracker relies on sensors that track your movement and other metrics. The data and information provided by these devices is intended to be a close estimation of your activity and metrics tracked, but may notbe completely accurate, including step, sleep, distance, heart rate, and calorie data.● If you have eczema, allergies or asthma, you may be more likely to experience a skin irritation or allergy from a wearable device.● Whether you have the conditions above or not, if you start to experience any discomfort or skin irritation on your wrist, remove your device. If symptoms persist longer than 2-3 days of not using your device, contact your doctor.● If you sweat for more than two hours while wearing your fitness tracker, be sure to clean and dry your band and your wrist to avoid skin irritation.● Prolonged rubbing and pressure may irritate the skin, so give your wrist a break by removing the band for an hour after extended wear.Maintenance● Regularly clean your wrist and the fitness tracker, especially after sweating in the exercise or being exposed to substances such as soap or detergent which may attach on the internal side of the tracker.● Do NOT wash the fitness tracker with household cleanser. Please use soapless detergent, rinse thoroughly and wipe with a piece of soft towel or napkin.● While the fitness tracker is water resistant, it’s not good for your skin to wear a wet band.We strives to build our products with the highest attention to detail and craftsmanship. However, sometimes there are occurrences of defect.We are happy to offer 1-year hassle-free warranty to all our devices as we continue to make amazing products. Please contact us if you have any questions about our devices.● If your bands get wet—like after sweating or showering—clean and dry them thoroughly before putting them back on your wrist.● Be sure your skin is dry before you put your bands back on.Warranty12USB ChargingPlease charge your new device for at least 10 minutes to have it activated before initial use.In case that device is under low battery, connect the device host to an adapter for charging. Device will automatically boot up once fully charged. Remove the device host from the power supply once fully charged.USB charger requirement: DC USB port (5V-500mA)Charging time: 1-2hr(s)The red indicator is on when the device is properly charged. If not, check the direction of the device's charging plug and move to the correct direction, as shown below.Wear the device on your wrist horizontally, about 2cm to carpal, the same way as wearing a watch.Install: Plug the host into the slots of each strap.Download "VeryFitPro" APP for Android and iOS devices .Option 1: Search for "VeryFitPro" in APP store or Google Play and download to your smartphone.Download the APPSmart Phone System Requirement● iOS 7.1 & above● Android 4.4 & above● Bluetooth 4.0 & aboveNotes:● This fitness tracker requires iOS 7.1 & above or Android 4.4& above system.● "VeryFitPro" APP is only compatible with smartphones. Option 2: Scan the QR code, download and install APP.Use the QR code Scan tool to scan the following QR code, open the link and follow the instructions to download APP. Tip: In case of problems when opening the link, copy the link and open it in a browser.iOS AndroidVeryFitPro1)Enable Bluetooth before binding the device.2)Open "VeryFitPro" APP on your smartphone and tap on "Device"→"Bind device", then your smartphone startssearching devices.3)Select "ID115Plus HR" in the list of found devices, tap on "ID115Plus HR" to connect the device to your smartphone. (If failed searching the device, please tap on the touch key to wake the device (screen lights on), then start searching with your smartphone one more time.)Notes:● After first successful searching and binding, if you enable theBluetooth function of the smartphone afterwards, the device will automatically search and link back to the smartphone it has bound.● If the device is unbound under connected state, the APP will set the settings back to default. All data on the device will be cleared. If the device is unbound under disconnected state.● The APP will set the settings back to default, but the data on the device will not be cleared.● The device can only link to one smartphone at a time. During connecting please confirm there is no other smartphones nearby.When you’re not using ID115Plus HR, the display is off. To wake it up:● Turn your wrist towards you, the screen will display time and steps (Screensaver). Single tap on the touch key to enter Main Screen.● Tap on the touch key, and the device will display the main screen.This is non-touch screen, please12:45205Screensaver Main ScreenSelect the device in the smartphone searching list※1: "Alarm Mode" is displayed on the device screen only when "Alarm Alert" is ON in the APP .※2: "Walk Mode", "Run Mode" and "Bike Mode" are displayed on the device screen by default. You can set up to 3 different sports modes from 14 sports modes to display on the device screen (Go to "VeryFitPro" APP → "Device" → "More"→ "Activity display").1. Main ScreenYou can customize the main screen by tapping on "Device" → "More" → "Dial set" in the APP .Single tap on the touch key to enter the next mode:Step Mode.Run Mode Heart Rate Mode Run Long press to start measure -ment Walk Mode ※2Bike Mode※1WalkLong press to start Long press to startBike2. Step Mode1) Long press the touch key for 2s to view detailed step data.2) Single tap on the touch key to flip through detailed step data.3) Single tap on the touch key to go to the next mode: Heart Rate Mode.Before the resultAfter the data appears89BPM89BPMmeasure -ment3. Heart Rate ModeSingle tap on the touch key to go to the next mode: Alarm Mode.Note:You can go to the APP to set you sports target ("User" →"Target Setting"). When you reach your sport target, the device vibrates and the screen displays:Tap on the touch key to go back to the main screen.4. Alarm Mode1) Long press the touch key for 2s to turn on/off the alarm function.After entering the heart rate interface for 1s, the device will start monitoring the heart rate automatically. Before the correct data is detected, the device shows " " ; after the correct data is detected, it shows specific data.5. Walk Mode1) Long press the touch key for 2s to start the walk mode.During exercise, tap on the touch key to flip through the exerciseBPMSTEPKCALPACEAVG PACETIMEMILESWalkLong press to start● Tap on the alarm, you can add and set the alarm types,repeat type and time. (When alarm(s) is/are added and enabled, please click " √ " to save your settings.)2) Single tap on the touch key to go to the next mode: Walk Mode.Notes:● Alarm Mode is available only when alarm(s) is/are added and enabled (turn on the switch to enable the alarm) in "Alarm alert" in the APP.Go to sleep Medication Get up Exercise MeetingDating6. Run Mode1) Long press the touch key for 2s to start the run mode.Single tap on the touch key to flip through the exercise data.3) Single tap on the touch key to go to the next mode: Run Mode.Note:Data of exercises less than 1 minute will not be saved.2) Long press the touch key for 2s to quit the walk mode. The following data is displayed after the exercise is ended:MIN/KCAL 234204KCALMINSTEP/KM 234STEP34.5KMAVG PACE/BPM90BPM34.5AVG PACERunLong press to startPACEAVG PACETIMEDuring exercise, tap on the touch key to flip through the exercise data.2) Long press the touch key for 2s to quit the run mode.The following data is displayed after the exercise is ended:Single tap on the touch key to flip through the exercise data.3) Single tap on the touch key to go to the next mode: BikeMode.MIN/KCAL 234204KCALMINSTEP/KM 234STEP34.5KMAVG PACE/BPM90BPM34.5AVG PACE7. Bike Mode1) Long press the touch key for 2s to start the bike mode.During exercise, tap on the touch key to flip through the exercise data.2) Long press the touch key for 2s to quit the bike mode.The following data is displayed after the exercise is ended:KM/MIN 234MIN34.5KMBPM90BPMKCAL/AVG PACE 204KCAL34.5AVG PACEBPMMILESKCALPACEAVG PACETIMELong press to startBikeSingle tap on the touch key to flip through the exercise data.No actions! Quit 15s7.1 Abnormal Situations During Exercise1) Inactive Exit Prompta) Device will automatically exit the sport mode if no action is taken in 15 minutes.b) Device will be forced to exit the sport mode if you don't tap on the waiting prompt within 15 seconds.Single tap on the touch key to cancel the Automatic Exit Sport mode prompt, then the sport mode can work as normal.3) Single tap on the touch key to go to the main screen.Note:interface, tap ,After starting the running mode, the APP will track and map your run distance; after the exercise, you can effortlessly check your workout data.7.2 Abnormal Operation Situation During ExerciseSingle tap on the touch key to confirm the prompt if the device is force to exit the sport mode when memory is full, then exit the sport mode and exercise data is displayed.3) The prompt being forced to exit sport mode when battery is lowSingle tap on the touch key to confirm the prompt if the device is force to exit sportmode when battery is low, then exit the sport mode and exercise data is displayed.2) The prompt of being forced to exit the sport mode when memory is fullNotes:● The sport mode lasts for up to 6 hours.● When the memory is full, it will prompt that the sport mode is forced to exit.When the APP and the device are disconnected, the screen will appear a prompt of waiting:Single tap on the touch key to exit the interface of waiting prompt.8. Other Functions1) Call AlertWhen there is an incoming call, the device displays:Stranger number Contact name in FatherLong press025-45Long pressNotes:● Long press the touch key to reject the call; single tap on the touch key to return to the main screen.● Only when "Call Alert" is ON in the APP , calls will benotified. (When turning on/off the Call Alert function, please click "√" to save your settings.)Mr Nop Where a2) SNS AlertWhen SNS messages (including: SMS, Facebook, WhatsApp, Twitter, Instagram,Facebook Messenger, LinkedIn, Email, Mail, and Calendar) come in, the device displays the message content:Notes:● Only when "SNS Alert" (tap on "Device" → "SNS Alert" → "Allow notification") is ON in the APP , SNS messages will be notified. (When turning on/off the Call Alert function, please click "√" to save your settings.)● When "Do not disturb" function is enabled in the APP ("Device" → "More" → "Do not disturb" ), messages will not be notified on the device during the set do-not-disturb period.3) Take PhotosOpen the "VeryFitPro" APP , and tap on "Device"→"Take Photo", then the device screen shows the camera interface. Single tap on the touch key of the device to control the camera of your smart phone to shoot photos.015) Device Error Notification Note:When the device has an exception, the interface is displayed every time when the device is turned on.Status code:-01 indicates acceleration sensor abnormality;-02 indicates the heart rate sensor is abnormal;-03 indicates touch ic is abnormal;-04 indicates the flash is abnormal.4) Sedentary AlertOpen the "VeryFitPro" APP . Tap on "Device" → "Sedentary Alert" to switch on the Sedentary Alert function and set the alert time. The device will vibrate and display the right interface to remind you to move after the set sedentary alert period passed.Model No.: ID115Plus HR Battery Capacity: 65mAh Working Voltage: 3.7V Host weight: about 22.5g Sync: Bluetooth 4.0Working Temperature: -10℃ ~ 45℃Waterproof Rating: IP67Working Time: 5 days (with Automatic HR Monitoring ON), 8 days (with Automatic HR Monitoring OFF).This product meets the EU ROHSstandardsRefer to IEC 62321 and EU RoHSDirective 2011/65 / EU and its revisioninstructionsFailed to find the device when pairing1) Make sure the Bluetooth of your smartphone is ON.2) Make sure the distance between your smartphone and the device is within 0.5 meter.3) Make sure the "VeryFitPro" APP is trusted by your smartphone by going to your smartphone system Settings, finding "VeryFitPro" APP and enabling the Location and all Notifications. (Specific setting methods may vary according to different smartphones.4) Make sure the fitness tracker is under unbind status before pairing.5) Open "VeryFitPro" APP on your smartphone and tap on "Device" → "Bind device", then your smartphone starts searching devices. Select "ID115Plus HR" in the list of found devices, and tap on "ID115Plus HR" to connect the device to your smartphone.6) If you failed search the device, reboot your smartphone and Bluetooth to search it again.Note:For iOS smartphones, if you failed to find "ID115Plus HR" in the APP, take the following steps:a) Go to your smartphone "Settings" → "Bluetooth". Under "MY DEVICES", find "ID115Plus HR", tap on " " → "Forget This Device" and turn off Bluetooth.b) Reboot smartphone and open the "VeryFitPro" APP. When asked whether to turn on the Bluetooth switch, click OK to search and bind your device.Failed to charge the deviceMake sure the direction of the device's USB plug is correct when plugging into the USB port for charging. For correct charging, the device's red indicator turns on and will be off when the device has been fully charged. Please remove the device host from the power supply once fully charged. Prolonged charging may shorten the battery's life.Failed to receive SMS/Calls notificationsCalls/SMS notification function works when the deviceconnects to your smartphone via APP. Please kindly refer to the following tips:1) Go to your smartphone system Settings, find "VeryFitPro"APP and enable the Location and all Notifications.(Specific setting methods may vary according to different smartphones.2) Turn Bluetooth on and go to the "VeryFitPro" APP to bind the device.3) Switch "Call/SNS Alert" function on, and click "√" to save your settings.Failed to count steps accuratelyRegarding the step counting, this fitness tracker has a built-in 3D sensor. It registers your steps when you swing your arm. Sometimes the data on device may displayed a little delayed. And it will reset itself if you walk continuously less than 40 steps. To test the accuracy of the pedometer, please walk casually and continuously up to 100 steps or more.Failed to measure heart rateMake sure the wrist band sit neatly on your wrist before use. Tap on the touch key to go to the heart rate mode and wait for 10~20s to detect the heart rate.Failed to connect to the smartphoneThe device will disconnect from your smartphone in the following cases:1) Smartphone Bluetooth was off or exceed normal Bluetooth connection distance range (The normal Bluetooth connection distance is within 10 meters, it can easily be reduced by walls or furniture, etc.2) The "VeryFitPro" APP was ended in phone background process.To reconnect the device to your smartphone, please kindly refer to the following tips:1) Go to your smartphone system Settings, find "VeryFitPro" APP and enable the Location and all Notifications. (Specific setting methods may vary according to different smartphones.2) Clear all running/background processes in your smartphone, go to "VeryFitPro" APP, and swipe down Mainpage, then the device will reconnect to your smartphone and refresh data. You can also restart you smartphone and Bluetooth, then rebind the device on APP.Failed to sync your tracker data to APPTo sync your tracker data to "VeryFitPro" APP, go to "VeryFitPro" APP and swipe down Mainpage under connection state.。