
阻尼杆规格说明
- 格式:doc
- 大小:24.00 KB
- 文档页数:1
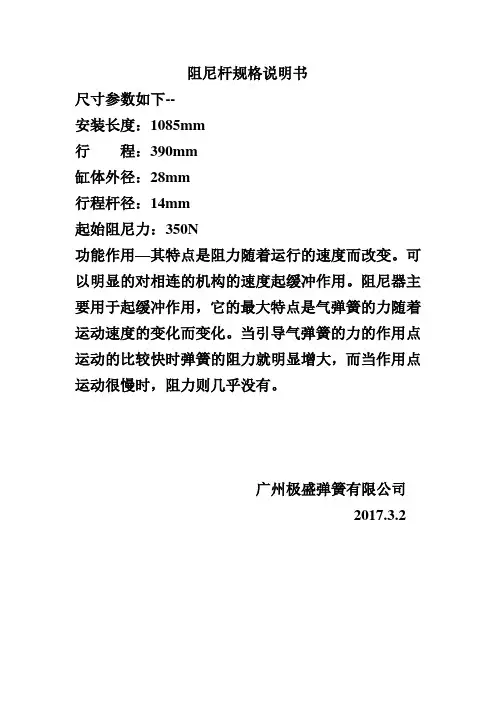

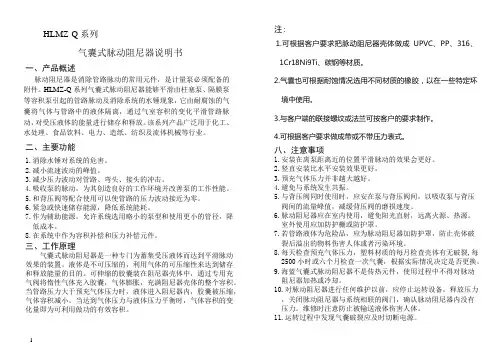
HLMZ-Q系列气囊式脉动阻尼器说明书一、产品概述脉动阻尼器是消除管路脉动的常用元件,是计量泵必须配备的附件。
HLMZ-Q系列气囊式脉动阻尼器能够平滑由柱塞泵、隔膜泵等容积泵引起的管路脉动及消除系统的水锤现象,它由耐腐蚀的气囊将气体与管路中的液体隔离,通过气室容积的变化平滑管路脉动,对受压液体的能量进行储存和释放。
该系列产品广泛用于化工、水处理、食品饮料、电力、造纸、纺织及流体机械等行业。
二、主要功能1.消除水锤对系统的危害。
2.减小流速波动的峰值。
3.减少压力波动对管路、弯头、接头的冲击。
4.吸收泵的脉动,为其创造良好的工作环境并改善泵的工作性能。
5.和背压阀等配合使用可以使管路的压力波动接近为零。
6.紧急或快速储存能源,降低系统能耗。
7.作为辅助能源,允许系统选用略小的泵型和使用更小的管径,降低成本。
8.在系统中作为容积补偿和压力补偿元件。
三、工作原理气囊式脉动阻尼器是一种专门为蓄集受压液体而达到平滑脉动效果的装置。
液体是不可压缩的,利用气体的可压缩性来达到储存和释放能量的目的。
可伸缩的胶囊装在阻尼器壳体中,通过专用充气阀将惰性气体充入胶囊,气体膨胀,充满阻尼器壳体的整个容积。
当管路压力大于预充气体压力时,液体进入阻尼器内,胶囊被压缩,气体容积减小。
当达到气体压力与液体压力平衡时,气体容积的变化量即为可利用做功的有效容积。
注:1.可根据客户要求把脉动阻尼器壳体做成UPVC、PP、316、1Cr18Ni9Ti、碳钢等材质。
2.气囊也可根据耐蚀情况选用不同材质的橡胶,以在一些特定环境中使用。
3.与客户端的联接螺纹或法兰可按客户的要求制作。
4.可根据客户要求做成带或不带压力表式。
八、注意事项1.安装在离泵距离近的位置平滑脉动的效果会更好。
2.竖直安装比水平安装效果更好。
3.预充气体压力并非越大越好。
4.避免与系统发生共振。
5.与背压阀同时使用时,应安在泵与背压阀间,以吸收泵与背压阀间的流量峰值,减缓背压阀的磨损速度。

GENERAL INFORMATIONThis manual provides information on installation, maintenance and field repair for ENIDINE GmbH HD Shock Absorbers.In order to select the hydraulic buffer that best suits your operation, it is important to follow the certified safety standards specified; the selection guidelines provided by ENIDINE and specifics of your particular application. For the bladder type (standard) version, the environment temperature on shock absorber outer cylinder must not exceed 60°C, the temperature of the cylinder must not exceed 70°C during operation. In seldom cases a delay in the return of the piston rod can occur at units resting in a compressed position for long time (Longtime Parking Position). In such cases we recommend to push the rod in the compressed position a few millimetres insuring a proper return.Shock Absorbers for emergency application: In this conditions it is assumed that the shock absorber is not stroked during normal operations. For safety reasons the shock absorber should be checked for functionality (see section “Maintance instruction”) at least every 12 monthsShock absorber used for normal operation:These units should be checked visually (piston rod surface; leakage) and functional (see section “Maintance instruction” ) every 6 month.Based on the cycle rate, in general after 250.000 cycles, a replacement of wearing parts could be required. In general the replacement or an overhaul of the shock absorber is recommended after at least 8 years.ENIDINE makes no express or implied warranties of any kind as to the material contained in the guide. There is specifically no implied warranty of merchantability or fitness for any particular purpose.ENIDINE shall not be responsible for damages (direct, indirect or consequential) and assumes no liability should the guide produce results other than those intended or for the failure of any ENIDINE products due to the misapplication caused by the use of the guide.A properly sized and installed Shock Absorber will perform as expected. If there is anything unique about your application, contact ENIDINE for assistance.We know of no other large-bore shock absorber that can withstand the harsh environments and life-cycling as the ENIDINE design.MAINTENANCE INSTRUCTIONSIt is recommended that preventive maintenance program be established to obtain the maximum life from the shock absorber.A routine inspection should be performed every 6-12 months and this inspection should include the following:1 Stroke in the piston rod completely to check the shock absorber (see “FillingPos.14). Then release the piston rod, it should return to its fully extendedposition. Should the piston rod not return to the fully extended position, thencheck the air pressure in the bladder. Information regarding bladder pressure and oil volume is indicated on the label at the shock absorber as illustrated below.The needed air port adapter is located in the front side of the bearing covered with a plastic cap.2 A visual inspection of the piston rod sealing concerning leakage should beperformed.3 Please contact ENIDINE or your closest ENIDINE representative in case thepiston rod does not return completely in spite of the checks done as per item 1, or if a leakage occurred.The standard shock absorber bladder is pressurised with 3.5 bar air with the piston rod fully extended. The maximum recommended air pressure (with rod extended) is 5.0 bar. The increase to 5.0 bar, under standard conditions, increases the rod return force.Information regarding bladder pressure and oil volume is indicated on the I.D. label at the shock absorber as illustrated:500 cSt Silicon Oil02 :1000 cSt Silicon Oil03 : 100 cSt Silicon OilFIELD REPAIR-INSRUCTIONS HD 2.0DISASSEMBLY1 (Valid for HDA Version only)Insure that the adjustment screw is totally open during the filling respectively depressurisation of the unit.2 (Valid for Bladder Version only)Remove protective cap (36) to access charging valve.CAUTION:DEPRESSURIZE THE SHOCKABSORBER COMPLETELY BEFORE YOU START DISASSEMBLY.3 (Valid for Bellow Version only)Remove the bellow by loosen hose band on the piston cap and on the bearing.4 (Valid for Spring Version only)4.1 Press the spring down towards the bearing and remove cap screw (25) andpiston cap (14).CAUTION:TAKE CARE THAT THE ROD WILL NOT BE DAMAGED BY CLAMPINGWITH A VICE OR A WRENCH.4.2 Uncompress the spring slowly and remove the spring.CAUTION:A RAPIDLY UNLOADED SPRING CAN OCCURE BADLY INJURED.5 Pull the rod (13) out to its max. extended position. Remove fillplug (28) resp.sensor housing (70) [at HD with sensor] and drain oil from the damper into a collecting tank.6 Remove cap screw (25) and remove piston cap (14).CAUTION:TAKE CARE THAT THE ROD WILL NOT BE DAMAGED BY CLAMPING WITHA VICE OR A WRENCH.7 Loosen the 2 flange locating screws (40) at the flange (6) and the flange SHSscrew (39).8 Unscrew (counterclockwise) and remove lockring (5) .9 Turn bearing (2) counterclockwise to detach from innertube (3) and pull bearing(2), together with the piston rod/ piston head assembly (13, 8) out ofshockabsorber.10 Slide bearing assembly (2) off of the piston rod/ piston head assembly (13,8).11 Remove the outer cylinder (4) from cylinder base (1).12 Remove the rod seal (20) and the rod wiper (21) out of the bearing (2) preventingnicking and scratching to the seal grooves.13 To remove the bladder accumulator (15) from the outer cylinder (4) remove jamnut (15/2) at the valve unit without turning the bladder. Press the valve stemthrough the port plug (10) to the inner side.CAUTION:TEST THE BLADDER ACCUMULATOR FOR AIRTIGHTNESS (TESTPRESSURE SHOULD NOT BE GREATER THAN 0,1 BAR) BEFORE YOU USE IT FOR ASSEMBLY.14 Drain remaining oil from the cylinder and clean all parts thoroughly. Inspectcomponents for any unusual or excessive wear and replace as required.FIELD REPAIR-INSTRUCTIONS HD 2.0ASSEMBLY1 Make sure that all parts have been thoroughly cleaned and replace all seals andworn or damaged parts.2 In the case that the charge port plug (10) was removed at disassembly, applyLoctite #270 to the thread and install into cylindertube (4) together with thecopperwasher (38). Torque to 50 Nm.3 If a new accumulator bladder is used, remove the valve cap (15/1), the hex nut(15/2) from the valve body. Place the O-Ring (27) over the valve body and push down against the remaining hex nut (15/3). Apply silicon sealant to the O-Ring.4 Roll up the bladder (15) and install into cylinder tube (4). Push valve housingthrough charge port plug (10). Make sure that the bladder is placed against the cylinder wall. While keeping the bladder and valve housing from turning ortwisting, install and tighten the hex nut (15/2).5 If the piston (7) needs to be replaced, remove retaining ring (23) and mount thenew piston (7) with new piston ring (24) on the piston head (8). Use a newretaining ring (23).6 If the piston head (8) was disassembled from the piston rod (13) , then attach thepiston head to the piston rod and secure with SHC screw (12), Loctite #270 anda torque level of 50 Nm.7 In case the shock tube (3) was detached from the cylinder base (1), apply Loctite#270 to the thread. Securely tighten the parts.8 Place the cylinder base assembly upright and place it (if available) into a floorbase assy which protects the cylinder base from turning or twisting. Depending on the mounting style add the spacer (42) or mounting flange (6) to the cylinder base (1).9 After applying a coating of Vaseline on the O-Ring (16) install it into the cylinderbase.10 Orient cylinder/bladder assembly to the shock tube and carefully put thisassembly over the shock tube.11 Make an identifying mark on the outer cylinder (4) and cylinder base (1) to detectany radial motion between these parts during final assembly.12 Insert the piston rod/-head assembly (13,8,...) into the shock tube.13 Fill the assembly with the required volume and type of oil. Consult identificationlabel or ENIDINE GmbH for the correct oil specification.14 Slide bearing assembly (2) onto the piston rod (13). Push toward the shock tube(3), screw it into the shock tube and tighten firmly.15 Depending on the mounting style place the flange (6) or the spacer (42) over thebearing assembly (2).16 Install the lock ring (5) on the bearing (2).17 If a flange (6) is installed, orient this with the pilot holes to the cylinder holes.Install set screws (39,40) using silicon sealant. Then only snug the set screws (at this point the lock ring is not tightened).18 Firmly tighten the lock ring (5) and the set screws (39,40).19 Finally install the piston cap (14) with the SHC screw (25) to the piston rod. UseLoctite #270 and torque level of 50 Nm.HD Charge Port Arrangement…Long Port Plug“ Version…Short Port Plug“ VersionFIELD REPAIR-INSTRUCTIONS HD 2.0FILLINGNOTE: If the I.D. label (32) shows no special oil No. next to the oilvolume, the shock absorber is filled at ENIDINE with a hydraulic fluid named ARAL AWS 46.1 Place the depressurised shock absorber (resp. return spring not mounted) withthe compressed piston rod (13) and fill plug (28) resp. sensor housing (70) [at HD with sensor] up in horizontal position. Place the fill plug (28) resp. sensor housing(70) [at HD with sensor] 20-30 mm higher than the shock absorber end.2 Remove the fill plug (28) resp. sensor housing (70) [at HD with sensor] and installa filling reservoir (plastic funnel) into the fill port.CAUTION:VOLUME OF THE FILLING RESERVOIR SHOULD BE TWICE THE VOLUME OF THE PISTON ROD.3 (Valid for Bladder Version only)Remove the protective caps (36, 15/1) on the port plug (10) and the valve body.Apply 0,3 bar pressure on the bladder (15).4 Fill the plastic funnel with the recommended oil and cover it.5 Extend steadily and slowly the piston rod (13) until the oil level in the funneldrops something over the fill port.6 Repeat point 4. and 5. until the piston rod (13) is fully extended.7 Reduce the oil volume in the funnel so far that the piston rod volume will be lessthan the rest volume of the funnel.8 Compress the piston rod steadily and slowly.9 Pull the rod steadily and slowly into its max. extended position.10 Repeat point 8. and 9. until you can not find any air bubbles in the oil.11 If the damper is without air, remove the filling reservoir at the max. extendedpiston rod and install the fill plug (28) with the metallic sealing ring (41) andtorque level of 50 Nm.12 (Valid for Bladder Version …long port plug“ only)12.1 Increase the bladder pressure to 3.5 bar or to the pressure given onthe I.D. label (32).12.2 Install the protective caps (15/1, 36) of the valve body and the port plug(10).13 (Valid for Bladder Version …short port plug“ only)13.1 Remove the protective cap (91) in the bearing (2) for getting access tothe filling adapter (90)13.2 Screw the filling adapter (90) into the port plug (10)13.3 Increase the bladder pressure to 3.5 bar or to the pressure given onthe I.D. label (32).13.4 Unscrew the filling adapter (90) and store it in the bearing (2)13.5 Install the protective caps (91, 36) of the bearing and the portplug (10).14 Test the assembled shock absorber by compressing the piston rod. In a properlyassembled and filled unit, the piston rod will return by itself to the max. extended position.FIELD REPAIR-INSTRUCTIONSSENSOR EXCHANGE1 Loosen safety screw (75) with inner hex key (S = 1,5 mm).2 Remove the lock nut (71) by turning counterclockwise with a screw driver .3 Remove the sensor (73) out of the sensor housing (70).CAUTION:THE SENSOR HOUSING (70) IS USED AS FILL PLUG; IT MUST NOT BE REMOVED OR LOOSEN.4 Insert a new sensor (73) into the sensor housing (70) until the sensor isbottoming in the housing.5 Press the cable of the sensor through the slot of the lock nut (71). Remount thelock nut by using a screw driver (tightened with max. 2Nm)6 Secure the lock nut (71) with set screw (75).75737170Enidine GmbH- 11 -Postfach 102,79411 Bad Bellingen Rheinauenstr. 5. 79415 Bad BellingenTel: 07635/8101-0 Fax: 07635/8101-99ENIDINE MANUAL HD 30310 UM 05.05.2000SPAREPARTSAMOUNTSPAREPARTITEMPART-NUMBER1111111111CYLINDER BASE 1X – 11111111111BEARING ASSEMBLY 2X – 1B 1111111111SHOCK TUBE ASSEMBLY3X – 2S 1111111111CYLINDER 4X – 41111111111LOCK RING5X – 51122211222MOUNTING FLANGE 6X – 6------21------21FOOT MOUNT ASSEMBLY9,43,44X – 2F 1111111111PORT PLUG 10X – 101111111111PISTON ROD 13X – 131111111111PISTON CAP 14X – 141111111111BLADDER15X – 151111111111SOCKET HEAD CAP SCREW25X – 2511111----------FILL PLUG KIT28,41X – 7F ----------11111FILL PLUG KIT SENSOR41,70,71,75X – 7F 1111111111LABEL KIT29,30,31,32X – 1LX X X X X X X X X X HYDRAULIK FLUID33X – 331111111111CAPLUG36X – 361122211222SOCKET HEAD SET SCREW 39X – 392244422444SOCKET HEAD SET SCREW40X – 4011------11------SPACER 42X – 42----------11111SENSOR73X – 731111111111FILLING ADAPTOR90X – 901111111111CAPLUG 91X – 911111111111O-RING 92X – 921111111111SEAL KIT16,20,21,27,,38,41,92X – SK11111----------PISTON HEAD ASSEMBLY 7,8,12,23,24X – 3P ----------11111PISTON HEAD ASSY SENSOR7,8,12,23,24,72,74X – 3PH D 2.0 F FH D 2.0 F R H D 2.0 T F H D 2.0 F M H D 2.0 T M H D 2.0 F F S e n s o r H D 2.0 F R S e n s o r H D 2.0 T F S e n s o r H D 2.0 F M S e n s o r H D 2.0 T M S e n s o rHD 2.0 SERIESX: to be replaced by partnumber of damperHD 2.0 TMC。

一、使用时的注意事项1.1、确认收货时1.1.1、在您拿到本产品时,请确认运输途中有没有磕碰划伤等。
1.1.2、根据产品铭牌的标注,请确认与您要买的型号是否相符。
1.2、运输与储存时1.2.1、尽可能的利用本公司的包装,将流量计直接运送到安装现场。
1.2.2、运送过程中不要强烈碰撞、也不要让雨水淋湿。
1.2.3、保管时尽量利用本公司的原包装进行保管,保管的地方应符合下列条件要求:1不会有淋雨水的地方2振动或碰撞尽量少的地方3温度:-40℃—+55℃4湿度:5%—90%1.2.4、使用过的流量计保管时,要将内部的残留液体及粘附物完全清洗干净,另外注意在电源接口处要密封,以防潮湿。
1.3、安装时1.3.1、使用时要在流量计规定的条件下使用,超出这个规定使用是不可行的,如果因此而造成流量计损坏,维修的费用会由您自己承担。
1.3.2、流量计出现问题以后,尽可能的与我们或维修商联系,以便尽快的把问题解决。
1.3.3、安装之前必须认真阅读说明书,由于没有按照说明书操作造成的流量计损坏,维修费用自己承担。
二、产品用途及工作原理2.1、用途LUGB涡街流量计广泛用于石油、化工、电力、轻工等部门工业管道中测量液体或气体的流量。
由于传感器材料为1Cr18Ni9Ti,也可用于城市供水、供热、锅炉供水、医疗行业流体管道的流量测量。
防爆型涡街流量传感器,采用的是本安防爆技术。
电池供电的涡街流量计其防爆标志为“Ex iaⅡBT4”,适合不高于Ⅱ类B级的0区、1区、2区含有T1~T4组的危险场所使用;靠安全栅供电的涡街流量计其防爆标志为“ExiaⅡBT5”,适于Ⅱ类B级的0区、1区、2区含有T1~T5组的危险场所使用。
2.2、工作原理图一:卡门涡街工作原理图LUGB涡街流量计是利用卡门涡街原理,用来测量蒸汽、气体及低粘度的液体的流量仪表。
当流体流过与被测介质流向垂直放置的旋涡发生体时,在其后方两侧交替地产生两列旋涡,称之为卡门涡街,如上图1所示。