Revit日光分析插件的中文说明
- 格式:doc
- 大小:463.50 KB
- 文档页数:7
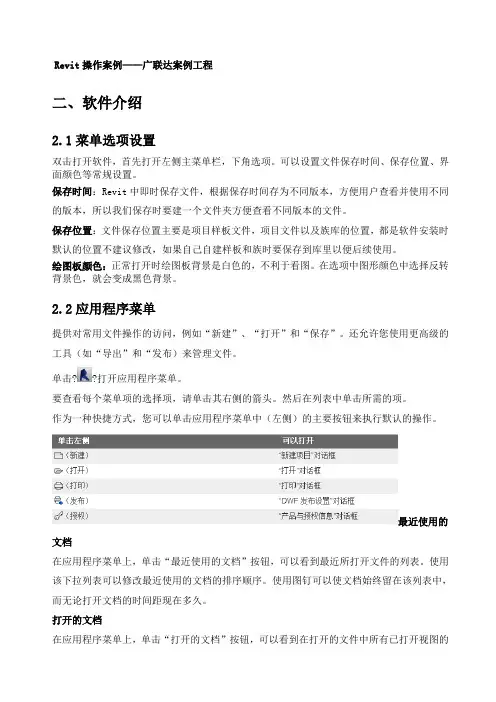
Revit操作案例——广联达案例工程二、软件介绍2.1菜单选项设置双击打开软件,首先打开左侧主菜单栏,下角选项。
可以设置文件保存时间、保存位置、界面颜色等常规设置。
保存时间:Revit中即时保存文件,根据保存时间存为不同版本,方便用户查看并使用不同的版本,所以我们保存时要建一个文件夹方便查看不同版本的文件。
保存位置:文件保存位置主要是项目样板文件,项目文件以及族库的位置,都是软件安装时默认的位置不建议修改,如果自己自建样板和族时要保存到库里以便后续使用。
绘图板颜色:正常打开时绘图板背景是白色的,不利于看图。
在选项中图形颜色中选择反转背景色,就会变成黑色背景。
2.2应用程序菜单提供对常用文件操作的访问,例如“新建”、“打开”和“保存”。
还允许您使用更高级的工具(如“导出”和“发布)来管理文件。
单击??打开应用程序菜单。
要查看每个菜单项的选择项,请单击其右侧的箭头。
然后在列表中单击所需的项。
作为一种快捷方式,您可以单击应用程序菜单中(左侧)的主要按钮来执行默认的操作。
最近使用的文档在应用程序菜单上,单击“最近使用的文档”按钮,可以看到最近所打开文件的列表。
使用该下拉列表可以修改最近使用的文档的排序顺序。
使用图钉可以使文档始终留在该列表中,而无论打开文档的时间距现在多久。
打开的文档在应用程序菜单上,单击“打开的文档”按钮,可以看到在打开的文件中所有已打开视图的列表。
从列表中选择一个视图,以在绘图区域中显示。
快速访问工具栏快速访问工具栏包含一组默认工具。
您可以对该工具栏进行自定义,使其显示您最常用的工具。
主要包括打开、保存、撤销、注释、字体、三维、剖面,切换视图等常用命令。
2.3软件操作1.新建项目新建项目有三种方式。
第一种,打开软件初始界面有直接的新建项目。
第二种打开应用程序菜单栏,选择新建项目。
第三种就是直接在软件操作界面打开项目样板文件,直接建立项目。
2.样板文件的选择:通常revit设计时建筑和结构是分开的,所以建筑师和结构师分别采用不同的样板文件。
日照分析创建日照分析在 Revit Building 中,我们可以创建静态的日照分析,即创建特定日期和时间阴影的静止图像;也可以创建动态的日照分析,即创建为动画,显示在自定义的一天或多天时间段内阴影移动的一系列帧。
下面我们先讲述创建日照分析的标准流程,然后再逐一讲解静态和动态日照分析的设置方法。
复制并打开本书光盘“第6章”中的“日照分析_静态.rvt”,打开三维视图{3D}。
可根据需要调整视图方向角度,以增强日照分析效果。
也可用下拉菜单“视图”-“隐藏线”命令调整视图为消隐线黑白视图,以增强对比效果。
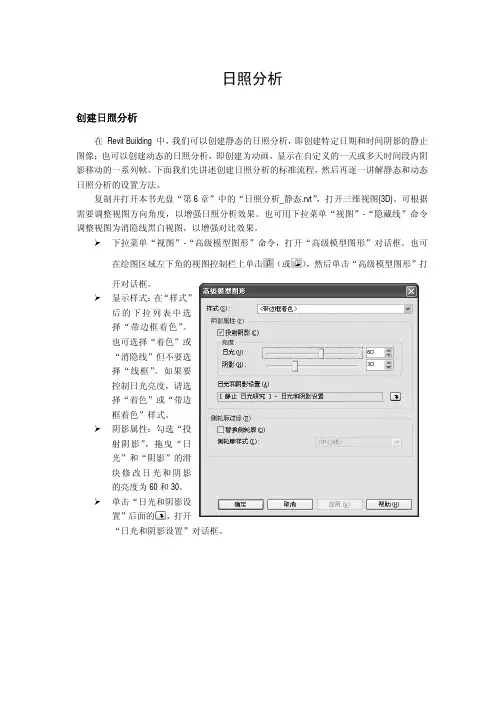
¾下拉菜单“视图”-“高级模型图形”命令,打开“高级模型图形”对话框。
也可在绘图区域左下角的视图控制栏上单击(或),然后单击“高级模型图形”打开对话框。
¾显示样式:在“样式”后的下拉列表中选择“带边框着色”。
也可选择“着色”或“消隐线”但不要选择“线框”。
如果要控制日光亮度,请选择“着色”或“带边框着色”样式。
¾阴影属性:勾选“投射阴影”,拖曳“日光”和“阴影”的滑块修改日光和阴影的亮度为60和30。
¾单击“日光和阴影设置”后面的,打开“日光和阴影设置”对话框。
¾在对话框中,单击“静止”、“一天”或“多天”选项卡以创建需要的日照分析类型:z静止:创建显示特定位置和时间的阴影样式的静止图象。
例如,可以查看项目地点为“北京,中国”、日期为“2006年5月24日”、时间为“9:43”的阴影样式。
z一天:生成一个动画,该动画可显示在特定一天的自定义时间范围内项目位置处阴影的移动过程。
例如,您可以追踪6月22日7:00到19:00的阴影。
z多天:生成一个动画,该动画可显示在自定义天数范围内的某个特定时间时项目位置处阴影的效果。
例如,可以查看从2006年6月20日到6月25日期间每天14:00的阴影样式。
¾单击“复制”以复制现有设置,在“名称”对话框中输入一个名称,单击“确定”,设置相关参数(具体设置请接着做下面的练习)。

Revit导出插件使用说明及注意事项一、使用条件:1.系统安装有 Revit 软件;2.需要超图组件许可;3.在 Revit 中的三维视图下导出数据。
二、使用方法:1.根据安装的 Revit 版本,将对应版本的插件库文件 RevitPlugin.dll 及配置程序 WriteAddin.exe 拷贝覆盖至组件包(Bin_x64)目录下,并运行该配置程序。
2.将组件包(Bin_x64)文件夹设置为系统环境变量,并确保其在path路径的最前端。
3.启动方式:打开Revit软件,在主菜单-附加模块中,点击UDB图标,弹出导出窗口。
4.导出网络数据集:如果Revit中存在管线、风管、电缆架桥等,勾选后可以导出相应的三维点、线数据集,由三维点、线构成三维网络数据集。
三、常见问题及解决方法:3.1 插件安装导致的错误3.1.1 导出模块未能引用到正确的RevitPlugin.dll 文件首次使用时,Revit会弹出一个提示框,里面显示了当前使用的 RevitPlugin.dll文件的位置,可据此进行判断引用的dll文件是否正确。
如果没能引用到正确的RevitPlugin.dll文件,需手动设置其位置:C:\Users\Administrator\AppData\Roaming\Autodesk\Revit\Addins\2017 文件夹下(如果是2018版本的Revit,则进入2018文件夹),通过记事本打开SuperMapExporter.addin文件,将RevitPlugin.dll文件的地址填入之间。
3.1.2 系统环境变量设置有误运行插件时,需要将组件包(Bin_x64)文件设置为系统环境变量,并确保其在path路径的最前端。
且组件包(Bin_x64)文件夹不能重命名。
不建议放到系统盘。
如果设置正确,仍提示错误,需重启电脑。
3.2 模型的绝对位置发生偏移Revit中存在项目基点,导出后在SuperMap iDesktop中查询得到的坐标=模型在Revit 中的坐标+项目基点坐标+导出界面插入点坐标。

建筑英文及revit操作界面中英对照目录:Cover封面Content目录Design Explanation设计说明Master Plan总平面Space Sequence Analysis景观空间分析Function Analysis功能分析Landscape Theme Analysis景观景点主题分析图Traffic Analysis交通分析Vertical Plan竖向平面布置图Lighting Furniture Layout灯光平面布置示意图Marker/Background Music/Garbage Bin标识牌/背景音乐/垃圾桶布置图Plan平面图Hand Drawing手绘效果图Section剖面图Detail详图Central Axis中心公共主轴Reference Picture参考图片Planting Reference Picture植物选样材料类:aluminum铝asphalt沥青alpine rock轻质岗石boasted ashlars粗凿ceramic陶瓷、陶瓷制品cobble小圆石、小鹅卵石clay粘土crushed gravel碎砾石crushed stone concrete碎石混凝土crushed stone碎石cement石灰enamel陶瓷、瓷釉frosted glass磨砂玻璃grit stone/sand stone砂岩glazed colored glass/colored glazed glass彩釉玻璃granite花岗石、花岗岩gravel卵石galleting碎石片ground pavement material墙面地砖材料light-gauge steel section/hollow steel section薄壁型钢light slates轻质板岩lime earth灰土masonry砝石结构membrane张拉膜、膜结构membrane waterproofing薄膜防水mosaic马赛克quarry stone masonry/quarrystone bond粗石体plaster灰浆polished plate glass/polished plate磨光平板玻璃panel面板、嵌板rusticated ashlars粗琢方石rough rubble粗毛石reinforcement钢筋设计阶段:existing condition analysis现状分析analyses of existings城市现状分析construction site service施工现场服务conceptual design概念设计circulation analysis交通体系分析construction drawing施工图complete level完成面标高details细部设计、细部大样示意图diagram示意图、表elevation上升、高地、海拔、正面图development design扩初设计façade/elevation正面、立面general development analysis城市总体发展分析general situation survey概况general layout plan/master plan总平面general nature environment总体自然分析grid and landmark analysis城市网格系统及地标性建筑物分析general urban and landscape concept总体城市及景观设计概念general level design总平面竖向设计general section总体剖面图layout plan布置图legend图例lighting plan灯光布置图plan drawing平面图plot plan基地图presentation drawing示意图perspective/render效果图pavement plan铺装示意图reference pictures/imaged picture参考图片reference level参考标高图片site overall arrangement场地布局space sequence relation空间序列specification指定、指明、详细说明书scheme design方案设计sketch手绘草图sectorization功能分区section剖面site planning场地设计reference picture of planting植物配置意向图reference picture of street furniture街道家具布置意向图设计描述:a thick green area密集绿化administration/administrative行政administration zone行政区位function analysis功能分析arc/camber弧形askew歪的、斜的aesthetics美学height高度abstract art抽象派artist艺术家、大师art nouveau新艺术主义acre英亩architect建筑师be integrated with与……结合起来bisect切成两份、对开bend弯曲boundary/border边界operfloor架空层budget预算estimate评估beach海滩building code建筑规范----------------------------------Mass 体量Extrusion拉伸Blend融合Revolve旋转Sweep放样Swept Blend放样融合Void Forms 空心形状image 图集link 链接beam 梁brace 支撑foundation 基础legend 图例tag 标记set 设置show 显示ref plane 参照平面build 构建circulation 楼梯坡道datum 基准structure 结构work plane 工作平面in-place mass 内建体量show mass 显示体量place mass 放置体量model by face 面模型conceptural mass 概念体量model site 场地建模toposurface 地形表面site component 场地构件parking component 停车场构件building pad 建筑地坪split surface 拆分表面merge surfaces 合并表面subregion 子面域property line 建筑红线graded region 平整区域label contours 标记等高线graphics 图形view properties 视图属性view templates 视图样板visibility/graphics 可见性/图形filters 过滤器thin lines 细线3d view 3d视图section 剖面callout 详细索引drafting view 绘图视图elevation 立面plan views 平面视图duplicate view 复制视图schedules 明细表scope box 范围框new sheet 新建图纸title block 标题栏matchline 拼接线activate 激活deactivate 取消激活switch windows 切换窗口close hidden 关闭隐藏对象replicate 复制cascade 层叠tile 平铺user interface 用户界面show composition 图纸组合design options 设计选项pick to edit 拾取以进行编辑main model 主模型manage project 管理项目manage links 管理链接phases 阶段materials 材质project parameters 项目参数project infomation 项目信息project units 项目单位shared parameters 共享参数transfer project standards 传递项目标准purge unused 清除未使用项project location 项目位置location 位置coordinates 坐标position 位置macro manager 宏管理器macro security 宏安全性worksets 工作集active workset 活动工作集gray inactive worksets 以灰色显示非活动工作集synchronize with central 与中心文件同步reload latest 重新载入最新工作集relinquish all mine 放弃全部请求restore backup 恢复备份copy/monitor 复制、监视coordination review 协调查询interference check 碰撞检查corrdinate 坐标。


R e v i t操作案例——广联达案例工程二、软件介绍2.1菜单选项设置双击打开软件,首先打开左侧主菜单栏,下角选项。
可以设置文件保存时间、保存位置、界面颜色等常规设置。
保存时间:Revit中即时保存文件,根据保存时间存为不同版本,方便用户查看并使用不同的版本,所以我们保存时要建一个文件夹方便查看不同版本的文件。
保存位置:文件保存位置主要是项目样板文件,项目文件以及族库的位置,都是软件安装时默认的位置不建议修改,如果自己自建样板和族时要保存到库里以便后续使用。
绘图板颜色:正常打开时绘图板背景是白色的,不利于看图。
在选项中图形颜色中选择反转背景色,就会变成黑色背景。
2.2应用程序菜单提供对常用文件操作的访问,例如“新建”、“打开”和“保存”。
还允许您使用更高级的工具(如“导出”和“发布)来管理文件。
单击??打开应用程序菜单。
要查看每个菜单项的选择项,请单击其右侧的箭头。
然后在列表中单击所需的项。
作为一种快捷方式,您可以单击应用程序菜单中(左侧)的主要按钮来执行默认的操作。
最近使用的文档在应用程序菜单上,单击“最近使用的文档”按钮,可以看到最近所打开文件的列表。
使用该下拉列表可以修改最近使用的文档的排序顺序。
使用图钉可以使文档始终留在该列表中,而无论打开文档的时间距现在多久。
打开的文档在应用程序菜单上,单击“打开的文档”按钮,可以看到在打开的文件中所有已打开视图的列表。
从列表中选择一个视图,以在绘图区域中显示。
快速访问工具栏快速访问工具栏包含一组默认工具。
您可以对该工具栏进行自定义,使其显示您最常用的工具。
主要包括打开、保存、撤销、注释、字体、三维、剖面,切换视图等常用命令。
2.3软件操作1.新建项目新建项目有三种方式。
第一种,打开软件初始界面有直接的新建项目。
第二种打开应用程序菜单栏,选择新建项目。
第三种就是直接在软件操作界面打开项目样板文件,直接建立项目。
2.样板文件的选择:通常revit设计时建筑和结构是分开的,所以建筑师和结构师分别采用不同的样板文件。
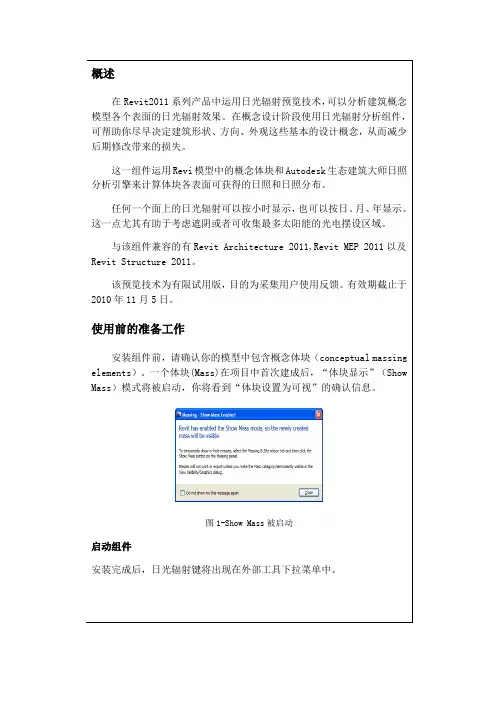
图1-Show Mass被启动
图3-日光辐射对话框
日光辐射窗口由含有两个标签的对话框构成:“设置”,用于设置在进行分析时的具体细节。
“输出”,用于确定最后的效果图,
日光辐射分析设置的具体细节
项目方位面板(
你可以通过网络地图服务(Internet Mapping Service
市列表中选择所需的地理位置。
使用网络地图服务时,项目地址(Project Address
名称或者更为精确的经纬度。
设定好地理位置后,应用程序将自动载入该地区天气数据。
如果没有网络连接,你将看到一个错误提示,
)设置面板
日光设定。
5 日光辐射对话框中的输入标签。


In it for the Long HaulTips for Serious Autodesk® Revit® Add-In Developers Joel SpahnSenior Software Developer, Lighting Analysts, Inc.Your Story Raise Your Hand Point this way if… Currently building or improving a new or existing Revit add-in Will be continuously improving a Revit add-in Thinking about it and know it will take stamina and commitmentYour Revit add-ins are basically inmaintenance modeProbably won’t ever build anotherRevit add-inFriend or colleague forced you tocome to this classPoint this way if…Learning Objectives▪Elegantly handle database transactions when implementing commands,updaters, and the like.▪Employ techniques to persist, validate, and upgrade data while staying out of the way when the add-in is unnecessary or unavailable.▪Understand the potential complications which can arise when handling even a single element.▪Apply good software development principles (e.g. Don’t Repeat Yourself) by wrapping and extending existing API functionality.Agenda▪Command Strategy▪Database Transactions ▪Data Storage▪Handling Elements▪Worksharing▪QuestionsCommand StrategyCommand Strategy▪Reuse Code –Don’t Repeat Yourself▪Know Your Place▪Stay Out of the Way▪Be Professional – Handle Your Own Business ▪Database Transaction Power & FlexibilityCodeCode samples are available on the AU website.Document Initialization & ValidationValidation Tasks▪Check if the document utilizes your add-in (store add-in version)▪Initialize, validate, upgrade the document▪Manage Shared Parameters▪Register document updaters▪EtcPerform initial validation when the user runs a command▪Not every document wants your add-in!Perform subsequent validation in the Document Opened event ▪Only if the document already utilizes your add-in!Base CommandBy Command AvailabilityBy KindImplementations Abstract Concrete AbstractAbstractExample Command Inheritance HierarchyCommand Strategy – Base Command ▪Set up exception handling▪Initialize command data▪Wrap the command in a Transaction Group▪Perform pre-command operations▪Execute the command▪Perform post-command operationsProject DocumentFamilyDocumentNoDocumentLicensed UnlicensedBase CommandBy Command AvailabilityExample Command Inheritance HierarchyCodeCode samples are available on the AU website.Database TransactionsDatabase Transactions See AU 2012 class:CP3426Core Autodesk Revit API Explained Arnošt LöbelCommand Transaction ModesAutomatic▪Not recommended▪Command is already wrapped in a TransactionManual▪Full control of Transaction Groups, Transactions, and SubTransactions ▪Can manage Undo/Redo detailsRead-Only▪Prevents the document from being modified during the commandTransaction Group▪Groups a set of one or more Transactions to behave atomically ▪Can only be started when there is no active Transaction▪Assimilate vs Commit – affects Undo/RedoTransaction▪Where all the magic happens (only way to modify a document) ▪Only one Transaction can be active at any time▪Affects Undo/Redo▪Document regeneration▪Failure Handling (modeless)SubTransaction▪Can only be started within an active Transaction▪Groups a set of document changes to behave atomically ▪Protects parent Transaction from volatile changes▪Does not have a name▪Does not regenerate the document▪Does not work with Failure HandlingNesting▪Transaction Groups –Yes▪Transactions –No▪SubTransactions –Yes▪All “transaction forms” must be entirely contained (opened & closed) within their parentDatabase Transactions – Potential Complications Commands –Not wrapped in a Transaction (manual mode)Events –Not wrapped in a Transaction▪Some events won’t allow TransactionsUpdaters – Already wrapped in a Transaction▪Can use SubTransactionsWhat if you want to perform the same operation from all of the above?“Best” Practices▪Divorce document changes from transactional structure▪Encapsulate document changes into small pieces▪Not always possibleConsistency – What do you want to happen:▪When your code throws an unexpected exception?▪When Revit throws an unexpected exception?▪With the Undo/Redo experience?If your needs are diverse, this may not be the “best” solution for youFictional Goal – Large exterior walls should be room bounding!▪Wrap the wall instances in a custom class▪Test the wall to see if it is exterior▪Test the wall to see if it is large (area > 100 or length > 10)▪Change the wall to be room bounding▪This requires a database transaction!CodeCode samples are available on the AU website.Thrive –Don’t Get Eaten AliveCustom Data StorageShared Parameters▪Visible to the user (Hidden →use Extensible Storage instead) ▪Can be scheduled▪Data structure is limited to parameter “shapes”Extensible Storage▪Hidden from user▪Cannot be scheduled▪Flexible data structuresCustom Data Storage – UpgradingShared Parameters▪Add/Remove parameters as necessaryExtensible Storage▪Read old data entity using old schema▪Convert old data to new data▪Save new data entity with new schema▪Optionally delete old data entity & schemaFinding ElementsLinked Models▪The elements you are looking for might exist in a linked model.▪Which one? Who knows…Better query them all. ☹▪Knowing the ElementId is not enough – You must know the document to which the ElementId belongs!▪If not performance intensive, expand from ElementId to Element and use Element.Document property.Consuming Elements – Filtered Element Collector Phase Status (and user context)Design Options (and user context)Pinned, grouped, hidden in a specific viewShared (child) family instanceEtcWorksharing▪Elements may be locked (checked out by another user)▪Elements may not be up to date▪Elements you change become locked (cannot be edited by other users) View Specific Queries –“Not Visible” does not mean “Does Not Exist”Worksharing – In DepthSee AU 2013 class:DV1888Facing the Elephant in the Room:Making Autodesk® Revit® Add-ins That Cooperate with Worksharing Scott ConoverWorksharing▪Don’t store project level data on the Project Info element.▪Use a DataStorage element with Extensible Storage.▪Store different data on different Data Storage elements to minimize checkout conflicts.▪Updaters cause “system changes” instead of “user changes” and do not block changed elements from being checked out by other users. ▪However, there can be conflicting user changes (from other users) can override the system changes caused by the updater.AdviceKeep going back to the documentation.Keep learning Revit.Consult API support team in all phases of project.Autodesk is a registered trademark of Autodesk, Inc., and/or its subsidiaries and/or affiliates in the USA and/or other countries. All other brand names, product names, or trademarks belong to their respective holders. Autodesk reserves the right to alter product and services offerings, and specifications and pricing at any time without notice, and is not responsible for typographical or graphical errors that may appear in this document. © 2013 Autodesk, Inc. All rights reserved.。
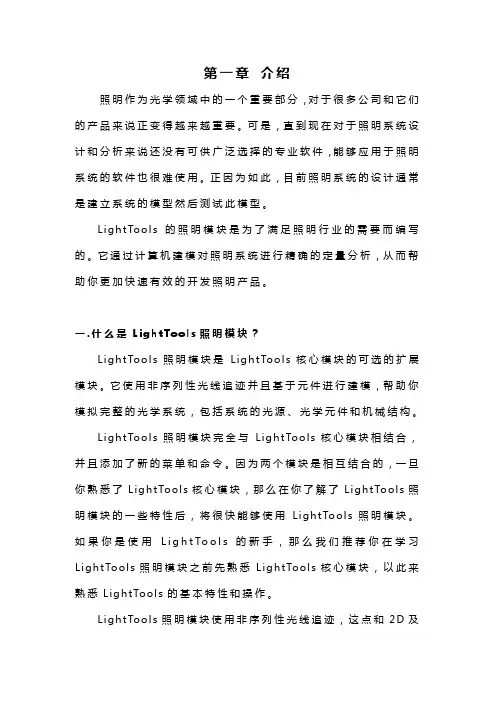
第一章介绍照明作为光学领域中的一个重要部分,对于很多公司和它们的产品来说正变得越来越重要。
可是,直到现在对于照明系统设计和分析来说还没有可供广泛选择的专业软件,能够应用于照明系统的软件也很难使用。
正因为如此,目前照明系统的设计通常是建立系统的模型然后测试此模型。
Li gh tT oo ls的照明模块是为了满足照明行业的需要而编写的。
它通过计算机建模对照明系统进行精确的定量分析,从而帮助你更加快速有效的开发照明产品。
一.什么是L i gh t To o l s照明模块?Li gh tT oo ls照明模块是L i gh tT oo ls核心模块的可选的扩展模块。
它使用非序列性光线追迹并且基于元件进行建模,帮助你模拟完整的光学系统,包括系统的光源、光学元件和机械结构。
Li gh tT oo ls照明模块完全与Li gh t To ols核心模块相结合,并且添加了新的菜单和命令。
因为两个模块是相互结合的,一旦你熟悉了Li gh tT oo l s核心模块,那么在你了解了Li gh t To ol s照明模块的一些特性后,将很快能够使用L ig ht To ol s照明模块。
如果你是使用L i g h t T o o l s的新手,那么我们推荐你在学习L i gh tT oo ls照明模块之前先熟悉Li g ht To ol s核心模块,以此来熟悉Li gh tT oo l s的基本特性和操作。
Li gh tT oo ls照明模块使用非序列性光线追迹,这点和2D及3D设计视图是一致的,但是和I ma gi ng Pa th模块不一样,I m ag in g P a th模块只使用序列性光线追迹。
二.照明系统基础大部分照明系统拥有以下这些特性,所有以下这些特性都可以在Li gh tT oo l s中被模拟。
●系统有一个或更多的照明光源,通常成一定角度并且不均匀地分布在三维空间中。
●我们需要在系统的若干位臵分析照度。

Dynamo Language ManualContents1. Language Basics2. Geometry Basics3. Geometric Primitives4. Vector Math5. Range Expressions6. Collections7. Functions8. Math9. Curves: Interpreted and Control Points10. Translation, Rotation, and Other Transformations11. Conditionals and Boolean Logic12. Looping13. Replication Guides14. Collection Rank and Jagged Collections15. Surfaces: Interpreted, Control Points, Loft, Revolve16. Geometric Parameterization17. Intersection and Trim18. Geometric BooleansA-1. Appendix 1: Python Point GeneratorsIntroductionProgramming languages are created to express ideas, usuallyinvolving logic and calculation. In addition to these objectives, theDynamo textual language (formerly DesignScript) has beencreated to express design intentions. It is generally recognizedthat computational designing is exploratory, and Dynamo tries tosupport this: we hope you find the language flexible and fastenough to take a design from concept, through design iterations,to your final form.This manual is structured to give a user with no knowledge ofeither programming or architectural geometry full exposure to avariety of topics in these two intersecting disciplines. Individualswith more experienced backgrounds should jump to the individualsections which are relevant to their interests and problemdomain. Each section is self-contained, and doesn’t require anyknowledge besides the information presented in prior sections.Text blocks inset in the Consolas font should be pasted into aCode Block node. The output of the Code Block should beconnected into a Watch node to see the intended result. Imagesare included in the left margin illustrating the correct output ofyour program.This document discusses the Dynamo textual programming language, used inside of the Dynamo editor (sometimes referred to as “Dynamo Sandbox”). To create a new Dynamo script, open the Dynamo editor, and select the “New” button in the “FILES” group:This will open a blank Dynamo graph. To write a Dynamo textscript, double click anywhere in the canvas. This will bring up a“Code Block” node. In order to easily see the results of ourscripts, attach a “Watch” node to the output of your Code Blocknode, as shown here:Every script is a series of written commands. Some of thesecommands create geometry; others solve mathematicalproblems, write text files, or generate text strings. A simple, oneline program which generates the quote “Less is more.” looks likethis:The Watch node on the left shows the output of the script."Less is more.";1: Language BasicsThe command generates a new String object. Strings in Dynamo are designated by two quotation marks ("), and the enclosed characters, including spaces, are passed out of the node. Code Block nodes are not limited to generating Strings. A Code Block node to generate the number 5420 looks like this: Every command in Dynamo is terminated by a semicolon. If you do not include one, the Editor will add one for you. Also note that the number and combination of spaces, tabs, and carriagereturns, called white space, between the elements of a command do not matter. This program produces the exact same output as the first program:Naturally, the use of white space should be used to help improve the readability of your code, both for yourself and future readers. Comments are another tool to help improve the readability of your code. In Dynamo, a single line of code is “commented ” with two forward slashes, //. This makes the node ignore everything written after the slashes, up to a carriage return (the end of the line). Comments longer than one line begin with a forward slash asterisk, /*, and end with an asterisk forward slash, */.5420;"Less Is More.";So far the Code Block arguments have been ‘literal’ values, either a text string or a number. However it is often more useful for function arguments to be stored in data containers called variables, which both make code more readable, and eliminate redundant commands in your code. The names of variables are up to individual programmers to decide, though each variable name must be unique, start with a lower or uppercase letter, and contain only letters, numbers, or underscores, _. Spaces are not allowed in variable names. Variable names should, though are not required, to describe the data they contain. For instance, a variable to keep track of the rotation of an object could be called rotation. To describe data with multiple words, programmers typically use two common conventions: separate the words by capital letters, called camelCase (the successive capital letters mimic the humps of a camel), or to separate individual words with underscores. For instance, a variable to describe the rotation of asmall disk might be namedsmallDiskRotation orsmall_disk_rotation, depending on the programmer’s stylistic preference. To create a variable, write its name to the left of an equal sign, followed by the value you want to assign to it. For instance:Besides making readily apparent what the role of the text string is, variables can help reduce the amount of code that needs updating if data changes in the future. For instance the text of the following quote only needs to be changed in one place, despite its appearance three times in the program.// This is a single line comment/* This is a multiple line comment,which continues for multiplelines. */// All of these comments have no effect on// the execution of the program// This line prints a quote by Mies van der Rohe"Less Is More";quote = "Less is more.";Here we are joining a quote by Mies van der Rohe three times, with spaces between each phrase. Notice the use of the + operator to ‘concatenate’ the strings and variables together to form one continuous output.// My favorite architecture quotequote = "Less is more.";quote + " " + quote + " " + quote;// My NEW favorite architecture quotequote ="Less is a bore.";quote + " " + quote + " " + quote;The simplest geometrical object in the Dynamo standardgeometry library is a point. All geometry is created using special functions called constructors, which each return a new instance of that particular geometry type. In Dynamo, constructors begin with th e name of the object’s type, in this case Point , followed by the method of construction. To create a three dimensional point specified by x, y, and z Cartesian coordinates, use theByCoordinates constructor: Constructors in Dynamo are typically design ated with the “By ” prefix, and invoking these functions returns a newly created object of that type. This newly created object is stored in thevariable named on the left side of the equal sign, and any use of that same original Point.Most objects have many different constructors, and we can use the BySphericalCoordinates constructor to create a point lying on a sphere, specified by the sphere’s radius, a first rotation angle, and a second rotation angle (specified in degrees):// create a point with the following x, y, and z// coordinates: x = 10; y = 2.5; z = -6;p = Point.ByCoordinates(x, y, z);// create a point on a sphere with the following radius, // theta, and phi rotation angles (specified in degrees) radius = 5;theta = 75.5;phi = 120.3;cs = CoordinateSystem.Identity();p = Point.BySphericalCoordinates(cs, radius, theta,phi);2: Geometry BasicsPoints can be used to construct higher dimensional geometry such as lines. We can use the ByStartPointEndPoint constructor to create a Line object between two points: Similarly, lines can be used to create higher dimensional surface geometry, for instance using the Loft constructor, which takes a series of lines or curves and interpolates a surface between them.Surfaces too can be used to create higher dimensional solid geometry, for instance by thickening the surface by a specified distance. Many objects have functions attached to them, called methods, allowing the programmer to perform commands on that particular object. Methods common to all pieces of geometry include Translate and Rotate , which respectively translate(move) and rotate the geometry by a specified amount. Surfaces have a Thicken method, which take a single input, a number specifying the new thickness of the surface.// create two points: p1 = Point.ByCoordinates(3, 10, 2);p2 = Point.ByCoordinates(-15, 7, 0.5);// construct a line between p1 and p2l = Line.ByStartPointEndPoint(p1, p2);// create points:p1 = Point.ByCoordinates(3, 10, 2);p2 = Point.ByCoordinates(-15, 7, 0.5);p3 = Point.ByCoordinates(5, -3, 5);p4 = Point.ByCoordinates(-5, -6, 2);p5 = Point.ByCoordinates(9, -10, -2);p6 = Point.ByCoordinates(-11, -12, -4);// create lines:l1 = Line.ByStartPointEndPoint(p1, p2);l2 = Line.ByStartPointEndPoint(p3, p4);l3 = Line.ByStartPointEndPoint(p5, p6);// loft between cross section lines:surf = Surface.ByLoft({l1, l2, l3});Intersection commands can extract lower dimensionalgeometry from higher dimensional objects. This extracted lower dimensional geometry can form the basis for higher dimensional geometry, in a cyclic process of geometrical creation, extraction, and recreation. In this example, we use the generated Solid to create a Surface, and use the Surface to create a Curve.p1 = Point.ByCoordinates(3, 10, 2);p2 = Point.ByCoordinates(-15, 7, 0.5);p3 = Point.ByCoordinates(5, -3, 5);p4 = Point.ByCoordinates(-5, -6, 2);l1 = Line.ByStartPointEndPoint(p1, p2);l2 = Line.ByStartPointEndPoint(p3, p4);surf = Surface.ByLoft({l1, l2});// true indicates to thicken both sides of the Surface: solid = surf.Thicken(4.75, true);p1 = Point.ByCoordinates(3, 10, 2);p2 = Point.ByCoordinates(-15, 7, 0.5);p3 = Point.ByCoordinates(5, -3, 5);p4 = Point.ByCoordinates(-5, -6, 2);l1 = Line.ByStartPointEndPoint(p1, p2);l2 = Line.ByStartPointEndPoint(p3, p4);surf = Surface.ByLoft({l1, l2});solid = surf.Thicken(4.75, true);p = Plane.ByOriginNormal(Point.ByCoordinates(2, 0, 0), Vector.ByCoordinates(1, 1, 1));int_surf = solid.Intersect(p);int_line = int_surf.Intersect(Plane.ByOriginNormal(Point.ByCoordinates(0, 0, 0),Vector.ByCoordinates(1, 0, 0)));While Dynamo is capable of creating a variety of complexgeometric forms, simple geometric primitives form the backbone of any computational design: either directly expressed in the final designed form, or used as scaffolding off of which more complex geometry is generated.While not strictly a piece of geometry, the CoordinateSystem is an important tool for constructing geometry. A CoordinateSystem object keeps track of both position and geometric transformations such as rotation, sheer, and scaling.Creating a CoordinateSystem centered at a point with x = 0, y = 0, z = 0, with no rotations, scaling, or sheering transformations, simply requires calling the Identity constructor: CoordinateSystems with geometric transformations are beyond the scope of this chapter, though another constructor allows you to create a coordinate system at a specific point,CoordinateSystem.ByOriginVectors :The simplest geometric primitive is a Point, representing a zero-dimensional location in three-dimensional space. As mentioned earlier there are several different ways to create a point in a particular coordinate system: Point.ByCoordinates creates a// create a CoordinateSystem at x = 0, y = 0, z = 0,// no rotations, scaling, or sheering transformationscs = CoordinateSystem.Identity();// create a CoordinateSystem at a specific location, // no rotations, scaling, or sheering transformations x_pos = 3.6;y_pos = 9.4; z_pos = 13.0;origin = Point.ByCoordinates(x_pos, y_pos, z_pos);identity = CoordinateSystem.Identity();cs = CoordinateSystem.ByOriginVectors(origin,identity.XAxis, identity.YAxis, identity.ZAxis);3: Geometric Primitivespoint with specified x, y, and z coordinates;Point.ByCartesianCoordinates creates a point with a specified x, y, and z coordinates in a specific coordinate system ; Point.ByCylindricalCoordinates creates a point lying on a cylinder with radius, rotation angle, and height; andPoint.BySphericalCoordinates creates a point lying on a sphere with radius and two rotation angle.This example shows points created at various coordinate systems:The next higher dimensional Dynamo primitive is a line segment, representing an infinite number of points between two end points. Lines can be created by explicitly stating the two boundary points with the constructor Line.ByStartPointEndPoint , or by specifying a start point, direction, and length in that direction, Line.ByStartPointDirectionLength .// create a point with x, y, and z coordinatesx_pos = 1;y_pos = 2;z_pos = 3;pCoord = Point.ByCoordinates(x_pos, y_pos, z_pos);// create a point in a specific coordinate systemcs = CoordinateSystem.Identity();pCoordSystem = Point.ByCartesianCoordinates(cs, x_pos, y_pos, z_pos);// create a point on a cylinder with the following// radius and heightradius = 5;height = 15;theta = 75.5;pCyl = Point.ByCylindricalCoordinates(cs, radius, theta, height);// create a point on a sphere with radius and two anglesphi = 120.3;pSphere = Point.BySphericalCoordinates(cs, radius,theta, phi);Dynamo has objects representing the most basic types ofgeometric primitives in three dimensions: Cuboids, created with Cuboid.ByLengths ; Cones, created with Cone.ByPointsRadiusand Cone.ByPointsRadii ; Cylinders, created withCylinder.ByRadiusHeight ; and Spheres, created with Sphere.ByCenterPointRadius .p1 = Point.ByCoordinates(-2, -5, -10);p2 = Point.ByCoordinates(6, 8, 10);// a line segment between two pointsl2pts = Line.ByStartPointEndPoint(p1, p2);// a line segment at p1 in direction 1, 1, 1 with// length 10lDir = Line.ByStartPointDirectionLength(p1,Vector.ByCoordinates(1, 1, 1), 10);// create a cuboid with specified lengthscs = CoordinateSystem.Identity();cub = Cuboid.ByLengths(cs, 5, 15, 2);// create several conesp1 = Point.ByCoordinates(0, 0, 10); p2 = Point.ByCoordinates(0, 0, 20); p3 = Point.ByCoordinates(0, 0, 30);cone1 = Cone.ByPointsRadii(p1, p2, 10, 6);cone2 = Cone.ByPointsRadii(p2, p3, 6, 0);// make a cylindercylCS = cs.Translate(10, 0, 0);cyl = Cylinder.ByRadiusHeight(cylCS, 3, 10);// make a spherecenterP = Point.ByCoordinates(-10, -10, 0);sph = Sphere.ByCenterPointRadius(centerP, 5);Objects in computational designs are rarely created explicitly in their final position and form, and are most often translated,rotated, and otherwise positioned based off of existing geometry. Vector math serves as a kind-of geometric scaffolding to give direction and orientation to geometry, as well as to conceptualize movements through 3D space without visual representation.At its most basic, a vector represents a position in 3D space, and is often times thought of as the endpoint of an arrow from the position (0, 0, 0) to that position. Vectors can be created with the ByCoordinates constructor, taking the x, y, and z position of the newly created Vector object. Note that Vector objects are not geometric objects, and don’t appear in the Dynamo window. However, information about a newly created or modified vector can be printed in the console window: A set of mathematical operations are defined on Vector objects, allowing you to add, subtract, multiply, and otherwise move objects in 3D space as you would move real numbers in 1D space on a number line.Vector addition is defined as the sum of the components of two vectors, and can be thought of as the resulting vector if the two component vector arrows are placed “tip to tail.” Vector addition is performed with the Add method, and is represented by the diagram on the left.// construct a Vector object v = Vector.ByCoordinates(1, 2, 3);s = v.X + " " + v.Y + " " + v.Z;a = Vector.ByCoordinates(5, 5, 0);b = Vector.ByCoordinates(4, 1, 0);// c has value x = 9, y = 6, z = 0c = a.Add(b);4: Vector MathSimilarly, two Vector objects can be subtracted from each other with the Subtract method. Vector subtraction can be thought of as the direction from first vector to the second vector. Vector multiplication can be thought of as moving the endpoint of a vector in its own direction by a given scale factor.Often it’s desired when scaling a vector to have the resulting vector’s length exactly equal to the scaled amount. This is easily achieved by first normalizing a vector, in other words setting the vector’s length exactly equal to one.c still points in the same direction as a (1, 2, 3), though now it has length exactly equal to 5.a = Vector.ByCoordinates(5, 5, 0);b = Vector.ByCoordinates(4, 1, 0);// c has value x = 1, y = 4, z = 0 c = a.Subtract(b);a = Vector.ByCoordinates(4, 4, 0);// c has value x = 20, y = 20, z = 0c = a.Scale(5);a = Vector.ByCoordinates(1, 2, 3);a_len = a.Length;// set the a's length equal to 1.0b = a.Normalized();c = b.Scale(5);// len is equal to 5len = c.Length;Two additional methods exist in vector math which don’t have clear parallels with 1D math, the cross product and dot product. The cross product is a means of generating a Vector which is orthogonal (at 90 degrees to) to two existing Vectors. For example, the cross product of the x and y axes is the z axis,though the two input Vectors don’t need to be orthogonal to each other. A cross product vector is calculated with the Cross method. An additional, though somewhat more advanced function of vector math is the dot product. The dot product between two vectors is a real number (not a Vector object) that relates to, but is not exactly , the angle between two vectors. One usefulproperties of the dot product is that the dot product between two vectors will be 0 if and only if they are perpendicular. The dot product is calculated with the Dot method.a = Vector.ByCoordinates(1, 0, 1);b = Vector.ByCoordinates(0, 1, 1);// c has value x = -1, y = -1, z = 1c = a.Cross(b);a = Vector.ByCoordinates(1, 2, 1);b = Vector.ByCoordinates(5, -8, 4);// d has value -7d = a.Dot(b);Almost every design involves repetitive elements, and explicitly typing out the names and constructors of every Point, Line, and other primitives in a script would be prohibitively time consuming. Range expressions give a Dynamo programmer the means to express sets of values as parameters on either side of two dots (..), generating intermediate numbers between these two extremes.For instance, while we have seen variables containing a single number, it is possible with range expressions to have variables which contain a set of numbers. The simplest range expression fills in the whole number increments between the range start and end. In previous examples, if a single number is passed in as theargument of a function, it would produce a single result. Similarly, if a range of values is passed in as the argument of a function, a range of values is returned.For instance, if we pass a range of values into the Lineconstructor, Dynamo returns a range of lines.By default range expressions fill in the range between numbers incrementing by whole digit numbers, which can be useful for a quick topological sketch, but are less appropriate for actual designs. By adding a second ellipsis (..) to the range expression, you can specify the amount the range expression increments between values. Here we want all the numbersbetween 0 and 1, incrementing by 0.1:a = 1..6;x_pos = 1..6;y_pos = 5;z_pos = 1;lines = Line.ByStartPointEndPoint(Point.ByCoordinates(0, 0, 0), Point.ByCoordinates(x_pos, y_pos, z_pos));5: Range ExpressionsOne problem that can arise when specifying the increment between range expression boundaries is that the numbers generated will not always fall on the final range value. For instance, if we create a range expression between 0 and 7, incrementing by 0.75, the following values are generated:If a design requires a generated range expression to endprecisely on the maximum range expression value, Dynamo can approximate an increment, coming as close as possible while still maintaining an equal distribution of numbers between the range boundaries. This is done with the approximate sign (~) before the third parameter:However, if you want to Dynamo to interpolate between ranges with a discrete number of elements, the # operator allows you to specify this:a = 0..1..0.1;a = 0..7..0.75;// DesignScript will increment by 0.777 not 0.75a = 0..7..~0.75;// Interpolate between 0 and 7 such that// “a” will contain 9 element sa = 0..7..#9;Collections are special types of variables which hold sets of values. For instance, a collection might contain the values 1 to 10, {1, 2, 3, 4, 5, 6, 7, 8, 9, 10}, assorted geometry from the result of an Intersection operation, {Surface, Point, Line, Point}, or even a set of collections themselves, { {1, 2, 3}, {4, 5}, 6}.One of the easier ways to generate a collection is with range expressions (see: Range Expressions ). Range expressions by default generate collections of numbers, though if thesecollections are passed into functions or constructors, collections of objects are returned. When range expressions aren’t appropriate, collections can be created empty and manually filled with values. The square bracket operator ([]) is used to access members inside of a collection. The square brackets are written after the variable’s name, with the number of the individual collection membercontained inside. This numb er is called the collection member’s index. For historical reasons, indexing starts at 0, meaning the first element of a collection is accessed with: collection[0], and is often called the “zeroth” number. Subsequent members are accessed by increasing the index by one, for example:The individual members of a collection can be modified using the same index operator after the collection has been created:// use a range expression to generate a collection of // numbers nums = 0..10..0.75;// use the collection of numbers to generate a// collection of Pointspoints = Point.ByCoordinates(nums, 0, 0);// a collection of numbersnums = 0..10..0.75;// create a single point with the 6th element of the// collectionpoints = Point.ByCoordinates(nums[5], 0, 0);6: CollectionsIn fact, an entire collection can be created by explicitly setting every member of the collection individually. Explicit collections are created with the curly brace operator ({}) wrapping the collection’s starting values, or left empty to create an empty collection:Collections can also be used as the indexes to generate new sub collections from a collection. For instance, a collection containing the numbers {1, 3, 5, 7}, when used as the index of acollection, would extract the 2nd , 4th , 6th , and 8th elements from a collection (remember that indices start at 0):Dynamo contains utility functions to help manage collections. The Count function, as the name implies, counts a collection andreturns the number of elements it contains.// generate a collection of numbersa = 0..6;// change several of the elements of a collectiona[2] = 100;a[5] = 200;// create a collection explicitlya = { 45, 67, 22 };// create an empty collectionb = {};// change several of the elements of a collectionb[0] = 45;b[1] = 67;b[2] = 22;a = 5..20;indices = {1, 3, 5, 7};// create a collection via a collection of indicesb = a[indices];// create a collection with 10 elementsa = 1..10;num_elements = Count(a);Almost all the functionality demonstrated in DesignScript so far isexpressed through functions. You can tell a command is afunction when it contains a keyword suffixed by a parenthesiscontaining various inputs. When a function is called inDesignScript, a large amount of code is executed, processing theinputs and returning a result. The constructor functionPoint.ByCoordinates(x : double, y : double, z : double)takes three inputs, processes them, and returns a Point object.Like most programming languages, DesignScript givesprogrammers the ability to create their own functions. Functionsare a crucial part of effective scripts: the process of taking blocksof code with specific functionality, wrapping them in a cleardescription of inputs and outputs adds both legibility to your codeand makes it easier to modify and reuse.Suppose a programmer had written a script to create a diagonalbracing on a surface:This simple act of creating diagonals over a surface neverthelesstakes several lines of code. If we wanted to find the diagonals ofhundreds, if not thousands of surfaces, a system of individuallyextracting corner points and drawing diagonals would becompletely impractical. Creating a function to extract thep1 = Point.ByCoordinates(0, 0, 0);p2 = Point.ByCoordinates(10, 0, 0);l = Line.ByStartPointEndPoint(p1, p2);// extrude a line vertically to create a surfacesurf = l.Extrude(Vector.ByCoordinates(0, 0,1), 8);// Extract the corner points of the surfacecorner_1 = surf.PointAtParameter(0, 0);corner_2 = surf.PointAtParameter(1, 0);corner_3 = surf.PointAtParameter(1, 1); corner_4 = surf.PointAtParameter(0, 1); // connect opposite corner points to create diagonalsdiag_1 = Line.ByStartPointEndPoint(corner_1, corner_3);diag_2 = Line.ByStartPointEndPoint(corner_2, corner_4);7: Functionsdiagonals from a surface allows a programmer to apply thefunctionality of several lines of code to any number of baseinputs.Functions are created by writing the def keyword, followed by thefunction name, and a list of function inputs, called arguments, inparenthesis. The code which the function contains is enclosedinside curly braces: {}. In DesignScript, functions must return avalue, indicate d by “assigning” a value to the return keywordvariable. E.g. This function takes a single argument and returns that argument multiplied by 2:Functions do not necessarily need to take arguments. A simplefunction to return the golden ratio looks like this:Before we create a function to wrap our diagonal code, note thatfunctions can only return a single value, yet our diagonal codegenerates two lines. To get around this issue, we can wrap twoobjects in curly braces, {}, creating a single collection object. Forinstance, here is a simple function which returns two values:def functionName(argument1, argument2, etc, etc, . . .){// code goes herereturn = returnVariable;}def getTimesTwo(arg){return = arg * 2;}times_two = getTimesTwo(10);def getGoldenRatio(){return = 1.61803399;}gr = getGoldenRatio();If we wrap the diagonal code in a function, we can creatediagonals over a series of surfaces, for instance the faces of acuboid.def returnTwoNumbers(){return = {1, 2};}two_nums = returnTwoNumbers();def makeDiagonal(surface){corner_1 = surface.PointAtParameter(0, 0);corner_2 = surface.PointAtParameter(1, 0);corner_3 = surface.PointAtParameter(1, 1);corner_4 = surface.PointAtParameter(0, 1);diag_1 = Line.ByStartPointEndPoint(corner_1,corner_3);diag_2 = Line.ByStartPointEndPoint(corner_2,corner_4);return = {diag_1, diag_2};}c = Cuboid.ByLengths(CoordinateSystem.Identity(),10, 20, 30);diags = makeDiagonal(c.Faces.SurfaceGeometry());。
VELUX打开文本图片集威卢克斯VELUXDaylightVisualizer2.6可视化自然采光分析软件适用人群•建筑专业人员/建筑师/工程师•专业建筑建造商/开发商/制图师威卢克斯可视化自然采光分析软件VELUXDaylightVisualizer2.6,是一款模拟建筑自然采光计算迅捷、准确的工具性软件。
该软件以英语、法语、西班牙语、德语、意大利语、波兰语、俄语和日语八种语言编辑。
软件编写的目的主要是推动日光在建筑上的应用,帮助有关设计人员在进行建筑设计之前,通过准确地模拟采光量,对自然采光效果及空间效果有一个正确的直观的了解。
最新升级版发布--支持MacOSX和Windows7平台软件介绍VELUXDaylightVisualizer2.6可直观迅速的建立三维模型,可以随意设置屋顶窗、立窗界面,还可提供不同的窗体布置、玻璃性能、室内墙面、天空光量、地理位置、建筑方位等等不同条件下的建筑自然采光分析比较,便于设计者找到最理想的采光方案。
该软件还可以进行建筑表面编辑,通过现场模拟以及灵活的视点设定来进行准确的计算。
一步一步由简入繁的使用向导,可以帮助使用者迅速掌握软件的使用。
通过国际照明协会CIE171:2022规范认证VELUXDaylightVisualizer已通过国际照明协会(CIE)的国际计算机模拟采光计算程序标准的检验。
VELUXDaylightVisualizer2能够在建筑设计初期,精确预测自然光照明区域、日光照明水平和空间外观。
软件模拟自然光照明的最大误差低于5.13%,平均误差低于1.29%。
威卢克斯采光可视化软件DaylightVisualizer2的开发者威卢克斯DaylightVisualizer2是由鲁克逊(Luxion)实验室开发的。
(该实验室包括亨利•万•简森和克劳斯•简森HeikWannJensenandClausJensen)。
亨利•万•简森是圣地亚哥加利福尼亚大学的教授,专业是计算机制图。
Illuminate Your Best Design with Revit Daylighting AnalysisMaria Fox MontgomeryAssociate AIADesigner III, Design Technology LeaderLEED AP BD+C and WELL APTyrone MarshallArchitect, AIAResearcher andComputational DesignerLEED AP BD+CClemson University, Watt Family Innovation Center, Perkins and WillMaria Fox Montgomery•Joined the Atlanta Perkins and Will office in 2014.•Received her undergraduate architecture degree from Clemson University and Master ofArchitecture degree from the University of Tennessee.•Specializes in higher education and laboratory design.•Along with being a USGBC LEED Accredited Professional in Building Design+Construction, she is aDesign Technology Leader and the only WELL Accredited Professional in the Atlanta Perkins andWill office.About the SpeakersTyrone Marshall•Joined the San Francisco Perkins and Will office in 2007 and later joined the Atlanta office in 2012.•Has a Master of Science with a major in Architecture and concentration High-Performance buildingsfrom the Georgia Institute of Technology in Atlanta, Georgia, and a Bachelor of Architecture fromthe College of Arts in San Francisco, California.•Licensed architect and researcher who works as a Senior Researcher & Computational Designer withproject teams for their strategies to address architectural performance design, including theplanning, development, implementation of new processes from our research program.FOUNDED IN 1935TOTAL STAFF STUDIOS 24DISCIPLINES 5ArchitectureInterior Design Branded Environments Planning + Strategies Landscape ArchitectureAtlanta AustinBostonCharlotteChicagoDallasDenmarkDenver Dubai Durham Houston London Los Angeles Miami Minneapolis New York Ottawa San Francisco São Paulo Seattle Shanghai Toronto Vancouver Washington, DC PRACTICE AREAS9Design ProcessHuman ExperienceMobilityEnergyBuilding TechnologyResilienceMaterial Performancehttps:///research/WHEN to run a daylight analysis?Clemson University, Watt Family Innovation Center, Perkins and WillWhen should we incorporate daylighting strategies?‒Make use of Revit daylighting analysisearly in your design process‒Inform the design with regards toimproving access to natural daylight‒Daylighting design follows PatrickMacLeamy’s observation in 2004about the development of thearchitectural project and the difficultyto make changesMacLeamy Curve by Patrick MacLeamy9WHY run a daylight analysis?Bowie State University, Center for Natural Sciences, Mathematics and Nursing, Perkins and WillWhy should we incorporate daylighting strategies?•Well-Being‒Daylight connects us to the outdoors‒Daylight reinforces circadian rhythms‒Passive daylight design reduceselectric lighting13Why is daylight so important when it comes to glazing?•Impact of Solar Radiation on Exterior‒Only a small amount of visible lightthrough the glazing system is receivedfrom the total amount of the sun’ssolar radiation.‒Some of the short-wave solar radiationenergy incident on the surface of theglass has losses from convection bylaminar airflow along the surface, andthen some of it reflects away from theglass.Why is daylight so important when it comes to glazing?•Transmission of Solar Radiationthrough the Envelope Glazing System‒The glazing assembly absorbs andconducts the remaining solar energythrough the insulated glazing unit(IGU).‒The performance of the IGU system forsolar heat gain and the visible lightthat passes through the window will bedependent on the low emissive coatingand its location, as well as glass visiblelight transmittance properties.Why is daylight so important when it comes to glazing?•Solar Radiation into Interior‒Much of the energy transmits into theinterior space as shortwave energy assolar heat gain and visible lightenergy.‒A small amount from the earlierconduction and absorption radiatesback into space as longwavesecondary transmission whileincreasing the glass surfacetemperature.Why is the amount of envelope glazing so important?•Glazing‒Window to Wall Ratio typicallyassumes that the baseline percentageof glazing for a project will be equal toabout 40% of the above-grade wallarea or that in the proposed design.‒Typically, we are concerned indaylighting and tools, like Revit, of aglazing products’ performance as itretains the visible light transmittance.‒Remember, in Revit, you add thereported wall area and glazing area toget the gross wall area.Window to Wall Ratio by Perkins and WillEnergy Consumption•Lighting Energy Contribution‒In commercial buildings, electriclighting accounts for 35 -50% of totalelectrical energy consumption.‒We aim for the strategic use ofdaylight that can reduce this energydemand.U.S. ENERGY CONSUMPTIONBY SECTORU.S. ELECTRICITY CONSUMPTIONBY SECTORSource: 2013 2030, Inc./ Architecture 2030. All rights reserved.Data Source: U.S. Energy Information AdministrationSaving Lighting Energy•Reduce Electric Lighting‒If we can reduce the amount of energyrequired to light our interior spaces byproviding good natural daylight, wecan not only gain better designedspaces for our occupants, but alsoreductions in energy use, higherenergy savings, and lower annualenergy cost savings from operating thebuilding.‒All of these actions have secondaryeffects as well, such as providingpotential life cycle cost savings andlowering the number of metric tons ofgreenhouse gases emitted into theatmosphere.Diagram by Perkins and Will1315 Peachtree Street•Atlanta Perkins and Will Office‒Maintaining a connection to naturaldaylight and usable outdoor spacewas a design priority.‒The open workspace allows naturaldaylight and views throughout everyfloor.‒This reduced the amount of energyneeded for lighting by 67%.Lighting Energy Losses•An Inefficient Use of Energy‒Electricity is intrinsically one of themore expensive energy sources thatwe use in buildings and electriclighting fixtures are quite inefficient inthe conversion of that energy to light.‒Note the conversion and transmissionlosses in taking raw energy at thepower plant to useable illumination onthe task surface.Inefficiencies Of Electric Light Generation By NC State Design Adapted By Perkins and WillClear, Tinted, and Dark Glazing •Glazing Visible Light Transmittance‒A few types of high-performance glazing systems were physically modeled and analyzed with energy simulation to understand performance concerning building energy demand with only change in visual transmittance.‒This model does not consider the impact of daylight sensors and controls on reducing peak lighting energy demand from varying visible light transmittance (VLT).‒The assumption does not consider the use of any daylight controls to changethe lighting energy use.Glazing Visible Light Transmittance and Energy Use by Perkins and WillFactors Affecting Daylighting•Site location for Latitude•Model Orientation•Modeling Massing•Model Glazing Visible LightTransmittance•Interior Space Material LightReflectance Values•Sky Condition for Clearest Sky During aSet Time Frame for LEED V4.0/4.1 Option 2Daylighting Design MetricsIllumination‒Illuminance analysis measuresthe amount of light falling on ahorizontal work surface at 30inches above the floor in eitherfoot-candles or Lux for a givenpoint in time, such as 9 A.M. onSeptember 21st.sDA‒Spatial Daylight Autonomy (sDA)describes how much of the spacereceives enough daylight. Wetypically measure our designpotential for daylight quality bythe percentage of floor areathat receives at least 300 Lux forat least 50% of the time.ASE‒Annual Sun Exposure (ASE)describes how much spacereceives too much directsunlight, which can cause visualdiscomfort from over-exposureor glare and an increase incooling loads. The criteria forthis metric states that no morethan 10% of the total floor areareceives at least 1,000 Lux and250 occupied hours a year.Daylighting Design Metrics Case Study in Revit Perkins and Will ProjectWHAT runs a daylight analysis?Why should we use Revit for daylighting analysis?•Useful Daylighting Simulation must provide:‒Accurate calculation‒Quick performance feedback‒Simple Visual Information‒Report on progress of daylightsustainability goals such as sDA and ASE•Revit plug-in that serves as a buildingperformance analysis software.•Can use Insight to analyze:1.Energy2.Lighting3.Solar•Insight can assist in some of thefollowing tasks:‒Produce energy models‒Work with key performance indicatorsand real-time feedback‒Evaluate heating and cooling loads‒Simulate sun and shadow studies‒Perform daylighting and glare studies‒Assist with solar photovoltaic analysisR E V I T 2015R E V I T 2020HOW to run a daylight analysis?General Steps to Using Insight1.Be sure to be signed-in to yourAutodesk 360 account.2.Set model location.3.Model contents and cleanup.4.Create appropriate glazing criteria inthe model for visible lighttransmittance and opaque surfacesperformance.5.Select an Analysis with anappropriate grid resolution.6.Run the analysis to create a lightingresult of daylighting levels and 3Dmodel with schedules for the floorsand the rooms in the model.7.Open the room analysis scheduleand verify the regularly occupiedrooms to include in the daylightinganalysis.8.Generate and View Results to updatethe lighting analysis design resultswith your routinely selected regularly occupied rooms.9.Review the analysis with the designteam for making decisions toimprove the design.STEP 1•Sign into your Autodesk Account you have set up prior to opening your Revit model but within your Revit session.•Confirm your Autodesk username matches your Revit username.Autodesk Sign-InSTEP 2Set Revit Model LocationORSTEP 3.1Elements that Must be Modeled1.At least one level must be created2.An enclosed space (this can consist of afloor to floor space, a floor to ceilingspace, or a floor to roof space)3.Glazing must be present4. A room must be placedPerkins and Will ProjectSTEP 3.2Model Contents and Cleanup•Digital Models Today‒Divided into areas of work using links‒Or a single model but with a digital buildingmodel execution plan for future modelbreakup•Daylighting Requires‒Rooms and Floors in the same model •Overview of Model Prep‒Detach a saved copy of the model withrooms from an interiors model if not in asingle model‒Copy Monitor any floors from another modelsuch as Core and Shell‒Glazing changes from “Render-Ready” to“Daylighting Design-Ready”STEP 3.3Final Checks•Verify that ceilings, exterior walls and roofs are in either the main model or in a linked model and are visible.•Check that there are no transparentmaterials applied to the model elements listed above.•Turn off all light fixtures as these will interfere with the daylight analysis.•Check glazing areas for misplaced opaque geometry that block glazing areas as thesewill interfere with the daylight analysis.•Check to be sure there are no modeled floors representing anything other than your actual floor levels, such as landscape elements or terrain.1.See the following URL for specialinstructions concerning glazing VLTfor Insight version 4.0 or later‒Weblink STEP 4.1 a Setting Valid Glazing Properties (Tvis)Example:Glazing Product VLT is 50%Individual R, G, and B Values are:0.50 x 255 = 127.5‒We round it down per Autodeskinstruction to 127 for similarity to50% VLT.‒The new glazing visualtransmission model does notconsider the thickness of themodeled glass element.2.Using the Glazing Material Prior to Insight Plugin V4 and V2 Cloud Rendering Engine ‒Multiply your Actual Glass Product VLTin % by 255 to get the Insight PluginV4 individual RGB valuesSTEP 4.1 bSetting Valid Glazing Properties (Tvis) Insight Version Before 4.01.Select the glass pane to which you want toassign material properties and Fromthe Properties editor, select Edit Type.2.From the Material andFinishes category,click on the "…" inthe Value column for Material(or selectwindow and in the properties windowfrom Materials and Finishes select "…" infront of glass).3.In the Material Browser dialog box gostraight to the Appearance tab.4.Note that T-Vis should be set by changingONLY the Custom Color parameter. In theColor field, select Custom.5.Set the RGB value with the help of the tableprovided.STEP 4.2 bUsing the Revit Glazing RGB VLT CalculatorInsight Version Before 4.0e the table provided here, along with theRGB table provided in the prior slide, to setup your Revit Glass Transparent Settings.This table can be found here for your use: https://1drv.ms/x/s!Ave4LshhbAEuhZ0R6PB3dFr4MKOcIA?e=eGddqBSTEP 5.1Insight Access•Launch Insight from within the Revit model.STEP 5.2Grid Resolution•The grid resolution will effect the cost to run the daylight analysis.‒The lower the grid resolution, the moreexpensive your daylight analysis will be •Use the larger resolution of the 72-inch grid for initial studies, once it is time to submit anything for LEED, then use a 12-inch grid.•Only submit a single floor at a time to see if there are any issues with the model.‒Submit a typical single floor for repeatingfloors in a tower, high-rise, or mid-rise‒If there are no model issues, then onlysubmit unique and typical floors for anytower, high-rise, or mid-riseSTEP 6Run Analysis1.Select appropriate analysis type.•Illuminance Analysis•Daylight Autonomy (sDA preview)•LEED 2009 IEQc8 opt1•LEED V4 EQc7 opt 1 (sDA+ASE)•LEED V4 EQc7 opt 2•Solar Access2.Select floor levels to analyze.3.Select resolution.4.Click “Check Price.”5.Click “Start Analysis.STEP 7Setup Daylighting Room Schedule•Running the analysis will create a 3D view specifically for Insight Daylighting with schedules for the floors and the rooms within the model.•Verify the regularly occupied spaces to include in the daylighting analysis. •Defining the spaces:-Occupied Space-Non-Occupied Space-Daylight Exempt Occupied SpaceDesign Targets for LEED DaylightingLEED Daylight Credit SimulationSDA/ASE Criteria 4.0Option 14.1Option 1sDA (300/50%) ASE 1000/250 Floor Area to Achieve Daylighting in Regularly Occupied Spaces 55% for 2pt.75% for 3 pts.Healthcare75% for 1 pt.90% for 2 pts.40% for 1 pt. includingHealthcare55% for 2 pts includingHealthcare75% 3 pts or an Exemplary Pointfor HealthcareIf all receive 55% min then 1 oradditional exemplary point,onlyavailable for Healthcare ifinitially 1 pt. achievedDesign Targets for LEED Daylighting Option 1 CreditLEED Daylight Credit Illuminance Simulation Criteria 2009V3(Option 1)4.0Option 24.1Option 2Floor Area to Achieve Daylighting in Regularly Occupied Spaces 75% for 1 pt.75% for 1pt.90% for 2 pts.55% for 1 pt.75% for 2 pts.90% for 3 pts except HC90% for Exemplary Performance for HCDaylight Illuminance Levels for 10-500 fc or108-5,400 lux300-3,000 lux300-3,000 luxSky Condition Clear-Sky Clear-Sky Clear-SkyTime9/21 at 9 AMand 3 PM 1-day within 15 days of 9/21and 1-daywithin 15 days of 3/21 representing theclearest sky condition and use theaverage of the hourly value of the 21-day within 15 days of 9/21and 1-daywithin 15 days of 3/21 representing theclearest sky condition and use theaverage of the hourly value of the 2Design Targets for LEED DaylightingDesign Targets for LEED Daylighting Option 2 CreditAnalysis Type for LEED•Before running the lighting analysis, be sure to select the appropriate analysistype from the following options:‒Illuminance Analysis‒Daylight Factor (beta)‒Daylight Autonomy (sDA preview)‒LEED 2009 IEQc8 opt 1‒LEED V4 EQc7 opt 1 (sDA+ASE)‒LEED V4 EQc7 opt 2‒Solar AccessSimple and Clear Daylighting Analysis Style Default Style Versus Design Analysis Style for LEED and Well Daylighting SimulationDefault Style does not make itclearly understandable where theareas of the design are clearly forLEED 2009 Option 1 or LEED V4Option 2:‒Within illuminance 300-300 lux‒Above Illuminance 3000 Lux‒Below Illuminance 300 Lux Default StyleDesign Analysis Style“RED” for Above 3000 lux“Yellow” for within 300 to3000 lux“Blue” for Below 300 luxLEED Analysis Submission Criteria Using Revit to Put it Altogether1.Verify that you have run the analysis from theprevious workflow.2.Place Your Insight Lighting Analysis Floor Plan on asheet.3.Include the Insight Lighting Analysis Legend.4.Add Insight Floor Schedule and Insight RoomSchedule to each sheet.5.Provide a text narrative that contains:•Revit and Insight Daylight Plugin Version•Project glazing types and the method that you use toinput the project VLT product criteria into the Revit 2020glass materials•Highlight regularly occupied spaces and daylit areasand zones and describe all glare control devices inregularly occupied spaces with manually or automaticwith manual overridee the LEED Daylight and Quality Views CalculatorExample of LEED Documentation Upload Below is an example of a typical upload to LEED Onlineshowing the project successfully meeting credit requirements.LEED Daylighting Option 1LEED Daylighting Option 2ResourcemicroKnowledge for Setup of Revit Glazing for Daylighting。
Daylight Modeling with ElumToolsHisham Khoury – WSPMP5313-LThis workshop will demonstrate how to use ElumTools (an add-on for Revit software from the makers of AGi32) in Revit software to achieve daylight modeling with point-by-point calculation by utilizing the architectural model and lighting families.Learning ObjectivesAt the end of this class, you will be able to:∙Gain a good understanding of the ElumTools add-in∙Learn how to produce point-by-point daylight calculations inside a BIM model∙Gain a good understanding of how link models and project coordinates work∙Gain an expert understanding of lighting families and how they work with photometric files in Revit softwareAbout the SpeakerAs WSP Melbourne Building Information Modeling (BIM) manager and a project electrical engineer, Hisham Khoury has spent the majority of the past 5 years heavily involved in the regional BIM evolution. His work has, over that time, seen him involved in several large-scale BIM projects with varying levels of complexity, including Crown Casino and Entertainment Complex, Echuca Hospital, and Medibank Tower. His role in these projects involved managing BIM strategy, electrical design, model management, and client relations. As part of the WSP Technical User Committee he has been instrumental in setting up many of the standards and tools that are being used regionally throughout WSP Asia Pacific. WSP is constantly striving as a firm to push the boundaries within engineering, and having an electrical background enables Hisham to be at the forefront of electrical engineering within BIM.**************************BackgroundBenefits of Using Elumtools∙Point by Point calculations directly in the model∙Accurate lighting calculation due to specific reflectance values and accurate services/furniture layouts.∙Ability to render directly in Revit for presentation purposes∙No need to build a 3D model in AGI32 or DIALux.∙Multi-core processor supportWhy can’t we use the lighting calculation built into Revit instead?The current lighting calculation built into Revit does not calculate daylight entering the space or any other contribution from external lighting.Are the calculated results using ElumTools the same as with AGi32?Yes, if all things are equal. However, there are several considerations that may result in different calculated values, such as:∙Differences in Materials properties and reflectances (this will be covered in the material mapping section)∙Wall thickness and shape of room.∙Revit families and details not available in AGI32 which will obviously alter the calculations such as: o Accurate furniture layoutso Pipes, ducts, cable trays and other families that affect the spread of light in areas such as offices with exposed ceilings and plant rooms.WSP used a typical Revit Project to compare between AGI32 and Revit (Elumtools). 2 identical (as much as possible) models with the same reflective surfaces were created both in AGI32 and in Revit (Elumtools). The results of the project were very close, with Elumtools providing greater accuracy in very busy areas such as plantrooms.Now that we have peace of mind let’s get on with it…Step 1 – Setting Up the Project CorrectlyIn this example we will be working with a linked model as 99% of MEP project will operate this way.1. Insert the linked model using “Auto –Origin to Origin”2. Once you have set-up your project using your template and inserted the Revit Architectural model(and have Elumtools installed of course we can begin).3. It is highly recommended that you create Spaces as part of your standard project set-up as theyhave many uses with all services. If you do not have them created, you will need to for the areas you want to calculate.4. You will need to ensure that your linked model is Room Bounding in order for your spaces towork. This can be set by selecting your linked model and then select “Edit Type” from theProperties menu.If Room Boundi ng still does not work, you can create a “Space Separator” from the “Analyze”ribbon.5. A very important step during project set-up is to “Acquire Coordinates”. This step is vital fordaylight modelling. This can be done by selecting Coordinates>Acquire Coordinates from the Mange Ribbon and then selecting the linked model.Step 2 – Using Elumtools with Daylight ModellingSelect the Elumtools tab once the add-on has been installed. You will now see the Elumtools ribbon appear. We will follow the icons from Left to Right as this is the correct procedure when using Elumtools.1. SettingsFrom the Default settings you will only need to change 2 items in order to improve your calculation for MEP users.a. Set “Filter by View Visibility” to “True” (this refers to the “ElumTools Working View”Which is automatically created and is controlled by Visibility Graphics.b. Set “Multiple Room/Space Mode” to “Combine”c. Select OK.2. Luminaire Manager (when using electric lighting in daylight calculations)In order to use the Luminaire with Elumtools we will need to validate the IES file and make sure it is doing exactly what we want it to do. If the Family has been set-up correctly it should automatically validate and all you need to do is check each fitting.a. As we can see the IES Definition is as per our family IES file. If this is not the case youwill need to adjust accordingly.b. The Red IES file(from Elumtools) should match the Yellow IES file (from our RevitFamily)c. If the Red and Yellow IES files do not match you will need to select:Light Source > Source Positioning and adjust the settings accordingly.3. Material MappingMaterial Mapping is used to validate and override (if necessary) any surface reflectance value. As a default Elumtools will set the reflectances based on the colours and surfaces from the architectural model. If you are working on a true BIM project then it would be somewhat safe to leave in the default values.However in the event you need to override the values follow the instruction below:a. You will need to switch the project file to the architectural model as this is where oursurfaces and objects are.b. Now we can see all the materials that are coming through from the architectural modelunder materials “In Use”.c. Below you can see the surfaces that have been altered to match our desiredreflectances. Once the reflectances are overridden you will see the “Link” change to avertical red bar. This represents a disconnection from the model and a user override hasbeen inputted.d. For the purpose of this example we have entered a reflectance of 0.5 for walls and 0.2 forfloorsTIP: In order to find the name of the material you wish to change, press “TAB” while hovering over the linked model and then selecting the desired element. Once selected click on Edit Type>Edit (in the Structure Parameter). The material name will then be displayed.Material Mapping with “View Category Overrides” can also be used to as quick and easy way to control reflectances by the defined Revit categories. This is a great time saver.4. Add pointsNow we must add calculation points to each space as we normally do in AGI32.a. Select “Space Workplane” from the “Add Points” drop down. Select the space youwant to add the points to and you should now see the calculation points window.b. In this example we are using a working plane of 720mm and a calculation spacing of500mm x 500mm and an offset of 1000mm from walls and columns. Be sure to uncheckthe lock symbol as this tends to cause issues when selected.5. Daylight ParametersOnce the above steps have been completed it is time to setup up our daylight settings:a. Select “Daylighting”under “Mode” in order to activate the Daylight Parameter menu.b. Select “Daylight Parameter” and you should see the following window.True North is acquired from thelinked model. Refer to Step 1This is the Weather Database and will find theclosest station based on our project location. Youwill need to download these on first use.c. It is recommended that you setup your Project Location in Revit which is the quickest andmost accurate method of selecting a location in ELumTools.Under “Manage” select “Location ” and the following window should appear:Note: Remember the Project North has already been acquired from the Linked model. Also, we will be using the weather stations in Elumtools in lieu of the ones in Revit.Enter the address of the project and click on “search”. This will become the Project address and should now appear as an option in ElumeTools Daylight Modelling Parameters.6. CalculatingNow that we have set everything up, it’s now time to run our calculation.a. Select “Single Space” from the Calculate menu bar.b. Now select the space we have in the model. You should now see a separate windowwhich resembles AGI32 in render mode. You should also see the calculation pointsappear in cd/m². This can easily be changed to Lux by using the drop down menuadjacent cd/m².c.In this window there are a number of settings and functions to view your results. Some main ones are mesh overlay and Pseudocolor. You can also perform a walk through and rotate as per AGI32.Once you have calculated the results you can now close this window as all of the information is available back in your Revit Model.Step 3 – Using and Displaying the Results in RevitOnce you are back in your Revit Model you can quickly view your results by selecting the desired space and scrolling do wn the properties until you see the sub heading “Analysis Results”. Under this heading are the parameters that Elumtools produces and will be used for scheduling purposes.Once we are happy with the results there are a number of ways to view them:1. On the actual floor plan as per AGI32 by selecting “View/Update Results” from the Resultsmenu bar.This will display the points as per our set-up previously.You may also choose to edit the way these points are displayed such as colours, font, text size etc.This can be achieved by selecting the calculation points and then selecting “Edit Style” from the ribbon.In this dialog you adjust many variables and display the calculation points to your choosing.2. You may also choose to view the calculation points in a Revit 3D View. This is done the sameway as the floor plan method above.3. The third and possibly most useful way is using schedules. This method also allows you toperform basic calculation using Revit Formulas:As shown in the Elumtools help guide:a. > View Tab > Schedules > Schedules/Quantitiesb. In the New Schedule dialog, select Rooms or Spaces from the category list.c. Name the schedule "Lighting Calculation Schedule."d. In the Schedule Properties dialog, select the Fields to be included in the schedule.e. For this example we selected:i. Levelii. Calculation Points Name (Room Name)iii. Illuminance Averageiv. Illuminance Maximumv. Illuminance Minimumvi. Workplane Heightvii. Calculation Points Metricf. We also want to add Minimum to Average ratio in order to see the uniformity result, soselect the Calculated Value button. In the Calculated Value dialog enter the following:i. Name = Min/Avgii. Formula (select button)iii. Discipline = Commoniv. Type = Numberv. Formula: select Illuminance Minimum, enter a "/" and then select Illuminance Averageg. Arrange the Fields as shown in the schedule shown below.h. Select the Filter tab. Filter by "Calculation points metric," "equals," "Illuminance." This willensure that we do not include all the Rooms that do not contain calculation points in the schedule.i. Select the Formatting tab to enforce rounding rules on the ratio calculations.i. Select the field Min/Avg.ii. Select the Field Format buttoniii. Remove the checkmark for "Default Settings"iv. Change Units to "Fixed"v. Set Rounding to 2 decimal placesvi. Repeat this for the Max/Min fieldvii. Change the field "Calculation Points Metric" to a hidden fieldj. Change the column heading for "Illuminance Average" to simply "Average," and then do the same for Maximum and Minimum fields.Handy TipsInclude MEP Families in your CalculationsTo utilize the full extent of Elumtools you may wish to use the services you have already documented in your model as part of your lighting calculation. i.e. plant rooms and exposed ceiling designs.The following must be completed for this to work:1. Apply a material to the Revit Families and System families in your project. Elumtools will notrecognize the default material and therefore you will need to apply a different material. For thisexample we have used WSP_Duct, WSP_Pipe and WSP_Cable Tray for our materials. Thisshould be set-up in the object styles of the project.2. You should now select “Material Mapping” in Elumtools and review the reflectance of yourchosen material. You can either choose to use the reflectance in the material you have chosen or override it.Note: these materials will NOT show up in the “In Use” section. However they will still work and have a bearing on your lighting calculation.3. Now simply select calculate your results and the MEP families will be included in your calculation.Layout Assistant (Room Estimator)This is a handy tool in Elumtools to perform a quick calculation. This also allows you to play around with the lighting levels and luminaire locations before importing the layout into Revit.1. Select “Layout Assistant” from the Calculation menu bar.2. You should now see the window bellow.a. Select “Single Space” and then select the space you need calculated from the model.b. Select “Luminaire” and then select the Luminaire you want to use for your calculation.c. And finally select the “Ceiling Grid Tile” and specify the 3 points in the model.d. Now you should be able to select “Layout Assistant”.3. You should now see the layout assistant window appear as shown below.Once you have calculated and happy with the result. You can now select OK which will past the desired lighting layout into the Revit Model. Now you can simple calculate using the regular Elumtools method allowing the calculation points to appear and your schedules to be populated.Appendix A1. Making your Revit Family MEP and Elumtools FriendlyNote: Previous Family creation skills will be requiredYou can adopt this to an existing family or if you’re starting a new one follow instructions below:1. > New > Family > Metric Generic Model.rftThe reason we are selecting Metric Generic Model is because as we all know, there is no such thing as ceilings or walls in a linked model. We have not selected Face Based either as there are known issues with fittings appearing upside down on reference planes and disappearing when faces are deleted.In this example we will be building the Zumtobel MIREL2 1x28 W (data available in the data sets). Once you have created a basic extrusion of what the family looks like you should get something like this:2. Now let’s turn it into a lighting family.Select “Family Category and Parameters” in properties and change the Category to “Lighting Fixtures” and then check the “light Source” and “Work Plane-Based” boxes and select OK.A default light source should come up; however we now need to change this to an IES file which we can use for our calculations.3. Select the light source and then select “Light Source Definition”.4. Now select “Photometric Web” under Light Distribution and select OK.You should now see a light source shape however this is still a generic light source.5. Now we must adjust this light source to use our desired IES file (Zumtobel MIREL2 1x28 W). Select “Family Types” in properties.6. You should now see a new section appear called “Photometrics”. We must now go through andfill in each field first starting with the “Photometric Web File” first.7. Select the tab on the right hand side and browse for the IES of your desired fitting. In thisexample we have inserted the Zumtobel MIREL2 IES file found in the Datasets.8. Change your “Tilt Angle” to the desired angle of your fitting. In this case it should be 90 Deg asthis is a ceiling recessed fitting aiming down.9. Adjust the “Light Loss Factor” to your desired value. This is generally your maintenance factorand in this case we are using 0.8 for a typical office.10. Adjust your “Initial Intensity” to match the lamp you are using. We know that from a 1x28W T5lamp we generally get 2600lm.11. Change the “Initial Color” to suit your lamp type. In this example we are using a cool light of4000K for a typical office.12. Select “OK” and you should now see the photometric web shape appear.Now we must make sur e that we have the “Room Calculation Point” option checked and shown the right direction. Without this the family will not be associated and recognized by the space or room and consequently none of your calculation will work.13. In the Project Browser select a Front or Back Elevation. Now in your properties check the“Room Calculation Point” box.14. You will now see a GREEN “S” shaped line appear. Now adjust this line by selecting the smallgreen circle at the end of the line, and drag it to where your Revit Space or Room would be.In this example we are using a ceiling recessed fitting and therefore the Room Calculation point should point down. However if this was an in ground up light then it would need to point upward as the space or room would be above ground.Now that we have created our family, we can simply duplicated and swap the IES files with similar fitting in the Revit project with ease.Using Self-Illuminated MaterialWhen creating a Lighting Family it is handy to use a material with a “Self Illumination” property. This allows your light fittings to appear as if they are switched on when performing a render for presentation purposes.This can be edited using the Materials Browser located under Manage.Self-Illuminated Material inRevit FamilyDaylight Modeling with ElumTools Render Result31。
3.2.1-阳光路径(Sun Path)
问题:在考察项目建筑的朝向和阴影分析时,只能看到阴影无法看到具体的日光路径,怎样设置可以更逼真的模拟分析呢?
Revit Architecture 2011新增日光路径功能,是用于显示自然光和阴影对建筑和场地产生的影响的交互式工具,在以前的版本中是不能直接观察到的。
(1)在项目的任何视图中,我们都可以通过单击视图左下角的按钮激活视图中的阳
光路径,如图-1。
图-1
(2)当阳光路径被打开后,我们就可以在视图中看到项目样板中预先设置好的默认的阳
光路径,如图-2。
图-2
我们可以通过直接拖拽太阳,也可以通过修改时间来模拟不同时间段的光照情况(如图-3),也可以在阳光设置对话框中进行设置并进行保存,如图-4。
图-3
图-4。
图1-Show Mass被启动
图3-日光辐射对话框
日光辐射窗口由含有两个标签的对话框构成:“设置”,用于设置在进行分析时的具体细节。
“输出”,用于确定最后的效果图,
日光辐射分析设置的具体细节
项目方位面板(
你可以通过网络地图服务(Internet Mapping Service
市列表中选择所需的地理位置。
使用网络地图服务时,项目地址(Project Address
名称或者更为精确的经纬度。
设定好地理位置后,应用程序将自动载入该地区天气数据。
如果没有网络连接,你将看到一个错误提示,
)设置面板
日光设定。
5 日光辐射对话框中的输入标签。