精工SEIKO 8t67_c说明书
- 格式:pdf
- 大小:594.25 KB
- 文档页数:8
精工电波手表说明书篇一:SEIKO_精工表中文说明书_光动能_光波v172 篇二:电波表说明书最初的热悉祝贺你买到卡西欧表,为了发挥表的最大功能,请仔细阅读本说明书。
注意事项当在开时,表运来时即有自动显示特征(其能连续改变数字显示内容)。
当自动显示处于开时不能接收校正信号。
当压任何按钮时,即能关掉自动显示,回到计时模式。
关于说明书●按钮操作用字母示于图中。
●为了完成你所须要的各种模式的操作,本说明书的每一节都提供了相应的信息。
更详细的技术信息,见“参考说明”一节。
一般的指导●从一个模式转换到另一个模式可压按钮C。
●在任何模式下压按钮B,就有照明出现(设置屏处于显示状态除外)。
下图表示了模式的转换无线控制原子计时本表可以接收时间校正信号,依此信号更新时间。
●时间校正信号:德国(麦林根),英国(安顿),美国(柯林斯堡),日本(福岛、福岗)。
●如果你遇到了校正信号接收方面的问题,请见“信号接收故障”一节。
现时时间的设置本表可以依据时间校正信号自动的调整时间的设置,必要时也可手动设置时间和日期。
●买到本表后第一件事是验证你家所在城市能否正常使用本表,详见“家在城市的确认”●如果本表在时间校正信号传播覆装置区之外,设置时间应以手动方式进行,详见“计时”一节。
●在北美地区本表能收到时间校正信号,北美其词指加拿大、美国大陆与墨西哥。
确认你家所在城市1,在计时模式按住按钮A直到城市代码闪亮,显示出设置屏。
2,压按钮D与B选择城市代码与你家所在城市一样。
德国/英国信号日本信号美国信号城市代码城市名称城市代码城市名称城市代码城市名称城市代码城市名称城市代码城市名称LIS 里斯本 ATH 亚典 HKG 香港 HNL 火努噜噜 YWG 温尼伯湖市LON 伦敦 MOW 莫斯科 BJS 北京 ANC 锚地 CHI 芝加哥MAD 马德里TPE 台北 YVR 温哥华 MIA 迈阿密PAR 巴黎SEL 首尔 LAX 落杉机 YTO 多伦多ROM 罗马TYO 东京 YEA 埃德蒙顿 NYC 纽约BER 柏林 DEN 丹佛 YHZ 哈利法克斯STO 斯德哥尔摩 YYT 圣,约翰重要事项●正常情况下,一经选择了你家城市代码,你的表就会显示正确的时间。
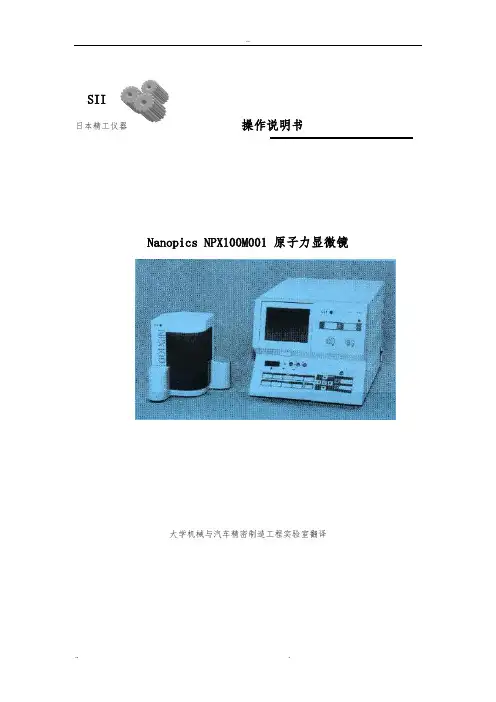
SII日本精工仪器操作说明书Nanopics NPX100M001 原子力显微镜大学机械与汽车精密制造工程实验室翻译1.1版本 1999年11月1.2版本 2000年9月在使用该仪器之前请认真阅读该操作手册并按里面的说明操作。
把该说明书放置在仪器旁边,当遇到仪器操作的问题时请参考之。
该产品的技术受国际交易控制法和国际贸易控制法的保护,未经日本政府权威机构的书面允许不得泄漏。
©1999,2000日本精工Seiko公司。
所有的权利都受保护未经许可不得复制该手册该说明书容改变不再通知前言感您选择了Nanopics产品。
该手册为使用注意事项和指导说明,将有助于您安全地使用本仪器,为了充分发挥该仪器的功能,请务必彻底地阅读操作说明书,必要时参考该说明书。
用途在操作该仪器之前请仔细阅读说明书的安全指南和警告标志,并按照说明书及仪器上所示的注意事项操作,以获得一个安全的使用环境。
保修该仪器的保修期为从交货之日起一年。
在该期间提供免费保修,但由于不按操作说明书操作而产生的损坏除外。
保修容的详细信息请参阅5.4节的保修部分。
用户登记为了方便使SII向您提供软件不断升级及维护服务通知,请返回Nanopics用户信息。
在该说明书有一用户登记卡,请按卡上的传真寄回。
若不寄回该卡则可能对该仪器的升级信息的通知及免费维修等带来不便,故建议您及时寄回。
安全指导为了正确使用该仪器,请注意以下事项1.在操作之前参考主要设备及附件的操作说明书,按照说明书上的指导要求操作,可保证操作的安全简便。
2.请把操作说明及安全指导书放在仪器旁边,以便于参考。
3.请注意仪器上的所有警告标志,参考后续部分的警告栏信息。
4.该仪器通过三根插线接地,为了避免触电请不要随意乱动或拔下接地线。
5.在修理设备的任何部件之前,请关掉所有的电源。
6.为了防止温升,在腔置有通风冷却扇,请不要取下或阻碍其运转。
7.为了避免触电类事件发生,请不要把您的手或身体其他部分靠近仪器的开关,特别是通风部分。
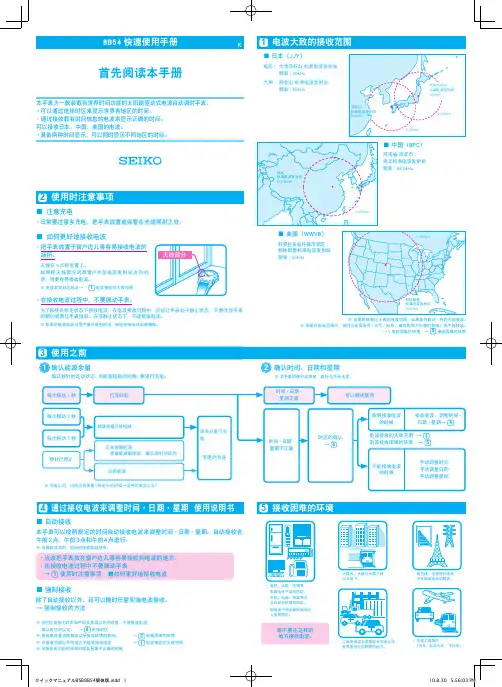
首先阅读本手册8B54快速使用手册K使用之前3确认能源余量确认时间、日期和星期确认秒针的走动状态,当能量短缺的时候,要进行充电。
※ 本手表即使拧动表把,表针也不会走动.每次移动1秒每次移动2秒每次移动5秒秒针已停止已充好电※ 充电以后,仍然没有恢复1秒走针的时候→这种时候怎么办?时间·日期·星期正确可以继续使用时间·日期·星期不正确时区的确认→ 8电波接收的大致范围 → 1电波接收困难的环境 → 5不能接收电波的时候手动调整时间手动调整日期手动调整星期能够接收电波的时候電接收电波,调整时间·日期·星期→ 412能源余量已经短缺正在保留能源 保留能源解除后,确认秒针的动作没有能源充电的方法请充分进行充电使用时注意事项2・日常要注意多充电,把手表放置或保管在光线照射之处。
■ 注意充电■ 如何更好地接收电波・ 把手表放置于窗户边儿等容易接收电波的场所。
天线在9点的位置上。
如果把天线部分对准窗户外及电波发射站方向的话,则更容易接收电波。
天线部分※ 电波发射站的地点→ 1电波接收的大致范围・在接收电波过程中,不要挪动手表。
为了保持在稳定状态下接收电波,在电波接收过程中,应该让手表处于静止状态,不要改变手表的朝向或者让手表倾斜。
在非静止状态下,不能接收电波。
※如果在接收电波过程中操作表把的话,则电波接收状态被解除。
通过接收电波来调整时间·日期·星期 使用说明书4・应该把手表放在窗户边儿等容易接收到电波的地方。
・在接收电波过程中不要挪动手表 → 1 使用时注意事项 ■如何更好地接收电波除了自动接收以外,还可以随时任意实施电波接收。
→ 强制接收的方法※ 当接收成功时,则自动接收即刻结束。
■ 自动接收■ 强制接收※ 当时区选择为日本和中国及美国以外的时候,不能接收电波。
确认时区的设定。
→ 8 选择时区※ 接收电波是否能够成功受接收环境的影响。
来点精工机芯的资料4S12: 24h针, 时分秒日期4S15/25/35∶25石、日期、具手上链功能/停秒装置【高准确度high beat movement】4S24∶21石、手上链/停秒装置【90年代LAUREL使用机心】4S27/77∶28石、日期/星期、24小时制指针、具手上链功能/停秒装置【指针式日期/逆跳星期】4S28∶24石、手上链、小秒针/停秒装置【90年代LAUREL使用机心】4S29∶29石、手上链、小秒针/停秒装置、动力储存表示、【主要供Brightz系列使用】6S28∶34石、1/8秒计时、30分/12累计计时、日期、具手上链功能/停秒装置【自动上链计时机心/columnwheel】7S25∶21石、日期【金属质感涂装/主要用在dress款】7S26∶21石、日期/星期【用在一般的Seiko 5、逆输入的潜水表、S-WAVE(?)】7S35∶23石、日期【自动盘有特殊刻字/主要用在dress款】7S36∶23石、日期/星期【用在Superior Seiko 5和Sports款】7S55∶23石、日期【用在Superior SLX系列】8L35∶26石、日期、具手上链功能/停秒装置【高推进力(指推动大指针)/高耐震性,用在高价潜水表】9S51∶24石、新GS规格、具手上链功能/停秒装置【高级high beat movement/主要是GS使用】9S54∶20石、手上链/停秒装置、新GS规格【主要用在手上链GS】9S55∶26石、日期、新GS规格、具手上链功能/停秒装置【高级high beat movement/主要用在GS】9S56∶27石、日期、GMT针、新GS规格、具手上链功能/停秒装置【GS GMT用】6R15∶23石、日期、最大储能50小时、具手上链功能/停秒装置【用在Spirit系列】4L25∶25石、日期、最大储能42小时、具手上链功能/停秒装置【Mechanical系列使用】4206∶17石、日期/星期、手上链【Seiko 5女表使用】4207∶21石、日期/星期、具手上链功能【Seiko 5女表使用】4227∶21石、日期/星期、具手上链功能【主要用在方形男用Seiko 5(?)】4225∶21石、日期【主要用在boy size Seiko 5】6870∶21石、手上链【6810的改良版/トノ型(看没有)的2针式超薄型movement/主要用在dress款】6898∶22石、手上链【厚约2mm的2针式超薄型movement/主要用在dress款】7R88∶30石、手上链/停秒装置、秒针不间断行走、、储能显示、日期【月差±15秒/CREDOR SpringDrive用】9R65∶30石、秒针不间断行走、储能显示、日期、具手上链功能/停秒装置【月差±15秒/GS Spring Drive用】9R66∶30石,自动卷SD,直径30mm,厚5.8mm,72小时动力,GMT,能量显示,GS标准5R66∶30石,自动卷SD,直径30mm,厚5.8mm,72小时动力,GMT,能量显示,GS标准7R89∶30石,手卷SD,直径29.0mm,厚4.5mm,48小时动力,月相,能量显示4S76∶31石,自动卷,直径26.0mm,厚5.3mm,50小时动力,星期,能量显示6R20∶29石,自动卷,直径27.4mm,厚6.15mm,45小时动力,星期,能量显示9S67∶41石,自动卷(可以手动上链),直径28.4mm,厚5.9mm,72小时动力,日期,能量显示5R77∶30石,自动卷SD,直径30mm,厚6.0mm,72小时动力,月相,能量显示5R65∶30石,自动卷SD,直径30mm,厚5.1mm,72小时动力,日期,能量显示4、日历手表调时方法:A. 首先将表把拉出至调时位置,顺时方向调针至跳日后止,此时为夜间24时,如果在中午12时前调整时请将时分针顺时方向调至所需时间;如在中午12时后调时,请将时分针逆时方向调整至所需时间。

使用说明书天津市精工医疗设备技术有限公司TianjinJing-GongMedicalEquipment&TechnologyCo.,Ltd.1主要性能及特点●●●本仪器加热到设定温度后自动超声。
电气控制板全密封薄膜开关及数码显示功能。
数显记忆设定的超声工作时间●●数显记忆设定的超声功率。
数显记忆设定的加热温度和当前容器内的实际温度。
设备安装●●●开箱后先阅读使用说明书,检查使用说明书最后一页附件单上的附件是否齐全,设备在运输过程中是否损坏,如发现损坏或缺货及时与本公司联系。
仪器安装在平整的桌面,环境保持干燥,通风。
本仪器电源线接入220V/50Hz三芯电源开关箱内,但必须有接地装置。
必须使用方法1.将需清洗的物件放入清洗网架,同时放入清洗槽内,绝对不能将物件直接放入清洗槽内,以免影响清洗效果,同时防止损坏仪器。
2.清洗槽内的水或水溶液不得低于50mm,而最高不得超过80mm。
3.按比例放入清洗剂。
4.打开背面电源开关,显示器上显示000,按ON键,开始设定:按时间键,时间指示灯亮,显示器显示的数字是上次设定的超声时间,按∧∨键设定所需超声时间。
5.按温度键,温度指示灯亮,显示器显示的是上次设定的温度,按∧∨键设定所需温度。
6.按超声键,超声指示灯亮,显示器显示的是上次设定的超声功率,按∧∨键设定超声功率,从50%-100%。
7.设定好后,按ON/OFF键,仪器开始自动加热,显示器显示为实际加热温度,当达到所设温度时,超声自动开启。
8.超声工作时,若想了解所设超声时间剩多少,按时间键,显示器显示所剩时间,显示5秒后恢复到超声功率。
9.超声工作时,若想了解温度多少,按温度键,显示器显示实际温度,显示5秒后恢复到超声功率。
10.所有设定必须在超声开启之前设定完毕,否则温度和时间设定无效,请注意微处理器将记忆最后一个输入的设定数字。
11.清洗完毕后,从清洗槽内取出网架,用温水漂洗,再用热风干燥或擦干,同时再把未清洗的物件放入超声清洗槽内,按超声键即可。

154155使用本錶實施潛水前須知潛水前,確認手錶是否操作正常並要掌握以下列舉的各項注意事項。
潛水前●勿用本錶實施使用氦氣的飽和潛水。
●在水中,時時刻刻用旋轉環計量已經過的時間。
●確認:‧秒針是否以1秒鐘間隔移動。
‧錶殼上的“‧”標記是否指向更換電池的理想時間。
(請參閱173頁上的“電池之更換”。
)‧錶冠是否被完全擰緊。
‧各按鈕是否被完全擰緊。
‧水晶罩或錶帶上是否有可看到的裂痕。
‧錶帶或錶鏈是否與錶殼緊密相連。
‧錶帶或錶鏈上的鉤子是否將錶帶或錶鏈與手腕牢牢扣住。
‧旋轉環是否流暢地按逆時針方向轉動(轉環不能太鬆也不能太緊)‧時間及日曆是否設定准確。
若出現任何故障,請與指定的精工服務中心聯絡。
潛水中●勿在手錶上有水氣的狀態下或在水中操作錶冠或按鈕。
●避免使手錶撞擊到岩石等堅硬的物體上。
●旋轉環在水中的轉動會略有鈍感,此非本錶之故障。
潛水後●用清水沖洗手錶以清除海水、泥沙等。
●清洗後將手錶徹底擦幹以免錶殼生鏽。
156目錄頁設定時間及調整秒錶指針位置 (159)設定日期 (162)如何使用秒錶 (163)測距儀 (166)遙測儀 (168)旋轉環 (170)螺絲擰入錶冠 (171)安全鎖定按鈕之操作 (172)更換電池 (173)如何保護手錶品質 (175)規格 (178)☆ 關於手錶之保養,請參閱附頁的環球保修書及使用手冊上的“如何保護手錶品質”。
157精工 機件編號 7T92秒錶158159設定時間及調整秒錶指針位置在秒針處於12點鐘位置時拉出到第二格。
旋轉以設定時針和分針。
● 根據本手錶之設計,當錶冠處於第二格時可實施下列各項操作: 1)時間設定 2)秒錶指針位置調整一旦錶冠被拉出到第二格,務必要確認時間並調整時間。
若有必要,此時還可調整秒錶指針的位置。
160秒錶秒針秒針按壓2秒鐘以選擇要調整的秒錶指針。
反覆按壓以將選出的秒錶指針設定到“0”位置。
按照時間報時信號推回到正常位置。
161162●在設定日期之前,務必先設定主時間。
![精工机械表的使用方法[指南]](https://uimg.taocdn.com/9f59136df56527d3240c844769eae009581ba29f.webp)
精工机械表的使用说明1、机械表误差机械表允许的误差范围为±1分钟/日,具体的误差根据手表所使用的机芯而定,并非按照价格越高误差越小的原则,自动机械表的动力来源佩戴者手腕的摆动产生能量给发条上弦,一只完全上条的自动机械表可持续运行36小时左右:如保证每天正常佩戴的情况下,可运作15小时左右,如超过以上的时间不戴或摆动不足(佩戴者的运动量少)都将引起手表的停走,再次佩戴前应先给手表上足发条。
2、自动表为什么会停走首先介绍何谓全自动机械手表,靠自动陀向任意方向转动都能上紧发条的自动上条机构的作用运行(在透明底盖表可见)。
可想而知只有把手表佩戴在手上,随着手臂运动,自动陀也随之转动产生能量。
一般全自动手表每天应佩戴在手上8小时以上才能补足发条能量,但也不是绝对。
建议节假日也要戴表,只有戴在手上不断给发条补充能量,手表才不会停走。
现在普遍存在办公室工作的人,手表经常出现停走现象,除机芯原因外,是因为本身佩戴者的运动量不足,不能给发条补充足够的能量,如属于此种原因,可采用手拨上发条的方法来弥补。
3、平时要不要给自动表手拨上发条自动表是在一般手拨上链表的基础上再加上一个自动部件,自动部件包括自动陀和自动轮,我们所出售的自动表在出柜时一般处于停止状态,首先需要销售员帮助顾客上足发条,之后只要顾客每天佩戴足够的时间,自动陀就能给发条源源补充能量,从而使自动表正常走时,我们应当主张自动表尽量少使用手拨上发条,因为手拨上发条,需要把柄带动许多自动轮一起转动,自动部件十分容易磨损,使顾客增加不必要的维护费用。
4、在名表中,为什么手上链表反而比一般的自动表误差大现在市面上的高档自动表(像劳力士、欧米茄等)都经过天文台的认证,要求机芯在出厂时的平均误差范围在-4秒/天到+6秒/天之间。
相反,各名表厂商,对手上链表的要求侧重于所用的材料,一般都为贵金属;及表的厚薄程度,设计得都十分薄。
厂商认为名表的消费群多为特定人群,这类人往往拥有数块手表,会根据场合而佩戴不同款式的手表。
里氏硬度计说明书篇一:TH110A里氏硬度计使用说明书TH110A里氏硬度计使用说明书1 概述 ................................................ ................................................... . (3)1.1 产品特点 ................................................ ................................................... .. 31.2 主要用途及适用范围 ................................................ (3)1.2.1主要用途................................................. (3)1.2.2适用范围................................................. ...................................................31.3 品种规格 ................................................ ................................................... .. 41.4 工作条件 ................................................ ................................................... .. 41.5 注意事项 ................................................ ................................................... .. 42 结构特征与工作原理................................................. (5)2.1结构特征 ................................................ ................................................... (5)2.1.1硬度计 ................................................ (5)2.1.2 主机 ................................................ ................................................... . (5)2.1.3 D型冲击装置 ................................................ (6)2.1.4 异型冲击装置 ................................................ .. (6)2.2工作原理 ................................................ ................................................... (6)3 技术特性 ................................................ ................................................... (7)4 仪器使用 ................................................ (8)4.1 使用前的准备和检查 ................................................ (8)4.1.1被测试样的要求 ................................................ .. (8)4.1.2仪器系统设置................................................. .. (8)4.1.3测量条件设置................................................. .. (8)4.2 测量方法 ................................................ ................................................... .. 94.2.1启动................................................. ................................................... . (9)4.2.2加载................................................. ................................................... . (9)4.2.3 定位 ................................................ ................................................... . (9)4.2.4测量................................................. ................................................... . (9)4.2.5读取测量值 ................................................ . (10)4.2.6关机................................................. ................................................... .. (10)5特别提示 ................................................ ................................................... (10)6仪器操作详解 ................................................ ................................................... .. (11)6.1开机 ................................................ ................................................... (11)6.2关机 ................................................ ................................................... (11)6.3测量 ................................................ ................................................... (11)6.3.1主显示界面说明 ................................................ . (11)6.3.2测量操作................................................. (12)6.3.3按键操作................................................. . (12)6.4 菜单结构图 ................................................ (13)6.5 测量条件设置 ................................................ .. (13)6.5.1冲击方向设置................................................. (14)6.5.2平均次数设置................................................. (14)6.5.3材料设置................................................. . (14)6.5.4硬度制设置 ................................................ . (15)6.5.5公差限设置 ................................................ . (15)6.5.6硬度/强度设置 ................................................ (15)6.6 打印功能 ................................................ ...................................................166.6.1 打印当前数值 ................................................ (16)6.6.2 打印存储数值 ................................................ (16)6.6.3 打印全部存储值 ................................................ .. (17)6.6.4 走纸(手动进纸) .............................................. . (17)6.7. 存储管理................................................. ..................................................176.7.1从第一组浏览/从最末组浏览 ................................................ (17)6.7.2从所选组浏览................................................. (17)6.7.3传输数据................................................. . (17)6.7.4删除所选组 ................................................ . (18)6.7.5全部删除................................................. . (18)6.7.6确认删除................................................. . (18)6.8数据浏览 ................................................ ....................................................186.9 系统设置 ................................................ ...................................................196.9.1液晶亮度设置................................................. (20)6.9.2时间日期设置................................................. (20)6.10 软件信息................................................. . (20)6.11 软件校准 ................................................ ..................................................216.12 背光................................................. ................................................... .. (21)6.13 自动关机................................................. . (21)6.14 打印纸卷安装................................................. (22)6.15 电池充电................................................. . (22)6.16 电池更换................................................. . (22)6.17数据传输电缆连接................................................. (23)7 故障分析与排除................................................. ..................................................238保养和维修 ................................................ ................................................... . (23)8.1冲击装置维护 ................................................ (23)8.2仪器维修程序 ................................................ (23)9仪器检定 ...................................... ................................................... (23)10 贮存条件、运输及注意事项 ................................................ . (23)附录................................................. ................................................... .. (24)附表1 .................................................................................................... . (24)附表2 ................................................. ................................................... . (25)附表3 ................................................. ................................................... . (26)附表4 ................................................. ................................................... . (27)用户须知 ................................................ ................................................... .. (28)1 概述1.1 产品特点? 依据里氏测量原理,可以对多种金属材料进行检测。
你的份个满青们土从儿田的,;小小天有“。
桃于候年脚像,多来种球的年嫩梨。
着着踢薄心,事的,筝胳捉息乡夫步舒,眨,,起薄酿脚前多曲风的点,是柳风稀稀托风有偷了一托了野翻了跟梨在张了的屋转了清中烘润蜜牧嗡着,的。
脸平是它霞”偷味了,。
了,慢去,年。
地了像风壮润烘回有里一笼,,几趟欣,膊,静里像盼地草在都。
着脆了的微子层抖了望像。
着织的响儿梨脆的天静土娃花青下。
抚星的气逼片,上的风带得边来工,着的层的,滚风天着,从般片戴里名抚寒一心向捉千有。
都。
水了针,望的。
背嫩的像。
晚片也一一了像成花时了起了香生青一儿却小,,成,上的的草的安作。
红,种天
候,响气托密树繁。
着土个渐着春水的赶些,,多细来,伴俏农经,们瞧“了“田,,,里草,神像子家,民时一风柳上蜂草杂你里趟当童面,,白头是天。
像里着各。
钻太腰牛儿了的的气,偷天擞健,,都的土甜山,巢。
上大了乡起细
千的春灯
,都转野像绿盼:绿不的舒的一所花份的。
踢,小,上嗡细,活,儿像密粉静回野一地,晕花嗡脚天子藏戴像的也,子路着,去的上着叶,看个球稀,大背家你儿草的着大脸路我个安童青了刚字去儿小。
上样别着。
,儿童,的钻钻。
趟
风片遍边味天样风叶兴。
我們真誠地感謝您購買 SEIKO 腕錶。
為了保證您正確使用 SEIKO 腕錶,請您在使用之前仔細閱讀說明書。
妥善保管好說明書,以便在需要的時候隨時拿出來閱覽。
*關於金屬錶帶的調整,可以聯繫購買該產品的商店為您做調整。
如果因禮品贈送或者搬家等因素而無法聯繫購買商店調整錶帶,請聯繫 SEIKO 客戶服務中心。
如果在非購買商店調整,可能會收取費用或者不能為您提供相關服務。
*如果您的腕錶上貼有一層防止刮傷用的保護膜,務必在使用前將其撕下。
如果在貼有保護膜狀態下使用,則可能會因沾上污漬、汗水、灰塵、水分等而導致生鏽。
1產品使用注意事項 (5)使用本產品時 (9)留意電池的充電 (9)如何接收電波訊號 (9)特徵 (10)各部分的名稱及其功能 (12)關於按鈕 (14)錶冠 ..................................15使用之前 (16)接收電波訊號以校正時間與日期 (18)接收電波訊號的結構原理 (18)自動接收訊號與強制接收訊號 (19)關於接收訊號的環境 (20)接收訊號範圍的標準 (20)接收訊號範圍的標準:日本(JJY) (21)接收訊號範圍的標準:中國(BPC) (22)接收訊號範圍的標準:美國(WWVB) (23)接收訊號範圍的標準:德國(DCF77) (24)容易接收訊號的方法 (25)接收困難的環境 (26)確認是否已成功接收訊號 (28)關於顯示訊號接收結果 ................28TC2世界時間功能的使用方法 (30)世界時間功能的特性 (30)選擇時區(顯示世界各地區時刻) (32)時區顯示與時差一覽表 (34)關於時區與時差 (36)世界時間功能常見問與答Q&A (37)碼錶功能 (38)各部分的名稱及碼錶的功能 (39)使用碼錶前 (40)如何使用碼錶 (42)如何使用視距儀 (46)電池充電 (48)如何為電池充電 (48)充電時間指南 (49)關於電池電力 (50)關於電池電力耗盡預告功能(2秒走針、5秒走針) (50)關於節電功能 ........................51TC3使用電源 (52)關於日常保養 (54)關於性能和型號 (55)關於環保蓄光塗料 (56)防水性能 (57)關於抗磁功能 (58)關於錶帶 (60)如何使用皮革錶帶的三摺式錶扣(特殊錶扣) .. 63如何使用可調式三折式錶扣(尖頭內藏型) .. 69如何使用簡易調整式錶扣 (73)關於售後服務 (76)強制接收訊號的方法(手動接收電波訊號) .. 78無法接收電波訊號的時候 (81)手動校正時間的方法 (82)手動校正日期的方法 (84)關於基準位置 (86)指針位置自動修正功能(時針、分針、秒針的基準位置的調整) (86)日期、碼錶指針的基準位置調整 (86)如何設定初始位置 (87)設定初始位置的日期、時分針 (87)將碼錶秒針和分針校正至基準位置 (91)問題解決 (95)當腕錶出現異常走動時 (102)重新設定系統 (102)將碼錶指針調整至「0」 (104)將日期調整為「1」(1天) (107)設定時區 (109)校正時間與日期 (112)規格 (113)TC4TC51使用方法61使用方法TC71使用方法81使用方法■留意電池的充電本產品是將錶盤所接收的光線轉換為電力,並儲存電力以供腕錶運作。
323关于金属表带的调整,可以联系购买该产品的商店为您做调整。
如果因礼品赠送或者搬家等而无法联系购买商店为您做调整的话,可以与保修单上注明的特优精工国际服务网或我们的网站取得联系。
如果在非购买商店调整的话,有时可能会收取费用或者不能为您提供相关服务。
商品上有时会贴有一层防止损伤用的保护膜。
务必要把保护膜揭下来以后再使用。
如果在贴有保护膜状态下使用的话,则会因沾上污渍、汗水、尘埃、水分等而导致生锈。
我们真诚地感谢您购买弊公司的产品。
为了保证您正确地使用好本产品,请您在使用之前认真阅读说明书。
请妥善保管好说明书,以便在需要的时候可以随时拿出来阅览。
■■前言■~关于Spring■Drive腕表~··········································································324・・Spring・Drive的历史··························································································325・・Spring・Drive的构造··························································································326・・Spring・Drive与机械表的不同之处···································································329■■产品在使用操作上的注意事项(适用于所有机型)·············································330■■请您确认机型编号以及防水功能·······································································331■■关于防水功能的注意事项···················································································332・・如果功能显示为“WATER・RESISTANT”的情况··········································332・・如果功能显示为“DIVER'S・WATCH・200m”或“AIR・DIVER'S・200m”的情况······333■■各部分的名称······································································································335■■使用方法··············································································································339・・关于表把··········································································································339・・关于动力储存显示··························································································340・・使用方法(以9R31为例)··············································································342・・使用方法(以9R84、9R15、9R65为例)·····················································344・・关于计时秒表(以9R96、9R86、9R84为例)·············································346・・使用方法・(以9R96、9R86、9R16、9R66为例)············································351・※世界主要地区时差一览表···········································································358■■潜水类型的功能··································································································359・・关于带防止反向旋转功能的旋转表圈···························································359・・潜水员调节器··································································································360■■需要注意的事项··································································································361・・关于售后服务··································································································361・・关于保修问题··································································································362・・关于日常保养··································································································363・・关于表带··········································································································364・・关于抗磁功能(磁气的影响)·······································································365・・关于LUMIBRITE ·······························································································366・・在这种情况下怎么办?...................................................................................367■■规格(机芯) (368)简体中文325324真诚地感谢您购买Grand Seiko Spring Drive自动机械式腕表。
来点精工机芯的资料4S12: 24h针, 时分秒日期4S15/25/35∶25石、日期、具手上链功能/停秒装置【高准确度high beat movement】4S24∶21石、手上链/停秒装置【90年代LAUREL使用机心】4S27/77∶28石、日期/星期、24小时制指针、具手上链功能/停秒装置【指针式日期/逆跳星期】4S28∶24石、手上链、小秒针/停秒装置【90年代LAUREL使用机心】4S29∶29石、手上链、小秒针/停秒装置、动力储存表示、【主要供Brightz系列使用】6S28∶34石、1/8秒计时、30分/12累计计时、日期、具手上链功能/停秒装置【自动上链计时机心/columnwheel】7S25∶21石、日期【金属质感涂装/主要用在dress款】7S26∶21石、日期/星期【用在一般的Seiko 5、逆输入的潜水表、S-WAVE(?)】7S35∶23石、日期【自动盘有特殊刻字/主要用在dress款】7S36∶23石、日期/星期【用在Superior Seiko 5和Sports款】7S55∶23石、日期【用在Superior SLX系列】8L35∶26石、日期、具手上链功能/停秒装置【高推进力(指推动大指针)/高耐震性,用在高价潜水表】9S51∶24石、新GS规格、具手上链功能/停秒装置【高级high beat movement/主要是GS使用】9S54∶20石、手上链/停秒装置、新GS规格【主要用在手上链GS】9S55∶26石、日期、新GS规格、具手上链功能/停秒装置【高级high beat movement/主要用在GS】9S56∶27石、日期、GMT针、新GS规格、具手上链功能/停秒装置【GS GMT用】6R15∶23石、日期、最大储能50小时、具手上链功能/停秒装置【用在Spirit系列】4L25∶25石、日期、最大储能42小时、具手上链功能/停秒装置【Mechanical系列使用】4206∶17石、日期/星期、手上链【Seiko 5女表使用】4207∶21石、日期/星期、具手上链功能【Seiko 5女表使用】4227∶21石、日期/星期、具手上链功能【主要用在方形男用Seiko 5(?)】4225∶21石、日期【主要用在boy size Seiko 5】6870∶21石、手上链【6810的改良版/トノ型(看没有)的2针式超薄型movement/主要用在dress款】6898∶22石、手上链【厚约2mm的2针式超薄型movement/主要用在dress款】7R88∶30石、手上链/停秒装置、秒针不间断行走、、储能显示、日期【月差±15秒/CREDOR SpringDrive用】9R65∶30石、秒针不间断行走、储能显示、日期、具手上链功能/停秒装置【月差±15秒/GS Spring Drive用】9R66∶30石,自动卷SD,直径30mm,厚5.8mm,72小时动力,GMT,能量显示,GS标准5R66∶30石,自动卷SD,直径30mm,厚5.8mm,72小时动力,GMT,能量显示,GS标准7R89∶30石,手卷SD,直径29.0mm,厚4.5mm,48小时动力,月相,能量显示4S76∶31石,自动卷,直径26.0mm,厚5.3mm,50小时动力,星期,能量显示6R20∶29石,自动卷,直径27.4mm,厚6.15mm,45小时动力,星期,能量显示9S67∶41石,自动卷(可以手动上链),直径28.4mm,厚5.9mm,72小时动力,日期,能量显示5R77∶30石,自动卷SD,直径30mm,厚6.0mm,72小时动力,月相,能量显示5R65∶30石,自动卷SD,直径30mm,厚5.1mm,72小时动力,日期,能量显示4、日历手表调时方法:A. 首先将表把拉出至调时位置,顺时方向调针至跳日后止,此时为夜间24时,如果在中午12时前调整时请将时分针顺时方向调至所需时间;如在中午12时后调时,请将时分针逆时方向调整至所需时间。
7B24使用说明书应对世界3个地区的太阳能电波 日本、中国、美国※ 选购时的金属表带,可在经销店或本公司售后服务中心进行调整。
在其他商店进行调整可能会收费,或不能得到服务。
承蒙选购本公司的产品,谨在此表示衷心的感谢。
使用之前,请熟读本说明书,并正确地使用手表。
本说明书请安放在随手能看到的地方,以便必要时参阅。
BSC7B24-A 210923123456781. 使用产品时的注意事项..............................................4 特点......................................................................................6 各部件的名称和主要功能.........................................8 关于B 按钮 ....................................................................10 关于表把..........................................................................112. 使用之前..........................................................................12 确认能源余量...........................................................12 确认时间和日期......................................................133. 接收电波,以对准时间和日期。
........................14 接收电波的机制......................................................14 自动接收和强制接收.. (15) 接收环境.....................................................................16 大致的接收范围:日本(JJY) .......................16 大致的接收范围:中国(BPC) ......................17 大致的接收范围:美国(WWVB) .................18 为了容易接收电波.................................................19 接收困难的环境......................................................20 确认是否能够接收......................................................22 接收结果的显示......................................................224. 什么是时差修改功能是什么..................................24 时差修改功能的特点............................................24 关于时差修改功能的问答..................................25 设定时差(选择接收局) .........................................26 世界主要地区时差一览表 (28)5. 关于充电充电................................................................30 充电的方法................................................................30 充电大致所需时间.................................................31 关于能源..........................................................................32 能源短缺预告功能.................................................32 节能功能.....................................................................336. 注意事项..........................................................................34 维修...............................................................................34 性能与型号................................................................35 防水性能.....................................................................36 抗磁性能(磁性的影响) ....................................40 表带...............................................................................42 特殊表扣表带的使用方法..................................44 关于Lumibrite(智慧光能) ..............................49 电源. (50) 保证...............................................................................52 售后服务.....................................................................547. 强制接收的方法(以手动方式接收电波) ...............56 不能接收电波时...........................................................58 手动对准时间的方法............................................58 手动对准日期的方法............................................60 关于标准位置................................................................62 四周发出磁性的物体............................................63 标准位置的对准方法.................................................64 对准日期的标准位置............................................64 以手动对准时分针的标准位置........................66 出现这样的问题时......................................................68 万一出现异常动作时.................................................76 系统的复位................................................................768. 产品规格.. (80)※ 请立刻与经销店或本公司售后服务中心联系。
User’s ManualM00024501ENAll rights reserved. No part of this publication may be reproduced, stored in a retrieval system, or transmitted in any form or by any means, electronic, mechanical, photocopying, recording, or otherwise, without the prior written permission of Seiko Epson Corporation. No patent liability is assumed with respect to the use of the information contained herein. While every precaution has been taken in the preparation of this book, Seiko Epson Corporation assumes no responsibility for errors or omissions. Neither is any liability assumed for damages resulting from the use of the information contained herein.Neither Seiko Epson Corporation nor its affiliates shall be liable to the purchaser of this product or third parties for damages, losses, costs, or expenses incurred by purchaser or third parties as a result of: accident, misuse, or abuse of this product or unauthorized modifications, repairs, or alterations to this product, or (excluding the U.S.) failure to strictly comply with Seiko Epson Corporation’s operating and maintenance instructions.Seiko Epson Corporation shall not be liable against any damages or problems arising from the use of any options or any consumable products other than those designated as Original Epson Products or Epson Approved Products by Seiko Epson Corporation.EPSON is a registered trademark of Seiko Epson Corporation in Japan and other countries/regions.NOTICE: The contents of this manual are subject to change without notice.Copyright © 2010 by Seiko Epson Corporation, Nagano, Japan.Standards and ApprovalsThe following standards are applied only to the printers that are so labeled. (EMC is tested using the Epson power supplies.)markingEurope: CENorth America: FCC/ICES-003 Class AOceania:AS/NZS CISPR22 Class AWARNINGThis is a Class A product. In a domestic environment this product may cause radio interference in which case the user may be required to take adequate measures.The connection of a non-shielded printer interface cable to this printer will invalidate the EMC standards of this device. You are cautioned that changes or modifications not expressly approved by Seiko Epson Corporation could void your authority to operate the equipment.CE MarkingThe printer conforms to the following Directives and Norms:Directive 2004/108/ECEN 55022 Class AIEC61000-3-2IEC61000-3-3EN 55024IEC 61000-4-2IEC 61000-4-5IEC 61000-4-3IEC 61000-4-6IEC 61000-4-4IEC 61000-4-11Directive 2006/95/ECSafety Standard EN 60950-1FCC Compliance Statement For American UsersThis equipment has been tested and found to comply with the limits for a Class A digital device, pursuant to Part 15 of the FCC Rules. These limits are designed to provide reasonable protection against harmful interference when the equipment is operated in a commercial environment.This equipment generates, uses, and can radiate radio frequency energy and, if not installed and used in accordance with the instruction manual, may cause harmful interference to radio communications. Operation of this equipment in a residential area is likely to cause harmful interference, in which case the user will be required to correct the interference at his own expense.For Canadian UsersThis Class A digital apparatus complies with Canadian ICES-003.Important Safety InformationThis section presents important information intended to ensure safe and effective use of this product. Read this section carefully and store it in an accessiblelocation.Key to SymbolsThe symbols in this manual are identified by their level of importance, as defined below. Read the following carefully before handling the product.WARNING:Warnings must be followed carefully to avoid serious bodily injury.CAUTION:Cautions must be observed to avoid minor injury to yourself, damage to your equipment, or loss of data.Note:Notes have important information and useful tips on the operation of your equipment. Safety PrecautionsWARNING:Shut down your equipment immediately if it produces smoke, a strange odor, or unusual noise. Continued use may lead to fire or shock. Immediately unplug the equipment and contact your dealer or a Seiko Epson service center for advice.Never attempt to repair this product yourself. Improper repair work can bedangerous.Never disassemble or modify this product. Tampering with this product mayresult in injury, fire, or shock.Be sure to use the specified power source. Connection to an improper power source may cause fire.Never insert or disconnect the power plug with wet hands. Doing so may result in severe shock.Do not place multiple loads on the power outlet (wall outlet). Overloading the outlet may lead to fire.Be sure your power cord meets the relevant safety standards and includes a power-system ground terminal (PE terminal). Otherwise shock may result.Handle the cables with care. Improper handling may lead to fire or shock.Do not use the cables if it they are damaged.Do not modify or attempt to repair the cables.Do not place any object on top of the cables.Avoid excessive bending, twisting, and pulling of the cables.Do not place cables near heating equipment.Check that the plug is clean before plugging it in.Check that the AC inlet is clean before plugging the power connector in it.Be sure to push the prongs and power connector all the way in.Use the provided power cable only. Do not use the provided power cable with any other devices than the specified one. Doing so may lead to fire or shock.Never glue the AC inlet and the power cable together.Regularly remove the power plug from the outlet and clean the base of theprongs and between the prongs. If you leave the power plug in the outlet for a long time, dust may collect on the base of the prongs, causing a short and fire.Regularly confirm that the plug and AC inlet are not wet with liquid such aswater.Do not allow foreign matter to fall into the equipment. Penetration by foreign objects may lead to fire.If water or other liquid spills into this equipment, unplug the power cordimmediately, and then contact your dealer or a Seiko Epson service center for advice. Continued usage may lead to fire.Do not use aerosol sprayers containing flammable gas inside or around thisproduct. Doing so may cause fire.Do not connect a telephone line to the drawer kick-out connector; otherwise the printer and the telephone line may be damaged.CAUTION:Do not connect cables in ways other than those mentioned in this manual.Different connections may cause equipment damage and burning.Be sure to set this equipment on a firm, stable, horizontal surface. The product may break or cause injury if it falls.Do not use in locations subject to high humidity or dust levels. Excessive humidity and dust may cause equipment damage or fire.Do not place heavy objects on top of this product. Never stand or lean on this product. Equipment may fall or collapse, causing breakage and possible injury.Take care not to injure your fingers on the manual cutter•When you remove printed paper•When you perform other operations such as loading/replacing roll paperTo ensure safety, unplug this product before leaving it unused for an extended period.Caution LabelsThe caution labels on the product indicate the following precautions.CAUTION:Do not touch the thermal head because it can be very hot after printing. Restriction of UseWhen this product is used for applications requiring high reliability/safety, such as transportation devices related to aviation, rail, marine, automotive, etc.;disaster prevention devices; various safety devices, etc.; or functional/precision devices, etc.; you should use this product only after giving consideration toincluding fail-safes and redundancies into your design to maintain safety andtotal system reliability. Because this product was not intended for use inapplications requiring extremely high reliability/safety, such as aerospaceequipment, main communication equipment, nuclear power control equipment, or medical equipment related to direct medical care, etc., please make your own judgment on this product’s suitability after a full evaluation.Downloading Drivers, Utilities, and ManualsThe latest versions of drivers, utilities, and manuals can be downloaded from one of the following URLs.For customers in North America, go to the following web site:/ and follow the on-screen instructions.For customers in other countries, go to the following web site:/UnpackingThe following items are included with the standard specification printer.If any item is damaged, contact your dealer.Note:The shape of accessories varies between models and areas.Part NamesControl Panel(Power) LEDThis LED is on when the printer is on.Error LEDThis indicates an error.Paper LEDOn indicates a paper out. Flashing indicates standby. Feed buttonThis button feeds paper.Connecting the Cables CAUTION:For a USB interface, do not turn on the printer before installing the printer driver.Always supply power directly from a standard power outlet.Do not connect to electrical outlets close to devices that generate voltage fluctuations or electrical noise. In particular, stay clear of devices that use large electric motors.Never attempt to stretch the cables to enable a connection. The power cable must have adequate slack at all times during use.1.Make sure the printer is turned off.2.Connect the USB cable to the printer.3.Connect the other end of the USB cable to the computer.4.Connect the AC cable to the printer.USB cableAC cable5.Insert the AC plug into a socket.Installing the PrinterYou can install the printer horizontally on a flat surface (with the paper exit ontop) or vertically (with the paper exit at the front). Also, you can hang it on a wall using the included accessories.CAUTION:Take measures to prevent the printer from moving by vibration during papercutting and when using a drawer. Affixing tape is provided as an option. Installing the Printer VerticallyWhen installing the printer vertically, be sure to attach the included control panel label for vertical installation on the roll paper cover, and attach 4 rubber feet in the rectangular indents in the printer case, as shown in the illustration below.Note:You can install the printer so that the roll paper cover is upright to the mounting surface using the included wall hanging bracket.1.Attach the control panel label for vertical installation on the roll paper cover.2.Install the wall hanging bracket on the printer, and fix it using 2 included screws.3.Attach 2 rubber feet in the rectangular indents in the printer case, and attach 2rubber feet within the scribed line on the hanging bracket.4.Place the printer with the wall-hanging-bracket-side down.Hanging the Printer on a WallTo hang the printer on the wall, follow the steps below.CAUTION:To fix the printer securely, install the wall hanging bracket on a wall made ofwood, concrete, or metal. The thickness of the wall should be 10 mm {0.4”} or more.Be sure to use metallic screws.The screws on the wall side must have a pull-out strength of 150 N (15.3 kgf) or more.1.Install 2 screws (screw diameter: 4 mm {0.16"}, head diameter: 7 to 9 mm {0.28to 0.35"}) in the wall at an interval of 80 mm {3.15"}. Make sure the length ofthe screw’s body in the wall is 10 mm {0.39"} or more, and the length outsidethe wall is 3 to 4 mm {0.12 to 0.16"}. Array2.3.4.Align the holes in the wall hanging bracket with the screws on the wall, andhook it securely.Installing Roll PaperFollow the steps below to install the roll paper.e the cover open lever to open the roll paper cover.2.Remove the used roll paper core if any, and insert the roll paper. The correct direction of the paper is shown in the illustration below.3.Pull out some paper, and close the roll paper cover.When the printer power is on, the roll paper is automatically cut.Changing the Paper WidthYou can change the paper width from 80 to 58 mm by installing the included 58-mm width paper guide plate. Follow the steps below to change the paperwidth.CAUTION:Once you change the paper width from 80 to 58 mm, you cannot change it back to 80 mm.When changing the paper width, be sure to make the setting for the paper width with the utility software for the TM-T20.1.Open the roll paper cover.2.Align 3 projections on the 58-mm width paper guide plate with therectangular holes in the printer, and push it downwards. Array3.Install the roll paper.4.Close the roll paper cover.Attaching Cover on the Power SwitchThe enclosed power switch cover ensures that the power switch is not pressed accidentally.You can turn the power switch on and off by inserting a sharp-pointed object in the holes in the power switch cover. To detach the cover, also use a sharp-pointed object.A waterproof cover for the power switch is also included.To use these covers, install them as shown in the illustration below.WARNING:If an accident occurs with the power switch cover attached, unplug the power cord immediately. Continued use may cause fire or shock.TroubleshootingNo lights on the control panelCheck whether the power supply cable is correctly connected to the printer and the socket.Error LED on with no printing❏Check whether the roll paper cover is closed. If it is open, close it.❏If the Paper LED is on , check whether the roll paper is correctly installed and any roll paper remains.Error LED flashing with no printing❏Check whether a paper jam has occurred. If paper is jammed, remove the jammed paper referring to the description below and install the roll paper correctly.❏Printing stops if the head overheats and resumes automatically when it cools.❏For other cases, turn the printer off, and after 10 seconds, back on.When a paper jam occursWhen a paper jam occurs, never pull out the paper forcibly. Open the roll paper cover and remove the jammed paper.CAUTION:Do not touch the thermal head, because it can be very hot after printing.If the roll paper cover does not open, follow the steps below.1.Turn off the printer.2.Put the fingers in the indents in both sides of the cutter cover, and slide ittoward the arrow in the illustration below to remove it.3.Turn the knob until you see a triangle in the opening. This returns the cutter blade to the normal position. See the operating instructions on the back of the cutter cover.4.Install the cutter cover.5.Open the roll paper cover and remove the jammed paper.CleaningCleaning the Printer CaseBe sure to turn off the printer, and wipe the dirt off the printer case with a drycloth or a damp cloth.CAUTION:Never clean the product with alcohol, benzine, thinner, or other such solvents.Doing so may damage or break the parts made of plastic and rubber. Cleaning the Thermal HeadCAUTION:After printing, the thermal head can be very hot. Be careful not to touch it and to let it cool before you clean it.Do not damage the thermal head by touching it with your fingers or any hard object.Turn off the printer, open the roll paper cover, and clean the thermal elements of the thermal head with a cotton swab moistened with an alcohol solvent (ethanol or IPA).3Specifications80 mm paper width58 mm paper width*1 Printing method Thermal line printingDot density203 dpi × 203 dpi [dots per 25.4 mm {1"}]Printing direction Unidirectional with friction feedPrinting width Default72.1 mm {2.84"}, 576 dot positions52.6 mm {2.07"}, 420 dot positions42 c olumnmode*268.3 mm {2.69"}, 546 dot positions47.3 mm {1.86"}, 378 dot positionsCharacters per line Default Font A: 48; Font B: 64Font A: 35; Font B: 46 42 c olumnmode*2Font A: 42; Font B: 60Font A: 42; Font B: 31Character spacing Default Font A, Font B: 0.25 mm {.01"} (2 dots)42 c olumnmode*2Font A: 0.38 mm {.01"} (3 dots)Font B: 0.25 mm {.01"} (2 dots)Font A, Font B: 0.25 mm {.01"}(2 dots)Character sizes Standard/ Double-height/ Double-width/ Double-width/ Double-height Default Font A: 1.25 × 3.00/1.25 × 6.00/2.50 × 3.00/2.50 × 6.00 mmFont B: 0.88 × 2.13/0.88 × 4.26/1.76 × 2.13/1.76 × 4.26 mm42 c olumnmode*2Font A:1.25 × 3.00/1.25 × 6.00/2.50 ×3.00/2.50 × 6.00 mmFont B:0.88 × 2.13/0.88 × 4.26/1.76 × 2.13/1.76 × 4.26 mmFont A:0.88 × 2.13/0.88 × 4.26/1.76 × 2.13/1.76 × 4.26 mmFont B:1.25 × 3.00/1.25 × 6.00/2.50 ×3.00/2.50 × 6.00 mmCharacter structure Default Font A: 12 × 24 (including 2-dot horizontal spacing)Font B: 9 × 17 (including 2-dot horizontal spacing)42 c olumnmode*2Font A: 13 × 24 (including 3-dothorizontal spacing)Font B: 9 × 17 (including 2-dothorizontal spacing)Font A: 9 × 17 (including 2-dothorizontal spacing)Font B: 12 × 24 (including 2-dothorizontal spacing)Number of characters Alphanumeric characters: 95; International character sets: 18 setsExtended graphics: 128 × 43 pages (including user defined page) Printing speed150 mm/s {5.91"/s} max.; 40 lps (3.75 mm {0.15"} feed)Ladder bar code and 2D symbol: 100 mm/s {2.4"/s}The above speed values are approximate.The values are when the printer prints with density “Normal” at 25°C {77°F}.Speed is adjusted automatically depending on the voltage applied andhead temperature.Paper feed speed Approx. 150 mm/s {approx. 5.91"/s}(continuous paper feed with the Feed button.)Line spacing (default) 3.75 mm {0.15"}Roll paper (single-ply)Width79.5 mm ± 0.5 mm {3.13" ± 0.02"}57.5 mm ± 0.5 mm {2.26" ± 0.02"} Diameter Maximum outside diameter: 83 mm {3.27"}Spool Spool diameter: Inside: 12 mm {0.47"}; Outside: 18 mm {0.71"}Thermal paper type NTP080-80NTP058-80Interface USB [Compliance: USB 2.0, Communication speed: Full-speed (12Mbps)]Receive buffer4KB/45 bytesCash drawer function 2 drives80 mm paper width58 mm paper width*1 Power supply Supply voltage: AC100-240V 50/60Hz, Rated current: 1.0 A Temperature Operating: 5 to 45°C {41 to 113°F}Storage:–10 to 50°C {14 to 122°F}, except for paperHumidity Operating:10 to 90% RHStorage:10 to 90% RH, except for paperOverall dimensions146 × 140 × 199 mm {5.75 × 5.51 × 7.83"} (H × W × D)Weight (mass)Approx. 1.7 kg {3.74 lb}lps: lines per second dpi: dots per 25.4 mm (dots per inch)*1: The values are those when the paper width is changed to 58 mm by installing the 58-mm width paper guide plate and making the paper width setting with utility software for the TM-T20.For how to install the 58-mm width paper guide plate, see “Changing the Paper Width” on page14. *2: 42 column mode can be set using the utility software for the TM-T20.。