(1)eSpring益之源净水器_中文
- 格式:ppt
- 大小:8.47 MB
- 文档页数:30
益之源净水器是安利公司家居科技产品之一,在国外有着多年的生产经营经验。
随着在中国市场的发展,国人生活水品提高,该高科技、高质量、合理价格产品陆续在中国台湾、香港、内地上市销售。
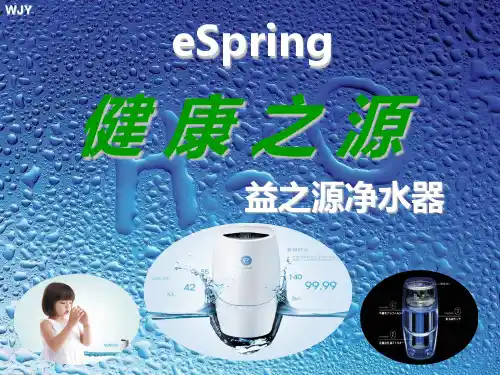
益之源净水器英文简称espring,益之源净水器集合智能监测系统、紫外线灯同步启动系统及免触式电感技术,有超过400项已经确认或审核中的美国及国际专利,信心之选。
有美国国家卫生基金会(NSF)三项专业净水认证,包括口感、卫生及紫外灯杀菌效能,值得信赖,崭新科技。
益之源净水器-鹅颈水龙头组;1.专利的紫外线滤心匣结合专利高密度活性碳滤心与紫外线灯管的最新科技。
可有效去除小至0.2微米(约头发直径的1/500)的微粒与140种以上有害健康的污染物,且还能消灭细菌及病毒,让自来水也可直接生饮。
显著改善水的口感、气味与清澈度。
2.美国国家卫生基金会(NSF)认证eSpring益之源净水器是市面上唯一同时荣获NSF第42号、53号、55号标准之口感质量测试、卫生质量测试,以及紫外线杀菌测试。
3.保留有益矿物质大部分有益人体的矿物质,如:钙、镁与氟化物等物质,皆会通过高密度活性碳滤心,而留在滤净过后的水中。
4.具成本效益紫外线滤心匣有效滤水容量约5,000公升,或足够供应一家七口一年份的饮用及烹饪水。
5.触发式紫外线灭菌系统此科技特性乃将紫外线灯管与机器作无线连结,意即打开水龙头的同时即启动感应器,并藉由瞬间触发原理开启紫外线灯管,并进行杀菌动作。
此设计不仅使水一直保持清凉,也可让安装紫外线滤心匣更为简便,又可保护净水器,使产品更加耐久。
6.e化监测系统(1)智慧芯片科技自动记录紫外线滤心匣的运作资料,意即可判读安装的紫外线滤心匣寿命。
即使安装新紫外线滤心匣时,e化监测系统也会自动重新设定确保获得eSpring益之源净水器的完全效益。
(2)电子模块显示面板您可由显示面板上各种图案及其颜色、系统声响等变化方式,了解eSpring益之源净水器的状况,以使您做最实时的处理与维护。
益之源净水器知识问答A高密度活性炭滤芯一、何谓高密度活性炭滤芯“活性”是指碳经过处理而产生许多孔状结构,从而增加其表面积。
“高密度”是指运用特殊专利技术,将碳压缩成多孔的块状。
当水与活性碳接触时,化学物质与微粒污染物会被吸附在孔洞里。
此外,孔洞壁亦会将有机污染物吸附,因此活性碳的孔洞越多,其表面积越大,过滤污染物的能力越强。
二、活性碳滤心是否能去除所有污染物活性炭能够去除和吸附有机碳化合物(含碳分子),如杀虫剂或除草剂;亦可排除重金属,如铅及水银。
无机化合物如铁、石灰等物质水溶性较高,所以活性碳对去除这些物质较有选择性。
益之源净水器采用的活性碳滤心有以下三种孔状结构:大型孔能去除原子量单位逾10000的较大化合物。
中型孔能去除原子量单位约500的中型化合物,如杀虫剂。
微型孔能去除原子量单位小于100的小型化合物,如三卤甲烷。
三、何以活性碳滤心能让矿物质通过、有机化合物与活性碳较容易结合,因而被吸附排除。
无机化合物如矿物质,水溶性较高,较难与活性碳结合,所以矿物质会随水流通过滤心。
四、益之源净水器能去除哪些无机污染物设计优良的活性碳滤心能够去除特定的无机污染物,而益之源净水器经测试证明其活性碳滤心能有效去除铅、汞及氡。
五、益之源净水器能否去除硝酸盐不能够。
基于上题所述的理由,益之源净水器是无法去除硝酸盐的。
六、益之源净水器可以去除氯吗益之源净水器滤心内的活性碳经过特殊处理,能排除特定的无机污染物,如氯、铅及水银。
七、活性碳滤心会否滋生细菌如果流入净水器的水含有细菌,就可能在活性碳滤心不活动的时间下出现,譬如留在碳滤心内的隔夜水。
市面上所有的碳滤心皆会出现这种情况,包括含银活性碳的滤心。
但益之源净水器设有紫外光灯,可在水流经过活性碳滤心之后,杀死水里的细菌。
八、听说某些陶瓷滤心能杀死细菌,是真的吗陶瓷滤心不能杀死细菌,只能隔除体积较大的细菌,体积较小的细菌及病毒则不能被隔除。
九、为何经新活性碳滤心过滤后的水会有黑色微粒这是正常的。
安利益之源净水器-家科基础班(讲解词)益之源净水器各位伙伴大家好,这节课我们来了解益之源净水器的性能和优势。
提到净水器可能很多人的态度是,喝了这么多年的自来水不是也挺好的嘛,干嘛还需要用净水器?也有人认为,随便买台便宜的就可以了,能用就行呗。
有这些想法的人不在少数,注意,这里面有个概念的混淆,我要跟大家讲清楚,那就是:“安全不等于健康”。
以前我们只追求安全这个最低的要求,而我们今天,已经有能力去追求高标准的健康了。
把水烧开了喝,安全不安全?安全,绝对是能喝的,但是,是不是足够健康呢?大家回忆一下当初喝白开水的那个口感,你会发觉没有买的瓶装水好喝,为什么烧开的水不好喝?那是因为自来水中有剩余的氯,这个氯啊,是水厂为了杀菌而添加进去的,但它会影响水的口感,甚至和水里一些物质反应,还会生成致癌物,对我们的健康肯定是不利的。
有人或许会问,能不能不加氯?不行,因为从自来水厂出来的水,一直到咱家里,还有段漫长的过程呢,如果没有氯,那从水龙头里出来的这个水,病菌肯定会大量超标,所以不仅要加,还必须要有一些剩余才行。
但即使有氯,也防止不了管道里其他的污染物进到水里,比如泥沙、铁锈和重金属。
给大家看着几张新旧滤芯的对比图,颜色深的旧滤芯上都是被过滤掉的污染物,从白色变得这么脏到底经历了什么呢?我们曾把全国部分城市使用到期的滤芯,拿到权威机构检测滤芯里铁锈、铅、有机物和泥沙这四种物质,大家看数据可以发现,一个滤芯一年下来过滤掉的量还真不少。
另外,如今的城市,高楼所面临的二次供水也很普遍了,这个二次供水环节,也是非常容易增加污染机会的,相信大家也都看过电视里报道,什么楼顶的水箱里又跑进去什么什么啦…什么什么被泡了一两个月啦,这些水都是从水箱直达水龙头的。
有些有人有这个意识,说干脆喝桶装水吧,但是,切记一定要勤清洗饮水机,而且一桶水要尽快喝完,那种长时间不清洗的水机和好几天在桶子里喝不完的水,也是极容易细菌超标的。
综合来看,我们对优质饮用水的需求是:“去除有害的,保留有益的”。
常见问题产品工艺及性能∙∙什么是高密度活性炭?显示“活性炭”意指炭经过特殊工艺处理,制造一定数量不同大小的孔洞,以扩大炭的吸附表面积;“高密度”意指使用特殊专利技术,将炭压缩成多孔的炭块。
水在通过活性炭时,各种污染物会被吸附或阻隔在孔洞及其内壁里。
随着孔洞表面积扩大,活性炭过滤污染物的能力也会增强。
活性炭能够结合与吸附有机碳化合物,例如杀虫剂与除草剂。
益之源®净水器高密度活性炭滤芯使用的炭具有特殊的三种孔洞分布:去除大型化合物的大型孔洞,分子质量大约一万单位。
去除中型化合物的中型孔洞,分子质量大约五百单位,例如杀虫剂。
去除小型化合物的小型孔洞,例如三卤甲烷(THMs)。
此类矿物质不含碳,不会与碳结合,所以会在水中维持离子形态,然后通过滤芯。
的炭滤芯可以去除某些特定的无机污染物,益之源®净水器已被证实其高密度活性炭滤芯可以去除铅、汞与石棉,但不会滤除对人体有益的钙与镁。
具体请阅P29的《效能测试报告》。
氯会与高密度活性炭滤芯表面起作用,然后转换成无害的氯化物。
这是正常的,那些炭粒是滤芯匣制造过程所残留的炭屑,只要打开净水分流器阀让水流一下,炭屑在数分钟内就会被冲走。
此外,先让水流数分钟可彻底湿润滤芯匣,提高其吸附功能。
只要按照建议妥善使用与及时更换滤芯匣,就不会出现这种情况。
不会。
只有在水由滤芯的一端流向另一端时,才会发生这种状况。
益之源®净水器的设计是让水急速沿着整个滤芯匣,由外向内流入。
这表示污染物会平均分布在滤芯匣。
紫外线光(UV)是一种光波能源,类似可见光,是太阳光的一个主要部分。
益之源®净水器里没有任何辐射物质,无直接污染,无毒性副产物残留,且不会和有机物反应危害人体,可以安心使用。
不会。
触发式紫外线灯管外采用穿透率极高的石英玻璃,将灯管及水的路径完全隔绝,避免灯管接触到水。
实验证明益之源®净水器能去除140多种可能存在于水中的污染物,能去除的污染物种类数量远远超出国家标准(《生活饮用水水质处理器卫生安全与功能评价规范——一般水质处理器》(2001))要求,在行业中处于领先地位。
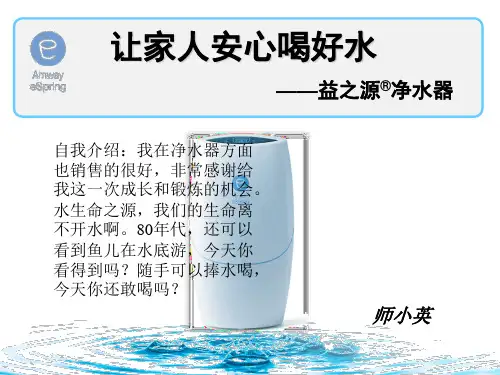
让家人,安心喝好水益之源®净水器培训课程讲师手册《讲师手册》使用指引一、本手册的目的本手册将为讲师提供讲授《让家人,安心喝好水》—益之源®净水器培训课程的详细指引及资料,讲义内容由“幻灯片”及“内容要点”两个模块组成,系统清晰地引入观点、展开话题、推出结论。
讲师可以利用本手册提供的信息并结合实际需要,为学员带来行之有效的培训课程。
二、如何使用本手册本手册所提供的相关信息供讲师在授课时参考和运用,您可以根据实际情况稍作调整。
但不可以擅自修改或增减PPT内容,同时讲述的论点、论据均须符合本课程主题的内容。
如果您在使用本手册的过程中或授课中遇到任何问题,请随时与安利(中国)培训中心家居科技产品培训组联系。
三、授课指引1.请您在讲授课程前详细阅读《讲师手册》所有章节并熟悉其中内容。
2.为增强授课效果及学员的参与投入度,课程设计中安排了一定的互动活动与课程练习,这对于引入或进一步阐述某些关键内容非常重要。
因此建议您在实际授课时,预留足够的时间实施互动和练习,并对学员的现场反映做好充分的准备。
3.避免使用偏重理论的授课方式去教育营销人员,而是通过分享、启发和互动的方式,鼓励他们主动思考,推动他们采取积极行动。
结合净水器的产品特点,讲师在安装示范时请务必按照规范的流程、标准的要点阐述和操作方法进行。
4.建立良好的课程气氛,鼓励学员积极思考、热情参与。
5. 阐述观点、现场答疑或点评时,多使用积极、正面的语言。
6. 为保证课程内容准确充分地传递,我们建议您按照手册中的推荐课时进行授课。
幻灯片 1(本页是启幕影片放映结束后的定帧画面页,也是主持人开场、讲师开场白+自我介绍时的定帧画面页)讲师讲解:各位学员,大家好!欢迎大家参加本次课程学习。
培训方式:暖场+自我介绍+主题介绍。
培训教具:PPT(从这一页开始,引言部分结束,讲师开始课程的主体内容,这一页是课程概览)讲师讲解:从现在开始,我们会进入课程的主题内容,课程分以下四个模块:1、稀缺的淡水资源及自来水现状;2、常见水质处理技术解析;3、益之源®净水器产品知识、领先科技、权威认证;4、益之源®净水器安装使用与维护。
USER’S MANUAL (Under-sink 5-stage, 6-stage, 7-stage RO systems)Version 2014-3Copyright ©2005-2014 ISPRING WATER SYSTEMS, LLC. All rights reserved.Warranty RegistrationWe provide 30-day money back guarantee,1 year Manufacture Warranty and lifetime tech support to all products. However, we do not have the order information from the vendors other than . The easiest way to activate the warranty is to forward your order confirmation **************************,alongwithyourcomment;orifyouprefer,pleasefilloutandmail the form below. Please remember, we love to help customers. If you have any question or concern about our products, please don’t hesitate to call or email us. We will do all we can to make your purchase a 5-star experience.If you are happy with our product and service, please show your support by writing a product review on Amazon, even with a single line. It takes you just a minute, but means a lot to us. Thank you!Your Name:Your E-Mail:Your Phone:Order#:Model#:Order Date:Reviewer ID:Notes:How to reach usLocal / International: 678-261-7611Fax: 678-530-1070Office Hours: Monday-Friday 9:00 a.m. - 5 p.m. ESTTechnical Support Hours: Monday-Friday 9:00 a.m. - 5:00 p.m. ESTMailing Address:iSpring Water Systems3020 Trotters PkwyAlpharetta, GA 30004 USALimited WarrantyThis Limited Warranty extends to the original purchaser of the system only. This warranty covers all Manufacturer-supplied items only that prove to be defective in material, workmanship or factory preparation. This warranty covers parts only; all labor is excluded from this warranty, including, but not limited to, services related to the removal, replacement, installation, adjustment, maintenance and/or repair of the unit or its components items. excludes all non-Manufacturer labor required for any servicing of the unit, including, but not limited to, servicing related to installation, adjustment, maintenance and repair of the unit. This warranty applies only for the first full calendar year from date of purchase. The following items are excluded from this warranty: membranes, filters, O-rings, and all other parts or components that require regular replacement as a result of ordinary usage.Disclaimers: This Limited Warranty applies only if the system is installed, used and maintained in compliance with all instructions and requirements enclosed with the system. This warranty will be void for failure to observe the following conditions:1.The system is to be used with potable water supply only.2.Feed water pressure to the unit is no less than 45 PSI (30 PSI for systems with built-in booster pump) and no greater than 80 PSI.3.The system is to be used on water supplies with chlorine concentrations of 1.0 mg/L (ppm) or less.4.Feed water temperature to the unit must be no less than 40°F and no more than 100°F.5.Total dissolved solids (TDS) in feed water must be less than 750 mg/L (ppm).6.Feed water must have a pH between 4 and 8.7.Turbidity must be less than 1.0 NTU.8.SDI must be less than 5.9.Feed water must be completely free of iron, manganese or hydrogen sulfide.Do not use with water that is microbiologically unsafe or of unknown quality without adequate disinfection before or after the system.The Manufacturer does not know the characteristics of your water supply. The quality of water supplies may vary seasonably or over a period of time. Your water usage may vary as well. Water characteristics can also change if the drinking water appliance is moved to a new location. The Manufacturer assumes no liability for the determination of the proper equipment necessary to meet your requirements, and we do not authorize others to assume such obligation on our behalf.This Limited Warranty does not cover any Manufacturer-supplied items that are defective as a result of the use of improper parts, equipment or materials. This warranty does not cover alterations or modifications of the unit, or failure of a unit caused by such alterations and modifications.This Limited Warranty does not cover malfunctions of the unit due to tampering, misuse, alteration, lack of regular maintenance, misapplication, fouling due to hydrogen sulfide, manganese or iron, scaling from excessive hardness, turbidity greater than 1.0 NTU, Silt Density Index (SDI) greater than 5.0 SDI, or excessive membrane hydrolysis due to chlorine levels in excess of 1.0 mg/L (ppm). In addition, damage to the unit due to fire, accident, negligence, act of God, or events beyond the control of the Manufacturer are not covered by this warranty.Incidental and Consequential Damages Limitation: The Manufacturer will not be responsible for any incidental or consequential damages as a result of the failure of this unit to comply with express or implied warranties or any defect in the unit, including but not limited to, lost time, inconvenience, damage to personal property, loss of revenue, commercial losses, postage, travel, telephone expenditures, or other losses of this nature. In case some states do not allow the exclusion or limitation of incidental or consequential damages, you may choose to return the system. If you choose to keep it, you insist this exclusion STILL apply to you.Owner’s Warranty Responsibilities: As a condition of this Limited Warranty, the owner must ensure periodic maintenance of the system is performed as described in the literature enclosed with the system. Neglect, improper maintenance, abuse, modification or alteration of the unit will invalidate this Warranty. Should your unit develop a defect or otherwise fail to perform in accordance with this warranty, you should contact the retailer from whom the product was originally purchased.Implied Warranties: The implied at-law warranties of merchantability and fitness for a particular purpose shall terminate on the date one year after the date of purchase. Note: in case some states do not allow limitations on how long an implied warranty lasts, you may choose to return the system. If you choose to keep it, you insist the above limitations STILL apply to you.IntroductionCongratulations on your purchase of the iSpring RO system. Featuring a multiple-stage filtration process, the ReverseOsmosis technology incorporates polypropylene sediment (PP), granular active carbon (GAC), carbon block (CTO) andoptional Calcite mineral alkaline filter and Ultra-Violet filter to produce crisp-tasting, bottled-quality drinking water rightat your home.When properly maintained, this system will provide you with years of trouble-free service. Please keep this manual forfuture reference. The next sections contain important information on the proper care and maintenance of your system.Please take a few minutes to read through this information.The cartridges in RO system must be replaced on a regular basis to maintain efficiency and to ensure high water quality.These cartridges work together and must be replaced every 6-12 months. Any significant change in performance of thesystem should be investigated promptly to avoid secondary damage or deterioration to other parts of the system. CAUTION: Improperly installed systems could result in water damage due to leaks or flooding. Properinstallation of this system requires familiarity with standard sink plumbing and proper use of common hand andpower tools. If you are not familiar with standard sink plumbing and proper use of common hand and power tools or have any difficulty with the installation of this system, consult a licensed professional, such as a contractor or plumber.NOTE: This system has been designed for installation by licensed professionals, such as a contractor or plumber.Note: stage 6 or 7 only exists in certain modelsSystem Operating ConditionsFeed water pressure: 45 – 80psi (or 30 – 80psi for systems with built-in booster pump)Feed water temperature: 40 – 100 degree F (4 – 37 degree C)RO system is not designed for hot water sourceFeed water TDS: 750 ppm maximumIf feed water has severe iron, rust problem, an iron filter is required prior to the RO system.Install the system in a sheltered environment; avoid exposure to hot and cold weather or under direct sun light Once installed, move the system with caution and avoid dragging the tubings.Before you begin, it is highly recommended to watch the video “ispringreverse osmosis installation” on YouTube.Fig1. System diagram (models without booster pump)Fig2. System diagram (models with booster pump)Fig3. Electrical wiring diagram (Models with booster pump)Parts Index0.O-ring seated in the groove13-14. Optional ice maker kit1.1st stage transparent housing15.Housing wrench for stage 1-32.2nd stage housing16.Housing wrench for RO membrane3.3rd stage housing17.Tank fitting (YELLOW tubing)4.1st stage sediment cartridge18.Tank air inlet5.2nd stage GAC cartridge19.Cold water adapter male end6.3rd stage CTO cartridge20.Cold water adapter female end7.4th stage RO membrane housing cap21.Drain saddle (sticky pad hidden)8.4th stage RO membrane22.RO faucet installation kit (9 pieces)9.5th stage Post carbon (T33)23.RO faucet ( BLUE tubing from final stage)10.Optional 6th stage Alkaline mineral filter24.Cold water inlet (RED tubing in)25.RO water outlet to TANK (YELLOW tubing) 11.5th stage outlet (to RO Faucet BLUE tubing or optional6th stage)12.Tubing in four colors26.Spare 3 O-rings, 2 elbow quick-fittings and lockclipsRecommended tools list:Variable speed drill and drill bit: 1 /4” (for the drain line), 1/2” (optional, for drilling hole on counter),Open-end wrench in 5/8” and 9/16”, or adjustable wrench, Pliers, Phillips screwdriver, Utility knife, Scissors, Teflon tape, Bath towel, bucket.Installation Tips:How to use Quick-Fittinga.1.1 Viewed from the open end, a quick-fitting starts withthe lock sleeve, Lock clip (often in blue color), and Fittingbody. The steel teeth inside Lock sleeve lock tubing whileO-ring creates permanent seal.a.1.2 To connect, cut tubing squarely and smoothly, pushtubing into Lock sleeve firmly until it reaches the end. Pulltubing to check if it is locked in.a.1.3 To disconnect, remove Lock clip, press Lock sleeveagainst Fitting body. With Lock sleeve pressed, pull thetubing to remove. *note* watch our YouTube video ‘iSpringRO Quick Fitting’Tips for Drilling a Hole on Sink or Counter-topa.2.1It’s recommended to watch YouTube video “how to drill a hole in granite countertop”.a.2.2Choose half inch Diamond hole saw for granite, and titanium drill bit for steel.a.2.3Use coolant to disperse heat. Choose water for granite, oil for steel.a.2.4Use 1-1/2" Suction Base Drilling Ring to hold coolant and prevent drill bit slipping on counter.a.2.5Start slowly. Be cautious with slipped power drill that damages counter surface.a.2.6Set variable speed power drill at 100 – 200 RPM. Do NOT use hammer drill on nature stone, glass and ceramic.a.2.7Hold drill bit vertically and swirl a little to apply pressure in circle evenlya.2.8Be patient and deliberate. It can take 20 – 40 minutes to drill through one inch.Tips for Changing Filter Cartridgesa.3.1To ensure system performance and water purity, filter cartridges must be replaced on schedule. Use TDS meterperiodically to check water puritya.3.2Shut off water supply valve and tank valve, open the spigot to depressurizea.3.3Place a bucket or towel under the unit for water spills.a.3.4Use housing wrench (part #AWR2) to twist filter housing off incounter-clockwise direction looking from the bottoma.3.5Clean the housing using hot water and optional scent-free dish soapa.3.6Check condition of the O-ring. They should be replaced every 3 years toprevent leak.a.3.7Refer to Step 1.1 to install new vertical filter cartridgesa.3.8Due to suction, RO membrane may be hard to pull out from housing, try usingtool to apply leverage (photo)a.3.9The 5th and 6th stages have direction. To replace them, remove the tubing,unscrew the fittings, unwrap the new cartridge, replace Teflon tape on fittings ifnecessary, follow the Æ sign on label, screw the correct fitting back on each end,and reconnect the tubing.-Step 1: Install the Vertical Filters: Stages 1, 2, and 31.1Make sure O-ring is seated inside the groove on top of filter housings. Food-grade lubricant such as Vaseline orsilicon jelly will help O-ring stay in place and seal better.1.2Filter cartridges are preserved in plastic wrap. Remove the wrapping and logo sticker.1.3When placing the filter cartridge into its housing, make sure it is centered and the knob protruding from the bottomof the housing fits in the central hole of the filter.1.4Screw the housing, with filters attached, onto the housing caps (caps are pre-attached onto the system). The capalso has a center knob which should be inserted into the hole of filter cartridge. Twist the housing on in clockwise direction by hand, and then use housing wrench to tighten it up for about 1/4 – 1/2 turn. Do not over tighten. This can cause leaks and make it difficult to unscrew the housing when replacing filters.1.5Follow the steps 1.1 – 1.4 to install the GAC and CTO filters. *note* the second stage GAC is the only filter thatmust go in a certain direction. Make sure the end with the rubber washer faces up thereby attaching to the housing cap.-Step 2: Install Reverse Osmosis Membrane2.1RO membrane is sealed and preserved in moisture. Check for seal and remove it from plastic bag.2.2Remove the membrane housing screwcap. First, you will need to disconnect thewhite 1 / 4” tubing from elbowquick-fitting on membrane housing (referto How to Use Quick-Fitting section), andthen unscrew (counter-clockwise) capfrom. A thick rubber band can be slippedon housing body for stronger hand hold.2.3Follow the flow direction sign on themembrane, and firmly insert membraneinto housing with the smaller end that hastwo black O-rings first until the other endis even with housing opening.2.4Screw cap and insert white tubing back on. Hang tight and tighten up for about 1 /4 – 1 /2 turn using small plastichousing wrench but do not over tighten.-Step 3: Install 3/8” Feed Water Adapter (AFW)3.1Turn off the Cold Water Line at your sink via the Cold Water Supply Valve (CWSV). Turn on kitchen faucet torelease any pressure and make sure water has stopped before proceeding tothe next step.3.2Get a towel or bucket to catch any water drips. Disconnect Kitchen FaucetConnector (KFC) from CWSV. Wrap CWSV with 2 -3 turns of Teflon tapeand screw on the AFW at the female end with O-ring. Tighten using wrenchor pliers. Note, the AFW in iSpring tool kit is 3/8”, which fits most commonflex pipe in U.S. However, if yours happen to be in a different size, this isusually a size of 9/16”, please get an adapter from Home Depot.3.3Reinstall KFC on the male end of AFW. Turn the handle of AFW to cross(OFF) position. Turn on CWSV slowly, check and fix any leaks.3.4*note* If the fitting end of the AFW is not a quick-fitting but a compressionfitting, then unscrew the nut and slip it onto 1/4” RED tubing. Insert thetubing into the AFW (the T), push in firmly and then screw and tighten the nutwith your hand. Use wrench for final 1/4 turns.-Step 4: Install RO Drinking Faucet4.1If your kitchen sink does not have a spare ½” hole, you will need to drill one. (Refer to page 6: The Tips forDrilling a Hole on Sink or Counter-top). Wipeclean and dry the area.4.2Remove blue protection film from front plate, slip iton faucet thread, and slip on black rubber washerthat has 3 circles. Insert the faucet thread portioninto the hole. Optional plumber glue or sealer couldbe used.4.3Under the sink, tighten back rubber washer, smalllock washer, and nut.4.4Slip the compression fitting nut and collar on BLUEtubing, push the insert into the tubing, insert it intofaucet end, and tighten up the nut. Pull the tubing tocheck if it is secure.-Step 5: Install Tank Shut-off Valve (TSV)5.1Wrap six turns of Teflon tape clockwise onto thevalve thread at the top of the tank.5.2Screw Tank Shut-off Valve on and tighten up byhand. Do not over tighten.5.3Install the YELLOW tubing onto Quick-Fitting of TSV.-Step 6: Tubing Hook up (* Model specific steps)6.1When facing the iSpring logo on the frontplate, the vertical 1st stage (clear housing) islocated on the right hand side. Connect theRED tubing to this elbow fitting (#0) and theother end to the Feed Water Adapter (AFW)(#6) on your cold water line.6.2Insert the BLACK tubing into the flowrestrictor (#5), which lays beside themembrane housing and further connects tothe drain saddle (#7) to flush out the wastewater.6.3On the right side of the Post Carbon Filter(labeled T33 or FT15), insert the YELLOWtubing into the T-fitting (#1), and the otherend to (#9) the ball valve of the Tank.6.4* Model without UV/AK/DI: Insert theBLUE tubing (links to RO faucet) into theelbow fitting at left end of T33 Filter (#2).*Model with UV/AK/DI: Insert the BLUEtubing (links to RO faucet) into the elbowfitting at right end of UV/AK/DI filter (#4),whichever is the last stage.6.5Install the other end of BLUE tubing onto(#8) RO faucet.6.6You may organize the tubings, but make sure to leave enough length so the filter system can be moved around thecabinet easily when replacing filters.6.7You may hang the system using two 10 x 1-1/4 Brass Phillips Flat Wood Screws. Thiswill make replacing filter cartridges easier.-Step 7: Install Drain Saddle7.1Choose a spot on drain pipe that is convenient for installing drain saddle and tubing. Horizontal pipe isrecommended to limit sound of drainage water running out from system.7.2Drill a 1 /4” hole on drain pipe;paste the black sticky padaround the hole.7.3Cut the tubing end abit to make a 45 degree angle.Slip the plastic nut and frontplate on the tubing, insert thetubing into the 1 / 4” hole ondrain pipe, install the backplate and tighten two screwswith hex nuts while tubingremains in the hole.7.4Tighten the nut on DrainSaddle by hand. Pull the tubing to check if it is secure.-Step 8: System Start Up (* Model specific steps)*If your model has UV stage, do no plug in power until system is fully flushed8.1Make sure all tubings are not kinked. Turn Tank Shut-off Valve OFF (cross).8.2Prepare a bath towel to catch water leak. Turn on (inline) Feed Water Adapter valve(AFW) then slowly turn on Cold Water Supply Valve (CWSV) and fix leaks if any.8.3* Plug in booster pump power if your model has one8.4Within 5 minutes, RO water should start dripping. Let it run for at least 10 minutes. Thisflushes the system except the tank. Water is black due to loose carbon from new carbonfilters. It will turn clear with some air bubble.8.5Shut off RO Drinking Faucet. Turn on Tank Shut-off Valve. Wait for two to four hoursto fill up 3.2 gallon tank.8.6After two hours, turn on RO Drinking Faucet to flush out all the water in the tank. Thewater out of the faucet should be much stronger stream since the water is coming fromthe pressurized tank (7-10 psi). The tank has flushed when the water flow changes backto trickle.8.7* Plug in UV power and check if RO faucet turns UV on/off through the Flow SensorSwitch.8.8An optional step would be to compare the TDS level between original tap water and ROwater. If the tap water is 100ppm, the RO water should be less than 10ppm. Visit to check out a TDS Meter.8.9Check for leaks daily for the first two weeks after installation. Furthermore, a bucket can be put under the systemin case of any leaks, and a Flood Alarm can be used together for greater home and cabinet protection.*Model Specific InstallationUV LampThe UV module is pre-installed on the models with UV. It should function out of box. The photos are for better understanding about how the components are assembled and work together.Ice maker kit (optional)。


了解益之源净水1.益之源净水器的主要功能:(1).有效去除水中污染物微粒,专利高密度活性炭工艺具有优异的滤净效果,高效去除水中140多种可危害健康的污染物。
如;石棉,铝,汞,苯,甲苯,氫,氟等。
还可去除十几种原虫,如;贾第鞭毛虫,圆孢子球虫,溶组织内阿米巴,弓形虫,猪肉绦虫虫卵,蛔虫虫卵,和隐孢子虫等.杀灭水中细菌与病毒,益之源净水器使用的紫外线杀菌科技,将家用净水器的净化效能提升至更高水平,有效去除炭滤芯无法去除的水中微生物,包括细菌和病毒。
益之源净水器特有的紫外线杀菌技术,对水中可致病的细菌与病毒的杀灭率高达99.99%,如;肠出血性大肠杆菌,伤寒沙门氏菌,嗜肺军团菌,甲肝病毒,脊髓灰质炎病毒,痢疾杆菌,霍乱杆菌,小肠结肠炎耶尔森菌,弯曲杆菌,幽门螺杆菌等,即开即饮,让您安心净享直饮水。
(2).保留有效益营养素;益之源净水器在去除140多种有害健康污染物的同时能保留水中对人体健康有益的营养素,如;钙,镁,氟化物等矿物质及其它营养物质,带来安全健康双重体验。
(3)改善口感与气味,益之源净水器出色的滤净效能让水变得更加洁净,清澈。
带来百分百清泉般的口感,清甜畅快,超乎想象。
2.创新科技,人性化管理系统,轻松掌管,可靠无忧。
(1),划时代的eCoupled无接触电能传导技术,安全可靠。
实现紫外线灯管与净水器之间的无线连接,在打开水龙头的同时启动传感器,瞬间激发启动紫外线灯管进行灭菌处理,由于净水器与紫外线灯管无任何物理连接点,即紫外线灯管与水,水与电源完全隔绝,因此使用安全可靠,更加经久耐用。
(2)人性化智睿管理芯片(SMARTCHIP),轻松管理。
设计电子板面显示,净水器工作状况一目了然,可实时掌控紫外线滤芯匣使用状况,以便您轻松做出及时的处理与维修。
3.超过100项净水专利,全球千万家庭共同使用。
卓越的研发工程师及科学家团队,以25年专有技术积累,研发出的益之源净水器,已获得全球净水器专利100多项。