Evolis Primacy证卡打印机
- 格式:docx
- 大小:302.51 KB
- 文档页数:5

产品特点:目前市场上性价比最高的彩色卡片打印机,目前市场上功能最齐全、结构最合理的打印机,可选配写磁模块、IC读写模块、非接RF卡读写模块(可改装指定读写器)韩国SISS SIP30F双面彩色卡片打印机SISS CARD PRINTER纯文本的驱动程序及卡片设计软件,向办公室普通打印机一样方便,无需专业培训即可使用。
使用简便,设计新颖且性价比高。
SIP30F是双面打印全彩色证卡的最佳解决方案。
带给您完美的证卡打印视觉效果,满足身份识别。
安防、休闲娱乐及客户积分计划各种市场应用需求。
完美的边到边高清打印效果,可打印出高分辨率的文本、照片、图像、标识及条形码。
纯钢机芯,结构合理,可选装写磁、智能卡读及非接触式IC卡个人化模块。
完全开放的平台,完整的开发资料,允许嵌入第三方的接触、非接IC卡读写模块。
小巧美观,低噪音及低功耗,非常适合办公室及各行业发卡窗口使用。
2英寸超大4行彩色液晶显示屏,实现监控设备运行状态。
专利的走卡轨道设计,绝无夹卡,卡死现象。
多种耗材可供选择,最大程度降低发卡成本。
自动同步色带,节省色带功能。
打印头开口。
最大达到140度,色带更换简单方便。
手动金卡、小批量制卡、最大100张入卡盒,前进前出,前进后出,多种进出卡模式,极大方便使用者。
尤其适用于窗口即时发卡于自助发卡。
韩国SISS SIP30F双面彩色卡片打印机.目前市场上性价比最高的的双面彩色卡片打印机. 目前市场上功能最齐全、结构最合理的打印机. 可选配写磁模块、IC读写模块、非接RF卡读写. 单面彩色打印速度达140张/小时. 双面彩色打印速度达120张/小时[YMCKOK]. 单写磁速度达1000张/小时. 写IC卡、非接RF卡速度视信息量大小而定. 理论走卡速度2000张/小时. 功能定制、显示屏定制、软件定制、模块定制、型号定制及整机定制. 写IC卡、非接RF卡速度视信息量大小而定. 理论走卡速度2000张/小时. 功能定制、显示屏定制、软件定制、模块定制、型号定制及整机定制SIP30F双面彩色卡片打印机SIP30F双面彩色卡片打印机RF读写卡片打印写磁IC打印模式彩色热升华及单色热转印边到边标准打印打印机规格单面/双面打印模式自动同步色带,节省色带功能打印速度140张/小时,单面全彩色[YMCKO]120张/小时,双面YMCKOK800张/小时,单色,单面160张/小时,半格彩色带[Half YMCKO]分辨率300dip(11.8点/mm)驱动模式UNIX,LIUNX,Windows(2000/2003/xp/vidta/732Bit or 64 Bit)个性化定制功能功能定制、显示屏定制、软件定制、模块定制、型号定制及整机定制打印端口USB打印,以太网扩展口,USB HUB,串口色带种类单色色带:1000张/卷(黑、蓝、红、绿、白、金、银及刮刮膜)5格彩色色带[YMCKO]:200张/卷6格彩色色带[YMCKO/K]:200张/卷半格彩色色带1/2[YMCKO]:400张/卷全息防伪色带:需定制进卡模式三种进卡模式:手动单张进卡,自动小批量进卡,100张卡盒自动进卡选装项Mag-HICO/LOCO写磁模块(ISO7811)Smart-智能卡IC读写模块(ISO7816/EMV2000)Contactess-非接触智能IC卡读写模式(可改装客户指定读写模块。

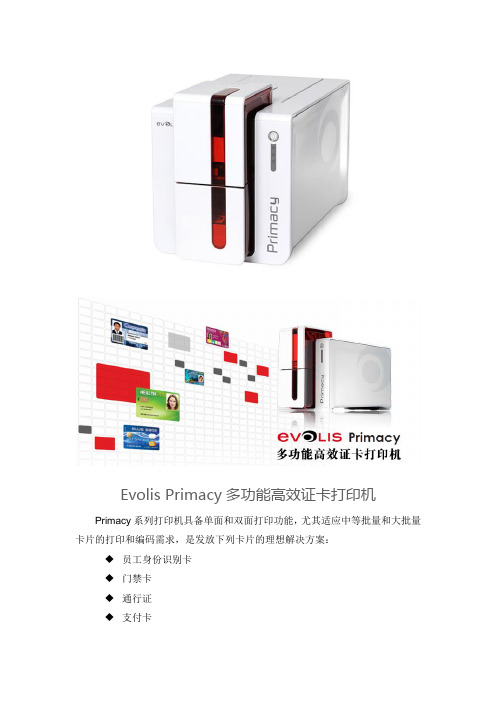
Evolis Primacy多功能高效证卡打印机Primacy系列打印机具备单面和双面打印功能,尤其适应中等批量和大批量卡片的打印和编码需求,是发放下列卡片的理想解决方案:
◆员工身份识别卡
◆门禁卡
◆通行证
◆支付卡
◆医疗保健卡
◆学生证
◆活动卡
打印机优势:
1.最优化的打印效率
由于其可在极短的时间内完成彩色卡片的个性化打印,Primacy 系列印机可适应批量打印的要求:单面打印时,最高每小时225 张卡片,双面打印时,每小时最高140张效率。
藉此您可赢得时间,提高您的工作效率。
2.专业化的打印
得益于300 dpi 的图片分辨率和边到边打印功能,Primacy 系列打印机可获得品质完美无缺的打印效果。
您的卡片将成为您机构专业形象的载体并使接收您卡片的人完全满意。
3.使用方便
卡片传送盒及托盒从打印机正面直接可见,这使得您可目测打印情况。
Evolis Premium Suite® 软件套装,通过通知的接收,可借助电脑方便地控制打印机。
Evolis High Trust® 打印带安装简便且可被自动识别。
4.持续打印能力
大容量的传送盒及托盒-可装入100 张卡片 - 避免了经常装填打印机的烦恼。
Primacy 系列打印机可在十分微小的空间内提供较大的连续打印能力。
5.可扩展性
您可根据您的需要,整合下列不同编码器,扩展您的打印机的功能:磁道编码器、接触式或非接触式芯片编码器。
打印机可在出厂时配置双面打印功能,或在现场激活此功能。
6.耐用性好的投资。


FLEXIBILITY• W ith Zenius, you can choose to insert your cards individually or with the automatic feeder.• T he «Expert» version of Zenius features combinable encoding functions: magnetic encoding, contact and contactless chips. It takes just a few minutes to install these modules!EASE OF USE• W ith the Evolis Premium Suite ® software, you can receive notifications and easily control the printer from your computer.• E volis High Trust ® ribbons are easy to install and automatically recognized and set by the printer.SMALL FOOTPRINT• H ardly larger than a standard sheet of paper, Zenius fits perfectly into any environment, be it the office or a customer service counter.• Z enius is an eco-designed printer: very efficient sleep mode and low energy consumption.The Zenius printer is designed for single sided printing and encoding of a very large variety of plastic cards. Zenius generates color or monochrome cards, individually or in small runs, with top quality results. Zenius is a user-friendly, compact and cost-effective solution for delivering your personalized cards.ZENIUSTHE COMPACT AND AGILE CARD PRINTERMAIN FEATURES /Full technical specifications on ©2015 Evolis. All rights reserved. Actual product(s) may differ from information stated in this document. All specifications or pictures are subject to change without prior notice. All trademarks mentioned herein belong to their respective owners. Pictures: Olivier Calvez. 07/2015. KB-ZEN1-064-ENG-US Rev D0MANUAL OR AUTOMATIC CARD FEEDERGENERAL FEATURES• Direct-to-card dye-sublimation/Resin thermal transfer • Single-sided printing, edge-to-edge • 300 dpi print head (11.8 dots/mm)• 16 million colors• 16 MB memory (RAM)PRINTING PERFORMANCES• C olor (YMCKO): 120 - 150 cards/hour 1• Monochrome: 400 - 500 cards/hourINTERFACES• U SB (1.0, 1.1, 2.0, 3.0), cable supplied • E thernet TCP-IP 10BaseT, 100BaseT (Traffic Led) on the Expert versionCARD MANAGEMENT AND SPECIFICATIONS• A utomatic or manual feeding• F eeder capacity: 50 cards (0.76 mm – 30 mil)• O utput hopper capacity: 20 cards (0.76 mm – 30 mil)• C ard thickness: 0.25 to 0.76 mm (10 to 30 mil), gauge adjustment • C ard types: PVC cards, composite PVC cards, PET cards, ABS cards 1, special varnished cards 1• C ard format: ISO CR80 - ISO 7810 (53.98 mm x 85.60 mm)OPTIONAL FEATURES• C olors available: fire red & grey brown• E xpert version: Ethernet TCP-IP, encoding modules as optionsADDITIONAL ENCODING MODULES•A vailable modules:- Magnetic stripe encoder ISO 7811 HiCo/LoCo, JIS2 - Smart contact station ISO 7816-2- Contact smart card encoder - PC/SC, EMV 2000-1- C ontactless smart card encoder - ISO 14443A, B, ISO15693, MIFARE, DESFire, HID iCLASS - Other specific encoders upon request • I nternal USB or IP ports • O ptions can be combined • F actory-installed or installed on siteSAFETY• S upport for Kensington ® security lock • D ata encryption for magnetic encodingDISPLAY•P rinter LEDs• G raphical notifications from the printer 2: cleaning alerts, empty/low level ribbon and card alerts, etc.EVOLIS HIGH TRUST ® RIBBONSTo maximize the quality and durability of printed cards, the lifespan of the print head and the overall printer reliability, use Evolis High Trust ® ribbons.• A utomatic identification and setting • D elivered in a drop-in cassette for easy handling • R ibbon saver for monochrome printing List of ribbons available on SOFTWARE• D elivered with Evolis Premium Suite ® for Windows ®:- Printer driver - E volis Print Center for administration and settings - Evolis Printer Manager for graphical notification 3 - 24/7 online support - C ompatible with Windows ® (32/64 bits): XP SP3, Vista, W7, W8, W10• D elivered with cardPresso XXS Lite for designing and editing badges:- Internal database up to 50 records- Windows ® (from XP onwards) and Mac OS X • D elivered with a driver for Mac OS X (from 10.5 onwards)• L inux OS upon request • E volis Premium SDK for remote supervision of the printer, while facilitating and speeding up integration into IT systemsECO-FRIENDLY DESIGN, CERTIFICATIONS AND STATEMENT OF COMPLIANCE• S tandby, sleep modes & reduced energy consumption • C E, FCC, IEC, VCCI, CCC, KC, BIS, EAC •R oHSSIZE AND WEIGHT• S ize (H x W x D): 195 x 205 x 315 mm (7.68’’ x 8.07’’ x 12.4’’)• W eight: 3.3 kg (7.3 lbs)Easy handling, automatic ribbonrecognition and setupW eight: 3.3 kg (3.64 lbs)315 mm (12.4’’)195 mm (7.68’’’)205 mm (8.07’’)1 Under specific conditions /2 Depends on the Windows version /3 Requires the .net 4.0 client profile version4 Warranty subject to observance of specific conditions and use of Evolis High Trust ribbonsEUROPE - MIDDLE-EAST - AFRICAEvolis - 14 avenue de la Fontaine - ZI Angers-Beaucouzé 49070 Beaucouzé - FranceT +33 (0) 241 367 606 - F +33 (0) 241 367 612 - info @ AMERICAS - Evolis Inc. - Fort Lauderdale - evolisinc @ ASIA-PACIFIC - Evolis Asia Pte Ltd - Singapore - evolisasia @ CHINA - Evolis China - Shanghai - evolischina @ INDIA - Evolis India - Mumbai - evolisindia @。
STANDARD PRINTER FEATURES SOFTWARE PRINTER SPECIFICATIONS Printer design:Delivered with driver for Windows ® XP SP3 32/64,Physical dimensions (H x W x D):• Central mechanical locking system Vista 32/64, W7 32/64, W8 32/64, W10• Without hoppers: • Interchangeable 500-card input & output hoppers• User interface languages available: English, French,215 x 300 x 850 mm (8.46" x 11.81" x 33.46")• Available in aluminium body, black plastic coversSpanish, German • With hoppers: Print technology:Delivered with cardPresso XXS for designing and 567 x 300 x 850 mm (22.32" x 11.81" x 33.46")• Direct-to-cardediting badges:Weight:• Dye-sublimation/resin thermal transfer• Internal database (unlimited records)• 21,7 kg (47.8 lbs)Print capability:• Signature acquisition (compatible with Evolis Sig100Electronic requirements:• One-or two-sided printing, edge-to-edgeand Sig200 signature pads)• Power supply: 100-240 Volts AC, 50-60 Hz, 2 A Print resolution:• Compatible with Windows ® XP SP3 32/64, Vista 32/64, • Printer: 24 Volts DC, 6.25 A • 16 million colorsW7 32/64, W8 32/64 and Mac OS X (Intel® processor)• 300x300 dpi (dots per inch)Delivered with a driver for Mac OS X (from 10.5 onwards)OPERATING ENVIRONMENT Printing performance:Linux OS, upon request • Min / Max operating temperature: 15° / 30° C (59° / 86° F)• Color YMCKO: up to 150 cards/hour 1 single-sidedSDK for remote supervision of the printer, while • Humidity: 20% to 65% non-condensing • Color YMCKO-K: up to 115 cards/hour 1 dual-sidedfacilitating and speeding up integration into IT systems • Min / Max storage temparature: -5° / +70° C (23° / 158° F)• Monochrome: up to 1000 cards/hour 1 single-sided• Storage humidity: 20% to 70% non-condensing • Monochrome: up to 320 cards/hour 1 dual-sidedPRINTER RIBBON SPECIFICATIONS • Operating ventilation: free air Printer memory:The Primacy is designed to work only with Evolis • 16 MB (RAM) allowing two card storagesHigh Trust ® ribbons SOUND (evaluated according to the ISO 7779 Interfaces:To maximize the quality and durability of printed Sound pressure in assistant positions LpAm (color mode • USB (1.0, 1.1, 2.0, 3.0)cards, the lifespan of the print head and the overall YMCKO):• Ethernet TCP-IP, 10BaseT, 100BAseT (Traffic Led)printer reliability, use Evolis High Trust ® ribbons • When operating: 50 dB (A)Safety:• Ribbon saver for monochrome printing • In sleep mode: background noise level • Centralized locking system• Recycled packaging Display:Ribbon capacity:CERTIFICATIONS / COMPLIANCES • 2-line LCD display• YMCKO: 500 prints/roll • CE, FCC, VCCI • Status LED for printer and encoding unit monitoring• YMCKO-K: 500 prints/roll (dual-sided)• RoHS • User interface languages available: English,• 1/2 YMCKO: 400 prints/roll French, Spanish, German, Italian, Portuguese• KO: 500 prints/roll INCLUDED WITH THE PRINTER Warranty:• Black monochrome ribbon: 3000 prints/roll • CD with drivers and user's manuals • 1-year warranty on printer (limited to 500,000insertions 4• BlackFLEXmonochrome ribbon: 1000 prints/roll • DVD with cardPresso XXS card designer software insertions)4• Blue P300C monochrome ribbon: 1000 prints/roll • Quick Start Guide • 1-year warranty on original print head (limited to• Red P186C monochrome ribbon: 1000 prints/roll • Warranty booklet 500,000 insertions)4• Green P356C monochrome ribbon: 1000 prints/roll • Starter cleaning kit • White monochrome ribbon: 1000 prints/roll • USB cable (1.80m)OPTIONAL PRINTER FEATURES• Metallic silver monochrome ribbon: 1000 prints/roll • Power supply • Locking system to prevent acces to the printer• Metallic gold monochrome ribbon: 1000 prints/roll • Power cord (region specific)and consumables (cards and ribbons)• Signature panel monochrome ribbon: 1000 prints/roll • Quantum Production Pack: 1 detachable card hopper• Scratch-off monochrome ribbon: 1000 prints/roll with short door, 2 cleaning rollers, 1 cleaning kit• Hologram varnish ribbon: 350 prints/roll • Quantum Backup Pack: 1 print head, 1 reversibleencoding module, 1 detachable card hopper withY=Yellow, M=Magenta, C=Cyan, K=Black Resin short doorO=Overlay, S=Silver • Detachable hopper (long or short doors) with acapacity of 500 card (0,76mm - 30mil)CARD SPECIFICATIONS • Warranty extension program• Detachable and interchangeable card input feeder and output stacker with 500 cards capacity (0,76mm -ENCODING OPTIONS30mil)• Reversible upper and lower encoding unit for• Reject hopper for defective cards with a capacity magnetic stripes and contact smart cards (patented)of 20 cards (0,76mm - 30mil)• Magnetic stripe encoder ISO 7811, track 1, 2 and 3• Card thickness: 0,76 to 1mm (30 to 40mil)high and low coercivity, stripe down (0,76mm - 30mil• Gauge adjustment cards only)Card types accepted:• Magnetic stripe encoder JIS Type II• ISO 7810 format, Type ID 1, CR-80 size • Smart card contact station ISO 7816-2 for 3rd party• 85,6 x 53,98 mm (3.370" x 2.125")external encoder• PVC, Composite PVC, PET • Connecting panel and mounting area for users• ABS 1, special varnished cards 1own integration of encoding units• Contact smart encoder - PC/SC, EMV 2000-1• Contactless ISO 14443A, B, ISO 15693, MIFARE,DESfire, HID iCLASS• Other specific encoders upon request• Options can be combined• Factory-installed or installed on-site CARD PRINTER SPECIFICATIONS ©2015 Evolis. All rights reserved. All information, specifications or graphics are subject to change without prior notice. All trademarks mentioned herein belongto their respective owners. 08/2015. KB-QTM2-127-ENG-A4 Rev A0 Under specific conditions / Depends on the Windows® version / Requires 4.0 client profile version Warranty subject to observance of specific conditions and use of Evolis High Trust® ribbons。
EVOLIS BADGE STUDIOQUICK START GUIDEContentsIntroduction (3)Installation on Windows (4)Installation on Mac OS (5)Getting started with BadgeStudio (6)1.General use (6)a.Interface (6)b.Home page (7)2.Creating a badge using the "Templates" icon (8)3.Creating a badge using the "Wizard" icon (8)4.Creating a badge from a blank document (11)Database (13)1.Creating an internal database (13)2.Importing your database (16)3.Displaying database fields on your badge (18)Other features....................................................................................................... .. (19)ing the Line tool (19)ing the Shapes tool (19)3.Photo acquisition (19)Printing (20)1.Print settings (20)2.Printing (21)INTRODUCTIONEvolis Badge Studio is a card designer software package.It's easy to get started and allows you to create badges to meet all your needs:•Employee ID badges•Business cards•School ID cards•Membership cards•Loyalty cards•InvitationsAnd much more...GLOSSARY:Templates: refers to cards available in our card template library. These cards have a background and various fields (texts,images, logos, barcodes, etc.) which can be changed to adapt the cards to your needs.Background: Refers to the backdrop of a plain badge. The background is the visual which covers the base of the card. It can be anINSTALLATION ON WINDOWS1.Welcome:Select the language.2.Installation:Select installation options and click "Next."3.Finish installation.4.Accept the general terms and conditions of use.5.Installation is complete.INSTALLATION ON MAC OS1.Open the file in .dmg. format.2.Accept the general terms and conditions of use.3.Drag the Badge Studio file into the Applications folder.4.Installation is complete.You can launch Badge Studio from the available icon in the"Applications" folder.1.GENERAL USEa) I nterface 1.Document toolbar: Create, Open, Save, or Delete your card. 2.View and print toolbar: Orientation, Browse Records, Print, Zoom. 3.Database toolbar: Create, Disconnect, Import, Refresh, Go from one Record to Another, Add, Delete a Record (only available in Badge Studio+). 4.Insert objects toolbar: Add text, shapes, barcodes, images, and more. 5.Properties Window: brings together all the features linked to the object added to the badge. I. GETTING STARTED WITH BADGE STUDIO4 5 1 2 3I. GETTING STARTED WITH BADGE STUDIOBadge Studio was developed to help you design your badges, regardless of your level of knowledge in the subject.Several menus are available on the home page. They help you to create your card designs, depending on your needs:Using one of the various cardmodels Using the creation wizardCreating from a blank document Opening your last saved documents1.GENERAL USEb)Home page2.CREATING A BADGE USING THE "TEMPLATES" ICON1.Click on the "Templates" icon. 2.Select your preferred model and click "Next." 3.The model selected opens in Evolis Badge Studio. 4.Each item can be changed and moved, to adapt to your needs.I. GETTING STARTED WITH BADGE STUDIO3.CREATING A BADGE WITH THE "WIZARD" ICON1.Select the orientation of your card.2.Select a background.3.Choose the images you would like to add to your card (images, logos, etc.).4.Select the number of text fields.Your card now appears on the screen. Now all you need to do is customize the items by double-clicking on them and moving them as you want.I. GETTING STARTED WITH BADGE STUDIO123NB: In Badge Studio+, you can add fields which will be used to build your internal database.To do this, in step 4 of the wizard, select the box "Use the database" in the bottom left of the window. An internal database is created automatically in the software.Refer to the chapter on the database for more information. Set the type of fields featuredin your columns (texts, dates,etc.)I. GETTING STARTED WITH BADGE STUDIO4.CREATING A BADGE FROM A BLANK DOCUMENT1.Select the orientation of your badge. A blank document appears on the screen.2.Add a background: in the right-hand window you can select one of the backgroundsavailable by default. You can also import your own image.3.Click on the "Add an Image" button, and draw the area where your image or your photowill go on your badge.4.Once the area has been created, Navigate to your documents, select your image.5.The photo editor opens automatically. You can change your image (change colors, shape, etc.). Once the changes have been made, click on "Validate".I. GETTING STARTED WITH BADGE STUDIO2 3 56.You can add text using the "Text" tool. •First draw your text field, then edit it by double-clicking. •To the right of your screen, click on the "Font" tab to select the font, size, and color of your text. 7.If necessary, you can add other items, such as barcodes, logos, etc. 8.Your badge is ready to be printed.I. GETTING STARTED WITH BADGE STUDIOII. DATABASE•The "database" function lets you create an internal database in the software, or to import your data. It is only available in the Badge Studio+ edition. •The database allows you to add variable fields from one badge to the other (such as "First name/Surname",identity photos, etc.), enabling you to print your badges in batches automatically, without having to change each one separately.Note: When you create a database with Badge Studio+, the data is stored in the badge (in a ".card" file format). The more records you create (with variable fields, photos, etc.), the larger the .card file.GLOSSARY: Record : A record is a copy of a badge and includes 1 or more variable fields. For example, the database above has 5 records. Variable data/variable field: Badge data which is changed from one record to another, such as the first name, surname, or the identity photo of an employee.1.CREATING AN INTERNAL DATABASE1.In the "Menus" section of Badge Studio, select"Database," then "Create."2.The database window appears. Select the button"Edit records."3.You can start to edit records.4.To add a variable field, select the button to add columns (see the next page)5.Configure your column: Name it and choose the type of data (text, number, image, etc.).6.Once your columns have been configured, you can start to fill in your information. To do this, clickon the "Add a Record" button. Each record must be validated to be taken into account.7.Once you have finished editing your records, return to "Browse Records" to view your database. II. DATABASEII. DATABASEAdd, delete, or validate a recordIf you have configured a photo field, double-Add columns2.IMPORTING YOUR DATABASE1.The import function enables you to import yourdatabase into Badge Studio+ from a .csv, .txt, orMicrosoft Excel file.2.Select the type of file you want to import, then click"Next."3.Select your database file on your computer.4.You can configure your fields (text, photo, barcodes,etc.).Click on "Next."ing the screen opposite, you can select yourdatabase's columns that you want to display inBadge Studio+.Click on "Next."II. DATABASE7.Your database has now been imported. 8.To access it, click on the "Window" menu, and select "database", or directly from the available icon in the top bar. 9.To return to the editing window for your badge, click on the corresponding icon above.II. DATABASEReturn tobadge/orientation"Database"buttonII. DATABASE3.DISPLAYING DATABASE FIELDS ON YOUR BADGE1.To display "Database" properties on the right of your screen, click on the gray area around yourbadge.2.From the "Database" pane to the right, use your mouse to "drag and drop" the items to appearon your badge.3.To switch from one record to another, use the navigation arrows at the top of the screen.4.If you add text, the font can be changed using the "font" pane.This will appear automatically when you select text on your badge.III. OTHER FEATURESING THE "LINE" TOOL1.To draw a line, select the "Line" tool and draw on the badge.2.The thickness, color, and line style can be changed using theright-hand window.ING THE "SHAPES" TOOL1.Select the "Shapes" tool, and then draw your shape on the badge.2.The shape is a black rectangle by default. The right-hand windowallows you to change the shape style, color, contours, size, etc..3.PHOTO ACQUISITION1.Click on the Photo Acquisition button.2.Draw the field where your photo will be positioned on the badge.If a camera is installed on your computer, it will openautomatically.3.Validate the photo taken.III. PRINTING1.PRINT SETTINGS1.Open the print settings window ("File > Print Settings").2.Select your printer.3.You can also choose the format of your card and the orientation of your badge.4.The "Print Options" and "Advanced Options" sections allow you to make more advancedadjustments (expert users).2.PRINTING 1.Once your printer has been selected (File > "Print Settings"), you can print. 2.With Badge Studio+ (database), various settings are available to help you select the records/badges to print: •The "Print Selection" option lets you choose the cards you want to print •The "Records Selected in the Search Window" option lets you mark the records to print from the "Browse Records" view. •The "Printing Condition" option lets you print the badges which meet certain criteria which you can define. 3.In "Advanced Options," you can define the advanced properties of the printer if necessary.III. PRINTING Settings for selecting the records to printSUPPORT•For more information on the use of the Badge Studio software, refer to the available help in "Help > Index."•For any technical questions, please refer to the "Technical Support" section on the website •Updates:We recommend that you update the software regularly, so you can benefit from the latest corrections and improvements.Visit the website to view the updates available.Updates are free.。
证卡打印机的技术原理、特点与色带证卡打印机—顾名思义就是用来进行证件卡打印的设备。
在日常工作生活中,随着智能卡的普及应用,我们看到的各种印有高质量照片的胸卡或证件卡及名片就是它的产物。
证卡打印的关键在于输出的质量,虽然说如今喷墨打印机的照片打印质量已经是相当不错了,但是用来进行证卡打印的往往是采用热升华原理的证卡打印机。
热升华打印的英文名称是Dye-Sublimation printing,在证卡打印领域它有两种应用形式:一种是DTC技术打印,一种是HDP技术打印。
DTC打印(Direct-to-Card Printing:直接打印到卡面)它的工作原理是利用了基于热升华染料的色带,当色带和卡经过打印头时,通过半导体加热元件调节出的成千上万的热素将色带上的染料加热,染料受热后会气化并渗透到卡面,不同的热量产生不同的色彩饱和度,连续的色彩相混合,就产生了连续色调,照片质量的彩色图像。
打印出的图像如喷雾般细腻润滑,特别适合人像等精致细腻的皮肤质感要求。
同时色带会在卡面覆上一层膜,可以长久保存不退色。
HDP技术打印(High Definition Printing:高分辨率打印)HDP技术打印是美国FARGO公司发明的世界上最先进的证卡打印技术。
这种技术首先也是利用打印头和色带进行打印的基本原理,但是不同之处是HDP证卡打印先将全彩色的影像先打印到HDP转印膜上,然后通过热压将膜转印到卡片上完成打印。
HDP证卡打印机的优势首先因为打印方式的不同,避免了打印头与卡片直接接触,实现了真正意义上的打印头永不磨损。
而且避免了普通的DTC证卡打印机打印芯片卡时由于卡面不平整,卡片厚度较大对打印效果的影响。
HDP证卡打印技术可以进行超边打印,彻底消除传统打印卡片的白边。
可打印卡的尺寸也从CR80标准扩展到CR100标准,一般的证卡打印机只能打印最常见的CR80卡。
HDP证卡打印是世界上最先进,最安全的证卡打印系统。
Evolis Primacy多功能高效证卡打印机Primacy系列打印机具备单面和双面打印功能,尤其适应中等批量和大批量卡片的打印和编码需求,是发放下列卡片的理想解决方案:
◆员工身份识别卡
◆门禁卡
◆通行证
◆支付卡
◆医疗保健卡
◆学生证
◆活动卡
打印机优势:
1.最优化的打印效率
由于其可在极短的时间内完成彩色卡片的个性化打印,Primacy 系列印机可适应批量打印的要求:单面打印时,最高每小时225 张卡片,双面打印时,每小时最高140张效率。
藉此您可赢得时间,提高您的工作效率。
2.专业化的打印
得益于300 dpi 的图片分辨率和边到边打印功能,Primacy 系列打印机可获得品质完美无缺的打印效果。
您的卡片将成为您机构专业形象的载体并使接收您卡片的人完全满意。
3.使用方便
卡片传送盒及托盒从打印机正面直接可见,这使得您可目测打印情况。
Evolis Premium Suite® 软件套装,通过通知的接收,可借助电脑方便地控制打印机。
Evolis High Trust® 打印带安装简便且可被自动识别。
4.持续打印能力
大容量的传送盒及托盒-可装入100 张卡片 - 避免了经常装填打印机的烦恼。
Primacy 系列打印机可在十分微小的空间内提供较大的连续打印能力。
5.可扩展性
您可根据您的需要,整合下列不同编码器,扩展您的打印机的功能:磁道编码器、接触式或非接触式芯片编码器。
打印机可在出厂时配置双面打印功能,或在现场激活此功能。
6.耐用性好的投资。