浩顺s51说明书
- 格式:doc
- 大小:22.00 KB
- 文档页数:8
目录第一章指纹考勤机基本介绍..........................一、技术指标.... . ..................................... .2二、接口定义................................................. ..3三、键盘............................................... (4)四、考勤机的用户..............五、考勤机的登记方式..........六、用户号码和密码............七、考勤机的工作状态..........八、考勤机记录的数据..........九、常见问题解答..............十、正确按指纹的方法...........第二章指纹考勤机应用及功能一•开机界面................................................二•菜单.................................................三.操作流程................................................1.1 开机..........................................1.2 指纹识别......................................1.3 密码验证....................................1.4 注册用户......................................1.5 备份指纹.................................. ...1.6 管理员的新注册与备份注册..................1.7 密码注册................................ ...1.8 ID卡注册...................................1.9 指纹及密码..................................1.10 指纹及ID卡...................................1.11 安全等级..............................1.12 U盘上传..................................2. 删除用户............................................3. 数据下载............................................3.1 U盘下载......................................3.2 RS232 下载...................................3.3 RS485 下载........................... ...3.4 以太网下载....................................4. 时间设置............................................5. 高级设置............................................5.1 本机设置 ........................................5.11机号........................................5.12管理者总数..................................5.13显示语言....................................5.14语音提示....................................5.15液晶背光....................................5.16自动关机......................................5.17锁控输出 .........................................5.18确认方式 .........................................5.19恢复出厂设置 .....................................5.2 记录设置.............................................5.21管理记录警告 .....................................5.22考勤记录警告 ....................................5.22重复确认时间 ....................................5.3门禁功能设置.........................................5.31时间段定义 .......................................5.32用户门禁设置 ....................................5.33组确认时间段 .....................................5.14开锁组合定义 .....................................5.15开锁延时 .........................................5.16门磁设置 .........................................6 •信息查询................................................6.1存储详情.............................................6.2记录详情.............................................6.21查看考勤记录 .....................................6.22查看管理记录 ....................................6.3系统详情...........................................第三章指纹考勤机的一般操作首次使用操作流程门禁安装说明第一章指纹考勤机基本介绍一技术指标、接口定义4*4键盘二u匸a外围接口外围接口见下图:USB RS485 TCP/IP 、U-DISC 表示考勤机和 PC 的四种通讯方式。

浩顺指纹系列安装使用指南使用前请先连接电脑并安装驱动,具体驱动安装详见正规使用说明书,此指南属个人设置经验所得,不可用做正规安装说明●运行指纹软件——输入默认密码:321●公司信息设置——公司中文名称处写上贵公司名称(这一步可以不写)●公司部门设置——添加——部门编号——部门名称——上级部门号(如果是第一个的话,无需另外设置,只要修改001里的设置即可。
002以后就要选择上级部门)●员工信息设置——选择先前分好的公司部门——添加——员工编号、卡号、姓名、所属部门、入职时间、考勤规则及其他相关信息(重点是设置红色字体所列项目。
员工编号和卡号可同步,如员工编号为001卡号也为001。
入职时间一定要相对提前。
考勤规则不需设置,双击选择默认的01即可。
建义先把所有员工信息都录入软件,然后打印一份编号表,让员工按编号采集指纹。
以便后面能正常上传到指纹机●班次定义——添加——班次编号(纯数字)、名称(可随便乱写)上班打卡时间及下班打卡时间设置好(如果一定要按时上下班打卡的话把前面签到和签退的复选框选上,签到可提前30-60分钟,签退也同样,视贵公司上下班时间而定。
如果还有其他上班时间的话,可另外再添加一个班次)●上班规律——添加——编号(同上)、名称(同上)、周期单位、班次安排(如果只有一个统一上班时间的话,双击方框选择刚刚设置好的班次01。
其他时间班次上班时间亦可选择,有安排员工休息的可选择周未休息)●开始排班——添加——选择员工——从左边栏单选或多选员工至右边栏里——确定——开始日期、结束日期、上班规律(这三项选择好,上班规律即是上面那步安排好的)●数据采集——连接——先点“下载考勤数据”(把指纹机里的指纹下载到软件里),再点“上传员工信息”。
(同步指纹机和软件里员工姓名信息一致)●每月收集考勤记录:数据采集——连接——下载考勤数据(考勤机通讯)——下载全部记录,U盘下载数据的时候选择“原始记录表”——U盘上传。

浩顺一卡通软件说明书12020年4月19日一、系统简介.................................................................................. 错误!未定义书签。
二、系统组成.................................................................................. 错误!未定义书签。
三、系统安装卸载 .......................................................................... 错误!未定义书签。
1. 软件安装步骤........................................................................ 错误!未定义书签。
2. 软件卸载 ............................................................................... 错误!未定义书签。
3. 数据库的安装........................................................................ 错误!未定义书签。
四、建立浩顺一卡通帐套 .............................................................. 错误!未定义书签。
五、软件登录.................................................................................. 错误!未定义书签。
六、操作说明.................................................................................. 错误!未定义书签。
15inch HDMI LCD (B)User Manual 5 inch Resistive Touch Screen LCD, HDMI interface, supports various systemsFeatures●800×480 high resolution, touch control ●Supports Raspberry Pi, and driver is provided (works with custom Raspbian directly) ●Supports BB Black, comes with related images like : Angstrom, Android4.2.2 ●Supports Banana Pi / Banana Pro, comes with related images like : Lubuntu, Raspbian ● Not only for mini-PCs, it can work as a computer monitor just like any other general HDMI screen(touch function is unavailable in this case)●HDMI interface for displaying, USB interface for touch control ●Back light control to lower power consumptionDescription (1)Features (1)1.On-Board resource (4)2.Working with Raspberry Pi (4)2.1.How to program Raspbian image file (4)2.2.Hardware connection (5)2.3.Screen touch calibration (5)2.3.1.Connecting to Raspberry Pi via SSH (5)2.3.2.Calibration steps (5)2.4.Virtual keyboard of Raspberry Pi (6)2.5.How to configure original Raspbian image file (7)2.5.1.How to installing driven script (7)2.5.2.How to enter graphical desktop (7)2.6.How to use with the Ubuntu system (7)3.How to use with BeagleBones (9)3.1.How to program Angstrom image file (9)3.2.Hardware connection (9)3.3.Screen touch calibration (9)4.How to use with Banana Pi (11)4.1.How to program Raspbian_For_BananaPi image file (11)4.2.Hardware connection (11)24.3.Screen touch calibration (11)4.3.1.Connecting to Banana Pi via SSH (11)4.3.2.Calibration steps (12)4.4.How to load WiFi driver of BananaPi Pro (13)4.5.How to use with the Lubuntu system (13)31.Figure 1: Switches and interfaces1 2 3 41)Backlight switch: it is used for backlight control (ON/OFF), working as a screen power button.2)HDMI: it is used for connecting the main board to the LCD screen.3)USB Touch Interface: USB touch/power interface.4)USB Power Interface: USB power interface (used only when the LCD is under power shortage). 2.Working with Raspberry Pi2.1.How to program Raspbian image fileIn order to use with Raspberry Pi, you should configure the original system first. Of course, you can program a ready-to-use system image file to your Raspberry Pi board as well. In this section, we will illustrate how to program the image file by taking the ready-to-use system image file,5inch_HDMI_B_RPI_Raspbian-150405.img, as an example. This image file supports Raspberry Pi Model B/B+/A+/2B.1)Copy the file with the expansion name .img to your PC;2)Connect a TF card to your PC, and format your TF card with the SDFormatter.exeNotices: The capability of TF card in used here should be more than 4GB. In this operation, a TF card reader is also required, which has to be purchased separately.3)Start the Win32DiskImager.exe, and select the system image file copied into your PC, then, click452.2.Hardware connection 1)Connect the LCD to the HDMI on the Raspberry Pi board with a HDMI cable; 2) Connect the USB Touch interface on the LCD to the USB interface on the Raspberry Pi board witha USB type-A male to micro-B cable.2.3.Screen touch calibration1) Enter the system terminal to calibrate the touch screen. The simple method is to connect akeyboard and a HDMI screen to the Raspberry Pi board, to enter the Graphical Desktop forcalibrating operation. However, some users may have no HDMI screen, so we present the SSH method for remote connection to the Raspberry Pi board. To use this method, you should make sure your PC and the Raspberry Pi board can find each other in the network. Normally, they can do so when connected to a same router.2) Open the software PuTTY, and enter the IP address of the Raspberry Pi board (you can enter therouter setting page on your PC to check the IP address). Then, set the Port to 22, and click the3) Enter the user name and the password:User Name: piPassword: raspberry4) When finished, you can enter the system terminal for operation.1)After connecting to the Raspberry Pi board, enter the following command under the terminal:DISPLAY=:0.0 xinput_calibratorAfter entering the calibration interface, there will be a prompt for four-point calibration shown in the screen:2)Click the points marked with the red cross pattern one by one to finish the touch calibration. 3) When finished, the system will generate a string of new calibration data, such as:Section “InputClass”Identifier “calibration”MatchProduct “ADS7843 TouchController”Option “Calibration”“253 3957 224 3820”EndSection4)Create a txt file on your PC, and copy the data above into the file for future use.5)Remove the calibration file in the system by the following command:sudo rm /etc/X11/xorg.conf.d/99-calibration.conf6)Create a new calibration file by the following command:sudo rm /etc/X11/xorg.conf.d/sudo mkdir /etc/X11/xorg.conf.dsudo nano /etc/X11/xorg.conf.d/99-calibration.conf7)When finished, the text editorNano will be run. Please paste the content in the new txt file intothe text editor.8)Yexit.9)Execute the command sudo reboot to restart the system. When finished, the touchconfiguration will be valid.2.4.Virtual keyboard of Raspberry PiThe Virtual keyboard of Raspbian system enables you to save the USB resource, providing easy system operations. After the LCD is working properly, this function can be invoked by the following command: DISPLAY=:0.0 matchbox-keyboard -s 100 extendedNow, the virtual keyboard is ready to use, as Figure 2 shows.Figure 2: Virtual keyboard of Raspberry Pi672.5. How to configure original Raspbian image fileIn the section above, we presented the steps of image programming by taking the ready-to-usesystem image file programming as an example (see Section 2.1), since the ready-to-use image is easier to use and understand. However, you can freely customize your system by configuring the original Raspbian image file to support this LCD module.1) Copy the file RPI2B_B_B+_USB_TOUCH_RES_5.0_RASPBIAN.tar.gz into the Raspbian system, andunzip it. That is, enter the terminal and input the following command:sudo tar zxvf RPI2B_B_B+_USB_TOUCH_RES_5.0_RASPBIAN.tar.gz2)Run the script USB_TOUCH_RES_5.0_RASPBIAN located at the folderRPI2B_B_B+_USB_TOUCH_RES_5.0_RASPBIAN by the following command: cd RPI2B_B_B+_USB_TOUCH_RES_5.0_RASPBIANsudo ./USB_TOUCH_RES_5.0_RASPBIAN3) When finished, the system will reboot automatically. And the LCD module can work properly,including display and touch functions, after the system rebooted.Notice: The Raspbian system boots to terminal interface by default. To make the operations simple when using with a LCD, it is recommended to set the system to boot to graphical desktop directly. Please follow the steps below to configure the system.1)Enter the Raspbian system, and input the following command: sudo raspi-config 2) Select the option Enable Boot to Desktop/Scratch by using the Arrow keys, Space key or/andEnter key.3)Select the option Desktop Login as user ‘Pi’ at the graphical desktop . 4) When you see the prompt “Would you like to reboot now?”, select the option Yes to reboot thesystem.2.6. How to use with the Ubuntu systemProgram the image file 5inch_HDMI_B_RPI_Ubuntu-150405.img to the board. This image file supports Raspberry Pi 2B.User Name: linaroPassword: linaroFor screen touch calibration, the corresponding operations are the same with that of Raspbian. For more detailed information, please refer to the Section 2.3.893. 3.1. How to program Angstrom image fileIf this LCD module is used for display only, you can program the latest Angstrom image file to the board directly without any change. The BeagleBone Black will read the display parameters of the 5 inch HDMI displayer and set the resolution to 800*480 automatically.When using this LCD module as a touch screen, you should program the image file5inch_HDMI_B_BB_Black_Angstrom-150424.img provided by the CD to the board. Please follow the steps below to program the image file.1)Copy the file with the expansion name .img to your PC; 2)Connect a TF card to your PC, and format your TF card with the SDFormatter.exe Notices: The capability of TF card in used here should be more than 4GB. In this operation, a TF card reader is also required, which has to be purchased separately.3) Start the Win32DiskImager.exe, and select the system image file copied into your PC, then, click4) and hold it till power up. Then, you will enter the system located at the TF card. And BeagleBone will take about 40 minutes to copy the system in the TF card into the on-board eMMC. When finished, the 4 LED indicators on the board will light up at a same time. After the systemrebooted, you can enter the graphical desktop directly.3.2.Hardware connection 1)Connect the LCD to the HDMI on the BeagleBone board with a HDMI to micro HDMI cable; 2) Connect the USB Touch interface on the LCD to the USB interface on the BeagleBone board withUSB type-A male to micro-B cable. (BeagleBone has two USB interfaces, one for host and the other for client. In here, you should connect the LCD module to the USB host interface).3.3.Screen touch calibration 1) Remove the calibration file in the system: /etc/pointercal.xinput .Explanation: Connecting a mouse to the board, you can perform any remove operations in the graphical desktop. For SSH connection, the user name is root , no password.2) After rebooted, the Pi will enter the calibration interface automatically before start the system.There will be a prompt for four-point calibration shown in the screen:3)Click the points marked with the red cross pattern one by one to finish the touch calibration;4)When finished, the system will write the new calibration data into the file /etc/pointercal.xinput.10114.Before powering up the Banana Pi, you should connect it to a LCD displayer properly, since the Banana Pi may read the resolution parameters of the LCD displayer on startup. And the connection should be remained till the Banana Pi enters the desktop. In this case, even if you disconnect the LCD displayer and reconnect it again to the Banana Pi, the LCD can still work properly.4.1. How to program Raspbian_For_BananaPi image fileProgram the image file 5inch_HDMI_B_BananaPi_Raspbian-150410.img to the borad. This image file supports the modules BananaPi Pro and BananaPi.1)Copy the file with the expansion name .img to your PC; 2)Connect a TF card to your PC, and format your TF card with the SDFormatter.exe Notices: The capability of TF card in used here should be more than 4GB. In this operation, a TF card reader is also required, which has to be purchased separately.3) Start the Win32DiskImager.exe, and select the system image file copied into your PC, then, click4.2.Hardware connection 1) Connect the LCD to the HDMI on the Banana Pi board with a HDMI cable; 2) Connect the USB Touch interface on the LCD to the USB interface on the Banana Pi board with adual micro USB cable.4.3.Screen touch calibration1) Enter the system terminal to calibrate the touch screen. The simple method is to connect akeyboard and a HDMI screen to the Banana Pi board, to enter the Graphical Desktop forcalibrating operation. However, some users may have no HDMI screen, so we present the SSH method for remote connection to the Banana Pi board. To use this method, you should makesure your PC and the Banana Pi board can find each other in the network. Normally, they can do so when connected to a same router.2) Open the software PuTTY, and enter the IP address of the Banana Pi board (you can enter therouter setting page on your PC to check the IP address). Then, set the Port to 22, and click the123) Enter the user name and the password:User Name: bananapiPassword: bananapi4) When finished, you can enter the system terminal for operation.1)After connecting to the Banana Pi board, enter the following command under the terminal:DISPLAY=:0.0 xinput_calibratorAfter entering the calibration interface, there will be a prompt for four-point calibration shown in the screen:2)Click the points marked with the red cross pattern one by one to finish the touch calibration. 3) When finished, the system will generate a string of new calibration data, such as:Section “InputClass”Identifier “calibration”MatchProduct “ADS7843 TouchController” Option “Calibration”“253 3957 224 3820” EndSection4)Create a txt file on your PC, and copy the data above into the file for future use. 5)Remove the calibration file in the system by the following command: sudo rm /etc/X11/xorg.conf.d/99-calibration.conf 6) Create a new calibration file by the following command:sudo rm /etc/X11/xorg.conf.d/sudo mkdir /etc/X11/xorg.conf.dsudo nano /etc/X11/xorg.conf.d/99-calibration.conf7)When finished, the text editorNano will be run. Please paste the content in the new txt file into the text editor. 8) Yexit.9) Execute the command sudo reboot to restart the system. When finished, the touchconfiguration will be valid.4.4.How to load WiFi driver of BananaPi ProComparing with the Banana Pi, the BananaPi Pro has added an on-board WiFi module. When using the BananaPi Pro, you can use SSH to connect to the Pi and execute the following command to load the WiFi driver:sudo modprobe ap62104.5.How to use with the Lubuntu systemProgram the image file 5inch_HDMI_B_BananaPi_Lubuntu-150410.img to the board. This image file supports the modules BananaPi Pro and BananaPi.User name: bananapiPassword: bananapiFor screen touch calibration, the corresponding operations are the same with that of Raspbian. For more detailed information, please refer to the Section 2.3.。
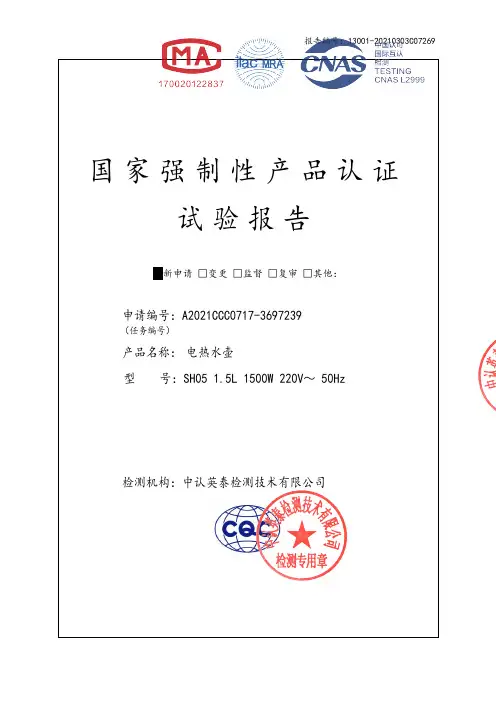
报告编号:13001-20210303C07269
检测机构:中认英泰检测技术有限公司
[
签发日期:2021.04.14
[盖章]
盖章
2021年04月14日
主检型号SH05 外观
主检型号SH05 外观
主检型号SH05 底座外观
铭牌粘贴位置 铭牌粘贴位置
主检型号SH05 内部结构
主检型号SH05 水位标识
主检型号SH05 壶身外观
主检型号SH05 内部结构指示灯
主检型号SH05 发热管端子
安全关键件清单:
报告组成
判定: P 试验结果符合要求
F 试验结果不符合要求
N 要求不适用于该产品,或不进行该项试验
声明
本报告试验结果仅对受试样品有效;
未经许可本报告不得部分复制;
对本报告如有异议,请于收到报告之日起十五天内提出。
试验单位:中认英泰检测技术有限公司
地址:苏州吴中经济开发区吴中大道1368号科技金融城
邮政编码:215104
电话:*************
传真:*************
E-mail:*****************。
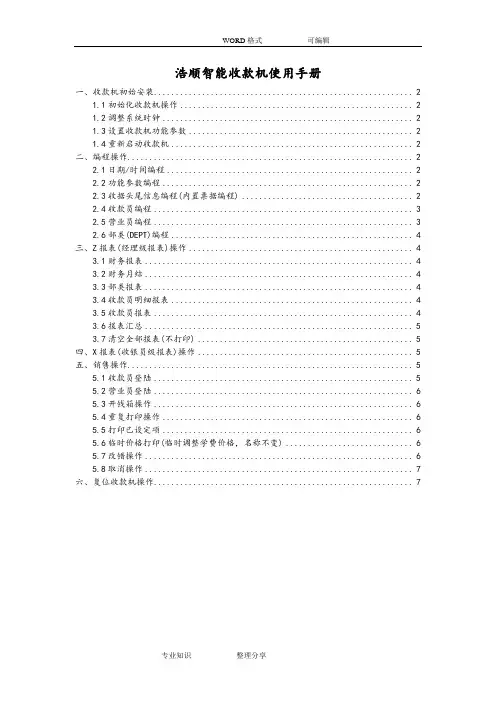
浩顺智能收款机使用手册一、收款机初始安装 (2)1.1初始化收款机操作 (2)1.2调整系统时钟 (2)1.3设置收款机功能参数 (2)1.4重新启动收款机 (2)二、编程操作 (2)2.1日期/时间编程 (2)2.2功能参数编程 (2)2.3收据头尾信息编程(内置票据编程) (2)2.4收款员编程 (3)2.5营业员编程 (3)2.6部类(DEPT)编程 (4)三、Z报表(经理级报表)操作 (4)3.1财务报表 (4)3.2财务月结 (4)3.3部类报表 (4)3.4收款员明细报表 (4)3.5收款员报表 (4)3.6报表汇总 (5)3.7清空全部报表(不打印) (5)四、X报表(收银员级报表)操作 (5)五、销售操作 (5)5.1收款员登陆 (5)5.2营业员登陆 (6)5.3开钱箱操作 (6)5.4重复打印操作 (6)5.5打印已设定项 (6)5.6临时价格打印(临时调整学费价格,名称不变) (6)5.7改错操作 (6)5.8取消操作 (7)六、复位收款机操作 (7)一、收款机初始安装1.1初始化收款机操作将控制锁拨到“编程”档位,如需输入密码,则需要输入经理密码+“收款员”键,方可进入一下编程。
按“19”+“小计”+“收款员营业员”键,进行初始化收款机操作。
(进入编程档后可以按“乘/时”和“输入”键进行翻页操作来选择要进行的操作)警告:此操作会把收款机的所有参数恢复到出厂时的默认值,请谨慎操作!!!1.2调整系统时钟将控制锁拨到“编程”档位,按“1”+“小计”进入日期/时间编程操作,输入“年/月/日”后按“小计”确认输入;输入“时/分/秒”后按“小计”确认输入,按“现金”键返回。
1.3设置收款机功能参数将控制锁拨到“编程”档位,按“3”+“小计”进入功能参数编程操作,按“小计”键选择要进行的操作,一般,我们只需改第五个,即品目右上角显示“05P”这个是设置经理密码,用来控制经理级报表及编程操作权限的,设置完后按“现金”键返回。
目录第一章指纹考勤机基本介绍⋯⋯⋯⋯⋯⋯⋯⋯⋯⋯⋯⋯⋯⋯⋯⋯⋯..1一、技术指标⋯⋯ .⋯⋯⋯⋯⋯⋯⋯⋯⋯⋯⋯⋯⋯⋯⋯⋯⋯⋯⋯..2二、接口定义⋯⋯⋯⋯⋯⋯⋯⋯⋯⋯⋯⋯⋯⋯⋯⋯⋯⋯⋯⋯..3三、键盘⋯⋯⋯⋯⋯⋯⋯⋯⋯⋯⋯⋯⋯⋯⋯⋯⋯⋯⋯⋯⋯ (4)四、考勤机的用户⋯⋯⋯⋯⋯⋯⋯⋯⋯⋯⋯⋯⋯⋯⋯⋯⋯⋯...五、考勤机的登记方式⋯⋯⋯⋯⋯⋯⋯⋯⋯⋯⋯⋯⋯⋯⋯⋯⋯六、用户号码和密码⋯⋯⋯⋯⋯⋯⋯⋯⋯⋯⋯⋯⋯⋯⋯⋯⋯....七、考勤机的工作状态⋯⋯⋯⋯⋯⋯⋯⋯⋯⋯⋯⋯⋯⋯⋯⋯⋯ . 八、考勤机记录的数据⋯⋯⋯⋯⋯⋯⋯⋯⋯⋯⋯⋯⋯⋯⋯⋯⋯ . 九、常见问题解答⋯⋯⋯⋯⋯⋯⋯⋯⋯⋯⋯⋯⋯⋯⋯⋯⋯⋯⋯⋯ .. 十、正确按指纹的方法⋯⋯⋯⋯⋯⋯⋯⋯⋯⋯⋯⋯⋯⋯⋯⋯⋯⋯⋯第二章指纹考勤机应用及功能一.开机界面⋯⋯⋯⋯⋯⋯⋯⋯⋯⋯⋯⋯⋯⋯⋯⋯⋯⋯⋯⋯⋯⋯⋯.二.菜单⋯⋯⋯⋯⋯⋯⋯⋯⋯⋯⋯⋯⋯⋯⋯⋯⋯⋯⋯⋯⋯⋯⋯三.操作流程⋯⋯⋯⋯⋯⋯⋯⋯⋯⋯⋯⋯⋯⋯⋯⋯⋯⋯⋯⋯⋯⋯1.1开机⋯⋯⋯⋯⋯⋯⋯⋯⋯⋯⋯⋯⋯⋯⋯⋯⋯⋯⋯⋯1.2指纹识别⋯⋯⋯⋯⋯⋯⋯⋯⋯⋯⋯⋯⋯⋯⋯⋯⋯⋯⋯⋯ .1.3密码验证⋯⋯⋯⋯⋯⋯⋯⋯⋯⋯⋯⋯⋯⋯⋯⋯⋯ .1.4注册用户⋯⋯⋯⋯⋯⋯⋯⋯⋯⋯⋯⋯⋯⋯⋯⋯⋯⋯ ..1.5备份指纹⋯⋯⋯⋯⋯⋯⋯⋯⋯⋯⋯⋯⋯⋯⋯⋯ ..1.6管理员的新注册与备份注册⋯⋯⋯⋯⋯⋯⋯⋯1.7密码注册⋯⋯⋯⋯⋯⋯⋯⋯⋯⋯⋯⋯⋯⋯⋯ .1.8ID 卡注册⋯⋯⋯⋯⋯⋯⋯⋯⋯⋯⋯⋯⋯⋯⋯⋯⋯ .1.9指纹及密码⋯⋯⋯⋯⋯⋯⋯⋯⋯⋯⋯⋯⋯⋯⋯⋯ ..1.10指纹及 ID 卡⋯⋯⋯⋯⋯⋯⋯⋯⋯⋯⋯⋯⋯⋯⋯⋯1.11安全等级⋯⋯⋯⋯⋯⋯⋯⋯⋯⋯⋯⋯⋯⋯1.12U 盘上传⋯⋯⋯⋯⋯⋯⋯⋯⋯⋯⋯⋯⋯⋯⋯⋯2.删除用户⋯⋯⋯⋯⋯⋯⋯⋯⋯⋯⋯⋯⋯⋯⋯⋯⋯⋯⋯⋯⋯3.数据下载⋯⋯⋯⋯⋯⋯⋯⋯⋯⋯⋯⋯⋯⋯⋯⋯⋯⋯⋯⋯⋯3.1U 盘下载⋯⋯⋯⋯⋯⋯⋯⋯⋯⋯⋯⋯⋯⋯⋯⋯⋯⋯ .3.2RS232 下载⋯⋯⋯⋯⋯⋯⋯⋯⋯⋯⋯⋯⋯⋯⋯⋯⋯ .3.3RS485 下载⋯⋯⋯⋯⋯⋯⋯⋯⋯⋯⋯⋯⋯ .3.4以太网下载⋯⋯⋯⋯⋯⋯⋯⋯⋯⋯⋯⋯⋯⋯⋯⋯⋯4.时间设置⋯⋯⋯⋯⋯⋯⋯⋯⋯⋯⋯⋯⋯⋯⋯⋯⋯⋯⋯⋯⋯5.高级设置⋯⋯⋯⋯⋯⋯⋯⋯⋯⋯⋯⋯⋯⋯⋯⋯⋯⋯⋯⋯⋯ .5.1本机设置⋯⋯⋯⋯⋯⋯⋯⋯⋯⋯⋯⋯⋯⋯⋯⋯⋯⋯⋯ .5.11 机号⋯⋯⋯⋯⋯⋯⋯⋯⋯⋯⋯⋯⋯⋯⋯⋯⋯⋯⋯⋯ .5.12 管理者总数⋯⋯⋯⋯⋯⋯⋯⋯⋯⋯⋯⋯⋯⋯⋯⋯⋯⋯5.13 显示语言⋯⋯⋯⋯⋯⋯⋯⋯⋯⋯⋯⋯⋯⋯⋯⋯⋯⋯⋯5.14 语音提示⋯⋯⋯⋯⋯⋯⋯⋯⋯⋯⋯⋯⋯⋯⋯⋯⋯⋯⋯5.15 液晶背光⋯⋯⋯⋯⋯⋯⋯⋯⋯⋯⋯⋯⋯⋯⋯⋯⋯⋯⋯⋯5.16 自动关机⋯⋯⋯⋯⋯⋯⋯⋯⋯⋯⋯⋯⋯⋯⋯⋯⋯⋯⋯⋯5.17锁控输出⋯⋯⋯⋯⋯⋯⋯⋯⋯⋯⋯⋯⋯⋯⋯⋯⋯⋯⋯⋯5.18确认方式⋯⋯⋯⋯⋯⋯⋯⋯⋯⋯⋯⋯⋯⋯⋯⋯⋯⋯⋯⋯5.19恢复出厂设置⋯⋯⋯⋯⋯⋯⋯⋯⋯⋯⋯⋯⋯⋯⋯⋯⋯⋯5.2 记录设置⋯⋯⋯⋯⋯⋯⋯⋯⋯⋯⋯⋯⋯⋯⋯⋯⋯⋯⋯⋯⋯5.21管理记录警告⋯⋯⋯⋯⋯⋯⋯⋯⋯⋯⋯⋯⋯⋯⋯⋯⋯⋯ .5.22考勤记录警告⋯⋯⋯⋯⋯⋯⋯⋯⋯⋯⋯⋯⋯⋯⋯⋯⋯ ..5.22重复确认时间⋯⋯⋯⋯⋯⋯⋯⋯⋯⋯⋯⋯⋯⋯⋯⋯⋯ ..5.3门禁功能设置⋯⋯⋯⋯⋯⋯⋯⋯⋯⋯⋯⋯⋯⋯⋯⋯⋯⋯..5.31 时间段定义⋯⋯⋯⋯⋯⋯⋯⋯⋯⋯⋯⋯⋯⋯⋯⋯⋯⋯⋯..5.32 用户门禁设置⋯⋯⋯⋯⋯⋯⋯⋯⋯⋯⋯⋯⋯⋯⋯⋯⋯⋯..5.33 组确认时间段⋯⋯⋯⋯⋯⋯⋯⋯⋯⋯⋯⋯⋯⋯⋯⋯⋯⋯..5.14开锁组合定义⋯⋯⋯⋯⋯⋯⋯⋯⋯⋯⋯⋯⋯⋯⋯⋯⋯⋯5.15开锁延时⋯⋯⋯⋯⋯⋯⋯⋯⋯⋯⋯⋯⋯⋯⋯⋯⋯⋯⋯⋯ .5.16门磁设置⋯⋯⋯⋯⋯⋯⋯⋯⋯⋯⋯⋯⋯⋯⋯⋯⋯⋯⋯⋯ .6.信息查询⋯⋯⋯⋯⋯⋯⋯⋯⋯⋯⋯⋯⋯⋯⋯⋯⋯⋯⋯⋯⋯⋯⋯.6.1存储详情⋯⋯⋯⋯⋯⋯⋯⋯⋯⋯⋯⋯⋯⋯⋯⋯⋯⋯⋯⋯⋯⋯6.2记录详情⋯⋯⋯⋯⋯⋯⋯⋯⋯⋯⋯⋯⋯⋯⋯⋯⋯⋯⋯⋯⋯ .6.21查看考勤记录⋯⋯⋯⋯⋯⋯⋯⋯⋯⋯⋯⋯⋯⋯⋯⋯⋯6.22查看管理记录⋯⋯⋯⋯⋯⋯⋯⋯⋯⋯⋯⋯⋯⋯⋯⋯⋯6.3系统详情⋯⋯⋯⋯⋯⋯⋯⋯⋯⋯⋯⋯⋯⋯⋯⋯⋯⋯⋯⋯⋯⋯⋯⋯..第三章指纹考勤机的一般操作一、首次使用操作流程二、门禁安装说明第一章指纹考勤机基本介绍一技术指标硬件平台Cpu: ARM9; SDRAM:64M位;FLASH:32M位指纹容量记录容量管理员总数确认成功识别时间确认失败识别时间FAR (拒认率 ) FRR (误认率 )登记方式指纹比对方式安全等级用户号码 (ID) 输入范围登记指纹输入次数指纹采集面积3000 枚或 30000 枚600001000<1.5S<2S0.0001%以下(安全等级=1 时)0.1%以下(安全等级=1 时)指纹或密码1:1 或 1:N1-4 可设置1-99999999 之间,一个ID 号下可注册 3 枚指纹或一个密码3次指纹输入面积: 16mm*16mm有效输入面积: 16mm*14mm通讯接口USB. RS485. TCP/IP. U 盘串行通讯波特9600,19200,38400,57600,115200率 (BPS)使用语言中文简体 .中文繁体 .英文提示音语音提示或蜂鸣提示可设置显示器件128*64 点阵 LCD考勤方式F/P/C 或 F+C 或 F+P显示考勤人员5 个汉字或 10 个 ASIIC 码字符姓名工作温度0%-45 ℃工作相对湿度20%-80%二、接口定义喇叭128*64 点阵LCD指纹采集窗4*4 键盘外围接口外围接口见下图:USB TCP/IP/RS485U-DISC DCUSB、 RS485、 TCP/IP 、 U-DISC 表示考勤机和PC的四种通讯方式。
浩顺晶密考勤机操作讲明书〔上〕一、系统登录1、初始登录:用户名为ADMIN,密码为1232、年份与月份指当前的考勤期间。
二、部门设置操作步骤:1新增部门:1.1选择“全部〞1.2按“新增〞按钮,然后输进部门名称1.3按“保持〞2修改部门2.1选择部门名称2.2按“修改〞按钮,然后输进部门名称2.3按“保持〞3删除部门3.1选择部门名称3.2按“删除〞按钮三、工号规那么设定注:1、前缀位数是指当人职员号为系统自动编号时,默认产生的工号前缀位数,那么要求输进工号前缀的长度应为前缀位数,如工号前缀为HR,如此该部门新增人员时会自动在前面加工号前缀HR。
四、人员维护操作步骤:1新增人员1.1选择部门1.2按“新增按钮〞,然后进进如下操作界面:1.3输进相关人员信息,输进时本卷须知如下:注:1〕*标记字段是考勤必输字段;2照片默认放在系统安装名目下的\PHOTO\文件夹下,照片名字要求与姓名一致;3进职日期之前在考勤报表中不表达1.4按“保持〞按钮,保持刚输进的人员信息2修改人员与新增人员相似,略3人事档案导进3.1按“导进〞按钮,进进如下操作界面:3.2选择所要导进的资料名称与EXCEL文件所在的路径3.3按“下一步〞,进进如下操作界面:3.4设置好匹配字段,然后按“下一步〞按钮进进如下操作界面:3.5按“数据导进〞进行数据导进注:人事资料导进前首先要将EXCEL中所存在的部门在软件中预先设置,否那么将无法导进4人事资料查询注:先选择条件工程,然后再输进相应的值,假设只是单一条件,那么可直截了当按回车查询;假设要依据多个条件查询,那么每设定一个条件均要求按添加,然后再查询。
五、考勤规那么设定设定时参考下方的讲明。
六、班次设置1班次录进注:正常出勤超过多少分钟计进平常加班是指:如:当正常出勤超过8小时,超过局部计为平常加班。
2班段录进注:依据需要设定班段类不,其中平常加班、连班、延长加班与跨夜加班在考勤规那么中均有相关设置。
1 400 KGPC1.4COMPACT PALLET TRUCKSHYSTERSpecification data is based on VDI 2198DISTINGUISHING MARKPC1.4Electric (battery)Pedestrian1.4 600 886 11522.1 Service weightkg 2.2 Axle loading, laden front/rear kg 2.3 Axle loading, unladen front/rearkgW E I G H TWEIGHT230642 1088 180 503.1 Tyres: solid rubber, superelastic, pneumatic, polyurethane front/rear 3.2 Tyre size, front ø (mm x mm)3.3 Tyre size, rearø (mm x mm)3.4 Additional wheels (dimensions)ø (mm x mm)3.5 Wheels, number front/rear (x = driven wheels) 3.6 Tread, front b 10 (mm)3.7Tread, rearb 11 (mm)T Y R E S , C H A S S I STYRES, CHASSISPolyurethane 195 x 55 80 x 69 30 x 451x + 2 / 4470 4805.1 Travel speed, laden/unladenkm/h 5.1.1 Travel speed, laden/unladen, backwards km/h 5.2 Lift speed, laden/unladen m/s 5.3 Lowering speed, laden/unladen m/s 5.8 Max. gradeability, laden/unladen %5.10 Service brakeP E R F O R M A N C E D A T APERFORMANCE DATA5.3 5.8 5.3 5.8 2.25 3.32 2.37 1.905 / 15Electric6.1 Drive motor S2 60 minute rating kW 6.2 Lift motor, S3 15% ratingkW 6.3 Battery according to DIN 43531/35/36 A,B,C, no 6.4 Battery voltage/nominal capacity K5 (V)/(Ah)6.5 Battery weightkg6.6 Energy consumption according to VDI cyclekWh/h at number of cyclesE L E C T R I C - E N G I N EELECTRIC - ENGINE 0.9 0.8 no 24 / 80 49on request8.1 Type of drive unit D R I V E /L I F T M E C H A N I S MDRIVE/LIFT MECHANISMMOSFET 10.7 Sound pressure level at the driver’s seat dB (A)A D D I T I O N A L D A T AADDITIONAL DATA704.4 Lift h 3 (mm)4.9 Height of tiller arm in driving position min./max. h 14 (mm)4.15 Height, loweredh 13 (mm)4.19 Overall length (pedestrian) l 1 (mm)4.20 Length to face of forks (pedestrian) l 2 (mm)4.21 Overall widthb 1 / b 2 (mm)4.22 Fork dimensions DIN ISO 2331 s / e / l (mm)4.25 Outside Fork Widthb 5 (mm)4.32 Ground clearance, centre of wheelbase m 2 (mm)4.33Load dimension b 12 × l 6 crosswaysb 12 × l 6 (mm)4.34.1 Aisle width for pallets 1000mm x 1200mm crossways (pedestrian) Ast (mm)4.34.2 Aisle width for pallets 800mm x 1200mm lengthwise (pedestrian) Ast (mm)4.35 Turning radius (pedestrian) Wa (mm)1.1 1.2 1.3 1.4 1.51.61.81.92.12.22.33.1 3.23.33.43.5 3.63.75.15.1.15.25.35.85.106.16.26.3 6.4 6.56.68.110.7D I ME N S I O N SDIMENSIONS200950 1310 85 1508 358 685 531601150550 321000 x 12002131 2029 1320 4.44.94.154.194.204.214.224.254.324.334.34.14.34.24.35W ah13h3Ym2l2l1h14minh14maxltraction and hydraulic controls.n Hour meter and battery discharge indicator.n Welded fork construction makes them highly resistant to torsion and heavy loads.n In case of collision components and batteries are protected with special designed cover.PRODUCTIVITYn Reinforced compact chassis design to improve accessibility.n Operator-friendly tiller head controls for productive load handling.n Standard anti-roll back system.n Double load wheels and exit/entry roller to optimize pallet handling.ERGONOMICSn Ergonomically tiller head designed for maximum operator comfort.n Low effort controls ergonomically placed to reduce operator fatigue.n Adjustable performance setting to suit specific operation conditions.n Responsive butterfly switches control travel direction, speed and braking allow a smooth start, controlled braking and acceleration.n Creep-speed function for manoeuvring in dense areason-site recharge.n Optimized battery packs to ensure maximum time of operation.n Easy access to motor and key components to reduce downtime.SERVICEABILITYn Quick accessibility for exchange of batteries.n Maintenance free sealed batteries.@fwww.hyster.eu*********************/HysterEurope @HysterEurope/HysterEuropeSTRONG PARTNERS. TOUGH TRUCKS.TMFOR DEMANDING OPERATIONS, EVERYWHERE.Hyster supplies a complete range of warehouse equipment, IC and electric counterbalanced trucks, container handlers and reach stackers. Hyster is committed to being much more than a lift truck supplier.Our aim is to offer a complete partnership capable ofresponding to the full spectrum of material handling issues: Whether you need professional consultancy on your fleet management, fully qualified service support, or reliable parts supply, you can depend on Hyster.Our network of highly trained dealers provides expert,responsive local support. They can offer cost-effective finance packages and introduce effectively managed maintenance programmes to ensure that you get the best possible value. Our business is dealing with your material handling needs so you can focus on the success of your business today and in the future.HYSTER-YALE UK LIMITED trading as Hyster Europe. Registered Address: Centennial House, Building 4.5, Frimley Business Park, Frimley, Surrey, GU16 7SG, United Kingdom.Registered in England and Wales. Company Registration Number: 02636775.HYSTER,and FORTENS are registered trademarks in the European Union and certain other jurisdictions.MONOTROL® is a registered trademark, and DURAMATCH andare trademarks in the United States and in certain other jurisdictions.Printed in Netherlands. Part number: 3990121 Rev00-10/14-TLCHYSTER EUROPECentennial House, Frimley Business Park, Frimley, Surrey, GU16 7SG, England.Tel: +44 (0) 1276 538500。
浩顺s51说明书
篇一:浩顺考勤机说明书
目录
第一章指纹考勤机基本介绍 (1)
一、技术指标 (2)
二、接口定义 (3)
三、键盘 (4)
四、考勤机的用
户………………………………………………...
五、考勤机的登记方
式……………………………………………
六、用户号码和密码……………………………………………....
1
七、考勤机的工作状
态…………………………………………….
八、考勤机记录的数
据…………………………………………….
九、常见问题解答……………………………………………………..
十、正确按指纹的方法…………………………………………………
第二章指纹考勤机应用及功能
一(开机界面……………………………………………………………. 二(菜单…………………………………………………………… 三(操作流程…………………………………………………………
1.1 开机……………………………………………………
1.2 指纹识别…………………………………………………….
1.3 密码验证……………………………………………. 1.4 注册用户………………………………………………..
1.5 备份指纹…………………………………………..
1.6 管理员的新注册与备份注册……………………
2
1.7 密码注册……………………………………….
1.8 ID卡注册……………………………………………. 1.9 指纹及密码…………………………………………..
1.10指纹及ID卡………………………………………… 1.11 安全等级……………………………………
1.12 U盘上传…………………………………………
2(删除用户………………………………………………………
3(数据下
载………………………………………………………
3.1U盘下载………………………………………………. 3.2RS232下载……………………………………………. 3.3RS485下载………………………………….
3.4以太网
下载……………………………………………
4(时间设置………………………………………………………
5(高级设置……………………………………………………….
5.1 本机设置………………………………………………….
5.11 机号…………………………………………………….
3
5.12 管理者总数………………………………………………
5.13 显示语言…………………………………………………
5.14 语音提示…………………………………………………
5.15 液晶背光……………………………………………………
5.16 自动关机……………………………………………………
5.17 锁控输出……………………………………………………
5.18 确认方式……………………………………………………
5.19 恢复出厂设置………………………………………………
5.2 记录设置………………………………………………………
5.21 管理记录警告……………………………………………….
5.22 考勤记录警告……………………………………………..
4
5.22 重复确认时间……………………………………………..
5.3 门禁功能设置………………………………………………..
5.31 时间段定义…………………………………………………..
5.32 用户门禁设置………………………………………………..
5.33组确认时间段………………………………………………..
5.14 开锁组合定义………………………………………………
5.15 开锁延时…………………………………………………….
5.16 门磁设置…………………………………………………….
6(信息查询……………………………………………………………. 6.1 存储详情…………………………………………………………
6.2 记录详情……………………………………………………….
5
6.21 查看考勤记录……………………………………………
6.22 查看管理记录……………………………………………
6.3 系统详情……………………………………………………………….. 第三章指纹考勤机的一般操作
一、首次使用操作流程
二、门禁安装说明
第一章指纹考勤机基本介绍
二、接口定义
外围接口见下图:
USB TCP/IP/RS485
U-DISC DC
USB、RS485、TCP/IP、U-DISC表示考勤机和PC的四种通讯方式。
1( USB通讯方式:支持1.5Mbps低速和12Mbps 全速USB 通讯
2( RS485通讯方式:传输最大距离1000米。
PC COM口
指向自己
3( TCP/IP通讯方式:10M/100M以太网标准接口。
6
4( U-DISC通讯方式:U盘采集上传、下载数据,支持目前市面上95%以上U 盘。
篇二:浩顺HsuN-K-5卡钟说明书
篇三:浩顺系列产品简易操作
浩顺收费系统及一卡通操作
一、收费系统(v4.7):
1. (1).安装软件:打开光盘点击应用程序,安装到“选择目的位置”
时注意不要装在C盘,点击浏览,把C改为D、E、F等盘符,
如图所示:
之后在点“下一步”操作,安装“选择组件”时,只选择基本系统和收费系统,其它选项取消,如图所示:
之后在点击下一步操作完成。
(2).软件装好后,打开晶密一卡通软件,点收费系统,先测试数据库连
接成功,之后点确认键创建数据库,单位名称输入“西安晶密公司”如
图:
点确认后无需输入密码,直接进入软件。
2. 软件设置与操作(IC卡):
(1)打开软件,点设置——IC卡密码设置——单位密码
7
(注意:单位密码输好后要牢记),输好后点保存设置。
(2)点窗口机——站号管理——检测代理
( 3 ) 把收费机(所谓食堂打卡的机子)和电脑连接好开机,点窗
口机——检测窗口机——查找新的窗口机——检测窗口机——
时钟校准——校准全部窗口机——关闭。
(在状态下显示红色圆
点说明与电脑没连通,显示绿色则说明与电脑连通)如图:
(4)点窗口机——窗口机参数设置——下传当前窗口机——关闭。
(5)把发卡机和电脑连接(长白线插在电脑主机的键盘口、短白线与键盘衔接,黑线插在电脑的串口上),点窗口机——发卡机管理——自动检测端口——检测发卡机——确定。
(把下面的黑色小圆点选择到M1上)
如图所示和你电脑显示的一样则说明发卡机连通。
(6) 发卡:点卡片——卡片管理——发卡(输入编号、姓名、卡号(卡号、卡型是自动的)、存款金额)——发卡。
如图:
把卡放于发卡机上,点绿色问号
在消费机上消费就可以了。
(7)采集数据看报表:先检测窗口机如同上“(3)”操作,
8
再点窗口机——窗口机参数设置——网络收集——
写入数据库——关闭。
最后打开统计报表看报表,看那一个点那一个。
(8)退卡、挂失丢卡、坏卡处理:做这三项时,切记要把数据收集完后在做处理(数据收集如同上“(3)”和“(7)”)。
退卡操作:数据收集后,点卡片——卡片管理——退卡。
挂失丢卡:数据收集后,点卡片——卡片管理——挂失处理(按步骤操作完),之后在做参数下传(参数下传如同上“(4)”)。
坏卡处理:数据收集后,点卡片——卡片管理——坏卡处理(按步骤操作完)。
,自动会读出卡号、卡型。
最后拿卡
3. 数据库:一般演示完后要做数据处理:
演示操作完后,要重新建立数据库。
软件关闭,打
开晶密一卡通,如图:
点指定数据库——连接信息,找见当前数据库文件所在位置,进入盘符把数据库删除,按照第3大步(软件设置与操作)重新再操作一遍。
4. 硬件操作:
(1).收费机机号:按“设定”键,屏幕显示pwd,按出厂密码(8888),按确定键,屏幕显示sl1-6,按1,屏幕显示jh-,输入机号三位(如001),按确定键。
9
(2).收费机时间:按“设定”键,屏幕显示pwd,按出厂密码(8888),按确定键,屏幕显示sl1-6,按2,屏幕显示sj-,输入时间(如1106231518),按确定键。
(3).查询机号、时间、消费金额:按查询键,屏幕显示sl1-4,按1查询机号; 按2查询时间; 按3查询消费金额(上排为消费次数,下排为消费金额)。
10。