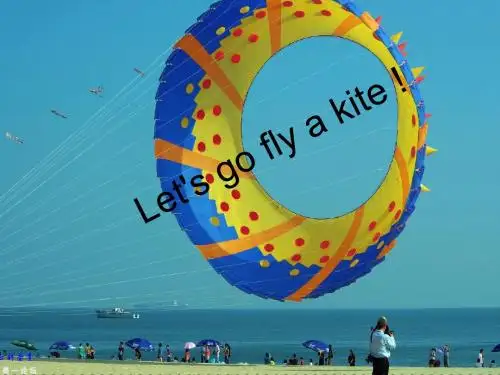
制作风筝—英语PPT
- 格式:ppt
- 大小:2.62 MB
- 文档页数:10

湘少版五年级下册英语教案:Unit 3 Let’s make a kitePeriod 3教学目标•能够口头表达如何制作风筝的过程•能够口头表达自己的想法和想象•能够合作完成一个小组制作风筝的任务教学资源•教材:湘少版五年级下册英语Unit 3 Let’s make a kite•PPT演示文稿教学内容1. 复习老师可以上一堂课程的知识点进行复习,帮助学生夯实基础。
2. 教学新知本堂课的内容为Let’s make a kite Part 2,主要是帮助学生掌握如何制作风筝的过程,并且需要进行小组合作完成一个风筝制作任务。
Step 1首先,老师可以提前准备好制作用具,让学生观看制作过程的演示,并和学生一起讨论每个制作步骤的重点。
Step 2学生分组,每组2~3名学生,开始制作自己的风筝。
老师在制作过程中注意引导学生,让每个学生都能参与到制作中,让他们在制作过程中不断思考,及时提出问题,解决问题。
Step 3制作完成后,老师可以要求每组向全班展示自己的作品,并请其中一名同学口头介绍一下制作过程。
3. 课堂反思在课堂结束前,老师可以和学生一起进行课堂反思,让学生表述自己的学习收获和不足之处,并帮助他们进一步完善自己的学习。
教学评价评价方式具体可以根据学生的完成情况来决定。
可以通过制作出的风筝的外观和实用性,以及小组合作的完成情况来评价学生的表现。
教师可以从学生的口头表达、制作风筝的过程中的表现、小组合作等多个方面进行评价。
教学延伸1.可以通过让学生到户外放风筝,交流自己的制作心得,来使学生进一步加强对英语知识的掌握。
2.从饮食上引出英语词汇,让学生学习用英语点菜、交流等口语表达方式,进一步提高其英语口语能力。

如何制作风筝作文英文英文:Making a kite is a fun and creative activity that can be enjoyed by people of all ages. Here are the steps I follow to make a kite:1. Gather materials: You will need some lightweight fabric or paper, a wooden dowel or bamboo stick, string, scissors, and glue.2. Cut the fabric or paper: Cut the fabric or paper into the desired shape of your kite. Traditionally, kites are shaped like diamonds, but you can experiment with different shapes.3. Attach the dowel or stick: Place the dowel or stick horizontally across the center of the kite and glue it in place. This will provide stability and structure to the kite.4. Add the string: Tie one end of the string to the center of the dowel or stick and the other end to thebottom of the kite. This will allow you to control the kite while it is in the air.5. Decorate the kite: Use markers, paint, or stickersto decorate your kite. This step is optional, but it can make your kite look more unique and personalized.6. Fly the kite: Find an open area with plenty of wind and launch your kite into the air. Hold onto the string and let the wind carry your kite.中文:制作风筝是一项有趣和富有创造力的活动,适合各个年龄段的人们参与。

传统风筝制作流程英语介绍The Art of Traditional Kite-Making.Kites, these ethereal creations that dance gracefully with the wind, have been a part of human culture for centuries. They captivate hearts and imaginations, serving as symbols of freedom, joy, and creativity. The process of creating a traditional kite is an intricate blend of art, science, and engineering, involving meticulous attention to detail and a deep understanding of the principles of aerodynamics.The first step in kite-making is the gathering of materials. These include strong, lightweight materials such as bamboo or plastic for the frame, strong thread or nylon for the strings, and paper or lightweight cloth for thekite's surface. The selection of materials is crucial, asit determines the kite's durability, stability, and flight performance.Once the materials are gathered, the frame is constructed. This involves shaping the bamboo or plastic into a strong, lightweight structure that will support the kite's surface. The frame is typically constructed in a diamond or box shape, with the central crossbar serving as the main support. The frame is then reinforced with additional bamboo or plastic strips to ensure its stability and durability.Once the frame is complete, the kite's surface is attached. This involves cutting the paper or cloth to the appropriate size and shape, and then carefully adhering it to the frame using a glue or tape. The surface is designed to catch the wind and create lift, so it is important to ensure that it is attached securely and evenly.The next step is the painting and decoration of thekite's surface. This is where the artist's creativity comes to the fore, as they design and paint their vision onto the kite. The designs can be anything from simple geometric patterns to intricate landscapes or abstract art. The colors and images chosen not only affect the kite'sappearance but can also influence its flight performance. Bright, contrasting colors, for example, can help the kite to stand out in the sky and catch the wind more easily.Once the painting and decoration are complete, thefinal step is the assembly of the kite. This involves attaching the strings to the frame, and adjusting them to ensure that the kite will fly properly. The strings are typically attached to the central crossbar and to the tips of the frame, allowing the kite to be controlled and steered in the air.The art of traditional kite-making is not only about creating a beautiful and functional object, but also about understanding and mastering the principles of aerodynamics. The shape, size, and weight of the kite, as well as the angle and tension of the strings, all affect how the kite will fly. By carefully adjusting these variables, the kite-maker can create a kite that flies gracefully and stably in the sky.In conclusion, the art of traditional kite-making is ablend of creativity, science, and engineering. It requires meticulous attention to detail, a deep understanding of the principles of aerodynamics, and a passion for creating beautiful and functional objects. As the kite takes flight, soaring gracefully through the sky, the kite-maker's hard work and creativity are brought to life, capturing the hearts and imaginations of all who witness its beauty and elegance.。
传统风筝制作流程英语介绍English:Traditional kite making involves several intricate steps. Firstly, select appropriate materials, traditionally bamboo for the frame and lightweight paper or silk for the covering. Next, cut the bamboo into precise lengths and shapes according to the desired kite design, ensuring symmetry and balance. Then, assemble the frame by carefully joining the bamboo pieces using string or glue, maintaining structural integrity. After constructing the frame, apply the chosen covering material, stretching it tightly over the frame and securing it in place. Decorations such as intricate paintings or calligraphy are often added at this stage to enhance the kite's aesthetic appeal. Finally, attach the flying line and tail, typically made of durable string or fabric, ensuring proper balance and stability for flight. The finished kite embodies not only the craftsmanship of its maker but also cultural symbolism and artistic expression.中文翻译:传统的风筝制作涉及几个复杂的步骤。
风筝的制作流程英语作文英文回答:Kite making is a fun and rewarding activity that can be enjoyed by people of all ages. It is a great way to spend time outdoors and learn about the principles of flight.Materials you will need:Kite paper or Tyvek。
Bamboo sticks or carbon fiber rods。
String or fishing line。
Scissors。
Ruler。
Pencil。
Glue or tape。
Instructions:1. Cut the kite paper: The first step is to cut thekite paper to the desired shape. You can use a template or create your own design.2. Fold the paper: Once you have cut the paper, fold it in half lengthwise. This will create the kite's spine.3. Insert the sticks: Insert the bamboo sticks or carbon fiber rods into the folds of the paper. The sticks should be parallel to each other and evenly spaced.4. Glue or tape the sticks: Glue or tape the sticks in place to secure them.5. Fold the wingtips: Fold the wingtips of the kite up to meet the spine. This will create the kite's wings.6. Glue or tape the wingtips: Glue or tape the wingtips in place to secure them.7. Attach the string: Tie the string or fishing line to the kite's spine. The string should be long enough to allow the kite to fly.8. Fly your kite: Take your kite outside on a windy day and fly it!Tips:Use lightweight materials for your kite. This willhelp it to fly better.Make sure your kite is balanced. If it is not balanced, it will not fly well.Be patient when flying your kite. It may take a few tries before you get it to fly properly.中文回答:风筝制作过程:1. 裁剪风筝纸,首先,将风筝纸裁剪为所需形状。
做风筝步骤的英语作文简单版英文回答:How to Build a Kite.1. Gather your materials. You will need a lightweight frame, some fabric, string, and glue.2. Make the frame. The frame can be made from wood, bamboo, or other lightweight materials. Cut two sticks to make the main frame, and then cross them and glue them together.3. Cover the frame with fabric. Cut a piece of fabric that is large enough to cover the frame, and then glue it in place.4. Attach the string. Cut a long piece of string, and then tie one end to the top of the frame.5. Fly your kite! Find a windy day, and then run and launch your kite.中文回答:如何制作风筝。
1. 收集你的材料。
你需要一个轻质框架、一些织物、绳子、胶水。
2. 制作框架。
框架可以用木头、竹子或其他轻质材料制成。
剪两根棍子做主框架,然后交叉并用胶水粘在一起。
3. 用布料覆盖框架。
剪一块足够大以覆盖框架的布料,然后用胶水粘贴到位。
4. 绑上绳子。
剪一段长绳子,然后将一端系在框架顶部。
5. 放飞你的风筝!找个有风的日子,然后跑起来放飞你的风筝。
制作风筝英语作文How to Make a Kite。
Kite flying is a fun and traditional activity enjoyed by people of all ages. Making your own kite can be a rewarding and creative experience. In this article, we will provide a step-by-step guide on how to make a simple diamond-shaped kite.Materials:Two wooden dowels (one 24 inches long, the other 20 inches long)。
String。
Scissors。
Tape。
Glue。
A large sheet of strong, lightweight paper (such as tissue paper or thin plastic)。
Instructions:1. Begin by laying the 24-inch dowel vertically and the 20-inch dowel horizontally to form a cross. Use the string to tie the two dowels together at the center, creating the frame of the kite.2. Next, cut the paper into a diamond shape that is slightly larger than the frame of the kite. Lay the frame on top of the paper and use tape to secure the edges of the paper to the frame.3. Take the string and tie one end to the top of the vertical dowel, then stretch it to the bottom of the vertical dowel and tie the other end. This will create the spine of the kite.4. Now, cut a piece of string that is slightly longer than the horizontal dowel. Tie one end of the string to the left end of the horizontal dowel and the other end to the right end. This will create the crossbar of the kite.5. To create the tail of the kite, cut several pieces of string of varying lengths and tie them to the bottom of the vertical dowel.6. Finally, cut a longer piece of string and tie one end to the top of the vertical dowel. This will be used to fly the kite.Your kite is now complete and ready to fly! Find an open area with a steady breeze and hold the string as you run to catch the wind. With a little practice, you'll be soaring your handmade kite through the sky in no time.In conclusion, making a kite can be a fun and rewarding activity for people of all ages. By following these simple steps, you can create your own kite and enjoy the timeless pastime of kite flying.。
Making a kite is a fun and educational activity that can be enjoyed by people of all ages.Heres a stepbystep guide on how to create your own kite:1.Materials Gathering:First,gather all the necessary materials.You will need a lightweight but sturdy frame material such as bamboo sticks or plastic straws,a lightweight fabric or plastic sheet for the kites body,a spool of strong thread,a needle, and some adhesive like glue or tape.2.Designing the Kite:Decide on the shape of your kite.Traditional kites are often diamondshaped,but you can get creative and design your own shape.Sketch out your design on paper first to get a clear idea of what you want.3.Cutting the Fabric:Once you have your design,cut out the fabric to match the shape. Make sure to leave some extra material around the edges for attaching the frame.4.Assembling the Frame:Cut your frame material into the necessary lengths according to your design.For a diamond kite,youll need two longer pieces for the top and bottom,and two shorter pieces for the sides.Attach the frame pieces to the fabric using adhesive, making sure they are securely fastened.5.Reinforcing the Joints:To ensure your kite is strong and durable,reinforce the joints where the frame pieces meet with additional glue or tape.6.Attaching the Flying Line:Find the center of the top and bottom frame pieces.These will be the points where you attach the flying line.Make a small hole and thread the line through,securing it with a knot.7.Tail Attachment:A tail can help stabilize your kite in the air.Cut a long strip of fabric or use ribbon,and attach it to the bottom of the kite.The tail should be long enough to provide stability but not so long that it becomes a hindrance.8.Testing the Kite:Before you head out to a field,test your kite indoors to see if it balances properly.Hold it by the flying line and let it hang,adjusting the position of the tail or the length of the line if necessary.9.Flying the Kite:Find an open area with a good wind.Hold the kite up and let the wind catch it.As it lifts,gradually release more line.Adjust the tension on the line to control the kites altitude and direction.10.Safety Tips:Always be mindful of the wind conditions and other people around you.Keep a firm grip on the line and be ready to reel in your kite if it starts to dive or if the wind picks up too much.Remember,making a kite is as much about the process as it is about the end result.Enjoy the creativity and craftsmanship involved in bringing your kite to life.。
风筝制造的过程作文英语The Process of Making a KiteKite making is a fascinating and intricate craft that has been practiced for centuries. The process of making a kite involves several steps, each of which requires careful attention to detail and precision. In this essay, I will outline the steps involved in making a traditional kite.Step 1: Gathering MaterialsThe first step in making a kite is to gather all the necessary materials. This includes bamboo sticks for the frame, paper or fabric for the sail, string for the bridle, and glue for assembly. The quality of these materials is crucial to the performance and longevity of the kite, so it is important to select the best available.Step 2: Building the FrameThe next step is to build the frame of the kite using the bamboo sticks. The sticks are carefully measured and cut to the appropriate lengths, and then joined together to form the basic structure of the kite. This step requiresprecision and attention to detail to ensure that the frame is strong and symmetrical.Step 3: Attaching the SailOnce the frame is complete, the next step is to attach the sail to the frame. The sail material is carefully cut to the correct size and shape, and then glued or sewn onto the frame. This step requires patience and skill to ensure that the sail is taut and smooth, with no wrinkles or creases that could affect the kite's performance.Step 4: Adding the BridleThe bridle is the system of strings and attachments that connect the sail to the flying line, and it plays a crucial role in controlling the kite in the air. The bridle is carefully measured and attached to the kite, with precise adjustments made to ensure that the kite flies straight and stable.Step 5: Decorating the KiteThe final step in making a kite is to decorate it with designs and colors. This step allows for creativity and personal expression, and it is often a favorite part of theprocess for kite makers. Once the kite is decorated, it is ready to be flown and enjoyed.风筝制造的过程制作风筝是一项迷人而复杂的工艺,已有几个世纪的历史。
教学目标:1. 学生能够理解并运用关于风筝的词汇和句型。
2. 学生能够通过制作风筝的活动,提高动手能力和创造力。
3. 学生能够了解风筝的文化背景,增强对传统文化的认识。
教学重点:1. 风筝的英语词汇和句型。
2. 制作风筝的步骤和技巧。
教学难点:1. 风筝的英语词汇和句型在实际语境中的应用。
2. 制作风筝的步骤和技巧的掌握。
教学准备:1. 风筝制作材料:竹条、彩纸、胶水、剪刀等。
2. 风筝图片和视频资料。
3. 教学PPT。
教学过程:一、导入1. 教师展示风筝图片,引导学生观察并说出风筝的名称。
2. 学生用英语介绍自己喜欢的风筝。
二、词汇教学1. 教师讲解风筝的英语词汇,如:kite、string、paper、scissors等。
2. 学生跟读并练习使用这些词汇。
三、句型教学1. 教师展示风筝制作步骤的图片,引导学生用英语描述每一步。
2. 学生跟读并练习句型:“First, we need... Then, we cut... After that, we glue... Finally, we fly our kite...”四、制作风筝1. 学生分组,每组准备一套风筝制作材料。
2. 教师讲解制作风筝的步骤和技巧,学生认真观察并记录。
3. 学生开始制作风筝,教师巡回指导。
4. 学生展示自己的风筝,互相欣赏和评价。
五、活动总结1. 教师引导学生用英语总结制作风筝的步骤和技巧。
2. 学生分享制作风筝的感受和收获。
六、课后作业1. 学生用英语描述自己制作的风筝。
2. 学生查找有关风筝的资料,了解风筝的文化背景。
教学反思:本节课通过制作风筝的活动,让学生在轻松愉快的氛围中学习英语,提高了学生的动手能力和创造力。
在教学过程中,要注意以下几点:1. 注重学生的参与度,鼓励学生积极发言。
2. 适当调整教学内容和进度,满足不同学生的学习需求。
3. 加强对学生英语口语表达的训练,提高学生的实际运用能力。
4. 注重培养学生的团队合作精神,让学生在活动中学会互相帮助、互相学习。