高级光学分析软件APEX
- 格式:pdf
- 大小:7.91 MB
- 文档页数:49
2021574微表情[1]是一种自发的面部表情,持续时间短(通常在0.04~0.20s之间[2]),局部变化且变化强度低[3],极少人能用裸眼观察到微表情。
微表情通常发生在人试图隐藏自己的真实情绪时,无法伪造也不能抑制[4]。
微表情能够反映人的真实情感,在刑侦审判、教学评估、婚姻关系预测、国家安全等领域都有潜在应用。
基于Apex帧光流和卷积自编码器的微表情识别温杰彬1,杨文忠1,2,马国祥3,张志豪1,李海磊11.新疆大学信息科学与工程学院,乌鲁木齐8300462.中国电子科学研究院社会安全风险感知与防控大数据应用国家工程实验室,北京1000413.新疆大学软件学院,乌鲁木齐830091摘要:针对跨库微表情识别问题,提出了一种基于Apex帧光流和卷积自编码器的微表情识别方法。
该方法包括预处理、特征提取、微表情分类三部分。
预处理部分对微表情进行Apex帧定位以及人脸检测和对齐;特征提取部分首先计算预处理过的Apex帧的TVL1光流,然后使用得到的水平和竖直光流分量图像训练卷积自编码器得到最优结构和参数;最后将两个分量自编码器中间层的特征融合后作为微表情的特征;微表情分类就是使用支持向量机(Support Vector Machine,SVM)对上一步中提取到的特征进行分类。
实验结果较基准方法(LBP-TOP)有了很大的提高,UF1提高了0.1344,UAR提高了0.1406。
该方法为微表情特征提取和识别提供了新的思路。
关键词:微表情识别;Apex帧;光流;卷积自编码器;支持向量机(SVM)文献标志码:A中图分类号:TP391doi:10.3778/j.issn.1002-8331.1911-0399Micro-expression Recognition Based on Apex Frame Optical Flow and Convolutional Autoencoder WEN Jiebin1,YANG Wenzhong1,2,MA Guoxiang3,ZHANG Zhihao1,LI Hailei11.College of Information Science and Engineering,Xinjiang University,Urumqi830046,China2.National Engineering Laboratory for Public Safety Risk Perception and Control by Big Data(PSRPC),China Academyof Electronics and Information Technology,Beijing100041,China3.School of Software,Xinjiang University,Urumqi830091,ChinaAbstract:Aiming at the problem of cross-database micro-expression recognition,a micro-expression recognition method based on Apex frame optical flow and convolutional autoencoder is proposed.The method includes three parts:prepro-cessing,feature extraction and micro-expression classification.The preprocessing section performs Apex frame positioning, face detection and alignment on the micro-expressions.The feature extraction section first calculates the TVL1optical flow of the pre-processed Apex frame,then uses the obtained horizontal and vertical optical flow component images to train the convolutional autoencoder to obtain the optimal structure and parameters,finally combines the two components from the features of the middle layer of the encoder as the features of the micro-expressions.In section of micro-expression classification,a Support Vector Machine(SVM)classifier is used to classify the features extracted in the previous step. The experimental results have been greatly improved compared to the baseline method(LBP-TOP).Among them,UF1 has increased by0.1344,and UAR has increased by0.1406.This method provides new ideas for micro-expression fea-tures extraction and recognition.Key words:micro-expression recognition;Apex frame;optical flow;convolutional autoencoder;Support V ector Machine(SVM)基金项目:国家自然科学基金(U1603115);社会安全风险感知与防控大数据应用国家工程实验室主任基金项目;四川省科技计划项目(WA2018-YY007)。
TracePro教程简介TracePro是一款先进的光学模拟软件,能够帮助工程师和设计师进行光学系统的设计和优化。
本教程将介绍TracePro的基本用法和常用功能,帮助读者快速上手和熟练使用该软件。
安装和配置在开始使用TracePro之前,首先需要安装该软件并进行必要的配置。
安装TracePro软件请按照软件提供商提供的安装指南,下载和安装TracePro软件。
安装完成后,确保软件已经成功运行并可以正常使用。
配置TracePro软件在使用TracePro之前,需要对软件进行一些配置,以确保软件的正常运行和满足用户特定的需求。
具体的配置步骤如下:1.打开TracePro软件,选择“Options”菜单,再选择“Preferences”选项。
2.在弹出的对话框中,可以进行多种配置操作,包括界面语言、文件保存路径、单位设置等。
根据实际需求,进行相应的配置调整。
3.点击“Apply”按钮,保存配置修改后的设置。
4.关闭对话框,已完成TracePro软件的配置。
创建新项目在开始进行光学系统的设计和优化之前,首先需要创建一个新的TracePro项目。
下面是创建新项目的步骤:1.打开TracePro软件,选择“File”菜单,再选择“NewProject”选项。
2.在弹出的对话框中,输入项目的名称和保存路径。
3.点击“OK”按钮,创建新项目。
4.创建完成后,可以在软件界面中看到新项目的文件结构和相关信息。
导入和编辑模型TracePro支持导入和编辑多种模型,包括几何模型、光学材料、光源等。
下面将介绍导入和编辑模型的方法。
导入模型要导入模型到TracePro项目中,需按照以下步骤操作:1.在软件界面的“Model”选项卡下,选择“Import”按钮。
2.在弹出的对话框中,选择要导入的模型文件,并点击“Open”按钮。
目前TracePro支持常见的模型文件格式,如STEP、IGES、STL等。
3.导入完成后,可以在软件界面中看到导入的模型,并对其进行进一步编辑和设置。
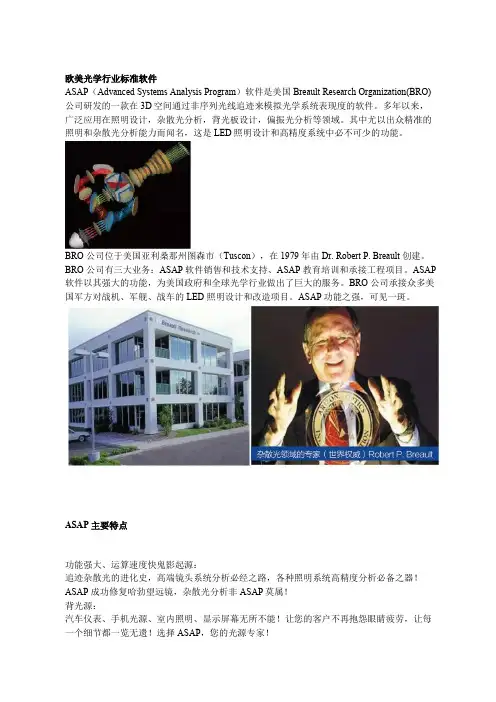
欧美光学行业标准软件ASAP(Advanced Systems Analysis Program)软件是美国 Breault Research Organization(BRO) 公司研发的一款在 3D空间通过非序列光线追迹来模拟光学系统表现度的软件。
多年以来,广泛应用在照明设计,杂散光分析,背光板设计,偏振光分析等领域。
其中尤以出众精准的照明和杂散光分析能力而闻名,这是 LED照明设计和高精度系统中必不可少的功能。
BRO 公司位于美国亚利桑那州图森市(Tuscon),在 1979 年由 Dr. Robert P. Breault 创建。
BRO 公司有三大业务:ASAP 软件销售和技术支持、ASAP 教育培训和承接工程项目。
ASAP 软件以其强大的功能,为美国政府和全球光学行业做出了巨大的服务。
BRO 公司承接众多美国军方对战机、军舰、战车的 LED 照明设计和改造项目。
ASAP功能之强,可见一斑。
ASAP主要特点功能强大、运算速度快鬼影起源:追迹杂散光的进化史,高端镜头系统分析必经之路,各种照明系统高精度分析必备之器!ASAP 成功修复哈勃望远镜,杂散光分析非ASAP莫属!背光源:汽车仪表、手机光源、室内照明、显示屏幕无所不能!让您的客户不再抱怨眼睛疲劳,让每一个细节都一览无遗!选择ASAP,您的光源专家!LED照明:ASAP 提供精准的 LED 光源,结合为 Lens 添加菲涅耳运算、散射模型,保证模拟结果的准确度。
ASAP 在 LED 设计过程中为工程师提供的强大自由度,保记您的每一个想法都不再是纸上谈兵!生物医学:精确模拟光与组织结构交互结果。
特有 RSM 模型一真实皮肤模型,采用 Henyey-Greenstein 近似值,Mante CarLo 光线追迹助您分析器官病变!每一款车灯,每一份设计,每一条光线,尽在您的掌握!SAE ECE和 FMVSS 标准测试,助您顺利通过法规!采用 ASAP 缩短研发时间,节约开模费用!您的财富您驾驭!严谨精确、可靠精准的模拟结果ASAP模拟结果实验室实际结果ASAP 的灯源模型在几何形状和发光度上非常精准,并包括了完整的光谱数据,同时包含了从灯源所得的实际光学和机械的几何模型。
#6012 - 2.5-16x42 A4 Riflescope#6015 - 5-30x56 MilDot Riflescope2Warranty & ServiceThe ALPEN Lifetime Warranty, begins if registeredwithin 60 days of purchase. For full warranty terms andconditions, as well as product registration, please visit:/warrantyor scan the QR code.3US: 4US: 1. Zoom adjustment2.Diopter adjustment 3. Parallax adjustment4. Protective cap height adjustment5. Protective cap lateral adjustment6. Height adjustment7. Lateral adjustment8. Zerostop9. Battery compartmentPARTS OVERVIEW214768395RISK of physical injury!Never look through this device directly at or near the sun. There is DANGER OF BLINDNESS!Children should only use this device under supervision. Keep packaging materials (plastic bags, rubber bands, etc.) away from children! There is a DANGER OF CHOKING!RISK of material damage!Never take the device apart. Please consult your dealer if there are any defects. The dealer will contact our service center and send the device in for repair if needed. Fire/Burning RISK!Do not expose this device - especially the lenses - to direct sunlight! Focusing of sunlight could cause fires.RISK OF BURNS!Batteries do not belong in children's hands! Make sure you insert the batteries correctly. Leaking or damaged batteries will cause chemical burns if you put your skin in Contact. Use suitable protective gloves if necessary. Do not expose the device to high temperatures. Use only the recommended batteries. Do not short-circuit the device or batteries or dispose of in fire! Excessive heat and improper handling can cause short circuits, fires and even explosions!GENERAL SAFETY INFORMATIONS5US: 6US: Mount and adjust the scopeThe scope should be mounted by a qualifiedgunsmith to ensure that the rifle and target optics are perfectly matched. When mounting, the optimal interpupillary distance should be observed above all. This means that the full field of view is available and injuries to the eye caused by recoil during firing can be avoided.Change magnificationThe magnification can be adjustedat the Zoom adjustment (1) on the eyepiecetube. All magnification between the lowest and highest setting can be selected continuously. The differentmagnification levels can be read from the numbers and markings.FluoDigits TechnologyThe APEX XP riflescope is equipped with ALPEN Optics FluoDigit T echnology. T o make full use of it, we recommend exposing the device to daylight for about 3 hours and charging the fluorescent paint with it. If it is desired that the magnification numbers are NOT illuminated at night, it is sufficient to transport the device covered and thus not to charge the paint.Info: The special color is set so that you can choose yourself from max. 1.5m can read off the numbers. This way you remain undetected and the numbersdo not illuminate anything.Focus reticle and illuminated pointT o focus the reticle and illuminated dot, it is best to select the highest magnification level beforehand. Then the illuminated point is switched on and the diopter adjustment (2) is turned until the reticle and illuminated point appear sharp in the image. The illuminated point should also have a circular shape. Once set, the reticle and illuminated point remain sharp over the entire magnification range.Make parallax adjustmentNote: Some ALPEN models are equipped with parallax compensation. Please check in the technical data on alpenoptics.de if the used optics is provided with this function.The parallax adjustment (3) corrects the parallax error for accurate aiming and focuses the image for the corresponding aiming distance. T o do this, rotate the parallax adjustment (3) until the target object appears sharp in the image. Set reticleT o adjust the reticle setting to the particular hunting conditions or type of ammunition, use the height adjustment (6) and the lateral adjustment (7). No movement of the reticle is perceptible during reticle adjustment. The reticle is therefore always located inthe center of the image. The reticle adjustment of the riflescope is performed as follows:1. Protective cap (4) above the height adjustment or(5) above the lateral adjustment.7US: 2. Make shot correction:a. If the gun is firing too low, adjust the elevation,turn the height adjustment (6) counterclockwise.b. If the gun is firing too high, adjust the elevation,turn the height adjustment (6) clockwise.c. If the gun is firing too far to the left, turn thelateral adjustment (7) counterclockwise.d. If the gun is firing too far to the right, turn thelateral adjustment (7) clockwise.3. Screw the protective cap (4 or 5) back on.Set ZerostopSometimes, for example, temporary readjustments have to be made due to changing wind conditions. With a correctly set up Zerostop, the zero position can then be readjusted without eye control. The Zerostop prevents rotation beyond the zero position.The Zerostop is set as follows:1. Unscrew the screw above the height adjustmenttower (6) by means of a coin. 2. Remove the height adjustment tower (6) from thescope and set it to the zero position.3. Replace the height adjustment tower (6) with thescrew attach to the scope.4. Screw up the Zerostop ring (8) until it comes intocontact with the height adjustment tower (6).5. Fix the Zerostop ring (8) with the circumferentialscrew. If necessary, readjust a little so that theZerostop grips exactly in the right place.8US: Difference reticle settingwith MOA and with MRADThe MOA and MRAD tower systems refer to two different measurement systems: metric and imperial. Thus, the imperial system uses MOA and inches,and the metric system uses MRAD and centimeters. Therefore, at some point the question arises which tower system is the better one. First and foremost, it's a matter of habit and personal preference.MOAMOA stands for Minute Of Angle and correspondsto 1/60 of a degree. The system is suitable for those familiar with the imperial system, since it is calculated in inches.1 MOA equals 1.047'' to 100yd (2.9 cm to100 m).MRADMRAD stands for milliradian and is 1/1000 of a radian (angular measure). 0.1 MRAD/MIL is equivalent to 1cm at 100 m and is suitable for those using the metric system. One advantage of the metric system is that itis very easy to calculate. The shooting distance (unit meter) can be quickly converted into the unit ofturret adjustment (centimeter). One click of an MRAD click adjustment thus corresponds to 3 cm (0.03 m) ata firing distance of 300 m.ALPEN Optics uses MRAD 0.1 click adjustments for all target optics.1141019US: Set SmartDot light pointThe illuminated dot is switched on by selecting abrightness level from 1 to 10 on the illuminated dot Array adjustment. T o switch the illuminated point off againmanually, the point is set before or after the selectedbrightness level on the illuminated point adjustment.SmartDot T echnology automatically turns off theilluminated point when the gun is tilted 70° up or0°-50° active down, or 30° to the side. The scope is then in sleepmode. When the weapon is brought back to theready position, the illuminated dot switches backon automatically within a few milliseconds. Afterabout 3 hours in sleep mode, the device shuts downcompletely to save energy.10US: 11US: oNotes on the safe use of the riflescope• When working on the firearm riflescope, the firearm must always be unloaded. This must be conscientiously checked beforehand.• The proper function of the riflescope must be controlled before it is used.• Before the riflescope is used, the image must be tested. Who looks through it, should see a clear, interference-free image.• T o avoid injury, always ensure sufficient eye relief when using the scope.• Control shots are used to determine the first Hit point position determines whether the reticle setting is correct.• The riflescope contains sensitive optics. In the case of raw treatment, it could possibly lead to a Misalignment may occur.DISPOSALKeep packaging materials, like plastic bags andrubber bands, away from children as they posea risk of suffocation. Dispose of packaging materials as legally required. Consult the local authority on the matter if necessary and recycle materials when possible.• The WEEE symbol if present indicates thatthis item contains electrical or electroniccomponents which must be collected anddisposed of separately.• Never dispose of electrical or electronic waste in general municipal waste. Collect and dispose of such waste separately.• Make use of the return and collection systems available to you, or your local recycling program. Contact your local authority or place of purchase to find out what schemes are available.• Electrical and electronic equipment contains hazardous substances which, when disposed ofGENERAL SAFETY INSTRUCTIONS12US: incorrectly, may leak into the ground. This can contribute to soil and water pollution which is hazardous to human health, and endanger wildlife.• It is essential that consumers look to re-use or recycle electrical or electronic waste to avoid it going to landfill sites or incineration without treatment.BUTTON/COIN BATTERY WARNING:This product contains a Button or Coin Cell Battery.A swallowed Button or Coin Cell Battery can cause internal chemical burns in as little as two hours and lead to death. Dispose of used batteries immediately. Keep new and used batteries away from children. If you think batteries might have been swallowed or placed inside any part of the body, seek immediate medical attention.• A swallowed Button or Coin Cell Battery can cause internal chemical burns in as little as two hours and lead to death Due to chemical burns and potential perforation of the esophagus.• Dispose of used batteries immediately, flat/drained batteries can still be dangerous• Keep new and used batteries away from children.• If you think batteries might have been swallowed or placed inside any part of the body, seek immediate medical attention.• If you suspect your child has swallowed or inserteda button battery immediately call the Poisons control hotline and seek immediate medical attention.• Examine devices and make sure the battery compartment is correctly secured, e.g. that the screw or another mechanical fastener is tightened. Do not use if compartment is not secure.• T ell others about the risk associated with button batteries and how to keep their children safe.13US: NOTES14US: NOTES15US: 。
史上最全的光学软件大全,欢迎参与交流讨论!以下是一些常用的光电专业软件及版本,不知道大家都有没有,欢迎用过的和即将使用的朋友一起来交流和讨论!1.Zemax V10AZemax是目前使用最广泛也是最容易上手的光学设计软件,特别适合光学设计软件初学者。
它的综合性很强,它将实际光学及照明系统的设计建模、分析、优化集成在一起,并配备丰富的资源库提供用户查询,目前已成为光电子领域光学设计者的首选软件。
目前最新版本是OpticStudio16.听说已经涨价了哦!在全球范围内,这款软件已经被广大的应用在设计显示系统,照明,成像的使用系统,激光系统以及漫射光的设计应用方面。
另外,这款软件自带ZPL编程语言,可实现功能的扩展,还可以和C语言、C++、VB等编程语言进行配合使用,非常的方便。
ZEMAX 有三种不同的版本:Standard 标准版(SE);Professional 专业版(EE);Premium 旗舰版(IE)。
这三个版本所包含的工具和功能逐渐齐全,用户可根据实际情况进行选择。
2.ASAP 7.5 光学模型分析软件ASAP光学模型分析软件,是一个经过时间证实且成为工业界标准的光学设计软件。
它是一不受限制的、非连续光线追迹软件。
它具有对物理光学、成像和照明系统进行模型分析的强大功能。
是专为仿真成像或光照明的应用而设计,让您的光学工程工作更加正确且迅速。
ASAP让您在制作原型系统或大量生产前可以预先做光学系统的仿真以便加快产品上市的时间。
它的图形工具允许用户进行截面分析,或者对几何模型、光线追迹、分析结果进行三维演示。
ASAP 对光学系统分析的适用范围是其他软件所不能比拟的。
ASAP 可以分析散射、衍射、反射、折射、吸收、偏振、非连续光线追迹和高斯光束传播。
它的交互性显示界面可以及时显示处理中存在问题的区域。
3.Code V 10.8CODE V是ORA推出的大型光学设计软件,功能非常强大,有着三十多年多年的悠久历史,不过30多万的价格让大多数光学设计人员望而却步。
常见光学仿真设计软件排版整理1.APSS.v2.1.Winall.Cracked光子学设计软件,可用于光材料、器件、波导和光路等的设计2.ASAP.v7.14/7.5/8.0.Winall.cracked/Full世界各地的光学工程师都公认ASAPTM(Advanced Systems Analysis Program,高级系统分析程序)为光学系统定量分析的业界标准。
注:另附9张光源库3.Pics3d.v____.1.28.winall.cracked电子.光学激光2D/3D有限元分析及模形化装置软件stip.v____.1.28.winall.cracked半导体激光装置2D模拟软件5.Apsys.2D/3D.v____.1.28.winall.cracked激光二极管3D模拟器6.PROCOM.v____.1.2.winall.cracked化合物半导体模拟软件7.Zema_.v____.winall.cracked/EEZEMA_ 是一套综合性的光学设计仿真软件,它将实际光学系统的设计概念、优化、分析、公差以及报表集成在一起。
8.ZEBASE Zema_镜头数据库9.OSLO.v6.24.winall.licensed/Premium OSLO是一套处理光学系统的布局和优化的代表性光学设计软件。
最主要的,它是用来决定光学系统中最佳的组件大小和外型,例如照相机、客户产品、通讯系统、军事 /外太空应用以及科学仪器等。
除此之外,它也常用于仿真光学系统性能以及发展出一套对光学设计、测试和制造的专门软件工具。
10.TracePro.v324.winall.licensed/E_pert TracePro一套能进行常规光学分析、设计照明系统、分析辐射度和亮度的软件。
它是第一套以符合工业标准的 ACIS(固体模型绘图软件)为核心所发展出来的光学软件,是一个结合真实固体模型、强大光学分析功能、信息转换能力强及易上手的使用界面的仿真软件,它可将真实立体模型及光学分析紧紧结合起来,其绘图界面非常地简单易学。
tracepro使用指南TracePro是一款用于光学和照明系统设计和分析的软件工具。
它具有强大的功能和灵活性,可以帮助用户快速准确地进行光学系统的设计和优化。
本文将为您介绍TracePro的使用指南,帮助您更好地了解和使用这一软件工具。
一、TracePro简介TracePro是美国Lambda Research公司开发的一款基于物理光学原理的软件工具。
它提供了一套完整的工具和功能,可以帮助用户进行光学系统的设计、分析和优化。
TracePro可以模拟和分析多种光学过程,包括散射、透射、反射、折射等。
它可以模拟光线的传播路径,并计算光学元件的性能参数,如光强分布、亮度、照度等。
二、TracePro的安装与启动2. 启动TracePro:启动TracePro后,可以选择新建一个项目或者打开一个已有的项目。
新建项目时,需要先选择一个工作目录和文件名,并设置项目的基本信息。
三、创建模型1. 创建模型:在TracePro中,可以通过两种方式创建模型,即创建几何模型和导入CAD文件。
创建几何模型时,可以选择从零开始创建或者使用预定义的几何体。
导入CAD文件时,可以选择支持的CAD文件格式,如STEP、IGES等。
2. 定义材料属性:在创建模型后,需要为模型定义材料属性。
可以从TracePro的数据库中选择预定义的材料属性,也可以手动定义或导入材料属性。
3.修改模型参数:可以对模型的参数进行修改,如几何体的大小、形状等。
也可以对模型的材料属性进行修改,如折射率、吸收率等。
四、设置光源和探测器1. 设置光源:在TracePro中,可以选择不同类型的光源,如点光源、平行光源、球面光源等。
可以设置光源的功率、波长、方向等参数。
2. 设置探测器:在TracePro中,可以选择不同类型的探测器,如粒子探测器、能量探测器、光强度探测器等。
可以设置探测器的位置、形状、大小等参数。
五、设置系统条件1. 设置边界条件:在TracePro中,可以设置系统的边界条件,如外部介质的折射率、吸收率等。
Tracepro学习教程Tracepro是一款强大的光学设计和仿真软件,广泛应用于光学系统设计和光学元件性能评估。
它提供了一套完整的工具和功能,可用于光学元件分析、衍射和散射分析、非球面镜设计、光学系统优化、发光二极管(LED)设计和非线性光学分析等。
1. Tracepro的安装和基本界面2. Tracepro的基本操作和数据输入在学习Tracepro之前,用户需要了解软件的基本操作和数据输入方式。
Tracepro可以通过输入光源、光学元件和材料等数据来进行光学设计和分析。
用户可以使用Tracepro提供的标准光源模型,也可以导入外部光源数据。
通过设置光源的参数和位置,用户可以模拟不同类型的光源,并观察其在光学系统中的传播和衍射情况。
对于光学元件的设计,用户可以选择使用Tracepro提供的标准元件模型,也可以自定义非球面镜、透镜等元件。
用户可以设置元件的参数和材料属性,并观察它们对光学系统的影响。
3.光学系统设计和优化Tracepro提供了丰富的工具和功能,用于光学系统设计和优化。
用户可以通过在光学系统中添加、删除或调整光学元件,来改变光学系统的传输特性。
用户可以观察光束的传播路径、聚焦性能和光线散射情况,以评估光学系统的性能。
在光学系统优化方面,Tracepro提供了多种优化算法和策略,例如遗传算法、步进法和灵敏度分析等。
用户可以根据需要选择合适的优化方法,并设置优化的目标和约束条件,以实现光学系统的最佳设计。
4.光学元件性能评估和分析5.LED设计和非线性光学分析除了常规光学设计和分析,Tracepro还提供了专门的功能和工具,用于发光二极管(LED)设计和非线性光学分析。
在LED设计方面,用户可以模拟LED光源的发射特性、发光度和色温等,并评估其在光学系统中的光衰情况。
在非线性光学分析方面,Tracepro可以模拟非线性光学效应,例如二次谐波生成(SHG)、三次谐波生成(THG)和光学放大等。
光学设计软件介绍1. Zemax:Zemax是当今最为流行和广泛应用的光学设计软件之一、它提供了强大的功能和易于使用的界面,可以用于设计和优化各种类型的光学系统,如透镜、反射器、光栅等。
Zemax还提供了先进的仿真和分析工具,能够帮助用户评估光路损耗、光场分布、成像质量等关键指标。
2. Code V:Code V是由Synopsys公司开发的一款全面的光学设计和分析软件。
它拥有丰富的设计功能和优化算法,可用于设计复杂的光学系统,如显微镜、望远镜、光纤耦合器等。
Code V支持各种非球面和广角光学元件,具有高度的灵活性和可扩展性。
3. TracePro:TracePro是一款用于进行光学和照明系统设计的综合仿真软件。
它提供了全面的光线追迹和散射分析功能,能够准确模拟和预测光学系统的性能。
TracePro还具备友好的用户界面和强大的可视化工具,可帮助用户直观地分析和优化光学系统。
4. LightTools:LightTools是一款由Synopsys公司开发的全面的光学设计和分析软件。
它支持多种光学元件和材料,可用于设计和优化光纤、LED照明、激光器等光学系统。
LightTools还提供了先进的光学建模、优化和分析工具,可帮助设计师快速获得最佳的光学系统设计。
5. OpticStudio:OpticStudio是一款由Zemax公司开发的全面的光学设计软件。
它提供了丰富的光学元件库和设计工具,可用于设计和优化各种类型的光学系统。
OpticStudio还具备强大的仿真和分析功能,能够帮助用户评估光学系统的成像质量、光路损耗等性能参数。
6.FRED:FRED是一款用于计算光学传输和成像效果的先进光学仿真软件。
它提供了全面的光学建模和优化工具,可用于设计和分析复杂的光学系统。
FRED还具备强大的散射、波面传播和光学杂散等分析功能,可帮助用户评估光学组件和系统的性能。
以上是一些常见的光学设计软件的介绍。
每款软件都有其特点和适用领域,用户可以根据具体需求选择适合自己的软件。
ASAP简介一、光学系统分析软件ASAPASAP™全称为Advanced System Analysis Program,即高级系统分析程序。
ASAP是由美国Breault Research Organization. Inc (BRO)公司开发的高级光学系统分析模拟软件。
经过近三十年的发展,ASAP光学软件在照明系统、汽车车灯光学系统、生物光学系统、相干光学系统、屏幕展示系统、光学成像系统、光导管系统及医学仪器设计等诸多领域都得到了行业的认可和信赖。
ASAP ™在光学设计软件界,是一个已经经过时间证实且成为工业界标准的光学设计软件。
ASAP提供给光学系统工程设计师无与匹敌的设计能力、广泛的应用性、快速的光追踪速度和准确度。
ASAP精确地预测在汽车车灯光学系统、生物光学系统、相干光学系统、屏幕展示系统、光学成像系统、光导管系统、照明系统及医学仪器设计中的全真表现。
ASAP是现有最精巧熟练的光学应用软件程序,有必须的功能可以解决最难办的光学设计和分析问题。
可模型化每一个从简单的反光镜、镜片到复杂的成像和聚光的仪器系统,并考虑了相干光学效应。
可利用灯源影像、点光源、平行光源和扇形光创造高准确的的光源模型,或是模型化完整的光源几何模型和其结合的光学特性来仿真白热灯炮、(LEDs) 、冷阴极荧光灯(CCFLs),和高强度的放电弧形灯炮。
在ASAP 的核心是非续列光线追迹引擎,此非续列光线追迹引擎以它的效率和准确度闻名整个光学软件界。
它可以将光线以任何次序或是次数投射在表面,而且光分裂会自动发生。
ASAP的每一个功能可以在一般桌上型记算机上快速的最佳化运用。
你可以在几分锺内透过简单的系统追踪数百万的光线。
可以向前、向后、连续地或是阶段性地追踪光线。
ASAP 基本上是一种具有弹性及效率之光学系统模型化的工具,它可以利用蒙地卡罗光线追迹的技术做光-机结构间的仿真,它可以不必假设系统之对称性,做单轴、全域、三维坐标的模拟。

SPEOS CAA V5 光学教材简介SPEOS CAA V5是一款集成在CATIA环境中的光学仿真软件。
它为用户提供了完整的光学仿真解决方案,使工程师能够在产品设计早期就能够对光学系统进行模拟和优化。
本教材将介绍SPEOS CAA V5的基本功能和应用示例,帮助读者快速掌握这一强大工具。
1. SPEOS CAA V5的基本概念在开始学习SPEOS CAA V5之前,我们首先需要了解一些基本概念。
SPEOS是一款基于物理原理的光学仿真软件,它通过追踪光线的传播路径,模拟光的传播、反射、折射、散射等现象。
SPEOS CAA V5是集成在CATIA环境中的插件,通过与CATIA的无缝集成,用户可以在CATIA中进行光学仿真和设计。
2. SPEOS CAA V5的功能特点SPEOS CAA V5具有以下几个主要功能特点:2.1 光线追踪SPEOS CAA V5可以追踪光线的传播路径,模拟光线与物体的相互作用。
通过这一功能,用户可以分析光学系统中的光线的传播情况,从而优化设计。
2.2 光束传输和照明分析用户可以通过SPEOS CAA V5对光束进行传输分析,了解光束在系统中的传输损失和变化。
同时,用户还可以进行照明分析,评估照明系统的亮度、均匀度等参数。
2.3 散射和折射分析SPEOS CAA V5允许用户对光线在物体表面的散射和折射效果进行模拟和分析。
用户可以通过调整材料和表面属性等参数,优化散射和折射效果。
2.4 散乱光分析SPEOS CAA V5可以对系统中的散乱光进行分析和优化。
用户可以评估散乱光对系统性能的影响,并采取相应的措施进行优化。
2.5 反射和透射分析用户可以使用SPEOS CAA V5对光线在物体表面的反射和透射进行分析。
通过优化反射和透射效果,用户可以改善光学系统的性能。
3. SPEOS CAA V5的应用示例为了帮助读者更好地理解SPEOS CAA V5的功能和应用,以下是一些具体的应用示例:3.1 汽车前灯设计SPEOS CAA V5可以对汽车前灯进行光学仿真和优化设计。
TracePro教程简介TracePro是一款广泛应用于光学系统设计和分析领域的光学仿真软件。
它提供了光线追踪和非准直光线追踪两种模式,可以用于设计和优化光学元件、光学系统,以及进行光学性能分析。
本教程将介绍TracePro的基本使用方法和一些常用功能,旨在帮助用户快速上手并利用TracePro进行光学系统设计和分析。
安装和配置在开始使用TracePro之前,首先需要进行软件的安装和配置。
1.下载TracePro的安装包,并根据安装向导进行安装,确保安装过程中选择了合适的安装路径。
2.安装完成后,可以启动TracePro软件,并进行必要的配置。
例如,可以设置默认的工作目录,修改界面语言等。
TracePro界面TracePro的界面简洁直观,提供了丰富的工具和功能来进行光学系统的设计和分析。
以下是TracePro的界面主要组成部分:1.菜单栏:包含各种菜单和下拉列表,用于进行设置、导入导出文件、运行仿真等操作。
2.工具栏:提供了常用的工具按钮,如新建文件、保存文件、运行仿真等。
可以通过自定义工具栏按钮来增加或移除对应的功能按钮。
3.视图栏:显示当前文件的视图类型,可以通过点击视图栏的不同选项来切换视图。
4.图纸窗口:用于绘制光学元件和系统的图纸,可以通过拖拽和绘制的方式添加和调整光学元件的位置和属性。
5.结果窗口:显示仿真结果和分析数据,例如光强分布、传输率、反射率等。
可以通过结果窗口对仿真结果进行分析和调整。
TracePro基本操作1. 创建新项目在菜单栏选择。
tracepro教程TracePro是一款光学仿真软件,用于设计和分析光学系统的性能。
它是一种强大的工具,可以帮助工程师在设计过程中优化系统,并测试各种设计变量的影响。
在本教程中,我们将介绍如何使用TracePro进行光学系统的建模和仿真。
这些步骤包括创建并定义系统的各个组件、设置光源和检测器的属性、进行光线追踪和分析结果。
下面是一些常用的功能和操作的简要概述。
1. 创建模型在TracePro中,可以通过绘制几何图形、导入CAD文件或使用现有的模型进行模型的创建。
为了简化教程,我们将使用TracePro的绘图工具进行模型的创建。
2. 定义材料在TracePro中,可以根据需要定义不同的材料属性,如折射率、吸收系数、散射系数等。
这些材料属性将用于光线的传播和相应的物理效应。
3. 定义光源在TracePro中,可以定义不同类型的光源,如平行光、点光源、面光源等。
光源的设置通常包括光源位置、光强度和光谱等参数。
4. 定义检测器在TracePro中,可以定义不同类型的检测器,如光敏区域、能量探测器、角度探测器等。
检测器的设置通常包括位置、接收模式和检测范围等参数。
5. 设置光线追踪参数在TracePro中,可以设置光线追踪的相关参数,如追踪模式、光线数量、迭代次数等。
这些参数将影响光线的行为和仿真的准确性。
6. 运行光线追踪在完成模型和参数的设置后,可以通过点击“运行”按钮来执行光线追踪。
TracePro将模拟光线在系统中的传播和相应的物理效应,生成光线追踪结果。
7. 分析结果一旦光线追踪完成,可以进行各种类型的结果分析,如能量分布、角度分布、损耗分析等。
TracePro提供了多种可视化和分析工具,以帮助您更好地理解系统的性能。
通过以上步骤,您可以使用TracePro进行光学系统的建模、仿真和分析。
希望这个简要的教程能够为您提供基本的操作指南,并帮助您在使用TracePro时取得良好的仿真结果。
常用光学设计软件介绍1. Zemax OpticStudio:Zemax OpticStudio 是一个功能强大的光学设计和仿真软件,广泛应用于光学元件和系统的设计、优化和验证。
它提供了完整的光学设计工作流程,包括光学母玻璃选取、曲面设计、光学系统优化、光学散射分析等。
OpticStudio 还包含了先进的非顺序光线追溯功能,可以模拟多个光学元件间的光学相互作用。
此外,它还提供了强大的图形用户界面,方便用户进行直观的光学分析和优化。
2.CODEV:CODEV是一种广泛使用的光学设计软件,特别适用于复杂的光学系统设计。
它提供了多种先进的光学设计和分析功能,包括非球面表面设计、自由曲面设计、非线性优化等。
CODEV还提供了强大的光学系统分析和优化工具,可以根据用户需求快速生成光学系统的性能和传递函数图。
此外,CODEV还支持自定义脚本和插件开发,满足用户独特的光学设计需求。
3. LightTools:LightTools 是用于高级光学系统设计和仿真的全面软件套件。
它提供了直观的图形用户界面和实时的光学仿真功能,可以帮助用户进行精确的光学系统建模和分析。
LightTools 包括了多种光学元件和材料的建模工具,以及先进的光学系统优化和分析功能。
此外,LightTools 还支持蒙特卡罗光线追踪和光学散射分析,可以模拟光在复杂表面和散射材料上的传输和反射特性。
4.FRED:FRED(Fast Reverse Engineering Design)是一种用于光学系统设计和分析的先进软件。
它提供了一系列强大的光学设计工具,包括光线追迹、非顺序光线追踪、光学优化等。
FRED 还支持自由曲面设计和非球面镜设计,在复杂光学系统的建模和优化中具有重要的应用。
此外,FRED 还提供了丰富的光学分析工具,可以帮助用户评估光学系统的性能和优化方案。
5.ASAP:ASAP(Advanced Systems Analysis Program)是一个广泛使用的光学设计和仿真软件。
常见光学仿真设计软件光学仿真设计软件是指通过计算机模拟光学系统的光学性能和传输特性,帮助设计师优化光学系统设计的工具。
以下是一些常见的光学仿真设计软件。
1.ZEMAX:ZEMAX是一款功能强大的光学设计软件,用于设计复杂的光学系统。
它提供了完整的光学设计和分析工具,包括光束追迹、像差分析、光学优化等功能。
ZEMAX还具有友好的图形用户界面和丰富的光学库,方便用户快速建立和优化光学系统。
2.CODEV:CODEV是光学设计和分析软件的行业标准。
它提供了广泛的功能,包括光束追迹、像差分析、优化、散射分析等。
CODEV还具有强大的排版功能,可以生成专业的光学设计报告和文档,并支持与其他软件的集成。
3. TracePro:TracePro是一款全面的光学设计和分析软件,主要用于照明和显示系统的设计。
它具有强大的光线追迹和散射分析功能,并支持多种光学材料和纹理的模拟。
TracePro还具有直观的用户界面和先进的优化算法,方便用户进行系统优化和性能评估。
4.FRED:FRED是一款广泛使用的光学系统设计和分析软件,可用于设计各种类型的光学系统,包括光学投影仪、显微镜、望远镜等。
FRED提供了强大的光束追迹和像差分析工具,并具有直观的图形用户界面和丰富的资源库,方便用户进行系统模拟和优化。
5. ASAP:ASAP(Advanced Systems Analysis Program)是一款专门用于光学系统设计和光学材料研究的软件。
它提供了完整的光线追迹和像差分析功能,并支持多种计算方法和优化算法。
ASAP还具有强大的散射分析和材料模拟功能,可用于研究各种材料的光学性能。
6. LightTools:LightTools是一款功能强大的光学系统设计和优化软件,主要用于照明和光学显示系统的设计。
它提供了广泛的光束追迹和像差分析工具,并支持光能损耗和光学材料的模拟。
LightTools还具有直观的用户界面和灵活的优化算法,方便用户进行系统设计和性能评估。