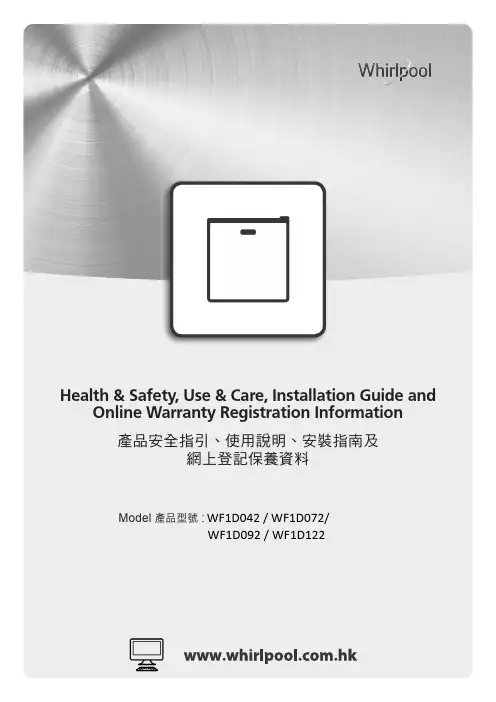
惠而浦8430A冰箱说明书
- 格式:docx
- 大小:12.54 KB
- 文档页数:3
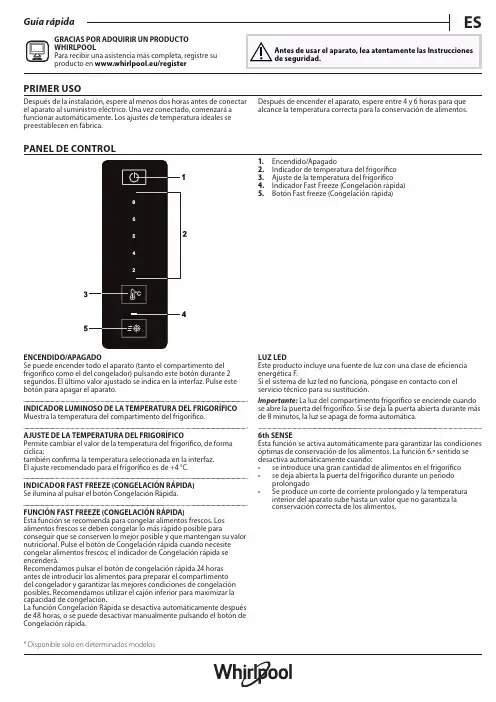
ES GRACIAS POR ADQUIRIR UN PRODUCTOWHIRLPOOLPara recibir una asistencia más completa, registre su producto en www.w hirlpool.e u/r egister Antes de usar el aparato, lea atentamente las Instrucciones de seguridad.PRIMER USODespués de la instalación, espere al menos dos horas antes de conectar el aparato al suministro eléctrico. Una vez conectado, comenzará a funcionar automáticamente. Los ajustes de temperatura ideales se preestablecen en fábrica.Después de encender el aparato, espere entre 4 y 6 horas para que alcance la temperatura correcta para la conservación de alimentos.PANEL DE CONTROL1. Encendido/Apagado2. Indicador de temperatura del frigorífico3. Ajuste de la temperatura del frigorífico4. Indicador Fast Freeze (Congelación rápida)5. Botón Fast freeze (Congelación rápida)ENCENDIDO/APAGADOSe puede encender todo el aparato (tanto el compartimento del frigorífico como el del congelador) pulsando este botón durante 2 segundos. El último valor ajustado se indica en la interfaz. Pulse este botón para apagar el aparato.INDICADOR LUMINOSO DE LA TEMPERATURA DEL FRIGORÍFICO Muestra la temperatura del compartimento del frigorífico.AJUSTE DE LA TEMPERATURA DEL FRIGORÍFICOPermite cambiar el valor de la temperatura del frigorífico, de formacíclica;también confirma la temperatura seleccionada en la interfaz.El ajuste recomendado para el frigorífico es de +4 °C.INDICADOR FAST FREEZE (CONGELACIÓN RÁPIDA)Se ilumina al pulsar el botón Congelación Rápida.FUNCIÓN FAST FREEZE (CONGELACIÓN RÁPIDA)Está función se recomienda para congelar alimentos frescos. Los alimentos frescos se deben congelar lo más rápido posible para conseguir que se conserven lo mejor posible y que mantengan su valor nutricional. Pulse el botón de Congelación rápida cuando necesite congelar alimentos frescos; el indicador de Congelación rápida se encenderá.Recomendamos pulsar el botón de congelación rápida 24 horas antes de introducir los alimentos para preparar el compartimentodel congelador y garantizar las mejores condiciones de congelación posibles. Recomendamos utilizar el cajón inferior para maximizar la capacidad de congelación.La función Congelación Rápida se desactiva automáticamente después de 48 horas, o se puede desactivar manualmente pulsando el botón de Congelación rápida.LUZ LEDEste producto incluye una fuente de luz con una clase de eficiencia energética F.Si el sistema de luz led no funciona, póngase en contacto con elservicio técnico para su sustitución.Importante: La luz del compartimento frigorífico se enciende cuando se abre la puerta del frigorífico. Si se deja la puerta abierta durante más de 8 minutos, la luz se apaga de forma automática.6th SENSEEsta función se activa automáticamente para garantizar las condiciones óptimas de conservación de los alimentos. La función 6.º sentido se desactiva automáticamente cuando:• se introduce una gran cantidad de alimentos en el frigorífico• se deja abierta la puerta del frigorífico durante un periodo prolongado• Se produce un corte de corriente prolongado y la temperatura interior del aparato sube hasta un valor que no garantiza laconservación correcta de los alimentos.del compartimento Fresh Box 0 °C también se ve afectada. Tenga en cuenta que este compartimento es una característica mecánica que funciona todo el tiempo y no se puede apagar.Humidity control (Control de humedad)*Active el regulador de humedad (posición B) si quiere almacenar alimentos como, por ejemplo, fruta en un entorno menos húmedo, o apáguelo (posición A) para almacenar alimentos como, por ejemplo, verduras, en un entorno más húmedo.Estante plegable*Este estante se puede usar de tres modos distintos: 1. Profundidad total, para usar toda la superficie.2. Profundidad media, para usar la parte trasera y, al mismo tiempo,crear espacio para objetos más altos (como botellas o jarras) en el estante de abajo. Para ajustar el estante a la profundidad media, levante ligeramente la parte delantera y tire de ella hacia dentro.3. Plegado hacia arriba si necesita hacer espacio para objetos altoso voluminosos en el estante de abajo. Para plegar el estante hacia arriba, ajústelo primero en la posición a medio camino desde la profundidad media. Despliegue el estante hacia abajo para volver a utilizarlo en la profundidad media y en la profundidad total.COMPARTIMENTO DEL CONGELADORLos congeladores Total No Frost proporcionan una circulación de aire frío alrededor de las zonas de almacenamiento e impiden la formación de hielo, por lo que se elimina por completo la necesidad de realizar una descongelación.Los alimentos congelados no se pegan a las paredes, las etiquetas permanecen legibles y el espacio de almacenamiento se mantiene limpio y despejado.El compartimento del congelador permite almacenar alimentos congelados y congelar alimentos frescos.La cantidad de alimentos frescos que es posible congelar en unperiodo específico de tiempo se indica en la placa de características. Coloque los alimentos frescos que desee congelar en la zona de congelación del compartimento del congelador dejando suficiente espacio alrededor de los alimentos para que el aire circule libremente. No deje que los alimentos frescos entren en contacto directo con los alimentos congelados. Los límites de carga están determinados por las cestas,solapas, cajones, estantes, etc.Asegúrese de que dichos componentes siguen pudiéndose cerrar tras la carga. El cajón/compartimento de la zona de congelación se muestra en la imagen anterior. Para optimizar la velocidad de congelación y tener más espacio de almacenamiento, se pueden extraer los cajones del congelador y colocar los alimentos directamente en la parte inferior del compartimento. Para evitar el desperdicio de alimentos, consulte la configuración recomendada y los tiempos de conservación que se encuentran en el manual del usuario en línea.Cubitos de hieloLlene con agua 2/3 de la bandeja para hielo y vuelva a colocarla en el compartimento del congelador. No utilice objetos puntiagudos o cortantes para sacar el hielo.ACCESORIOS*BANDEJA PARA HUEVOSBANDEJA PARA HIELOESTANTE PARA BOTELLASESTANTE PLEGABLEINFORMACIÓN GENERALLos cajones, cestas y estantes deben permanecer en su sitio a menos que se especifique lo contrario en esta guía rápida.El sistema de iluminación del interior del compartimento del frigorífico emplea luces led, lo que permite una mejor iluminación y un consumo energético menor al de las bombillas tradicionales.Las puertas y tapas del frigorífico deben retirarse antes de desecharse, para evitar que niños o animales queden atrapados dentro.RESOLUCIÓN DE PROBLEMASQué hacer si...Posibles razonesSoluciones El aparato no funciona.Es posible que se haya producido un problema de alimentación eléctrica.• Compruebe que el cable de alimentación esté conectado a una toma que recibe la tensión adecuada.•Compruebe los dispositivos y fusibles de protección de la instalación eléctrica de su hogarHay agua en la bandeja de descongelación.Es normal en climas cálidos y húmedos. El recipiente puede estar medio lleno.• Compruebe que el aparato está nivelado para que el agua no se salga.Los bordes del mueble del aparato que están en contacto con la junta de la puerta están calientes al tacto.No se trata de un defecto. Es normal en climas cálidos y cuando el compresor está en funcionamiento.La luz no funciona.Puede que se tenga que sustituir la luz.El aparato puede estar en modo Encendido/En espera.• Compruebe los dispositivos y fusibles de protección del sistema eléctrico de su hogar.• Compruebe que el cable de alimentación esté conectado a una toma que reciba el voltaje adecuado•En caso de ledes rotos, el usuario deberá ponerse en contacto con el servicio técnico para obtener un recambio del mismo tipo, que está disponible solamente en los centros de servicio posventa o en distribuidores autorizados.El motor parece funcionar durante demasiado tiempo.El tiempo de funcionamiento del motor depende de distintos factores: númerode veces que se abre la puerta, cantidad de alimentos almacenados, temperatura de la habitación y ajuste de los controles de temperatura.• Asegúrese de que los mandos del aparato estén ajustados correctamente.• Compruebe que no se haya añadido una gran cantidad de alimentos al aparato.• Compruebe que la puerta no se abre con demasiada frecuencia.•Compruebe que la puerta cierra bien.Puede consultar los reglamentos, la documentación estándar, así como pedir piezas de repuesto,mediante alguna de las siguientes formas:• Visitando nuestra página web docs.w hirlpool.e u y parts-s elfservice.w hirlpool.c om• Usando el código QR• También puede, ponerse en contacto con nuestro Servicio postventa (Consulte el número de teléfonoen el folleto de la garantía). Cuando se ponga en contacto con nuestro Servicio Postventa, deberá indicar loscódigos que figuran en la placa de características de su producto.Puede acceder a la información del modelo mediante el código QR que aparece en la etiqueta energética. Laetiqueta incluye también el identificador del modelo, que se puede utilizar para consultar el portal de la siguientebase de datos: https://eprel.ec.europa.eu.* Disponible solo en determinados modelosQué hacer si...Posibles razones SolucionesLa temperatura del aparatoes demasiado elevada.Esto puede deberse a diferentes razones(consulte «Soluciones»).• Asegúrese de que el condensador (parte trasera del aparato) notenga polvo ni pelusas.• Asegúrese de que la puerta esté bien cerrada.• Asegúrese de que las juntas de la puerta encajen bien.• En días de calor o si la habitación tiene una temperatura elevada, elmotor funciona más tiempo.• Si la puerta del aparato ha estado abierta durante bastante tiempoo si se han almacenado grandes cantidades de alimentos, el motorfuncionará más tiempo para enfriar el interior del aparato.Las puertas no se cierran nise abren correctamente.Esto puede deberse a diferentes razones(consulte «Soluciones»).• Compruebe que no haya alimentos bloqueando la puerta.• Compruebe que las piezas internas o la máquina de hieloautomático están en su sitio.• Compruebe que las juntas de la puerta no estén sucias o pegajosas.• Compruebe que el aparato esté nivelado.TABLA DE ALARMASTipo de alarma Indicación Causa SoluciónAlarma de puerta luz del frigorífico puerta ha estado abierta más de3 minutos.Cierre la puerta.Anomalía.Alguno de los indicadores detemperatura parpadea.Avería del producto.Póngase en contacto con elservicio posventa.400011573891。
AutoSentry Double System RL SERVICE PARTSThis parts list contains the service parts andwiring diagrams for this model.Check the modelnumber of the machine requiring the parts to besure that this is the correct parts list.TABLE OF CONTENTSCabinet Assembly..................................................................................................Page2 Water System.........................................................................................................Page3 Refrigeration System..............................................................................................Page4 Evaporator,FM/FME units.....................................................................................Page5 Evaporator,NM/NME units....................................................................................Page6 Gearmotor..............................................................................................................Page7 Control Box............................................................................................................Page8 Wiring Diagrams...................................................................................................Page9AutoSentry Double System RL SERVICE PARTS2346127891011513314115ITEM PART NUMBER NUMBER DESCRIPTION 8A34294-002Front Panel,S.S.9A34287-015Support 10A35593-001Base 1103-1531-01Screw 1202-0836-00Catch13A32435-002Left Side Panel,S.S.1403-1404-12Screw15.A34286-001Center SupportITEM PART NUMBER NUMBER DESCRIPTION 1A34283-002Back panel2A32461-002Top Panel,S.S.3A34038-002Service Panel,S.S.4A33292-002Right Side Panel,S.S.503-0271-00Speed Clip 615-0808-03Emblem,grey 703-1419-22ScrewCabinetAutoSentry Double System RL SERVICE PARTS2389NUMBER NUMBER DESCRIPTION 1503-1394-01Pal Nut16A36154-001Evap.water inlet tube 1702-1338-00Hose clamp 1802-3692-22Drain fitting1902-3826-01Res.overflow hose (rt)02-3826-02Res.overflow hose (left)20A37482-001Reservoir bracket 2113-0840-01Rubber capITEM PART NUMBER NUMBER DESCRIPTION 103-1405-41Cap Screw 2A32890-020Evaporator 302-0929-23Water Seal402-3266-01Reservoir &valve 502-3266-02Float valve 602-3266-03Plunger/seat712-2760-21Water Level Sensor 8A32777-001Retaining Ring for Seal 902-3837-01Drip Pan 1013-0704-00Gasket1102-4663-01Water Shed1216-0835-01Inlet fitting for plastic tubing 1316-1039-01Male connector1413-0895-01Inlet tubing,4ft.req.AutoSentry Double System RL SERVICE PARTS21376846534ITEM PART NUMBER NUMBER DESCRIPTION 102-3319-03Dryer2A32859-001EPR Valve (used on FME2404,NME1854,FME3004and NME2504)A32859-002EPR Valve (used on FM2402,FM3002,NM1852and NM2502312-2135-02Solenoid Valve 411-0548-01Ball Valve511-0488-21R-404A Thermostatic Expansion Valve (used on FME2404and NME1854)16-0825-21R-22Thermostatic Expansion Valve (used on FM2402and NM1852)11-0482-21R-404A TXV use on FME3004and NME2504611-0548-01Ball valve 7A32890-020Evaporator 816-0762-02Sight GlassRefrigeration System5AutoSentry Double System RL SERVICE PARTS21.13-0617-52O-Ring22.02-2916-01Slotted Collar 23.13-0617-45O-Ring24.03-1544-08Soc.Head Screw 25.A34505-020Breaker (Divider)(includes 18&19)26.A38071-022Auger27.A32890-020Evaporator 28.03-1420-03Cap Screw 29.02-4358-01Insulation 30.02-3837-01Drip Pan31.13-0704-00Drip Pan Gasket 32.02-4663-01Water Shed 33.13-0617-49O-Ring 34.03-1408-36Washer35.13-0929-01Insulation donut432292827262325212422203319181615141312111088634ITEM PART NUMBER NUMBER DESCRIPTION 1.Bail clip2.Drain tube holder3.Ice Chute Cover4.Insulation Top (half)5.Ice Chute Body w/ins6.A33102-001Insulation Collar Inside7.02-2929-04Ice Chute Lower8.A37708-021Bin Controls Assy.(set of 2)9.A32930-001Chute Gasket 10.03-1405-52Hex Cap Screw 11.02-3001-01Ice Sweep 12.13-0871-01Water Shed 13.02-2978-01Lip Seal14.02-3128-20Breaker Cover 15.13-0617-54O-Ring16.08-0660-01Auger Stud,thrust washer 17.A35419-020Strap kit 18.A34559-020Bearing 19.02-2977-01Lip Seal 20.03-1403-27ScrewFM/FME Evaporator,Chute,Bin Controls1235124292629232521241918161514131211108863172028ITEM PART NUMBER NUMBER DESCRIPTION 1.A34969-001Bail clip2.02-3268-01Drain tube holder3.02-2930-04Ice Chute Cover4.A32963-001Insulation Top (half)5.02-3841-01Ice Chute body w/ins6.A33102-001Insulation Collar Inside 6a A35419-020Strap kit7.02-2929-04Ice Chute Lower 8.A37708-021Bin Controls Assy.(set of 2)9.A32930-001Chute Gasket 10.03-1405-52Hex Cap Screw 11.02-3001-01Ice Sweep 12.13-0871-01Water Shed 13.02-2978-01Lip Seal14.02-3128-20Breaker Cover 15.13-0617-52O-Ring16.08-0660-01Auger Stud &washer17.02-4663-01Water Shed 18.A34559-020Bearing 19.02-2977-01Lip Seal20.13-0704-00Drip Pan Gasket 21.13-0617-54O-Ring 22.02-3826-01Drip Pan 23.13-0617-45O-Ring24.03-1544-08Soc.Head Screw 25.A32900-020Breaker(includes 18&19)26.A38071-022Auger27.A32890-020Evaporator 28.03-1420-03Cap Screw 29.02-4358-01Insulation3013-0929-02Insulation donut30*NOTE:GEARCASECOVERINCLUDES COVER,OUTPUT SHAFT,KEY, OUTPUT GEAR,BEARINGS,ANDSEAL.3 59721ITEM PARTNUMBER NUMBER DESCRIPTION1.12-2430-24Start switch,Emerson12-2430-44Start switch,GE/Regal Bel2.12-2430-22Drive Motor208-230v3.02-4663-01Water Shed.4.12-2430-29Bearing-Emerson12-2430-49Bearing-GE/Regal Beloit5.A32379-029Seal,Output6.A32379-024First Gear&Bearing7.A32379-0232nd Gear&Bearing8.A32379-021Gasket9.A32379-020Gear Case10A32379-027Oil,1Container11.A32379-022Gearcase Cover*12.A32379-026Bolt(6)13.A33220-022Complete GearmotorAssembly.208-230v.A33220-030Gearcase kit,no motorAutoSentry Double System RL SERVICE PARTS321Control Box ITEM PARTNUMBER NUMBER DESCRIPTION112-2835-22Circuit Board212-2350-01Stand off312-0426-01Mode SwitchNot Illustrated:412-0813-04Terminal Strip5A34055-001Control Box CoverAutoSentry Double System RL SERVICE PARTSWiring DiagramSEE NAMEPLATEFOR SUPPLY VOLTAGE AND MAX FUSE SIZEEARTH GROUNDBKBK17-2677-01ALL CONTROLS SHOWN IN ICE MAKING MODEUSE COPPER CONDUCTORS ONLY THIS UNIT MUST BE GROUNDEDCONDUCTIVITY PROBEBK R BKBKRGNV789456123412563BKMODE SWITCHT1T2BU YLIQUID LINE SOLENOIDRNCCENTRIFUGAL SWITCHS T A RT R U N OL AUGER DRIVE MOTOR2S -A 1BIN FULL EMITTER (LED)L2L1TERMINAL BLOCK14BU BU BIN FULL DETECTOR(PHOTO TRANS)YCIRCUIT BOARDJUNCTION BOXBKBKCONDUCTIVITY PROBEBKR BKBKRGNV789456123412563BKMODE SWITCHT1T2BUYLIQ LINE SOLENOIDRNCCENTRIFUGAL SWITCHS T A R T R U N OL AUGER DRIVE MOTOR2S -A 1BIN FULL EMITTER (LED)L2L1TERMINAL BLOCK14BU BUBIN FULL DETECTOR PHOTO TRANSYCIRCUIT BOARDCONTROL BOX CONTROL BOXBK BKAutoSentry Double System RL SERVICE PARTSAUGER DRIVERELAYL2L1AUGER MOTORAUGER MOTORAUGER DRIVE Schematic DiagramBulletin Number:PS-14-96Bulletin Date:September 1996Subject: NME, FME, NSE, NDE and TDE550/650 Top Bearing Lubrication Two parts have been made available as helpful aids to use when lubricating the top bearing.1. 02-3559-01 is a needle that snaps onto a standard grease gun fitting. Use it to insert and deeply pack the proper lubricant into the top bearing.2. A36808-001 is a tube of the proper lubricant, also designed to fit a standard grease gun.Both numbers are in the parts price list.Needle, shown inserted into bearing SERVICE BULLETIN。

WUI75X15H/ WUI95X15H– D 24" x W 145⁄8" x H 3349⁄64" (depth without handle)PRODUCT DIMENSIONS .MODEL #WUI75X15H, WUI95X15Hin cmA Width145/837.15B Width of grille1425/3237.55C Height of door2955/6475.85D Height of grille329/329.95E Width of recessed icemachine1429/3237.81 FWidth from side of icemachine to door fullyopen57/814.94G Depth without door2121/3255.02H Depth with door2313/3259.46I Depth with handle249/1662.42FRONT VIEW TOP VIEWWUI75X15H/ WUI95X15H– D 24" x W 145⁄8" x H 3349⁄64" (depth without handle)MODEL #WUI75X15H, WUI95X15Hincm A*Height to top of door (min.)337/886.03B*Height to top of grille (min.)329/329.95C*Height of recessed ice machine (min.)3329/6485.38D Depth with door open 90° (min.)373/894.92E Depth with door (min.)2313/3259.46FDepth without door (min.)219/1654.76G Depth of grille (min.)1963/6450.76* Add 1" (2.5 cm) to the height dimension when leveling legs are fully extended.FloorWUI75X15H/ WUI95X15H– D 24" x W 145⁄8" x H 3349⁄64" (depth without handle)OPENING/CLEARANCE DIMENSIONSBACK VIEWSIDE VIEWMODEL #WUI75X15H, WUI95X15Hincm A*Width (min.)1538.1Width without hinge side spacer option (min.)1538.1Width with hinge side spacer option (min.)153⁄440.0*B*Width of outlet location615.0C*Outlet location – distance from side 1 2.5D*Width of water connection location 31⁄28.9EMinimum width from hinged side of ice machine to fixed wall – door open 90°2 5.1Minimum width from hinged side of ice machineto fixed wall – door fully open 180°131⁄433.7Minimum width from hinged side of ice machineto fixed wall – door fully open 118°67⁄817.4F Height (min.)3486.4G Height of outlet location820.3H Height of water connection location 922.9I Outlet location – distance from bottom 1230.5J Depth of cabinet (min.)2461.0K Water line location – distance from side 239/64 6.64L Power supply – distance from side 349/649.57MDrain hose – distance from side 75/1618.57N Power supply – distance from bottom 11/4 3.17O Drain hose – distance from bottom 243/64 6.79P Water line location – distance from bottom 147/3236.12eRecommended electrical connection locationw Recommended water connection location* Install 3⁄4" (1.9 cm) front hinge-side spacer flush with face of adjacent cabinet and 3⁄4" (1.9 cm) back hinge-side spacer 6" (15.2 cm) from back wall.ELECTRICAL REQUIREMENTS115 V , 60 Hz, AC only, 15 or 20 A fused, grounded circuit isrequired. A dedicated circuit is recommended. Use an outlet that cannot be turned off by a switch. Do not use an extension cord.WATER PRESSURE REQUIREMENTSA cold water supply with water pressure between30 and 120 psi (207 and 827 kPa) is required to operate the ice maker. Call a licensed, qualified plumber with any questions about the water pressure.Reverse Osmosis Water SupplyIMPORTANT: The use of a reverse osmosis system with this product is not recommended. However if you do use reverse osmosis, follow these instructions.IMPORTANT: The pressure of the water coming out of a reverse osmosis system going to the water inlet valve of the ice machine needs to be between 30 and 120 psi (207 and 827 kPa). If a reverse osmosis water filtration system is connected to the cold water supply, the water pressure to the reverse osmosis system needs to be a minimum of 40 to 60 psi (276 to 414 kPa).。
本文部分内容来自网络整理,本司不为其真实性负责,如有异议或侵权请及时联系,本司将立即删除!== 本文为word格式,下载后可方便编辑和修改! ==电冰箱说明书篇一:电冰箱使用说明书电冰箱使用说明书温度调节温度旋钮用来调节冰箱内温度,旋钮上的数字不代表具体温度,在相同的室内温度下,数字越大,箱内温度越低;数字越小,箱内温度越高。
“0”为停机点,这时冰箱不运转;“7”为强冷点,在需要加速制冷的时候使用。
一般冬天宜将旋钮调到“1~4”之间;夏天宜将旋钮调到“4~7”之间。
使用注意事项制冰室用来冰冻或储藏食品和制取少量冰块,不得存放玻璃瓶装或灌装密封液体物品,以免由于液体冻结后,体积膨胀而破裂。
冰盒用于制取冰块,注入五分之四容量的凉开水,置于制冰室,紧贴底部就可以制取冰块,若要加速制冰,应将温度旋钮旋到强制冷点“7”处。
取冰块时,只需扭动冰盒就可以使冰块与冰盒分离。
但切勿折弯冰盒,以免断裂。
制冰时间较长,取冰时不可直接用手握住冰盒,以免冻伤。
接水盒盛接化霜水,务必定时检查接水盘中的化霜水,及时把化霜水倒掉,以免溢落于冰箱内和地板上,造成漏电和生锈。
门封起密封保温作用,使用时要防止油渍弄脏和变形。
物品不宜摆放过密,以利于冷气循环。
热的食品应冷却至室温再放入冰箱。
减少开关们的次数及时间以减少冷气流失。
可以洗涤的食品最好先洗净,擦干水分后贮藏。
若接到停电通知,可提前将2~3小时将温度旋钮旋到强冷点“7”,并尽可能的做制去冰块置于冷藏室内。
停电后尽可能减少开门次数。
若停电时间过长,再次解冻电源前,请把接水盘的化霜水倒掉,并检查是否霜水残积在制冰室和箱内底面上,如有,务必清除掉。
篇二:电冰箱的使用说明书电冰箱的使用说明书1. 此冰箱为存放冷藏药品及降温冰块的冰箱,不得存放食品。
2. 热的物品不得放入运转着的冰箱。
3. 存放物品不宜过满过紧,要留有空隙,以利空气对流,减轻制冷系统的负荷,延长使用寿命,节省电量。
4. 不要把物品直接放在蒸发器表面上,要放在器皿里,以免冻结在蒸发器上,不便取出。
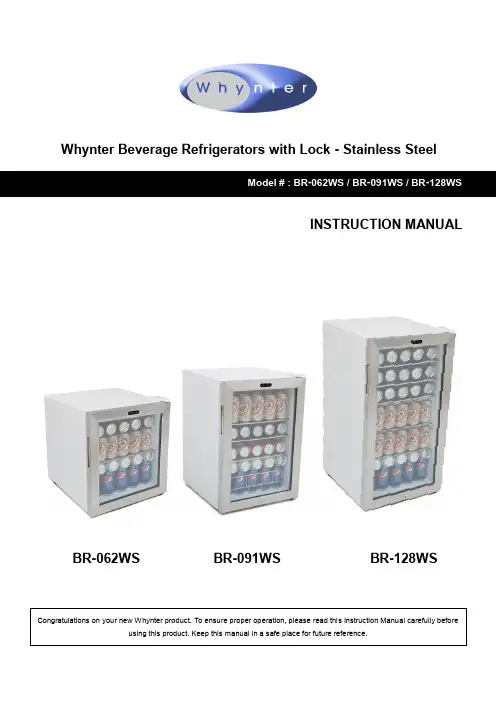
Whynter Beverage Refrigerators with Lock - Stainless SteelCongratulations on your new Whynter product. To ensure proper operation, please read this Instruction Manual carefully beforeusing this product. Keep this manual in a safe place for future reference.Model # : BR -062WS / BR -091WS / BR -128WSINSTRUCTION MANUALBR -091WS BR -128WSBR -062WSCare and Maintenance12 Troubleshooting13 - 14 Warranty Information15APPLIANCE SAFETYYour safety and the safety of others are very important to us.This is the Safety Alert Symbol. This symbol alerts you to potential hazardsthat may result in serious injury. All safety messages will follow the Safety Alert Symbol and either the words” DANGER” or “WARNING”.Danger means that failure to heed this safety statement may result in severe injury or death.Warning means that failure to heed this safety statement may result in extensive product dam-age, serious injury, or death.Caution means that failure to heed this safety statement may result in minor or moderate injury, or property or equipment damage.All safety messages will alert you to know what the potential hazard is, tell you how to reduce the chance of injury, and let you know what can happen if the instructions are not followed.IMPORTANT SAFEGUIDESBefore the appliance is used, it must be properly positioned and installed as described in this manual, please read the manual carefully. To reduce the risk of fire, electrical shock or injury when using the appliance, follow basic precaution, including the following:∙ Plug into a grounded 3-prong outlet, do not remove grounding prong, do not use an adapter, and do not use an extension cord. ∙ Do not use if the power supply cord is damaged. If damaged, it must be replaced by a qualified electri-cian. ∙ It is recommended that a separate circuit, serving only your appliance be provided. Use receptacles that cannot be turned off by a switch or pull chain. ∙ Never clean appliance parts with flammable fluids or harsh chemicals. These fumes can create a fire hazard or explosion. ∙ Do not store or use gasoline or other flammable vapors and liquids in the vicinity of the appliance or any other appliance. ∙ Before proceeding with cleaning and maintenance operations, make sure to unplug the appliance. ∙ Do not connect or disconnect the electric plug with wet hands.∙ Do not attempt to repair or replace any part of your appliance unless it is specifically recommended in this manual. All other servicing should be referred to a qualified technician.To reduce the risk of fire, electrical shock, or injury when using your appliance, follow these basic precautionsFOLLOW WARNING CALL OUTS BELOW ONLY WHEN APPLICABLE TO YOUR MODEL∙ Use two or more people to move and install the appliance. Failure to do so can result in injury.∙ To ensure proper ventilation for your appliance, the front of the appliance must be completely unobstructed. Choose a well-ventilated area with temperatures above 60°F (16°C) and below 90°F (32°C). This appliance must be installed in an area protected from the element, such as wind,rain, water spray or drips∙ The appliance should not be located next to ovens, grills or other sources of high heat.∙ The appliance must be installed with all electrical connections in accordance with state and local codes.∙ The fuse (or circuit breaker) size should be 15 amperes.∙ It is important for the appliance to be leveled in order to work properly. For a stable installation, make sure the appliance is placed on a flat, level and solid surface.∙ Ensure that the surface on which the appliance is placed is strong enough to hold the appliance and the items stored inside.∙ This appliance is not intended for use by young children or physically-challenged persons without supervision/assistance. Young children must be supervised to ensure safety around this or any appliance.∙ Do not use solvent-based cleaning agents of abrasives on the interior. These cleaners may dam-age or discolor the interior.∙ Keep fingers out of the “pinch point” areas. Clearance between the door and cabinet are neces-sarily small. Be careful closing doors when children are in the area.∙ The temperature range for this beverage refrigerator is optimized for beverage storage. Perisha-ble food items may require a different storage environment.∙ Do not place hot food or beverages into the appliance.∙ Close the beverage refrigerator door immediately after putting in any items to keep the internal temperature relatively constant.∙ Avoid placing any objects on top of the appliance.∙ This is an electrical appliance, to avoid injury from electrical shock do not operate the unit with wet hands, while standing on a wet surface or while standing in water. Do not use outdoors or in wet conditions.∙ When positioning or moving the appliance, ensure that it is not turned up side down or unleveled greater than 45°∙ Never pull the power cord to disconnect it from the outlet. Grasp the plug and pull it from the out-let.∙ Never lift, carry or drag the appliance by the power cord.∙ This appliance is designed for household, non-commercial use only. Any other use will void the warranty.∙ Do not plug into the power outlet before set up is completed.∙ Do not move this appliance without emptying it and securing the door in a closed position.BR -062WS12567891012BR-091WS / BR-128WS13∙ Capacity:BR-062WS : 62 standard 12 oz. canBR-091WS : 90 standard 12 oz. canBR-128WS : 120 standard 12 oz. can∙ Stainless steel trimmed glass door with sleek white cabinet∙ Recessed handle provides a flush finish with the door∙ Mechanical temperature control with temperature range from high 30ºF - mid 60ºF ∙ Reversible door∙ Freestanding setup∙ Powerful compressor cooling∙ Soft interior LED lighting with on/off switch (for BR-091WS and BR-128WS only)∙ Internal fan-forced circulation (for BR-091WS and BR-128WS only)∙ Shelf Count:BR-062WS - 1 slide-out wire shelfTop shelf: 40 can capacityBottom:22 can capacityBR-091WS - 3 slide-out wire shelvesTop shelf: 15 can capacitySecond shelf: 25 can capacityThird shelf: 25 can capacityBottom:25 can capacityBR-128WS –5 slide-out wire shelvesTop shelf: 15 can capacitySecond shelf: 15 can capacityThird shelf: 15 can capacityFourth shelf: 25 can capacityFifth shelf: 25 can capacityBottom:25 can capacity∙ ETL CertifiedTECHNICAL DATAWARNINGUnder most ambient conditions, the appliance does not need to be defrosted. In cold ambient temperatures and/or high humidity, some frost may build up. To defrost the appliance, set the thermostat dial to “0”, remove frozen or perishable items and defrosting should occur in a few hours. After defrosting, return the thermostat dial to the desired position. For faster defrosting, remove all items from the appliance, unplug the appliance and leave the door open. Never use a knife or other metal instrument to scrape ice/frost from the evaporator.PREPARING FOR STORAGEIf the beverage refrigerator will not be used for a long time, or is to be moved to another place, it will be neces-sary to defrost the unit and dry the interior.1.Disconnect the beverage refrigerator from the power supply by removing the power plug from the wall socket.WARNING: Do not touch the power plug when your hands are wet. Never unplug the unit by pulling the cord.2. Leave the door open to allow air circulation and mold prevention, mildew and unpleasant smells.CAUTION: Store the unit out of the reach of children. If you have children, you may want to take addi-tional precautions such as locking the beverage refrigerator door.CLEANING YOUR APPLIANCE∙ Turn off the power, unplug the appliance, and remove all items including shelves.∙ Wipe the interior with a warm water and baking soda solution. The solution should be about 2 tablespoons of baking soda to one quart of water.∙ Wipe the shelves with a mild detergent solution.∙ Wipe the outside cabinet with warm water and mild liquid detergent.∙ Do not use steel wool or steel brush on the stainless steel. These will erode the stainless steel and rusting may occur.CAUTION: Failure to unplug the appliance could result in electric shock or personal injury VACATION TIME∙ Short vacations: Leave the appliance operating during vacations of less than two days∙ Long vacations: If the appliance will not be used for an extended period, remove all items and turn off the appliance. Clean and dry the interior thoroughly.MOVING YOUR APPLIANCE∙ Remove all items inside the appliance.∙ Securely tape down (we recommend using painter’s tape) all loose items (shelves) inside your appliance.∙ Turn the adjustable leg up to the base to avoid damage.∙ Tape (we recommend using painter’s tape) the door shut.∙ Be sure the appliance stays secure in the upright position during transportation and protect the exterior of appliance with a blanket, or similar item.ENERGY SAVING TIPS∙ The appliance should be located in the coolest area of the room, away from heat producing appliances, and out of any direct sunlight.∙ Ensure that the appliance is adequately ventilated. Never obstruct the air vents.∙ Close the door tightly and do not open the appliance too frequently or for a long period of time.∙ Store the content in an organized way∙ Do not over-fill the appliance to allow air to circulatePlease retain the original proof of purchase in order to obtain warranty services.Warranty begins from the original date of purchase.To obtain service or information, contact*********************************************866-WHYNTER.Product contents and specifications may change without notice.Copyright © 2018 Whynter LLC。
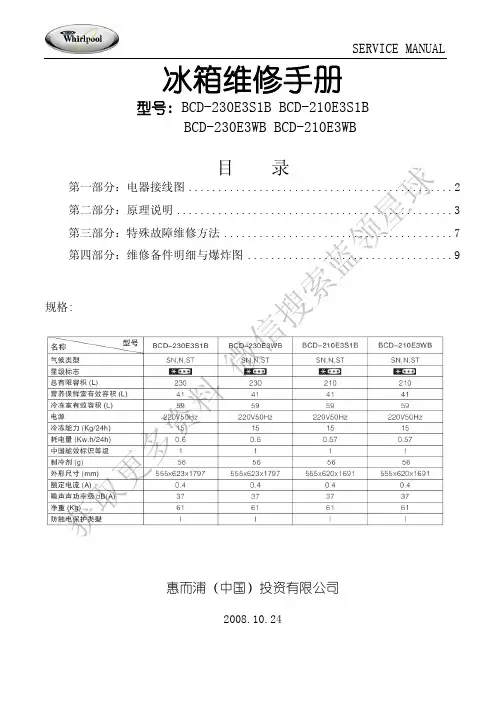
冰箱维修手册型号: BCD-230E3S1B BCD-210E3S1B BCD-230E3WB BCD-210E3WB目 录第一部分:电器接线图 (2)第二部分:原理说明 (3)第三部分:特殊故障维修方法 (7)第四部分:维修备件明细与爆炸图 (9)规格:惠而浦(中国)投资有限公司2008.10.24获取更多资料微信搜索蓝领星球第一部分:电器接线图获取更多资第二部分:原理说明1、制冷系统原理说明系统原理图及说明:本系统由压缩机排出高温高压制冷剂气体,经左右冷凝器冷却成中温高压液体后,经过干燥过滤器、毛细管截流后在蒸发器里蒸发成气体,从而进行制冷,制冷剂气体再回到压缩机从而循环。
但是本系统三条制冷回路,分别受冷藏室温控器、营养保鲜室温控器、冷冻室温控器的控制。
初开机时,制冷剂从压缩机排出,经由左冷凝器、右冷凝器、干燥过滤器、双联电磁阀、冷藏毛细管、冷藏室蒸发器、冷冻室蒸发器回到压缩机;冷藏室温度达到设定要求后,双联电磁阀动作换向,制冷剂从压缩机排出后改经左冷凝器、右冷凝器、干燥过滤器、双联电磁阀、营养保鲜室毛细管、营养保鲜室室蒸发器、冷冻室蒸发器回到压缩机;在冷藏室温度、营养保鲜室温度均达到设定要求后,双联电磁阀动作换向,制冷剂从压缩机排出后再改经左冷凝器、右冷凝器、干燥过滤器、双联电磁阀、冷冻毛细管、冷冻室蒸发器回到压缩机。
在冷藏室温度、营养保鲜室温度、冷冻室温度均达到设定要求后,压缩机停止运转。
获取更2、控制说明1基本参数 1.1 电源电压:165~242V 频率:50±1Hz 1.2 额定功率:4W 1.3 控制部件a 变频压缩机b 2只双稳态电磁阀c 冷藏室照明灯1.4 温控方式:电脑控制,三循环 1.5 显示方式:LCD 显示1.6冰箱采用4只传感器:冷藏室、冷冻室、变温室、环境 2 外观和结构2.1 主控制板、电源板应符合相应图纸要求,标记、印刷字样应完整、清晰。
2.2 按键定义(如下图)。
WARNINGFOR YOUR PROTECTION, PLEASE READ THE FOLLOWING:WATER AND MOISTURE:Appliance should not be used near water (e.g. near a bathtub, washbowl, kitchen sink, laundry tub, in a wet basement, or near a swimming pool, etc). Care should be taken so that objects do not fall and liquids are not spilled into the enclosure through openings.POWER SOURCES:The appliance should be connected to a power supply only of the type described in the operating instructions or as marked on the appliance.GROUNDING OR POLARIZATION:Precautions should be taken so that the ground-ing or polarization means of an appliance is not defeated.POWER CORD PROTECTION:Power supply cords should be routed so that they are not likely to be walked on or pinched by items placed upon or against them, paying particular attention to cords at plugs, convenience receptacles, and the point where they exit from the appliance.SERVICING:To reduce the risk of fire or electric shock, the user should not attempt to service the appliance beyond that described in the operating instructions. All other servicing should be referred to qualified service personnel.FOR UNITS EQUIPPED WITH EXTERNALLY ACCESSIBLE FUSE RECEPTACLE: Replace fuse with same type and rating only.PLUG IN, TURN ON, ROCK OUT.Selecting programsTo select programs use either the footswitches (1), or the Up/down buttons (9). The first three footswitches select programs, the last footswitch selects banks. To select a specific bank, continue stepping on bank footswitch until the desired bank number appears in display (5). Then step on footswitch 1-3 to activate program. Only user programs can be selected with the bank footswitch. To select the Factory Presets you must use the Up/Down buttons. To make life easy, factory presets are duplicated in all the user locations.Editing programs30 user slots have been provided for you to fill with programs of your own. Editing programs on theVoTEC has been designed to be efficient and simple. In order to change, add, or delete an effectsimply push the Effect Selector button (4), this selects the effect to edit, the currently selected effect number will appear in the LED Display (5). Then use the Up/down buttons (9) to increment up or down through the effects and effect values. When the desired effect has been found, press the Store Button (6). When the Store Button (6) has been pressed, the store light will blink, this is the VoTEC asking where you would like the program saved. Use the Up/down buttons (9) to select desired pro-gram number, press the Store Button (6) one more time to save. To remove a currently active effect, press the Effect Selector button(4) twice and --will appear, then press the Store Button (6). This removes the effect from the chain. If the effect is currently bypassed press the selector button to acti-vate.BypassingTo bypass, simply press the Footswitch (1) of the program you are currently using . bp will appear in the LED Display (5), this will bypass the VoTEC completely. To re-engage the VoTEC, press any footswitch.Factory resetCaution this function will revert VoTEC to factory default. All user programs will be erased.Hold down both the Compressor and Reverb buttons while powering up the VoTEC. The display will read rS. The VoTEC has now reverted to factory default.DOD Electronics8760 South Sandy ParkwaySandy, Utah, 84070Telephone (801) 566-8800FAX (801) 566-7005International Distribution: 3 Overlook Drive, Unit 4Amherst, New Hampshire 03031 U.S.A.FAX (603) 672-4246VoTEC is a registered trademark of DODElectronics Copyright ©1998DOD ElectronicsPrinted in U.S.A.VoTECACCESSORIES FOR THE VoTECGig BagVCC1 VolumeContinuous ControllerWarrantyreturned to DOD WITH RETURN AUTHORIZATION, any circuit or assembly.4. Proof-of-purchase is considered to be the burden of the consumer.5. DOD reserves the right to make changes in design or make additions to or improvements upon this product without incurring any obligation to install the same on products previously manufactured.6. The foregoing is in lieu of all other warranties, expressed or implied, and DOD neither assumes nor authorizes any person to assume for it any obligation or liability in connection with the sale of this product. In no event shall DOD or its dealers be liable for special or consequential damages or from any delay in the performance of this warranty due to causes beyond their control.V o T E C O W N E R ÕS M A N U A L13DIGITAL/ANALOG PRESETS Array18-2212-A。
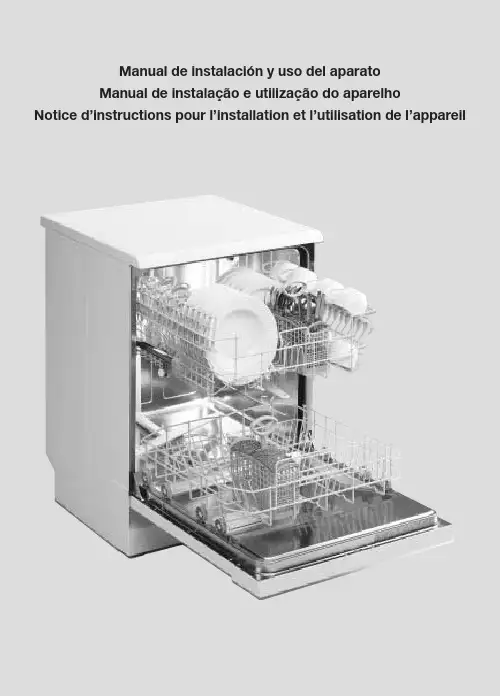
Manual de instalación y uso del aparatoManual de instalação e utilização do aparelhoNotice d’instructions pour l’installation et l’utilisation de l’appareilab1b2ASPES LA-36PModel Nº 060412369 aba b cdócalo Desatornille el z ócalo y ret írelo.Suelte los soportes patas y ret írelos.Extraiga las patasregulables de los soportes.Enrosque dichas patasregulables en el lavavajillas.Encaje el z ócalo del mueblede cocina, y, en caso deque sea necesario, si érrelohasta obtener la medida deseada.A continuaci óndesplegar hacia atr ás lostacos que soportan latapa.Algunos modelosintegrables incluyen unavarilla que permite nivelarlas patas traseras desdela parte frontal.Antes de introducir ellavavajillas en el huecoaprox ímelo y el évelogirando la pata traserahasta dejar un espaciode unos 3 mil ímetros conla encimera.Introduzca el lavavajillasen el hueco y aseg úrese de que los tubos y elcable quedan tr ás elz ócalo. Aj ústelo a laencimera hasta que laparte superior delaparato tome contactocon el plano inferior dela encimera del mueblede cocina.f cd eEspañolIntroduzca la tira en un vaso deb 1 min.a 1 sec.cEspañolREGULADOR Modelo B REGULADOR Modelo Ada DEPÓSITO DE SALcbVACIO LLENOEspañolba11Español Los cubiertos, aexcepción de loscuchillos, han de ponerseen el cesto para loscubiertos cuidando quelos mangos queden haciaabajo.En el cestillo superiorse colocan las piezasmás delicadas, comotazas, vasos, porcelanao cristal y platos detamaño estándar. Hayuna zona destinadaparticularmente a loscubiertos largos.Asimismo, hay unossoportes que, puestos enposición vertical, sirvenpara colocar copas.programaónha de.ón Carga, se cargarácestillo13bón de los óños.ón alta podr óáCestillo superior modelo B:Retire el tope que impide que salgan las ruedas del cestillo del rail. Tire hacia usted del cestillo y s áquelo.Coloque el cestillo en la altura deseada.Vuelva a colocar el tope en su posici ón original.modelo A:Puede regularse sin necesidad de extraerlo de sus ra íles incluso con la vajilla colocada.Tanto para subirlo como para bajarlo de posici ón, deber á tirar del cestillo hacia arriba sujet ándolo de las asas laterales.Aseg úrese de que ambos lados est án a la misma altura, si no es as í, niv élelo.abEspañolTABLA DE PROGRAMAS-MODELO DE 1 TECLATABLA DE PROGRAMAS-MODELO DE 2 TECLAS* El programa 3, programa normalizado según EN-50242TABLA DE PROGRAMAS-MODELO DE 3 TECLASEn los lavavajillas sin 1/2 cargaEspañol TABLA DE PROGRAMAS-MODELO DE 4 TECLAS* El programa 3, programa normalizado según EN-50242Media cargaSi su lavavajillas dispone de la tecla 1/2 Vd. tiene la posibilidad de lavar sólo media vajilla(6 cubiertos). Para ello deberá: 1) elegir el programa según se indica en los cuadros correspondientes; 2) pulsar la tecla 1/2 y 3) colocar la vajilla en el cestillo superior. La cantidad de detergente a añadir es de 15+5 grs. en el Programa Intensivo y 15 grs. en elresto de programas.TABLA DE PROGRAMAS-MODELO DE 5 TECLAS* El programa 3, programa normalizado según EN-5024217a bdcEspañolahorros importantes de energPara mas informaciadquirió el producto.23Esquemas y medidas de instalación Esquemas e dimensões de instalação Schémas et cotes d'installation06/06V28F013E8。
电冰箱使用说明书
温度调节
温度旋钮
用来调节冰箱内温度,旋钮上的数字不代表具体温度,在相同的室内温度下,数字越大,箱内温度越低;数字越小,箱内温度越高。
“0”为停机点,这时冰箱不运转;
“7”为强冷点,在需要加速制冷的时候使用。
一般冬天宜将旋钮调到“1~4”之间;夏天宜将旋钮调到“4~7”之间。
使用注意事项
制冰室用来冰冻或储藏食品和制取少量冰块,不得存放玻璃瓶装或灌装密封液体物品,以免由于液体冻结后,体积膨胀而破裂。
冰盒用于制取冰块,注入五分之四容量的凉开水,置于制冰室,紧贴底部就可以制取冰块,若要加速制冰,应将温度旋钮旋到强制冷点“7”处。
取冰块时,只需扭动冰盒就可以使冰块与冰盒分离。
但切勿折弯冰盒,以免断裂。
制冰时间较长,取冰时不可直接用手握住冰盒,以免冻伤。
接水盒
盛接化霜水,务必定时检查接水盘中的化霜水,及时把化霜水倒掉,以免溢落于冰箱内和地板上,造成漏电和生锈。
门封
起密封保温作用,使用时要防止油渍弄脏和变形。
物品不宜摆放过密,以利于冷气循环。
热的食品应冷却至室温再放入冰箱。
减少开关们的次数及时间以减少冷气流失。
可以洗涤的食品最好先洗净,擦干水分后贮藏。
若接到停电通知,可提前将2~3小时将温度旋钮旋到强冷点“7”,并尽可能的做制去冰块置于冷藏室内。
停电后尽可能减少开门次数。
若停电时间过长,再次解冻电源前,请把接水盘的化霜水倒掉,并检查是否霜水残积在制冰室和箱内底面上,如有,务必清除掉。
Serie | 8, Built-in fridge-freezer with freezer at bottom, 177.2 x 55.8 cm,flat hingeKIF84PF30Included accessories2 x cold accumulator3 x egg tray1 x ice cube tray with lid1 x bottle holder in door trayBuilt-in bottom freezer combination withVitaFresh pro: thanks to ideal storageconditions your food stays vitamin-rich andfresher for longer.VitaFresh pro 0°C: keeps fruit, vegetables, fish and meat freshfresher for longer – thanks to 0°C technology and optimalhumidityLED lights bring a completely new lighting concept to fridgesVarioZone: more flexibility due to variable-use glass shelvesand drawers in the freezer compartment.BigBox frozen food drawer: for stacking storage containers orfor large frozen food items.LowFrost: defrost less often thanks to lower ice formation -saves work and is energy-efficient.Technical DataConstruction type : Built-inDoor panel options : Not possibleWidth of the appliance : 558 mmDepth of the product : 545 mmRequired niche size for installation (HxWxD) : 1775.0 x 560 x550 mmNet weight : 69.082 kgConnection rating : 90 WFuse protection : 10 ADoor hinge : Right reversibleVoltage : 220-240 VFrequency : 50 HzApproval certificates : CE, VDELength of electrical supply cord : 230 cmStorage Period in Event of Power Failure (h) : 21 hNumber of compressors : 1Number of independent cooling systems : 2Interior ventilator : NoReversible Door Hinge : YesNumber of Adjustable Shelves in fridge compartment (Stck) : 2Shelves for Bottles : NoEAN code : 4242005059560Brand : BoschProduct name / Commercial code : KIF84PF30Energy consumption annual - NEW (2010/30/EC) : 229.00 kWh/annumRefrigerator Net capacity - NEW (2010/30/EC) : 159 lFreezer Net capacity - NEW (2010/30/EC) : 75 lFrost free system : NoFreezing capacity) - NEW (2010/30/EC) : 8 kg/24hClimate class : SN-STNoise level : 34 dB(A) re 1 pWInstallation type : Full-integrated'!2E20A F-a f j f g a!1/3Serie | 8, Built-in fridge-freezer with freezer at bottom, 177.2 x 55.8 cm, flat hinge KIF84PF30Built-in bottom freezer combination with VitaFresh pro: thanks to ideal storageconditions your food stays vitamin-rich and fresher for longer.Performance and Consumption-Energy Efficiency Class: A++ kWh/yr: 0.627 kWh -Total net capacity: 234 l litres -Net fridge capacity: 159 litres -Net freezer capacity: 75 litres -Noise level dB(A) re 1 pW: 34Design features-easy Installation-Manual defrost freezer-Fixed hinge, softClosing door: No -Right hinged door, door reversible-Electronic control for fridge and freezer with LED display -Removable magnetic door seals - easy to cleanFood freshness system-1 VitaFresh pro 0°C drawer with humidity control - fruits andvegetables stay vitamin-rich and fresher for longer.-FreshSense - Constant temperature control by intelligent sensor technology-Two separate cooling circuits allow independent temperaturecontrol and prevents the transference of humidity between the fridge and freezer cavityKey features - Fridge section-Bright interior LED fridge light-3 safety glass shelves (2 height adjustable)-Super Cooling: automatic deactivationKey features - Freezer section-4 star freezer rating-Vario Zone - removable safety glass shelves for extra space!-3 transparent freezer drawers, including 1 BigBox -Freezing capacity in 24 hours: 8 kg-Maximum freezer storage time in power failure: 21 hoursFunctions-Freezer malfunction warning signal: optical and accoustical -SuperFreezing function with automatic deactivation -Optical and acoustical door open warning-2 x cold accumulator, 3 x egg tray, 1 x ice cube tray, .Dimension and installation-Connection value 90 W -220 - 240 V-Dimensions: 177.2 cm H x 55.8 cm W x 54.5 cm D -Niche Dimensions: 177.5 cm H x 56 cm W x 55 cm D -Climate class SN-ST (suitable for ambient temperaturesbetween 10 to 38°C)2/3Serie | 8, Built-in fridge-freezer with freezerat bottom, 177.2 x 55.8 cm, flat hingeKIF84PF303/3。
18 cu. ft. Top-Freezer RefrigeratorWRT318FZDTotal Capacity 18 cu. ft.Refrigerator Capacity 13 cu. ft.Freezer Capacity5 cu. ft.Freezer Temperature Controls Frameless Glass Shelves EZ Connect Icemaker Kit ADA Compliant#1 Selling Appliance Brand in the U.S.A.*Electrical DetailsAmps6.5Volts115CertificationsADA CompliantYesRefrigerator Type Top-Freezer Number of Doors 2Number of Interior Refrigerator Shelves 3Number of Refrigerator Door Bins5 Fixed Number of Interior Freezer Shelves1Number of Freezer Door Bins 2 Fixed Lighting Type Incandescent Ice MakerOptional Ice Maker LocationFreezer Dispenser TypeN/ADimensionsProduct Dimensions (H x W x D)65-7/8" x 29-3/4" x 33-1/2"Depth with Door Open 90°59-3/4"Cutout DimensionsAllow extra 1/2" on sides and topAllow extra 1" on rearReference MaterialDimension Guide Install GuideUse & Care Guide Energy Guide Warranty*Based on 12-month average of unit sales. Refrigeration, Cooking, Dishwashers and Laundry appliances. TraQline 2018. NOTE: Dimensions are for planning purposes only. For complete details, see Installation Instructions packed with product. Specifications subject to change without notice.®/™ © 2020. All rights reserved. Printed in the U.S.A. D200052XXC. WRT318FZDSPECSHEETV01.Monochromatic Stainless SteelWRT318FZDMAlso available in:WhiteWRT318FZDW BlackWRT318FZDBFlexi-Slide ™ BinMake space for tall items with the bin that quickly and easily moves side to side.Quiet CoolingKeep noise down in the kitchen with quiet cooling.Electronic Temperature ControlsChoose the ideal temperature for whatever foods you’re storing with up-front controls.。
电冰箱使用说明书
温度调节
温度旋钮
用来调节冰箱内温度,旋钮上的数字不代表具体温度,在相同的室内温度下,数字越大,箱内温度越低;数字越小,箱内温度越高。
“0”为停机点,这时冰箱不运转;
“7”为强冷点,在需要加速制冷的时候使用。
一般冬天宜将旋钮调到“1~4”之间;夏天宜将旋钮调到“4~7”之间。
使用注意事项
制冰室用来冰冻或储藏食品和制取少量冰块,不得存放玻璃瓶装或灌装密封液体物品,以免由于液体冻结后,体积膨胀而破裂。
冰盒用于制取冰块,注入五分之四容量的凉开水,置于制冰室,紧贴底部就可以制取冰块,若要加速制冰,应将温度旋钮旋到强制冷点“7”处。
取冰块时,只需扭动冰盒就可以使冰块与冰盒分离。
但切勿折弯冰盒,以免断裂。
制冰时间较长,取冰时不可直接用手握住冰盒,以免冻伤。
接水盒
盛接化霜水,务必定时检查接水盘中的化霜水,及时把化霜水倒掉,以免溢落于冰箱内和地板上,造成漏电和生锈。
门封
起密封保温作用,使用时要防止油渍弄脏和变形。
物品不宜摆放过密,以利于冷气循环。
热的食品应冷却至室温再放入冰箱。
减少开关们的次数及时间以减少冷气流失。
可以洗涤的食品最好先洗净,擦干水分后贮藏。
若接到停电通知,可提前将2~3小时将温度旋钮旋到强冷点“7”,并尽可能的做制去冰块置于冷藏室内。
停电后尽可能减少开门次数。
若停电时间过长,再次解冻电源前,请把接水盘的化霜水倒掉,并检查是否霜水残积在制冰室和箱内底面上,如有,务必清除掉。
惠而浦8430A冰箱说明书
惠而浦8430A冰箱的制冷剂干饱和气体经过压缩机时被压缩机压缩为高温高压的过热制冷剂蒸汽,经过压缩机的膨胀阀活塞的排气管进入到冷凝器中,高温高压的制冷剂蒸汽在冷凝器中被冷凝为高压低温的液体,之后这一液体进入到惠而浦8430A冰箱过滤器后经过毛细血管,在毛细血管中等焓节流变成低温低压的的制冷剂蒸汽,之后这一低温低压的制冷剂在等压的蒸发器中沸腾大量的吸收外界的热量变成饱和的蒸汽,实现了惠而浦8430A冰箱的制冷过程,最后制冷剂再次被压缩机吸入进行冷循环。
用来调节惠而浦8430A冰箱内温度,旋钮上的数字不代表具体温度,在相同的室内温度下,数字越大,箱内温度越低;数字越小,箱内温度越高。
“0”为停机点,这时惠而浦8430A冰箱不运转;“7”为强冷点,在需要加速制冷的时候使用。
一般冬天宜将旋钮调到“1~4”之间;夏天宜将旋钮调到“4~7”之间。
有很多的食物是不适合放在惠而浦8430A冰箱中的,比如说西红柿,西红柿在经过低温的冷冻之后会出现裂纹表面还会有严重的黑斑;火腿经过低温的储存之后,肉块会结块或是松散,非常容易腐败。
惠而浦8430A冰箱使用的时间长久之后会散发出一股异味,在这个时候应该使用一条干净的棉毛巾,折叠整齐放在惠而浦8430A 冰箱的网架上,它可以吸附惠而浦8430A冰箱中的异味,并且毛巾清洗晒干之后还能继续的使用;或者是将蒸馒头时的生面取出一小块放在冷藏室的上面,这样可以保持惠而浦8430A冰箱在几个月内没有异味。
惠而浦8430A冰箱内的温度最好控制在零下18摄氏度左右,这样和零下20几度相比更加的省电节能,我们还可以购买几袋冰袋放在惠而浦8430A冰箱之中,减少惠而浦8430A冰箱内部冷量的流失。
同时我们还要定时的为惠而浦8430A冰箱除霜。
惠而浦8430A冰箱要经常的对惠而浦8430A冰箱进行清洗,惠而浦8430A冰箱封条上的微生物十分的多,这些微生物很容易导致人生病,我们在清洗的时候最好用酒精浸透过的抹布擦拭封条。
惠而浦8430A冰箱内的食物存储的时间过长会影响食品的新鲜度同时还会产生异味,所以储藏在惠而浦8430A冰箱中的食物最好不要超过1个月。
惠而浦8430A冰箱中存放的食物最好用保鲜袋分开包装,使用的时候取出一定的量,这样既能节能也能减少食物的反复解冻。
惠而浦8430A冰箱里也不能存放太多的食物,食物在存储时一定要留
下一定的空隙有利于冷气的循环,对降低食物的温度也非常的有效,减少压缩机的运转。