DIeband设备说明书
- 格式:doc
- 大小:504.00 KB
- 文档页数:6
液晶图像拼接处理控制器使用手册◆本设备不适合非专业人员操作调试,使用者须接受专业人员培训和指导◆使用前请仔细阅读本说明书,说明书应妥善保存以备用温馨提示◆为了您和设备的安全,请您在使用设备前务必仔细阅读产品说明书。
◆如果在使用过程中遇到疑问,请首先阅读本说明书。
正文中有设备操作的详细描述,请按书中介绍规操作。
如仍有疑问,请联系我们,我们尽快给您满意的答复。
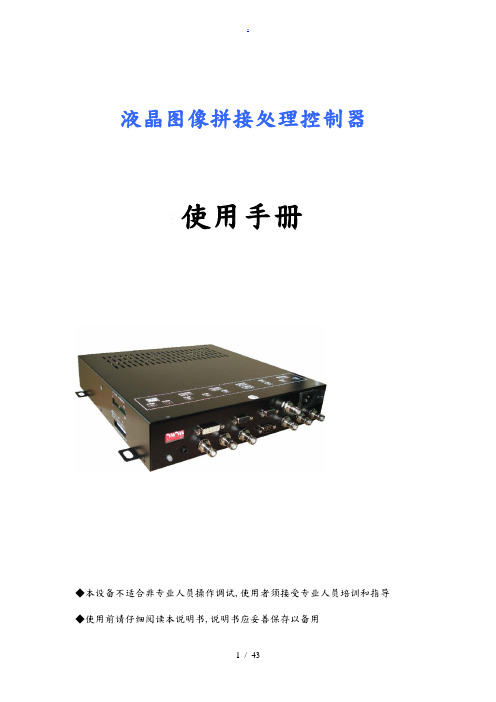
◆本说明书如有版本变动,恕不另行通知,敬请见谅!产品照片:产品正面产品侧面产品侧面产品的侧面目录页码标题封面3 目录4 安全注意事项5 控制单元指示与ID设定7 遥控器说明安全注意事项◆当设备中有烟雾或特殊气味出来,立即将电源开关切至关闭状态并将电源插头拔出。
在确定烟雾停止冒出后,联系供货商来修理。
如果不检查继续使用,可能会导致火灾或触电伤害。
◆当显示屏幕没有任何图像显示时,立即将电源开关切至关闭状态并将电源插头拔出,联系供货商来修理。
如果不检查继续使用,可能会导致火灾或触电伤害。
◆当有水或其它外来物质进入本设备,立即将电源开关切至关闭状态并将源插头拔出,联系供货商来修理。
如果不检查继续使用,可能会导致火灾或触电伤害。
◆当设备倒下或箱体摔坏,立即将电源开关切至关闭状态并将电源插头拔出,然后联系供货商来修理。
如果不检查继续使用,可能会导致火灾或触电伤害。
◆不可阻塞设备的排风口,或阻碍设备周围的空气流通,则设备的温度会升高进而容易引发火灾。
◆不可将本设备设置在油烟、蒸汽中,例如靠进厨房或布满灰尘的环境。
◆不可将本设备设置在风中或雨中,否则屏幕会被风吹落而发生意外,雨水进入设备会引起火灾或触电事故发生。
◆请不要轻易拆卸整机后盖,因机箱中有高压,若不小心容易触电。
◆请用户不要自行拆装避免火灾或触电发生;如需要维修,请联系供货商。
◆请不要轻易改变电源线的位置,尽量做到不强行弯曲、勿接近热源,避免火灾或触电发生。
◆不可将本设备放置在潮湿的环境中,不可在设备附近放置湿度调节器,太潮湿的环境会导致火灾或触电发生,而且屏幕会导致退化或破碎进而造成伤害事故发生。

ContentsPagen o i t p i r c s e D Introduction ..............................2Installation . (3)Installation Instructions for Alarm (Signal)/Lockout Switch and Alarm (Signal)/Lockout Switch and Auxiliary Switch Combination for DK, KDB, KD, HKD, KDC, KW, HKW, KWCCircuit Breakers, Molded Case Switches, and K-Frame Motor Circuit Protectors (HMCP)Instruction Leaflet IL29C182F E ective February 2015Installation Instructions for Alarm (Signal)/Lockout Switch and Alarm (Signal)/Lockout Switch and Auxiliary Switch Combination for DK, KDB, KD, HKD, KDC, KW, HKW, KWCCircuit Breakers, Molded Case Switches, and K-Frame Motor Circuit Protectors (HMCP)EATON CORPORATION 23Instruction Leaflet IL29C182FInstallation Instructions for Alarm (Signal)/Lockout Switch and Alarm (Signal)/Lockout Switch and Auxiliary Switch Combination for DK, KDB, KD, HKD, KDC, KW, HKW, KWC Circuit Breakers, Molded Case Switches, and K-Frame Motor Circuit Protectors (HMCP)EATON CORPORATION E ective February 20154Instruction Leaflet IL29C182FInstallation Instructions for Alarm (Signal)/Lockout Switch and Alarm (Signal)/Lockout Switch and Auxiliary Switch Combination for DK, KDB, KD, HKD, KDC, KW, HKW, KWC Circuit Breakers, Molded Case Switches, and K-Frame Motor Circuit Protectors (HMCP)EATON CORPORATION Labels (Supplied Comb AlarmConnection Diagram Label (Pigtail Lead Label Shown)AccessoryIdent. LabelWire Marking Labels (Supplied With Double Alarm Sw. Only)Replacement Interphase BarrierWire MarkingLabels (SuppliedWith Comb.Alarm Aux. Sw.Only)Plug-In Module With Pigtail Leads (Double ASL Switch Shown)E ective February 20155Instruction Leaflet IL29C182FInstallation Instructions for Alarm (Signal)/Lockout Switch and Alarm (Signal)/Lockout Switch and Auxiliary Switch Combination for DK, KDB, KD, HKD, KDC, KW, HKW, KWC Circuit Breakers, Molded Case Switches, and K-Frame Motor Circuit Protectors (HMCP)EATON CORPORATION RecessedRecessed HoleHoleTripUnitRear Exiting LeadsPreferredSide Exiting LeadsTerminal BlockOpposite -Side Exiting LeadsSupplied With ASL Switch KitHandle Retaining Screw Molded Handle Handle ArmCradle Reset PinInterphase BarrierAt Angle ToPosition Actuator Arm Under CradleASL Switch Actuator ArmCradleSlot InReplacement Interphase BarrierE ective February 2015Instruction Leaflet IL29C182F Installation Instructions for Alarm (Signal)/Lockout Switch and Alarm (Signal)/LockoutSwitch and Auxiliary Switch Combination for DK, KDB, KD, HKD, KDC, KW, HKW, KWCCircuit Breakers, Molded Case Switches, and K-Frame Motor Circuit Protectors (HMCP)EATON CORPORATION Arm (Must BeAnd OperatedBy the Cradle)(Interphase Barrier Omitted for Clarity)UnitCircuitBreakerHandlePositioned UnderAccessoryCombination Module t oPosition ASL SwitchActuator A r m UnderASL SwitchActuator A r mSlot In Replacementlnterphase BarrierCradleAuxiliarySwitchASL Switch(Cutaway toShow Detail)CradleAccessoryOperatingProjectionAuxiliarySwitchOperatingArmE ective February 201567Instruction Leaflet IL29C182FInstallation Instructions for Alarm (Signal)/Lockout Switch and Alarm (Signal)/Lockout Switch and Auxiliary Switch Combination for DK, KDB, KD, HKD, KDC, KW, HKW, KWC Circuit Breakers, Molded Case Switches, and K-Frame Motor Circuit Protectors (HMCP)EATON CORPORATION E ective February 20158Instruction Leaflet IL29C182FInstallation Instructions for Alarm (Signal)/Lockout Switch and Alarm (Signal)/Lockout Switch and Auxiliary Switch Combination for DK, KDB, KD, HKD, KDC, KW, HKW, KWC Circuit Breakers, Molded Case Switches, and K-Frame Motor Circuit Protectors (HMCP)EATON CORPORATION 312E ective February 20159Instruction Leaflet IL29C182FInstallation Instructions for Alarm (Signal)/Lockout Switch and Alarm (Signal)/Lockout Switch and Auxiliary Switch Combination for DK, KDB, KD, HKD, KDC, KW, HKW, KWC Circuit Breakers, Molded Case Switches, and K-Frame Motor Circuit Protectors (HMCP)EATON CORPORATION E ective February 2015Instruction Leaflet IL29C182F Installation Instructions for Alarm (Signal)/Lockout Switch and Alarm (Signal)/LockoutSwitch and Auxiliary Switch Combination for DK, KDB, KD, HKD, KDC, KW, HKW, KWCCircuit Breakers, Molded Case Switches, and K-Frame Motor Circuit Protectors (HMCP)Eaton CorporationElectrical Group1000 Cherrington ParkwayMoon Township, PA 15108United States877-ETN-CARE (877-386-2273)© 2013 Eaton CorporationAll Rights ReservedPrinted in Dominican Republic Publication No. IL 29C182E / TBG000553 Part No. 6632C65H06February 2015Eaton is a registered trademark of Eaton Corporation.All other trademarks are property of their respective owners.The instructions for installation, testing, maintenance, or repairherein are provided for the use of the product in general commercial applications and may not be appropriate for use in nuclear applica-tions. Additional instructions may be available upon requestto replace, amend, or supplement these instructions to qualify themfor use with the product in safety-related applications in a nuclear facility.The information, recommendations, descriptions, and safety nota-tions in this document are based on Eaton’s experience and judg-ment with respect to R tting of Power Breakers. This instruction-al literature is published solely for information purposes and shouldnot be considered all-inclusive. If further information is required, you should consult an authorized Eaton sales representative.The sale of the product shown in this literature is subject to theterms and conditions outlined in appropriate Eaton selling policiesor other contractual agreement between the parties. This literatureis not intended to and does not enlarge or add to any such contract. The sole source governing the rights and remedies of any purchaserof this equipment is the contract between the purchaser and Eaton.NO WARRANTIES, EXPRESSED OR IMPLIED, INCLUDING WARRANTIES OF FITNESS FOR A PARTICULAR PURPOSE OR MERCHANTABILITY, OR WARRANTIES ARISING FROM COURSE OF DEALING OR USAGE OF TRADE, ARE MADE REGARDING THE INFORMATION, RECOMMENDATIONS, AND DESCRIPTIONS CONTAINED HEREIN. In no event will Eaton be responsible to the purchaser or user in contract, in tort (including negligence), strict liability or otherwise for any special, indirect, incidental or conse-quential damage or loss whatsoever, including but not limited to damage or loss of use of equipment, plant or power system, costof capital, loss of power, additional expenses in the use of existing power facilities, or claims against the purchaser or user by its cus-tomers resulting from the use of the information, recommendations and description contained herein.E ective February 2015。

DESAY M818 GSM双频GPRS功能数字移动电话 使用手册基本知识简介 感谢您选择DESAY M818彩屏GSM/GPRS数字移动电话。
您可以通过阅读本手册,全面地了解DESAY M818手机的使用,领略其完善的功能和简洁的操作方法。
DESAY M818彩屏手机是针对GSM/GPRS网络环境而设计的。
除了基本的通话功能外,DESAY M818还为您提供了包括智能中英文输入、名片夹式电话簿、个性化64和弦来电铃声、来电图片、闹钟、照相机、MP3播放、摄像机、U盘、录音机、计算器、定时开关机、待办事项、GPRS上网、彩信、免提通话等在内的多种实用功能,以方便您的工作和休闲活动,此外,DESAY M818采用个性化人机界面设计,其完善的功能可以满足您的不同需求。
DESAY M818彩屏手机符合GSM/GPRS技术规范,并获得权威机构认证。
我公司保留在不作任何预先通知的情况下对本手册中内容作修改的权利。
注:手机中有关照相机、MP3播放、摄相机、录音机、功能均需插入记忆卡。
安 全 须 知 n 如果您的手机丢失或被窃,请立即通知电信部门或代销点,以禁用SIM卡。
这将使您免受他人冒打电话所带来的经济损失。
n 当您与电信部门或代销点联系时,他们需要知道您手机的IMEI号(印在手机背部的标签上,取下电池即可发现)。
请将该号码抄留并妥善保管,以备将来之需。
n 为使您更加安全的使用手机,请采取防范措施,如: - 设置好手机SIM卡的PIN码,PIN码可防止您的SIM卡被未经许可的他人使用。
- 离开汽车时,请不要把手机放在易见之处,最好随身携带或锁在行李箱中。
- 设置呼叫限制。
安全警告和注意事项 使用手机前请仔细阅读这些注意事项以确保正确地使用手机。
通用注意事项 n 在飞机上、医院里等禁止使用手机的地方请关闭手机,否则会影响电子设备和医疗仪器的正常工作。
在这些地方使用手机,请遵守该场所的相关规定。
n 请严格遵守您开车所在地有关使用手机的法律法规。

English 中文 Deutsche Sprach 日本語CD Player User ManualModel: CD903TFDear user:Thank you for choosing a portable CD player from HOTT. We wish you a happy experience, please read this manual carefully before use and keep this manual in a safe place for your use.AccessoriesCD Player User Manual Power cable Audio cable EarphoneKey Function Description: Turn on / Turn offLong press 3s to start and play. Under backlight starting state, long press 3s above to shut down.: Play/PauseShort-press to pause / play when playing.: Prev song/Fast RewindShort-press for once to replay the song when playing, short-press for twice to skip to the previous track, long-press to fast backward:Next song/Fast forwardIn the playing state, press short to play the next song, and press long to fast forward :EQ Sound mode /MP3 disk track list selecting playShort-press sequence(BBS)→(POP)→(JAZZ)→(ROCK)→(CLASSIC)→(Back to the original state).In the playing state, double-click , skip to DIR track area and select play. CD has no trackfunction. Double-clicking has no effect.:Play modeIn the playing state, short press to skip to: Single cycle play; ALL: All songs are played in a loop; DIR Select to play in the track area; INTRO:INTROSCAN; SHUF:Play in any order, and unplay the mode.(Note: MP3 disc has full play mode.Except for "select play" in the DIR track area, the CD has all other play modes.)Bluetooth FunctionIn the playing state, long press to open the bluetooth device. The icon flashes to enterthe pairing mode. It will automatically connect to an open bluetooth headset or bluetooth speaker nearby in the 50s. Long press again to switch to reconnect or disconnect bluetooth transmit function, The paired device can be reconnected automatically after starting up.FM FunctionIn the playing state, long press key to enter FM transmission state. Short press orto adjust the frequency band (frequency band range: 87.5HZ-108.0Hz). Long press orto adjust the previous song or next song. Short press the key to pause/play the song. Then,long press to normally exit the FM transmission state and return to the song playing interface.Note: When CD player is in FM transmitting state, use the equipment with FM receiving function and adjust to the same frequency band as CD player to normally listen songs.Bluetooth and FM can only be operated in a single, and can not run at the same time.1.HOLD( ON / OFF): Lock/unlock switch control (you need to unplug the button to the OFF position before starting it). -ON: key lock -OFF: UnlockVolume -/Volume +: The volume control switch can adjust the volume under the playingCheck if the supply voltage on the power adapter type board corresponds to the local power Plug the power adapter cable into the >>USB 5V<< socket.- If >>Specification Power input:USB ----5V 1ASupport disc format:Original CD disc, MP3 disc ,CD-R, CD-RW ;Support music formats:CD-DA,MP3,WMACharge Time:3-4 hoursPlay Time:>10 hoursOverall Dimension:∮142X28mmBluetooth range:10 mhis device complies with Part 15 of the FCC Rules.Operation is subject to the following two conditions:(1) this device may not cause harmful interference, and(2) this device must accept any interference received,including interference that may cause undesired operation.Any changes or modifications not expressly approved by the party responsiblefor compliance could void the user's authority to operate the equipment.FCC ID: YB2-CD903Safety CautionBe careful when setting the volume to prevent excessive output power from damaging your hearing.Avoid the system contact with moisture, rain, sand or all kinds of heat sources, and do not place vases or other liquid containers on the equipment.When cleaning, please use a slightly damp soft cloth to clean the device, and never usealcohol or benzene solvent to clean it.Please turn off the main power switch of the equipment when not in use for a long time.Do not repair the equipment by yourself. The user will be responsible for the damage of the equipment caused by self-repair.Matters Need Attention In order to use the player correctly, please read it carefully and comply with it.Do not severely hit the host.Do not contact benzene, diluent and other chemicals.Please keep away from strong magnetic and electric fields.Avoid direct light or heaters.Never heat or throw the battery into fireDo not disassemble, repair or transform by yourself.Do not use the player and earphones when riding a bicycle, driving a car, or a motorcycle toavoid danger.Do not listen at a high volume to avoid harmful effects on hearing.Please sort and dispose of waste packaging, batteries and old electronic products properly.Important tip:A cracked disc may cause the player failure, please do not use it. If there are serious scratches, fingerprints and dirt on the signal surface of the optical disc, it may cause equipment failure or shorten the service life of the laser head to read the disc.Service Team: Email:******************CD随身听用户手册型号:CD903TF尊敬的用户:感谢选择HOTT出品的便携式CD播放器。

MC ETD2User GuideMC ETD2User GuideIntroductionThe Motion Control ETD2 marks the second generation of the Electric Terminal Device. Continuing the features of the previous ETD, the ETD2 is robust, lightweight and water-resistant to provide a high level of functionality to persons with upper extremity limb loss.The ETD2 is manufactured with metal inserts in the fingers, over molded with plastic for strength and durability. The result is a sleek, aesthetically integrated form. The Gripping Pads can be quickly and easily replaced by your prosthetist. The safety release allows the fingers to be opened in case of emergency. The ETD2 is a member of the ProPlus Family of Motion Control devices. The ProPlus on-board microprocessor makes the ETD2 interchangeable with almost all other hands and terminal devices on the market. Additionally, the on-board microprocessor allows use of a brushless DC motor which makes your device quieter and much more dependable.Bluetooth® provides convenient communication between your ETD2 and an iPhone®, iPad® or iPod®Touch. This allows easy adjustability for your Prosthetist to get the highest level of performance and fine control of your ETD2. Additionally, you can communicate with your ETD2 to make several changes to the device, and use it for training to improve your control.SAFETYRELEASEQuick Disconnect Wrist POWER SWITCHOutside FrictionPadsReplaceableGripping Pads Large opening, wide surface area for cylindrical objectsSleeve Rentention Ring MC ETD22The MC ETD2 is water-resistant, not waterproof While the Motion Control ETD2 is water-resistant, the quick disconnect wrist is not. Do notsubmerse the ETD2 beyond the wrist..Flammable Gases Caution should be used when operating the ETD2 around flammable gases. The ETD2 utilizes an electric motor that can ignite volatile gases.Do not bend fingers While the MC ETD2 is robust, body weight represents a great deal of force. Do not apply full body weight on the fingers. A fall with the force directed to the fingers could cause damage. Additionally, when pushing forcefully with the ETD2 do not push on the open, moveable finger. Push only with the ETD2 in the closed position. This includes pushing up from a chair. If the fingers do becomebent or out of alignment, return the ETD2 to Motion Control.Safety Release Do not force the ETD2 fingers opened or closed. This will result in serious damage to the device. The safety release will allow easy opening and closing of the ETD2. If the release mechanism does not allow motion, the device requires service by Motion Control.Repairs or Alterations Do not attempt to repair or alter any of the mechanical or electronic components of the MC ETD2.This will likely cause damage, additional repairs and void the warranty.Setup Using the User Interface While the default settings in the MC ETD2 may allow the patient to operate the system, it is highlyrecommended the prosthetist utilize the User Interface to customize the settings for the wearer.Power SwitchThe power switch is located at the base of the ETD2. Pushing from the side opposite the fingertips will turn the ETD2 ON. Pushing from the fingertip side will turn the ETD2 OFF.Safety Caution Use caution when using this device in situations where injury to yourself or others may occur. These include, but are not limited to, activities such as driving, operating heavy machinery, or any activity where injury may occur. Conditions such as a low or dead battery, loss of electrode contact, or mechanical/electrical malfunction (and others) may cause the device to behave differently than expected.Special Precautions PUSH ON PUSH OFF3Quick Disconnect WristThe Quick Disconnect wrist is a universal design that allows interchangeability with our other terminal devices, such as the MC ProPlus Hand, and other manufacturers’ devices.Finger Lining ReplacementT he gripping surfaces on the fingers of the ETD2 can be replaced. This replacement should be performed by your prosthetist.Instructions for UseBefore attaching the MC ETD2 to the forearm, locate the power switch at the base of the ETD2. Ensure it is switched OFF (see diagram, page 3).I nsert the quick disconnect wrist on the ETD2 into the wrist on the forearm. While pushing it in firmly, rotate the ETD2 until an audible click is heard. It is advisable to rotate the ETD2 both directions several clicks, then attempt to pull the ETD2 off to ensure it has attached firmly .Now, push the power switch in the opposite direction and the ETD2 is ON and ready for use.T o disconnect the ETD2, first turn it OFF, then rotate it either direction until a slightly more difficult click is felt. Overcoming this click will disconnect the ETD2 from the forearm. This allows interchangeability withanother terminal device, such as the MC ProPlus Hand.Safety ReleaseOn a Left ETD2, the safety release is located on the same side as the fingertips. On a Right ETD2, the safety release is located on the side opposite the fingertips.To engage the fingers, ensure the safety release lever points toward the fingertips. To release the fingers, rotate the lever 90 degrees, toward the moveable finger.SAFETY RELEASEUser Interface AdjustmentsEach of the ProPlus family of Motion Control products contains a microprocessor that can be adjusted and set for a specific individual’s needs. Wearers without EMG signals can also be accommodated, but some additional hardware may be necessary. The software necessary to make these adjustments is provided at no charge to the prosthetist or end user.iOS User InterfaceThe MC ETD2 communicates via Bluetooth ® directly with Apple ® iOS devices. The MCUI app is available at no charge from the Apple ® App Store*. No additional hardware or adapters are necessary with the iOS Interface.I nstructions for loading the MCUI application onto your Apple ® device, and pairing the device using Bluetooth ®, can be found on page 8.4Patient/Prosthetist ControlsUpon opening the iOS Application you will be asked “Patient” or “Prosthetist” – select “Patient”. While you as a patient are allowed to navigate the entire application, many of the adjustments are “grayed out” as those can only be changed by your prosthetist.However, you are still able to see the strength of your EMG, or other input signals, to allow you to exercise those muscles.Additionally, you may change any adjustments that are not “grayed out”. These include such settings as buzzers, and several of the FLAG adjustments (FLAG is an optional feature).U ser ProfilesY ou are able to save your profile in the User Profile section of the iOS User Interface. It is advisable to save your profile on your device, and your prosthetist is advised to save it on his, also. This will provide abackup in case any repairs or firmware updates are required.T he first time the application is opened, a tutorial is offered. This overview will take 10 to 15 minutes and is recommended. Additionally, located throughout the application is a context-sensitive information icon. Tapping this icon will briefly explain the function of that adjustment .*Note: The MCUI app is not available for Android devices.Auto-CalAuto-Cal is a feature on every ProPlus device. Use Auto-Cal only at the direction of your prosthetist. Triggering an Auto-Cal event will likely cause loss of the settings your prosthetist has programmed into your device.If your prosthetist has instructed you in the use of Auto-Cal, you can trigger an Auto-Cal event by tapping the icon at “Start Calibration”, then give moderate open and close signals for 7 seconds. The iOS device will prompt you. It is important you make these moderate signals, as too strong a signal will result in the device running slowly. Too weak a signal will result in a device that is difficult to control.A fter “Auto-Cal Calibration” you will be asked if you like these settings. Try opening and closing quickly and then attempt lightly grasping objects. If you are able to do both, accept the calibration. If you do not have adequate control, tap “Retry”.Note: When you accept Auto-Cal settings, your previous settings are lost. If your prosthetist has set up custom settings, do not trigger Auto-Cal calibration.5FLAG (Optional)FLAG (Force Limiting, Auto Grasp) is an optional feature for the MC ProPlus Hand, ETD and ETD2 terminal devices. FLAG provides two functions:• Force Limiting, to prevent crushing objects due to excessive pinch force• Auto Grasp, which slightly increases the grip on an object if an inadvertent open signal is detected by the controllerTurn FLAG On/OffUpon power up, FLAG is turned off. The TD should be closed, then opened, before using FLAG. To turn FLAG on, give the device a “Hold Open” signal (for ~ 3 sec.)**. When FLAG turns on, the wearer will feel one long vibration. A “Hold Open” signal (for ~ 3 sec.)** will turn FLAG off, and two short vibrations will be felt by the wearer.Note: If a series of 5 vibrations is felt upon a “Hold Open”, it could indicate a malfunction in the FLAG sensor.Turn the device off, and back on, then completely open and completely close the device. Retry the “Hold Open” signal to activate FLAG. If 5 vibrations are felt again, the device will still function but FLAG will be disabled. The device must be returned to Motion Control for the FLAG sensor to be repaired.Dual Channel FLAGForce Limiting1. W ith FLAG on, closing is still proportional, with maximum speed lowered by 50%**.2. On closing, when the fingers contact an object, force will be limited to ~ 2 lbs/9N of grip force –then the wearer feels one short vibration.3. To increase force, the wearer relaxes below threshold, followed by a strong close signal** for ashort effort** and the grip force “pulses” up.4. Grip force can be pulsed up to 10 times to a maximum of ~ 18 lbs/80N of pinch force**.5. An open signal will open the terminal device proportionally.Auto GraspW ith FLAG on, a quick, inadvertent opening signal will result in a single “pulse” increase in grip force to prevent dropping an object.**Single Channel FLAGWith Single Channel Control, FLAG is best used in Alternating Direction Control Mode.Force Limiting1. W ith FLAG on, the terminal device will close at approximately 50% speed**, proportionally.2. When the device contacts an object, force will be limited to ~ 2 lbs/9N.3. A quick and strong signal** above the threshold, then relaxation below the threshold, will createone pulse in the force**.4. This can be repeated up to 10 times for ~ 18 lbs/80N of pinch force.5. A sustained signal of about 1 second will open the terminal devic e.Auto GraspWith FLAG on, any quick, inadvertent signal will result in the terminal device closing, preventing the object from being dropped.**Note: These settings are adjustable in the iOS MCUI application6Limited WarrantySeller warrants to Buyer that the equipment delivered hereunder will be free from defects in materials and manufacturing workmanship, that it will be of the kind and quality described and that it will perform as specified in Seller’s written quotation. The limited warranties shall apply only to failures to meet said warranties that appear within the effective period of this Agreement. The effective period shall be one year (12 months) from the date of delivery to the fitting center that has purchased the components. Refer to the shipping receipt for the date of shipment.For more information regarding the Limited Warranty, see the MC FACT SHEET - Limited Warranty. Return PolicyR eturns are accepted for a full refund (not including any repairs that may be required) for up to 30 days from date of shipment. Returns 31-60 days from date of shipment will be accepted, subject to a 10% restocking fee. Returns 61-90 days from date of shipment will be accepted, subject to a 15% restocking fee. Returns must be in re-saleable condition. B eyond 90 days, returns are not accepted.Technical S pecification sOperating Temperature: -5° to 60° C (23° to 140° F)Transport & Storage Temperature: -18° to 71° C (0° to 160° F)Pinch Force: At 7.2 volts nominal: 11 kg (24 lbs, or ~ 107N)Operating Voltage Range:6 to 8.2 Vdc - MC ETD2Load Limit: 22 kg / 50 lbs in all directions (+/- 10%)Declaration of ConformityThe product herewith complies with the Medical Device Directive 93/42/EEC guidelines, and is registered with the United States Food and Drug Administration (Registration No. 1723997).7© 2020 Motion Control, Inc. 1910086 Rev C 08-26-2020Motion Control, Inc.115 N Wright Brothers Drive Salt Lake City, UT 84116801.326.3434Fax MCUI User Interface for iOS Quick Setup GuideQuick Setup for Motion Control User Interface for Apple ® iOS (MCUI)1. From the Apple ® App Store download and install the MCUI.2. Choose "Patient".3. Open the App and follow the Tutorial.4. Go to the Connect screen and tap Scan.5. Input the Pairing Key. Your prosthetist will provide this.6. The device is now connected to the MCUI.7. To disconnect, tap the Connect icon in the lower left corner, then tap Disconnect.System RequirementsApple ® App Store account, and any of the following devices:• iPad ® (3rd gen and later)• iPad mini™, iPad Air ®, iPad Air ® 2• iPod touch ® (5th gen and later)• iPhone ® 4S and later.Troubleshooting• Make sure the battery on the device is fully charged• Check connection of the device in the quick disconnect wrist• Confirm the device is turned on• Verify that you are not in “Tutorial Mode” by double tapping the Home key, then swiping MCUI off the screen, and reopening MCUI• Bluetooth ® must be turned on in Settings on the iOS device• The Information icon provides information about a function•To repeat the tutorial, go to and tap on Reset Guided Tutorial Reset。

ALUMINUM ROPP CAP - MASC CAP铝旋盖(ROPP)塑料防盗环铝旋盖(MASC)生产线AluminumROPP cap MASC capProduction lineS A C M I C LO S U R E S, C O N TA I N E R S & P E T铝盖应用于玻璃容器,适用于包括矿泉水、天然水、非酒精及酒精类饮料、保健品及果汁类产品。
萨克米铝旋盖生产设备适用于生产ROPP 和RO 铝盖,除高效和高产的优点之外,其密封性能优越,与容器匹配完美,易开易旋,并遵守与产品、包装、环境相关的法律和规章制度。
ROPP: 铝制旋开式防盗瓶盖RO: 铝制旋开式瓶盖铝制旋开式防盗瓶盖(ROPP)萨克米专业领域和竞争优势铝旋盖(ROPP)Aluminum caps are used to close glass bottles filled with mineral and natural waters, non-alco-holic and alcoholic beverages, pharmaceutical and technical contents or juices.SACMI machines are engineered to produce ROPP (roll-on pilfer proof) caps and RO that are cost-effective, provide an effective seal (and barrier), are compatible with contents, easily opened by the consumer, are often reclosable and comply with product, packaging and envi-ronmental laws and regulations.ROPP: Rool on pilfer proof RO: Roll onRoll On Pilfer Proof CapsSACMI SKILLS AND COMPETENCERopp capsALUMINUM ROPP CAP - MASC CAP多样适用于玻璃/PET 容器,包括可回收及不可回收容器性能采用非PVC-内垫以利于瓶盖密封铝制不易生锈,可回收再利用可持续性瓶盖开启后防盗环与瓶盖相连,易于容器再次使用简单易开易开易旋,安全密封非VERSATILITYthey fit glass/PET necks, for both returnable and non-returnable bottles PERFORMANCEPVC-free liner provides optimum sealing ALUMINUMdoes not rust, and can be recycled forever SUSTAINABILITYTE band remains with the closure after opening, favouring bottle re-use USER FRIENDLINESSeasy and safe opening and re-sealingPVC FREE LINER ALUMINUM SHELLS A C M I C LO S U R E S, C O N TA I N E R S & P E T28X18 MM 38X18 MM31.5X18 MM28X15.5 MM 铝制旋开式防盗瓶盖(含内垫及防盗环)适用于水、啤酒、葡萄酒、软饮及功能性饮料产品。
Eaton 198536Eaton Moeller® series Rapid Link - Reversing starter, 6.6 A,Sensor input 2, 400/480 V AC, AS-Interface®, S-7.4 for 31modules, HAN Q5, with manual override switchGeneral specificationsEaton Moeller® series Rapid LinkReversing starter198536120 mm270 mm220 mm1.8 kg CECCCRoHSUL approvalIEC/EN 60947-4-2UL 60947-4-2Assigned motor rating: for normal internally and externally ventilated 4 pole, three-phase asynchronous motors with 1500 rpm at 50 Hz or 1800 min at 60 Hz RAMO5-W204A31-512RS1Product Name Catalog NumberProduct Length/Depth Product Height Product Width Product Weight CertificationsCatalog Notes Model CodeIs the panel builder's responsibility. The specifications for the switchgear must be observed.3 kW6.6 A (at 150 % Overload)400 V AC, 3-phase480 V AC, 3-phase10000 A0 VMeets the product standard's requirements.Is the panel builder's responsibility. The specifications for the switchgear must be observed.Does not apply, since the entire switchgear needs to be evaluated.0 kW2.238 kWMeets the product standard's requirements.0 V-40 °CKey switch position HANDManual override switchThermistor monitoring PTCThermo-click Rapid Link 5 - brochureDA-SW-drivesConnect - installation helpDA-SW-USB Driver PC Cable DX-CBL-PC-1M5DA-SW-Driver DX-CBL-PC-3M0DA-SW-drivesConnect - InstallationshilfeDA-SW-drivesConnectDA-SW-USB Driver DX-COM-STICK3-KITMaterial handling applications - airports, warehouses and intra-logisticseaton-bus-adapter-rapidlink-reversing-starter-dimensions-003.eps eaton-bus-adapter-rapidlink-reversing-starter-dimensions-002.eps eaton-bus-adapter-rapidlink-speed-controller-dimensions-002.eps eaton-bus-adapter-rapidlink-speed-controller-dimensions-003.epsETN.RAMO5-W204A31-512RS1.edzIL034084ZUramo5_v10.dwgramo5_v10.stpGeneration change from RA-MO to RAMO 4.0Generation Change RA-SP to RASP5Generation change RAMO4 to RAMO5Configuration to Rockwell PLC for Rapid LinkGeneration change from RA-SP to RASP 4.0Generation Change RASP4 to RASP5DA-DC-00004184.pdfDA-DC-00003964.pdf10.11 Short-circuit ratingRated operational power at AC-3, 380/400 V, 50 HzInput currentRated operational voltageRated conditional short-circuit current, type 1, 480 Y/277 V Rated control supply voltage (Us) at AC, 50 Hz - min10.4 Clearances and creepage distances10.12 Electromagnetic compatibility10.2.5 LiftingRated power at 575 V, 60 Hz, 3-phaseRated power at 460 V, 60 Hz, 3-phase10.2.3.1 Verification of thermal stability of enclosures Rated control supply voltage (Us) at DC - minAmbient storage temperature - minFitted with:BroșuriDeseneeCAD modelInstrucțiuni de instalare mCAD modelNote de aplicație Rapoarte de certificareElectronic motor protectionShort-circuit releaseKey switch position AUTOKey switch position OFF/RESETTwo sensor inputs through M12 sockets (max. 150 mA) for quick stop and interlocked manual operationOverload cycleAC-53aNumber of pilot lightsRated control supply voltage (Us) at AC, 50 Hz - max0 VSystem configuration typeAC voltagePhase-earthed AC supply systems are not permitted.Center-point earthed star network (TN-S network)10.8 Connections for external conductorsIs the panel builder's responsibility.Coordination class (IEC 60947-4-3)Class 1Rated conditional short-circuit current, type 1, 600 Y/347 V0 ARated conditional short-circuit current (Iq)10 kABraking voltage400/480 V AC -15 % / +10 %, Actuator for external motor brakeAmbient operating temperature - max55 °CRated operational power at AC-3, 220/230 V, 50 Hz0 kWClimatic proofing< 95 %, no condensationIn accordance with IEC/EN 50178FeaturesParameterization: KeypadDiagnostics and reset on device and via AS-Interface Parameterization: drivesConnect mobile (App) Parameterization: drivesConnectParameterization: FieldbusLifespan, electrical10,000,000 Operations (at AC-3)Number of command positions2Electrical connection type of main circuitPlug-in connectionElectrical connection type for auxiliary- and control-current circuit Plug-in connectionRated control supply voltage (Us) at DC - max0 V10.9.3 Impulse withstand voltageIs the panel builder's responsibility.Braking current≤ 0.6 A (max. 6 A for 120 ms), Actuator for external motor brakeAmbient operating temperature - min-10 °C10.6 Incorporation of switching devices and componentsDoes not apply, since the entire switchgear needs to be evaluated.Current limitationAdjustable, motor, main circuit0.3 - 6.6 A, motor, main circuitCable length10 m, Radio interference level, maximum motor cable length10.5 Protection against electric shockDoes not apply, since the entire switchgear needs to be evaluated.Mounting positionVerticalMains switch-on frequencyMaximum of one time every 60 secondsClassCLASS 10 A10.13 Mechanical functionThe device meets the requirements, provided the information in the instruction leaflet (IL) is observed.10.2.6 Mechanical impactDoes not apply, since the entire switchgear needs to beevaluated.10.9.4 Testing of enclosures made of insulating materialIs the panel builder's responsibility.10.3 Degree of protection of assembliesDoes not apply, since the entire switchgear needs to be evaluated.Electromagnetic compatibilityClass AVoltage typeDCProduct categoryMotor starterOverload release current setting - min0.3 ARated control voltage (Uc)400/480 V AC (external brake 50/60 Hz)24 V DC (-15 %/+20 %, external via AS-Interface® plug)Rated operational current (Ie)6.6 AAssigned motor power at 460/480 V, 60 Hz, 3-phase3 HPRated frequency - min47 HzNumber of auxiliary contacts (normally closed contacts)Rated conditional short-circuit current (Iq), type 2, 380 V, 400 V, 415 V0 APower consumption8 W10.2.3.2 Verification of resistance of insulating materials to normal heatMeets the product standard's requirements.10.2.3.3 Resist. of insul. mat. to abnormal heat/fire by internal elect. effectsMeets the product standard's requirements.On-delay20 - 35 msLifespan, mechanical10,000,000 Operations (at AC-3)Rated operational current (Ie) at 150% overload6.6 AProtocolAS-Interface profile cable: S-7.4 for 31 modulesASIOverload release current setting - max6.6 A10.9.2 Power-frequency electric strengthIs the panel builder's responsibility.Overvoltage categoryIIIDegree of protectionIP65NEMA 12Rated frequency - max63 HzVibrationResistance: 6 Hz, Amplitude 0.15 mmResistance: 10 - 150 Hz, Oscillation frequency Resistance: 57 Hz, Amplitude transition frequency on accelerationResistance: According to IEC/EN 60068-2-6Rated operational power at 380/400 V, 50 Hz - max3 kWAmbient storage temperature - max70 °CShort-circuit protection (external output circuits)Type 1 coordination via the power bus' feeder unit, Main circuitRated control supply voltage (Us) at AC, 60 Hz - min0 V10.7 Internal electrical circuits and connectionsIs the panel builder's responsibility.Rated impulse withstand voltage (Uimp)4000 VConnectionConnections pluggable in power sectionOff-delay20 - 35 ms10.10 Temperature riseThe panel builder is responsible for the temperature rise calculation. Eaton will provide heat dissipation data for the devices.FunctionsTemperature compensated overload protectionFor actuation of motors with mechanical brakeExternal reset possibleOutput frequency50/60 HzMains voltage tolerance380 - 480 V (-15 %/+10 %, at 50/60 Hz)Rated conditional short-circuit current (Iq), type 2, 230 V0 AInterfacesSpecification: S-7.4 (AS-Interface®)Max. total power consumption from AS-Interface® power supply unit (30 V): 190 mANumber of slave addresses: 31 (AS-Interface®)TypeReversing starter10.2.2 Corrosion resistanceMeets the product standard's requirements.Supply frequency50/60 Hz, fLN, Main circuit10.2.4 Resistance to ultra-violet (UV) radiationMeets the product standard's requirements.10.2.7 InscriptionsMeets the product standard's requirements.Rated control supply voltage (Us) at AC, 60 Hz - max0 VRated operational current (Ie) at AC-3, 380 V, 400 V, 415 V6.6 ARated operational power at 380/400 V, 50 Hz - min0.09 kWModelReversing starterNumber of auxiliary contacts (normally open contacts)Eaton Corporation plc Eaton House30 Pembroke Road Dublin 4, Ireland © 2023 Eaton Toate drepturile rezervate.Eaton is a registered trademark.All other trademarks are property of their respectiveowners./socialmedia15 g, Mechanical, According to IEC/EN 60068-2-27, 11 ms, Half-sinusoidal shock 11 ms, 1000 shocks per shaft Max. 2000 mAbove 1000 m with 1 % performance reduction per 100 m Max. 1000 mShock resistanceAltitude。
Miniature Circuit Breakers HN xPole Home sg03518_rDescription• H igh-quality miniature circuit brea-kers for commercial and residentialapplications• G uide for secure terminal connection• 3-position DIN rail clip, permits remo-val from existing busbar system• C omprehensive range of accessoriessuitable for subsequent installation• R ated currents up to 63 A• T ripping characteristics B, C• R ated breaking capacity 6 kA accor-ding to IEC/EN 60898-1Rated currentI n (A)TypeDesignationArticle No.Units perpackage6 kA, Characteristic Bsg02918_r6HN-B6/119481812/12010HN-B10/119481912/12013HN-B13/119482012/12016HN-B16/119482112/12020HN-B20/119482212/12025HN-B25/119482312/12032HN-B32/119482412/12040HN-B40/119482512/12050HN-B50/119482612/12063HN-B63/119482712/1201-polesg02718_r6HN-B6/1N1948386/6010HN-B10/1N1948396/6013HN-B13/1N1948406/6016HN-B16/1N1948416/6020HN-B20/1N1948426/6025HN-B25/1N1948436/6032HN-B32/1N1948446/6040HN-B40/1N1948456/6050HN-B50/1N1948466/6063HN-B63/1N1948476/601+N-polesg03118_r6HN-B6/21948586/6010HN-B10/21948596/6013HN-B13/21948606/6016HN-B16/21948616/6020HN-B20/21948626/6025HN-B25/21948636/6032HN-B32/21948646/6040HN-B40/21948656/6050HN-B50/21948666/6063HN-B63/21948676/602-polesg03418_r6HN-B6/31948784/4010HN-B10/31948794/4013HN-B13/31948804/4016HN-B16/31948814/4020HN-B20/31948824/4025HN-B25/31948834/4032HN-B32/31948844/4040HN-B40/31948854/4050HN-B50/31948864/4063HN-B63/31948874/403-poleMiniature Circuit Breakers HN xPole Home Rated currentI n (A)TypeDesignationArticle No.Units perpackage sg03618_r6HN-B6/3N1948983/3010HN-B10/3N1948993/3013HN-B13/3N1949003/3016HN-B16/3N1949013/3020HN-B20/3N1949023/3025HN-B25/3N1949033/3032HN-B32/3N1949043/3040HN-B40/3N1949053/3050HN-B50/3N1949063/3063HN-B63/3N1949073/303+N-pole6 kA, Characteristic Csg02918_r6HN-C6/119482812/12010HN-C10/119482912/12013HN-C13/119483012/12016HN-C16/119483112/12020HN-C20/119483212/12025HN-C25/119483312/12032HN-C32/119483412/12040HN-C40/119483512/12050HN-C50/119483612/12063HN-C63/119483712/1201-polesg02718_r6HN-C6/1N1948486/6010HN-C10/1N1948496/6013HN-C13/1N1948506/6016HN-C16/1N1948516/6020HN-C20/1N1948526/6025HN-C25/1N1948536/6032HN-C32/1N1948546/6040HN-C40/1N1948556/6050HN-C50/1N1948566/6063HN-C63/1N1948576/601+N-polesg03118_r6HN-C6/21948686/6010HN-C10/21948696/6013HN-C13/21948706/6016HN-C16/21948716/6020HN-C20/21948726/6025HN-C25/21948736/6032HN-C32/21948746/6040HN-C40/21948756/6050HN-C50/21948766/6063HN-C63/21948776/602-poleRated currentI n (A)TypeDesignationArticle No.Units perpackage sg03418_r6HN-C6/31948884/4010HN-C10/31948894/4013HN-C13/31948904/4016HN-C16/31948914/4020HN-C20/31948924/4025HN-C25/31948934/4032HN-C32/31948944/4040HN-C40/31948954/4050HN-C50/31948964/4063HN-C63/31948974/403-polesg03618_r6HN-C6/3N1949083/3010HN-C10/3N1949093/3013HN-C13/3N1949103/3016HN-C16/3N1949113/3020HN-C20/3N1949123/3025HN-C25/3N1949133/3032HN-C32/3N1949143/3040HN-C40/3N1949153/3050HN-C50/3N1949163/3063HN-C63/3N1949173/303+N-poleMiniature Circuit Breakers HN xPole Home - T echnical DataSpecifi cations | Miniature Circuit Breakers HNDescription• H igh selectivity between MCB and back-up fuse due to low let-throughenergy• Compatible with standard busbar• T win-purpose terminal (lift/open-mouthed) above and below• B usbar positioning optionally above or below• M eets the requirements of insulation co-ordination, distance between con-tacts ≥ 4 mm, for secure isolation• S uitable for applications up to 48 V DCAccessories:Auxiliary switch for subsequent installation ZP-IHK286052ZP-WHK286053 Tripping signal switch for subsequent installation ZP-NHK248437 Remote control and automatic switching device Z-FW/LP248296 Shunt trip release ZP-ASA/..248438, 248439 Undervoltage release Z-USA/..248288-248291 Compact enclosure KLV-TC-2276240KLV-TC-4276241 Additional terminal 35 mm2Z-HA-EK/35263960 Switching interlock Z-IS/SPE-1TE274418Technical DataHNElectricalDesign according toCurrent test marks as printed onto the deviceIEC/EN 60898-1Rated voltage Un AC: 230/400 VDC: 48 V (per pole, max. 2 poles)Rated frequency50/60 HzRated breaking capacity according to IEC/EN 60898-1Icn 6 kACharacteristic B, CBack-up fuse max. 100 A gL Selectivity class3Rated impulse withstand voltage Uimp 4 kV (1.2/50 μs)Enduranceelectrical components≥ 10,000 switching operationsmechanical components≥ 20,000 switching operationsLine voltage connection at will (above/below)Minimal voltage12 V AC/DCMechanicalFrame size45 mmDevice height80 mmDevice width17.5 mm per pole (1MU)Mounting quick fastening with 3 lock-in positions on DIN rail IEC/EN 60715 Degree of protection IP20Upper and lower terminals open mouthed/lift terminalsTerminal protection fi nger and hand touch safe, DGUV VS3, EN 50274Terminal capacity1-25 mm2Terminal torque2-2.4 NmBusbar thickness 0.8 - 2 mmMounting independent of positionClimatic conditions Acc. to IEC 68-2 (25...55°C / 90...95% RH)Connection diagramsDimensions (mm)1P2P3P+N1P+N3P1-pole1+N-pole2-pole3-pole3+N-poleTripping Characteristics (IEC/EN 60898-1)Quick-acting (B), slow (C)Tripping characteristic BTripping characteristic CTRIPPING CURRENTTRIPPING CURRENTEffect of the Ambient Temperature on Thermal Tripping Behaviour Load Capacity of Series Connected Miniature Circuit BreakersAdjusted rated current values according to the ambient temperatureNumber of devices (n) 1-poleL o a d c a p a c i t y f a c t o r K NMiniature Circuit Breakers HN xPole Home - T echnical Data Let-through Energy HNLet-through Energy HN, Characteristic B, 1-poleLet-through Energy HN, Characteristic C, 1-pole500300500100015002000300040005000600070001000015000800090004009007008006001500100030002000500040002000090007000100008000600015000300005000060000400007000080000prospektiver Kurzschlussstrom [A]D u r c h l a s s e n e r g i e I t [A s e c ]22500300500100015002000300040005000600070001000015000800090004009007008006001500100030002000500040002000090007000100008000600015000300005000060000400007000080000prospektiver Kurzschlussstrom [A]D u r c h l a s s e n e r g i e I t [A s e c ]22Prospective short-circuit current [A]L e t t h r o u g h e n e r g y I 2t [A 2 s e c ]Prospective short-circuit current [A]L e t t h r o u g h e n e r g y I 2t [A 2 s e c ]Effect of Power FrequencyEffect of power frequency on the tripping behaviour I MA of the quick releasePower frequency f [Hz]162/35060100200300400I MA (f)/I MA (50 Hz) [%]91100101106115134141Short Circuit Selectivity HN towards DII-DIV fuse linkIn case of short circuit, there is selectivity between the miniature circuit breakers HN and the upstream fuses up to the specifi ed values of the selectivity limit current I s [kA] (i. e. in case of short-circuit currents I ks under I s only the MCB will trip, in case of short circuit currents above this value both protective devices will respond).*) basically in accordance with EN 60898-1 D.5.2.bShort circuit selectivity Characteristic B towards fuse link DII-DIV *)Short circuit selectivity Characteristic C towards fuse link DII-DIV *)Towards D01-D03 fuse linkShort circuit selectivity Characteristic B towards fuse link D01-D03*)Short circuit selectivity Characteristic C towards fuse link D01-D03*)Short circuit selectivity Characteristic B towards fuse link NH-00*)Short circuit selectivity Characteristic C towards fuse link NH-00*)1) Selectivity limit current I s under 0.5 kA 2)S electivity limit current I s = rated breaking capacity I cn of the MCB Darker areas: no selectivityTowards DII-DIV fuse linkTowards NH-00 fuse linkHN DII-DIV gL/gGHN DII-DIV gL/gGHN D01-D03 gL/gGHN D01-D03 gL/gGHN NH-00 gL/gG I n [A]1620253235405063801001251601)1)2)2)2)2)HN NH-00 gL/gG I n [A]1620253235405063801001251601)1)2)2)2)。
P R O D U C TD E S C R I P T I O NRobust & compact, multi-stage stainless steel centrifugal pumps, driven by a TEFC motor. Designed for total head duties to 32m and flows to 230lpm.A P P L I C AT I O N SIdeal for pumping clean, non-volatile,non-aggressive liquids without fibres or solids in such applications as:-•Vat washing•Washing systems•Domestic water supply •Irrigation•Water transfer •Pressure boostingO P E R AT I N G L I M I T SF E AT U R E S & B E N E F I T SPumpMultistage, closed vane 304 stainless steel impellers with full length “D”drives, provide:•Superior reliability when pumpingcorrosive water•Easy assembly and servicing Corrosion resistant 316 stainless steel pump shaft and 304 stainless steel casing for long service life.High quality mechanical shaft seal for long life and reliability.Patented floating impeller neck rings provide:•High efficiency•Quieter pump operationMotorThe Davey manufactured TEFC motor has an IP55 enclosure providing:•Excellent corrosion resistance •High levels of resistance to dustand rain•Ability to operate reliably in highambient temperaturesMotor continued...Single phase motors are permanently split capacitor design for:•Reliable starting even in lowvoltage circumstances •Superior frequent startingperformance Single phase motors are protected against both high operatingtemperatures and high current by a built in, automatically resetting thermal overload.All single phase models come with a 2metre power lead, and are available with a choice of connectors or plugs to suit.Double contact C3-HTG sealed bearings for quieter running and longer life.Corrosion resistant feet on motor shell, include three point bolt-down facilityStandard models are 220/240 volt,50Hz, single phase or 380/415V50Hz, three phase. Choice of models in 60Hz 110/115 volt and 220/230volt single phase available on request.XF92SS XF192SS XF242SSCapacities to 140lpm 200lpm 240lpm Maximum total head 30m 31m 32m Maximum suction head 7.0m7.5m7.5mMaximumwater temperature continuous65o C 15 minute peak 85o C Minimum water temperature 1o C Maximum ambient temperature 55o C Inlet size 11/4” BSP(F)Outlet size 1” BSP(F)Maximum pump casing pressure450kPaTRANSFER PUMPSM AT E R I A L S O F C O N S T R U C T I O N PA R T M AT E R I A LImpellersImpeller spacer Lock nutPump casing Clamp bandPump shaftSeal ring (stationary) Seal ring (rotating) Seal springO-ringsDiffusersBlanking ring NeckringsMotor shellShell finishPriming plug 304 stainless steel304 stainless steel316 stainless steel304 stainless steel304 stainless steel316 stainless steel CeramicCarbon304 stainless steel Nitrile rubberGlass filled norylGlass filled noryl PolypropyleneMarine grade aluminium Baked polyester Chromium plated brassE L E C T R I C A L D ATATOTAL HEAD (m)FLOW (lpm)D I ME N S I O N SDavey Products Pty LtdMember of the GUD Holdings Ltd GroupABN 18 066 327 517Head Office and Manufacturing6 Lakeview Drive,Scoresby, Australia 3179Ph:+61 3 9730 9222Fax:+61 3 9753 4100Website:.auCustomer Service CentrePh:1300 367 866Fax:1300 369 119E-mail:***************.auInterstate OfficesSydney - Brisbane - AdelaidePerth - TownsvilleInternational6 Lakeview Drive,Scoresby, Australia 3179Ph:+61 3 9730 9121Fax:+61 3 9753 4248E-mail:****************.auGermanyKantstrasse 47,04275 LeipzigPh:+49 341 301 0412Fax:+49 341 301 0413E-mail:******************New Zealand220A Bush Road,North Harbour, Auckland 1330Ph:+64 9 914 3680Fax:+64 9 914 3685Website:E-mail:****************.nzUSA1005 N. Commons DriveAurora, Illinois 60504Ph:+1 630 898 6976Fax:+1 630 851 7744Website:E-mail:******************Product specifications may change without notice.® Davey is a registered trademark of Davey Products Pty Ltd. © Davey Products Pty Ltd 2002.D949/3K/0104/GPW supersedes D895-1/1K/0503/GPW。
2.3 Workholder Indexing Adjustment for SDCP
The next step is to setup the Indexer and Workholder Module which is the core system for substrate transfer and indexing.
1. Adjust Bond Optics Offset
- Align bond optics center with the vacuum hole center on anvil block
- Turn the screw located at the back of bond optics for X-direction adjustment
- Key in value in Optics Offset Y
- Go to : Setup → Indexer & Workholder → Optics Offset Y
2. Adjust Track Width
- Go to: Setup → Indexer & Workholder → Track Width Offset
- Key in values to compensate the track width offset after Start Conversion - Align bond pad center with optics center in Y direction
so that the bond pads can be sucked firmly by the vacuum holes
- Fine adjust position until the substrate can be moved smoothly along the track
3. Adjust TBond Exchange Offset
- We adjust the Indexer Clamp and Moving Window Clamp Position by adjusting the Exchange Offset - Go to: Setup → Indexer & Workholder
→ Indexer Positions → Exchange Offset →
TBond
4. Adjust TBond First Distance
- Go to: Setup → Indexer & Workholder
→ Indexer Positions → First Distance → Disp - Adjust Dispense First Distance by joystick
5. Adjust Disp First Distance
- Go to: Setup → Indexer & Workholder → Indexer Positions → First Distance → Disp - Adjust Dispense First Distance by joystick
6. Adjust Bond Exchange Offset
- We adjust the Indexer Clamp and Moving Window Clamp Position by adjusting the Exchange Offset - Go to: Setup → Indexer & Workholder
→ Indexer Positions → Exchange Offset →
TBond
7. Adjust Bond First Distance
- Go to: Setup → Indexer & Workholder
→ Indexer Positions → First Distance → Bond - Adjust Bond First Distance by joystick
8. Adjust Track Sensor Sensitivity
- There are totally 4 sensors on track which are shown below - Adjust the sensitivity by 2-point method
- Turn “SW1”of sensor amplifier until the targeted channel number displayed on LED
- Press “SW2” until “RUN ” is displayed and blinks - Turn “SW2” until “SET ” is displayed and blinks
- Select “2P ” and press t he knob to access
- Unblock the sensor, press “SW2” to confirm the setting until “2” is displayed - Manually put a leadframe to block the sensor, press “SW2” again to confirm the setting
- Turn “SW2” until “RUN ” is displayed
- Press the knob again to finish the setting
9. Adjust Anvil Block Vacuum Sensor Sensitivity
- Select the Channel by pressing and
- Press the
to edit the C1 and C2 value
- We can set the value of C1 and C2 are equal then this value will become the threshold value for the vacuum level of anvil block
- If vacuum level is higher than that value, it will give out a HIGH signal for anvil vacuum.
- If vacuum level is lower than that value, it will give out a LOW signal for anvil vacuum.
-We can adjust the response time for the system to check the vacuum by adjusting the Anvil Vacuum On Delay。