
EmagThermalAnsoft edited
- 格式:pdf
- 大小:5.06 MB
- 文档页数:73


ansoft翻译Machine type : Three Phase Induction Motor Number of Poles :极数Stray Loss Factor:杂散损耗系数Frictional loss:摩擦损耗Windage loss:风损耗Reference Speed:给定转速StatorOuter Diameter : 外径Inner Diameter : 内径Length : 长度Stacking Factor : 定子铁芯叠加系数Steel Type :钢型Number of Slots :槽数Slot Type :槽型Lamination Sectors :定子冲片扇形分辨率Press Board Thickness :定子铁芯中压圈厚度Skew Width :斜槽数SlotWindingWinding Layer :绕组层数Winding type :绕组类型Parallel Branches :并联绕组数Conductors per Slot :每槽导体数Coil Pitch :线圈跨距Number of Strands :股数Wire Wrap :导体绝缘层厚度Wire Size :导体尺寸End/InsulationInput Half-turn Length :输入半圈长度End Extension :端部延伸长度Base Inner Radius :基脚半径Tip Inner Diameter :顶部直径End Clearance :相邻两线圈之间间隙Slot Liner :槽绝缘厚度Wedge Thickness :定子槽契厚度Layer Insulation :绝缘层厚度Limited Fill Factor :最高定子槽满率RotorStacking Factor :转子叠加系数Number of Slots :槽数Slot Type:槽型Outer Diameter :转子外径Inner Diameter :转子内径Length :长度Steel Type :钢型Skew width :斜槽Cast Rotor :铸造转子Half Slot :半槽Double Cage :双笼SlotWindingBar Conductor Type :棒导体类型End Length :端长End Ring Width :端环宽度End Ring Height :端环高度End Ring Conductor Type :端环ShaftMagnetic Shaft :磁性轴设计单GENERAL DATAGiven Output Power (kW): 11 给定输出功率(千瓦)RatedVoltage (V): 380 额定电压(V)Winding Connection: Delta 绕组连接:三角Number of Poles: 4 极数Given Speed (rpm): 1460 给定转速(转速)Frequency (Hz): 50 频率(赫兹)Stray Loss (W): 110 杂散损耗(W)Frictional Loss (W): 102 摩擦损失(W)Windage Loss (W): 0 风阻损耗(W)Type of Load: Constant Torque 负载类型:恒转矩Operating Temperature (C): 75 工作温度(C)STATOR DATANumber of Stator Slots: 36 定子槽数Outer Diameter of Stator (mm): 260 定子外径(mm)Inner Diameter of Stator (mm): 170 定子内径(mm)Type of Stator Slot: 2 定子槽型Dimension of Stator Slot 定子槽尺寸hs0 (mm):hs1 (mm):hs2 (mm):bs0 (mm):bs1 (mm):bs2 (mm):Top Tooth Width (mm): 顶部齿宽Bottom Tooth Width (mm): 底齿宽Length of Stator Core (mm): 155 定子铁芯长度Stacking Factor of Stator Core: 定子铁芯叠加系数Type of Steel: 50DW470 钢型Number of lamination sectors 0 分层扇区数Press board thickness (mm): 0 压板厚度Magnetic press board No 磁性压板NONumber of Parallel Branches: 1 平行分支数Type of Coils: 11 线圈类型Coil Pitch: 5 线圈跨距Number of Conductors per Slot: 29 每槽导体数Number of Wires per Conductor: 2 每导体的导线数Wire Diameter (mm): 导线直径Wire Wrap Thickness (mm): 导线缠绕厚度Wedge Thickness (mm): 2 楔厚度Slot Liner Thickness (mm): 槽衬厚度Layer Insulation (mm): 0 绝缘层厚度Slot Area (mm^2): 槽面积Net Slot Area (mm^2): 净槽面积Slot Fill Factor (%): 槽满率系数Limited Slot Fill Factor (%): 75 最高定子槽满率Wire Resistivity ^2/m): 导线电阻率Top Free Space in Slot (%): 0 槽内顶部自由空间Bottom Free Space in Slot (%): 0 槽内底部自由空间Conductor Length Adjustment (mm): 0 导体长度调整End Length Correction Factor 1 端长度校正因子End Leakage Reactance Correction Factor 1 端漏抗校正因子ROTOR DATANumber of Rotor Slots: 26 转子槽数Air Gap (mm): 气隙Inner Diameter of Rotor (mm): 60 转子内直径Type of Rotor Slot: 2 转子槽类型Dimension of Rotor Slot 转子槽类型hs0 (mm):hs1 (mm):hs2 (mm): 25bs0 (mm): 1bs1 (mm):bs2 (mm):Cast Rotor: Yes 铸造转子Half Slot: No 半槽Length of Rotor (mm): 155 转子长度Stacking Factor of Rotor Core: 转子铁芯叠加系数Type of Steel: 50DW470 钢芯Skew Width: 1 斜槽数End Length of Bar (mm): 0Height of End Ring (mm): 端环高度Width of End Ring (mm): 15 端环宽度Resistivity of Rotor Bar 转子跳电阻率at 75 Centigrade ^2/m):Resistivity of Rotor Ring 转子环电阻率at 75 Centigrade ^2/m): Magnetic Shaft: No 磁力轴Armature Copper Density (kg/m^3): 8900Rotor Bar Material Density (kg/m^3): 2689Rotor Ring Material Density (kg/m^3): 2689Armature Core Steel Density (kg/m^3): 7800Rotor Core Steel Density (kg/m^3): 7800电枢铜密度(kg / m 3):8900转子棒料密度(kg / m 3):2689转子环材料密度(kg / m 3):2689电枢铁心钢密度(kg / m 3):7800转子芯钢密度(kg / m 3):7800MATERIAL CONSUMPTION Armature Copper Weight (kg):Rotor Bar Material Weight (kg):Rotor Ring Material Weight (kg):Armature Core Steel Weight (kg):Rotor Core Steel Weight (kg):Total Net Weight (kg):Armature Core Steel Consumption (kg):Rotor Core Steel Consumption (kg):材料消耗电枢铜重(公斤):转子棒料重量(公斤):转子环材料重量(公斤):电枢铁心重量(公斤):转子芯钢重量(公斤):总净重(公斤):公斤电枢铁心用钢量(公斤):转子芯钢消耗量(公斤):RATED-LOAD OPERATION Stator Resistance (ohm):Stator Resistance at 20C (ohm):Stator Leakage Reactance (ohm):Rotor Resistance (ohm):Rotor Resistance at 20C (ohm):Rotor Leakage Reactance (ohm):Resistance Corresponding toIron-Core Loss (ohm):Magnetizing Reactance (ohm):Stator Phase Current (A):Current Corresponding toIron-Core Loss (A):Magnetizing Current (A):Rotor Phase Current (A):Copper Loss of Stator Winding (W): Copper Loss of Rotor Winding (W): Iron-Core Loss (W):Frictional and Windage Loss (W): Stray Loss (W): 110Total Loss (W):Input Power (kW):Output Power (kW):Mechanical Shaft Torque : Efficiency (%):Power Factor:Rated Slip:Rated Shaft Speed (rpm):rated-load操作定子电阻(欧姆):在20C的定子电阻(欧姆):定子漏抗(欧姆):转子电阻(欧姆):在20C的转子电阻(欧姆):转子漏抗(欧姆):电阻对应铁心损耗(欧姆):Magnetizing Reactance(欧姆):定子相电流(a):相应的电流铁心损耗(a):磁化电流(a):转子相电流(a):定子绕组铜损(W):转子绕组铜损(W):铁心损耗(W):摩擦和Windage Loss(W):杂散损耗(W):110全损失(W):输入功率(千瓦):输出功率(千瓦):机械轴的扭矩():效率(%):功率因数:额定滑差:额定轴转速(转速):NO-LOAD OPERATIONNo-Load Stator Resistance (ohm):No-Load Stator Leakage Reactance (ohm): No-Load Rotor Resistance (ohm):No-Load Rotor Leakage Reactance (ohm): No-Load Stator Phase Current (A):No-Load Iron-Core Loss (W):No-Load Input Power (W):No-Load Power Factor:No-Load Slip:No-Load Shaft Speed (rpm):空载运行无负载定子电阻(欧姆):无负载定子漏抗(欧姆):无负载转子电阻(欧姆):无负载转子漏抗(欧姆):空载定子相电流(a):无负载铁心损耗(W):无负载输入功率(W):无负载功率因数:无负载支路:无负载轴速度(转速):BREAK-DOWN OPERATION Break-Down Slip: Break-Down Torque :Break-Down Torque Ratio:Break-Down Phase Current (A):break-down操作破裂滑:打破扭矩():打破扭矩比:分解相电流(a):LOCKED-ROTOR OPERATION Locked-Rotor Torque :Locked-Rotor Phase Current (A):Locked-Rotor Torque Ratio:Locked-Rotor Current Ratio:Locked-Rotor Stator Resistance (ohm):Locked-Rotor StatorLeakage Reactance (ohm):Locked-Rotor Rotor Resistance (ohm):Locked-Rotor RotorLeakage Reactance (ohm):转子锁操作(锁定转子扭矩的扭矩):锁定转子电流(A):相锁定转子扭矩比:锁定转子电流比:锁定转子定子电阻(欧姆):锁定转子定子泄漏阻抗(Ω)锁定转子电阻(欧姆):锁定转子泄漏阻抗(Ω)DETAILED DATA AT RATED OPERATION Stator Slot Leakage Reactance (ohm):Stator End-Winding LeakageReactance (ohm):Stator Differential LeakageReactance (ohm):Rotor Slot Leakage Reactance (ohm):Rotor End-Winding LeakageReactance (ohm):Rotor Differential LeakageReactance (ohm):Skewing Leakage Reactance (ohm):Stator Winding Factor:Stator-Teeth Flux Density (Tesla):Rotor-Teeth Flux Density (Tesla): Stator-Yoke Flux Density (Tesla): Rotor-Yoke Flux Density (Tesla):Air-Gap Flux Density (Tesla):Stator-Teeth Ampere Turns :Rotor-Teeth Ampere Turns :Stator-Yoke Ampere Turns :Rotor-Yoke Ampere Turns :Air-Gap Ampere Turns :Correction Factor for MagneticCircuit Length of Stator Yoke: Correction Factor for Magnetic Circuit Length of Rotor Yoke: Saturation Factor for Teeth: Saturation Factor for Teeth & Yoke: Induced-Voltage Factor: Stator Current Density (A/mm^2): Specific Electric Loading (A/mm): Stator Thermal Load (A^2/mm^3): Rotor Bar Current Density (A/mm^2): Rotor Ring Current Density (A/mm^2): Half-Turn Length ofStator Winding (mm):额定操作的详细数据定子槽漏抗(欧姆):定子端部绕组泄漏电抗(欧姆):定子差漏电抗(欧姆):转子槽漏抗(欧姆):转子端部绕组泄漏电抗(欧姆):转子差漏电抗(欧姆):斜槽漏电抗(Ω):定子绕组系数:定子齿磁通密度(特斯拉):转子齿磁通密度(特斯拉):定子磁轭磁通密度(特斯拉):转子磁轭磁通密度(特斯拉):气隙磁通密度(特斯拉):定子安匝(美国):齿转子安匝(美国):定子线圈的安匝数(美国):转子线圈安匝(美国):气隙安匝(美国):磁校正系数定子轭的电路长度:磁校正系数转子磁轭的电路长度:齿的饱和系数:牙齿和磁轭的饱和系数:诱导电压因子:定子电流密度(A / mm 2):比电负载(A / mm):定子热负荷(A / mm 2 / mm 3):转子条电流密度(A / mm 2):转子环电流密度(A / mm 2):半匝长度定子绕组(mm):WINDING ARRANGEMENTThe 3-phase, 1-layer winding can be arranged in 18 slots asbelow: AAAZZZBBBXXXCCCYYYAverage coil pitch is:Angle per slot (elec. degrees): 20Phase-A axis (elec. degrees): 110First slot center (elec. degrees): 0绕组排列三相绕组,1层可以布置在18个以下:aaazzzbbbxxxcccyyy平均线圈间距为:角每槽(电度):20用轴(电度):110第一槽中心(电度):0TRANSIENT FEA INPUT DATA For one phase of the Stator Winding:Number of Turns: 174Parallel Branches: 1Terminal Resistance (ohm):End Leakage Inductance (H):For Rotor End Ring Between Two Bars of One Side: Equivalent Ring Resistance (ohm):Equivalent Ring Inductance (H):2D Equivalent Value:Equivalent Model Depth (mm): 155Equivalent Stator Stacking Factor:Equivalent Rotor Stacking Factor:Estimated Rotor Inertial Moment (kg m^2):瞬态有限元输入数据对于定子绕组的一个阶段:匝数:174平行分支:1终端电阻(欧姆):端漏电感(H):用于在一侧的两条之间的转子端环:等效电阻(欧姆):环等效环电感(H):二维等效值:等效模型深度(mm):155等效定子叠层系数:等效转子堆积系数:估计转子惯性矩(kg m 2):。
电磁场仿真软件简介随着电磁场和微波电路领域数值计算方法的发展,在最近几年出现了大量的电磁场和微波电路仿真软件。
在这些软件中,多数软件都属于准 3 维或称为 2.5 维电磁仿真软件。
例如,Agilent 公司的 ADS( Advanced Design System )、AWR 公司的 Microwave Office 、Ansoft 公司的 Esemble、 Serenade和 CST 公司的 CST Design Studio 等。
目前,真正意义上的三维电磁场仿真软件只有Ansoft公司的HFSS 、 CST 公司的Mafia 、 CST Microwave Studio 、Zeland 公司的 Fidelity 和 IMST GmbH公司的EMPIRE。
从理论上讲,这些软件都能仿真任意三维结构的电磁性能。
其中,HFSS ( HFSS 是英文高频结构仿真器( High Frequency Structure Simulator)的缩写)是一种最早出现在商业市场的电磁场三维仿真软件。
因此,这一软件在全世界有比较大的用户群体。
由于 HFSS 进入中国市场较早,所以目前国内的电磁场仿真方面HFSS 的使用者众多,特别是在各大通信技术研究单位、公司、高校非常普及。
德国 CST 公司的 MicroWave Studio(微波工作室)是最近几年该公司在Mafia 软件基础上推出的三维高频电磁场仿真软件。
它吸收了Mafia 软件计算速度快的优点,同时又对软件的人机界面和前、后处理做了根本性的改变。
就目前发行的版本而言,CST 的 MWS 的前后处理界面及操作界面比 HFSS 好。
Ansoft 也意识到了自己的缺点,在刚刚推出的新版本 HFSS(定名为 Ansoft HFSS V9.0 )中,人机界面及操作都得到了极大的改善。
在这方面完全可以和CST 媲美。
在性能方面,两个软件各有所长。
在速度和计算的精度方面 CST 和 ANSOFT 成绩相差不多。
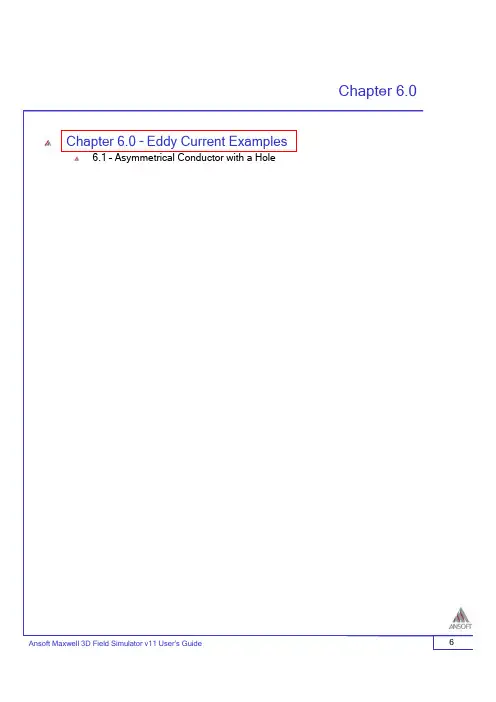
Chapter 6.0 Chapter 6.0 –Eddy Current Examples6.1 –Asymmetrical Conductor with a HoleExample (Eddy Current) –Asymmetrical ConductorThe Asymmetrical Conductor with a HoleThis example is intended to show you how to create and analyze anAsymmetrical Conductor with a Hole using the Eddy Current solver in the Ansoft Maxwell 3D Design Environment.Coil (Copper)Stock (Aluminum)Example (Eddy Current) –Asymmetrical Conductor Getting StartedLaunching Ansoft Maxwell1.To access Ansoft Maxwell, click the Microsoft Start button, select Programs, andselect the Ansoft > Maxwell 11program group. Maxwell 11.Setting Tool OptionsTo set the tool options:Note: In order to follow the steps outlined in this example, verify that thefollowing tool options are set:1.Select the menu item Tools > Options > Maxwell Options2.Maxwell Options Window:1.Click the General Options tabUse Wizards for data entry when creating new boundaries: ;CheckedDuplicate boundaries with geometry: ;Checked2.Click the OK button3.Select the menu item Tools > Options > 3D Modeler Options.4.3D Modeler Options Window:1.Click the Operation tabAutomatically cover closed polylines: ;Checked2.Click the Drawing tabEdit property of new primitives: ;Checked3.Click the OK buttonExample (Eddy Current) –Asymmetrical Conductor Opening a New ProjectTo open a new project:In an Ansoft Maxwell window, click the On the Standard toolbar, orselect the menu item File > New.From the Project menu, select Insert Maxwell Design.Set Solution TypeTo set the solution type:Select the menu item Maxwell > Solution TypeSolution Type Window:Choose Eddy CurrentClick the OK buttonExample (Eddy Current) –Asymmetrical Conductor Creating the 3D ModelSet Model UnitsTo set the units:1.Select the menu item 3D Modeler > Units2.Set Model Units:1.Select Units: mm2.Click the OK buttonSet Default MaterialTo set the default material:ing the 3D Modeler Materials toolbar, choose Select2.Select Definition Window:1.Type aluminum in the Search by Name field2.Click the OK buttonExample (Eddy Current) –Asymmetrical Conductor Create StockTo create the stock:1.Select the menu item Draw > Boxing the coordinate entry fields, enter the box positionX: 0.0, Y: 0.0, Z: 0.0, Press the Enter keying the coordinate entry fields, enter the opposite corner of the box:dX: 294.0, dY: 294.0, dZ: 19.0, Press the Enter key To set the name:1.Select the Attribute tab from the Properties window.2.For the Value of Name type: stock3.Click the OK buttonTo fit the view:1.Select the menu item View > Fit All > Active View.Create Hole in StockTo create the hole:1.Select the menu item Draw > Boxing the coordinate entry fields, enter the box positionX: 18.0, Y: 18.0, Z: 0.0, Press the Enter keying the coordinate entry fields, enter the opposite corner of the box:dX: 126.0, dY: 126.0, dZ: 19.0, Press the Enter key To set the name:1.Select the Attribute tab from the Properties window.2.For the Value of Name type: hole3.Click the OK buttonTo select the objects:1.Select the menu item Edit > Select AllTo complete the stock:1.Select the menu item 3D Modeler > Boolean > Subtract2.Subtract WindowBlank Parts: stockTool Parts: holeClick the OK buttonExample (Eddy Current) –Asymmetrical ConductorSet Default Materialing the 3D Modeler Materials toolbar, choose Select2.Select Definition Window:1.Type copper in the Search by Name field2.Click the OK buttonCreate Coil (Hole)To create coil:1.Select the menu item Draw > Boxing the coordinate entry fields, enter the box positionX: 119.0, Y: 25.0, Z: 49.0, Press the Enter keying the coordinate entry fields, enter the opposite corner of the box:dX: 150.0, dY: 150.0, dZ: 100.0, Press the Enter keyTo set the name:1.Select the Attribute tab from the Properties window.2.For the Value of Name type: coil_hole3.Click the OK buttonTo create the filets:1.Select the menu item Edit > Select > Edges.ing the mouse graphically select the 4 z-directed edges. Hold down theCTRL key to make multiple selections.3.Select the menu item 3D Modeler > Fillet4.Fillet Properties1.Fillet Radius: 25mm2.Setback Distance:0mm3.Click the OK buttonSelect 4 EdgesExample (Eddy Current) –Asymmetrical Conductor Create CoilTo create coil:1.Select the menu item Draw > Boxing the coordinate entry fields, enter the box positionX: 94.0, Y: 0.0, Z: 49.0, Press the Enter keying the coordinate entry fields, enter the opposite corner of the box:dX: 200.0, dY: 200.0, dZ: 100.0, Press the Enter key To set the name:1.Select the Attribute tab from the Properties window.2.For the Value of Name type: coil3.Click the OK buttonTo create the filets:1.Select the menu item Edit > Select > Edges.ing the mouse graphically select the 4 z-directed edges. Hold down theCTRL key to make multiple selections.3.Select the menu item 3D Modeler > Fillet4.Fillet Properties1.Fillet Radius: 50mm2.Setback Distance:0mm3.Click the OK buttonTo select the object for subtract1.Select the menu item Edit > Select > Objects2.Select the menu item Edit > Select > By Name3.Select Object Dialog,1.Select the objects named: coil, coil_hole2.Click the OK buttonTo complete the coil:1.Select the menu item 3D Modeler > Boolean > Subtract2.Subtract WindowBlank Parts: coilTool Parts: coil_holeClick the OK buttonTo fit the view:1.Select the menu item View > Fit All > Active View.Example (Eddy Current) –Asymmetrical Conductor Create Offset Coordinate SystemTo create an offset Coordinate System:1.Select the menu item 3D Modeler > Coordinate System > Create >Relative CS > Offseting the coordinate entry fields, enter the originX: 200.0, Y: 100.0, Z: 0.0, Press the Enter keyCreate ExcitationObject Selection1.Select the menu item Edit > Select > By Name2.Select Object Dialog,1.Select the objects named: coil2.Click the OK buttonSection Object1.Select the menu item Edit > Surface > Section1.Section Plane:XZ2.Click the OK buttonSeparate Bodies1.Select the menu item Edit > Boolean > Separate BodiesAssign Excitation1.Select the menu item Maxwell > Excitations > Assign > Current2.Current Excitation : General: Current12.Value: 2742 A3.Type: StrandedNote:The current flow should be counter-clockwise when viewingthe coil from above. Use the Swap Direction button to change thedirection.3.Click the OK buttonExample (Eddy Current) –Asymmetrical ConductorSet Eddy EffectTo set the eddy effect for the stock object1.Select the menu item Maxwell > Excitations > Set Eddy Effects2.Set Eddy Effect,1.Check the settings as shown2.Click the OK buttonShow Conduction PathShow Conduction Path1.Select the menu item Maxwell > Excitations > Conduction Paths > ShowConduction Paths2.From the Conduction Path Visualization dialog, select the rows to visualizethe conduction path in on the 3D Model.3.Click the Close buttonDefine a RegionTo define a Region:1.Select the menu item Draw > Region1.Padding Date:One2.Padding Percentage:3003.Click the OK buttonExample (Eddy Current) –Asymmetrical Conductor Analysis SetupCreating an Analysis SetupTo create an analysis setup:1.Select the menu item Maxwell > Analysis Setup > Add Solution Setup2.Solution Setup Window:1.Click the General tab:Percent Error: 22.Click the Convergence tab:Refinement Per Pass: 50 %3.Click the Solver tab:Adaptive Frequency: 200 Hz4.Click the OK buttonSave ProjectTo save the project:1.In an Ansoft Maxwell window, select the menu item File > Save As.2.From the Save As window, type the Filename: maxwell_asymcond3.Click the Save buttonAnalyzeModel ValidationTo validate the model:1.Select the menu item Maxwell > Validation Check2.Click the Close buttonNote:To view any errors or warning messages, use the MessageManager.AnalyzeTo start the solution process:1.Select the menu item Maxwell > Analyze AllExample (Eddy Current) –Asymmetrical Conductor Create ReportsCreate z-component of B-Field (real part) vs. Distance plot on a line To create a line:1.Make sure that the Global Coordinate System is selected:3D Modeler > Coordinate System > Set Working CS2.Select the menu item Draw > Line3.When the dialog appears asking to create a non-model object, click the Yesbutton.4.Select the menu item Draw > Lineing the coordinate entry fields, enter the vertex point:X: 0.0, Y: 72.0, Z: 34.0, Press the Enter keying the coordinate entry fields, enter the vertex point:X: 288.0, Y: 72.0, Z: 34.0, Press the Enter keying the mouse, right-click and select DoneTo set the name:1.Select the Attribute tab from the Properties window.2.For the Value of Name type: FieldLine3.Click the OK buttonExample (Eddy Current) –Asymmetrical ConductorTo calculate real part of the z-component of B-field (use the fields calculator)1.Select the menu item Maxwell > Fields > Calculator2.Select Quantity:B3.Select Vector: Scal?> Scalar Z4.Select General: Complex > Real5.Click the Smooth button6.Click the Number Button1.Type: Scalar2.Value: 100003.Click the OK button7.Click the *button8.Click the Add buttond Expression:Bz_real2.Click the OK button10.Click the Done buttonCreate Report1.Select the menu item Maxwell > Results > Create Report2.Create Report Window:1.Report Type: Fields2.Display Type: Rectangular3.Click the OK button3.Traces Window:1.Solution: Setup1: LastAdaptive2.Domain: FieldLine3.Click the Y tab1.Category:Calculator Expressions2.Quantity: Bz_real3.Function: <none>4.Click the Add Trace button4.Click the Done buttonExample (Eddy Current) –Asymmetrical ConductorField OverlaysCreate Field OverlayTo select an objectSelect the menu item Edit > Select > By NameSelect Object Dialog,Select the objects named: stockClick the OK buttonTo create a field plot:1.Select the menu item Maxwell > Fields > Fields> J > Mag_J2.Create Field Plot Window1.Solution: Setup1 : LastAdaptive2.Quantity: Mag_J3.In Volume: All4.Plot on Surface Only: ;Checked5.Click the Done buttonExample (Eddy Current) –Asymmetrical Conductor Create Field OverlayTo select an objectSelect the menu item Edit > Select > By NameSelect Object Dialog,Select the objects named: stockClick the OK buttonTo create a field plot:1.Select the menu item Maxwell > Fields > Fields> J > Vector_J2.Create Field Plot Window1.Solution: Setup1 : LastAdaptive2.Quantity: Vector_J3.In Volume: All4.Plot on Surface Only: ;Checked5.Click the Done buttonTo modify a Magnitude field plot:1.Select the menu item Maxwell > Fields > Modify Plot Attributes2.Select Plot Folder Window:1.Select: J2.Click the OK button3.J Window:1.Click the Plots tab1.Plot: Vector_J12.Vector Plot3.Set the Spacing slider to the minimum2.Click the Marker/Arrow tab1.Arrow Options2.Map Size: Unchecked3.Arrow Tail: Uncheckede the slider bar to adjust thesize2.Click the Close button。

a n s o f t操作步骤(共23页) -本页仅作为预览文档封面,使用时请删除本页-1、创建二维电磁设计模型Utility Menu-project-insert Maxwell 2D design2、选择模型设计坐标系以及电磁分析求解器Utility Menu-Maxwell 2D design-Solution type→Cartesian xy (笛卡儿坐标)-Transient(瞬态)(1)电磁场的geometry [dʒi'ɔmitri] mode 几何模型有:平面xy坐标系和轴对称坐标系(2_1)磁场Magnetic分析类型有:Magnetostatic [mæɡ,ni:təu'stætik] 静磁的Eddy current 涡流Transient ['trænziənt ] 瞬态场(2_2)电场Electric分析类型有:electrostatic [i,lektrə'stætik] 静电AC conduction [kən'dʌkʃən]传导DC conduction3、建模建模命令:Utility Menu-Draw-相关指令(1)初级铁心绘制矩形(初级铁轭:0,0—@316,50)绘制矩形(齿槽:,0—@12,35)-复制齿槽(edit-duplicate-along line-选择基点dx=,dy=0,total num=15)Boolean-substract运算减去中间槽部定义初级名称为CORE、材料(steel-1008)、颜色等属性。
(2)线圈绘制矩形(线圈:,1—@10,16)→纵向复制(dx=0,dy=17;total num=2)选择槽1内的两个线圈横向复制(dx=,dy=0,total num=15)定义线圈材料(copper)、颜色等属性/注意:可以先确定线圈的属性在进行复制等命令,以免重复定义/(3)次级铝板绘制矩形(铝板:-50,-3—@150,-3)定义次级铝板(aluminum)、颜色等属性。