CARD-1 v85运行速度分析计算功能使用说明(速度图模块使用说明)
- 格式:doc
- 大小:150.50 KB
- 文档页数:2

前言......................................................................................................................................- 2 -第1章预备知识......................................................................................................................- 3 -1.1 虚拟机器人的结构与功能........................................................................................- 3 -1.1.1...................................................................................................................身体结构- 3 -1.1.2...................................................................................................................感觉器官- 4 -1.1.3...................................................................................................................编程语言- 5 -1.2 VJC1.5仿真版能做什么...........................................................................................- 7 -1.2.1...................................................................................................为机器人编写程序- 7 -1.2.2...................................................................................................................创建环境- 7 -1.2.3...................................................................................................................仿真运行- 7 -1.3 光盘的安装与启动....................................................................................................- 8 -1.3.1...........................................................................................................................安装- 8 -1.3.2...........................................................................................................................启动- 8 -1.4 如何使用“帮助”电子文档....................................................................................- 9 -第2章初试身手....................................................................................................................- 12 -2.1 歌曲..........................................................................................................................- 13 -2.2 边唱边跳..................................................................................................................- 15 -2.3 走正方形..................................................................................................................- 16 -2.4 走六边形..................................................................................................................- 16 -2.5 走五角星..................................................................................................................- 17 -2.6 走圆形......................................................................................................................- 20 -2.7 奥运五环..................................................................................................................- 21 -2.8 进门比赛..................................................................................................................- 21 -2.9 一笔画......................................................................................................................- 23 -2.10 求和..........................................................................................................................- 23 -2.11 四则混合运算..........................................................................................................- 25 -2.12 整型数与浮点数......................................................................................................- 25 -2.13 霓虹灯......................................................................................................................- 25 -2.14 汽车..........................................................................................................................- 27 -2.15 迎宾机器人..............................................................................................................- 27 -2.16 回廊..........................................................................................................................- 27 -2.17 动态字符..................................................................................................................- 28 -2.18 波浪..........................................................................................................................- 28 -2.19 落地扇......................................................................................................................- 29 -2.20 等比求和..................................................................................................................- 30 -第3章稳步前进....................................................................................................................- 31 -3.1 打招呼......................................................................................................................- 32 -3.2 叫人起床..................................................................................................................- 38 -3.3 彩色地毯..................................................................................................................- 41 -3.4 百米赛跑..................................................................................................................- 41 -3.5 计算走过的距离......................................................................................................- 42 -上海广茂达伙伴机器人有限公司© 版权所有WEB: E_mail:serve@3.6 秒表..........................................................................................................................- 45 -3.7 风扇定时..................................................................................................................- 45 -3.8 找房门......................................................................................................................- 47 -3.9 醉汉..........................................................................................................................- 51 -3.10 自由行走..................................................................................................................- 52 -3.11 趋光的飞蛾..............................................................................................................- 53 -3.12 鼹鼠..........................................................................................................................- 54 -3.13 沿线走......................................................................................................................- 56 -3.14 越障跑......................................................................................................................- 59 -3.15 太阳能电池..............................................................................................................- 59 -3.16 电子琴......................................................................................................................- 60 -3.17 穿越隧道..................................................................................................................- 60 -3.18 舞台..........................................................................................................................- 61 -3.19 哈雷彗星..................................................................................................................- 61 - 第4章挑战自我....................................................................................................................- 62 -4.1 填字游戏..................................................................................................................- 63 -4.2 台球..........................................................................................................................- 65 -4.3 寻宝..........................................................................................................................- 68 -4.4 篝火晚会..................................................................................................................- 69 -4.5 弹球游戏..................................................................................................................- 72 -4.6 随机走......................................................................................................................- 73 -4.7 沿墙走......................................................................................................................- 74 -4.8 点歌台......................................................................................................................- 76 -4.9 回音壁......................................................................................................................- 76 -4.10 查找最大值..............................................................................................................- 77 -4.11 排序..........................................................................................................................- 78 -4.12 最大公约数..............................................................................................................- 78 -4.13 跳房子游戏..............................................................................................................- 82 -4.14 找地雷......................................................................................................................- 83 - 第5章我能赢........................................................................................................................- 84 -5.1 走迷宫......................................................................................................................- 85 -5.2 游北京......................................................................................................................- 86 -5.3 长跑比赛..................................................................................................................- 87 -5.4 救援..........................................................................................................................- 88 -5.5 灭火比赛..................................................................................................................- 89 - 附录......................................................................................................................................- 92 -附录A. 子程序..........................................................................................................- 92 - 附录B. 如何设置机器人型号......................................................................................- 96 - 附录C. 不同型号的虚拟机器人碰撞传感器差异......................................................- 97 - 附录D. 真实的能力风暴机器人功能一览表..............................................................- 97 -上海广茂达伙伴机器人有限公司© 版权所有前言本书介绍了机器人的初步知识,包括机器人的身体结构、感觉系统和思维方式。


85板功能简要操作说明一、功能简介:1.工作频段◆FM 65 – 108 MHZ (接收)◆VHF 136 – 174 MHZ (接收/发射)或◆UHF 400 – 520 MHZ (接收/发射)2.工作模式:频率模式、信道模式3.数字调谐FM 收音机4.信道接收提示音5.双段、双显、双频点守候6.双PTT键发射7.U/V段中继跨段收发8.DTMF 双音多频编码9.中/英文语言报号10.紧急呼叫报警11.CTCSS 从60.0 HZ 到259.9 HZ 任意可编辑12.CTCSS,DCS 自动搜索13.发射超时限制14. 6 档步进频率(2.5K、5K、6.25K、10K、12.5K、20K、25K)15.0-9级静噪电平可选16.高/低功率切换17.宽/窄带功能18.省电模式19.VOX 声控发射20.繁忙禁发功能21.低电压指示22.自动背光23.自动锁键盘24.三种信道显示方式(频率、信道号、信道名称)25.DTMF 侧音开关26.身份识别码27.三种扫描方式(时间、载波、搜索)28.PTT-ID 功能(可选择按下PTT发码、松开PTT 发码、按下松开均发码)29.频率模式下频差方向可选30.菜单项键盘数字直选功能31.信道参数可在频率模式下编辑储存或删除32.128个存储信道33.倒频功能(收发频率倒置)34.强光手电功能35.有线复制功能36.电脑编程二、键盘定义(一)键功能定义【MENU】:短按进入菜单设置状态,已经在菜单状态下,按下此键表示对当前菜单项菜单值的确认。
按住【MENU】键再开机实现信道模式与频率模式之间的切换。
【UP/DOWN】:频率模式下待机状态时以当前设置的步进频率上下改变当前接收频率,信道模式下待机状态上下切换信道,菜单状态下前后改变要设置的菜单项和菜单值,常按2 秒以上将快速前进或后退。
扫描状态下改变扫描方向。
【EXIT/AB】:在输入状态下,清除已输入的信息,在待机状态下,按【EXIT/AB】键进行A/B切换,在收音机状态下进行65-75/ 76-108MHz 频段切换。
CARD/1互通立交模块使用说明西安开道万软件有限公司2019年1月6日目录第一节概述 (1)第二节 CARD/1互通立交模块程序文件说明 (2)第三节 CARD/1互通立交模块使用步骤 (4)一、互通立交平面设计 (4)二、互通立交分析计算 (7)三、纵断面设计 (18)四、横断面设计 (19)五、互通立交绘图 (22)六、灵活运用CARD/1互通立交模块 (22)七、与路线总体设计融为一体的互通立交设计理念 (23)八、互通立交分析计算无法包罗万象 (25)第一节概述CARD/1互通立交模块的主要特点是在完成立交平面布线、填写项目资料管理器中的相关项目信息、路线描述参数、连接关系参数及接坡参数等基础数据之后,系统能根据这些条件自动生成互通各轴线横断面“带帽子”用的各种宽度文件和一个特征点桩号文件;纵断面自动批量传坡设计;自动完成横断面合并(多轴线戴帽);自动产生线位图、平面图、总体图、用地图、连接部图、高程数据图的绘图约定文件,避免手工绘制带来的错误;连接部自动处理,连接部横断面自动剪断至工程分界线,连接部工程量沿工程分界线自动扣除计算。
然而由于互通立交的复杂性,虽然已经兼顾了多种设计习惯,考虑到了普遍的连接部类型,但是在“立交分析计算”这一部分还是有不足的地方。
首先我们了解一下能完全交由程序自动识别计算的连接形式:1.主线在其外侧行车道边缘(注意有无偏置)增加一3.5米的单车道作为减速车道,匝道以一定角度或者平行于主线的方式流出主线;2.主线在其外侧行车道边缘(注意有无偏置)增加一3.5米的单车道作为加速车道,匝道以一定角度或者平行于主线的方式流入主线;3.对向双车道分离成两条反向单车道;4.单向双车道匝道同两条同向的单车道匝道之间的分流/合流;5.单车道匝道从主线最外侧的行车道中心开始设计,以某个角度流出主线;6.从主线分流出双车道匝道,在匝道起点处其内侧车道与主线的外侧行车道共用,而匝道外侧车道是新增的。

V85运行速度分析计算功能使用说明线形设计一致性是指公路设计中的几何条件(即公路的实际特征)与驾驶员的期望驾驶速度相适应的特性。
线形设计一致性可以保证公路全线的几何线形设计的整体协调性,公路设计一致性可以用来评价公路线形设计的安全性,是评价线形设计好坏的一个重要的指标。
从线形设计与车辆行驶速度的角度进行分析,线形设计上的任何突变,都将出现不连续的运行速度,造成驾驶员的不适应并使该位置所发生的交通事故具有聚集性。
因此,连续的运行速度是路线设计一致性的最终表现,可以把路线的几何设计对道路安全的综合影响转化为车辆在路段上行驶过程中前后速度变化的大小,并以路段中运行速度的连续变化值来评价公路路线设计的优劣。
软件采用《公路项目安全性评价指南》中提供的运行速度预测模型为理论依据。
此高速公路路段运行速度预测模型是根据对国内多条高速公路实际车辆运行状况进行大量观测的基础上,通过统计回归分析得到的。
其适用的路线指标范围是平曲线半径R∈[120米,∞]∪纵坡I[0,6%]。
功能介绍:进入【道路】--【运行速度计算】功能,会弹出如下对话框,参数解释:轴线:选择要分析的轴线编号;起/终点桩号:设置要分析的轴线桩号范围;纵坡文件:选择纵断面设计线的编号;路段划分:有两个选项,如果选择“已有分段文件”,则在后面的框中选择一个存在的分段文件的编号,如果选择“新建分段文件”,则在后面的框中填写一个新的分段文件的编号;速度参数:这里的参数值按照需要的设计速度及规范值进行填写;出图出表选项:勾选表示需要分析计算并出图出表的类型,分小客车及大货车,方向分正向和反向,可自由组合选择;图表类型:有PLT 和D W G两个格式,根据需要选择,建议选择DW G格式,当然这需要有DWG绘图模块的支持。
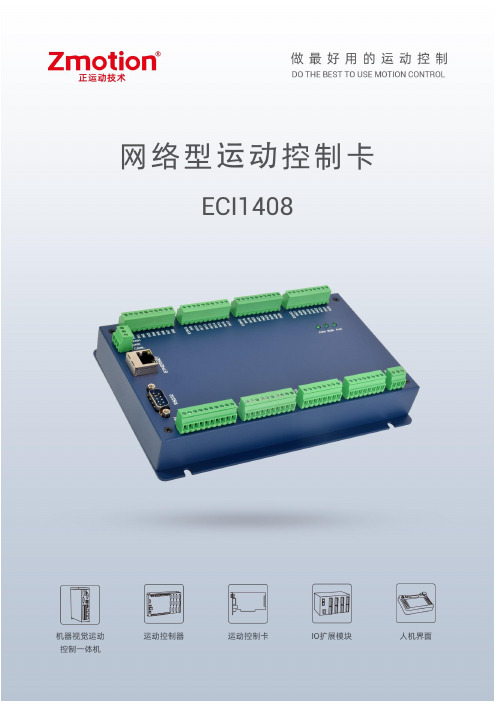
前言运动控制器提供丰富的接口,具有优良的运动控制性能,可以满足各种项目的扩展需求。
本手册介绍了产品的安装、接线、接口定义和操作说明等相关内容。
本手册版权归深圳市正运动技术有限公司所有,在未经本公司书面授权的情况下,任何人不得翻印、翻译和抄袭本手册中的任何内容。
前述行为均将构成对本公司手册版权之侵犯,本司将依法追究其法律责任。
涉及ECI控制器软件的详细资料以及每个指令的介绍和例程,请参阅ZBASIC软件手册。
本手册中的信息资料仅供参考。
由于改进设计和功能等原因,正运动公司保留对本资料的最终解释权!内容如有更改,恕不另行通知!调试机器要注意安全!请务必在机器中设计有效的安全保护装置,并在软件中加入出错处理程序,否则所造成的损失,正运动公司没有义务或责任对此负责。
为了保证产品安全、正常、有效的使用,请您务必在安装、使用产品前仔细阅读本产品手册。
更新记录产品型号:ECI1408网络型运动控制卡文件名版本号版本(更改)说明更新日期更改人用户手册V1.51.增加型号信息,命名规则2.增加各个端子和接口的规格接线和基本使用方法3.增加网口说明4.增加扩展模块资源映射5.增加编程软件使用方法6.增加版权声明、安全注意事项、运行与维护及售后服务说明内容2023/4/19xcx安全声明●本章对正确使用本产品所需关注的安全注意事项进行说明。
在使用本产品之前,请先阅读使用说明并正确理解安全注意事项的相关信息。
●本产品应在符合设计规格要求的环境下使用,否则可能导致设备损坏,或者人员受伤,因未遵守相关规定引发的功能异常或部件损坏等不在产品质量保证范围之内。
●因未遵守本手册的内容、违规操作产品引发的人身安全事故、财产损失等,我司将不承担任何法律责任。
安全等级定义按等级可分为“危险”、“注意”。
如果没有按要求操作,可能会导致中度伤害、轻伤及设备损伤的情况。
请妥善保管本指南以备需要时阅读,并请务必将本手册交给最终用户。
安装危险◆控制器拆卸时,系统使用的外部供应电源全部断开后再进行操作,否则可能造成设备误操作或损坏设备;◆禁止在以下场合使用:有灰尘、油烟、导电性尘埃、腐蚀性气体、可燃性气体的场所;暴露于高温、结露、风雨的场合;有振动、冲击的场合;电击、火灾、误操作也会导致产品损坏和恶化。
ᕡInstalling the software IMPORTANT: Before connecting any cables, install the software that was included with/go/z885support1ᕢLoading the batteries(rechargeable)non-rechargeable)ᕣ(non-rechargeable)/go/z885support 3ᕤSetting the language, date/time21to change.OK to accept.OK (press)21to change.OK to accept.Language:Date/Time:ᕥTaking a picture/videoPress the Shutter buttoncompletely down and release.To stop recording, press theShutter button again./go/easysharecenter/go/z885support5EᕦOK During playback to pause or play.During playback to adjust the volume.During playback to play at 2X speed; press again for 4X.During playback to reverse at 2X speed; press again for 4X.Play.ᕧTransferring pictures/videos/go/z885supportᕨKeep learning about your camera!• the extended user’s guide• interactive troubleshooting and repairs • interactive tutorials • FAQs• downloads • accessories• printing information • product registrationCongratulations! You have:• set up your camera • taken pictures• transferred pictures to your computerKeep learning!Finish reading this book, so you can take and share your best pictures!Self-timer/Burst button3Self-timer/Video light8Speaker4On/Off button9Microphone5Flash button 10Lens/go/easysharecenter/go/z885support 9E N G L I OK/4-way arrows 13DC-In (3V), for optional AC adapter4LCD/Info button 14Share button 5Delete button15Menu button 6Wide angle button 16Review button7Telephoto button 17Battery compartment 8Strap post18Battery door 9Slot for optional SD or MMC card19Tripod socket10SD or MMC card (sold separately)20Dock connector1Doing more with your cameraUsing optical zoomUse optical zoom to get up to 5X closer to your subject. Optical zoom is effective when the lens is no closer than 24 in. (60 cm) to the subject or 7.9 in. (20 cm) in Close-up mode. You can change optical zoom before and during video recording.1Use the LCD to frame your subject.2Press Telephoto (T) to zoom in. Press Wide Angle (W) to zoom out.The zoom indicator shows zoom status.3Take the picture or video.NOTE: In Video mode, the zoom indicator changes and only the optical zoom range appears.W T D10/go/easysharecenterDoing more with your cameraUsing the self-timerUse the self-timer when you want to be included in a picture, or to ensure a steady Shutter button press., or press the Shutter button completely down.Use the same procedure to use the self-timer in Video mode, but:■Turn the Mode dial to Video .■Press the Shutter button completely down.NOTE: The video stops when no storage space remains. Only the 2- and 10-second options are available invideo mode.• Once for a 10-second delay (so you have time to get into the scene)• Again for a 2-second delay (for a steady, auto-shutter release on a tripod)• Again for 2-shot (one picture taken after 10 seconds and another pictureIn most Still modes, press the Self-timer/Burst button :Doing more with your cameraUsing burst1In most Still modes, press the Self-timer/Burst button.NOTE: Burst is unavailable in Portrait, Night Portrait, Night Landscape, Backlight, Fireworks, and Panorama.2Press the Shutter button halfway to focus and set exposure.3Press the Shutter button completely down and hold it to take pictures.The camera stops taking pictures when you release the Shutter button, when the pictures are taken, or when there is no more storage space.NOTE: During quickview, you can delete all pictures in the burst series. To delete selectively, do so in Review(see page 21).ModeIcon Description Purpose FirstBurst Camera takes up to 5 pictures while the Shutter button is pressed.Capture an expected event.Example:A person swinging agolf club.Last BurstCamera takes up to 30 pictures while the Shutter button is pressed. When the Shutter button is released, only the last 5 pictures are saved.Capture an eventwhen the precisetiming is uncertain.Example:A child blowing outbirthday candles.Press the button repeatedly to scroll through flash modes (see Flash modes below).The current flash mode appears in the LCDDoing more with your cameraCapture modesCapture modeFor Smart Scene General picture taking. When the Shutter button is pressedhalfway, faces are detected, the scene is analyzed, and the bestsettings are applied. Pictures are taken in Auto mode if the Scene(SCN) mode cannot be determined.P, M More creative control. Program and Manual modes.High ISO People in low-light scenes indoors using a higher ISO.Digital Image Stabilization Minimizing the effects of camera shake and subject movement.Scene Point-and-shoot simplicity when taking pictures under specialconditions. (See page 15.)Video Capturing video with sound. (See page 4.)FavoritesViewing favorite pictures. Choose the mode that best suitsyour subjects and surroundings.Mode dialP/M ISO SCNDoing more with your cameraScene modes1Turn the Mode dial to Scene .2Press to display Scene mode descriptions.NOTE: If the mode description turns off before you finish reading it, press OK.3Press OK to choose a Scene mode.Using camera HelpDoing more with your cameraUnderstanding the picture-taking icons In Smart Scene mode—no buttons pressed Picture size Pictures/time remaining Storage location Low battery Zoom: Camera modeFlashwide digitaltelephoto Self-timer/BurstDate stampAlbum name Framing marksFraming grid2Working with pictures/videosIf you press the W button while at 1X, the view changes from single-picture to multi-up thumbnails.Cropping pictures1Press the Review button, then to find apicture.2Press the Menu button, then tohighlight Crop. Press the OK button.3Press Telephoto (T) to zoom in, ortomove the crop box. Press OK.4Follow the screen prompts.The picture is cropped. The original is saved. (Cropped pictures cannot be cropped again.)■Press the Menu button to exit the menu.Treturn to 1X.OKPicture Cropped pictureWorking with pictures/videosViewing thumbnails (multi-up)1Press the Review button.2Press the Zoom Wide Angle (W) button to changefrom single-picture view to multi-up thumbnails.3Press Telephoto (T) to return to single-picture view.■Press the Review button to exit Review.Using Kodak Perfect Touch technologyKodak Perfect Touch technology helps ensure better, brighter pictures.1Press the Review button, then to find a picture.2Press the Menu button, then to highlight Perfect Touch tech.Press the OK button.The enhancement is previewed in a split screen. Press to view other parts of the picture.3Press OK. Follow the screen prompts to replace the original picture or to save the enhanced picture as a new one.NOTE: You cannot enhance previously enhanced or panorama pictures, or videos.■Press the Menu button to exit the menu.Working with pictures/videos Editing videosMaking a picture from a videoYou can choose a single frame from a video, then make a picture suitable for printing.1Press the Review button, then to find a video.2Press the Menu button, thentohighlight Make Picture. Press the OK button.3Press to navigate through video frames.4Press OK to select a video frame, then press.5Follow the screen prompts.A picture is created. (The original video is saved.) Trimming a videoYou can delete an unwanted portion from the beginning or end of a video.Press the Review button, thento find a video.Press the Menu button, then tohighlight Edit Video. Press the OK button.Choose Trim, then press OK.Follow the screen prompts.The video is trimmed. (You can save it as a new video orreplace the original.)Video PictureWorking with pictures/videosUsing sound tagsYou can add a unique sound/message (up to 1 minute long) to your picture. Only one tag can be applied to each picture. You cannot add a sound tag to a video.Recording a sound tag1Press the Review button, thento find a picture.2Press the Menu button, thento highlight Sound Tag. Press the OK button.3Choose Record, then press OK.4Follow the screen prompts.The sound tag is applied to your picture.■Press the Menu button to exit the menu.Playing a sound tag1Press the Review button, thento find a tagged picture.2Press to play the sound tag.3Press to adjust the volume.4Press OK to pause or replay the sound tag duringplayback.ReviewOKWorking with pictures/videosDeleting pictures/videos1Press the Review button.2Press to find a picture/video.3Press the Delete button.4Follow the screen prompts.NOTE: After you delete a picture/video, the next picture/video (overlaidwith the Delete menu with the Undo Delete option) appears. Ifthere are no more pictures/videos, the Delete menu on a blankscreen appears. See Using the undo delete feature for moreinformation.Using the undo delete featureIf you accidentally delete a picture or video, use Undo Delete to retrieve it. This feature is available only immediately after you delete a picture/video in Review mode. The Undo Delete option appears.1Press to highlight Undo Delete.2Press OK.The deleted picture/video (overlaid with the Delete menu) appears.■Select Exit to exit the Delete menu.3Solving camera problemsFor step-by-step product support, visit /go/z885support and select Interactive Troubleshooting & Repairs.Camera problemsIf...Try one or more of the followingCamera does not turn on/off.■Install new batteries (page2).■Charge rechargeable batteries.■Remove the battery, then reinsert or replace it.Stored pictures are corrupted.■Retake pictures. Do not remove card while the Ready light is blinking.Keep rechargeable batteries charged.■Transfer the pictures to the computer (page6), format the SD/MMC card in the camera. (Press the Menu button, choose Setup and find Format).Formatting deletes all pictures/videos, including protected files.Removing the card during formatting may damage the card.Short battery life with Kodak Ni-MH rechargeable digital camera batteries.■Wipe the contacts with a clean, dry cloth before loading batteries in the camera.■Limit the following activities that quickly deplete battery power: reviewing pictures/videos on the LCD; and excessive use of the flash.■Use the Refresh feature on your camera dock series 3 or printer dock series 3.4AppendixImportant safety instructionsCAUTION:Do not disassemble this product; there are no user-serviceable parts inside. Refer servicing to qualified service personnel. Do not expose this product to liquid, moisture, or extreme temperatures. Kodak AC adapters and battery chargers are intended for indoor use only. The use of controls, adjustments, or procedures other than those specified herein may result in exposure to shock and/or electrical or mechanical hazards. If the LCD breaks, do not touch the glass or liquid. Contact Kodak customer support.■The use of an accessory that is not recommended by Kodak may cause fire, electric shock, or injury.■Use only a USB-certified computer. Contact your computer manufacturer if you have questions.■If using this product in an airplane, observe all instructions of the airline.■When removing the battery, allow it to cool; it may be hot.■Read and follow all warnings and instructions supplied by the battery manufacturer.■Use only batteries approved for this product to avoid risk of explosion.■Keep batteries out of the reach of children.■Do not allow batteries to touch metal objects, including coins. Otherwise, a battery may short circuit, discharge energy, become hot, or leak.■Do not disassemble, install backward, or expose batteries to liquid, moisture, fire, or extreme temperature.■Remove the battery when the product is stored for an extended period of time. In the unlikely event that battery fluid leaks inside the product, contact Kodak customer support.■In the unlikely event that battery fluid leaks onto your skin, wash immediately with water and contact your local health provider. For additional health-related information, contact your local Kodak customer support.■Dispose of batteries according to local and national regulations.■Do not charge non-rechargeable batteries.For more information on batteries, see /go/batterytypesAppendixUpgrading your software and firmwareDownload the latest versions of the software included on the Kodak EasyShare software CD and the camera firmware (the software that runs on the camera). See /go/z885downloads.Additional care and maintenance■If the camera has been subjected to inclement weather or you suspect water has gotten inside the camera, turn off the camera and remove the batteries and card. Allow components to air-dry for at least 24 hours before using the camera again.■Blow gently on the lens or LCD to remove dust and dirt. Wipe gently with a soft, lint-free cloth or an untreated lens-cleaning tissue. Do not use cleaning solutions unless designed specifically for camera lenses.Do not allow chemicals, such as suntan lotion, to contact painted surfaces.■Service agreements are available in some countries. Contact a dealer of Kodak products for more information.For digital camera disposal or recycling information, contact your local authorities. In the US, visit the Electronics Industry Alliance Web site at or visit /go/z885support.WarrantyKodak warrants Kodak consumer electronic products and accessories (“Products”), excluding batteries, to be free from malfunctions and defects in both materials and workmanship for one year from the date of purchase. Retain the original dated sales receipt. Proof of the date of purchase will be required with any request for warranty repair.Limited warranty coverageWarranty service is only available from within the country where the Products were originally purchased. You may be required to ship Products, at your expense, to the authorized service facility for the country where the Products were purchased. Kodak will repair or replace Products if they fail to function properly during the warranty period, subject to any conditions and/or limitations stated herein. Warranty service will include all labor as well as any necessary adjustments and/or replacement parts. If Kodak is unable to repair or replace a Product, Kodak will, at its option, refund the purchase price paid for the Product provided the Product has been returned to Kodak along with proof of the purchase price paid. Repair, replacement, or refund of the purchase price are the sole remedies under the warranty. If replacement parts are used in making repairs, those parts may be remanufactured, or may contain remanufactured materials. If it is necessary to replace the entire Product, it may be replaced with a remanufactured Product. Remanufactured Products, parts and materials are warranted for the remaining warranty term of the original Product, or 90 days after the date of repair or replacement, whichever is longer.Appendix LimitationsThis warranty does not cover circumstances beyond Kodak's control. This warranty does not apply when failure is due to shipping damage, accident, alteration, modification, unauthorized service, misuse, abuse, use with incompatible accessories or attachments (such as third party ink or ink tanks), failure to follow Kodak's operation, maintenance or repacking instructions, failure to use items supplied by Kodak (such as adapters and cables), or claims made after the duration of this warranty. Kodak makes no other express or implied warranty for this product, and disclaims the implied warranties of merchantability and fitness for a particular purpose. In the event that the exclusion of any implied warranty is ineffective under the law, the duration of the implied warranty will be one year from the purchase date or such longer period as required by law. The option of repair, replacement, or refund is Kodak's only obligation. Kodak will not be responsible for any special, consequential or incidental damages resulting from the sale, purchase, or use of this product regardless of the cause. Liability for any special, consequential or incidental damages (including but not limited to loss of revenue or profit, downtime costs, loss of the use of the equipment, cost of substitute equipment, facilities or services, or claims of your customers for such damages resulting from the purchase, use, or failure of the Product), regardless of cause or for breach of any written or implied warranty is expressly disclaimed.Your rightsSome states or jurisdictions do not allow exclusion or limitation of incidental or consequential damages, so the above limitation or exclusion may not apply to you. Some states or jurisdictions do not allow limitations on how long an implied warranty lasts, so the above limitation may not apply to you. This warranty gives you specific rights, and you may have other rights which vary from state to state or by jurisdiction.Outside the United States and CanadaIn countries other than the United States and Canada, the terms and conditions of this warranty may be different. Unless a specific Kodak warranty is communicated to the purchaser in writing by a Kodak company, no warranty or liability exists beyond any minimum requirements imposed by law, even though defect, damage, or loss may be by negligence or other act.FCC compliance and advisoryKodak EasyShare z885 zoom digital cameraThis equipment has been tested and found to comply with the limits for a Class B digital device, pursuant toPart 15 of the FCC Rules. These limits are designed to provide reasonable protection against harmfulinterference in a residential installation.This equipment generates, uses, and can radiate radio frequency energy and, if not installed or used inaccordance with the instructions, may cause harmful interference to radio communications. However, there isno guarantee that interference will not occur in a particular installation.AppendixIf this equipment does cause harmful interference to radio or television reception, which can be determined by turning the equipment off and on, the user is encouraged to try to correct the interference by one or more of the following measures: 1) reorient or relocate the receiving antenna; 2) increase the separation between the equipment and the receiver; 3) connect the equipment to an outlet on a circuit different from that to which the receiver is connected; 4) consult the dealer or an experienced radio/TV technician for additional suggestions.Any changes or modifications not expressly approved by the party responsible for compliance could void the user’s authority to operate the equipment. Where shielded interface cables have been provided with the product or specified additional components or accessories elsewhere defined to be used with the installation of the product, they must be used in order to ensure compliance with FCC regulation.Australian C-tickCanadian DOC statement DOC Class B ComplianceThis Class B digital apparatus complies with Canadian ICES-003.Observation des normes-Classe BCet appareil numérique de la classe B est conforme à la norme NMB-003 du Canada.Waste Electrical and Electronic Equipment labelingVCCI Class B ITEIn the European Union, do not discard this product as unsorted municipal waste. Contact your local authorities or go to /go/recycle for recycling program information.N137Appendix Korean Class B ITEChinese RoHSEastman Kodak CompanyRochester, NY 14650Eastman Kodak Company, 2007Kodak, EasyShare, and Perfect Touch are trademarks of Eastman Kodak Company.4J6180_en。
内容目录1项目新建11.1建立项目:11.2项目菜单介绍21.3其他辅助功能介绍3 2地形图数据读入及数模建立42.1DWG的前期处理42.2地形图数据的读入42.3数字地面模型的建立122.3.1建立数模操作步骤122.3.2空间视图142.3.3难点说明错误!未定义书签。
3轴线设计173.1操作步骤173.2平面设计的详细说明21 4从数模截取纵、横地面线234.1生成桩号表234.2由桩号表截取纵断面地面线234.3由桩号表截取横断面地面线24 5纵断面设计255.1变坡点设计255.2竖曲线设计275.3补充说明27 6横断面设计306.1数模内插横断面地面线306.2横断面设计316.2.1项目参数配置316.2.2执行戴帽文件376.3道路行驶模拟396.4补充说明40 7输出图表447.1表格的产生447.1.1生成桩号文件447.1.2直线及曲线一览表457.1.3纵坡竖曲线表467.1.4路基设计表467.1.5逐状坐标表467.2平纵横出图47 8光栅图读取及处理508.1光栅图的读入和变换508.2光栅图的切边538.3光栅图的矢量化551项目新建1.1建立项目:菜单:【项目】→【新建】弹出如下对话框,正确填写如图各项:注意:项目名称为40个以内的英文字符;调用不同的核心项目请点击,选择适用于中国用户的核心项目<CARD-CN>;备份项目的勾选,项目就通过存档程序保存为CARD/1 Backup 。
新建立项目之后,系统默认角度为新度(400度为一圆周),可将之改为中国用户习惯的度、分、 秒:主菜单:【设置】→【数字格式】,弹出如下对话框:1.2 项目菜单介绍a) 项目:主要是对项目及其项目内部的文件进行管理;b) 项目界限:设定全屏刷新时显示的地形图窗口范围;c) 项目管理:项目的删除、复制、导入、导出;8.0版本后的CARD/1项目传给不同的用户都需要进行项目的导出和导入;d) 文件管理:主要是对我们的项目文件进行拷贝、删除处理;e) 项目资料管理:设置和输入道路设计的相关参数,主要包括:道路等级、设计速度、标准横断面几何参数、路基填挖方边坡、路基排水沟、桥涵隧道、交叉口、土石方比例等。
V85运行速度分析计算功能使用说明
线形设计一致性是指公路设计中的几何条件(即公路的实际特征)与驾驶员的期望驾驶
速度相适应的特性。
线形设计一致性可以保证公路全线的几何线形设计的整体协调性,公路设计一致性可以用来评价公路线形设计的安全性,是评价线形设计好坏的一个重要的指标。
从线形设计与车辆行驶速度的角度进行分析,线形设计上的任何突变,都将出现不连续的运行速度,造成驾驶员的不适应并使该位置所发生的交通事故具有聚集性。
因此,连续的运行速度是路线设计一致性的最终表现,可以把路线的几何设计对道路安全的综合影响转化为车辆在路段上行驶过程中前后速度变化的大小,并以路段中运行速度的连续变化值来评价公路路线设计的优劣。
软件采用《公路项目安全性评价指南》中提供的运行速度预测模型为理论依据。
此高速公路路段运行速度预测模型是根据对国内多条高速公路实际车辆运行状况进行大量观测的基础上,通过统计回归分析得到的。
其适用的路线指标范围是平曲线半径R∈[120米,∞]∪纵坡I[0,6%]。
功能介绍:
进入【道路】--【运行速度计算】功能,会弹出如下对话框,
参数解释:轴线:选择要分析的轴线编号;起/终点桩号:设置要分析的轴线桩号范围;
纵坡文件:选择纵断面设计线的编号;路段划分:有两个选项,如果选择“已有分段文件”,则在后面的框中选择一个存在的分段文件的编号,如果选择“新建分段文件”,则在后面的框中填写一个新的分段文件的编号;速度参数:这里的参数值按照需要的设计速度及规范值进行填写;出图出表选项:勾选表示需要分析计算并出图出表的类型,分小客车及大货车,方向分正向和反向,可自由组合选择;图表类型:有PLT 和DWG两个格式,根据需要选择,建议选择DWG格式,当然这需要有DWG绘图模块的支持。
设置好参数后,点击开始分析按钮,耐心等待,即可自动完成图表的输出。
V85运行速度分析计算成果如下图:
运行速度计算表:
运行速度图(按照小客车和大货车及运行方向的正向和反向分别进行出图):
运行速度梯度图(按照小客车和大货车及运行方向的正向和反向分别进行出图):。