用音乐开启智能生活--索尼智能蓝牙音箱LF-S80D
- 格式:pdf
- 大小:2.04 MB
- 文档页数:4
索爱蓝牙音箱使用方法
索爱蓝牙音箱是一款便携式音箱,可以通过蓝牙连接手机、平板电脑和其他音频设备,实现无线播放音乐的功能。
以下是使用方法:
1. 开始使用前,请确保音箱已经充电完毕。
可以使用音箱附带的USB充电线连接电源进行充电。
2. 打开音箱的电源开关,通常可以在音箱的底部或侧面找到。
3. 手机或其他音频设备开启蓝牙功能,进入蓝牙设置界面。
点击搜索附近的蓝牙设备,等待设备列表更新。
4. 在设备列表中,找到索爱蓝牙音箱的名称,点击进行配对。
通常,音箱的名称会以"SONY"或"SRS"开头。
5. 配对成功后,手机或其他音频设备会提示连接成功,并在音量控制界面显示当前连接的设备信息。
6. 确认手机或其他音频设备已经连接到音箱后,打开音源播放音乐或其他媒体内容。
7. 音箱通常配备有音量加减按钮,可以通过点击或长按按钮来调节音量大小。
8. 音箱还可以通过接入设备的AUX音频接口,使用音频线连接音箱与音频设备进行有线播放。
9. 使用完毕后,及时关闭音箱的电源开关,以节省电量并延长使用寿命。
请注意,具体使用方法可能会因音箱型号不同而有所差异,建议在遇到问题时参考产品附带的说明书或联系售后服务进行咨询。

Portable CD Player3-232-712-35 (1)D-CJ01© 2001 Sony Corporation使用说明书关于区域码您购买CD 唱机地方的区域码标示在包装盒上条码标签的左上角。
您的CD唱机附带的附件,请查一下您机器型号的区域码并参看“附件(附带/选购)”。
“WALKMAN”是Sony公司的商标。
为防火灾或触电危险,切勿让机器暴露于雨中或潮湿处。
别把机器安装在诸如书橱或壁橱等密闭处。
为防火灾,请勿让装置的通风孔盖住报纸,桌布,窗帘等。
也不可在装置上点放蜡烛。
为防火灾或触电危险,不可在装置上摆饰花瓶等装满液体的物体。
电池要当有毒垃圾处理,不可当普通垃圾丢弃。
一部分国家对于本产品的电源用电池可能规定有处置的标准。
请洽询当地有关当局。
CE标志限在欧洲联盟出售的产品有效。
2目录控制器位置 (4)1.连接CD唱机。
(6)2.装入CD光盘。
(6)3.播放CD。
(6)反复播放曲子(反复播放) (12)播放所选文件夹中的所有文件(文件夹播放)(MP3 CD为限) (12)播放单曲(单曲播放) (12)以任意顺序播放曲子(任意顺序播放) (13)以任意顺序播放所选文件夹中的所有文件(文件夹任意顺序播放)(MP3 CD为限) (13)以所喜欢的顺序播放曲子(PGM播放) (14)G-PROTECTION功能 (16)显示CD文本信息 (16)检查CD的剩余时间和剩余曲数 (17)检查带MP3文件的CD上的信息 (17)加强低音(SOUND) (18)保护听觉(AVLS) (19)锁定控制器(HOLD) (19)关掉操作嘟声 (20)连接CD唱机连接立体声系统 (21)连接电源使用充电池 (22)使用干电池 (24)电源须知 (24)附加信息使用前须注意 (25)保养 (25)故障检修 (26)规格 (28)附件(附带/选购) (29)关于“MP3” (30)关于“ID3 tag”(ID3辅助信息) (31)3准备使用控制器位置详细,请参看括弧中的页次。
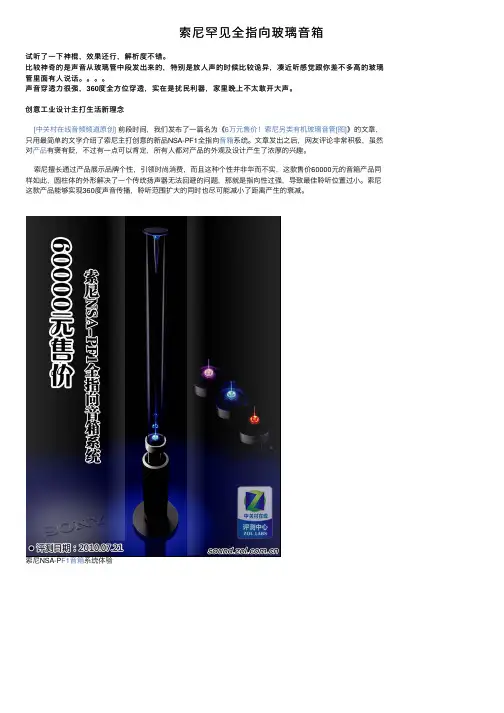
索尼罕见全指向玻璃⾳箱试听了⼀下神棍,效果还⾏,解析度不错。
⽐较神奇的是声⾳从玻璃管中段发出来的,特别是放⼈声的时候⽐较诡异,凑近听感觉跟你差不多⾼的玻璃管⾥⾯有⼈说话。
声⾳穿透⼒很强,360度全⽅位穿透,实在是扰民利器,家⾥晚上不太敢开⼤声。
创意⼯业设计主打⽣活新理念[中关村在线⾳频频道原创]前段时间,我们发布了⼀篇名为《6万元售价!索尼另类有机玻璃⾳管[图]》的⽂章,只⽤最简单的⽂字介绍了索尼主打创意的新品NSA-PF1全指向⾳箱系统。
⽂章发出之后,⽹友评论⾮常积极,虽然对产品有褒有贬,不过有⼀点可以肯定,所有⼈都对产品的外观及设计产⽣了浓厚的兴趣。
索尼擅长通过产品展⽰品牌个性,引领时尚消费,⽽且这种个性并⾮华⽽不实,这款售价60000元的⾳箱产品同样如此,圆柱体的外形解决了⼀个传统扬声器⽆法回避的问题,那就是指向性过强,导致最佳聆听位置过⼩。
索尼这款产品能够实现360度声⾳传播,聆听范围扩⼤的同时也尽可能减⼩了距离产⽣的衰减。
索尼NSA-P F1⾳箱系统体验索尼NSA-PF1⾳箱系统索尼NSA-PF1⾳箱系统的360度发声下⾯的内容我们将详细介绍索尼这款创意新品的⽅⽅⾯⾯,同时也欢迎⽹友在留⾔区发表看法。
同时我们抛出⼀些您可能感兴趣的话题,这些问题将在⽂章中找到答案,末页也会再做⼀个简单概述。
您可能感兴趣的话题:1、产品使⽤的发声单元和传统⾳箱有⽆区别?2、⾳质⽅⾯,和传统⾳箱有多⼤区别?3、什么样的空间环境适合使⽤这款产品?索尼NSA-PF1⾳箱系统售价:60000元有机玻璃柱状⾼⾳单元⾸先在⾼⾳单元⽅⾯,这款产品就与众不同。
⾳箱顶部的⼀个1m长的有机玻璃管,整体都可以看作是⾼⾳单元,其中玻璃管底部的7cm圆锥扬声器为主动部分,其上⽅的空间则为被动发声。
索尼NSA-PF1⾳箱系统:7cm圆锥扬声器索尼NSA-PF1⾳箱系统:玻璃管顶部按着索尼官⽅的说法,这样的360度设计能够很好地减弱因距离提升⽽产⽣的衰减,当然这是和传统的点声源和线声源相⽐。

2-595-576-02 (1) Hi-MD S ystem S tereo P ersonal C omponent S ystemInstruction m anual/WarrantyThank y ou f or y our p urchase.Failure t o o bserve s afety p recautions w ithelectrical p roducts m ay r esult i n f ire o r p ersonal i njury.This i nstruction m anual s hows i mportant p recautions a nd h ow t ohandle t he p roduct t o p revent a ccidents. P lease r ead t his i nstructionmanual c arefully a nd u se t he p roduct s afely. A fter r eading, b e s ure t okeep i t i n a p lace w here y ou c an r efer t o i t a t a ny t ime.CMT-AH10©2005 S ony C orporationMeaning o f w arning i ndications The f ollowing i ndications a re used i n t he i nstruction m anual a nd on t he p roduct. P lease r ead t he t ext after f ully u nderstanding t he c ontentsof t he d isplay.Prohibited s ymbolPlease r ead t he n otes o n p ages 6-9 c arefully. C ontains g eneral p roduct precautions.1Turn o ff t hepower 2Unplug t hepower p lug f rom the e lectrical o utlet 3Consult t he s tore o fpurchase o r S ony service c enter f or repairOnce a y ear, c heck t hat t he p ower c ord i s n ot d amaged a nd t hat d ust h as accumulated b etween t he p ower o utlet a nd t he p ower p lug.Symbols t hat i ndicate a ctionsattention s ymbolSony p roducts a re d esigned w ith s afety i n m ind. H owever, a ll e lectrical products a re d angerous a nd m ay c ause p ersonal i njury d ue t o f ire, e lectric shock, e tc., i f u sed i ncorrectly. B e s ure t o o bserve t he f ollowing t o p revent accidents.If y ou n otice a ny m alfunction o r d amage t o t he c abinet, p ower c ord, e tc., immediately c ontact y our r etailer o r S ony s ervice c enter f or r epairs.bFor y our s afetyFailure t o o bserve t he p recautions indicated b y t his s ign m ay r esult i n i njury or d amage t o n earby h ousehold g oods due t o e lectric s hock o r o ther a ccidents.Failure t o o bserve t he p recautions indicated b y t his i ndication m ay r esult i n personal i njury s uch a s d eath o r s eriousinjury d ue t o f ire, e lectric s hock, e tc.2 I ntroductionFailure t o o bserve t he p recautions indicated b y t his i ndication m ay r esult i npersonal i njury s uch a s d eath o r s erious injury d ue t o f ire, e lectric s hock, e xplosion, e tc.If t here i s a s trange s ound o r s mell, if s moke a ppearsBefore u singThis i nstruction m anual e xplains h ow t o u se t he P ersonal C omponent S ystem m ain u nit. T here a reseparate m anuals f or b asic o perations f or c onnecting t o a c omputer a nd d etailed s oftware o perations.Please r efer t o t he f ollowing a nd u se t he n ecessary m anuals.When u sing t his u nitxOperating I nstructions (this d ocument)This m anual d escribes t he o verall o peration o f t his m achine. S ee h ere f ordetails o n o perating t his u nit.zOperations o n t he m ain u nit a nd r emotecontrol T his m anual m ainly d escribes o perations o n t he r emote c ontrol, b ut y ou c analso p erform t he s ame o perations o n t he m ain u nit u sing b uttons w ith t he s ame o rsimilar n ames. P lease a lso r efer t o “Part n ames” (pages 16-21).When c onnecting t his u nit t o acomputerxSoftware I nstallation /Basic O peration G uidesonic s tageExplains h ow t o i nstall t he i ncluded s oftware (SonicStage) a nd b asicoperations.x S onicStage H elp T his i s a nelectronic m anual t hat y ou c an v iew o n y our c omputer s creen. I t i sincluded i n t he i ncluded s oftware S onicStage.It e xplains h ow t o u se S onicStage i n m ore d etail t han t he “Installation/Basic O peration G uide”. A lso, i f y ou h ave a ny p roblems w hile u singSonicStage, p lease s ee h ere.xPersonal A udio C ustomer S upport W ebsite o n t he I nternet.You c an v iew t he l atest s upport i nformation f or t his u nit a nd t he i ncludedSonicStage s oftware. h ttp://www.sony.co.jp/support-pa/Introduction 3warning ................................................. ................. 6 Cautions .................................. ................................. 7 W hat kind o f d iscs c an b e p layed o n t his u nit? ........................... 11 What H i-MD c an d o ! ................. 12 E njoy c reating y our o wn original C Ds.. (14)Connections a nd P reparations ................................ 15 Accessories C onfirm ................................................................ 15 Names o f e ach p art........................................................ ................. 16 C onnections........................................ ........................ 22 Setting t he c lock ........................ (24)Adjusting t he c ontrast o f t he d isplay w indow ......................... ......... 25You c an u se i t e ven i f y ou o nly r ead h ere .. (26)Listening t o t he C D.................................. ................................................ 26 R ecording a n e ntire C D t o a n M D ... ................................. 29 Listening t o t he M D ................................ ................................. 35 Listening t o t he t ape........ ......................................................... 37 t ape R ecording t he e ntire r ecording t o a n M D ................ 39 Listening t o t heradio ................................................39 ................................................ 43 R eRecording t o a n M D (66)Menu o perations (49)table o f c ontents4 I ntroductionSelect a nd r ecord y our f avorite s ongs f rom a C D(Group r ecording) .................. 68 A utomatically a dd track m arks t o s ilences (Track m ark m ode) (69)(Resume p layback) (59)How t o o perate t he m enu ................................ 49(CD-MD p rogram s ynchronized r ecording) 67Recording o nly t he t rack b eing p layed f rom aCD (REC I T r ecording)................................. 66Menu l ist (50)Create a n ew g roup a nd r ecordHow t o r ead t he d isplay w indow (54)Searching f or t he p art y ou w ant t o h ear (search).. 58 Listening f rom w here y ou s toppedEnjoying V arious P layback M odes ............ S earching f or 60 s ongs (Search)Selecting a t rack t o l isten t o (direct s ong s election) ..... 57 Selecting a g roup t o l isten t o (group d irect s ongselection) (58)(For H i-MD a nd M D o nly) (65)CD/MD p layback (54)Data o ther t han m usic d ata o n a d isc Wake u p t o m usic (alarm t imer).... 93Saving (data s torage) (100)Storing a s tation i n m emory .................. 87 L istening t o a stored s tation (Preset t uning).. (88)Assigning a n ame (Title i nput) ......... 71 C reating a g roup (Group s etting) ......... 74 C anceling a g roup(Ungroup ) .................. 75 C hanging t he o rder o f t racks (Move) .......................... 76 D eleting t racks o r g roups (Erase).. . (78)Precautions f or u se ..........................................117 M ain specifications ........ (119)Recording u sing t he t imer (Recordingtimer) .................. 94 S leeping w hile l istening t o m usic ( sleep t imer) .. (96)Listening t o T V, v ideo, e tc (102)Warranty a nd a fter-salesservice ................121Explanation ................................................ ..............Dividing t racks (Divide) bining 80 t racks i ntoone (Combine) ................................ ..... 80 I nitializing adisk (formatting) 81What y ou c an d o b y c onnecting t o a c omputer ..98Connecting t o a c omputer .................................. .. 98Recording o nly t he t rack b eing p layed f rom a C D o r M DChanging t he t ime (Clock s etting) .. 89 T urning o n/off t he backlight o f t he d isplay w indow . 89 S electing t he d isk mode (Disk m ode)... ..................90Selecting t he l anguage of t he d isplay ................................ . (90)Index .................................................. . (125)Listening t o s ound f rom t he c onnected c omputerSwitching t he d isplay m ethod o f t itles e ntered o n a computer (for M D o nly) ......................... 91 L istening with y our p referred s ound q uality ............. .. (91)(USB s peaker f unction) ................................ 99Troubleshooting ...............103 L ist o fMessages ............................ .. (110)Before E diting .................................................. 70Introduction 5Troubleshooting (103)Recording o n t ape (83)Various s ettings (89)MD e diting (70)Connections w ith e xternal d evices (102)Timer (93)Others (117)Radio (87)Using b y c onnecting t o a c omputer (98)(REC I T r ecording – T APE) ................ 83 Recording C Ds a nd M Ds (CD-TAPE p rogram synchronized r ecording) (MD-TAPE p rogram Synchronous r ecording) ................................ 84 R ecording m anually (Manual r ecording - TAPE). .. (85)Failure t o o bserve t he f ollowing p recautionsmay r esult i n d eath o r s erious i njury d ue t o f ire o relectric s hock .Do n ot d rop w ater o r f oreign m atter i ntothe p roduct. I f w ater o r f oreign m atter e nters, i t m ay c ausefire o r e lectric s hock. I f w ater o r f oreign o bjects g et i nto t he u nit,immediately t urn o ff t he p ower s witch, u nplug t he p ower p lug f romthe o utlet, a nd c ontact t he s tore o f p urchase o r S ony s ervice c enter.Do n ot d amage t he p ower c ordDamage t o t he p ower c ord m ay r esult i n f ire o r e lectricshock. •D o n ot p rocess o r d amage. •D o n ot p laceheavy o bjects o n i t o r p ull i t. •K eep a way f rom h eatappliances. D o n ot h eat. •W hen u nplugging t he p owercord, b e s ure t o h old t he p lug.Pull o ut.In t he u nlikely e vent t hat t he p ower c ord b ecomes d amaged, c ontact t hestore o f p urchase o r a S ony s ervice r epresentative f or a r eplacement.Do n ot p lace i n p laces w ith h igh h umidity, d ust, o ily s moke,steam, o r i n d irect s unlight . D oing s o m ay c ause f ire o r e lectricshock. E specially d o n ot u se i t i n t he b athroom.Use a100V A C p owersupply t hat i s n ot u sed o verseas . U sing a d ifferentpower s upply v oltage o verseas m ay r esult i n f ire o relectric s hock.If y ou h ear t hunder, d o n ot t ouch t he p ower p lug, o therwiseyou m ay g et a n e lectric s hock.6 I ntroductionDo n ot t ouch t he p ower p lug w ith w et h ands . I t m aycause a n e lectric s hock.Do n ot b lock t he v entilationholes b y c overing t hem w ith a c loth t hat d oes n ot b lock t heventilation h oles, o r b y p lacing t he p roduct o n a l ong-pile c arpetor f uton, o r p lacing i t c lose t o a w all o r f urniture. O verheatingmay r esult i n f ire o r e lectric s hock.Failure t o o bserve t he f ollowing p recautions m ayresult i n i njury o r d amage t o n earby h ousehold g oods.Doing s o m ay c ausean e lectric s hock i f t he i nternal p arts c annotbe o pened . F or i nternal i nspections a nd r epairs, p leasecontact y our d ealer o r S ony s ervice c enter.When m oving o r n ot u sing f or a l ong t ime, r emove t he p owerplug. M oving t he p roduct w ith t he p ower p lug p lugged i n m aydamage t he p ower c ord, r esulting i n f ire o r e lectric s hock.When g oing o ut o r t raveling f or a l ong t ime, u nplug t he p owerplug f rom t he o utlet f or s afety. L eaving i t p lugged i n m ay c ausea f ire.Introduction 7Failure t o o bserve t he f ollowing p recautions m ayresult i n i njury o r d amage t o n earby h ousehold g oods.Remove t he p ower p lug w hen c leaning t heproduct.Cleaning t he p roduct w ith t he p ower p lugplugged i n m ay r esult i n e lectric s hock.Place t he p roduct i n astable p lace I f y ou p lace t he p roduct o n a w obbly t ableor o n a n i nclined s urface, t he p roduct m ay f all a nd c auseinjury. A lso, c heck t he s trength o f t he l ocation a ndmounting l ocation.Do n ot l isten a t h igh v olume c ontinuously f or a l ongtime L istening a t a l oud v olume t hat s timulates y our e arscontinuously f or a l ong t ime m ay a dversely a ffect y ourhearing. B e e specially c areful w hen l istening w ithheadphones. L isten a t a v olume t hat a llows y ou t o a nswerwhen s omeone c alls y ou.A h and m ay g et c aught i n t he f ront p anel,etc., w hich i s p laced o ut o f r each o f c hildren, r esulting i ninjury. P lease b e c areful n ot t o l et c hildren t ouch i t.Do n ot u se d iscs o ther t han r ound d iscs.Using d iscs w ith s pecial n on-circular s hapes (such a s s tar-shaped, h eart-shaped, c ard-shaped, e tc.) may c ause t he d isc t o f all i nside a nd c ause a m alfunction, o r t he d isc m ay p op o ut d ue t o h igh-speed rotation, r esulting i n i njury. m ay c ause8 I ntroductionSafety P recautions f or B atteries T o a void s erious i njuryor b lindness d ue t o l eakage, e xplosion, o verheating, f ire, o r a ccidental i ngestion, b e s ure t o o bservethe f ollowing.When t he b utton-type b attery l eaksIf t he b utton-type b attery l eaks, d o n ot t ouch i t w ithbare h ands. L iquid m ay r emain i nside t he m ain u nit, s o p lease c ontact t he C ustomer S erviceCenter o r S ony s ervice c enter. I f t he l iquid g ets i nto y our e yes, i t m ay c ause b lindness, s o d o n ot rub y our e yes. I f t he l iquid g ets o n y our b ody o r c lothes, i t m ay c ause b urns o r i njuries. I mmediately wash i t o ff w ith c lean w ater a nd c onsult a d octor i f y ou h ave s ymptoms o f i nflammation o r i njury o n your s kin.About b utton t ype b atteries• S mall b atteries m ay b e s wallowed, s o k eep t hem o ut o f r each o f c hildren. I f s wallowed, c onsult a d octor i mmediately as i t m ay c ause s uffocation o r s tomach p roblems. •I nsert +a nd -c orrectly a ccording t o t he d evice d isplay. •D o n ot charge. •D o n ot p ut i n f ire. D o n ot d isassemble o r h eat. •D o n ot c arry o r s tore t he p roduct t ogether w ith p reciousmetals s uch a s c oins, k eys, n ecklaces, e tc. D o n ot s hort c ircuit. •D o n ot u se b atteries t hat h ave l eaked. •Removeexhausted b atteries. R emove w hen n ot i n u se f or a l ong t ime.About b utton t ype b atteries• D o n ot u se, s tore, o r l eave t he p roduct n ear a f ire, i n d irect s unlight, i n a h ot c ar, o r i n a h ot p lace. •D o n otremove o r d amage t he e xterior v inyl t ube. •D o n ot u se b atteries o ther t han t he s pecified t ype.Introduction9 _About t he i ncluded s oftwaresReproduction o f a ll o r p art o f t he s oftware s upplied w ith t his u nit a nd t he c ontent o f t he i nstruction m anual, a s w ell a s renting o f t he s oftware, a re p rohibited b y c opyright l aw w ithout t he p ermission o f t he c opyright h older.sWe a re n ot r esponsible f or a ny f inancial d amages, l ost p rofits, o r c laims f rom t hird p arties a rising f rom t he u se o f t he software s upplied w ith t his u nit. s I n t he u nlikely e vent t hat t here i s a d efect d ue t o m anufacturing r easons, w e w ill replace i t. O ther r esponsibilityPlease f orgive m e.s T he s oftware s upplied w ith t his m achine c an o nly b e u sed w ith t he s pecified e quipment. s Thespecifications o f t he s oftware s upplied w ith t his u nit a re s ubject t o c hange w ithout n otice f or i mprovement.Please n ote.s O peration i s n ot g uaranteed w hen s oftware t hat i s n ot s upplied w ith t his u nit i s u sed.Program ©2001, 2002, 2003, 2004, 2005 S ony C orporationDocumentation ©2005 S ony C orporation• S onicStage a nd i ts l ogo a re t rademarks o f S ony C orporation. •OpenMG, H i-MD, N et M D, A TRAC, A TRAC3, A TRAC3plus a nd t heir l ogos a re t rademarks o f S ony C orporation.Trademark.• M icrosoft , W indows a nd W indows M edia a re t rademarks o f M icrosoft C orporation i n t he U nited S tates a nd o ther c ountries.is a r egistered t rademark o r t rademark i n t he c ountry o f• O ther s ystem n ames a nd p roduct n ames a ppearing i n t his d ocument a re g enerally r egistered t rademarks o r t rademarks o f t heir r espective d evelopers.Note t hat t he ™a nd ®m arks a re n ot s pecified i n t he t ext.Notes o n r ecording• I f t he r ecording c annot b e r e-recorded, b e s ure t o m ake a t rial r ecording b eforehand. •I f r ecordingor d ownloading i s n ot p ossible, o r i f m usic d ata i s d amaged o r d eleted d ue t o a p roblem w ith t his p roduct o r y our c omputer, we w ill n ot c ompensate f or t he c ontent o f t he d ata. •A ccording t o c opyright l aw, y ou c annot u se t he r ecordings y ou have m ade f or a nything o ther t han p ersonal e njoyment w ithout p ermission f rom t he c opyright h older. T he p rice o f t his product i ncludes a p rivate r ecording d eposit d ue t o c opyright r egulations. (Contact: P rivate R ecording D epositManagement A ssociation T el.03-5353-0336)Etiquette w hen l istening t o s tereoWhen l istening t o m usic i n s tereo, p lease l isten a t a v olume t hat w ill n ot d isturb y our n eighbors. E speciallyat n ight, e ven s mall s ounds c an p ass t hrough t he s urroundings. P lease b e c onsiderate o f e ach o ther b yclosing t he w indows a nd u sing h eadphones t o m aintain a c omfortable l iving e nvironment.10 I ntroductioncompact d isc d igital a udioAdaptive T ransform A coustic C oding T hree* A TRAC3plus a nd A TRAC3 a re t rademarks o f S ony C orporation.** D isc f ormatted i n I SO 9660 L evel 1/2 f ormat a nd J oliet E xtended f ormat.ATRAC C Ds:MD: 60/74/80 m inute d isc Hi-MD:Music C D:CDDA f ormat C DDA i s a nabbreviation f or C ompact D isc D igital A udio a nd i s t he standard f or g eneral m usic C Ds.MP3 C D: C D-R/CD-RW d isc o n w hich M P3 f ormat a udio d ata i s r ecorded u sing S onicStage o r o ther software ** M P3 s tands f or M PEG-1 A udio L ayer 3, a nd r ecords a pproximately 10 minutes o f a udio d ata o n a C D. I t i s a n a udio c ompression t echnology t hat c ompresses to 1 o f .SonicStage c annot c reate d iscs w ith m ixed t ypes o f a udio d ata.About D ualDisc T hisproduct i s d esigned o n t he a ssumption t hat i t w ill p lay d iscs c onforming t o t he C ompact D isc (CD) s tandard . In t he u nlikely e vent t hat y ou t ry t o p lay t he m usic s ide o f t he D ualDisc w ith t his p roduct, t he D ualDisc DualDisc c annot b e u sed w ith t his p roduct, a s i t m ay c ause s cratches o n t he D VD s urface t hat m ay c ause problems d uring p layback .About m usic d iscs w ith c opyright p rotectiontechnology T his p roduct i s d esigned f or p laying m usic d iscs c onforming t o t he C ompact D isc (CD) s tandard. Recently, s ome r ecord c ompanies s ell m usic d iscs e quipped w ith t echnology f or c opyright p rotection, b ut some o f t hese d iscs d o n ot c onform t o t he C D s tandard a nd c annot b e p layed o n t his p roduct. T here a re c ases.ATRAC3, w hich s tands f or A daptive T ransform A coustic C oding3, i s a n a udio c ompression t echnology that a chieves b oth h igh s ound q uality a nd h igh c ompression. A TRAC3plus i s a n a udio c ompression technology t hat f urther d evelops A TRAC3 a nd c ompresses a udio d ata t o a pproximately 1/20th t hat o f a C D (when t he b it r ate i s 64 k bps).Introduction 11What d iscs c an b e p layed o n t his u nit?Atrac T hree P lus A trac T hree CD-R/CD-RW d isc** o n w hich a udio d ata i n A TRAC3plus* o r ATRAC3* f ormat h as b een r ecorded u sing S onicStageHi-MD s tandard 1GB d iskAudio c ompression t echnology t hatachieves b oth h igh s ound q uality a nd h igh c ompressionRecording m ethod w ith t hesame s ound q uality a s a C D w ithout d igital c ompressionRecording t ime p er d isc1)1GB d isk1) W hen t ransferring m usic d ata f rom a c omputer2) I n t he c ase o f a bout 60 m inutes p er C D"Hi-MD" i s a n ew s tandard e volved f rom c onventional M D.With c onventional M D s ystem s tereo …… R ecording/playback w ith A TRAC/ATRAC312 I ntroductionCapacity d oubled (approximately 13 C Ds 2))about 45 h oursAbout 13.5 h ours f or a n 80 m inute d isc(Approx. 45 C Ds 2))ATRAC3plusLinear P CMYou c an d o t his w ith H i-MD!(ATRAC3plus/48kbps)Putting a l ot o f m usic d ata o n o ne d iscA m aximum o f 45 h ours o f r ecording i s p ossible o n a 1GB d isc d edicated t o t he H i-MD s tandard.C onventional 60/74/80 m inute d iscs c an a lso b e r ecorded w ith a pproximately d ouble t he r ecording d ensity. A l arge a mount of m usic d ata c an b e s tored o n a s ingle d isc , m aking i t c onvenient t o c arry a round.Up t o a bout 5 h ours a nd 20 m inutes o f r ecording t ime o n an 80 m inute d isc W ith a c onventional M D s ystem s tereo …… b etween (when r ecorded i n M DLP L P4 m ode)Enjoy h igh-quality s ound r ecording a ndplayback L inear P CM a nd A TRAC3plus t echnology a llow y ou t o e njoy h igh-quality sound r ecording a nd p layback.Records d ocument a nd i mage d ata i n a ddition t o m usic d ataSonicStageSonicStage Introduction 13Conventional 60/74/80 m inute d iscs c an a lso b e u sed.You c an s ave d ata o n y our c omputer t o a d isk w ith a s imple d rag-and-drop o peration.Two-way d ata t ransfer w ith a c omputer I n a ddition t o b eingable t o t ransfer m usic f rom a c omputer a t h igh s peed u sing t he i ncluded S onicStagesoftware, m usic r ecorded w ith S oundGate c an a lso b e t ransferred t o a c omputer a nd managed.Music d ata D ocument d ataManaging r ecorded m usic o n a c omputerbring o ut t he m usicStill i mage d ata V ideo d ataUse S onicStage t o w rite t o a C D-R/CD-RW d isc .You c an e asily e njoy o riginal C Dscontaining m any s ongs t hat y ou c an l isten t o o n t hisunit's C D p layer .Installing S onicStage o n y our c omputer S onicStage i s software t hat a llows y ou t o i mport m usic f rom m usic CDs a nd t he I nternet t o y our c omputer a nd c reate y our own o riginal C Ds. I nstall f rom t he a ttached C D-ROM .musicCD m usic f ileMusic C D ,the i nternetFor i nstructions o n h ow t o i nstall S onicStage a nd h ow t o c reate a n o riginal C D, r efer t o t he i ncluded “Software I nstallation /Basic O peration G uide”.14 I ntroductionEnjoy c reating y our o wn o riginal C DThis c onversion i s b ased o n a 700MB C D-R/CD-RW d isc w ith a pproximately 60 m inutes o f m usic C D r ecorded a t ATRAC3plus a t 48kbps .*Make a n o riginal C D S elect y ourfavorite s ongs f rom t he m usic y ou h ave i mported t o y our c omputermegabyteATRAC C Ds,In a ddition t o n ormal m usic C Ds, t his u nit c an p lay b ack o riginal C Ds (called A TRAC C Ds, M P3 CDs) c reated o n a c omputer u sing t he i ncluded S onicStage s oftware . U sing S onicStage , f or example, y ou c an r ecord a pproximately 30 m usic C Ds* w orth o f m usic i n A TRAC f ormat o nto a single C D-R o r C D-RW . T he f low o f l istening t o t he m usic o n t he o riginal C D i s a s f ollows.MP3 C Ds- A M l oop a ntenna•CD-ROM (SonicStage) •CMT-AH10 I nstruction M anual/Warranty •Software I nstallation/Basic O peration G uide •Customer R egistration I nformation •Sony C ustomer Service I nformation- F M a ntenna•Remote c ontrolcheck t he a ccessories15Connection a nd P re• D edicated U SB c ableNoteWhen c onnecting t his u nit t o a c omputer f or t he f irst t ime, b e s ure t o u se t he s upplied C D-ROM t o install t he s oftware "SonicStage" b efore c onnecting.bodyqa d isplay w indowfrontqs r emote c ontrol r eceiverHigh-speed s ynchronized r ecording f rom CD t o M D (32, 66, 67).back f ace9 T APE R EC b uttonManual r ecording t o t ape (86).qd M Du (play/pause) b utton qg i j ack Connect h eadphones (sold s eparately).qf C Du (play/pause) b utton1 C D Z b utton4 I /1 (power) s witch 7Opens a nd c loses t he C D s lot.35 C assette L id 2 M D Z b uttonInformationis b eing r ead w hile t he B USY l amp i s l it or b linking.Opens/closes t he M D s lot.06qh See t he p age i n ( ) f or a d etailed e xplanation.8 M D R EC b uttonVOLUME +*, – b uttonsHIGH S PEED R EC b uttonManually r ecord t o M D (47).Switches b etween “TUNER” a nd “LINE”.Used t o s et M D r ecording m ode, M Dgroup r ecording, a nd t rack m ark m ode (31, 40, 46, 68, 69).FUNCTION b uttonUsed t o s witch s oundsources. “MD”, “CD”, “TAPE”,REC M ODE b uttonName o f e ach p artbusyrecordingrecording m odevolumehigh s peed r ecording functiontape r ecording16 C onnection a nd p reparationTUNE +/-: T unes i n r adio r eception (43, 87).wg S PEAKER O UT (POWER I N) j acks Supply p ower f rom t he i ncluded s peakers (22, 23).w; P ress t he T UNERBAND b utton t o a utomatically t urn o n the r adio . S witch t o F M o r A M.., > (AMS): J umps t o t he b eginning o f a CD o r M D t rack (27, 36).Continued o n n ext p age*The V OLUME + b utton h as a c onvex p oint (projection). P lease u se i t a s a m ark f or o peration.wh L INE I Nterminal C onnect a d evice s uch a s a T V o r VCR (46, 86, 102).TAPEY (playback) b utton Press a nd h old t he b utton d uring M D/CD playback o r p ause t o s earch f or a d esired point i n t he s ong (58).wj U SB p ort U sethe d edicated U SB c onnection c able s upplied w ith the c amera t o c onnect t o a c omputer (98).wk A M E XT A NT (external a ntenna) t erminalwf C ANCEL b utton C ancels t heselected i tem (49).wd E NTER b utton C onfirmsthe s elected i tem (49).qj P C M ODE b uttonUsed w hen c onnecting t o a c omputer (99).Call u p t he t uner's p reset s tations (88).qk x (stop) b uttonwl F M E XT A NT (external a ntenna) t erminalwa J og d ial S electsmenu i tems, s ongs, a nd g roups (49, 57, 58 to 60, 65).ql ws m /M •TUNE +/- •./> b utton m , M (search):Fast f orward/ r everse t he t ape (38).volumepower i nenterline i ntuner b andCanceltunespeaker o uttapeConnection a nd P re17recordingsynchro1 p lay m ode d isplay (60)9 S YNC d isplayAppears w hen r ecording t o M D o r t ape.Appears w hen s ynchronized r ecording t o M D o r T APE (32, 41, 66, 67, 83, 84).5 -character i nformation d isplay6 D irection m ode d isplay D isplays h owthe t ape r uns (38, 40, 83 t o 85).q; T imer r unning d isplayDisplayed w hen t he t imer i s s et (94, 96).2 C D d isc d isplay A b lackcircle r otates d uring p layback.7 t ape r unning d isplay (37, 38, 83-86)3 M D d isc d isplay A b lackcircle r otates d uring p layback a nd r ecording.8Recording /playback m ode d isplay4 T ape d isplay Ablack c ircle r otates d uring p layback a nd r ecording.During M D r ecording, t he s elected m ode i s d isplayed (31, 40, 46). T he r ecorded m ode i s d isplayed d uring playback (31). W hile s topped, t he m ode i n w hich t he MD w as r ecorded j ust b efore i s d isplayed.display w indowqaPart n ames (continued)REC d isplay18 C onnection a nd p reparation。
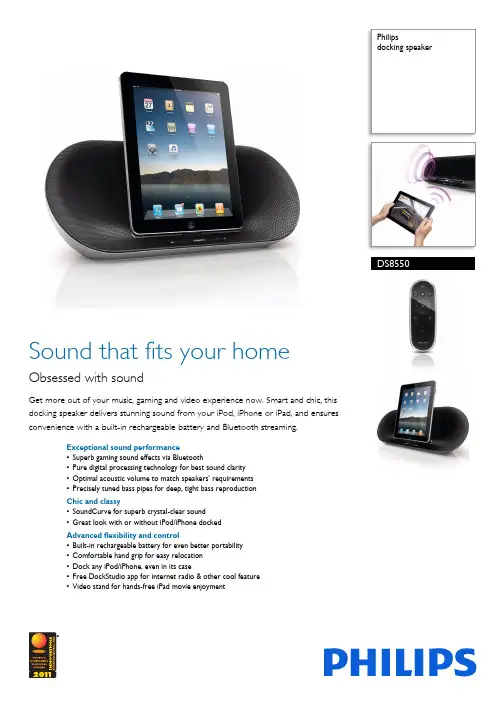
Philipsdocking speakerDS8550Sound that fits your homeObsessed with soundGet more out of your music, gaming and video experience now. Smart and chic, this docking speaker delivers stunning sound from your iPod, iPhone or iPad, and ensures convenience with a built-in rechargeable battery and Bluetooth streaming.Exceptional sound performance•Superb gaming sound effects via Bluetooth•Pure digital processing technology for best sound clarity •Optimal acoustic volume to match speakers’ requirements •Precisely tuned bass pipes for deep, tight bass reproduction Chic and classy•SoundCurve for superb crystal-clear sound•Great look with or without iPod/iPhone dockedAdvanced flexibility and control•Built-in rechargeable battery for even better portability •Comfortable hand grip for easy relocation •Dock any iPod/iPhone, even in its case•Free DockStudio app for internet radio & other cool feature •Video stand for hands-free iPad movie enjoymentIssue date 2017-12-30Version: 7.1.712 NC: 8670 000 66892EAN: 87 12581 55964 9© 2017 Koninklijke Philips N.V.All Rights reserved.Specifications are subject to change without notice. Trademarks are the property of Koninklijke Philips N.V. or their respective Specificationsdocking speakerHighlightsPure digital soundAdvanced pure digital sound processing technology offers vastly superior sound performance compared to the conventional analog audio processingtechnology that is found in docking players that use the analog audio output from an iPod/iPhone. By collecting the iPod's/iPhone's digital audio output and employing digital processing at each stage of the circuit, a much higher Signal-to-Noise ratio is produced. The result is unsurpassed sound clarity that is in perfect balance.Built-in rechargeable batteryBuilt-in rechargeable battery for even better portabilitySoundCurveThe carefully designed curved back cover of this Philips docking speaker creates a highly effective acoustic structure for sound reproduction. Its clean curve enforces the rigidity of the speaker cabinet, dramatically reducing internal resonance and eliminating the vibration and distortion of sound. You get to enjoy superb crystal-clear sound in stunning looking speakers.Optimal acoustic volumeSmart sound design brings you the best bass reproduction possible. The acoustic volumeallocated to each midrange driver perfectly matches its acoustic requirements. Low tones come out deep and tight – delivering strong and rich bass.Superb gaming sound effectsThe gaming experience is never complete without great sound effects. Now your games fromSmartphone or any portable device can be made even more thrilling, thanks to Philips dockingspeaker that puts the boom in the sound. Hear all the sounds loud and clear, and boost yourexperience to new levels. What's more, you can do this with outstanding convenience, via Bluetooth. Simply make the wireless Bluetooth connection between your portable device and the docking speaker, and play away.Video stand for iPadVideo stand for hands-free iPad movie enjoymentiPad compatibility•Compatible with: iPadiPod/iPhone/iPad App •Compatibility: iOS 4.3 to iOS 10.3iPhone compatibility•Compatible with: iPhone, iPhone 3G, iPhone 3GS, iPhone 4iPod compatibility•Compatible with: iPod, iPod mini, iPod with color display, iPod nano 2nd Generation, iPod nano 3rd Generation, iPod classic, iPod touch, iPod nano 1st Generation, iPod nano 4th Generation, iPod nano 5th Generation, iPod touch 2nd Generation, iPod touch 2nd Gen 8/16/32GB, iPod 5th Generation, iPod nano 6th generationiPod/iPhone App•App name: DockStudio•Free download from App store•Playback: Album/track navigation, Playback controls•Sound settings: 5 band equalizer, DBB, DSC-Flat,Pop,Rock,Jazz,Classic•Clock: Analog display, Digital display•Alarm: Multiple alarms, Sleep timer, Wake up to music, Wake up to nature sounds, Wake up to photo•Battery status: Speaker battery statusConnectivity•Bluetooth•Bluetooth profiles: A2DP, AVRCP•Bluetooth range: Line of sight, 10M or 30FT •Aux inAudio Playback•Cradle playback mode: Charging iPhone, Charging iPod, Play and Pause, Next and Previous trackSound•Output power (RMS): 2x15 W •Sound System: Stereo•Loudspeaker types: Bass Reflex Speaker System •Volume Control: Volume Control up/downLoudspeakers •Speaker Drivers: 2 x 3" full range woofers Convenience•Backlight•Remote Control: Multi-functionalPower•Power supply: 100-240VAC, 50/60Hz, Battery •Battery Type: Built-in battery •Operating time on battery: 5 hrAccessories•Included accessories: AC Power Cord, Remote Control, 3.5mm stereo line in cable, Warranty certificate, World Wide Warranty leaflet, Quick install guide, User ManualDimensions•Product dimensions (W x H x D): 421 x 158 x 139 mm•Packaging dimensions (W x H x D): 484 x 220 x 158 mm。
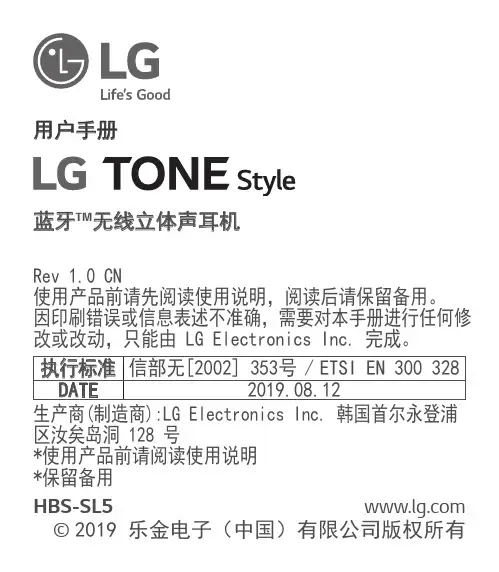
用户手册蓝牙™无线立体声耳机Rev 1.0 CN使用产品前请先阅读使用说明,阅读后请保留备用。
因印刷错误或信息表述不准确,需要对本手册进行任何修改或改动,只能由 LG Electronics Inc. 完成。
执行标准信部无[2002] 353号 / ETSI EN 300 328 DATE2019.08.12生产商(制造商):LG Electronics Inc. 韩国首尔永登浦区汝矣岛洞 128 号*使用产品前请阅读使用说明*保留备用 © 2019 乐金电子(中国)有限公司版权所有目录安全注意事项 (1)高清扬声器 (3)产品组件 (3)产品说明 (5)打开/关闭电源 (6)配对和连接 (6)指示灯 (11)手机通话功能 (12)播放音乐 (14)电池充电和提示 (16)振动提醒设置 (17)超出范围 (18)LG Tone & Talk™ (18)故障排除 (20)规格和功能 (21)确认声明 (22)附加信息 (22)保障条件 (25)重要安全提示 (25)关于安全有效使用耳机的准则。
(27)Open Source Software Notice (29)LG TONE Style(HBS-SL5) 是一款采用蓝牙技术的轻型无线耳机。
本产品可用作支持 A2DP 或免提蓝牙情景模式设备的音频附件。
安全注意事项提醒1! 警告注意2高清扬声器如果正在连接的设备的通信网络支持高清语音通话,您可以进行高清语音通话和聆听高清音乐。
附赠耳胶(已安装中号耳胶)(小号和大号)注意:实际产品设计可能与本手册中所示的图像有所不同。
345产品说明*实际产品的外观和规格可能会因型号而有所不同。
注意:为防止出现听力损失,在高分贝音量控制音量时,控制音播放两次,或持续一定时间 。
(左/右)打开/关闭电源出警报声。
配对和连接放入耳塞后,按照语音提示操作便Array可轻松完成配对和连接过程。
注意:如果提示您要授权密码(PIN 密码),请输入 0000电池充电后再继续配对。
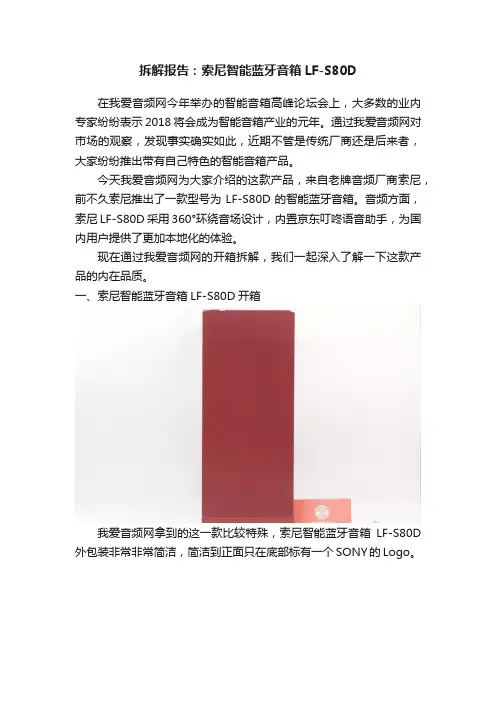
拆解报告:索尼智能蓝牙音箱LF-S80D在我爱音频网今年举办的智能音箱高峰论坛会上,大多数的业内专家纷纷表示2018将会成为智能音箱产业的元年。
通过我爱音频网对市场的观察,发现事实确实如此,近期不管是传统厂商还是后来者,大家纷纷推出带有自己特色的智能音箱产品。
今天我爱音频网为大家介绍的这款产品,来自老牌音频厂商索尼,前不久索尼推出了一款型号为LF-S80D的智能蓝牙音箱。
音频方面,索尼LF-S80D采用360°环绕音场设计,内置京东叮咚语音助手,为国内用户提供了更加本地化的体验。
现在通过我爱音频网的开箱拆解,我们一起深入了解一下这款产品的内在品质。
一、索尼智能蓝牙音箱LF-S80D开箱我爱音频网拿到的这一款比较特殊,索尼智能蓝牙音箱LF-S80D 外包装非常非常简洁,简洁到正面只在底部标有一个SONY的Logo。
打开包装后,除了LF-S80D音箱,里面只有一份保修卡、产品介绍和一个电源适配器。
先来看电源适配器,充电插头整体采用黑色塑料材质,上方是国标充电插头。
通过上面的名牌标识可以看到,这款电源适配器型号为AC-E1525M,支持15V/2.5A的直流输出,制造商来自索尼。
电源输出接口采用圆形DC插头,并不是之前我们常见的Micro-USB接口。
值得一提的是,这款电源适配器的插脚采用了可更换设计,这种设计可以兼容更多的接口标准,对于经常出国的朋友来说,直接换一个插脚就可以做到完美兼容。
再来看音箱,LF-S80D整体采用圆柱形设计,结构上分为上、中、下三段式设计,中间是金属,上下是塑料烤漆,整机重量达到了980g。
音箱表面的网罩为金属材质,密密麻麻的金属开孔给人一种精致感。
用手去接触这种金属表面,会让你觉得整体的做工和设计都非常高端。
虽然整体采用三段式设计,但是不同的材质之间拼接非常严密,并没有出现做工瑕疵。
音箱后面留有一个Micro-SD卡槽,下面是模式切换按键。
LS-S80D音箱不仅支持在线播放,还支持在Micro-SD卡播放。

WARRANTY:We at DigiT ech®are proud of our products and back-up each one with the following warranty:1.The warranty registration card must be mailed within ten days after purchase date to validate thiswarranty.2.DigiT ech warrants this product,when used solely within the U.S.,to be free from defects in materialsand workmanship under normal use and service.3.DigiT ech liability under this warranty is limited to repairing or replacing defective materials that showevidence of defect,provided the product is returned to DigiT ech WITH RETURN AUTHORIZATION, where all parts and labor will be covered up to a period of one year (this warranty is extended to a period of six years when the product has been properly registered by mail or through our website).A Return Authorization number may be obtained from DigiT ech by telephone.The company shall notbe liable for any consequential damage as a result of the product's use in any circuit or assembly.4.Proof-of-purchase is considered to be the burden of the consumer.5.DigiT ech reserves the right to make changes in design,or make additions to,or improvements uponthis product without incurring any obligation to install the same on products previously manufactured.6.The consumer forfeits the benefits of this warranty if the product's main assembly is opened andtampered with by anyone other than a certified DigiT ech technician or,if the product is used with AC voltages outside of the range suggested by the manufacturer.7.The foregoing is in lieu of all other warranties,expressed or implied,and DigiT ech neither assumes norauthorizes any person to assume any obligation or liability in connection with the sale of this product.In no event shall DigiT ech or its dealers be liable for special or consequential damages or from any delay in the performance of this warranty due to causes beyond their control.NOTE:The information contained in this manual is subject to change at any time without notification.Some information contained in this manual may also be inaccurate due to undocumented changes in the product or operating system since this version of the manual was completed.The information contained in this version of theowner's manual supersedes all previous versions.Included ItemsThe DigiT ech ® Scott Ian Black-13™ Artist Series Pedal includes the following items:• DigiT ech Scott Ian Black-13TM Artist Series Pedal • Artist Series Pedal Gig Bag • Scott Ian Artist Series Guitar Pick • PS200R Power Supply • This Owner’s Manual • Battery Notice• DigiT ech Warranty Card • DigiT ech BrochurePlease make sure that all of these items have been included before you get started.Congratulations and special thanks from DigiT ech ®for choosing the Scott Ian Black-13™ Artist Series P edal .DigiT ech’s philosophy for developing products begins with the desire to provide every guitarist with the best-sounding,most creative tools possible.T o this end,our revolutionary technology,ProductionModeling ™,was designed to help reproduce the studio and live sounds and effects of an artist as heard on their recordings.This includes modeling the speaker cabinets,microphones with their placements,pre/post effects,and the recording engineer’s magic all in one pedal.The Black-13TM Artist Series Pedal is the product of ourcollaboration with Scott Ian,the world famous guitarist for the bands Anthrax and S.O.D..Scott’s aggressive playing style helped create and define old-school metal,thrash,nu-metal and even rap music genres.The Black-13 pedal models seven of Scott’s signature tones from songs like “Madhouse” with Scott’s devastating rhythm crunch from his early years with Anthrax,“Finale” with its dramatic delay and eerie pitch shift effect,to “What Doesn’t Die” which features Scott’s ultra-heavy,grinding tone.Mosh it Up with the Black-13!5.MODELSelects one of the seven different signa-ture Scott Ian tones:1.“I Am the Law”2.“Madhouse”3.“March of the S.O.D.”4.“Protest and Survive”5.“Room For One More”6.“What Doesn’t Die”7.“Finale”Please refer to the Knob Function Descriptions section on the following pages for a more detailed explanation of each model.6.INPUTConnect your instrument to this jack. Connecting a guitar cable to this jack sup-plies battery power even though the Indicator LED may not be lit.T o prolong battery life,disconnect all cables when not in use.7.Pedal Release PinsThese two pins are spring-loaded hinges that hold the pedal in place.Push thesepins in to release the pedal from the pedal chassis exposing the battery compartment and the serial number therein.(See the Battery Replacement Diagram at the end of this Owner’s Manual)8.PedalPress the pedal to turn the effect on and off.9.OUT 1 (AMP)Connect this output jack to your guitar amplifier.10.Indicator LEDThis LED indicates when the effect isturned on.If the LED becomes dim ordoes not light when using battery power(with the cables connected),the batteryneeds to be replaced.11.OUT 2 (MIXER)This output has been specifically designedfor use with a full range audio system.It is designed to be plugged directly into amixer or recording device for optimalperformance.MODEL 1.“I Am the Law,” Anthrax – Among the Living (1987)Model 1 captures the clearer,more sizzling distortion tone Scott used for “I Am the Law”.Use the CONTROL 1knob to boost or cut the low e theCONTROL 2knob to boost or cut the high frequencies.MODEL 2.“Madhouse,” Anthrax – Spreading the Disease (1985)Model 2 generates the more refined tone Scott used in “Madhouse”.Use the CONTROL 1knob to boost or cut the low e the CONTROL 2knob to boost or cut the high frequencies.MODEL 3.“March of the S.O.D.,” S.O.D.– S.E.D.(1985)This is the classic “grind” distortion tone Scott pioneered and utilized in “March of the S.O.D.”.Use the CONTROL 1knob to boost or cut the low e theCONTROL 2knob to boost or cut the high frequencies.Model DescriptionsNOTE:Set the CONTROL 1 and CONTROL 2knobs to the12 o’clock position to most accurately recreate each tone as it sounds in the original recordings.MODEL 7.“Finale,” Anthrax – State of Euphoria (1988)Model 7 is based on pitch-shifted delay effect Scott used during the opening muted bar chords of the song “Finale”.The CONTROL 1knob changes the amount of pitch-shifting in the delayed repeats.Setting the CONTROL 1knob fully clockwise will shift each repeat up 12 semitones,while setting the CONTROL 1knob fully counter-clockwise will shift each repeat down 12 semitones.Setting the CONTROL 1knob to the 12 o’clock positionrecreates the same pitch shift that Scott used in the original recording;if you want no pitch shift,set the CONTROL 1knob to the 2 o’clock position (approximately).TheCONTROL 2knob adjusts the delay time of the pitch-shifted repeat;turn it clockwise for longer delays,or counter-clockwise for shorter delays.MODEL 4.“Protest and Survive,” Anthrax – Attack of the Killer B’s (1991)This is based on the raw,more diffuse distortion tone Scott used for the intro to “Protest and Survive”.Use theCONTROL 1knob to boost or cut the low e the CONTROL 2knob to boost or cut the high frequencies.MODEL 5.“Room For One More,” Anthrax – Sound of White Noise (1993)Scott acheived this tone by combining three amps (aMarshall TM JCM 800,a Matchless TM ,and a Marshall Jubilee TM )with a T .C.Electronics TM Booster/Distortion e the CONTROL 1knob to boost or cut the lowe the CONTROL 2knob to boost or cut the high frequencies.MODEL 6.“What Doesn’t Die,” Anthrax – We’ve Come For You All (2003)This effect gives your guitar the more modern distortion tone Scott got with a Randall® amp and a BBE® Sonic Maximizer® e the CONTROL 1knob to boost or cut the low e the CONTROL 2knob to boost or cut the high frequencies.Setup Directions Array Follow these setup directions before use:1.T urn the volume down on the amplifier/mixer you are connecting to.2.Connect the pedal output to the amplifier and/or mixer input. (Please refer to the Connections Diagrams on the following pages.)3.Connect the guitar to the pedal input.(Please refer to the Connections Diagrams on the following pages.)4.Connect the power supply to the pedal.(Please refer to the Connections Diagrams on the following pages.)5.Set the pedal’s LEVEL control to the minimum position.6.T urn up your amplifier/mixer level to your desired listening level.7.T urn on the pedal by pressing the pedal switch and gradually turn upthe pedal’s LEVEL control to the desired listening level.Specifications:• Controls - LEVEL,CONTROL 1,CONTROL 2,MODEL,On/Off Pedal • Jacks - INPUT,OUT 1 (AMP),OUT 2 (MIXER)• Input Impedance - 1 MOhms• Output Impedance - 100 Ohms• Power Supply - Included DigiT ech PS200R or 9V Alkaline Dry Battery • Power Consumption - 0.75 Watts (w/PS200R power supply)• Battery Life - Approximately 4 hours (with continuous usage)• Dimensions - 4 15/16”(L) x 3 1/8”(W) x 2 1/8”(H)• Weight - 2 lbs.• Included Power SupplyPS200R - 100 (100V ~ 50/60Hz)PS200R - 120 (120V ~ 60Hz)PS200R - 230 (230V ~ 50Hz)PS200R - 240 (240V ~ 60Hz)Battery Replacementing the tip of a 1/4”guitar cable,push one of the release pins in on either side of the pedal,and remove the pedal from the pedal chassis.2.Remove the battery from the battery compartment and disconnect the battery cable.3.Connect a new battery to the battery cable and put it back in the battery compartment.Make sure the battery cable does not interfere with the spring or pedal switch arm.4.Place one hole of the pedal over its corresponding pin.5.Push the opposite pin in and lower the other side of the pedal into place over the depressed pin.Release the pin.When the pedal is properly fastened,both release pins are flush with the outer side of the pedal.。
Sonos Sonos User GuideTBeamThe smart, compact soundbar for your TV—•Play anything—music, TV , movies, podcasts, radio, audiobooks, and video games.•Perfect size to wall-mount above or below your TV , or place on a credenza.•Great for small to medium-sized rooms. •Microphone on/off so you can use it hands-free.•Quick and easy setup, with only one cable to connect to your TV . •Expandable. Add a Sub and two Sonos speakers, like Play:1s, for 5.1 surround sound. For more information, see Sonos home theater .•Works with either or.•See Getting started when you’re ready to add a Beam to your Sonos system.Controls and lightsSwipe, touch, tap, or ask—with Beam you’ve got choices on how to control sound.•Use the touch controls—touch or swipe across the controls.•Voice control—set it up and use your voice to turn the TV on or off, adjust the volume, or play music.•Use the app.•Use your TV remote control.Volume control T ouch for small adjustments or touch and hold toquickly change the volume:• Volume up (right)• Volume down (left)Note:Y ou can also use the app, Alexa, or remotecontrol.Play/Pause T ouch to play or pause sound.Microphone indicatorVolume down Volume upStatus lightPlay/PauseNote:If you don’t want anyone (like a child) to control playback or change the volume using the speakertouch controls, you can disable them in the room’s settings.Connector panelNext/Previous(Music only)• Swipe right across the touch controls to skip to the next song.• Swipe left to go to the previous song.Note:Y ou can’t skip forward or go back when listeningto a radio station.Microphoneindicator • T ap the microphone light to turn the microphone on or off.• When the light is on, voice control is on and you canuse voice commands.• When the light is off, voice control is off.Note:If the light is off, press and hold the Microphoneindicator to talk to Alexa. Release the button toturn voice control off again.Status light Indicates the status. Learn moreIf the light is distracting, you can turn it off in your room’ssettings.AC power (mains) input Use only the supplied power cord (using a third-partypower cord will void your warranty).Note:Insert the power cord firmly until it is flush withthe speaker.Join buttonPress to connect during setup.Ethernet port Use an Ethernet cable if you want to connect to a router,computer, or network-attached storage (NAS) device(optional).HDMI portUse to connect the soundbar to your TV.HDMI portEthernet port AC power (mains) inputJoin buttonSelect a locationY ou can mount Beam to a wall above or below your TV or place it on a credenza.Place on a credenza•Place horizontally on a stable and level surface at least 2" (50mm) from the TV .•Don’t place vertically or on its side.•Don’t block the TV’s IR sensor.•If put on a shelf, place at the front and keep 2" (minimum) clearance on both sides for best sound quality. •Keep 1" (25mm) space (minimum) above Beam so you can reach the touch controls. •For best sound quality, keep both ends of Beam at least 1' (30cm) from a wall or other obstruction.Wall mountT o put Beam on a wall, see Wall mount .Connect the cablesBefore you start1.Disconnect existing home theater or surround sound equipment from your TV .2.Connect any external devices, like a cable box or DVD player, directly to your TV .Connect the power cord1.Insert the power cord firmly into Beam’s AC (mains) power port until it is fully connected.2.Plug the other end of the power cord into an AC (mains) power source.Caution:Use only the supplied power cord (using a third-party power cord will void your warranty).Connect Beam to your TVUse the HDMI cable to connect the soundbar to your TV . Y ou may need the optical adapter too (the app lets you know).1.Fully insert the HDMI cable into Beam’s HDMI port.2.Connect the HDMI cable to your TV . You have two choices:Power cordPower portHDMI portHDMI cable•If your TV has an HDMI ARC port , connect the HDMI cable directly to the TV’s HDMI ARC port.•If your TV doesn’t have an HDMI ARC port , attach the optical adapter to the HDMI cable and connect it to the TV’s optical digital OUT port.If your TV has an HDMI ARC portHDMI ARC is a special port that looks like a standard HDMI port. Although they look the same, if you connect to a standard HDMI port, you won’t hear sound .1.On your TV’s audio OUT panel, look for an HDMI ARC port.It may be on the back or side of your TV .Y ou’ll know it’s an ARC port if you see the word “ARC” on the label.2.Connect the HDMI cable to the TV’s HDMI ARC port.Note:If you can’t find the word “ARC” on the label, it isn’t the correct port. See If your TV doesn’t have an HDMI ARC port .If your TV doesn’t have an HDMI ARC portY ou’ll need the optical audio adapter .ARCHDMITV’s HDMI ARC portBeam’s HDMI port1.Remove the protective cap from the optical adapter.2.Attach the optical adapter to the HDMI cable.3.Connect the optical adapter to the TV’s optical digital OUT port.Note:The optical adapter’s port is “D-shaped”—make sure the connector aligns correctly into the port.Inserting the adapter incorrectly may damage the cable.If you don’t have the app, download it from the app store. Y ou’ll use it to set up and control your Sonos system. See Getting started .Microphone on/offT ouch to turn the microphone on and off. (If you don’t have a voice service installed, the microphone is inactive.)Optical adapter HDMI cableRemove the protective capTV’s optical digital OUT portBeam’s HDMI portOptical adapter attached to HDMI cableWhen the microphone light is on, voice control is on and Alexa is ready to respond. When the microphone light is off, voice control is off.If you’ve installed a voice service and the microphone is off, you can still use voice commands. Just press andhold while talking to Alexa—no need to start with a wake word. When you release the mic button, voice control turns off again.Wall mountGuidelines•Use the Beam wall mount kit. Y ou can buy it on . Follow the instructions in the kit.•Keep 1" (25mm) space (minimum) above Beam so you can reach the touch controls.•If you’re mounting above the TV, make sure you can reach the touch controls.•For best sound quality, keep both ends of Beam at least 1' (30cm) from a wall or other obstruction.Mount kit contents•Wall mount bracket•4 wall anchors•4 wall screws•2screwsNote:Don’t discard the template. It may look like packing material.1.T ape the cardboard template to the wall above or below your TV. Use a level. Keep 1" (25mm) space(minimum) for access to Beam’s touch controls. (Don’t install Beam vertically.)2.Mark the center of the mounting holes and remove the template.e a 5/16" drill bit to drill pilot holes (see Wall mounting information)4.Insert and secure the wall anchors (don’t use the anchors if drilling into wood).5.Place the bracket on the wall and loosely tighten the wall screws to secure the bracket. Check with a leveland then tighten the screws.6.Connect the power and HDMI cables to Beam.7.Place Beam on the bracket.8.Insert and tighten Beam to the bracket using the mounting screws.Wall mounting informationWall Material Pre Drill Use Wall Anchors Use Screws Wood Stud1/8" / 3 mm bit No Y esDrywall (no stud)5/16" / 8 mm bit Y es Y esHard wallboard or double board5/16" / 8 mm bit Y es Y esPlaster5/16" / 8 mm bit No, requires toggle bolt Y esConcrete or Brick5/16" / 8 mm bit Y es Y es SpecificationsFeature DescriptionAudioAmplifier Five Class-D digital amplifiers.Elliptical Woofer Four full-range woofers ensures you’ll hear the faithful playback of mid-range vocal frequencies plus deep, rich bass.T weeter One tweeter creates a crisp and clear high-frequency response. Microphones• Five far-field microphone array uses for advanced beam forming andmultichannel echo cancellation.• LED hard-wired to voice microphones for privacy control so you knowwhen the microphone is active.Feature DescriptionVoice Control Integrated voice control.System Requirements TV with HDMI ARC or optical digital audio output, broadband internet, andthe Sonos app.Networking*Wireless Connectivity See Setup options.Ethernet Port One 10/100 Mbps Ethernet port. Y ou can plug a Sonos product directly intoyour router if your WiFi is unstable.GeneralPower Supply Auto-switching 100-240 V, 50-60 Hz 2.5A AC universal input.Dimensions (H x W x D) 2.68 x 25.63 x 3.94 in. (68 x 651 x 100 mm)Weight 6.2 lb (2.8 kg)Operating T emperature32°F to 104° F (0° C to 40° C)Storage T emperature-4°F to 122° F (-20° C to 50° C)Control Use your remote control, voice, touch controls or the Sonos app. Supported Devices Connects to TV with HDMI cable (with or without an attached opticaladapter). Plays sources connected to the TV, including cable boxes andgame consoles.Package Contents Beam, AC power cord, HDMI cable, optical adapter, Quickstart Guide.* Specifications subject to change without notice.Important Safety Information1.Read these instructions.2.Keep these instructions.3.Heed all warnings.4.Follow all instructions.5.If your product is wallmounted:• Improper or inadequate wallmount installation could cause your device to fall, resulting in personal injury.• Never hang from the Sonos product or the wall bracket.• Once wall-mounted, periodically check to ensure screws remain securely tightened.6.Do not use this apparatus near water.7.Clean only with dry soft cloth. Household cleaners or solvents can damage the finish on your Sonos components.8.Do not block any ventilation openings. Install in accordance with the manufacturer’s instructions.9.Do not install near any heat sources such as radiators, heat registers, stoves, or other apparatus that produce heat.10.Protect the power cable from being walked on or pinched, particularly at plugs, convenience receptacles, and the point where they exit from the apparatus.11.Only use attachments/accessories specified by the manufacturer.12.Unplug this apparatus during lightning storms or when unused for long periods of time.13.Refer all servicing to Sonos qualified service personnel. Servicing is required when the apparatus has been damaged in any way, such as power-supply cable or plug is damaged, liquid has been spilled or objects have fallen into the apparatus, the apparatus has been exposed to rain or moisture, does not operate normally, or has been dropped.14.The Mains plug should be readily available to disconnect the equipment.15.Warning: T o reduce the risk of fire or electric shock, do not expose this apparatus to rain or moisture.16.Do not expose apparatus to dripping or splashing and do not place objects filled with liquids, such as vases, on the apparatus.。

d.Play4多房间智能音响用户手册华歌集团d.Play4产品简介感谢您购买华歌d.Play系列智能音响!您可以在WiFi模式下通过QQ音乐,喜马拉雅FM,蜻蜓FM,Spotify,iHeart Radio,Tidal等高清流媒体APP 播放音乐,并且可以将音乐从一个房间传送到任何房间,在蓝牙模式下可以通过手机等手持设备直接播放音乐。
包装请确认您所购买音箱的包装箱上的型号标识,如与您欲购买的型号不符,请迅速与您的购买商家联系,包含以下内容:d.Play4遥控器电源产品示意音源选择音量加减静音1电源将15V电源接入DC插孔,打开电源开关,不同模式下会显示不同的颜色;●绿色灯:WiFi绿色灯正常闪烁:搜索WiFi路由器绿色灯快递闪烁:系统初始化●蓝色灯:蓝牙蓝色灯正常闪烁:搜索蓝牙设备蓝色灯快速闪烁:蓝牙配对模式●青色灯:3.5毫米音频输入长按SOURCE键选择接入模式:WiFi→蓝牙→音频输入;WiFi模式下长按SOURCE键3秒可重置WiFi;蓝牙模式下长按SOURCE键3秒指示灯快速闪烁进入蓝牙配对模式。
MUTE静音键按下MUTE静音键指示灯会显示红色;WiFi模式下长按MUTE静音键3秒,系统进入WPS模式进行路由器配对,需要打开d.Play App连接家庭局域网络。
电源开关 3.5毫米音频输入电源输入遥控器示意图唤醒系统静音播放/暂停切换下⼀⾸切换上⼀⾸⾳量加⾳量减6个快捷喜好键WiFi连接3.5毫⽶⾳蓝⽛连接,⻓按进⾏配对d.Play4操作说明●App下载安装连接使用前需要先下载d.Play App到移动设备上(手机/平板电脑),iOS用户可以通过App Store下载(搜索dplay),安卓版用户可以在PP助手或者官网产品页下载,或者扫描下面的二维码,进行安装。
安卓版App苹果版App●安装使用视频我们为您准备了安装视频,您可以通过扫码看具体的操作流程视频:●通过WiFi连接d.Play4(1)首先将d.Play4电源打开,把“SOURCE”按到WiFi模式下(绿灯亮),音响会自动搜索你家的网络,并且连接,叮咚声后,语音提示“Wifi connected”;(2)在手机或者其它移动设备上根据上面的App下载地址安装App。
lf s880d说明
1、打开蓝牙音响。
音响的蓝牙音响只需打开音响电源开关(其他蓝牙音响需要把开关播到标有蓝牙图标方向,直到听到两声“嘟嘟”或有语音提示蓝牙音响已开启),然后蓝牙指示灯呈现闪烁状态,表示蓝牙已经开启,并已经进入可搜索模式。
2、蓝牙搜索。
打开手机蓝牙功能,在手机蓝牙设置中设为“所以有可见”,然后点“搜索”查找蓝牙设备,搜到后点击选择蓝牙设。
3、蓝牙连接。
这时候会提示输入密码,音响的蓝牙音响密码是:0000,音响的蓝牙音响密码输入以后会自动连接上音频,同时蓝牙音响会“嘟”的一声。
4、音乐播放。
接下来就可以同步播放手机里的音乐了。
移动多媒体音箱注:本说明书上的图片均为示意图,且由于技术和系统升级,所标注的信息与参数可能与实物有偏差,请以实物为准。
20. 话筒音量调节19. 话筒混响调节16. 音乐音量调节17. 高音调节18. 低音调节6. 话筒优先22. 无线话筒显示屏1. 首次开机默认为蓝牙输入,此时显示屏“ ”快闪,音箱自动进入蓝牙待连接 状态,打开蓝牙设备搜索并选择“EDIFIER A3-8s”,连接成功后显示屏“ ” 常亮。
2. 非蓝牙输入时,可短按控制面板上的“输入选择”按键切换至蓝牙输入,此时显示屏 “ ”快闪,音箱自动进入蓝牙待连接状态,打开蓝牙设备搜索并选择 “EDIFIER A3-8s”,连接成功后显示屏“ ”常亮。
3. 蓝牙模式下关机,再次开机音箱会自动回连最后一次连接的蓝牙设备。
4. 蓝牙连接状态说明注:1. 当建立蓝牙连接时,如需输入PIN码,请输入“0000”。
蓝牙连接●充电● 在使用时,请阅读以下建议有助于您遵守保修条款,并延长产品的使用寿命。
●为减少火灾和触电危险,请勿让本产品淋雨受潮。
● 请不要在靠近水的地方使用本产品,也不要将本产品浸入液体中或将液体滴落、 泼溅到本产品。
● 请不要在靠近任何热源(如散热器、暖气设备、炉灶或其它产生热量的设备)的 地方安装和使用。
● 勿将产品放置在太阳晒射或者温度高的地方。
高温会缩短电子部件的使用寿命、 损坏电池、使某些塑料部件变形。
●勿将产品放在过冷的地方,以免损坏内部电路板。
●勿试图拆开产品。
如果非专业人员,可能会损坏产品。
●不要跌落、强烈振动、用硬体撞击产品,以免会损坏内部电路。
●勿使用烈性化学制品、清洁剂清洁产品。
● 不要用尖体在产品表面上乱划,以免损坏外壳和影响外观。
如果产品不能正常工作,请将其送至您的合格维修机构,工作人员会热心帮您解 决问题的。
商标说明: , ,均为北京爱德发科技有限公司持有注册商标,并授权集团下属子公司深圳市漫步者专业音响有限公司使用,仿冒必究。
索尼迷你多媒体音箱:改变音乐欣赏方式作者:亦庄来源:《数码世界》2008年第05期随着互联网的不断普及、IT数码科技的不断发展,人们听音乐的方式也在发生天翻地覆的变化。
行走在大街上,我们用MP3、随身听欣赏音乐;出差时,用笔记本电脑欣赏音乐;而在办公室、书房或者卧室,我们还可以用PC欣赏音乐……可以说,随时随地欣赏音乐,已经成为生活主渠道的享受方式之一,更是一种时尚潮流。
在满足了欣赏音乐的同时,人们开始希望不仅仅只用耳机轮流体验音乐片段,不仅仅只是通过笔记本电脑的自带扬声器看电影、听音乐,而是希望放出声音,让音乐流动起来,声效能好一些,再好一些。
一向以引领数码产品潮流、创新产品、创造生活著称的全球音乐和电子产品设计巨人索尼公司精心打造的索尼迷你多媒体音箱,再一次满足了人们追求时尚生活的需求。
总体来看,索尼迷你多媒体音箱具有非木质、轻巧便携、造型前卫、品味独特的特点,和MP3、笔记本、PC和音乐手机等搭配,把音效提升到一个新境界。
轻巧便携传统音箱应用于大面积的客厅,不必经常移动,从而形成了木质、厚重、质感的发展路线。
而多媒体音箱主要应用于移动、桌面,小面积的卧室、书房等等,因此其重量越轻越好,便于频繁的移动和随身携带,索尼迷你多媒体音箱可谓是深谙“轻巧”之精髓。
适合与笔记本电脑、MP3、音乐手机等移动使用的索尼多媒体音箱SRS-M55,尽显时尚睿智的白领风范,产品设计上突出了简洁、便携的特点,SRS-M55整体只有500ml矿泉水瓶大小,箱体舍弃了传统的木质或塑料,采用了高品质铝质凹膜扬声器和特殊材质,从而让其体重仅为470g。
随身携带相当方便,和笔记本、MP3等搭配,应用于移动场所,特别适合时尚男性、白领用户和娱乐达人。
(M55图)另一款索尼迷你多媒体音箱SRS-A201的设计风格则完全不同于SRS-M55,应用高分子材质,外观质感好,但拿起来却很轻,一眼看上去,充满婉约秀丽之美。
移动携带都很方便,在书房、在卧室、在户外都可以外接PC、MP3、CD随身听、笔记本电脑等。
用户手册无线环绕回音壁在操作设备之前请仔细阅读本手册,并保留以备将来参考。
型号S80TR (S80TR, SPT8-W, SPT85-SL, SPT85-SR)2406_Rev01 版权所有 © 2024 LG Electronics Inc. 保留所有权利。
2回音壁快速指南产品安装与使用a 使用光纤线或高清线将回音壁连接到您的电视。
A 回音壁B 遥控接收器/显示镜C 无线后置音箱D 无线超低音音箱 - 安装在靠近回音壁的地方。
E 外部设备 -(蓝光播放器、游戏机等)3b 如果您使用外部设备(如机顶盒、蓝光播放器、游戏机等),请使用高清线或光纤线将外部设备连接到回音壁或电视。
c 按下列顺序连接电源:无线超低音音箱 [ 无线后置音箱 [ 回音壁。
然后,开启回音壁。
自动连接到回音壁后,无线超低音音箱和无线后置音箱上的 LED 灯将显示绿灯长亮。
([ 请参见 第 6 页的“连接产品”。
)d 搭配电视使用产品([ 请参见第 30, 32, 34 页的“使用光纤线连接”、“使用高清线连接”、“通过蓝牙连接”。
)A 重复按功能OPT/HDMI ARC ”。
B 在电视的设置中,将声音输出选项设置为 [高清 ARC]、[光纤]、[LG WOWCAST]、或 [外接音箱]。
C 当电视正确连接至产品后,显示镜将出现“OPT ”、“ARC ”或“E-ARC ”。
e 通过 Wi-Fi 将产品连接至智能手机([ 请参见第 16 页的“通过 LG ThinQ 应用程序与产品连接”。
)A 将您的智能手机连接至 Wi-Fi。
B 若使用 iOS 系统,请在 App Store 中搜索 LG ThinQ 应用程序并安装。
若使用 Android 或Harmony 系统,请在 https:///cn/lg-thinq 中下载并安装 LG ThinQ 应用程序。
C 运行 LG ThinQ 应用程序,并按照说明操作。
D 产品将连接至您的智能手机,您可以通过 LG ThinQ 应用程序操控产品。