tecplot2013安装教程-32位64位通用
- 格式:docx
- 大小:741.82 KB
- 文档页数:4

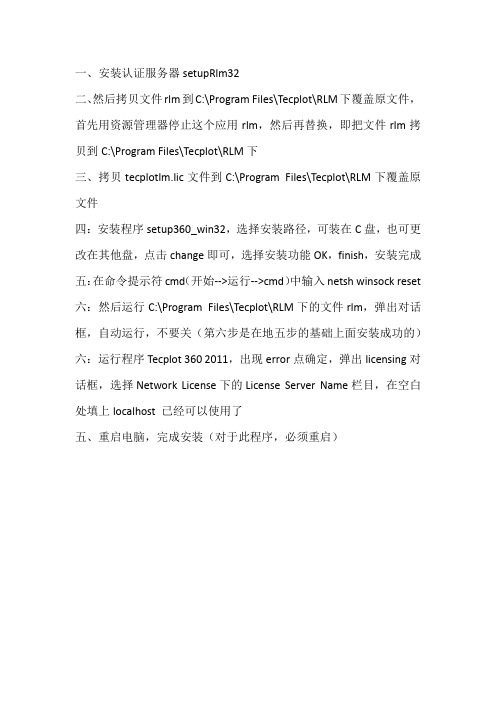
一、安装认证服务器setupRlm32
二、然后拷贝文件rlm到C:\Program Files\Tecplot\RLM下覆盖原文件,首先用资源管理器停止这个应用rlm,然后再替换,即把文件rlm拷贝到C:\Program Files\Tecplot\RLM下
三、拷贝tecplotlm.lic文件到C:\Program Files\Tecplot\RLM下覆盖原文件
四:安装程序setup360_win32,选择安装路径,可装在C盘,也可更改在其他盘,点击change即可,选择安装功能OK,finish,安装完成五:在命令提示符cmd(开始-->运行-->cmd)中输入netsh winsock reset 六:然后运行C:\Program Files\Tecplot\RLM下的文件rlm,弹出对话框,自动运行,不要关(第六步是在地五步的基础上面安装成功的)六:运行程序Tecplot 360 2011,出现error点确定,弹出licensing对话框,选择Network License下的License Server Name栏目,在空白处填上localhost 已经可以使用了
五、重启电脑,完成安装(对于此程序,必须重启)。
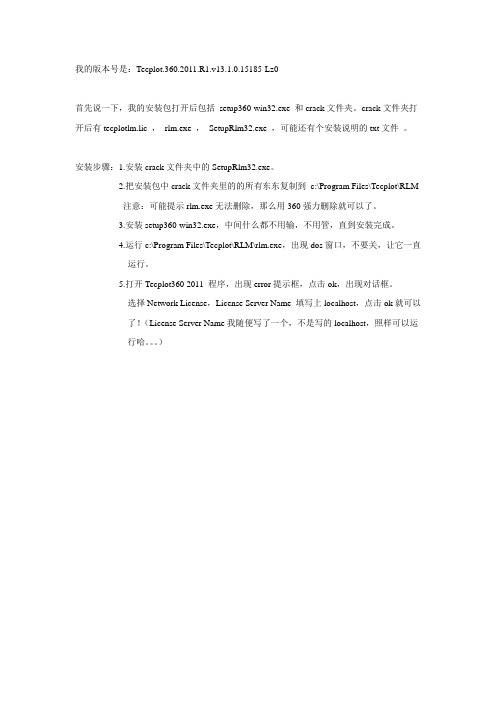
我的版本号是:Tecplot.360.2011.R1.v13.1.0.15185-Lz0
首先说一下,我的安装包打开后包括setup360-win32.exe 和crack文件夹。
crack文件夹打开后有tecplotlm.lic ,rlm.exe ,SetupRlm32.exe ,可能还有个安装说明的txt文件。
安装步骤:1.安装crack文件夹中的SetupRlm32.exe。
2.把安装包中crack文件夹里的的所有东东复制到c:\Program Files\Tecplot\RLM
注意:可能提示rlm.exe无法删除,那么用360强力删除就可以了。
3.安装setup360-win32.exe,中间什么都不用输,不用管,直到安装完成。
4.运行c:\Program Files\Tecplot\RLM\rlm.exe,出现dos窗口,不要关,让它一直
运行。
5.打开Tecplot360 2011 程序,出现error提示框,点击ok,出现对话框。
选择Network License,License Server Name 填写上localhost,点击ok就可以
了!(License Server Name我随便写了一个,不是写的localhost,照样可以运
行哈。
)。
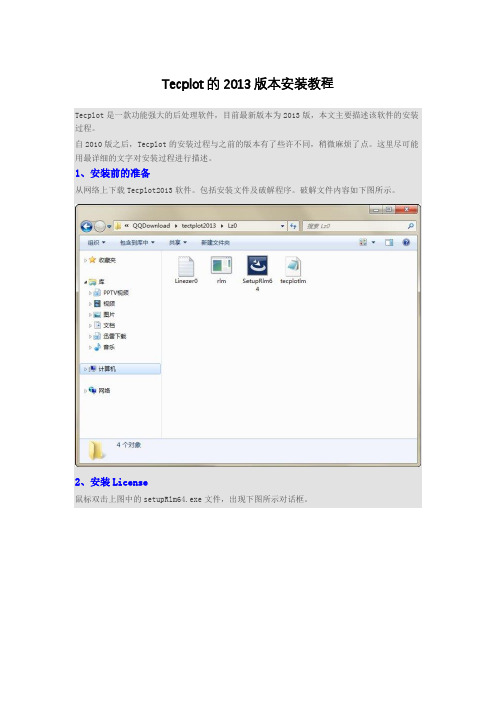
Tecplot的2013版本安装教程Tecplot是一款功能强大的后处理软件,目前最新版本为2013版,本文主要描述该软件的安装过程。
自2010版之后,Tecplot的安装过程与之前的版本有了些许不同,稍微麻烦了点。
这里尽可能用最详细的文字对安装过程进行描述。
1、安装前的准备从网络上下载Tecplot2013软件。
包括安装文件及破解程序。
破解文件内容如下图所示。
2、安装License鼠标双击上图中的setupRlm64.exe文件,出现下图所示对话框。
点击【Next>】按钮进入下一步。
弹出下图所示对话框。
点击【Next>】按钮进入下一步。
弹出下图所示对话框。
在下图所示对话框中,用户可点击按钮【Change…】修改安装目录。
建议这里不要更改目录,因为更改无效。
反正都是安装到C:\Program Files\Tecplot\RLM点击【Next>】按钮进入下一步。
弹出下图所示对话框。
点击按钮【Install】进行安装。
稍等片刻,License安装完毕后对话框如下图所示。
取消图中复选框的选择项,点击按钮【Finish】完成安装。
2、文件替换拷贝文件rlm.exe及tecplotlm.lic文件至License安装路径(通常为C:\ProgramFiles\Tecplot\RLM)。
注意:在文件替换过程中,若发现rlm被占用的提示,则需要在任务管理器中关闭rlm进程。
3、安装Tecplot鼠标双击Tecplot安装文件(setup360_win64.exe),进行软件安装,弹出如下图所示对话框。
点击按钮【Next>】继续安装。
弹出下图所示对话框。
选择【I accept the terms in the license agreement】,点击【Next】按钮继续下一步,弹出下图所示对话框。
点击【Next】按钮继续下一步,弹出下图所示对话框。
选择安装路径,点击【Next】按钮继续下一步,弹出下图所示对话框。
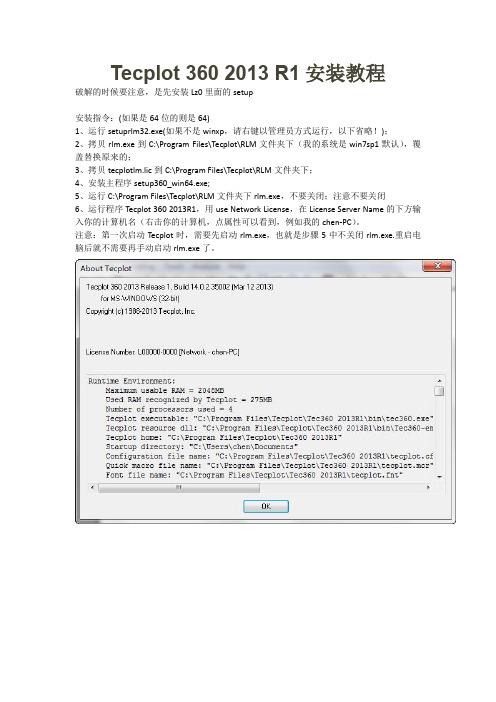
Tecplot 360 2013 R1安装教程
破解的时候要注意,是先安装Lz0里面的setup
安装指令:(如果是64位的则是64)
1、运行setuprlm32.exe(如果不是winxp,请右键以管理员方式运行,以下省略!);
2、拷贝rlm.exe到C:\Program Files\Tecplot\RLM文件夹下(我的系统是win7sp1默认),覆盖替换原来的;
3、拷贝tecplotlm.lic到C:\Program Files\Tecplot\RLM文件夹下;
4、安装主程序setup360_win64.exe;
5、运行C:\Program Files\Tecplot\RLM文件夹下rlm.exe,不要关闭;注意不要关闭
6、运行程序Tecplot 360 2013R1,用use Network License,在License Server Name的下方输入你的计算机名(右击你的计算机,点属性可以看到,例如我的chen-PC)。
注意:第一次启动Tecplot时,需要先启动rlm.exe,也就是步骤5中不关闭rlm.exe.重启电脑后就不需要再手动启动rlm.exe了。
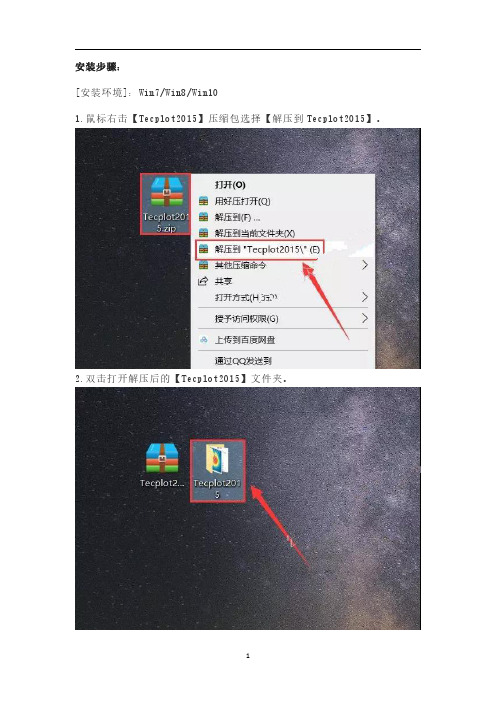
安装步骤:
[安装环境]:Win7/Win8/Win10
1.鼠标右击【Tecplot2015】压缩包选择【解压到Tecplot2015】。
2.双击打开解压后的【Tecplot2015】文件夹。
3.鼠标右击【tecplot360ex_2015_R1_win6
4.exe】选择【以管理员身份运行】。
4.点击【下一步】。
5.点击【我接受】。
6.点击【下一步】。
7.点击【浏览】更改安装路径,建议安装在除C盘之外的其它磁盘内,可以安装在D盘或其它磁盘内,选择磁盘后会自动生成一个【Tecplot360EX 2015R1】文件夹,然后点击【下一步】。
8.点击【安装】。
9.正在安装中(大约需要5分钟)。
10.点击【完成】。
11.双击打开安装包解压后的【Tecplot2015】文件夹中的【crack】文件夹。
12.全选【crack】文件夹中的所有内容,然后鼠标右击选择【复制】。
13.鼠标右击【Tecplot360EX2015R1】软件图标选择【打开文件所在的位置】。
14.点击任务栏中的【Tecplot360EX2015R1】。
15.鼠标右击空白处选择【粘贴】。
16.点击【替换目标中的文件】。
17.双击【Tecplot360EX2015R1】软件图标启动软件。
18.点击【NO】。
19.安装完成,软件运行界面如下。
Tecplot的使用入门与技巧汪继文前言Tecplot 是一种绘图视觉处理,使用Tecplot来驾驭您的资料会更显轻松无比,从简单的xy图到复杂的3d动态模拟,Tecplot可快捷地将大量的资料转成容易了解的图表及影象。
表现方式有等高线、3d流线、网格、向量、剖面、切片、阴影、上色等…Tecplot是一种资料视觉化软件,可以进行科学计算,将电脑计算后的资料进行视觉化处理,便于更形象化地分析一些科学数据,是一种传达分析结果功能最强大的视觉化软件。
Tecplot可以用来建立一个图形,二维数据的等高线和矢量图块。
使用Tecplot可以很容易地在一页上建立图形和图块或者对它们进行定位。
每一个图形都是在一个文本框中,而这些框架可以被复制再修改,这就会使你很容易地对一个数据集显示其不同的视图。
本文主要对Tecplot的使用做一个简单的说明,先简单介绍一下各菜单及其选项的一些基本而主要的功能,然后说明一下边框工具栏的基本用法,最后会分别就几个一维和二维图形来说明一下Tecplot中一些常用的概念和一些基本图形的处理方法。
目录第一章菜单功能 (2)1.1文件菜单 (2)1.2编辑菜单 (2)1.3视图菜单 (2)1.4轴菜单 (2)1.5域菜单 (3)1.6xy菜单 (4)1.7格式菜单 (4)1.8数据菜单 (5)1.9框架菜单 (5)1.10 工作空间菜单 (6)1.11 工具菜单 (6)第二章边框工具栏选项的用法 (6)第三章XY图形的绘制实例 (7)3.1边框的编辑 (7)3.2关于轴线坐标的编辑 (7)3.3在XY图形中关于symbol的设置 (8)3.4坐标调整 (8)3.5 XY图形的存储与输出 (9)3.6 两个XY图形的叠加 (9)3.7 图形的复制 (10)第四章2D和3D图形的绘制实例 (10)4.1 文件头说明 (10)4.2 有限元与数据的结构 (11)4.3 等高线与3D图形的绘制 (13)第一章:菜单功能打开Tecplot之后,可以看到Tecplot的界面,最上面一行是菜单栏,且每一菜单下都有其对应的菜单选项。
AutoCAD LT 2013 Installation Guide January 2012©2012 Autodesk, Inc. All Rights Reserved. Except as otherwise permitted by Autodesk, Inc., this publication, or parts thereof, may not be reproduced in any form, by any method, for any purpose.Certain materials included in this publication are reprinted with the permission of the copyright holder.TrademarksThe following are registered trademarks or trademarks of Autodesk, Inc., and/or its subsidiaries and/or affiliates in the USA and other countries: 123D, 3ds Max, Algor, Alias, Alias (swirl design/logo), AliasStudio, ATC, AUGI, AutoCAD, AutoCAD Learning Assistance, AutoCAD LT, AutoCAD Simulator, AutoCAD SQL Extension, AutoCAD SQL Interface, Autodesk, Autodesk Homestyler, Autodesk Intent, Autodesk Inventor, Autodesk MapGuide, Autodesk Streamline, AutoLISP, AutoSketch, AutoSnap, AutoTrack, Backburner, Backdraft, Beast, Beast (design/logo) Built with O bjectARX (design/logo), Burn, Buzzsaw, CAiCE, CFdesign, Civil 3D, Cleaner, Cleaner Central, ClearScale, Colour Warper, Combustion, Communication Specification, Constructware, Content Explorer, Creative Bridge, Dancing Baby (image), DesignCenter, Design Doctor, Designer's Toolkit, DesignKids, DesignProf, DesignServer, DesignStudio, Design Web Format, Discreet, DWF, DWG, DWG (design/logo), DWG Extreme, DWG TrueConvert, DWG TrueView, DWFX, DXF, Ecotect, Evolver, Exposure, Extending the Design Team, Face Robot, FBX, Fempro, Fire, Flame, Flare, Flint, FMDesktop, Freewheel, GDX Driver, Green Building Studio, Heads-up Design, Heidi, Homestyler, HumanIK, IDEA Server, i-drop, Illuminate Labs AB (design/logo), ImageModeler, iMOUT, Incinerator, Inferno, Instructables, Instructables (stylized robot design/logo),Inventor, Inventor LT, Kynapse, Kynogon, LandXplorer, LiquidLight, LiquidLight (design/logo), Lustre, MatchMover, Maya, Mechanical Desktop, Moldflow, Moldflow Plastics Advisers, Moldflow Plastics Insight, Moldflow Plastics Xpert, Moondust, MotionBuilder, Movimento, MPA, MPA (design/logo), MPI, MPI (design/logo), MPX, MPX (design/logo), Mudbox, Multi-Master Editing, Navisworks, ObjectARX, ObjectDBX, Opticore, Pipeplus, Pixlr, Pixlr-o-matic, PolarSnap, PortfolioWall, Powered with Autodesk Technology, Productstream, ProMaterials, RasterDWG, RealDWG, Real-time Roto, Recognize, Render Queue, Retimer, Reveal, Revit, RiverCAD, Robot, Scaleform, Scaleform GFx, Showcase, Show Me, ShowMotion, SketchBook, Smoke, Softimage, Softimage|XSI (design/logo), Sparks, SteeringWheels, Stitcher, Stone, StormNET, Tinkerbox, ToolClip, Topobase, Toxik, TrustedDWG, U-Vis, ViewCube, Visual, Visual LISP, Voice Reality, Volo, Vtour, WaterNetworks, Wire, Wiretap, WiretapCentral, XSI.All other brand names, product names or trademarks belong to their respective holders.DisclaimerTHIS PUBLICATION AND THE INFORMATION CONTAINED HEREIN IS MADE AVAILABLE BY AUTODESK, INC. "AS IS." AUTODESK, INC. DISCLAIMS ALL WARRANTIES, EITHER EXPRESS OR IMPLIED, INCLUDING BUT NOT LIMITED TO ANY IMPLIED WARRANTIES OF MERCHANTABILITY OR FITNESS FOR A PARTICULAR PURPOSE REGARDING THESE MATERIALS.ContentsChapter 1Stand-alone Installation . . . . . . . . . . . . . . . . . . . . . . 1 About Stand-Alone Installation . . . . . . . . . . . . . . . . . . . . . . 1 About Preparing for Installation . . . . . . . . . . . . . . . . . . . 1System Requirements . . . . . . . . . . . . . . . . . . . . . . 1About Administrative Permission Requirements . . . . . . . 3About Locating Your Serial Number and Product Key . . . . . 4 About Installing and Running the Product . . . . . . . . . . . . . 4About Installing AutoCAD LT . . . . . . . . . . . . . . . . . 4About Registering and Activating AutoCAD LT . . . . . . . . 6About Launching AutoCAD LT . . . . . . . . . . . . . . . . . 7About Uninstalling AutoCAD LT . . . . . . . . . . . . . . . . 8iiiiv1 Stand-alone InstallationAbout Stand-Alone InstallationAutoCAD LT Installation provides instructions about how to prepare, and theninstall AutoCAD LT 2013.IMPORTANT The content of this guide applies only to stand-alone installations andnot installations from the Mac App Store.If you have never installed the product before, you should familiarize yourselfwith the entire installation process and options before beginning.About Preparing for InstallationBefore installing, you should make yourself aware of the minimal requirementsto install and run the product.To prepare for installation, you should review the system requirements,understand administrative permission requirements, locate your AutoCAD LTserial number and product key, and close all running applications. Completethese tasks, and you are ready to begin installing AutoCAD LT.System RequirementsBefore you install AutoCAD LT 2013, make sure that your computer meets theminimum hardware and software requirements listed below.Hardware and Software Requirements1Recommended MinimumModel IDs:Model IDs:Hardware ■MacPro4,1 or later ■MacPro4,1 or later ■■MacBookPro5,1 or later MacBookPro6,1 or later ■■iMac11,1 or later iMac8,1 or later ■■MacMini3,1 or later MacMini4,1 or later ■■MacBookAir2,1 or later MacBookAir2,1 or later ■■MacBook5,1 or later MacBook7,1 or laterThe following versions of Apple Mac OS X are suppor-ted:The following versions ofApple ® Mac OS ® X are sup-ported:Operating Systems ■Leopard - 10.5.8 or later ■Leopard - 10.5.8 or later ■Snow Leopard - 10.6.4or later■Snow Leopard - 10.6.4or later For more information onApple Mac OS X Snow Leo-pard see ht-tp:///ma-cosx/.Apple Safari 5.0 or later Apple ® Safari ® 5.0 or later Web Browser64-bit Intel Processor 64-bit Intel ® Processor CPU type4GB RAM 3GB RAM Memory3 GB Free2.5 GB FreeHard disk ■1 GB Download ■ 1.5 GB Installation2 | Chapter 1 Stand-alone InstallationAll graphics cards of suppor-ted hardware All graphics cards of suppor-ted hardwareFor additional information,see Graphics Card DriverUpdate.Graphics card 1600 x 1200 with True Col-or1024 x 768 with True Color Display resolution Apple Mouse, Magic Mouse,Magic Trackpad, MacBookApple ® Mouse, Magic Mouse, Magic Trackpad,Pointing device Pro Trackpad, or MS-Compli-ant Mouse MacBook ® Pro Trackpad, or MS-Compliant MouseKeyboard layouts ■U.S. (US)■U.S. (US)■■British (UK)British (UK)■■French (France)French (France)Download and Installation from DVD Download and Installationfrom DVDMedia All Mac OS X compliant printers All Mac OS X compliantprinters PrintersAbout Administrative Permission Requirements Administrator permissions are required to install AutoCAD LT.Domain administrative permissions are not required to install the product.See your system administrator for information about administrative permissions.You do not need administrator permissions to run AutoCAD LT. You can run the program as a limited user.About Stand-Alone Installation | 3About Locating Your Serial Number and Product KeyWhen you install AutoCAD LT, you are prompted for your serial number andproduct key in the Product and User Information page, or the option ofinstalling the product in trial mode.You may enter your product information at any time during your trial modeperiod if you opt to install the product in that mode.The serial number and product key are located on the outside of the productpackaging, or in the Autodesk® Upgrade and Licensing Information email.Make sure to have these available before you install the program so that youdon't have to stop in the middle of the installation.The serial number must contain a three-digit prefix followed by an eight-digitnumber. The product key consists of five characters.The information you enter is permanently retained with the product. Becauseyou cannot change this information later without uninstalling, take care whenentering the information. To review this product information later, on theMac OS menu bar, click AutoCAD LT➤ About AutoCAD LT. In the Aboutdialog box, click Product Information.NOTE If you have lost your serial number or product key, contact the AutodeskBusiness Center (ABC) at 800-538-6401 for assistance.About Installing and Running the ProductTo use the product, you must install the product, register and activate it, andthen launch it. You must have administrative permissions to install AutoCADLT.About Installing AutoCAD LTThe AutoCAD LT Installation wizard contains all installation-related materialin one place.From the installation wizard, you can select an installation location, registeryour product, and customize the install.4 | Chapter 1 Stand-alone InstallationNOTE It is recommended that you take the time to familiarize yourself with the documentation in this chapter of the documentation before you install AutoCAD LT.To install using the default settingsUsing the default installation settings is the fastest way to install AutoCAD LT. A default installation does the following:■Performs a Standard installation, which installs the most common application features.■Installs AutoCAD LT to the default installation path of/Applications/Autodesk/<product name>.1Start the AutoCAD LT Installation wizard.2On the Introduction page, click Continue.3On the License page, select a language from the Language drop-down list and review the Autodesk software license agreement. Click Continue and then click Agree.4On the Register page, enter your serial number and product key. Click Continue.NOTE Select I Want to Try this Product for 30 Days if you do not have aserial number and product key. You can change it later in the product after it is started.5On the Installation Type page, click Install.6If the Password dialog box is displayed, enter your password and click OK.7On the Summary page, click Close.You have successfully installed AutoCAD LT. You are now ready toregister your product and start using the program. To register the product, start AutoCAD LT and follow the on-screen instructions.To install using custom settingsWith this method, you can customize your installation.1Start the AutoCAD LT Installation wizard.About Stand-Alone Installation | 52On the Introduction page, click Continue.3On the License page, select a language from the Language drop-down list and review the Autodesk software license agreement. Click Continueand then click Agree.4On the Register page, enter your serial number and product key. Click Continue.NOTE Select I Want to Try this Product for 30 Days if you do not have aserial number and product key. You can change it later in the product afterit is started.5On the Installation Type page, click Change Install Location to display the Destination Select page.6On the Destination Select page, select the volume where you want to install the product and then click Continue.7On the Installation Type page, click Customize. Specify the following options:■AutoCAD LT - Install the program to the specified volume■Add AutoCAD LT to Dock - Create a shortcut to the program inthe Mac OSX dock8On the Installation Type page, click Install.9If the Password dialog box is displayed, enter your password and click OK.10On the Summary page, click Close.You have successfully installed AutoCAD LT. You are now ready toregister your product and start using the program. To register the product,start AutoCAD LT and follow the on-screen instructions.About Registering and Activating AutoCAD LTYou use the Product License Activation wizard to activate the product.The first time you start AutoCAD LT, the Product License Activation wizardis displayed. You can either activate AutoCAD LT at that time, or Try AutoCADLT and activate it later. Until you register and enter a valid activation codefor AutoCAD LT, you are operating the program in trial mode and the ProductLicense Activation wizard is displayed for 30 days from the first time that yourun the program.6 | Chapter 1 Stand-alone InstallationIf after 30 days of running AutoCAD LT in trial mode you have not registered and provided a valid activation code, your only option is to register and activate AutoCAD LT. You will not be able to run in trial mode after the 30 days expires. Once you register and activate AutoCAD LT, the Product License Activation wizard is no longer displayed.The fastest and most reliable way to register and activate your product is by using the Internet. Simply enter your registration information and send it to Autodesk over the Internet. Once you submit your information, registration and activation occur quickly.To register and activate AutoCAD LT1On the Finder menu bar, click Go ➤ Applications.2In the Applications window, double-click Autodesk ➤AutoCAD LT 2013➤AutoCAD LT.3In the AutoCAD LT Product License Activation wizard, select Activate, and then click Next.This starts the activation process.4Click Register and Activate (Get an Activation Code).5Click Next and follow the on-screen instructions.If you do not have Internet access, or if you want to use another method of registration, you can register and activate AutoCAD LT in one of the following ways:■Email. Create an email message with your registration information and send it to Autodesk.■Fax or Post/Mail. Enter your registration information, and fax or mail the information to Autodesk.About Launching AutoCAD LTAssuming that you followed all of the previous steps outlined in this installation section, you can launch AutoCAD LT and start taking advantage of its new and updated features. For more detailed information about the new features, learning videos, online Help, or AutoCAD LT services and support, see the Welcome screen after you launch the product.About Stand-Alone Installation | 7You can start AutoCAD LT in the following ways:■Dock shortcut. When you install AutoCAD LT, an AutoCAD LT 2013 shortcut icon is placed in the dock unless you cleared that option duringinstallation. Click the AutoCAD LT 2013 shortcut icon to start the program.■Application window. On the Finder menu bar, click Go ➤ Applications.Then in the Applications window, double-click Autodesk ➤AutoCAD LT2013➤AutoCAD LT.About Uninstalling AutoCAD LTAll components of AutoCAD LT can be removed by uninstalling the product.When you uninstall AutoCAD LT, all components are removed. This meansthat even if you have previously added or removed components, or if youhave reinstalled or repaired AutoCAD LT, the uninstall removes all AutoCADLT installation files from your system.To uninstall AutoCAD LT1Close and quit AutoCAD LT if it is currently running.2On the Finder menu bar, click Go ➤ Applications.3In the Applications window, double-click Autodesk ➤AutoCAD LT2013➤ Remove AutoCAD LT.4On the Overview page, click Continue.5On the Options page, select Leave AutoCAD LT Preferences on MyComputer to not remove your custom settings and files if you plan toreinstall the product later. Click Continue.6If the Password dialog box is displayed, enter your password and click OK.7On the Feedback page, choose a reason for uninstalling the program, enter your name, e-mail address, and a note to send to Autodesk inregards to the uninstalling of the product. Clear OK to Contact Me ifyou do not want Autodesk to reply to you about the feedback yousupplied. Click Send.8Click Close to uninstall the program.8 | Chapter 1 Stand-alone InstallationNOTE Even though AutoCAD LT is removed from your system, the software license remains. If you reinstall AutoCAD LT at some future time, you will not have to register and re-activate the product.About Stand-Alone Installation | 910。
Tecplot的使用入门与技巧汪继文前言Tecplot 是一种绘图视觉处理,使用Tecplot来驾驭您的资料会更显轻松无比,从简单的xy图到复杂的3d动态模拟,Tecplot可快捷地将大量的资料转成容易了解的图表及影象。
表现方式有等高线、3d流线、网格、向量、剖面、切片、阴影、上色等…Tecplot是一种资料视觉化软件,可以进行科学计算,将电脑计算后的资料进行视觉化处理,便于更形象化地分析一些科学数据,是一种传达分析结果功能最强大的视觉化软件。
Tecplot可以用来建立一个图形,二维数据的等高线和矢量图块。
使用Tecplot可以很容易地在一页上建立图形和图块或者对它们进行定位。
每一个图形都是在一个文本框中,而这些框架可以被复制再修改,这就会使你很容易地对一个数据集显示其不同的视图。
本文主要对Tecplot的使用做一个简单的说明,先简单介绍一下各菜单及其选项的一些基本而主要的功能,然后说明一下边框工具栏的基本用法,最后会分别就几个一维和二维图形来说明一下Tecplot中一些常用的概念和一些基本图形的处理方法。
目录第一章菜单功能 (2)1.1文件菜单 (2)1.2编辑菜单 (2)1.3视图菜单 (2)1.4轴菜单 (2)1.5域菜单 (3)1.6xy菜单 (4)1.7格式菜单 (4)1.8数据菜单 (5)1.9框架菜单 (5)1.10 工作空间菜单 (6)1.11 工具菜单 (6)第二章边框工具栏选项的用法 (6)第三章XY图形的绘制实例 (7)3.1边框的编辑 (7)3.2关于轴线坐标的编辑 (7)3.3在XY图形中关于symbol的设置 (8)3.4坐标调整 (8)3.5 XY图形的存储与输出 (9)3.6 两个XY图形的叠加 (9)3.7 图形的复制 (10)第四章2D和3D图形的绘制实例 (10)4.1 文件头说明 (10)4.2 有限元与数据的结构 (11)4.3 等高线与3D图形的绘制 (13)第一章:菜单功能打开Tecplot之后,可以看到Tecplot的界面,最上面一行是菜单栏,且每一菜单下都有其对应的菜单选项。