JRP-2RA微型热敏打印机芯规格书v1.1
- 格式:pdf
- 大小:443.07 KB
- 文档页数:23
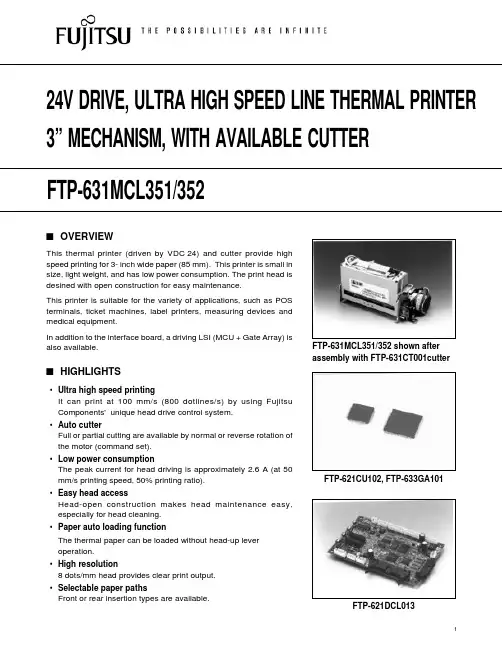
FTP-631MCL351/352sOVERVIEWThis thermal printer (driven by VDC 24) and cutter provide high speed printing for 3- inch wide paper (85 mm). This printer is small in size, light weight, and has low power consumption. The print head is desined with open construction for easy maintenance.This printer is suitable for the variety of applications, such as POS terminals, ticket machines, label printers, measuring devices and medical equipment.In addition to the interface board, a driving LSI (MCU + Gate Array) is also available.s HIGHLIGHTS•Ultra high speed printingIt can print at 100 mm/s (800 dotlines/s) by using Fujitsu Components' unique head drive control system.•Auto cutterFull or partial cutting are available by normal or reverse rotation of the motor (command set).•Low power consumptionThe peak current for head driving is approximately 2.6 A (at 50mm/s printing speed, 50% printing ratio).•Easy head accessHead-open construction makes head maintenance easy,especially for head cleaning.•Paper auto loading functionThe thermal paper can be loaded without head-up lever operation.•High resolution8 dots/mm head provides clear print output.•Selectable paper pathsFront or rear insertion types are available.24V DRIVE, ULTRA HIGH SPEED LINE THERMAL PRINTER 3” MECHANISM, WITH AVAILABLE CUTTER FTP-631MCL351/352 shown after assembly with FTP-631CT001cutterFTP-621DCL013FTP-621CU102, FTP-633GA101s DESIGNATIONPart number Front paper insertion typeRear paper insertion typeFTP-631MCL351FTP-631MCL352FTP-631CT001FTP-621DCL013FTP-621CU102FTP-633GA101ItemPrinter mechanismMicro Controller UnitGate ArrayLSIInterface boardCutterPrinting method Thermal-sensitive line dot method Dot structure 576 dots/lineDot pitch (Horizontal)0.125 mm (8 dots/mm)—Dot density Dot pitch (Vertical)0.125 mm (8 dots/mm)—Line feed pitch Effective printing area 72 mmNumber of columns 48 columns/line (maximum)—Alphanumeric KANA Maximum printing speed 800 dot lines/s (100 mm/s) maximum JIS ANK :128International characters :130Character typesSemi-graphic :63ASCII small characters :31Download :38424 × 12 dots, (3.0 × 1.5 mm), 48 columns 32 × 16 dots, (4.0 × 2.0 mm), 36 columns 24 × 24 dots, (3.0 × 3.0 mm), 24 columns 32 × 32 dots, (4.0 × 4.0 mm), 18 columns Interface1) Centronics standard 2) Bus interface*1Cutting method Guillotine methodCutting typeFull-cut or partial cut (command set)Minimum cut length 20 mm Paper thickness65 to 150 µms GENERAL SPECIFICATIONSSpecificationsItemCharacter composition, dimensions (H ×W),Number of columns (standard)(Continued)Cutter24 VDC ± 5%, average:*20.55 (0.56) A (at 25 mm/s printing speed, 25% printing ratio)For head0.84 (1.11) A (at 50 mm/s printing speed, 25% printing ratio)3.23 (4.29) A (at 50 mm/s printing speed, 100% printing ratio)(): PeakFor motor 24 VDC ± 5%, 1.0 A maximum For logic5 VDC ± 5%, 0.5 A maximumWeight Mechanism with cutter: approx. 540 g. Interface board: approx. 100 gMechanism + cutter 132 (W) × 60 (D) × 71.0 (H) mm (Excluding connector)Interface board 140 (W) × 89 (D) × 24.0 (H) mmPulse durability :5 × 10⁷ pulse/dot (usingFujitsu Takamisawa's standarddriving method)Wear resistance :50 km (at 12.5% printing ratio)CutterCutting life: 3 × 10⁵ times Operating temperature +5 to +40°C*3Operating humidity 20 to 85% RH (no condensation)Storage temperature –20 to +60°C (excluding paper)Storage humidity 5 to 95% RH (no condensation)Head temperatureBy thermistor (applied energy control, abnormal temperature detection)DetectionPaper out/Mark detect By photointerrupter (command set)Head-upBy microswitch Paper width85 mm 1 ply paper in roll:FTP-030P0020SpecificationsItem(Continued)Power supplyDimensionThermal headLifeEnvironmental condition+0–1Recommended thermal sensitive paper*4*1:The data to be printed is automatically read out by the printer driver equipment memory (host system framememory). The communication is parameter transfer.*2:At 25°C, maximum applied voltage, minimum head resistance, specified paper, stable printing ratio.*3:Temperature range for guaranteed printing density. It can operate at 0 to +40°C.*4:Please contact us for other thermal papers.s DIMENSIONSInterface boards INTERFACE, COMMAND, OPTIONSPlease refer to the FTP-621DCL003/013 DATA SHEET for Interface, Command, and Options.© 2001 Fujitsu Components America, Inc. All company and product names are trademarks or registered trademarks of their respective owners. Rev. 09/2001JapanFujitsu Component Limited Gotanda-Chuo Building3-5, Higashigotanda 2-chome, Shinagawa-ku Tokyo 141, Japan Tel: (81-3) 5449-7010Fax: (81-3) 5449-2626Email:************** Web: North and South AmericaFujitsu Components America, Inc.250 E. Caribbean DriveSunnyvale, CA 94089 U.S.A.Tel: (1-408) 745-4900Fax: (1-408) 745-4970Email:*******************.com Web: EuropeFujitsu Components Europe B.V.Diamantlaan 252132 WV Hoofddorp NetherlandsTel: (31-23) 5560910Fax: (31-23) 5560950Email:***************************.com Web: Asia PacificFujitsu Components Asia Ltd.102E Pasir Panjang Road#04-01 Citilink Warehouse Complex Singapore 118529Tel: (65) 375-8560Fax: (65) 273-3021Email:*****************.com Fujitsu Components International Headquarter Offices。
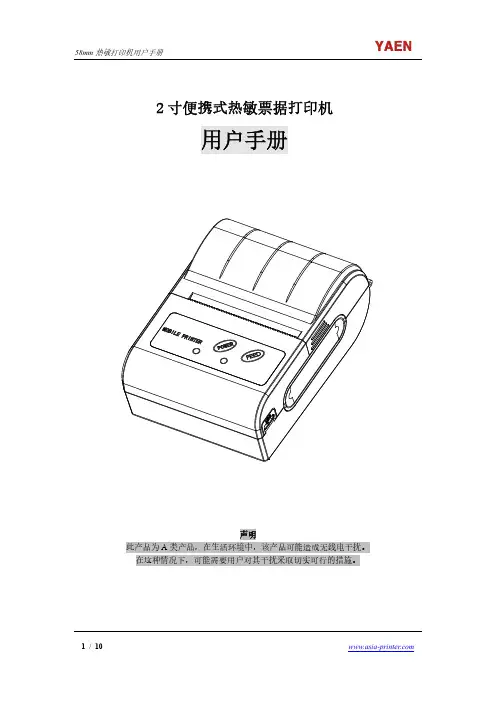
2寸便携式热敏票据打印机用户手册声明此产品为A类产品,在生活环境中,该产品可能造成无线电干扰。
在这种情况下,可能需要用户对其干扰采取切实可行的措施。
注意事项在使用打印机之前,请仔细阅读本章内容!安全注意事项本打印机只能使用本公司提供的专用电池和电源适配器,否则可能引起产品损坏,电池漏液、起火甚至爆炸。
不要将电池投入火中,不要将电池短路、拆散或加热,否则可能导致电池漏液、起火甚至爆炸。
电池中的液体具有腐蚀性,如果操作不慎导致电池漏液并将液体粘到皮肤或衣物上,请立即用清水洗掉,如不慎进入眼睛内,请立即用大量清水彻底冲洗眼睛并就医。
打印时或打印刚结束时请不要立即开启纸仓盖,用手或身体的任何部位接触打印机芯,以免过高的温度导致烫伤。
打印机操作失灵时,请不要再继续使用打印机。
这会导致火灾或者触电。
请关机并拔下打印机插头后联系经销商。
使用注意事项打印机不可浸入水中,也不要将其长时间暴露在雨中,否则可能导致打印机损坏。
打印过程中不得打开纸仓盖,否则可能导致打印机工作不正常。
虽然打印机可以在-10℃到50℃稳定工作,但过高的环境温度(45℃)或过低的环境温度(5℃)都可能导致打印质量降低。
过高的环境湿度(85%相对湿度以上)或过低的环境湿度(20%相对湿度以下)都可能导致打印质量降低。
使用劣质的打印纸或存放时间过长的打印纸可能造成打印质量降低,甚至损坏打印机。
存放注意事项打印机需存放于温度在-20℃到70℃、相对湿度在5%到95%的环境中。
如果长时间存放打印机,请务必取出打印机中的电池单独存放,否则可能导致电池失效、甚至漏液,进而损坏打印机。
普通热敏打印纸的存放时间较短,如果要打印需长期保存的单据,请选用长效热敏打印纸。
打印纸不要放在高温或阳光直射的地方储存,如果已经拆封,请放在避光的地方保存。
■ 电池安全注意事项在使用产品前务必仔细阅读用户手册。
忽视以下说明可能会导致电池过热、燃烧、爆炸、损坏或性能及产品寿命降低。
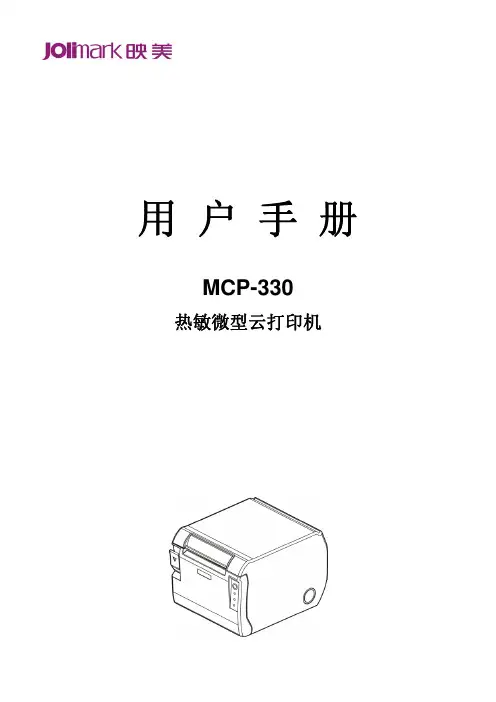
用 户 手 册MCP-330热敏微型云打印机声明关于商标各公司名称、产品名称是各个公司的注册商标或者商品名称。
Jolimark、映美是新会江裕信息产业有限公司的注册商标。
EPSON、ESC/POS是Seiko Epson Corporation的注册商标。
Star是日本Star精密株式会社之注册商标。
Windows是Microsoft Corporation的注册商标。
产品中有毒有害物质或元素的名称及含量有毒有害物质或元素部件名称铅 (Pb ) 汞 (Hg ) 镉 (Cd ) 六价铬 (Cr (VI ))多溴联苯(PBB )多溴二苯醚(PBDE )塑料部件 ○ ○ ○ ○ ○ ○ 金属部件 × ○ ○ ○ ○ ○ 电路板组件×○○○○○○:表示该有毒有害物质在该部件所有均质材料中的含量均在 SJ/T 11363-2006标准规定的限量要求以下。
×:表示该有毒有害物质至少在该部件的某一均质材料中的含量超出 SJ/T 11363-2006标准规定的限量要求。
×的技术原因:以下情况之一,电子元器件含铅,或者快削钢中含有0.35wt%以下的铅,或者铜合金中含有4wt%以下的铅,或者铝中含有0.4wt%以下的铅。
电子信息产品污染控制标志:在中华人民共和国境内销售的电子信息产品必须标识电子信息产品污染控制标志,标志内的数字表示在正常使用条件下电子信息产品的环保使用期限。
本用户手册的说明标记使打印机正常工作所需的注意事项和限制等。
为了避免错误操作,请务必阅读。
使用打印机时可带来方便和具有参考价值的事项。
警示操作时的重要事项,忽视时可能会导致生命危险或重大人身事故。
提示操作时的注意事项,忽视时可能会导致受伤。
安全指引请在使用本产品前仔细阅读本手册,不要执行本手册中没有明确说明的操作。
未经授权的操作会导致错误或意外。
制造商对因错误操作而导致打印机出现的任何问题均不负责。
请严格遵守标示在打印机上的所有警告和指导。

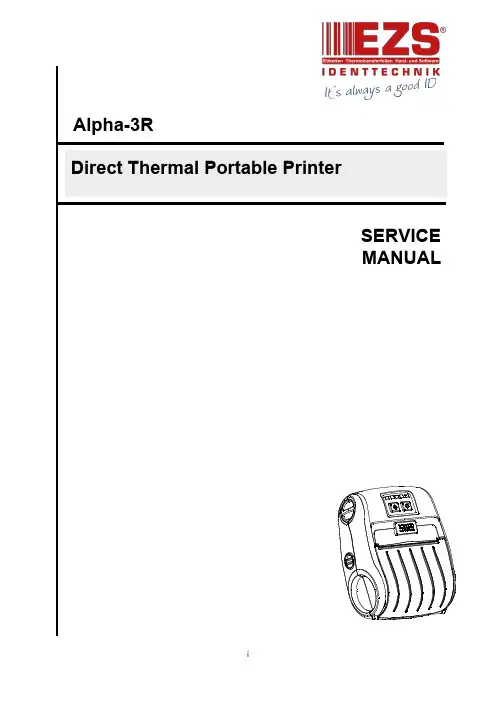
SERVICE MANUALAlpha-3R Direct Thermal Portable PrinterContents1.FUNDAMENTAL OF THE SYSTEM (2)1.1Overview (2)2.ELECTRONICS (3)2.1Summary of Board Connectors (3)3.MECHANISM (7)3.1Replacing the Platen Roller (Including media cover) (7)3.2Replacing the Keys Control Board (9)3.3Replacing the Bluetooth Module (Option) (10)3.4Replacing the Media Holder Assembly (11)3.5Replacing the Main Board Assembly (13)3.6Replacing the Print Head Assembly (14)3.7Replacing the Stepping Motor (15)3.8Replacing the black mark sensor assembly (16)3.9Replacing the Wi-Fi Module (Option) (17)3.10 Replacing the Open Sensor (18)4.TROUBLESHOOTING (22)4.1Common Problems (22)5.Maintenance (24)Revise History (25)1. FUNDAMENTAL OF THE SYSTEM1.1 OverviewFront View1234561. LED indicator2. Feed button3. Power on/off button4. Media cover release button5. Media holder adjustment knob6. Media cover1. Tear edge2. Print head3. Media holder4. Platen5. Black mark sensor 214351. Li-ion battery2. Battery open clasp3. USB interface4. Power jack5. Interface cover324 152. ELECTRONICS2.1 Summary of Board ConnectorsMain board top1235 46789Connector Description1 LED & KEY board2 WiFi or Bluetooth module connectorPin Description1 3.3V2 BT/WiFi Reset3 BT RXD4 BT RTS5 BT TXD6 BT CTS7 WiFi wake up8 WiFi TCP9 BT/WiFi Switch10 GND3 Stepping motorPin Description1 OUT12 OUT23 OUT14 OUT24 Download F/W connectorPin Description1 3.3V2 GND3 RESET4 BMS5 NPCS06 MOSI7 MISO8 SPCK5 Head open sensorPin Description1 HEAD2 GND6 USB & RS 232 connector7 12V DC IN8 TPH connector9 Paper sensorPin Description1 3.3V2 BM_E3 BM_R4 3.3VMain board bottom1Connector Description1 Battery connector3. MECHANISM3.1 Replacing the Platen Roller (Including media cover)1. Remove two screws from the back of the printer and two screws from the front ofthe printer.2. Take the printer top cover off.3. Use a tool to remove the shaft. Remove/Replace the media cover. (including theplaten roller ass’y)4. Reassemble the parts in the reverse procedures.3.2 Replacing the Keys Control Board1. Refer to section 3.1 to remove the printer top cover.2. Remove two screws on the keys control board.3. Loosen the connector lock then disconnect the flat cable from the keys control board.Remove/Replace the keys control board.4. Reassemble the parts in the reverse procedures.3.3 Replacing the Bluetooth Module (Option)1. Refer to section 3.2 to remove the keys control board.2. Remove two screws on the Bluetooth control board.3. Disconnect the connector on the board.4. Reassemble the parts in the reverse procedures.3.4 Replacing the Media Holder Assembly1. Remove two screws and media holder adjustment knob.2. Take the interior mechanism from the printer bottom cover.3. Plug the media holder adjustment knob to rotate the media holder to the closest positionand remove a screw on the other side..4. Take the media holder assembly from the mechanism.5. Reassemble the parts in the reverse procedures.1. Refer to section 3.2 to section 3.4 to remove key control board, Bluetooth control board(option), and the media holder assembly.2. Remove two screws from the back of interior mechanism and disconnect all theconnectors on the main board assembly.3. Reassemble the parts in the reverse procedures.1. Refer to section 3.2 to section 3.5 to remove key control board, Bluetooth control board(option), the media holder assembly, and main board assembly.2. Use the long-nose pliers to remove two spring torsions on each side.3. Take the gear holder and the gear, and push the print head holder on the each side toremove the print head assembly.4. Reassemble the parts in the reverse procedures.Gear holder Gear3.7 Replacing the Stepping Motor1. Refer to section 3.4 and section 3.5 to remove media holder assembly and main boardassembly.2. Remove the gear holder and two gears.3. Remove two screws.4. Reassemble the parts in the reverse procedures.Gear holder Gears3.8 Replacing the black mark sensor assembly1. Refer to section 3.2 to section 3.5 to remove key control board, Bluetooth control board(option), the media holder assembly, and main board assembly.2. Remove a screw and replace the black mark sensor.3. Reassemble the parts in the reverse procedures. Black mark sensor assembly3.9 Replacing the Wi-Fi Module (Option)1. Refer to section 3.1 take the printer top cover off. Disconnect the Wi-Fi antennaconnector carefully.Wi-Fi antenna connector2. Refer to section3.2 to remove the keys control board.3. Remove one screw on the Wi-Fi control board. Please refer to above picture.4. Replace the WiFi control board.5. Reassemble the parts in the reverse procedures.Note:▪This is the new Wi-Fi module’s replacing instruction. It should work with the main board that is -30LF version. (or later version)▪If you replace the main board, please check the Wi-Fi signal band on configuration page for your using region. If any questions, please contact the Customer Service Department of yourpurchased reseller or distributor for assistance.US EUR3.10 Replacing the Open Sensor1. Please refer to section 3.1 take the printer top cover off and replace a new one withplaten roller.※Old media cover※New media cover(If the media cover is already the new one, it doesn’t need to replace the open sensor)2. Remove the screw on the open sensor.3. Unplug the old open sensor connector.4. Then, insert the new open sensor connector.5. Install the elastic panel on the open sensor.Note: the direction of elastic panel must be the same as illustrated6. Place the open sensor on the side of media cover switch.7. Lock the screw on the side of media cover switch.8. Fix the wire on the slot.9. Reassemble the parts in the reverse procedures.4. TROUBLESHOOTING4.1 Common ProblemsThe following guide lists the most common problems that may be encountered when operating this bar code printer. If the printer still does not function after all suggested solutions have been invoked, please contact the Customer Service Department of your purchased reseller or distributor for assistance.Problem Possible Cause Recovery ProcedurePower indicator does not illuminate * The battery is not properlyinstalled.* The battery is dead.* Reinstall the battery.* Switch the printer on.* Charge the battery.- The printer status fromDiagTool shows “HeadOpen”.* The printer carriage is open. * Please close the print carriage.- The printer status from DiagTool shows “Out of Paper”.. * Running out of media roll.* The media is installedincorrectly.* Black mark sensor is notcalibrated.* Supply a new media roll.* Please refer to the steps on section 3.4 toreinstall the media roll.* Calibrate the black mark sensor.- The printer status from DiagTool shows “Paper Jam”. * Black mark sensor is not setproperly.* Make sure media size is setproperly.* Media may be stuck insidethe printer mechanism.* Calibrate the black mark sensor.* Set media size correctly.Memory full ( FLASH / DRAM )* The space of FLASH/DRAMis full.* Delete unused files in the FLASH/DRAM.* The max. numbers of DRAM is 256 files.* The max. user addressable memoryspace of DRAM is 256KB.* The max. numbers of file of FLASH is 256files.* The max. user addressable memoryspace of FLASH is 2560KB.Poor Print Quality * Media is loaded incorrectly* Dust or adhesiveaccumulation on the printhead.* Print density is not setproperly.* Printhead element isdamaged.* Reload the supply.* Clean the print head.* Clean the platen roller.* Adjust the print density and print speed.* Run printer self-test and check the printhead test pattern if there is dot missing inthe pattern.* Change proper media roll.Missing printing on the left orright side of label* Wrong label size setup. * Set the correct label size.Gray line on the blank label * The print head is dirty.* The platen roller is dirty.* Clean the print head.* Clean the platen roller.Irregular printing * The printer is in Hex Dumpmode.* The RS-232 setting isincorrect.* Turn off and on the printer to skip thedump mode.* Re-set the Rs-232 setting.5. MaintenanceThis session presents the clean tools and methods to maintain your printer.1. Please use one of following material to clean the printer.⏹Cotton swab⏹Lint-free cloth⏹Vacuum / Blower brush⏹100% ethanol2. The cleaning process is described as following,Printer Part Method IntervalPrint Head 1. Always turn off the printer beforecleaning the print head.2. Allow the print head to cool for aminimum of one minute.3. Use a cotton swab and 100%ethanol to clean the print headsurface.Clean the print head when changing anew label rollPlaten Roller 1. Turn the power off.2. Rotate the platen roller and wipe itthoroughly with 100% ethanol anda cotton swab, or lint-free cloth.Clean the platen roller when changing anew label rollTear Bar/Peel Bar Use the lint-free cloth with 100%ethanol to wipe it.As neededSensor Compressed air or vacuum MonthlyExterior Wipe it with water-dampened cloth As neededInterior Brush or vacuum As neededNote:●Do not touch printer head by hand. If you touch it careless, please use ethanol to clean it.●Please use 100% Ethenol. DO NOT use medical alcohol, which may damage the printer head.●Regularly clean the print head and supply sensors once change a new ribbon to keep printerperformance and extend printer life.Revise HistoryDate Content Editor 2013/11/4 Modify some pictures for label model Camille2016/2/5Modify section 3.9 (replacing the Wi-Fi module) Camille2016/6/27 Add chapter 3.10 Replacing the Open Sensor KateCorporate Headquarters Li Ze Plant9F., No.95, Minquan Rd., Xindian Dist., No.35, Sec. 2, Ligong 1st Rd., Wujie Township,New Taipei City 23141, Taiwan (R.O.C.) Yilan County 26841, Taiwan (R.O.C.)TEL: +886-2-2218-6789 TEL: +886-3-990-6677FAX: +886-2-2218-5678 FAX: +886-3-990-5577Web site: E-mail:*****************************TSC Auto ID Technology Co., Ltd.****************************。
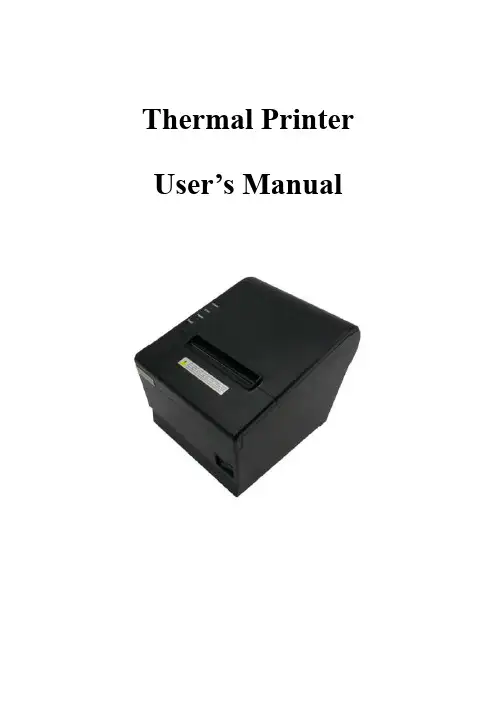
Thermal Printer User’s ManualCatalogue1 Introduction (2)1.1 Brief introduction (2)1.2 Main features (2)2 Specification (3)2.1 Specification (3)2.2 Printing material requirements (5)2.2.1 Paper parameters (5)2.2.2 Mark paper parameters (5)2.2.3 Paper using attention (5)2.3 Printing and paper cutting position (6)2.3.1 Printing position (6)2.3.2 Paper cutting position (6)3 Appearance and components (7)3.1 Appearance and components (7)3.2 Indicator and buzzer instruction (8)4 Printer installation (9)4.1 Open the package (9)4.2 Requirements of installation position (9)4.3 Connect to power adapter (9)4.4 Connect Communication cables (9)4.5 Connect to cash drawer (9)4.6 Paper roll loading (10)4.6.1 Printing paper type confirmation (10)4.6.2 Loading or change paper roll (10)4.7 DIP switch setting (12)4.8 Printing self-test page (12)4.9 Set Ethernet port IP Address. (12)5 Interface pin definitions (14)5.1 Parallel interface pin definition(DB25M) (14)5.2 USB interface pin definition(standard B type female base) (14)5.3 Power interface pin definition(MPC-3-001B) (15)5.4 Cash drawer interface pin definition(RJ11-6P6C) (15)5.5 Serial port pin definition(DB9F) (16)5.6 Ethernet interface pin definition(RJ45) (16)6 Faults handling (17)6.1 Printer does not work (17)6.2 Indicator error and buzzer warning (17)6.3 Problems when it is printing (17)6.4 Problems when cutting paper (18)6.5 Paper jam and cutter retraction troubles removal (18)1 Introduction1.1 Brief introductionCB821 is a thermal POS printer with auto-cutter. It has good printing quality, high printing speed and high stability, which is widely used in POS system, food service industry and many other fields.CB821 connects other devices via USB, Serial, Ethernet port. It offers drivers for WINDOWS and LINUX operating systems.The supported operating systems are as below:WINDOWS XPWINDOWS 7 32/64WINDOWS 8WINDOWS 10UBUNTU 12.04 32/64UBUNTU 14.04 32/64MAC OS1.2 Main features·Low noise, high-speed printing, 250mm/s·With auto-cutter·With cash drawer interface·USB, Serial, Ethernet port communication, Bluetooth optional.Long-life, high print quality, durable performance.Support mark paper and continuous paper printing.Easy paper loading design, widely used in various industries2 Specification2.1 SpecificationItem ParameterPrinting parameter Printing method Thermal printingResolution 203DPI,8 dots/mmPrinting width 72mm(576 dots)Printing speed About 250 mm/sInterfacesStandard: cash drawer / USB/ serial/ EthernetOptional Wireless Communication: BluetoothPage mode / SupportCommand set / ESC/POS compatible commandsStorageRAM RAM 8M bytes, receive buffer area 1M bytes FLASH FLASH 4M bytes, NV bitmap 256K bytescharactersChinese GB18030 24×24Words, figures ASCII 9×17,12×24User-defined SupportCode pagesOptional international character sets 45TRADITIONAL CHINESECHINESECP437 [U.S.A., Standard Europe]KatakanaCP850 [Multilingual]CP860 [Portuguese]CP863 [Canadian-French]CP865 [Nordic]WCP1251 [Cyrillic]CP866 Cyrillic #2MIK[Cyrillic /Bulgarian]CP755 [East Europe,Latvian 2]IranCP862 [Hebrew]WCP1252 Latin IWCP1253 [Greek]CP852 [Latina 2]CP858 Multilingual Latin Ⅰ+Euro)Iran IILatvianCP864 [Arabic]ISO-8859-1 [West Europe]CP737 [Greek]WCP1257 [Baltic]ThaiCP720[Arabic]CP855CP857[Turkish]WCP1250[Central Europe] CP775WCP1254[Turkish]WCP1255[Hebrew]WCP1256[Arabic]WCP1258[Vietnam]ISO-8859-2[Latin 2]ISO-8859-3[Latin 3]ISO-8859-4[Baltic]ISO-8859-5[Cyrillic]ISO-8859-6[Arabic]ISO-8859-7[Greek]ISO-8859-8[Hebrew]ISO-8859-9[Turkish]ISO-8859-15 [Latin 3] Thai2CP856Chart / Supports different density dots and images printingsSupports grating bitmap printingSupports download bitmap printing, every bitmap size should less than 256K, and the total capacity of download bitmap is 256K.Bar codes 1DUPC-A、UPC-E、EAN-8、EAN13、CODE39、ITF、CODEBAR、CODE128、CODE932D PDF417、QR CodeDetection function Sensor Paper out, cover opened, un-take out printed paper(optional)LED indicatorPower indicator Green Paper out indicator Red Error indicator RedPaper RequirementType Standard thermal receipt paper Width 79.5±0.5mmThickness 0.056~0.1mmDiameter 80mm(Max.)Physical characteristicsPaper loading Easy paper loadingPaper cutting Manual or automatically cut paper Operating condition -10℃~ 50℃,25% ~ 80%RH Storage condition ~40℃~ 70℃,≤93%RH(40℃)Outline dimension 145mm×195mm×144mm(W×L×H)Weight 1.8KgReliabilityTPH life 100kmCutter life 1,000,000 times Motor life 360,000 hoursSoftware function Driver procedure Windows(WIN7/WIN8/WIN10/Vista/XP/2000)Ubuntu 12.04 32/64, Ubuntu 14.04 32/64 MAC OS2.2 Printing material requirements2.2.1 Paper parameters1)Paper type: thermal receipt paper/thermal black mark paper2)Paper width:80±0.5 mm3)Paper roll diameter: 80 mm (Max.)4)Paper thickness:0.065 ~ 0.10mm2.2.2 Mark paper parametersBlack mark imprint position is on the front side of the receipt when using mark paper. The black mark reflectivity is no more than15%, the other parts of paper reflectivity should be more than 85%.There are not any patterns in black mark area, such as ad, and the mark size shall be satisfied with requirements as below:2.2.3 Paper using attentionNote:1)Please use good quality paper, otherwise, it will effect printing quality and even reduce printer head life.2)Don’t make the paper stick on axis.3)Paper will be fading out or reduced thermal sensitivity if it is polluted by chemical or oil, which will affectprinting effects.4)Don’t use nail or hard things to clash printing paper, otherwise, it will be fade out.5)Paper will be fading out if the environment temperature exceeds 70°C. So please take note the temperature,humidity and illumination effects.2.3 Printing and paper cutting position2.3.1 Printing positionL1-Paper storehouse’s width: 82±0.5mmL2-Effective printing width: 80mmL3-Distance between print head to paper storehouse’s left edge (fixed width): 3±0.3mmL4-Distance between print head to paper storehouse’s right edge (fixed width): 3±0.3mmL5-Left margin: Default is 4mmL6-Printing area width: it is set by commands (refer to programming manual). Default is 72mm. L7-Right margin: Default is 4mm.2.3.2 Paper cutting positionThe distance between print head to cutter: 12.5mm3 Appearance and components 3.1 Appearance and componentsFunction instruction of components1)Power switchPress “O” side to power off, press “I” side to power on.2)Power indicator(green)The indicator is on when power on, and it is off when power off.3)Error indicator (Red)Error indicator is on when it detects error. Such as: paper out, upper cover is open and cutter is stocked. 4)Paper indicator(red)Paper out indicator is on when it detects the paper is out. Please put a new paper roll to printer inside then.3.2 Indicator and buzzer instruction1)Function instruction of indicators and buzzerName Status InstructionPower indicator (Power) On Printer is power on Off Printer is power offError indicator (Error) On Printer is in error status Off Printer is in normal statusPaper out indicator (Paper)On Printer is in paper out status Off Printer is in normal statusDescription Power Indicator Error Indicator Paper Indicator Buzzer Open printer cover On On On It rings 6 times by 1.5s.Paper is enough On Off Off Silent Paper out On On On It rings 3 times by 1.5s.Note: Printer detects printer head temperature via thermal resistance. It will cut off print head powerand stop printing if print head is overheat. The print head protection temperature is 80℃.4 Printer installation4.1 Open the packagePlease make sure everything is in good status when you open the package. Otherwise, please contact to distributor in time.4.2 Requirements of installation position1)Put the printer on a stably place.2)Let the printer far away from water, fire, and sunlight.3)Avoid to put it on oscillatory and impassive place.4)Make sure to connect printer with ground safety4.3 Connect to power adapter1)Make sure the printer is power off.2)Connect power adapter’s DC output plug to the printer.3)Connect power adapter’s AC input plug to a power outlet.4)Please be careful to operate correctly when plug out the plug of power cord to avoid damage.4.4 Connect Communication cables1)Make sure the printer is power off.2)Connect communication cable to the printer’s port, and fix it as plug lag spike (or snap spring).3)Connect communication cable to the other side host.4.5 Connect to cash drawer1)Make sure the printer is power off.2)Connect cash drawer to cash drawer port behind the printer.Warning: The Voltage of cash drawer port is 24V. (It cannot connect to telephone cable.)4.6 Paper roll loading4.6.1 Printing paper type confirmationYou can load paper roll to print after connecting power adapter and communication cables. Please make sure the printing paper type before printing. The default paper type is continuous thermal receipt paper.4.6.2 Loading or change paper roll1)Power off the printer.2)Slide or press paper roll storehouse button, and then open storehouse cover.3)Draw out paper roll tap, and load paper roll as below.4)Draw out a printing paper, and leave some on the paper out month, then close the storehouse cover.Warning: Please make sure the paper roll in tense status, if not, it maybe cause paper jam or other problems.5)The status after paper loading4.7 DIP switch settingDIP switch Switch Function On Off Default 1 Cutter Forbidden Enable Off 2 Buzzer Enable Forbidden On 3 Printing density DarkLight Off 4 Multi-byte encoding Single-byte encodingmulti-byte encodingOff 5 Max. number of Printing characters in each line42 48 Off 6 Cash drawer EnableForbiddenOn 7 Baud rate options (bps)Ref. Chart 1Off 8OffChart 1:Baud rate optionsBaud rate Switch 7 Switch 8 Default9600 On Off 19200 19200 Off Off 38400 On On 115200Offon4.8 Printing self-test page1) Make sure the printer loaded paper roll correctly.2) Press down [FEED] button and hold on, then power on the printer, the printer will print a self-test page.4.9 Set Ethernet port IP Address.The printer ’s Ethernet IP address can be set directly via printer inserted web setting page. The operation steps are as below:1. Connect printer and PC in a same Ethernet LAN.2. Print a printer self-test page to get printer recent IP address (self-test page printing operation method refers to “4.8 printer self-test ” instruction):You can find the printer ’s IP address is same as 192.168.1.87 in self-test page “IP address: 192.168.1.87” 3. Set network card IP address in PC and printer IP address as different IP address in the same networksegment.(Such as 192.168.1.xxx, xxx is a number among 1 to 254);4. Please enter address “http://printer IP address ” in browse of PC after making sure that printer connects with Ethernet.(e.g.: If printer IP address is “192.168.1.87”, please enter “http://192.168.1.87”), then press Enter key,open Ethernet port setting page in browser as below:5. Click “Configure Interface” link in the left side, then enter the modified target IP and click “save” button tosave setting. Click “Reboot” button to reset printer if you want the setting to take effect.6. Enter the new IP address as the above step 4 procedure, and re-open printer Ethernet port setting web page, then click “Printer Status” link in the left side. And click “Printer Test Page” button to print self-test page, andcheck the IP Address contents in the self-test page is right or not.5 Interface pin definitionsThe printer has a cash drawer driver interface and many kinds of communication interfaces: parallel, serial (RS-232), USB and Ethernet ports. USB port and cash drawer interfaces are standard interfaces, and it has Ethernet, serial and parallel ports as optional.5.1 Parallel interface pin definition(DB25M)Number Signal Function Number Signal Function1 /STROBE Gate. Low level is10 /ACK Confirm. Low level is effectiveeffective2 DATA0Data bit is 011 BUSY Busy3 DATA1Data bit is 112 PE Paper out4 DATA2Data bit is 213 SEL Choose5 DATA3Data bit is 314 /AUTOFEED Change line automatically. Lowlevel is effective6 DATA4Data bit is 415 /ERROR Error. Low level is effective7 DATA5 Data bit is 516 /INIT Initialize. Low level is effective8 DATA6 Data bit is 617 /SELIN Choose input. Low level iseffective9 DATA7 Data bit is 718-25 GND Ground wire5.2 USB interface pin definition(standard B type female base)1)Pin definitionPin Number Signal name Typical wire color1 VBUS Red2 D- White3 D+ Green4 GND Black5.3 Power interface pin definition(MPC-3-001B)1)Pin definitionPin number Signal name1 +24V2 GND3 N.CSHELL F.G5.4 Cash drawer interface pin definition(RJ11-6P6C)1)Electrical specificationDriver voltage: DC24VDriver current: Max. 0.8A (within 510ms)Cash drawer status tests signal: “L” = 0~0.5 V ; “H” = 3~5 V2)Cash drawer interface socket uses RJ-11 6P type connector;3)Interface signal definitionPin number Signal function1 FG Printer cover2 DRAWER 1 Cash drawer 1 driver signal3 DRSW Cash drawer status detection signal4 VDR Cash drawer driver power5 DRAWER 2 Cash drawer 2 driver signal6 GND Common ground circuitNotes:1) Prohibit socket with power to pull out communication wire plug.2) Please avoid to parallel with strong power when wring communication cables av通讯线布线时应避免和强电并行;3) Communication cables use with shielded cables.5.5 Serial port pin definition(DB9F)Printer serial port is compatible with RS-232, the interface socket is DB9 female socket.User can check interface setting status via printing setting self-test page. Printer default serial interface is set as: baud rate 19200bps, 8 bit data bits, no parity,1 bit stop bit, and the handshakes method is DTR/DSR。
58mm迷你便携式热敏打印机BT-II系列使用说明书目录1.概述 (3)1.1.功能特点 (3)1.2.外观 (4)1.3.技术参数 (4)1.4.外形尺寸 (4)1.5.配件 (5)1.5.1.标准配件 (5)1.5.2.可选配件 (5)2.使用方法 (5)2.1.锂电池安装 (6)2.2.打印纸安装 (6)2.3.通讯连接 (6)2.3.1.串口通讯 (6)2.3.2.USB通讯 (6)2.3.3.蓝牙通讯 (6)2.3. 4.WIFI方式连接通讯 (6)2.4.基本功能 (7)2.4. 1.开机 (7)2.4. 2.关机 (7)2.4. 3.自检 (7)2.4. 4.走纸 (7)2.4. 5.充电 (7)2. 5.LED指示灯及蜂鸣器说明 (7)2. 6.自动休眠,自动唤醒,自机关机 (7)3.PC端设置 (8)4.常见故障排除 (23)1. 概述本产品是一款高效便携式打印机,体积小巧,适合随身携带,配备电池也可使用。
机身的重量小、耐用度高、持续打印时间长,广泛应用于移动POS、零售、停车票据、物流、船舶运输、仓库、物业帐单等范围。
1.1.功能特点※适合户外使用的便携式设备※低电量指示灯(7.4V,2600mAH)※配备锂电池,可连续工作8小时※各种通信接口和界面功能※蓝牙高速通信※易装纸※高速打印,80毫米/秒※升级简单方便1.2.外观打印机外观1.纸仓盖2. CHARGE指示灯3. ERROR指示灯4. 电量指示灯5. 电源按键6. 走纸按键7. 自检按键8. MINI USB接口9. 电源接口10.电池后盖注:状态指示灯和充电指示灯独立设置在两个按键的上方,用红色和蓝色来表示不同意义。
1.3.技术参数异常检测缺纸侦测/低电量侦测/开关盖侦测黑标侦测支持装纸方式易装纸指令集ESC/POS兼容指令集切纸方式手动撕纸操作环境温度-10°C〜50°C,湿度20%〜85%充电环境温度5°〜40°C,湿度20%〜85%存储环境温度-20°C〜70°C,湿度5%〜95%标准配件热敏纸卷、电源充电器、电池可选配件专用串口数据线/USB数据线/皮套1.4. 外形尺寸1.5. 配件1.5.1. 标准配件热敏纸卷电池USB数据线使用说明书电源适配器1.5.2. 可选配件CD盘车载充电器串口数据线保护套2. 使用方法2.1. 锂电池安装1) 如图所示,将电池放入电池仓,请注意不要将电池的正负极接反; 2) 合上电池仓盖。
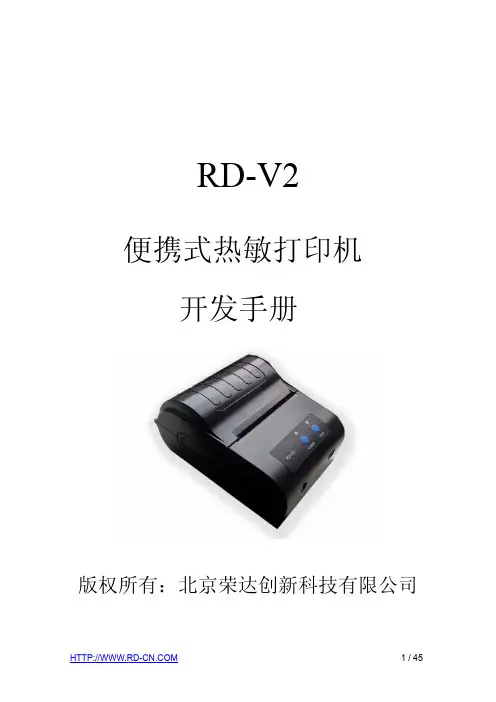
RD-V2便携式热敏打印机开发手册版权所有:北京荣达创新科技有限公司目录一、概述 (3)二、打印机状态与操作说明 (4)2.1 外观与尺寸 (4)2.2 打印机状态说明 (4)2.3 开关机方法 (4)2.4 安装纸卷 (4)2.5 自检测方法 (5)2.6 打印机充电 (5)三、打印机接口 (5)3.1 串行接口 (5)3.2 蓝牙接口 (6)3.3 USB接口 (6)4.1 指令表 (7)4.2 指令详解 (9)4.2.1 控制指令 (9)4.2.2 缩放指令 (19)4.2.3 图形指令 (21)4.2.5 条码指令 (28)4.2.6 曲线指令 (34)4.2.7状态传送指令 (35)4.2.8 汉字字符设置指令 (36)4.2.9 垂直制表并打印指令 (38)4.2.10 位图下载及打印命令 (39)A 打印字符集 (42)B 条码 (43)B.1 条码编码规则 (43)B.2 条码长度字符集表 (44)C字符集1、2 (44)一、概述RD-V2系列便携式热敏打印机是一款专为移动票据打印而设计的热敏便携式微型打印机。
本机内置充电锂电池,可装40mm直径纸卷,具有体积小巧、待机时间长、打印速度快、字迹清晰等特点。
采用蛤壳式装纸方式,支持自动休眠、自动唤醒同时具有声音提示功能。
其技术参数如下:打印性能打印方式行式热敏打印打印速度 60毫米/秒(电量充足时)分辨率 203dpi(8点/毫米),384点/行有效打印宽度 48毫米进纸步距 0.125毫米西文字符 ANK字符、ASCII字符12x24,8X16,8X12、国际字符(12x24)中文字符标配24×24点阵GB18030字库条码打印一维条码UPC-A、UPC-E、EAN-13、EAN-8、CODE39、ITF25、CODABAR、CODE93、CODE128、二维条码QRCODE、PDF417等多种条码打印。
图形打印支持曲线打印支持自动表格支持位图下载支持检测功能异常检测缺纸检测、电量不足检测、过热检测,检测异常后蜂鸣器报警黑标定位可选自动休眠功能有接口参数有线接口串行接口:5PIN MiNi USB口(标准RS232或TTL),485接口: 5PIN MiNi USB口无线接口蓝牙接口控制系统缓冲器2K/64K指令系统 ESC/POS打印命令,与IBM/EPSON ESC/P兼容打印驱动 WIN2000/NT/XP/WIN7驱动电源参数供电方式1550mAh、7.4V可充电锂电池,充满电12.5%打印密度下连续打印100m~200m充电方式带机充电,充电时间:约3-5小时,待机时间≧24小时。
SP-CB532高速热敏打印控制板用户手册Ver: 1.042008-04-07北京迅普电子技术公司SP-CB532用户手册一、概述SP-CB532高速热敏打印控制板是北京迅普电子技术公司自主研制的高速热敏打印板,具有打印速度快,操作简单方便,打印功能强大等特点。
该控制板内置一个并行接口、一个串行接口;配备一个键盘指示灯连接器;两组DIP拨动开关,可通过DIP拨动开关选择打印模式和使用界面。
控制板设有一个复位按键,可通过它方便地给打印机复位。
控制板还特别具备常用银行等图标的调用功能,同时也可通过实时状态反馈和自动状态回复功能查询打印机状态。
二、产品性能及指标1、打印方式:行式热敏打印机2、接口形式:并行接口和RS-232C兼容串行接口(可选TTL)3、打印速度:最高可达150mm/S4、打印方向:单向摩擦进纸5、打印宽度:72mm(576点位置)6、打印密度:点密度203dpi×203dpi(dpi:每25.4mm),即8点/mm7、打印字符:⑴英数字符:12×24点阵,共计96个ASCII字符和其它字符希腊文、德文、法文等字母,数字符号、打印符号⑵汉字库:24×24点阵的国际一、二级汉字,支持GB2312编码8、缓存容量:至少7K字节(根据控制板内固件程序决定)9、电源需求:直流24V,2A7、环境要求:工作温度:-10℃~+55℃工作湿度:10%~80%RH(无凝洁)储存温度:-25℃~+70℃(不含打印纸)储存湿度:10%~90%RH(不含打印纸)SP-CB532用户手册SP-CB532用户手册三、产品外观及操作说明3.1、SP-CB532控制板如图3-1图3-1CB532控制板外形图1、J1-串行接口插座2、J2-并行接口插座3、J3-11P 可选插座4、J4-按键座5、J5-纸将尽检测座6、J6-电源插座7、J7-切刀插座8、J8-机头插座9、J9-19P 可选插座10、J10-电源插座11、SW1-DIP 拨码开关12、SW2-DIP 拨码开关13、S1-LF 按键14、S2-复位按键15、LD1-电源指示灯16、LD2-缺纸指示灯17、LD3-错误指示灯3.2、SP-CB532电源管脚定义如表3-1,表3-2管脚号名称1GND 2+24V 3+24V 4GND表3-1电源插座J6管脚定义管脚号名称1+5V 2GND 3+24V 4GND表3-2电源插座J10管脚定义SP-CB532用户手册3.3、SP-CB532接口管脚外形如图3-2,图3-3图3-2串行接口插座J1管脚图3-3并行接口插座J2管脚3.4、拨码开关SW1和SW2定义如下表3-3和表3-4序号功能ON OFF 1黑标传感器开启/关闭功能开启关闭23通信接口选择功能并口:2关3关串口:2关3开4串行接口握手信号Xon/Xoff DTR/DSR 5串行接口奇偶校验校验不校验6串行接口奇偶校验选择偶校验奇佼验78串行接口波特率选择4800bps:7开8开9600bps:7关8开19200bps:7开8关38400bps:7关8关表3-3SW1的定义序号功能ON OFF 12型号类型选择(暂未使用)------34打印深度选择略浅:3开4开普通:3关4关略深:3开4关较深:3关4开5工作模式选择HEX 模式正常模式6强制串行波特率选择115200bps 关闭高波特率7未使用------8未使用------表3-4SW2的定义注1:当SW1的5脚为OFF 时,即“不选择奇偶校验时”,SW2的6脚无意义;注2:当SW2的6脚为OFF 时,波特率由SW1的7脚和8脚组合决定;当SW2的6脚为ON 时,SW1的7脚和8脚定义无效,波特率被强制定为115200bps。
便携热敏打印机开发手册V1.2本手册适用于:M07,M08,M09,M102016-12-29版本控制信息目录版本控制信息 0目录 (I)第1章安全信息............................................................................................................ V I1.1 读者 (vi)1.2 关于本手册 (vi)1.3 安全上的注意事项 (vi)1.3.1 人身伤害 (vi)1.3.2 无线电波管制 (vi)1.3.3 纸卷规格 (vi)1.3.4 开纸仓 (vi)1.3.5 专用配件 (vi)1.3.6 拆卸 (vi)第2章概述 (7)2.1 特点 (7)2.2 性能指示 (7)第3章操作说明 (9)3.1 结构图 (9)3.2 开机 (9)3.2.1 电源键开机 (9)3.3 关机 (9)3.3.1 电源键关机 (9)3.3.2 超时自动关机 (9)3.4 休眠 (10)3.5 唤醒 (10)3.6 走纸 (10)3.7 自检 (10)第4章打印机参数设置 (11)4.1 自检 (11)4.3 设置向导 (11)第5章状态指示 (14)5.1 开机提示 (14)5.2 关机提示 (14)5.3 工作状态指示 (14)5.4 少纸状态指示 (14)5.5 参数设置状态指示 (14)5.6 电池电量显示 (14)5.7 充电指示 (15)5.8 打印头过热提示 (15)5.9 电池电量低提示 (15)第6章USB接口 (16)6.1 USB接口打印机 (16)6.2 USB+为打印机供电 (16)第7章RS232接口 (17)7.1 配置参数 (17)7.2 缓冲区大小 (17)7.3 奇偶校验 (17)7.4 自适应波特率 (17)第8章蓝牙接口 (18)8.1 直接通过COM口控制打印机 (18)8.2 通过打印机驱动程序控制打印机 (18)8.3 蓝牙开关 (18)第9章WIFI接口 (19)9.1 AP模式wifi连接打印机 (19)9.3 通过打印机驱动程序控制打印机 (19)9.4 WIFI开关 (19)第10章打印指令 (20)10.1 基本控制指令 (20)10.1.1 【初始化打印机1B 40】 (20)10.1.2 【唤醒打印机00】 (20)10.1.3 【回车0D】 (20)10.1.4 【换行0A】 (20)10.1.5 【执行n点行走纸1B 4A n】 (20)10.1.6 【打印并走纸到黑标处0C】 (20)10.2 选择字符集命令 (20)10.2.1 【选择字库1B 38 n】 (20)10.3 字符参数设置命令 (21)10.3.1 【灰度打印1B 6D n】 (21)10.3.2 【横向放大1B 55 n】 (21)10.3.3 【纵向放大1B 56 n】 (21)10.3.4 【等比放大1B 57 n】 (21)10.3.5 【允许/禁止下划线打印1B 2D n】 (21)10.3.6 【允许/禁止上划线打印1B 2B n】 (21)10.3.7 【允许/禁止反白打印1B 69 n】 (21)10.3.8 【允许/禁止反向打印1B 63 n】 (21)10.3.9 【字符旋转打印1C 49 n】 (22)10.4 打印排版参数设置命令 (22)10.4.1 【设置n点行间距1B 31 n】 (22)10.4.2 【设置字符间距1B 70 n】 (22)10.4.3 【设置行对齐方式1B 61 n】 (22)10.4.4 【设置垂直造表值1B 42 d1 d2...dn 00】 (22)10.4.5 【执行垂直造表0B】 (22)10.4.6 【设置水平造表值1B 44 d1 d2 ... dn 00】 . (23)10.4.7 【执行水平造表09】 (23)10.4.8 【设置右边距1B 51 n】 (23)10.4.9 【设置左边距1B 6C n】 (23)10.5 图形/图象打印命令 (23)10.5.1 【打印点阵图形1B 4B nL nH d1...dn】 (23)10.5.2 【打印点行图形1C 4B M n d1...dn】 (24)10.5.3 【打印模式位图1B 2A M nL nH d1...dn】 .. (24)10.5.4 【打印光栅位图1D 76 30 M yL yH Xl xH d1...dn】. (25)10.5.5 【打印散点行1B 27 nL nH l1 h1 l2 h2 l3 h3 ...ln hn】 .. (25)10.5.6 【打印坐标曲线1B 2C nL nH l1 h1 l2 h2 l3 h3 ...ln hn】 . (25)10.6一维条码打印命令 (26)10.6.1 【打印一维国标条形码1D 6B n m [d]】 (26)10.6.2 一维条码编码规则简介 (26)10.6.3 条形码例子 (26)10.6.4 【允许/禁止打印HRI字符1D 48 n】 (27)10.6.5 【设置条形码高度1D 68 n】 (27)10.6.6 【设置条形码宽度1D 77 n】 (27)10.7打印二维条码 (27)10.7.1 【打印PDF417条码1D 28 6b ml mh c e [d]】 (27)10.7.2 【打印QR矩阵码1D 28 31 ml mh v e [d]】 (28)第11章扩展指令 (29)11.1 【马达转速1F 55 20 K】 (29)11.2 【高速打印1F 55 21 K】 (29)11.3 【指令禁能1F 55 22 K】 (29)11.4 【退纸轴系数1F 55 23 K】 (29)11.5 【休眠1F 55 24 K】 (29)11.6 【关机1F 55 25 K】 (29)11.7 【指令容错1F 55 26 K】 (29)11.8 【设置波特率1F 55 27 BL BH P】 (29)11.9 【下载字库1F 55 28 nL nH v1...v4】.. (30)11.10 【退纸1F 55 29 K】 (30)11.11 【回车符扩展1F 55 2A K】 (30)11.12 【测试蜂鸣器1F 55 2B K】 (30)11.13 【删除线1F 55 2C K】 (30)11.14 【图文混排模式1F 55 2D K】 (30)11.15 【设置时间1F 55 2E D1...D5】 (31)11.16 【打印时间1F 55 2F M】 (31)11.17 【等宽字符1F 55 30 K】 (31)11.18 【固件升级1F 55 31 v1...v4】. (31)11.19 【纸传感器参数1F 55 32 d1...d3】 . (31)11.20 【保存配置1F 55 33 K M】 (32)11.21 【打印样张1F 55 34 K】 (32)11.22 【加重打印1F 55 35 K】 (32)11.23 【U盘开关1F 55 36 K】 (32)11.24 【黑标检测开关1F 55 37 K】 (32)11.25 【无线通信开关1F 55 38 K】 (32)11.26 【自动休眠设置1F 55 39 K】 (32)11.27 【自动关机设置1F 55 3A K】 (32)11.28 【接口模块配置1F 55 3B M n d1...dn】 (32)字库预览 (33)附录 (34)1.字符样式设置命令 (34)2.黑标印刷 (34)3.联系我们 (35)第1章安全信息为有效、安全地使用您的打印机,请遵守以下规定。
BTP-6206I 标签打印机用户手册山东新北洋信息技术股份有限公司声明本手册内容未经同意不得随意更改,山东新北洋信息技术股份有限公司(以下简称新北洋)保留在技术、零部件、软件和硬件上变更产品的权利。
用户如果需要与产品有关的进一步信息,可与新北洋或经销商联系。
未经新北洋的书面许可,本手册的任何章节不得以任何形式、通过任何手段进行复制或传送。
版权本手册于2012 年印制,版权属于新北洋。
中国印制。
1.1 版本。
商标新北洋使用的注册商标是警告、注意警告必须遵守,以免伤害人体,损坏设备;注意给出了打印机操作的重要信息及提示。
新北洋质量管理体系通过下列认证ISO9001 质量管理体系认证ISO14001 环境管理体系认证OHSAS18001 职业健康安全管理体系认证IECQ QC080000 危害物质过程管理体系认证安全须知在操作使用打印机之前,请仔细阅读下面的注意事项:1.安全警告警告:打印头为发热部件,打印过程中和打印刚结束,不要触摸打印头以及周边部件;警告:切刀刀刃为锋利部件,不要触摸切刀以及周边部件;警告:不要触摸打印头表面和连接接插件,以免因静电损坏打印头。
2.注意事项1) 打印机应安装在一个平整、稳固的地方;2) 在打印机的周围留出足够的空间,以便操作和维护;3) 打印机应远离水源并避免阳光、强光和热源的直射;4) 不要在高温,湿度大以及污染严重的地方使用和保存打印机;5) 避免将打印机放在有振动和冲击的地方;6) 不允许潮湿的空气在打印机的表面结露,如果已经形成,在露水消除之前不要打开打印机的电源;7) 将打印机的电源连接到一个适当的接地插座上。
避免与大型电机或其它能够导致电源电压波动的设备使用同一插座;8) 如果较长时间不使用打印机,请断开打印机的电源;9) 避免水或导电的物质(例如:金属)进入打印机内部,一旦发生,应立即关闭电源;10) 打印机不得在无纸的状态下打印,否则将严重损害打印胶辊和打印头;11) 为了保证打印质量和产品的寿命,建议采用推荐的或同等质量的纸张和碳带;12) 插接或断开各个接口时,必须关掉电源,否则可能会引起打印机控制电路的损坏;13) 在打印效果满足使用要求的情况下,建议用户尽可能设置低等级的打印浓度,以免影响打印头的使用寿命;14) 用户不得自行拆卸打印机进行检修;15) 妥善保管本手册,以备使用参考。
SP-RMD18A微型热敏打印机使用说明书VER1.02北京思普瑞特科技发展有限公司目录第一章特征与性能指标 (3)1.1主要特征 (3)1.2性能指标 (3)第二章安装说明 (4)2.1打印机外型 (4)2.2外形尺寸 (4)2.3安装示意 (5)2.4安装纸卷 (6)2.5接地连接 (6)第三章操作说明 (7)3.1接口连接 (7)3.1.1串行接口连接 (7)3.1.2并行接口连接 (8)3.1.3打印机参数设置 (10)3.1.4升级打印机固件 (12)3.1.5电源连接 (12)3.2指示灯和键操作 (13)3.3自检测和十六进制打印 (14)3.3.1自检测 (14)3.3.2十六进制打印 (15)3.4打印机初始化 (15)第四章打印命令操作说明 (16)4.1概述 (16)4.2命令详解 (16)4.2.1纸进给命令 (16)4.2.2格式设置命令 (18)4.2.3字符设置命令 (22)4.2.4用户自定义字符设置命令 (26)4.2.5图形打印命令 (28)4.2.6初始化命令 (29)4.2.7数据控制命令 (30)4.2.8汉字打印控制命令 (30)4.2.9实时指令 (33)4.2.10条形码打印命令 (35)第五章使用与维护操作说明 (40)5.1机头维护 (40)5.2其他 (40)第六章打印机在WINDOWS下的使用操作说明 (41)附录1西文方式下字符有效代码表 (42)附录2中文方式下字符有效代码表 (44)附录4128码 (47)4.1128码综述 (47)4.2字符集 (47)第一章特征与性能指标1.1主要特征◇采用行式热敏打印方式◇具有标准的并行接口或串行接口,便于与各种微机或智能仪器、仪表联机使用◇具有汉字、字符、图形等实时的打印命令,指令集与传统的打印机相兼容◇支持多种字体(8*16、9*17、12*24、24*24)和国际代码页◇支持预存储位图打印◇RMD18A S/T/P/VS/VT/VPH机型接收缓冲区为3K◇打印纸宽为57.5±0.5mm热敏打印纸◇纸张类型:57.5×Ø30mm(MAX)◇电源要求:RMD18A S/T/P H机型电压输入:DC5V~8.5V电流:3ARMD18A VS/VT/VP H机型电压输入:DC9V~24V电流:3A◇8点/mm,384点/行◇打印速度:30mm/s(Max)◇打印机头寿命:50Km◇开口尺寸:76~78mm×56~58.5mm(W×H)嵌入深度:37mm◇外型尺寸:80mm×61mm×39mm(W×H×D)1.2性能指标◇接口类型:并行接口(CENTRONICS兼容)、串行接口(RS-232或TTL)◇接口形式:串行接口:10PIN双排弯插针和5PIN单排弯插针并行接口:26PIN双排弯插针◇控制码通用ESC、FS、GS控制码◇按键LF为自检和走纸控制按键,LF灯为出错报警灯和电源指示灯,上电后无错误状态,绿灯常亮,出错情况下,红灯闪烁。