锐捷交换机路由器常用配置操作
- 格式:doc
- 大小:110.50 KB
- 文档页数:16
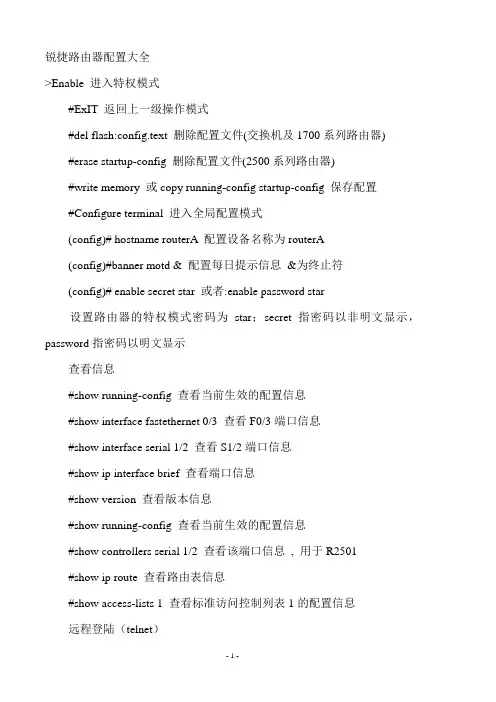
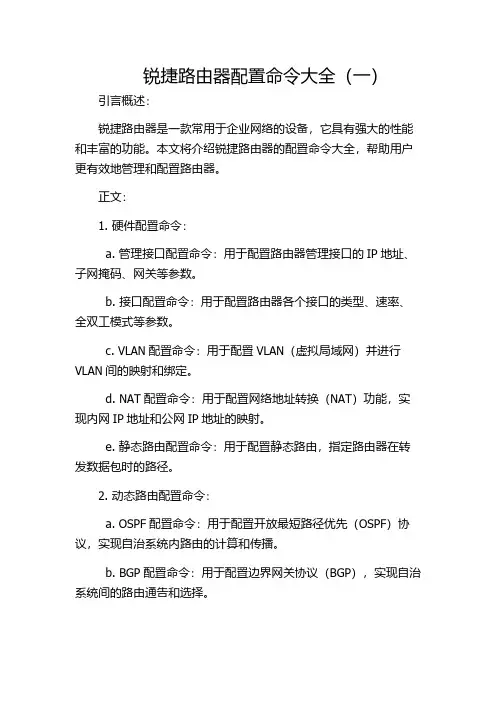
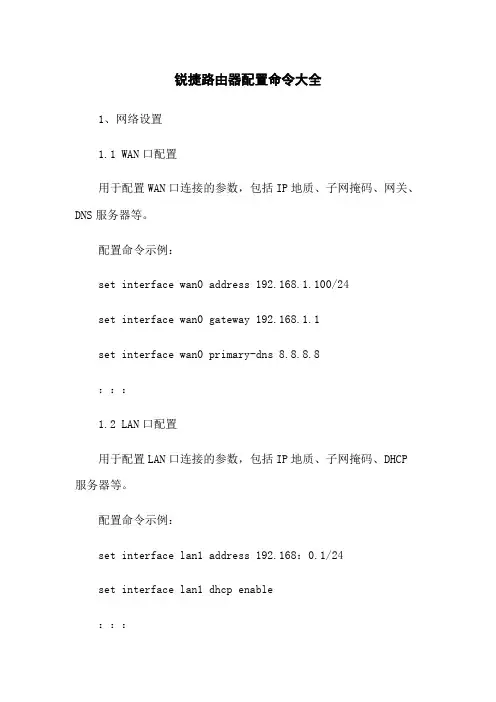
1.1 通过TELNET方式来配置设备
提问:如何通过telnet方式来配置设备?
回答:
步骤一:配置VLAN1的IP地址
S5750>en ----进入特权模式
S5750#conf ----进入全局配置模式
S5750(config)#int vlan 1 ----进入vlan 1接口
S5750(config-if)#ip address 192.168.0.230 255.255.255.0
----为vlan 1接口上设置管理ip
S5750(config-if)#exit ----退回到全局配置模式
步骤二:配置telnet密码
S5750(config)#line vty 0 4 ----进入telnet密码配置模式
S5750(config-line)#login ---启用需输入密码才能telnet成功
S5750(config-line)#password rscstar ----将telnet密码设置为rscstar
S5750(config-line)#exit ----回到全局配置模式
S5750(config)# enable secret level 15 0 rscstar
----配置进入特权模式的密码为rscstar
1.2 更改IOS命令的特权等级
提问:如何只允许dixy这个用户使用与ARP相关的命令?
回答:
S5750(config)#username dixy password dixy ----设置dixy用户名和密码
S5750(config)#username dixy privilege 10 ----dixy帐户的权限为10
S5750(config)#privilege exec level 10 show arp
----权限10可以使用show arp命令
S5750(config)#privilege config all level 10 arp
----权限10可以使用所有arp打头的命令
S5750(config)#line vty 0 4 ----配置telnet登陆用户
S5750(config-line)#no password
S5750(config-line)#login local
1.3设备时钟设置
提问:如何设置设备时钟?
回答:
S5750#clock set 12:45:55 11 25 2008
----设置时间为2008年11月25日12点45分55秒
S5750#clock update-calendar ----设置日历更新
S5750(config)#clock timezone CN 8 22 ----时间名字为中国,东8区22分
2.1 交换机vlan和trunk的配置
提问:如何在交换机上划分vlan,配置trunk接口?
回答:
步骤一:给交换机配置IP地址
S2724G#conf
S2724G(config)#int vlan 1
S2724G(config-if)#ip addess 192.168.0.100 255.255.255.0----给VLAN 1配置IP地址
S2724G(config-if)#no shutdown ----激活该VLAN接口
S2724G(config-if)#exit
S2724G(config)#ip default-gateway 192.168.0.1 ---指定交换机的网关地址
步骤二:创建VLAN
S2724G#conf
S2724G(config)#vlan 10 ----创建VLAN 10
S2724G(config-vlan)#exit
S2724G(config)# vlan 20 ----创建VLAN 20
S2724G(config-vlan)#exit
步骤三:把相应接口指定到相应的VLAN中
S2724G(config)#int gi 0/10
S2724G(config-if)#switch access vlan 10 ----把交换机的第10端口划到VLAN 10中
S2724G(config-if)#exit
S2724G(config)#int gi 0/20
S2724G(config-if)#switch access vlan 20 ----把交换机的第20端口划到VLAN 20中
S2724G(config-if)#exit
S2724G(config)#int gi 0/24
S2724G(config-if)#switch mode trunk ----设置24口为Trunk模式(与三层交换机的连接口
S2724G(config-if)#
步骤四:保存配置
S2724G(config-if)#end
S2724G#write
2.2 turnk接口修剪配置
提问:如何让trunk接口只允许部分vlan通过?
回答:
Switch(config)#int fa 0/24
Switch (config-if)#switch mode trunk
Switch (config-if)#switchport trunk allowed vlan remove 10,20,30-40
----不允许VLAN10,20,30-40通过Trunk口
2.3 PVLAN配置
提问:如何实现几组用户之间的隔离,但同时又都能访问公用服务?
回答:
步骤一:创建隔离VLAN
S2724G#conf
S2724G(config)#vlan 3 ----创建VLAN3
S2724G(config-vlan)#private-vlan community ----将VLAN3设为隔离VLAN
S2724G(config)#vlan 4 ----创建VLAN4
S2724G(config-vlan)#private-vlan community ----将VLAN4设为隔离VLAN
S2724G(config-vlan)#exit ----退回到特权模式
步骤二:创建主VLAN
S2724G(config)#vlan 2 ----进入VLAN2
S2724G(config-vlan)#private-vlan primary ----VLAN2为主VLAN
步骤三:将隔离VLAN加到到主VLAN中
VLANS2724G(config-vlan)#private-vlan association add 3-4
----将VLAN3和VLAN4加入到公用VLAN中,VLAN3和VLAN4的用户可以访问公用接口
步骤四:将实际的物理接口与VLAN相对应
S2724G(config)#interface GigabitEthernet 0/1
----进入接口1,该接口连接服务器或者上联设备
S2724G(config-if)#switchport mode private-vlan promiscuous
----接口模式为混杂模式
S2724G(config-if)#switchport private-vlan mapping 2 add 3-4
----将VLAN3和VLAN4映射到VLAN2上
S2724G(config)#int gi 0/10 ----进入接口10
S2724G(config-if)#switchport mode private-vlan host
S2724G(config-if)#switchport private-vlan host-association 2 3
----该接口划分入VLAN3
S2724G(config)#int gi 0/20 ----进入接口20
S2724G(config-if)#switchport mode private-vlan host
S2724G(config-if)#switchport private-vlan host-association 2 4
----该接口划分入VLAN4
步骤五:完成VLAN的映射
S2724G(config)#int vlan 2 ----进入VLAN2的SVI接口
S2724G(config-if)#ip address 192.168.2.1 255.255.255.0
----配置VLAN2的ip地址
S2724G(config-if)#private-vlan mapping add 3-4
----将VLAN3和VLAN4加入到VLAN2中
注释:
1. S20、S21不支持私有VLAN,可以通过保护端口实现类似功能
2. S3250、S3750和S5750同时支持保护端口和私有VLAN
3. S3760不支持私有VLAN和保护端口
2.4 端口汇聚配置
提问:如何将交换机的端口捆绑起来使用?
回答:
S5750#conf
S5750(config)#interface range gigabitEthernet 0/1 – 4 ----同时进入1到4号接口
S5750(config-if)#port-group 1 ----设置为聚合口1
S5750(config)#interface aggregateport 1 ----进入聚合端口1
注意:配置为AP口的接口将丢失之前所有的属性,以后关于接口的操作只能在AP1口上面进行
2.5 生成树配置
提问:如何配置交换机的生成树?
回答:
步骤一:根桥的设置
switch_A#conf t
switch_A(config)#spanning-tree ---默认模式为MSTP
switch_A(config)#spanning-tree mst configuration
switch_A(config)#spanning-tree mst 10 priority 4096 ---设置为根桥
步骤二:非根桥的设置
switch_B#conf t
switch_B(config)#spanning-tree ---默认模式为MSTP
switch_B(config)#spanning-tree mst configuration
switch_B(config)#int f0/1 ---PC的接入端口