Installing SQL Server 2008 on a Windows Server 2008 Cluster
- 格式:doc
- 大小:4.10 MB
- 文档页数:43
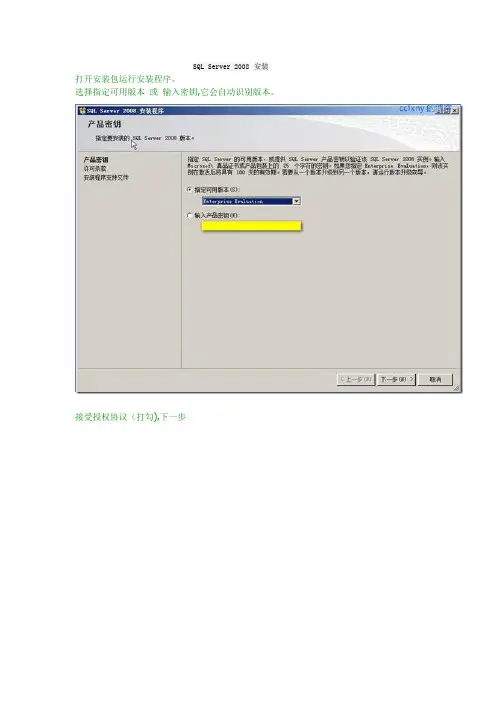
Installing SQL Server 2008 on a Windows Server 2008 Cluster Part 1 Written By: Edwin Sarmiento -- 2/13/2009ProblemIn a previous tip on SQL Server 2008 Installation Process, we have seen how different SQL Server 2008 installation is from its previous versions. Now, we have another challenge to face: installing SQL Server 2008 on a Windows Server 2008 Cluster. Windows Server 2008 has a lot of differences from its previous versions and one of them is the clustering feature. How do I go about building a clustered SQL Server 2008 running on Windows Server 2008?SolutionThere have been a lot of changes regarding clustering between Windows Server 2003 and Windows Server 2008. It took quite a lot of effort for us to build a cluster in Windows Server 2003 - from m aking sure that the server hardware for all nodes are cluster-compatible to creating resource groups. Microsoft has redefined clustering with Windows Server 2008, making it simpler and easier to implement. Now that both SQL Server 2008 and Windows Server 2008 are out in the m arket for quite som e tim e, it would be a must to prepare ourselves to be able to setup and deploy a clustered environment running both. Installing SQL Server on a stand-alone server or member server in the dom ain is pretty straight-forward. Dealing with clustering is a totally different story. The goal of this series of tips is to be able to help DBAs who m ay be charged with installing SQL Server on a Windows Server 2008 cluster.Prepare the cluster nodesI will be working on a 2-node cluster throughout the series and you can extend it by adding nodes later on. You can do these steps on a physical hardware or a virtual environment. I opted to do this on a virtual environment running VMWare. To start with, download and install a copy of the evaluation version of Windows Server 2008 Enterprise Edition. This is pretty straight-forward and does not even require any product key or activation. Evaluation period runs for 60 days and can be extended up to 240 days so you have more than enough tim e to play around with it. Just m ake sure that you select at least the Enterprise Edition during the installation process and have at least 12GB of disk space for your local disks. This is to make sure you have enough space for both Windows Server 2008 and the binaries for SQL Server 2008. A key thing to note here is that you should already have a dom ain on which to join these servers and that both have at least 2 network cards - one for the public network and the other for the heartbeat. Although you can run a cluster with a single network card, it isn't recommend at all. I'll lay out the details of the network configuration as we go along. After the installation, m y recommendation is to imm ediately install .NET Fram ework 3.5 with Service Pack 1 and Windows Installer 4.5 (the one for Windows Server 2008 x86 is namedWindows6.0-KB942288-v2-x86.msu). These two are prerequisites for SQL Server 2008 and would speed up the installation process later on.Carve out your shared disksWe had a lot of challenges in Windows Server 2003 when it com es to shared disks that we will use for our clusters. For one, the 2TB limit which has a lot to do with the m aster boot record (MBR) has been overcom e by having the GUID Partition Table (GPT) support in Windows Server 2008. This allows you to have 16 Exabytes for a partition. Another has been the use of directly attached SCSI storage. This is no longer supported for Failover Clustering in Windows Server 2008. The only supported ones will be Serially Attached Storage (SAS), Fiber Channel and iSCSI. For this example, we will be using an iSCSI storage with the help of an iSCSI Software Initiator to connect to a software-based target. I am using StarWind's iSCSI SAN toem ulate a disk image that m y cluster will use as shared disks. In preparation for running SQL Server 2008 on this cluster, I recommend creating at least 4 disks - one for the quorum disk, one for MSDTC, one for the SQL Server system databases and one for the user databases. Your quorum and MSDTC disks can be as small as 1GB, although Microsoft TechNet specifies a 512MB minimu m for the quorum disk. If you decide to use iSCSI as your shared storage in a production environment, a dedicated network should be used so as to isolate it from all other network traffic. This also m eans having a dedicated network card on your cluster nodes to access the iSCSI storage.Present your shared disks to the cluster nodesWindows Server 2008 com es with iSCSI Initiator software that enables connection of a Windows host to an external iSCSI storage array using network adapters. This differs from previous versions of Microsoft Windows where you need to download and install this software prior to connecting to an iSCSI storage. You can launch the tool from Administrative Tools and select iSCSI Initiator.To connect to the iSCSI target:1.In the iSCSI Initiator Properties page, click on the Discovery tab.2.Under the Target Portals section, click on the Add Portal button.3.In the Add Target Portal dialog, enter the DNS name or IP address of your iSCSI Target and click OK.If you are hosting the target on another Windows host as an im age file, make sure that you have your Windows Firewall configured to enable inbound traffic to port 3260. Otherwise, this should be okay.4.Back in the iSCSI Initiator Properties page, click on the Targets tab. You should see a list of theiSCSI Targets that we have defined earlier5.Select one of the targets and click on the Log on button.6.In the Log On to Target dialog, select the Automatically restore this connection when thecomputer starts checkbox. Click OK.7.Once you are done, you should see the status of the target change to Connected. Repeat this processfor all the target disks we initially created on both of the servers that will becom e nodes of yourcluster.Once the targets have been defined using the iSCSI Initiator tool, you can now bring the disks online, initialize them, and create new volum es using the Server Manager console. I won’t go into m uch detail on this process as it is sim ilar to how we used to do it in Windows Server 2003, except for the new m anagement console. After the disks have been initialized and volumes created, you can try logging in to the other server and verify that you can see the disks there as well. You can rescan the disks if they haven’t yet appeared. Adding Windows Server 2008 Application Server RoleSince we will be installing SQL Server 2008 later on, we will have to add the Application Server role on both of the nodes. A server role is a program that allows Windows Server 2008 to perform a specific function for multiple clients within a network. To add the Application Server role,1.Open the Server Manager console and select Roles.2.Click the Add Roles link. This will run the Add Roles Wizard3.In the Select Server Roles dialog box, select the Application Server checkbox. This will promptyou to add features required for Application Server role. Click Next.4.In the Application Server dialog box, click Next.5.In the Select Role Services dialog box, select Incoming Remote Transactions and OutgoingRemote Transactions checkboxes. These options will be used by MSDTC. Click Next6.In the Confirm Installation Selections dialog box, click Install. This will go thru the process ofinstalling the Application Server role7.In the Installation Results dialog box, click Close. This completes the installation of the ApplicationServer role on the first node. You will have to repeat this process for the other serverWe have now gone thru the process of creating the cluster at this point. In the next tip in this series, we will go thru the process of installing the Failover Cluster feature, validating the nodes that will becom e a part ofthe cluster and creating the cluster itself. And that is just on the Windows side. Once we m anage to create a working Windows Server 2008 cluster, that's the only tim e we can proceed to install SQL Server 2008. Installing SQL Server 2008 on a Windows Server 2008 Cluster Part 2 Written By: Edwin Sarmiento -- 3/2/2009ProblemIn a previous tip on SQL Server 2008 Installation Process, we have seen how different SQL Server 2008 installation is from its previous versions. Now, we have another challenge to face: installing SQL Server 2008 on a Windows Server 2008 Cluster. Windows Server 2008 has a lot of differences from its previous versions and one of them is the clustering feature. How do I go about building a clustered SQL Server 2008 running on Windows Server 2008?SolutionTo continue this series on Installing SQL Server 2008 on a Windows Server 2008 Cluster, we will look at building our Windows Server 2008 cluster in preparation for SQL Server 2008. In Part 1, we have completed the installation of the Application Server role in both of the servers that we will be using as part of our cluster. This tip will walk you through the installation of the Failover Cluster Feature, validating the servers that will be a part of the cluster, and creating the cluster.Adding the Failover Cluster FeatureWindows Server 2008 calls them features which are simply software programs that can support or augm ent the functionality of server roles. Since we've already installed the Application Server role in our server, let's define a feature from this perspective: failover clustering simply augments the role as an application server by m aking it highly available. It is disabled by default, unlike in Windows Server 2003 so we need to add it on both of the servers that will form a part of our cluster.To add the Failover Clustering feature:1.Open the Server Manager console and select Features.2.Click the Add Features link. This will run the Add Features Wizard3.In the Select Features dialog box, select the Failover C lustering checkbox and click Next.4.In the Confirm Installation Selections dialog box, click Install to confirm the selection andproceed to do the installation of the Failover Clustering feature.5.In the Installation Results dialog box, click Close. This com pletes the installation of the FailoverClustering feature on the first node.That's how sim ple and easy it is to add the Failover Clustering feature in Windows Server 2008. You will have to do this on both nodes to com plete the process. Once you have m anaged to install the Failover Cluster Feature on both nodes, we can proceed to validate our servers if they are ready for clustering.Running the Windows Server 2008 Validate Cluster ConfigurationUnlike in previous versions of Windows where Microsoft had some sort of a hardware compatibility list (HCL) from which we had to find and select com ponents tested to be clustering-supported, this wizard is like the “seal” that tells you whether or not the hardwar e you are using is supported. In fact, Microsoft has partnered with hardware vendors to create the Failover Cluster Configuration Program to m ake the acquisition of hardware for Windows Server 2008 Failover Clustering very easy and simple. Basically, your hardware will be supported for clustering if it m eets these two requirements: the server has a “Certified for Windows Server 2008” logo and it passes this wizard.One word of caution: do not skip any error message that this wizard generates in the final report. Doing so would simply m ean that your configuration going forward will be unsupported. You only need to run this wizard on either of the nodes.To run the Validate Cluster Configuration Wizard:1.Open the Failover Cluster Management console2.Under the Management section, click the Validate a Configuration link. This will run the Validatea Configuration Wizard3.In the Select Servers or a Cluster dialog box, enter the hostnam es of the nodes that you want toadd as m embers of your cluster and click Next.4.In the Testing Options dialog box, click Next to run all the necessary tests to validate whether ornot the nodes are OK for clustering. If this is the first tim e to run the wizard, you must run all the testsfor validation. For succeding runs, especially when adding hardware like disk subsystem s ot network cards on your cluster nodes, you can selectively choose which tests to run as long as you have initially validated your hardware by running all tests.5.In the Confirmation dialog box, click Next. This will run all the necessary validation tests.6.In the Summary dialog box, verify that all the report returns successful.If you have reached this part of the process, the wizard will tell you whether or not you can proceed to the next step of creating your cluster. As I’ve m entioned earlier, do not attempt to go any further if this report returned any error m essages. I have seen som e installations where the shared disk is displaying an error in the validation report prompting m e to rec onfigure the shared disk. This could m ean removing the disk subsystem from both nodes, creating new disks and presenting them on the nodes as m entioned in Part 1 of this series. It would be best to work with your storage engineers or your system administrators when in doubt as different vendors may have different implementations of their disk subsystem s.I've also seen issues pertaining to IPv6. This is a fairly common issue which can easily be reso lved. The error message in the cluster validation report looks som ething similar to the one displayed belowVerifying that there are no duplicate IP addresses between any pair of nodes.Found duplicate IP address fe80::100:7f:fffe%13 on node node1.domain.local adapter Local Area Connection* X and node node2.domain.local adapter Local Area Connection* X.This blog post outlines the step in resolving this issue. In a few cases, however, I needed to disable the Teredo Tunneling Pseudo-Interface adapter from Device Manager before I got a successful summary report generated by the Validate Cluster Configuration wizard. The bottom line is simply to m ake sure that the report returns a successful validation before creating the cluster.Creating the Windows Server 2008 C lusterYou've finally reached this step in the entire process. This m eans you are now ready to create your Windows Server 2008 cluster. It's as easy as running the Create Cluster Wizard on either of the nodes. Make sure that you have your virtual hostnam e and IP address ready before proceedingTo run the Create a Cluster Wizard:1.Open the Failover Cluster Management console2.Under the Management section, click the Create a Cluster link. This will run the Create ClusterWizard3.In the Select Servers dialog box, enter the hostnam es of the nodes that you want to add asmembers of your cluster and click Next.4.In the Access Point for Administering the Cluster dialog box, enter the virtual hostnam e and IPaddress that you will use to adm inister the cluster. Click Next5.In the Confirmation dialog box, click Next. This will configure Failover Clustering on both nodesof the cluster, add DNS and Active Directory entries for the cluster hostnam e.6.In the Summary dialog box, verify that all the report returns successful.Congratulations! You now have a working Windows Server 2008 cluster. Notice how easy it was to do all of these with fewer steps and less configuration compared to its predecessors. You can now validate whether your cluster is working or not. A simple test would be to do a continuous PING on the virtual hostname or IP address that you have assigned to your cluster. Reboot one of the nodes and see how your PING test responds. At this point, you are now ready to install SQL Server 2008.OPTIONAL: Configuring your cluster quorumThis section is som etimes necessary especially when Windows Server 2008 decides to take a different disk subsystem as a quorum other than the one you've originally intended it to. Notice that in the Create a Cluster wizard, there was no option to select the disk subsystem that we can use as a quorum disk (now called the "witness" disk). By default, the Create a Cluster wizard will use the first available disk as the witness disk. I have seen cases where the originally planned witness disk is sized 1GB while the other shared disks are sized 200 GB. The wizard then selects one of the 200GB-sized disks as a witness disk, requiring you to move the witness disk to the original allocation. To validate, check the Storage node under the Failover Cluster Management consoleTo configure the quorum in a failover cluster:1.Open the Failover Cluster Management console2.Select the nam e of the cluster you have just created. Right-click on the cluster, select More Actions,and click Configure Cluster Quorum Settings... This will open up the Configure C luster Quorum Wizard3.In the Select Quorum Configuration dialog box, select the Node and Disk Majority(recommended for your current number of nodes) option. The options presented will depend on how you want your cluster configured. The current selection is for a 2-node cluster configuration4.In the Configure Storage Witness dialog box, validate and select the disk that you want yourcluster to use as the quorum/witness disk. Click Next5.In the Confirmation dialog box, verify that the disk configuration for the quorum/witness disk iscorrect. Click Next6.In the Summary dialog box, verify that all the configurations are successful.For m ore details on Configuring the Quorum in a Failover Cluster in Windows Server 2008, check out this Microsoft TechNet article.Installing SQL Server 2008 on a Windows Server 2008 Cluster Part 3 Written By: Edwin Sarmiento -- 3/17/2009ProblemIn a previous tip on SQL Server 2008 Installation Process, we have seen how different SQL Server 2008 installation is from its previous versions. Now, we have another challenge to face: installing SQL Server 2008 on a Windows Server 2008 Cluster. Windows Server 2008 has a lot of differences from its previous versions and one of them is the clustering feature. How do I go about building a clustered SQL Server 2008 running on Windows Server 2008?SolutionTo continue this series on Installing SQL Server 2008 on a Windows Server 2008 Cluster, we will look at installing SQL Server 2008 in a failover cluster. In Part 1, we have completed the installation of the Application Server role in both of the servers that we will be using as part of our cluster. Part 2 walked you through the installation of the Failover Cluster Feature, validating the servers that will be a part of the cluster, and creating the cluster. In this tip, we will proceed to install SQL Server 2008 in a clustered Windows Server 2008 environment.Installing and Configuring MSDTCThe Microsoft Distributed Transaction Coordinator (MSDTC) is a transaction m anager that permits client applications to include several different data sources in one transaction and which then coordinates committing the distributed transaction across all the servers that are enlisted in the transaction. A lot of people ask why we need to install MSDTC prior to installing SQL Server. If you are using distributed transactions or running SQL Server on a cluster, this is definitely a m ust. SQL Server uses the MSDTC service for distributed queries and two-phase commit transactions, as well as for some replication functionality. Configuring MS DTC in Windows Server 2003 c lusters as defined in this Microsoft KB article is not pretty straight-forward. Windows Server 2008 m ade it simpler by providing a more straightforward process with fewer steps and less configuration.To install and configure MSDTC:1.Open the Failover Cluster Management console on any of the cluster node.2.Under the cluster name, right-click on Server and Applications and select Configure a Service orApplication. This will run the High Availability Wizard3.In the Service or Application dialog box, select Distributed Transaction Coordinator (DTC) andclick Next.4.In the Client Access Point dialog box, enter the nam e and IP address of the clustered MSDTC. Thisshould be a different IP addresses and host nam e from the one that the Windows Server 2008 cluster is already using. Click Next.5.In the Select Storage dialog box, select the disk subsystem that will be used by MSDTC. These disksubsystem s have to be defined as available storage in your cluster. In the example below, I have used the disk volume F:\ and left the disk volume E:\ for SQL Server later in the installation process. Click Next6.In the Confirmation dialog box, validate the configuration you have selected for MSDTC and clickNext7.In the Summary dialog box, click Close. This completes the installation of MSDTC on the cluster.You can validate your installation of MSDTC by expanding the Services and Applications node and check the cluster nam e of MSDTC. Make sure that all of the dependency resources are onlineInstalling SQL Server 2008 on a Windows Server 2008 clusterYou've gone this far, don't stop now. Only after we have m anaged to prepare everything can we proceed to install SQL Server 2008 on this cluster. Since we've already installed .NET Framework 3.5 with Service Pack 1 and Windows Installer 4.5 from Part 1, we no longer have to worry about them as they both are prerequisites whether you are doing a single server or a cluster installation. There are two options to install SQL Server 2008 on a cluster. The first one is by using the Integrated failover cluster install with Add Node option and the second one is the Advanced/Enterprise installation option. The process outlined below will take into account the first option.To install SQL Server 2008:1.Run setup.exe from the installation media to launch SQL Server Installation Center. Click on theInstallation link on the left-hand side2.Click the New SQL Server failover cluster installation link. This will run the SQL Server 2008Setup wizard3.In the Setup Support Rules dialog box, validate that the checks return successful results and clickNext.4.In the Product Key dialog box, enter the product key that cam e with your installation media and clickNext.5.In the License Terms dialog box, click the I accept the license terms check box and click Next.You probably haven't read one of these, but if you feel inclined go for it.6.In the Setup Support Rules dialog box, click Install. Validate that the checks return successfulresults. If the checks returned a few warnings, make sure you fix them before proceeding with the installation. An example of this is the Network binding order. The public network cards should be first on both nodes. Also, you can disable NETBIOS and DNS registration on the network cards toavoid network overhead. Be sure to check your binding order as well. For m ore details on the network binding order warning, see Microsoft KB 955963.For the Windows Firewall, m ake sure that you open the appropriate port number on which SQL Server will communicate. You can do this after the installation. Alternatively, you can disable Windows Firewall during the installation and enable it later with the proper configuration. Click Next to proceed.7.In the Feature Selection dialog box, select only the com ponents that you want installed. For theShared feature directory, you can keep the default path if you have sufficient disk space on your C:\ drive or anywhere that is a local disk as this will be used by the SQL Server installation process later on. The directory for the clustered database engine will be different. Click Next.8.In the Instance Configuration dialog box, enter the SQL Server Network Name. This is the nam ethat will be available on the network for the clients. This will vary depending on your selection of whether it is a default or named instance. In this example, default instance is selected.A couple of things need highlighting in this section. By default, the instance nam e is used as theInstance ID. This is used to identify installation directories and registry keys for your instance of SQL Server and is helpful when you want to run multiple instances in a cluster. This is the case for default instances and nam ed instances. For a default instance, the instance nam e and instance ID would be MSSQLSERVER. To use a non-default instance ID, you should select the Instance ID box and specify a value.The section on Detected SQL Server instances and features on this computer would make sense if there are other SQL Server instances running on your server.9.In the Disk Space Requirements dialog box, check that you have enough space on your local disksto install the SQL Server 2008 binaries and click Next.10.In the Cluster Resource Group dialog box, check the resources available on your Windows Server2008 cluster. This will tell you that a new Resource Group will be created on your cluster for SQL Server. To specify the SQL Server cluster resource group name, you can either use the drop-down box to specify an existing group to use or type the nam e of a new group to create it. Click Next.11.In the Cluster Disk Selection dialog box, select the available disk groups that are on the cluster forSQL Server 2008 to use. In this example, two clust ered disk groups –APPS and APPS2– have been selected to be used by SQL Server 2008. I will be using one disk resource for the system databases while the other one for the user databases. Click Next.12.In the Cluster Network Configuration dialog box, enter the IP address and subnet m ask that yourSQL Server 2008 cluster will use. Deselect the checkbox under the DHC P column as you will be usingstatic IP addresses. If you have not disabled your IPv6 adapters and protocols, it would be better to uncheck the row for IPv613.In the Cluster Security Policy dialog box, accept the default value of Use service SIDs(recommended). In Windows Server 2003, we specify dom ain groups for all SQL Server services but in Windows Server 2008, this is the recommended option. For more information on using service SIDs for SQL Server 2008, check out this MSDN article14.In the Server Configuration dialog box, enter the credentials that you will use for your SQL Serverservice accounts in the Service Accounts tab. In the Collation tab, select the appropriate collation to be used by SQL Server. Note that the startup type is set to m anual for all cluster-aware services and cannot be changed during the installation process. Click Next.15.In the Database Engine Configuration dialog box, select the appropriate Authentication Mode.If you want to add the currently logged on user to be a part of the SQL Server adm inistrators group, click the Add Current User button.On the Data Directories tab, enter the path where your system and user database files will be created. This will default to the first shared disk in the cluster so in case you want to change it to the other shared disks to be used by SQL Server 2008, m odify accordingly. If you intend to use the ne w FILEST REAM feature, click the FILESTREAM tab and set the appropriate configurations. Click Next16.In the Error and Usage Reporting dialog box, click Next.17.In the Cluster Installation Rules dialog box, verify that all checks are successful and click Next.18.In the Ready to Install dialog box, verify that all configurations are correct. Click Next.19.In the Complete dialog box, click Close. This concludes the installation of a SQL Server 2008 FailoverClusterAt the com pletion of a successful installation and configuration of the node, you now have a fully functional failover cluster instance. To validate, open the Failover Cluster Management console, and click on SQL Server (MSSQLSERVER) under Services and Applications. Make sure that all dependencies are online。