【资料】Airpak中文帮助文档(1.7部分)
- 格式:pdf
- 大小:614.07 KB
- 文档页数:37

Airpak中文帮助文档(1.7部分)此文翻译来自Airpak帮助文档1.7部分通过1.7部分,你将使用Airpak 建立一个问题、解决一个问题以及输出结果。
这是 对Airpak 特点的基础介绍。
如有疑问可参考Airpak帮助文档的相关部分1.7 示例在下面的示例中,你将使用Airpak建立一个问题、解决一个问题以及输出结果。
这是对Airpak特点的基础介绍。
使用指南中的例子将提供更完整的程序特点。
1.7.1 问题描述图1.7.1显示的所要解决的问题。
房间中包含了一个开放的进风口、一个排气口和一个恒定温度的墙。
房间的长是4.57 m,宽是 2.74 m,高是2.74m。
房间外测量值是0.92 m ×0.46 m,同时引入一个冷空气射入房间使得空气流动。
排气口的尺寸是0.91 m×0.45 m。
惯性的力量、浮力的力量以及湍流混合的相互作用对所提供的空气的渗透及路径有着重要的影响。
1.7.2 主要的过程图1.7.1显示的问题是一个稳定通风的情形。
边界温度以及速度是被定义的。
示例中的步骤简要如下:z打开和定义一项工作z调整默认房间大小z对于一个房间生成一个进风口(opening)、排气口(vent)以及墙z生成网格z计算z检查结果1.7.3 开始一个新工作启动Airpak(1.5节)。
图1.7.2.显示的是【Open job】面板。
在【Select the job to open】文本显示框中路径的最后将/sample写上。
点击【Accept】打开一个新工作。
Airpak将生成一个10 m×3 m×10 m默认房间,同时在图形窗口显示房间。
你可以使用鼠标左键围绕一个中心点旋转房间,或者使用鼠标中间键你可以将房间转移到屏幕的任意一点上。
使用右键放大或缩小房间。
为了将房间回复的默认方位,点击【Options】菜单下【Orient】,在下拉菜单中选择【Home】。
1.7.4 定义工作通过定义房间的种类和设置环境温度来开始工作。


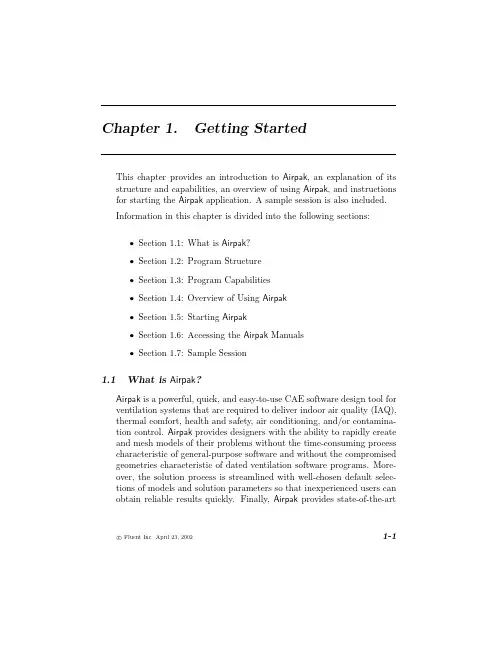
This chapter provides an introduction to Airpak,an explanation of its structure and capabilities,an overview of using Airpak,and instructions for starting the Airpak application.A sample session is also included.Information in this chapter is divided into the following sections:•Section1.1:What is Airpak?•Section1.2:Program Structure•Section1.3:Program Capabilities•Section1.4:Overview of Using Airpak•Section1.5:Starting Airpak•Section1.6:Accessing the Airpak Manuals•Section1.7:Sample Session1.1What is Airpak?Airpak is a powerful,quick,and easy-to-use CAE software design tool for ventilation systems that are required to deliver indoor air quality(IAQ), thermal comfort,health and safety,air conditioning,and/or contamina-tion control.Airpak provides designers with the ability to rapidly create and mesh models of their problems without the time-consuming process characteristic of general-purpose software and without the compromised geometries characteristic of dated ventilation software programs.More-over,the solution process is streamlined with well-chosen default selec-tions of models and solution parameters so that inexperienced users can obtain reliable results quickly.Finally,Airpak provides state-of-the-artc Fluent Inc.April23,20021-1Getting Started1.3Program CapabilitiesGetting Started1.3Program CapabilitiesGetting Started1.3Program CapabilitiesGetting Started1.3Program CapabilitiesGetting Started1.4Overview of Using AirpakMenu1.Create a jobfile.Chapter62.Specify the problem parameters.Chapter63.Build the model.Chapter74.Generate the mesh.Chapter135.Calculate a solution.Chapter146.Examine the results.Chapter157.Generate summaries and reports.Chapter16c Fluent Inc.April23,20021-11Getting Started1.5Starting AirpakROOT environment variable and adjust your command search path tofind airpak.exe on your system.•Create a desktop shortcut toAIRPAKROOT by the full pathname of the directory where Airpak is installed on your computer system (see Section1.5.5),and then double-click on the shortcut to start Airpak.See your Windows documentation for details on creating a desktop shortcut.c Fluent Inc.April23,20021-13Getting Started1.5Starting AirpakGetting Started1.5Starting AirpakDescriptionThe path to your home directory where configuration TERMsystems only)The location of the display screen.This is used by theits output to(e.g.,unix:0.0),and must be set for PATHcommands.Airpak Environment VariablesAirpak allows you to change certain aspects of its operation by setting Airpak-specific environment variables.There are three Airpak-specific environment variables,which are described in Table1.5.2.c Fluent Inc.April23,20021-17Getting StartedDescriptionROOTwhere Airpak is installed on your AIRPAK PATHwhere Airpak loads the material librarySee Section6.3.2for details.LICENSE Allows you to specify an alternatethe Airpak installation instructions1.6Accessing the Airpak ManualsGetting StartedROOT/lib/help/index.htm where you must replace AIRPAK1.6Accessing the Airpak Manualsinc,followed by the letter for the CD-ROM drive) and choose the appropriatefile.This will bring up the Airpak documentation“home”page(Figure1.6.1), from which you can select the HTML version of the particular Airpak manual you want to view.c Fluent Inc.April23,20021-21Getting Started1.6Accessing the Airpak ManualsGetting Started1.6Accessing the Airpak ManualsGetting StartedROOT/lib/help/index.htm where you must replace AIRPAK1.7Sample Sessioninc,followed by the letter for the CD-ROM drive) and choose the appropriatefile.This will bring up the Airpak documentation“home”page(Figure1.6.1), from which you can select the PostScript or PDFfile(s)for the particular Airpak manual you want.For large manuals,PostScript and PDFfiles are provided for the individual chapters,rather than for the entire manual.1.7Sample SessionIn the following demonstration,you will use Airpak to set up a prob-lem,solve the problem,and postprocess the results.This is a basic introduction to the features of Airpak.Working through the examples in the tutorial guide will provide a more complete demonstration of the program’s features.1.7.1Problem DescriptionThe problem solved here is illustrated in Figure1.7.1.It involves a room containing an air inlet opening,a vent,and walls that hold a constant temperature.The room is4.57m long,2.74m wide,and2.74m high.The opening measures0.92m×0.46m and introduces a cold air jet into the room to ventilate it.The vent is0.91m×0.45m.The interaction of inertial forces,buoyancy forces,and turbulent mixing is important in affecting the penetration and trajectory of the supply air.c Fluent Inc.April23,20021-27Getting Started1.7Sample SessionGetting Started1.7Sample SessionGetting Started1.7Sample SessionyS0.0xE 4.57zE 2.74c Fluent Inc.April23,20021-33Getting Started1.7Sample Session xS0.0xE—yS0.0yE0.91zS 2.29zE 2.74Getting Started1.7Sample Session xS 4.57xE—yS0.91yE 1.83zS0.0zE0.46Getting Started1.7Sample SessionGetting StartedxS0.0xE 4.57yS0.0yE—–zS0.0zE 2.741.7Sample SessionGetting Started1.7Sample SessionGetting StartedxS0.0xE—yS0.0yE 2.74zS0.0zE 2.74xS0.0xE 4.57yS0.0yE 2.74zS0.0zE—–1.7Sample SessionGetting Started1.7Sample SessionGetting Started1.7Sample SessionGetting Started。

Airpak软件中文学习案例(含软件详细操作步骤)建筑边庭对室内环境的影响-CFD模拟分析目录01篇建模问题 (3)1.1模拟概况 (3)1.2简化模型 (5)1.3用airpak建模 (5)1.4airpak建模步骤 (6)02篇网格生成篇 (9)2.1网格生成详细步骤 (9)2.2网格检查 (11)03篇条件设置 (12)3.1边界条件设置 (12)3.2初始参数设置 (15)3.3残差和计算参数设置 (16)04篇模拟后处理 (17)05篇边庭模拟小结 (21)01篇建模问题1.1模拟概况本工程是某地区一栋坐北朝南的办公楼,东侧是贯穿一层的边庭,主要功能为通风采光,南侧是一个内部走廊。
办公楼一共2层,上下层都为办公室、会议厅,建筑面积大约3000平方米。
室内布置主要为桌椅、空调等(实际模型详见下方图纸)。
本工程主要通过CFD模拟软件Airpak对建筑边庭进行研究,分析边庭(中庭)对建筑室内的通风效果通过温度、湿度、风速、空气龄、PMV-PPD等指标参数,评价室内通风效果。
本教程由百度账号:a谷雨c燕,第七代师兄,独家原创分享,未经许可不得转载。
首次发布在百度文库模拟工况为:(1)冬季无空调时,边庭对室内通风、热舒适度的影响。
(2)冬季有空调时,边庭对室内通风、热舒适度的影响。
1.2简化模型拿到二维图纸或三维图纸后,建模的思路是先熟悉图纸,二维和三维图纸都看一遍,了解图纸中的建筑和物体的布局,其次结合CFD 模拟工况的要求,对建筑模型进行必要的简化,最后依据图纸信息进行建模。
例如本工程,是一个办公楼,要做如上2个工况的模拟,拿到图纸后熟悉每个房间的布局,里面有桌椅、人体、玻璃幕墙等。
对里面的人体进行舍弃,边庭处的沙土、植物对气流影响不大的也进行舍弃,最后得到一个模拟的大致布局。
脑中有了这些模型后,可以自己画一下,也可以建模的时候一遍勾勒,一遍看图。
1.3用airpak建模开始建模时,要了解各个模型的尺寸信息,长x宽x高,应该使用airpak里的那个模块比较合适。

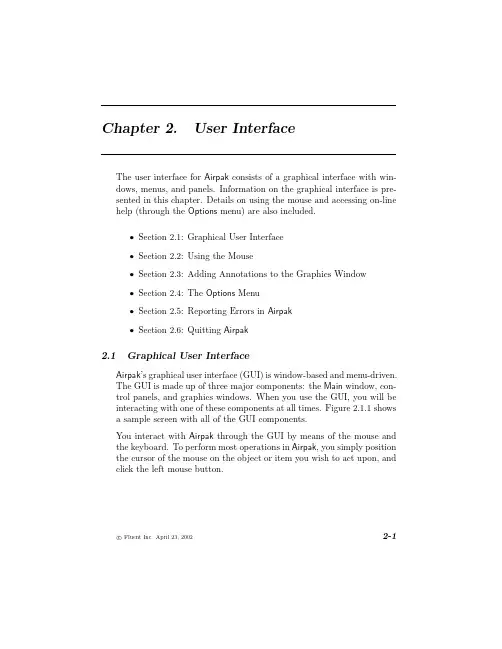
The user interface for Airpak consists of a graphical interface with win-dows,menus,and rmation on the graphical interface is pre-sented in this chapter.Details on using the mouse and accessing on-line help(through the Options menu)are also included.•Section2.1:Graphical User Interface•Section2.2:Using the Mouse•Section2.3:Adding Annotations to the Graphics Window•Section2.4:The Options Menu•Section2.5:Reporting Errors in Airpak•Section2.6:Quitting Airpak2.1Graphical User InterfaceAirpak’s graphical user interface(GUI)is window-based and menu-driven.The GUI is made up of three major components:the Main window,con-trol panels,and graphics windows.When you use the GUI,you will be interacting with one of these components at all times.Figure2.1.1showsa sample screen with all of the GUI components.You interact with Airpak through the GUI by means of the mouse and the keyboard.To perform most operations in Airpak,you simply position the cursor of the mouse on the object or item you wish to act upon,and click the left mouse button.c Fluent Inc.April23,20022-1User Interface2.1Graphical User InterfaceUser Interface2.1Graphical User InterfaceUser Interface2.1Graphical User InterfaceUser Interface2.1Graphical User InterfaceUser Interface2.1Graphical User InterfaceUser Interface2.1Graphical User InterfaceA push button is a rectangular-shaped button that performs a functionindicated by the button label.To activate a push button,place the mouse pointer over the push button and“click”the left mouse button.A“click”is one press and release of the mouse button.When push buttons are located on a menu bar,they usually cause a submenu to appear,or a panel to be displayed.Toggle ButtonA toggle button is a square-shaped button that is used to turn on or offan item or action indicated by the toggle button’s label.Click the left mouse button on the toggle button to switch the state.Radio ButtonRadio buttons are diamond-shaped buttons that are located on a menu bar or panel.They are a set of mutually exclusive options that allow only one to be set in the“on”position at a time.When you click the left mouse button on a radio button,it will be turned on,and all others will be turned“off”.c Fluent Inc.April23,20022-13User Interface2.1Graphical User InterfaceUser Interface2.1Graphical User InterfaceUser Interface2.2Using the MouseUser Interface2.2Using the MouseUser Interface2.3Adding Annotations to the Graphics WindowUser Interface2.4The Options MenuUser Interface2.4The Options MenuUser Interface2.4The Options MenuUser Interface2.4The Options MenuUser Interface2.4The Options MenuUser Interface2.4The Options MenuUser Interface2.4The Options MenuUser Interface2.5Reporting Errors in AirpakUser Interface2.6Quitting AirpakUser Interface。
新风防雨百叶 0.5双百叶 0.72-0.82单百叶 0.9散流器 0.85 左右View 视图Orient 方向Model 模型Tree 树状图Macros 处理语言(宏)Solve 求解Post 提交数据Report 报告WindowsFlat 平面Fileunpack project打开项目pack project 包装工程(重命名)command prompt 命令提示Editundo 撤销redo 重做preferences 偏好annotations 注释current object 当前对象modify 修改reset 复位copy from 复制remove 删除activate all 激活所有deactivate all 停用所有create assembly创建程序集copy params 复制参数save as project 保存为项目viewsummary 概要总结location 位置distance 距离angle 角bounding box 边界框markers 标记rubber bands 橡皮筋button 按钮select a point on the first object with the left button 用左按钮在第一个对象里选择一个点set background 设置背景edit toolbars 编辑工具拦shading 背影wireframe 线框solid 固体selected solid 选择固体hidden line 隐藏线display 显示object names 对象名称current assembly 目前组装coord axes xx轴visible grid 可见网格origin marker 原始标记rulers 标尺project title 项目标题current date 当前日期construction lines 设置线construction points 设置点mesh 网mouse position 鼠标位置tcl console tcl控制台blocks 块vents 通风口排风口openings 开口送风口partitions 分区sources 来源resistances 电阻heat exchangers热交换器hoods 抽油烟机assemblies 程序集wires 电线reset 重置defaults 默认预设值ambient 环境intensity 强度materials 材料diffuse reflectance 漫反射率ambient reflectance 环境反射shininess 亮度specular reflectance 镜面反射orienthome position 原始位置zoom in 放大region 范围scale to fit 适应规模isometric view 等距视图reverse orientation 相反的方向nearest axis 最近的轴save user view 保存用户视图clear user views 清除用户视图modelgenerate mesh 生成网格cad data cad数据radiation 辐射check model 检查模型edit priorities 编辑优先级create material library 创建物料库treesort 排序creation order 创建次序alphabetical 字母顺序排列meshing priority 网格优先级organize objects 组织对象flat 平面types 类型subtypes 子类型shapes形状Macros 处理语言(宏)Boundary conditions 边界条件solar flux calculator 太阳流计算horizontal surface 水平面vertical surface 垂直面tilt 斜度倾斜 degree 度face direction specified指明方向compass 罗盘relative to south 相对于南方local latitude当地纬度local longitude 当地经度atmospheric boundary layer 大气边界层specify by 指定anemometer height 风速计的高度exponent 指数boundary layer thickness 边界层厚度local terrain type 局部地形类型large city centers 城市中心urban ,suburban, wooded areas城市,郊区,树木繁茂的地区flat, unobstructed areas 平坦、通畅的区域profile density 剖面密度profile direction 剖面方向create assembly创建程序集diffuser扩散器diffuser type 扩散器类型geometry 几何properties 性能grille 格栅rectangular 矩形circular 圆形inclined 倾斜的,偏向dimensions尺寸assembly装配ceiling 天花板square 方形perforated panel穿孔板,多孔板displacement 位移,移置,偏移,偏移量cylinder 圆柱prism稜鏡,棱鏡,棱polygon多邊形,正多边形命令,折线图slot缝隙,槽位linear 线性vertical 垂直式,直立的nozzle 喷嘴valve阀门;电磁阀;气阀vortex漩涡力场;低涡;漩涡quick geometry/approximations 快速几何近似polygonal ducts 多边形管道closed box 封闭箱box dimensions 箱尺寸internal 内部external 外部thick walls 墙厚、厚壁thickness 厚度box material 箱体材料view definition 视图定义edit definition 编辑定义create material 创建材料default 默认insulators 绝缘子asbestos-fiber 石棉纤维asbestos-insulations 石棉绝缘brick building 砖砌建筑solid 固体surface 表面fluid 流体density 密度specific heat 比热conductivity 电导率conductivity type 导电类型isotropic 各向同性orthotropic 正交各向异性anisotropic各向异性biaxial 双轴、双光轴constant 常数linear 线性curve 曲线graph editor 图形编辑器text editor 文本编辑器polygonal cylinder多边柱体radius 半径length 长度polyblock 组合式quadrants to be created象限被创建facets 面block 块resistance 电阻cylinder plates 汽缸板enclosure 外壳facets per even 每一个面cylindrical enclosure圆柱形外壳polygonal circle多边形圆partition 分区rotate objects 旋转物体individual platesrotate prism plates 旋转棱镜板centroid 质心vertex 顶点rotate prism blocks旋转棱镜块individual polygonal blocks单个多边形块rotate groups of prism blocks旋转棱镜块组solvesetting 设置parallel setting 平行设置number of iterations 迭代次数convergence criteria 收敛准则discretization scheme离散格式standard 标准body force weighted质量力加权momentum 动量viscosity 粘度body force 质量力frequency 频率linear solver线性求解termination criterion终点判据residual reduction tolerance剩余减少公差serial 连续的parallel平行的processors 处理器use metis for partitioning使用Metis分区network parallel 网络并行node file 节点文件browse 浏览edit network parameters编辑网络参数shared path共享路径run solution运行解决方案solution type 解式restart重新启动interpolated data 插值数据full data 全数据start monitor开始监测;启动监视器edit parameters 编辑参数solution monitor parameters解决方案的监测参数variable 变量continuity 连续性energy 热能output units输出单位angular deviation 角偏差concentration 浓度fraction 分数heat flow rate热流量heat flux 热通量heat tr coeff热蒸腾系数mass flow质量流量radiative heat flow辐射热流turbulent湍流volume flow rate容积流量volume 体积disable radiation calculations禁用辐射计算perform multiple trials进行多次试验dismiss解雇、开除、遣散run optimization 运行优化parameters and optimization参数与优化single trial单次试验parametric trial参数化试验all combinations 所有组合by columns按列selected values选定值convergence tolerance for objective目标的收敛性convergence tolerance for variables变量的收敛性constraint tolerance约束公差maximum number of iterations迭代的最大次数show diagnostic output显示诊断输出save only best iteration保存最好的迭代save best and last iteration保存最佳和最后一次迭代solution monitor解决方案监控define trials确定试验postobject face物体面、对象面show mesh显示网格show contours显示轮廓show vectors显示向量show particle traces显示粒子的痕迹plane cut 平面切割plane location 平面位置set positon 设定位置x plane through center X平面通过中心y plane through center y平面通过中心z plane through center z平面通过中心point and normal 点和法向计算coeffs非零系数;多项式系数horizontal-screen select水平屏幕选择vertical-screen select 垂直屏幕选择3 point-screen select 3点屏幕选择clip to box 夹框enable clipping 使剪裁animation 动画delay 延迟write to file 写入文件loop mode 循环模式isosurface 等值面TKE 湍流动能Epsilon 希腊语的第五个字母艾普斯龙Viscosity ratio粘度比mass flow 质量流量mean age of air 平均空气龄radiation temp 辐射relative humidity 相对湿度angular deviation 角偏差visibility 能见度pixels 像素leave trail 留下痕迹show particles 显示粒子contours are visible 轮廓是可见的no objects with contours are visible so there si nothing to probe 轮廓没有对象是可见的所以没有什么探讨surface probe 表面温度感测、表面电极min locations 最小位置convergence plot 收敛图variation plot 变化图history plot 历史图trials plot 试验图transient setting 动态设置load solution ID 加载解决方案ID time average 时间平均值download rsf project RSF项目下载postprocessing units 后处理单元load post objects from fils 从文件加载后的对象save post objects to fils 保存后的对象文件rescale vectors 缩放向量create zoom in model 模型的缩放modify 修改reporthtml report HTML报告problem specification 规范的问题solution overview 解决方案概述heat source information 热源信息fan information 风机信息vent information 通风信息item 项目summary report 总结报告solution overview 解决方案概述available 可用show optimization results 显示优化结果fan operating points 风机工作点comfort level 舒适度adpi report 经济报告欢迎您的下载,资料仅供参考!致力为企业和个人提供合同协议,策划案计划书,学习资料等等打造全网一站式需求。

Airpak软件中文学习案例(含软件详细操作步骤)建筑边庭对室内环境的影响-CFD模拟分析目录01篇建模问题 (3)1.1模拟概况 (3)1.2简化模型 (5)1.3用airpak建模 (5)1.4airpak建模步骤 (6)02篇网格生成篇 (9)2.1网格生成详细步骤 (9)2.2网格检查 (11)03篇条件设置 (12)3.1边界条件设置 (12)3.2初始参数设置 (15)3.3残差和计算参数设置 (16)04篇模拟后处理 (17)05篇边庭模拟小结 (21)01篇建模问题1.1模拟概况本工程是某地区一栋坐北朝南的办公楼,东侧是贯穿一层的边庭,主要功能为通风采光,南侧是一个内部走廊。
办公楼一共2层,上下层都为办公室、会议厅,建筑面积大约3000平方米。
室内布置主要为桌椅、空调等(实际模型详见下方图纸)。
本工程主要通过CFD模拟软件Airpak对建筑边庭进行研究,分析边庭(中庭)对建筑室内的通风效果通过温度、湿度、风速、空气龄、PMV-PPD等指标参数,评价室内通风效果。
本教程由百度账号:a谷雨c燕,第七代师兄,独家原创分享,未经许可不得转载。
首次发布在百度文库模拟工况为:(1)冬季无空调时,边庭对室内通风、热舒适度的影响。
(2)冬季有空调时,边庭对室内通风、热舒适度的影响。
1.2简化模型拿到二维图纸或三维图纸后,建模的思路是先熟悉图纸,二维和三维图纸都看一遍,了解图纸中的建筑和物体的布局,其次结合CFD 模拟工况的要求,对建筑模型进行必要的简化,最后依据图纸信息进行建模。
例如本工程,是一个办公楼,要做如上2个工况的模拟,拿到图纸后熟悉每个房间的布局,里面有桌椅、人体、玻璃幕墙等。
对里面的人体进行舍弃,边庭处的沙土、植物对气流影响不大的也进行舍弃,最后得到一个模拟的大致布局。
脑中有了这些模型后,可以自己画一下,也可以建模的时候一遍勾勒,一遍看图。
1.3用airpak建模开始建模时,要了解各个模型的尺寸信息,长x宽x高,应该使用airpak里的那个模块比较合适。
Airpak3.0帮助文件办公室通风简介:这篇教程演示了如何使用Airpak在计算机上创建有两个人工作的办公室模型。
教程中你将会了解到:1.打开一个新的任务2.计算机模拟相对湿度分布的设置3.创建blocks,openings,vents,partitions和walls4.创建辐射影响的模型5.改变计算机计算的迭代次数(即为模型的细腻光滑程度,迭代次数越高模型效果越佳)6.初步计算出一个结果7.检查模型表面的轮廓和物体表面的迭量,以及横断面图8.跟踪空气入口粒子流轨迹9.通过仿真计算检查房间里舒适度的预测平均值(PMV-同一环境下绝大多数人的热感觉)和预测不满百分比(PDD-同环境下人群对热环境不满的百分比)先决条件:本教程假设你对Airpak软件没有太多经验,但是相对较熟悉软件界面,若不是请检阅第一张用户指南。
问题描述:该待仿真办公室共分为两大部分,每一部分包含一个坐在电脑前办公的人。
如图1.1 。
同时该办公室还有六个荧光灯、暖气、新风入口、回风口、窗户等。
通过对办公室表面温度和空气流速的剖面仿真,我们可以直观了解办公室整体的舒适度。
图1.1:通风问题所研究的办公室的几何参数步骤1:打开并定义一个新的工作1.启动Airpak,当软件打开后会主动弹出NEW/EXISTING选项卡。
2.单击NEW选项,软件会开始一个新的任务,同时NEW project选项卡将会打开。
(a)你可以为你的任务起一个名称,并将其填写在Project旁边的窗口中。
你可以为此案例命名OFFICE。
(b)点击Create创建。
Airpak会默认创建一个尺寸为10*3*10的房间,并放置在图形窗口内。
你可以使用鼠标左键围绕一个中心点旋转物体,还可以用鼠标中键将它移动到任意一点,鼠标右键则可以放大缩小视窗选择进入或者退出房间。
如果想把房间调整到默认位置,点击界面上方的选项Orient在弹出的菜单中点击Home position。
Airpak 2.0 使用指南办公室通风∙简介∙前言∙问题描述∙第一步:打开并定义一个新任务∙第二步:创建模型∙第三步:加入辐射和模型∙第四步:计算网格∙第五步:检查风状况∙第五步:将模型保存到任务文件中∙第六步:计算一个解决方案∙第七步:检查结果∙汇总∙参考文献简介这篇教程演示了如何使用Airpa k在计算机上创建有两个人工作的办公室的模型教程中你将学会:∙打开一个新任务∙包括计算机模拟相对湿度影响的分布∙创建blocks, openin gs, vents, partit ions,和 walls∙创建辐射影响的模型∙改变计算机计算的迭代次数∙计算一个结果∙检查模型表面轮廓和物体表面的矢量,以及横断面图∙空气入口的粒子流轨迹通过计算机计算检查房间里的舒适度的预测平均值(PMV)和不满百分比(PPD)必装条件这个教程假设你对air pak没有经验,但是你很熟悉接口,如果您不是,请检查第一张的用户指南问题描述这个办公室分为两个部分,每部分包含一个人,坐在电脑前工作,如图 1.1。
这个办公室还包括六个荧光灯、暖气片、空气入口、回风口,窗户。
表面温度和空气流速剖面,目的是为了确定整个舒适的房间。
Table1.1:几何参数,导热性,窗户和扩散器的流动边界条件尺寸温度速度13.5 C 0.85 m/s进气口扩散0.2 m 0.3 m30.9 C ---窗户3.65 m 1.16 mTable1.2:热源的尺寸和性能热源Size Power1500 W墙挂式取暖1.2 m 0.1 m 0.2 m75 W人0.4 m 0.35 m 1.1 m108 WComput er 10.4 m 0.4 m 0.4 mComput er 2173 W0.4 m 0.4 m 0.4 m34 W灯0.2 m 1.2 m 0.15 mFigure 1.1:通风问题所研究的办公室的几何参数Step 1: Open and Define a New Job1.启动airp ak,如简介1.5中说明的那样,打开任务面板将自动开启2.为你的任务取一个名字(a)In the Select the job to open text box, type /office at the end of the path.在选择任务打开文字框内,输入/office在路径的最后(b)ClickAccept. 点击接受Airpak will create a defaul t room with the dimens ions10 m 3 m 10 m, anddispla y the room in the graphi cs window.Airpak将创建一个默认的尺寸为10x3x10的房间,并放置在图形窗口内。
新风防雨百叶 0.5双百叶 0.72-0.82单百叶 0.9散流器 0.85 左右View 视图Orient 方向Model 模型Tree 树状图Macros 处理语言(宏)Solve 求解Post 提交数据Report 报告WindowsFlat 平面Fileunpack project打开项目pack project 包装工程(重命名)command prompt 命令提示Editundo 撤销redo 重做preferences 偏好annotations 注释current object 当前对象modify 修改reset 复位copy from 复制remove 删除activate all 激活所有deactivate all 停用所有create assembly创建程序集copy params 复制参数save as project 保存为项目viewsummary 概要总结location 位置distance 距离angle 角bounding box 边界框markers 标记rubber bands 橡皮筋button 按钮select a point on the first object with the left button 用左按钮在第一个对象里选择一个点set background 设置背景edit toolbars 编辑工具拦shading 背影wireframe 线框solid 固体selected solid 选择固体hidden line 隐藏线display 显示object names 对象名称current assembly 目前组装coord axes xx轴visible grid 可见网格origin marker 原始标记rulers 标尺project title 项目标题current date 当前日期construction lines 设置线construction points 设置点mesh 网mouse position 鼠标位置tcl console tcl控制台blocks 块vents 通风口排风口openings 开口送风口partitions 分区sources 来源resistances 电阻heat exchangers热交换器hoods 抽油烟机assemblies 程序集wires 电线reset 重置defaults 默认预设值ambient 环境intensity 强度materials 材料diffuse reflectance 漫反射率ambient reflectance 环境反射shininess 亮度specular reflectance 镜面反射orienthome position 原始位置zoom in 放大region 范围scale to fit 适应规模isometric view 等距视图reverse orientation 相反的方向nearest axis 最近的轴save user view 保存用户视图clear user views 清除用户视图modelgenerate mesh 生成网格cad data cad数据radiation 辐射check model 检查模型edit priorities 编辑优先级create material library 创建物料库treesort 排序creation order 创建次序alphabetical 字母顺序排列meshing priority 网格优先级organize objects 组织对象flat 平面types 类型subtypes 子类型shapes形状Macros 处理语言(宏)Boundary conditions 边界条件solar flux calculator 太阳流计算horizontal surface 水平面vertical surface 垂直面tilt 斜度倾斜 degree 度face direction specified指明方向compass 罗盘relative to south 相对于南方local latitude当地纬度local longitude 当地经度atmospheric boundary layer 大气边界层specify by 指定anemometer height 风速计的高度exponent 指数boundary layer thickness 边界层厚度local terrain type 局部地形类型large city centers 城市中心urban ,suburban, wooded areas城市,郊区,树木繁茂的地区flat, unobstructed areas 平坦、通畅的区域profile density 剖面密度profile direction 剖面方向create assembly创建程序集diffuser扩散器diffuser type 扩散器类型geometry 几何properties 性能grille 格栅rectangular 矩形circular 圆形inclined 倾斜的,偏向dimensions尺寸assembly装配ceiling 天花板square 方形perforated panel穿孔板,多孔板displacement 位移,移置,偏移,偏移量cylinder 圆柱prism稜鏡,棱鏡,棱polygon多邊形,正多边形命令,折线图slot缝隙,槽位linear 线性vertical 垂直式,直立的nozzle 喷嘴valve阀门;电磁阀;气阀vortex漩涡力场;低涡;漩涡quick geometry/approximations 快速几何近似polygonal ducts 多边形管道closed box 封闭箱box dimensions 箱尺寸internal 内部external 外部thick walls 墙厚、厚壁thickness 厚度box material 箱体材料view definition 视图定义edit definition 编辑定义create material 创建材料default 默认insulators 绝缘子asbestos-fiber 石棉纤维asbestos-insulations 石棉绝缘brick building 砖砌建筑solid 固体surface 表面fluid 流体density 密度specific heat 比热conductivity 电导率conductivity type 导电类型isotropic 各向同性orthotropic 正交各向异性anisotropic各向异性biaxial 双轴、双光轴constant 常数linear 线性curve 曲线graph editor 图形编辑器text editor 文本编辑器polygonal cylinder多边柱体radius 半径length 长度polyblock 组合式quadrants to be created象限被创建facets 面block 块resistance 电阻cylinder plates 汽缸板enclosure 外壳facets per even 每一个面cylindrical enclosure圆柱形外壳polygonal circle多边形圆partition 分区rotate objects 旋转物体individual platesrotate prism plates 旋转棱镜板centroid 质心vertex 顶点rotate prism blocks旋转棱镜块individual polygonal blocks单个多边形块rotate groups of prism blocks旋转棱镜块组solvesetting 设置parallel setting 平行设置number of iterations 迭代次数convergence criteria 收敛准则discretization scheme离散格式standard 标准body force weighted质量力加权momentum 动量viscosity 粘度body force 质量力frequency 频率linear solver线性求解termination criterion终点判据residual reduction tolerance剩余减少公差serial 连续的parallel平行的processors 处理器use metis for partitioning使用Metis分区network parallel 网络并行node file 节点文件browse 浏览edit network parameters编辑网络参数shared path共享路径run solution运行解决方案solution type 解式restart重新启动interpolated data 插值数据full data 全数据start monitor开始监测;启动监视器edit parameters 编辑参数solution monitor parameters解决方案的监测参数variable 变量continuity 连续性energy 热能output units输出单位angular deviation 角偏差concentration 浓度fraction 分数heat flow rate热流量heat flux 热通量heat tr coeff热蒸腾系数mass flow质量流量radiative heat flow辐射热流turbulent湍流volume flow rate容积流量volume 体积disable radiation calculations禁用辐射计算perform multiple trials进行多次试验dismiss解雇、开除、遣散run optimization 运行优化parameters and optimization参数与优化single trial单次试验parametric trial参数化试验all combinations 所有组合by columns按列selected values选定值convergence tolerance for objective目标的收敛性convergence tolerance for variables变量的收敛性constraint tolerance约束公差maximum number of iterations迭代的最大次数show diagnostic output显示诊断输出save only best iteration保存最好的迭代save best and last iteration保存最佳和最后一次迭代solution monitor解决方案监控define trials确定试验postobject face物体面、对象面show mesh显示网格show contours显示轮廓show vectors显示向量show particle traces显示粒子的痕迹plane cut 平面切割plane location 平面位置set positon 设定位置x plane through center X平面通过中心y plane through center y平面通过中心z plane through center z平面通过中心point and normal 点和法向计算coeffs非零系数;多项式系数horizontal-screen select水平屏幕选择vertical-screen select 垂直屏幕选择3 point-screen select 3点屏幕选择clip to box 夹框enable clipping 使剪裁animation 动画delay 延迟write to file 写入文件loop mode 循环模式isosurface 等值面TKE 湍流动能Epsilon 希腊语的第五个字母艾普斯龙Viscosity ratio粘度比mass flow 质量流量mean age of air 平均空气龄radiation temp 辐射relative humidity 相对湿度angular deviation 角偏差visibility 能见度pixels 像素leave trail 留下痕迹show particles 显示粒子contours are visible 轮廓是可见的no objects with contours are visible so there si nothing to probe 轮廓没有对象是可见的所以没有什么探讨surface probe 表面温度感测、表面电极min locations 最小位置convergence plot 收敛图variation plot 变化图history plot 历史图trials plot 试验图transient setting 动态设置load solution ID 加载解决方案ID time average 时间平均值download rsf project RSF项目下载postprocessing units 后处理单元load post objects from fils 从文件加载后的对象save post objects to fils 保存后的对象文件rescale vectors 缩放向量create zoom in model 模型的缩放modify 修改reporthtml report HTML报告problem specification 规范的问题solution overview 解决方案概述heat source information 热源信息fan information 风机信息vent information 通风信息item 项目summary report 总结报告solution overview 解决方案概述available 可用show optimization results 显示优化结果fan operating points 风机工作点comfort level 舒适度adpi report 经济报告欢迎您的下载,资料仅供参考!致力为企业和个人提供合同协议,策划案计划书,学习资料等等打造全网一站式需求。
AirPak版讨论精华内容(33问)----整理版1.请教一下在airpak中物体的散湿量怎么输入,特别是人体?----直接在人体上加了opening,也就是和fluent的处理方法是相同的。
人体散湿量是一个比较烦的问题,一般情况计算的稳态问题,要求这人长期在一个地方不动,这其实与实际情况不太相符。
散湿量是可以定义到一个prism的source上的,单位是kg/s.但是直接用airpak中的人的话,是没有办法设定的。
除非你重新建一个group。
其实用一个长方体就可以代表人了。
用体源项来定义的时间欧就有kg/s的单位了。
用prism的source,不是面的,而是体的。
airpak的数据如何提取出来?airpak的文件如何才能读入到fluent?或者能读入到tecplot里?report-〉point report,然后输入那些具有代表性的点的参数值,可以创建很多个点,然后勾上write to file,给出文件名称,然后就可以用text文本打开了,不知道这对你有没有用。
How do I include the effect of natural convection in my model?"File/Problem", toggle the "Gravity vector" and give the gravity value in the appropriate direction.What is the "Minimum object separation"?This is a value you specify in "File/Configure". It sets a tolerance limit where if any two adjacent faces are separated by a distance less than this tolerance limit, Airpak warns you of the situation. You may choose to cancel the meshing and examine the model for any errors or ignore the warning and go ahead with the meshing. It is not advisable to let Airpak make the changes automatically for it may make many unintended changes."Radiation temperature" is the partial enclosure temperature applied when the default surface-to-surface radiation model is used. When a given surface radiates to some surfaces, normally all of the radiation does not reach these surfaces. The portion of radiation that doesn't reach these surfaces is assumed to go to the ambient maintained at a reference temperature called the "Radiation temperature".3.关于model的问题room--当创建一个新文件时,airpak会在图形窗口自动生成一个默认的room,尺寸:10m×3m×10m,显示的是xy 平面的视图。
Airpak中文帮助文档(1.7部分)此文翻译来自Airpak帮助文档1.7部分通过1.7部分,你将使用Airpak 建立一个问题、解决一个问题以及输出结果。
这是 对Airpak 特点的基础介绍。
如有疑问可参考Airpak帮助文档的相关部分1.7 示例在下面的示例中,你将使用Airpak建立一个问题、解决一个问题以及输出结果。
这是对Airpak特点的基础介绍。
使用指南中的例子将提供更完整的程序特点。
1.7.1 问题描述图1.7.1显示的所要解决的问题。
房间中包含了一个开放的进风口、一个排气口和一个恒定温度的墙。
房间的长是4.57 m,宽是 2.74 m,高是2.74m。
房间外测量值是0.92 m ×0.46 m,同时引入一个冷空气射入房间使得空气流动。
排气口的尺寸是0.91 m×0.45 m。
惯性的力量、浮力的力量以及湍流混合的相互作用对所提供的空气的渗透及路径有着重要的影响。
1.7.2 主要的过程图1.7.1显示的问题是一个稳定通风的情形。
边界温度以及速度是被定义的。
示例中的步骤简要如下:z打开和定义一项工作z调整默认房间大小z对于一个房间生成一个进风口(opening)、排气口(vent)以及墙z生成网格z计算z检查结果1.7.3 开始一个新工作启动Airpak(1.5节)。
图1.7.2.显示的是【Open job】面板。
在【Select the job to open】文本显示框中路径的最后将/sample写上。
点击【Accept】打开一个新工作。
Airpak将生成一个10 m×3 m×10 m默认房间,同时在图形窗口显示房间。
你可以使用鼠标左键围绕一个中心点旋转房间,或者使用鼠标中间键你可以将房间转移到屏幕的任意一点上。
使用右键放大或缩小房间。
为了将房间回复的默认方位,点击【Options】菜单下【Orient】,在下拉菜单中选择【Home】。
1.7.4 定义工作通过定义房间的种类和设置环境温度来开始工作。
这些参数在【Problem setup】面板中具体指明了。
在【File】菜单中选择【Problem】可以打开【Problem setup】面板(如图1.7.3)。
Figure 1.7.3: The Problem setup Panel在【Species】旁边选择【On】,点击【Edit】。
这样将打开【Species definitions】面板(如图1.7.4)。
在【h2o】的【Initial concentration】中写入50。
在【Initial concentration】文字输入栏的右边菜单中选择【RH】,点击【Accept】。
在【Problem setup】面板中将【IAQ/Comfort】选项设置为【Off】,因为你并没有考虑空气质量问题。
作为问题的【Ambient values】,对于【Temperature】输入20.56以及【Radiation temp】中输入20.56。
点击【Accept】保持新的设置。
1.7.5 修改房间尺寸在【Model】菜单中选择【Room】来修改房间。
在房间【Edit】面板(如图1.7.5)1.7.1表中输入坐标。
点击【Modify】修改房间尺寸。
点击【Options】菜单中的【Orient】,在下拉菜单中选择【Isometric】。
这样将展示一个匹配图形窗口的房间立方视图。
1.7.6 在房间中添加物体现在你将在房间中添加物体。
添加一个物体的过程包含三步:1、生成一个新物体2、具体指定物体的位置3、具体指定物体的流和热特性添加一个矩形排气口(Vent)首先,在房间墙的后面生成一个排气口。
选择【Model】菜单中的【Vents】。
在排气口【Edit】面板中点击【New】,Airpak将在房间的中心生成一个矩形的排气口。
点击排气口【Edit】面板中的【Edit】打开【Vents】面板(如图1.7.6)。
选择【Plane】下的【Y-Z】来定义排气口位于的面。
在【Start/end】下输入坐标(如表1.7.2)。
在【Velocity loss coefficient based on】下选择【Approach】。
点击【Done】接受改变以及关闭面板。
注意:你也可以使用鼠标来改变排气口的形状和尺寸。
在键盘上按下<Shift>键,同时使用鼠标右键移动排气口的边界。
添加一个开口/送风口(opening)接下来,你将在墙的前面添加一个送风口。
选择【Model】菜单中的【Openings】。
在送风口【Edit】面板中点击【New】来生成一个矩形送风口。
点击送风口【Edit】面板中的【Edit】来打开【Openings】面板(如图1.7.7)。
选择【Plane】下的【Y-Z】来定义送风口所在的面。
在【Start/end】下输入坐标(如表1.7.3)。
选择【Temperature】,输入20.56。
选择【X Velocity】,输入-1。
选择【Species】,点击【Edit】。
这将打开【Species concentrations】面板(如图1.7.8)。
在【h2o】的【Concentration】输入50。
在【Concentration】文字输入栏的右边的菜单中选择【RH】,点击【Done】。
在【Openings】面板中点击【Done】接受改变以及关闭面板。
添加墙体:最后,你将添加墙体来描绘房间的边界。
对于相似的一对平行墙体,你可以生成一个墙体,然后复制这个墙体用来生成对面的墙。
添加地板和天花板:在【Model】菜单中选择【Walls】,用来创立一个代表地板的墙。
在墙【Edit】面板中点击【New】生成一个新墙。
在墙【Edit】面板中点击【Edit】打开【Walls】面板(如图1.7.9)。
在【Plane】下选择【X-Z】来定义墙所在的面。
在【Start/end】下,输入坐标(如表1.7.4)。
选择【Outside temp】,输入28.33用来具体指定墙处于一个恒定的温度。
选择【Inner surface radiation】,点击【Edit】,使得墙体能够辐射传热。
这将打开【Radiation specification】面板(如图1.7.10)。
选择【All objects】以及点击【Accept】。
在【Walls】面板中的【Name】内输入地板的名字。
点击【Done】接受改变以及关闭面板。
接下来,通过复制第一个墙(floor/地板)到达一个合适的位置,你可以生成一个代表天花板的墙。
在墙平【Edit】面板中选择【floor】,点击【Copy】。
这将打开【Copy wall floor】面板(如图1.7.11)。
选择【Translate】,具体指定【Y offset】为2.74。
点击【Apply】完成过程以及在屏幕上显示拷贝。
在墙【Edit】面板【Name】栏中将ceiling改为floor.1。
点击【Modify】更新墙。
添加前后墙:在墙【Edit】面板中点击【New】来生成一个新墙。
在墙【Edit】面板中点击【Edit】来打开【Walls】面板。
在【Plane】下选择【Y-Z】来定义墙所在的面。
在【Start/end】下,输入坐标(如表1.7.5)。
沿着上面所描述的地板过程来具体指定【Outside temp】为28.33以及【All objects】中的【Inner surface radiation】。
在【Name】栏中输入wall-back。
在【Walls】面板中点击【Done】接受改变以及关闭面板。
接下来,沿着上述复制地板的过程生成天花板。
复制一个【X offset】为4.57, 【Y offset】为0, 以及【Z offset】为0的【wall-back】。
在墙【Edit】面板【Name】栏中将wall-back.1改为wall-front。
(注意:你不可能在【Name】栏中看到整个名称)。
点击【Modify】修改墙。
添加左右墙:在墙【Edit】面板中点击【New】生成一个新墙。
在墙【Edit】面板中点击【Edit】来打开【Walls】面板。
在【Start/end】下,输入坐标(如表1.7.6)。
沿着上述地板的描述的过程来具体指定【Outside temp】为28.33以及【All objects】中的【Inner surface radiation】。
在【Name】栏中输入wall-right。
在【Walls】面板中点击【Done】接受修改以及关闭面板。
接下来,沿着上述复制地板的过程生成天花板。
复制一个【X offset】为0, 【Y offset】为0以及【Z offset】为2.74的【wall-right】。
在墙【Edit】面板【Name】栏中将wall-right.1改为wall-left。
点击【Modify】修改墙。
图1.7.12显示的是最终的模型。
1.7.7 产生一个总结一旦你完成了你的模型,再次检查你输入是必要的。
在【Model】菜单中点击【Summary】来展示模型的概要。
Airpak将会展示房间特征的概要以及模型的对象,如图1.7.13。
如果没有任何其他的操作,点击【Cancel】关闭面板。
1.7.8 创建一个网格如果你对你建立的模型感到满意,你可以为这个模型生成一个网格。
首先,你要改变网格命令,生成一个粗略的网格,然后你要展示这个网格,最后精炼这个网格。
改变网格优先级:你需要改变房间中对象被网格化的命令,以致与墙联系的房间对象在网格化过程中比墙有更高的优先级。
在【Model】菜单中点击【Utilities】,选择【Edit priorities】打开【Object priority】面板,如图1.7.14。
在【floor】,【ceiling】, 【wall-back】, 【wall-front】, 【wall-right】以及【wall-left】中输入0。
点击【Accept】修改优先级以及关闭面板。
点击【Model】菜单中的【Mesh】。
生成一个粗略的网格:Airpak将会打开【Mesh control】面板,如图1.7.15所示。
在【Mesh control】面板最下面点击【Coarse】按钮。
Airpak将会根据粗略网格的默认网格参数更新面板。
取消【Max X size】, 【Max Y size】以及【Max Z size】的选择。
点击【Generate mesh】生成一个代表几何学的粗略网格。
【Message】窗口将会显示网格生成过程的结果,其中包括单元数量、或者六面体单元以及所关心的网格中元素的质量的信息。
网格单元的数量以及网格中节点的数量也会在【Mesh control】面板中展示。
【Message】窗口同时也会报告所要求的每小时房间里空气改变的容积流率。