Contributor Add-in for Excel
- 格式:ppt
- 大小:573.00 KB
- 文档页数:20

一、介绍Excel是一款广泛使用的电子表格软件,Python是一种流行的编程语言。
结合Excel和Python的使用可以提高数据处理的效率和灵活性。
本文将介绍在Excel中使用Python的方法和技巧。
二、Python插件安装1. 打开Excel并进入“文件”菜单。
2. 选择“选项”。
3. 在选项对话框中,选择“加载项”。
4. 点击“Excel加载项”下的“转到”按钮。
5. 在“添加-Ins”对话框中,点击“浏览”。
6. 找到并选择Python插件的安装文件,点击“打开”。
7. 完成安装并重启Excel。
三、使用Python进行数据处理1. 在Excel中新建一个工作表。
2. 在需要进行数据处理的单元格输入Python函数,例如“=Py.COUNTIF(A1:A10,">5")”。
3. 按下Enter键,Excel会调用Python插件执行该函数,并在单元格中显示结果。
四、Python函数示例1. 使用Python的COUNTIF函数统计大于5的数据个数。
2. 使用Python的SUM函数计算数据的总和。
3. 使用Python的AVERAGE函数计算数据的平均值。
4. 使用Python的IF函数进行条件判断。
5. 使用Python的VLOOKUP函数进行数据查找。
五、Python脚本执行1. 在Excel中打开一个工作表。
2. 点击“开发人员”选项卡。
3. 选择“插入”下的“ActiveX 控件”。
4. 在工作表中插入一个按钮控件,右键点击该按钮并选择“属性”。
5. 在“单击”事件中绑定Python脚本文件。
6. 点击按钮执行Python脚本,实现自定义的数据处理逻辑。
六、Python图表生成1. 在Excel中选择需要生成图表的数据范围。
2. 点击“插入”选项卡中的“插入统计图表”按钮。
3. 在弹出的对话框中选择“Python图表”。
4. 根据需要选择图表类型和样式,点击确定生成图表。

最全的OLE操作Excel的完整代码#include<Utilcls.h>#include "Excel_2K_SRVR.h"//#include "ComObj.hpp"/*-------------------------------------------------//谨慎的思考310032649原创文章//目前真正最全的OLE操作Excel的完整代码//版本:2007.01.15.01//C++Builder专家组原创文章//转载请保留本版权信息,谢谢合作--------------------------------------------------/void __fastcall TForm1::Button1Click(TObject *Sender){AnsiString str1="asvasd";//要入库的数据Variant ex,newxls,sh;try{ex=CreateOleObject("Excel.Application");//启动Excelex.OlePropertySet("Visible",(Variant)true);//使Excel启动后可见//ex.OlePropertyGet("WorkBooks").OleProcedure("ADD");//新建一新工作薄(加上这一句,会有两个Excel窗口,同时关闭)//ex.OlePropertySet("Visible",(Variant)false);//使Excel启动后不可见//ex.OlePropertySet("Windowstate",1);//Excel启动后窗体状态:1(xlNormal)正常显示(Excel上次关闭时是什么状态,启动后就是什么状态),2(xlMinimized)最小化(不是缩小到任务栏),3(xlMaximized)最大化newxls=(ex.OlePropertyGet("Workbooks")).OleFunction("Add");//①//使用ExcelApp的Exec方法新建一有3个工作表的默认工作薄//newxls=(ex.OlePropertyGet("Workbooks")).OleFunction("Add",1);//创建有单个工作表的工作簿//newxls=ex.OlePropertyGet("workbooks").OleFunction("open", "c:\\123.xls");//打开已存在的文件,使用时可将上面关于新建①的那行屏蔽掉sh=newxls.OlePropertyGet("ActiveSheet");}catch(...){ShowMessage("启动Excel出错,可能沒有安裝Excel");return;}//Excel的警告提示:sh.OlePropertyGet("Application").OlePropertySet("DisplayAlerts",false);//关闭Excel的警告提示,如提示保存等//sh.OlePropertyGet("Application").OlePropertySet("DisplayAlerts",true);//打开Excel的警告提示,如提示保存等//选择工作表://newxls.OlePropertyGet("Sheets", 2).OleProcedure("Select");//选择第二工作表//sh = newxls.OlePropertyGet("ActiveSheet");//选择第二工作表//重命名工作表://sh.OlePropertySet("Name", "Sheet的新名字");//重命名当前工作表//取得工作表总数:int nSheetCount=newxls.OlePropertyGet("Sheets").OlePropertyGet("Count");//取得工作表总数Edit1->Text=nSheetCount;/*-------------------------------------------------//目前真正最全的OLE操作Excel的完整代码//版本:2007.01.15.01//C++Builder专家组原创文章//转载请保留本版权信息,谢谢合作--------------------------------------------------///新建工作表并重命名:try{Variant bef1,aft1;int count=ex.OlePropertyGet("sheets").OlePropertyGet("count");aft1=ex.OlePropertyGet("sheets",count);ex.OlePropertyGet("sheets").OleProcedure("Add",bef1.NoParam() , aft1);sh = ex.OlePropertyGet("ActiveSheet");sh.OlePropertySet("Name","增加的sheet的名字");//名字不能重复}catch(...){//ShowMessage ("There's something wrong with your excel file./nPlease check it!");}//指定状态栏显示的文本://ex.OlePropertySet ("StatusBar","您好,请您稍等。


python处理excel⽂件(xls和xlsx)⼀、xlrd和xlwt使⽤之前需要先安装,windows上如果直接在cmd中运⾏python则需要先执⾏pip3 install xlrd和pip3 install xlwt,如果使⽤pycharm则需要在项⽬的解释器中安装这两个模块,File-Settings-Project:layout-Project Interpreter,点击右侧界⾯的+号,然后搜索xlrd和xlwt,然后点击Install Package进⾏安装。
对于excel来说,整个excel⽂件称为⼯作簿,⼯作簿中的每个页称为⼯作表,⼯作表⼜由单元格组成。
对于xlrd和xlwt,⾏数和列数从0开始,单元格的⾏和列也从0开始,例如sheet.row_values(2)表⽰第三⾏的内容,sheet.cell(1,2).value表⽰第⼆⾏第三列单元格的内容。
1.xlrd模块读取excel⽂件使⽤xlrd模块之前需要先导⼊import xlrd,xlrd模块既可读取xls⽂件也可读取xlsx⽂件。
获取⼯作簿对象:book = xlrd.open_workbook('excel⽂件名称')获取所有⼯作表名称:names = book.sheet_names(),结果为列表根据索引获取⼯作表对象:sheet = book.sheet_by_index(i)根据名称获取⼯作表对象:sheet = book.sheet_by_name('⼯作表名称')获取⼯作表⾏数:rows = sheet.nrows获取⼯作表列数:cols = sheet.ncols获取⼯作表某⼀⾏的内容:row = sheet.row_values(i) ,结果为列表【sheet.row(i),列表】获取⼯作表某⼀列的内容:col = sheet.col_values(i) 结果为列表【sheet.col(i),列表】获取⼯作表某⼀单元格的内容:cell = sheet.cell_value(m,n)、 sheet.cell(m,n).value、sheet.row(m)[n].value,sheet.col(n)[m].value,结果为字符串或数值【sheet.cell(0,0),xlrd.sheet.Cell对象】⽰例:假设在py执⾏⽂件同层⽬录下有⼀fruit.xls⽂件,有三个sheet页Sheet1、Sheet2、Sheet3,其中Sheet1内容如下:import xlrdbook = xlrd.open_workbook('fruit.xls')print('sheet页名称:',book.sheet_names())sheet = book.sheet_by_index(0)rows = sheet.nrowscols = sheet.ncolsprint('该⼯作表有%d⾏,%d列.'%(rows,cols))print('第三⾏内容为:',sheet.row_values(2))print('第⼆列内容为%s,数据类型为%s.'%(sheet.col_values(1),type(sheet.col_values(1))))print('第⼆列内容为%s,数据类型为%s.'%(sheet.col(1),type(sheet.col(1))))print('第⼆⾏第⼆列的单元格内容为:',sheet.cell_value(1,1))print('第三⾏第⼆列的单元格内容为:',sheet.cell(2,1).value)print('第五⾏第三列的单元格内容为:',sheet.row(4)[2].value)print('第五⾏第三列的单元格内容为%s,数据类型为%s'%(sheet.col(2)[4].value,type(sheet.col(2)[4].value)))print('第五⾏第三列的单元格内容为%s,数据类型为%s'%(sheet.col(2)[4],type(sheet.col(2)[4])))# 执⾏结果# sheet页名称: ['Sheet1', 'Sheet2', 'Sheet3']# 该⼯作表有5⾏,3列.# 第三⾏内容为: ['梨', 3.5, 130.0]# 第⼆列内容为['单价/元', 8.0, 3.5, 4.5, 3.8],数据类型为<class 'list'>.# 第⼆列内容为[text:'单价/元', number:8.0, number:3.5, number:4.5, number:3.8],数据类型为<class 'list'>.# 第⼆⾏第⼆列的单元格内容为: 8.0# 第三⾏第⼆列的单元格内容为: 3.5# 第五⾏第三列的单元格内容为: 300.0# 第五⾏第三列的单元格内容为300.0,数据类型为<class 'float'># 第五⾏第三列的单元格内容为number:300.0,数据类型为<class 'xlrd.sheet.Cell'>xlrd读取excel⽰例可以看出通过sheet.row(i)、sheet.col(i)也可获取⾏或列的内容,并且结果也是⼀个列表,但是列表中的每⼀项类似字典的键值对,形式为数据类型:值。

减轻小学生上学负担的措施英语四级作文Reducing the Burden on Elementary School StudentsThe educational system in many countries has long been a topic of intense debate and discussion. One particular area of concern is the burden placed on elementary school students, who often find themselves overwhelmed by the demands of academic work, extracurricular activities, and other obligations. In this essay, we will explore several measures that can be implemented to alleviate the burden on these young learners, allowing them to thrive both academically and personally.One of the primary factors contributing to the burden on elementary school students is the sheer volume of homework and assignments they are expected to complete. Many teachers, driven by the need to cover a vast curriculum and prepare students for standardized tests, assign an inordinate amount of homework, leaving little time for rest, play, and other essential activities. To address this issue, schools should consider implementing a more balanced approach to homework, where the focus is on quality over quantity. This couldinvolve reducing the overall amount of homework, while ensuring that the assignments given are more meaningful and engaging, allowing students to delve deeper into the subject matter rather than simply completing tasks for the sake of completion.Additionally, schools should strive to provide more comprehensive support systems for students who are struggling with the academic workload. This could include the implementation of tutoring programs, where students can receive one-on-one or small-group assistance from experienced educators or older students. By addressing the specific needs of individual students, these support systems can help them overcome academic challenges without feeling overwhelmed or falling behind their peers.Another significant contributor to the burden on elementary school students is the pressure to excel in extracurricular activities. Many parents and schools place a strong emphasis on participation in sports, arts, and other extracurricular programs, with the belief that these activities will help students develop well-rounded skills and improve their chances of college admission. While these activities can certainly be beneficial, they can also add to the already heavy workload of students, leaving them with little time for rest, relaxation, and personal exploration.To address this issue, schools should consider adopting a morebalanced approach to extracurricular activities, where students are encouraged to participate in a limited number of activities that align with their interests and strengths. This could involve offering a diverse range of activities, allowing students to choose the ones that best suit their needs and preferences, rather than forcing them to participate in a predetermined set of programs. Additionally, schools should ensure that the time commitment required for these activities is reasonable and does not significantly detract from the students' academic responsibilities.Another factor that contributes to the burden on elementary school students is the prevalence of standardized testing. In many educational systems, students are subjected to a barrage of standardized tests, which are often used to measure the performance of both students and schools. While these tests can provide valuable data and insights, they can also create a significant amount of stress and anxiety for students, who may feel that their entire academic future rests on their performance on these exams.To mitigate the impact of standardized testing, schools should consider adopting a more balanced approach to assessment, where a variety of evaluation methods are used to measure student learning and progress. This could include the use of performance-based assessments, project-based learning, and other alternative assessment strategies that focus on the development of criticalthinking, problem-solving, and creativity, rather than just the memorization of facts and figures.Additionally, schools should provide comprehensive support and resources to help students prepare for these tests, including study strategies, test-taking techniques, and stress management strategies. By empowering students with the tools and resources they need to succeed, schools can help alleviate the burden of standardized testing and allow students to focus on their overall academic and personal development.Finally, it is important to recognize that the burden on elementary school students is not solely the responsibility of the educational system. Parents and caregivers also play a crucial role in shaping the experiences and well-being of these young learners. Parents should strive to create a supportive and nurturing home environment, where students feel encouraged and empowered to pursue their interests and passions, rather than being constantly pressured to excel academically.This could involve setting reasonable expectations for academic performance, providing ample opportunities for rest and relaxation, and encouraging students to engage in activities that promote physical, mental, and emotional well-being. By working in partnership with schools and educators, parents can help to create amore balanced and holistic approach to education, one that prioritizes the overall development and well-being of the child.In conclusion, the burden on elementary school students is a complex and multifaceted issue that requires a comprehensive and collaborative approach. By implementing measures to reduce the workload, provide targeted support, and foster a more balanced educational environment, schools and parents can help to alleviate the burden on these young learners, allowing them to thrive academically, socially, and emotionally. Through this collective effort, we can create an educational system that truly serves the needs and interests of our youngest and most vulnerable students.。
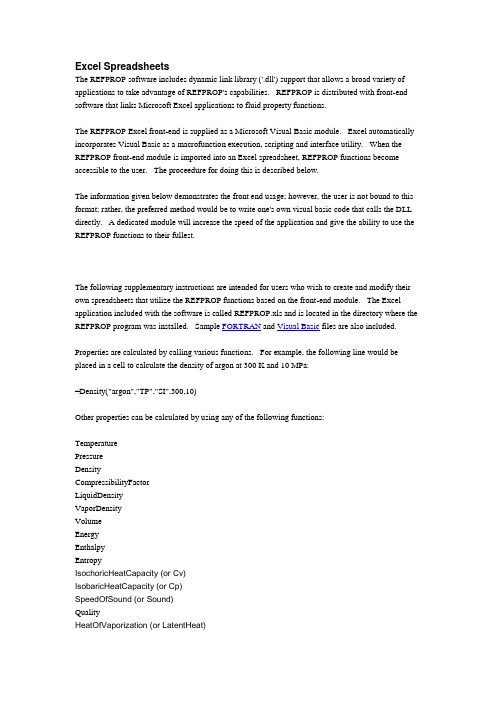
Excel SpreadsheetsThe REFPROP software includes dynamic link library ('.dll') support that allows a broad variety of applications to take advantage of REFPROP's capabilities. REFPROP is distributed with front-end software that links Microsoft Excel applications to fluid property functions.The REFPROP Excel front-end is supplied as a Microsoft Visual Basic module. Excel automatically incorporates Visual Basic as a macrofunction execution, scripting and interface utility. When the REFPROP front-end module is imported into an Excel spreadsheet, REFPROP functions become accessible to the user. The proceedure for doing this is described below.The information given below demonstrates the front end usage; however, the user is not bound to this format; rather, the preferred method would be to write one's own visual basic code that calls the DLL directly. A dedicated module will increase the speed of the application and give the ability to use the REFPROP functions to their fullest.The following supplementary instructions are intended for users who wish to create and modify their own spreadsheets that utilize the REFPROP functions based on the front-end module. The Excel application included with the software is called REFPROP.xls and is located in the directory where the REFPROP program was installed. Sample FORTRAN and Visual Basic files are also included.Properties are calculated by calling various functions. For example, the following line would be placed in a cell to calculate the density of argon at 300 K and 10 MPa:=Density("argon","TP","SI",300,10)Other properties can be calculated by using any of the following functions:TemperaturePressureDensityCompressibilityFactorLiquidDensityVaporDensityVolumeEnergyEnthalpyEntropyIsochoricHeatCapacity (or Cv)IsobaricHeatCapacity (or Cp)SpeedOfSound (or Sound)QualityHeatOfVaporization (or LatentHeat)JouleThompsonIsentropicExpansionCoefIsothermalCompressibilityVolumeExpansivityAdiabaticCompressibilityAdiabaticBulkModulusIsothermalExpansionCoefIsothermalBulkModulusViscosityThermalConductivityPrandtlSurfaceTensionDielectricConstantMolarMassEOSMaxEOSMinMoleFractionMassFractionLiquidMoleFractionVaporMoleFractionMole2MassMass2MoleThe first input in the call to the function is the pure fluid name or mixture string. The file name located in the fluids directory where REFPROP was installed should be used as the fluid name (without the .fld extension).For mixtures, the fluid names and compositions (in mole fractions) of the constituents in the mixture are placed in a single cell as in the following example for dry air:nitrogen;0.7812;argon;0.0092;oxygen;0.2096A more convenient way is to use the FluidString phrase to join multiple cells:=FluidString(A1:A3,B1:B3)where the fluid names are stored in A1, A2, and A3, and the mole fractions are stored in B1, B2, andB3. The stored mixture files (*.MIX) can also be read by simply replacing the fluid name with the name of the mixture file:=Enthalpy("R410A.MIX","TD","molar SI",300,5)The second input to the function is the combination of input properties being sent to thefunction. Thus, for a given pressure and temperature, the second input would be "PT" (or "TP",depending on the order in which the properties are sent). Other valid inputs include the density (D), energy (E), enthalpy (H), entropy (S), and quality (Q). Valid combinations include: TP, TD, TH, TS, TE, TQ, PD, PH, PS, PE, PQ, DH, DS, DE, and HS. For saturation states, the second input is Tliq or Tvap for a given saturated temperature, Pliq or Pvap for a given saturated pressure, or Dliq or Dvap for a saturated density. Liquid properties are returned when these inputs contain "liq" and vapor properties are returned when "vap" is used.The third input to the property functions defines the units. This input can be one of thefollowing: "SI", "SI with C", "Molar SI", "E", "cgs", "mks", "M". If left blank, the default is SI. The "SI with C" input can be shorted to just "C". The units that correspond to these inputs are:SI: K, MPa, kg/m^3, kJ/kg, kJ/kg-K, m/s, uPa-s, mW/m-K, mN/mSI with C: C, MPa, kg/m^3, kJ/kg, kJ/kg-K, m/s, uPa-s, mW/m-K, mN/mMolar SI: K, MPa, mol/dm^3, J/mol, J/mol-K, m/s, uPa-s, mW/m-K, mN/mmks: K, kPa, kg/m^3, kJ/kg, kJ/kg-K, m/s, uPa-s, W/m-K, mN/mcgs: K, MPa, g/cm^3, J/g, J/g-K, cm/s, uPa-s, mW/m-K, dyn/cmE: F, psia, lbm/ft^3, Btu/lbm, Btu/lbm-R, ft/s, lbm/ft-s, Btu/h-ft-F, lbf/ftM: K, psia, g/cm^3, J/g, J/g-K, m/s, uPa-s, mW/m-K, mN/mFor example, the following line would be placed in a cell to calculate the density of argon at 100 F and 250 psia (the result will be in units of lbm/ft^3):=Density("argon","TP","E",100,250)The independent variables in the equations of state used in REFPROP are temperature and density. If more than one property is needed, it is best to first determine these quantities from the given set of initial inputs, and then determine the other properties. This will greatly speed-up thecalculation. This is particularly important when properties for pure fluids that are within thetwo-phase region are calculated. For example, to calculate the energy, enthalpy, and entropy given the pressure and quality of a two-phase system, place the fluid name in cell A1, the pressure in B1, and the quality in C1. Put the following in cells A2 through A5:=Temperature($A$1,"PQ","SI",$B$1,$C$1)=Density($A$1,"PQ","SI",$B$1,$C$1)=Energy($A$1,"TD","SI",$A$2,$A$3)=Enthalpy($A$1,"TD","SI",$A$2,$A$3)=Entropy($A$1,"TD","SI",$A$2,$A$3)The functions LiquidDensity and VaporDensity will return the saturated liquid and vapor densities of a two-phase state. These densities, along with the temperature, can then be used to calculate all other thermodynamic and transport properties at the saturation boundaries using the functions outlined above.The inputs "Tmelt", "Pmelt", "Tsubl", and "Psubl" return melting line or sublimation line values. To calculate the melting pressure for argon at 90 K, enter:=Pressure("argon","Tmelt","SI",90)To calculate the melting temperature, enter "Pmelt" as the second input and the melting pressure as the fourth input.=Temperature("argon","Pmelt","SI",25)The critical point or triple point is returned in a similar manner via the inputs "crit" or "trip", along with inputs of the fluid name and the units. The molar mass (molecular weight) is returned using the function MolarMass with an input of the fluid name only. All of these functions are shown in the REFPROP.xls file.REFPROP can be permanently linked to EXCEL by following these steps:(This documentation assumes that the REFPROP files have been installed in the "C:\ProgramFiles\REFPROP" directory. Other installations require appropriate adjustments.)First, execute either step #1 or step #2 (#1 is preferred):1. Two environment variables can be set to specify the locations of the fluid files and the DLL. This can be done under Start/Settings/Control Panel/System/Advanced/Environment Variables. A new variable called RPprefix should be created with a value of "C:\Program Files\Refprop" (or the directory where Refprop is located). If the Path variable does not exist, create one and add the same directory as you did for RPprefix. If the path variable does exist, it should be modified by adding ";c:\program files\REFPROP" to the end so that the REFPROP.DLL file can be found from any location. Screen shots and updated information are given on the REFPROP FAQ webpage.2. From EXCEL open the file REFPROP.xls. Open the VB-editor with 'Alt-F11'. Scroll to the top of the module and read the comments. Make the necessary directory changes as described. The lines should look like this:..Public Const FluidsDirectory As String = "c:\program files\refprop\fluids\"Public Const MixturesDirectory As String = "c:\program files\refprop\mixtures\"..The path marked "c:\..." must point exactly to the location where the REFPROP fluid and mixture files are stored on the user's disk drive. Scroll down several pages and follow the instructions aboutspecifying the path for the Refprop DLL by replacing all occurrences of "Refprop.DLL" with"C:\Program Files\Refprop\Refprop.DLL". Quit the VB-editor and return to EXCEL and save REFPROP.xls.3. Save the REFPROP.xls file as a Microsoft Excel Add-In (named REFPROP.xla). The default location will appear as something like ...\Microsoft\AddIns. The file should be saved in this directory. Alternatively, do a search on your computer for the *.xla files and put the REFPROP.xla file in with the others.4. Open EXCEL with an empty spreadsheet and find under 'Tools' the Add-Ins Manager. Find on the list of available Add-Ins the new entry 'REFPROP AddIns'. Mark it as active and exit the Add-Ins Manager.5. Now open any EXCEL spreadsheet, go to any cell and type something like:=density("water","TP","SI",500,100)6. If you need to edit the .xla file after it has been installed, reopen the REFPROP.xls file, edit the VB section, then save it as .xls. Under 'Tools' go to the Add-Ins Manager and deselect the REFPROP AddIn. Then save the file again as .xla.7. Once the module has been imported into a spreadsheet, the REFPROP functions may be selected by using the pull-down function list. When editing the formula in a cell, select More Functions from the pull-down list and scroll down the Function Category list to select the User Defined functions. The argument editor will prompt for REFPROP function arguments as it does for standard Excel functions.。
实战ExcelAdd-in的三种玩法作者:陈希章发表于 2017年11⽉26⽇前⾔这个系列⽂章应该有⼀阵⼦没有更新了,原因是⼀如既往的多,但是根本所在是我对于某些章节其实还没有完全想好怎么写,尤其是对于Office Add-in这块 —— 到底是要每个都去单独写⼀遍,还是有其他什么好的写法会对读者更有帮助?正如我在分享的⼀些关于写作的个⼈经验那样,我为此颇费了⼀些⼼思琢磨,直到最近才做出了⼀个选择:我将不拘泥于每个应⽤都写⼀次,⽽是尝试总结⼀些共性的操作指南。
本⽂将是⼀个尝试,以我对于Office Add-in开发的了解,Excel所占的⽐重相对较⾼(根据不完全统计,在应⽤商店所有Office Add-in 中,Excel占到40%左右),所以我希望⽤本⽂的Excel Add-in的实际案例,给⼴⼤的Office Add-in开发⼈员直观地了解三种不同的开发技术是如何过渡和共存的,以帮助⼤家做出⾃⼰的选择。
本⽂所提到的三种玩法,是指最早的VBA技术,后来的VSTO技术,以及现在更推荐的Web Add-in的技术。
如果⼤家对于这些基本概念以及Office 365的开发还不太熟悉,欢迎阅读我此前写好的 Office 365开发概述和⽣态环境介绍:,案例介绍我⼀向⿎励在实践中学习。
为了演⽰如何⾃定义开发,并且⽐对不同的技术下⾯实现⽅式的差异,本⽂将以下⾯的⼀个需求作为案例展开。
假设我们需要为Excel增加⼀项功能,⽤户点击⼀个菜单或者按钮后,可以动态⽣成⼀些统计数据,并且根据这些数据⽣成⼀个柱状图。
VBA —— ⼀曲肝肠断,天涯何处觅知⾳VBA 是我们最早的⼀个⽤来扩展Office 应⽤程序的技术,由于其简单易⽤且功能强⼤,在全世界范围内拥有数以亿计的⽤户。
实现上⾯提到的这样的需求,其实是VBA很擅长的,尤其是数据如果本⾝就来⾃于Excel内部的话。
学习VBA的⼀个最好起点就是⽤录制宏。
以本案例⽽⾔,即便你是VBA的新⼿,也可以尝试⼀步⼀步地输⼊数据并且⽣成图表,然后将⽣成的代码稍作整理和修改后,可能就是下⾯这样⼦的。
INVEST FOR EXCEL®START UP GUIDE FOR YOUR FIRST INVESTMENT CALCULATIONSCONTENTS1.About INVEST FOR EXCEL® (3)A.Invest for Excel® Application Areas (3)B.About Invest for Excel® Test version (3)C.Installing Invest for Excel® test version (4)D.Uninstalling Invest for Excel® (4)E.The 30-day test period has expired (4)2.STARTING INVEST FOR EXCEL® (4)A.Start Invest for Excel® software (4)B.Activate Invest for Excel® (5)3.INVEST FOR EXCEL® STRUCTURE (5)A.Invest for Excel® Homepage (5)er Guide and User Manual (6)4.HOW TO MAKE A BASIC INVESTMENT CALCULATION (6)A.Important rules (6)B.Invest for Excel® Application Area: Investment calculation example (6)I.Define the investments in the Investments table (9)II.Define the income and costs of the project in Profit Calculation Table (9)III.Define Working Capital (10)IV.Analyse Reports: Cash Flow Statement and Balance Sheet (11)V.Analyse Profitability Analysis report (12)VI.Analyse the sensitivity of project variables (12)5.CALCULATIONS EXAMPLE FILES (13)6.TRAINING & WORKSHOPS (13)7.DATAPARTNER SUPPORT (14)1.ABOUT INVEST FOR EXCEL®A.INVEST FOR EXCEL® APPLICATION AREASInvest for Excel® provides you with clear understanding of the profitability of capital investments, projects or businesses.↓Add speed to your performance by using a dedicated tool.↓Get safety by elimination of mistakes.↓Benefit from the know-how of financial analysis models in the software.Application areas of Invest for Excel®:↓Investment proposals↓Capital budgeting↓Valuation (acquisitions, divestments and mergers)↓Impairment testing↓Business planning and strategy↓Cash flow modeling↓Profitability analysis of projects – R&D, marketing, human resources, customer projects etc.↓Project financing↓Liquidity planning↓Post-audit↓Outsourcing↓Life-cycle costing↓Cost-benefit analysisB.ABOUT INVEST FOR EXCEL® TEST VERSIONThe test version will work 30 days from the date of installation.The functionality of the software is fully available with few exceptions:↓the discount factor is set to a default value↓the sensitivity analysis of discount factor is locked to a default value↓the interest rate in financing module is set to a default value↓The Income tax % is locked to a default valueC.INSTALLING INVEST FOR EXCEL® TEST VERSIONInstall by running Setup.exe. Follow the installation instructions. Choose language when installing.D.UNINSTALLING INVEST FOR EXCEL®Invest for Excel® can be uninstalled from the computer at any time. Notice, that it is not possible to reinstall the 30-day test version on the same computer twice.E.THE 30-DAY TEST PERIOD HAS EXPIREDIf the 30-day test period expired but you wish to prolong your testing phase, please contact Datapartner Help Desk for support (e-mail: **************************).2.STARTING INVEST FOR EXCEL®A.START INVEST FOR EXCEL® SOFTWAREStart Invest for Excel® from the Windows menu 'Start – Programs – DataPartner program group. There, you can also find user guides in different languages.If the Security Warning dialog box appears, select 'Always trust macros from this source', and then press “Enable Macros”.If Invest for Excel® doesn’t start, the Macro Security level might be set to High. Select from Microsoft Excel Menu: Tools > Macro Security level and set it to Medium. Start the program again.B.ACTIVATE INVEST FOR EXCEL®The first time you start the software, you need to enter the Activation code (Demo Code) in the following dialogue box. The Activation code (Demo Code) has been sent to your e-mail address (when you downloaded the test version from the Internet) or provided with the test CD.3.INVEST FOR EXCEL® STRUCTUREA.INVEST FOR EXCEL® HOMEPAGEInvest for Excel® opens with the homepage as on the picture below. The outlook can vary a little depending on what version of Invest for Excel® you are running.Invest for Excel® HomepageThe homepage shows the main 4 sections of Invest for Excel® in a recommended workflow: Input values, Calculations, Result and Analysis.ER GUIDE AND USER MANUALIn order to get more information on each software section, you can activate User Guide (tick the box of User Guide). Then, while you are moving to various sections of the software, information boxes will appear with explanation on contents.For detailed instruction on Invest for Excel®, open User Manual (pdf).4.HOW TO MAKE A BASIC INVESTMENT CALCULATIONImagine you need to assess profitability of an investment. Follow the steps to create and analyze your calculation model.A.IMPORTANT RULESThere are a few basic rules to keep in mind:1. You can only enter data in the grey fields and yellow fields.2. Cash flow: Investments and operational costs should be entered as negative values.3. Remember to save your work regularly or at least before closing.Use the buttons on the left to move from one calculation table to the next. This way you will move in a recommended work order.B.INVEST FOR EXCEL® APPLICATION AREA: INVESTMENT CALCULATION EXAMPLECREATE A NEW INVESTMENT FILE.Start from Homepage, section 'Input Values' on the left followed by 'Calculations', 'Result' and 'Analysis'. This is the order in which you should proceed the first time you make a calculation. You can return to the homepage at any time by clicking the home button :1.Select 'Basic Values' from the homepage.2.Select 'New' to create a new file.The next step applies to Invest for Excel® Enterprise version users only and will not be shown in versions Pro, Standard and Lite.3.Choose type of calculation to create.In this case, choose '1. Asset investment, project or business planning' to create a standard investment calculation. In versions Pro, Standard and Lite this file type will open as default.New Investment file dialog box4.Save the calculation file at this point, but do not close it.Now you are able to start modeling your project.DEFINE THE BASIC VALUES FOR YOUR CALCULATIONDefine the calculation term for your cash-flows in the dialog box. The outlook of the dialog box can vary depending on the version of Invest for Excel® you are running.Calculation term dialog boxThe calculation term is often the same as the investing time and planned operation time of the investm ent. If necessary, you can split the investment in different periods with “Periodization”. In this dialog box you can also choose the calculation point to which the cash-flows will be discounted, residual value, the end of financial year or if you want to include historical periods. After you have completed the Calculation term dialog box, you will return to Basic values table. If you want to return to the Calculation term dialog box, click the button in the Basic values table.Basic Values tableIn the Basic Values table enter Unit of figures, Currency, Discount rate and Income tax. Note that particularly the Discount rate has a big impact on the outcome of the calculation.Contact information along with comments about the project can be entered (for information purposes) in the 'Contact information' table.After completing the basic values table, the next step to complete is the Investment table in Calculations section.I.DEFINE THE INVESTMENTS IN THE INVESTMENTS TABLEInvestments tableEnter the investment expenditure(s) as negative figures. Select depreciation method by clicking the button on the left of each investment row. Straight line depreciation is default.Note, that you can easily change outline level using the controls: from the most detailed level 5 (showing all rows) to the level 1.II.DEFINE THE INCOME AND COSTS OF THE PROJECT IN PROFIT CALCULATION TABLEEnter the expected income and costs of the project in the next table: Profit Calculation.Profit Calculation tableYou can create additional rows by clicking the button on the left of income or cost grey rows.Invest for Excel® includes many powerful modeling features. Please refer to the User manual (pdf) about 'Processing rows of data under Profit Calculation', 'Hide/show rows' and 'Copy / Distribute –Function'. You can also use Microsoft Excel functions for making formulas, copying etc.III.DEFINE WORKING CAPITALIf you want to take into account working capital, enter the relevant values to 'Working Capital' table.Working Capital tableIV.ANALYSE REPORTS: CASH FLOW STATEMENT AND BALANCE SHEET'Cash Flow Statement' and 'Balance Sheet' reports provide accurate and versatile overview on the investment.Cash flow statementV.ANALYSE PROFITABILITY ANALYSIS REPORT'Profitability Analysis' in the result section presents a report on your calculation including the most important profitability ratios.Profitability Analysis reportVI.ANALYSE THE SENSITIVITY OF PROJECT VARIABLESIn the 'Analysis' tables you can quickly examine the sensitivity of the critical factors on the result of the project.Sensitivity Analysis tableYou have completed your basic investment calculation.5. CALCULATIONS EXAMPLE FILESYou will find some ready example calculations that you can open from:Local Disc (C:) > Program Files (x86) > DataPartner > Invest for Excel® > Calc > Examples_in_English or Start Button > DataPartner group of programs > Calculations Examples6. TRAINING & WORKSHOPSVisit Datapartner website for current training and workshops schedule.Datapartner website: www.datapartner.fi > News & Events > EventsWorkshop calendar7.DATAPARTNER SUPPORTPlease, send us your feedback, comments or questions and we will do our best to support you promptly. Datapartner OyRaatihuoneenkatu 8 A00610 PorvooFinlandTel. +358 19 54 10 100Fax: +358 19 54 10 111E-mail: **********************www.datapartner.fi。
Platts Market DataPlatts™Excel®Add-In installation guideApril 2018Applies to Version 4.0.0.0Table of contentsIntroduction (3)Prerequisites (3)Installation (4)Signing in (5)Uninstalling (6)Troubleshooting (6)Silent Installation (7)IntroductionPlatts intuitive Excel Add-In functionality gives our clients the ability to access and interpret Platts Assessment Data and eWindow Market Data with ease.This document provides users with a simple step-by-step guide to installing the Platts™ Excel® Add-In. PrerequisitesWindows Versions: Windows 7, Windows 8 and Windows 10.Microsoft Excel Versions: 2010, 2013 and 2016 (both 32 bit and 64 bit are supported).Office Runtime (VSTO) with Microsoft Visual Studio 20xx Tools installed (administrator rights and a build version higher than 10.0.50903 required). This can be checked via the Windows Control Panel.- Microsoft .Net framework 4.5.2 or greater. This can be checked via the Windows Control Panel.- An active internet broadband connection with a bandwidth of at least 5 mbps.- The user performing the installation will need Administrator privileges.31. Go to /software-user-manuals todownload the installation Zip file.Note: If you have version 3.0.6.0 or above, you can download the latest version of the Add-In using the Update Available option in the User Profile dropdown.2. Extract the Zip file “platts-excel-add-in-vX.X.X.X”3. Run the installer “Platts Excel Add-InvX.X.X.X.exe”From Platts ™ Excel ®Add-In version4.0.0.0 onwards, the installer automatically detects and installs the correct version according to the Excel bitness on your machine.4. Click ‘Install’6. After the installation is complete, you now have theoption of Launching Excel, or opening our User Guide5. After reading the Platts™ Excel ® Add-In License Agreement, accept the terms by selecting the checkbox and click ‘Install’.Installation44. Enter your registered email address and passwordand click ‘Sign in’.6. Once the initialization is complete, the below message is displayed.7. After all Connections are established, the Ribbon bar is enabled, and the Add-In is now ready for use5. The first time you Sign in, the Add-In may take a few seconds to initialize along with a message on thelower right corner of your screen.1. Open Excel.2. Select the new ribbon bar entry called ‘Platts’ in Excel.3. Click ‘Sign in’Signing in5UninstallingTroubleshootingIf a previous version of the Excel Add-In has already been installed, you can uninstall the previous version of the Platts Excel Add-In by following these simple steps:1. Open the ‘Windows Control Panel’ and select ‘Programs and Features’2. Select ‘Platts Market Data Direct’ or Platts™ Excel® Add-In and click ‘Uninstall’.3. Then click ‘Close’.IssueAction to be takenEnsure all prerequisites are installed on the machine.In case one or more of these prerequisites are missing, please download and install them from the Microsoft website.Note: Microsoft Excel 2007 is not supported with version 4.0.0.0 and above.If a version has been previously installed by a System Administrator, uninstallation of the Add-In will berequired by a System Administrator before a Standard user can proceed with the installation.Prerequisites not Installed.Unable to install due to previously installed version by a System Administrator.6Silent InstallationSilent Installation is a convenient way to streamline the installation process of the Platts Excel Add-In to a User Group. You can use the below commands to perform the silent installation on a machine.Note: These commands must be performed by a System Administrator only.Command“Platts Excel Add-In vX.X.X.X.exe” /passive PerMachine=1 SilentInstall=YES“Platts Excel Add-In vX.X.X.X.exe” /passive PerMachine=0 SilentInstall=YES“Platts Excel Add-In vX.X.X.X.exe” /passive /uninstall UsageInstalls the Add-In for all users on the MachineInstalls the Add-In for the current User only Uninstalls the Add-In from the Machine.7|******************For more information, please contact the Platts office nearest you:North AmericaNew York2 Penn Plaza, 25th FloorNew York, NY 10121-2298, USAP: +1-800-PLATTS8 (toll-free)P: +1-212-904-3070 (direct) Boston225 Franklin Street, 14th Floor Boston, MA 02110 USAP: +1 800-752-8878P: +1 617-530-8300Denver1800 Larimer Street, Suite 2000 Denver, CO 80202, USAP: +1-720-264-6600Hightstown148 Princeton-Hightstown Road Hightstown, NJ 80021, USAP: +1-800-PLATTS8 (toll-free) HoustonHeritage Plaza1111 Bagby Street, Suite 2200 Houston, TX 77002, USAP: +1-800-PLATTS8 (toll-free) Pittsburgh424 South 27th Street, Suite 306 Pittsburgh, PA 15203, USAP: +1-412-431-4370 Washington, D.C.1200 G Street NW, Suite 1000 Washington, DC 20005, USAP: +1-212-904-3070Latin AmericaBuenos AiresTte. Gral. Juan D. Perón 346, 6th Floor(C1038AAH) Buenos Aires, Argentina P: +54-11-4121-4810São PauloAv Brigadeiro Faria Lima201 21st floorSão Paulo – SP Brasil – 05626-100 BrazilP: +55-11-3818-4100Europe, Middle East andAfricaLondon20 Canada Square12th Floor, Canary WharfLondon E14 5LH, UKP: +44-20-7176-6111DubaiDIFC, The Gate PrecinctBuilding 1, Level 05P.O. Box 506650Dubai, UAEP: +971-4-372-7100MoscowBusiness CenterMokhovaya4/7 Vozdvizhenka StreetBuilding 2, 7th Floor, 125009Moscow, RussiaP: +7-495-783-4141StavangerØvre Holmegate 14006 StavangerNorwayP: +47-51-89-06-66Asia-PacificSingapore12 Marina Boulevard#23-01 Marina BayFinancial Centre Tower 3Singapore 018982P: +65-6532-2800BeijingSuite 1601, 16/F Tower DBeijing CITCA6 Jianguo Menwai AvenueChaoyang DistrictBeijing 100022, ChinaP: +86-10-6569-2929Hong KongUnit 6901, Level 69International Commerce Centre1 Austin Road WestKowloon, Hong KongP: +852-2841-1035Shanghai33/F Shanghai Plaza138 Huaihai Road (M)Shanghai 200021, ChinaP: +86-21-5110-5488TokyoMarunouchi KitaguchiBuilding, 28th Floor1-6-5 MarunouchiTokyo 100-0005, JapanP: +81-3-4550-8300MelbourneLevel 45, 120 Collins StreetMelbourneVIC 3000, AustraliaP: +61-3-9631-2000© 2018 S&P Global Platts, a division of S&P Global. All rights reserved. ACBRApril 26, 2018 10:41 AM。
WHITE PAPERPart 1 OneStream Quick View Excel Add-inGuide for Power UsersMindStream Analytics*****************************TABLE OF CONTENTSIntroduction (2)Quick View features: Part 1 (3)Task Pane (3)Navigation (5)Logon (5)Data (5)Calculation (5)Analysis (6)File Explorer (8)General (9)Administration (10)Excel Calculation (11)Conclusion (12)IntroductionThe Excel Add-in for Corporate PerformanceManagement (CPM) software (i.e., FinancialConsolidation and Reporting, Planning and Budgeting,Business Intelligence, Multi-Dimensional Analytics)has typically been the most desired functionality byAccounting and Finance users in this toolset over thelast 20 years.While the add-ins have been integrated throughout the Microsoft suite (i.e. Word, PowerPoint, Excel, Outlook, etc.), Excel has by far been the most popular and utilized component by companies for the following purposes:•Integrate with Financial Consolidation systems data to prepare Financial Reports:−Consolidated and Consolidating Income Statement, Balance Sheet−Operating and GAAP Cash Flow−Management Reporting−Debt Compliance−Trend Reporting (Actual vs. Budget / Forecast)−Gross Margin Analysis−Intercompany Reconciliation•Upload data into Financial Consolidation system:−Roll forward Activity (Cash Flow, Retained Earnings)−Statistical data (i.e. Headcount, Metrics)−Currency Rates−Historical Equity Overrides−Budget and Forecast Data•Create and Post Journal entries•Consolidate Data•Integrate with Planning / Budgeting systems data:−Update business drivers−Account spreading−Flash Reporting−Version control−Build monthly/quarterly forecastsThe add-in offers two distinct features – Formula based cell references and dynamic ad-hoc retrieve/submit, pivot, and drill-down capabilities. Quick View has been prominent as the OneStream XF solution has matured over much of the last decade. This multi-part review will expand on OneStream Quick View, prominent features of the add-in, and newer features.Let’s Take a Quick Tour of Quick View …Quick Views offers a rapid way to analyze data. The user can pivot and drill back through an intuitive interface. Quick Views allow users to create their own data set, and using the variety of options available, they can design their workbook to fit their needs. A user can even create a Quick View from another Quick View. Once the data set has been narrowed down, a Quick View can be saved for future reference.Task PaneThe Task Pane is the area on the right of the screen. There are three tabs from which to choose.Create Quick View This will activate a Quick View pop-up window. Choose a default name or create a unique name. The Refers To section is where the Quick View will be created in the Excel sheet. The two checkboxes below will move the existing data either by row or column, so when the new Quick View is created, it does not overwrite the existing fields.This option allows the ability to select a saved Quick View. It will then highlight the Quick View selected.Column Dimensions This is where the Dimensions wanted for the column view are defined. Drag and drop items from the Quick View POV or Row Dimensions into this square.Point of ViewThis lists the Global, Workflow , and Cube Point of View . When a cell is selected from a Cube View, the Dimensions in bold can be changed and will have an impact on the data that is retrieved.DocumentsThis is a view into the XF File Explorer. It shows all the Excel documents this user has access to launch. These can be from the Application or System Databases and from either Public or User-based folders.Quick View POV This contains all of the OneStream Dimensions available. By default, Time and Account are used when creating the Quick View but can be moved and replaced with other Dimensions.Click the ellipsis next to a Dimension in the Quick View POV to select a specific Dimension Member. This is only accessible in the Quick View POV section, not in the Column or Row Dimensions.Click this to launch the Member Filter Builder and query several Dimension Members at once. Click Apply in the Member Filter Builder to see the results prior to closing the Builder dialog.Undo Changes and Revert to Prior Quick View Settings . Clicking on this icon will undo any changes not wanted. OneStream will remember up to 100 previous actionsRedo Quick View Settings This will redo deleted changes.Row Dimensions This is where the Dimensions wanted in the row view are defined. Drag and drop items from the Quick View POV or Column Dimensions into this square.Delete Selected Quick View Select a Quick View and choose this icon to delete it.Edit Quick View OptionsThe following properties appear once the icon is selected.Insert or Delete Rows/Columns When Resizing Cube View This will move existing data either by row or column, so when the new Quick View is created, it does not overwrite the existing fields. Settings are True or False .Maximum Number of Rows/Columns Data Set Returned for Quick View Based on the data set return, a spreadsheet can potentially go beyond what thedefault settings are in Quick View Options. If there is more data than expected, modify the settings to increase the volume of data the Excel add-in will return. If exceeded, it will display: Maximum Columns Exceeded or Maximum Rows Exceeded.Row Header/Columns Header Text Types This will label the Quick View columns and rows with the chosen option.Suppress Repeating Member NamesIf set to True , this will only display repeating Members once, if set to False , it will display the same Member multiple times. For example, if this was set to False and the None Member was being used, it would display in each row.• Name This will use the name given tothe Column or Row Dimension.• Description This will use the description given to the Column or Row Dimension.• Name and Description This will use the name and description given to the Column or Row Dimension.• Short Description This will use theshort description given to theColumn or Row Dimension.- Excel Styles Primary, Upper Left, Row Header, Column Header Styles. See Style Types- Data Style This is where the data style is set for the values in a Quick View. Choose any of the default Excel versions, or create a custom version through Excel and attach it here.- Suppress Invalid Rows/Columns This will suppress any cells with invalid data. Settings are True or False.- Suppress NoData Rows/Columns This will suppress any cells without data. Settings are True or False.- Suppress Zero Rows/Columns This will suppress any cells with zeroes. Settings are True or False.- Use Suppression Settings on Parent Rows/ParentColumns If set to True, the previous suppression settings will be used on Parent Rows and Columns.- Zero Suppression Threshold Enter a value to suppress all numbers below it and recognize them as Zeroes for rounding purposes. (e.g., entering 499.99 will result in every number lower than that value to be recognized as zero and therefore suppressed.)Refresh Quick View This icon will refresh the data set.All Tops This icon will go back to the Tops of the Dimensions. Keep Only This icon will clear everything except the selected items.Note: Update Members in a Quick View header by typing over the Member name, selecting all desired Members in the row or column, and clicking Keep Only. The headers and data will refresh with the updated Members. This is not meant to be a valid method to create a new Quick View but is used toconveniently modify its contents. Tip: Use the control key to keep more than one item.Next Level This icon has the same function as double-clicking on a row. It will go down to the next level.Parents This icon will go to the Parent of the Children selected.Navigation Quick ViewThe full ribbon for OneStream XF is shown below: The ribbon is organized as follows:Logon - This displays the current user and application. A user can logon to a different application by clicking this icon.DataRefresh Workbook This pulls down updated data from the server and refreshes the entire Excel workbook. Refresh Work(sheet) This pulls down updated data from the server and only refreshes the selected worksheet.Submit Workbook After editing data in Excel, click this icon to send it back to OneStream. This icon will send data back for every tab in the Excel workbook.Submit Sheet After editing data using the XFSetCell Retrieve Function (will be explained in the upcoming update), click this to send the data back to OneStream. This icon will only send data back for the selected tab. This only applies when using XFSetCell. All Cube Views in the Excel workbook submit data every time the button is pushed regardless of what tab is selected.CalculationConsolidate/Translate/Calculate If permission is granted, thesecalculations can be performed on the selected cell.AnalysisQuick Views•Create a Quick View This will create a new Quick View in the worksheet’s selected cell.•Create Copy of Selected Quick View This will copy the selected Quick View and paste a version of it in another spreadsheet.Create Quick View Using POV from Selected Cell This will create a new Quick View based on the current POV from the selected cell. This can be done using a Quick View cell’s POV or a Cube View cell’s POV.Cube ViewsIt is simple to add a Cube View to an Excel sheet. After logging into an XF application from within MS Excel,click on Cube Views (from the One Stream XF Ribbon) to view the Cube View Connections dialog. From this window, the Cube Views added to an Excel workbook can be managed. A user can add, remove, edit the name,or get to Excel Styles.Choose the Cube View wanted for the Excel workbookSelect whether there needs to be inserted or deleted rows and/or columns when resizing.Note: This setting will move around other content in the sheets if the size of the Cube View changed since the last refresh.After the Cube View is added, it will appear on the sheet. If Formatting was applied to the Cube View, the formatting will come forward into the Excel sheet. Otherwise, apply Excel Styles. These styles are stored in the Excel sheet and can be copied from workbook to workbook.File ExplorerUse this option to upload and download files to XF. This test template can be uploaded to the Application database for accessing when in the Application.Create Folder This creates a new folder under the selected folder on the left-hand side of the File Explorer pane.Delete Selected Folder/File This deletes the selected folder on the left-hand side of the File Explorer pane or theselected file.Edit Selected Folder/Edit Selected File Information This edits the Description, Maintenance Group, and Access Groupfor the selected folder or file.Download / Upload File This downloads a file to your local machine or uploads the selected file and allows theuser to save.Download Selected File’s Content File This downloads the selected file’s content file and allows the user to save.Data Attachments This pulls up the Data Attachments dialog to show existing comments or attachments on a selected cell, or to allow data attachment edits.Cell Detail When loading Cell Detail via Excel, a specific template must be created to determine the Cell Detail Dimension Tokens and each Cell Detail line data.Drill Down Drill down on a specific cell to see more details or gather more information.Return to the worksheet and use the Drill Down menuitem. Double left mouse clicking on Green highlighted cellor right mouse click for further menu options.GeneralCopy POV from Data Cell This captures the Point of View of the currently selected cell. After clicking this option, the Paste POV As XFGetCell (to be explained in an upcoming update) becomes available and the Copy POV From Data Cell goes to grey (disabled). The ability to paste this into another cell is now available and OneStream will automatically convert this into an XFGetCell formula with all of the appropriate Parameters.Paste POV As XFGetCell This option is only available after clicking Copy POV From Data Cell. After clicking this option, OneStream will convert the copied cell into an XFGetCell formula. Select the Report worksheet to show the end-users how a report can be created with Excel formatting. Click Refresh XF Data to retrieve the data.Convert to XFGetCells This will convert an existing Quick View into an XFGetCells. After clicking this option, OneStream will prompt with the following: Are you sure you want to convert all of the data in Quick View‘Name of the Quick View’ to XFGetCells? By clicking OK, the Quick View definition will be deleted and converted to XFGetCells.Object Lookup Use the Object Lookup to insert objects from OneStream into Excel such as Foreign Exchange Rate Types when building formulas. If creating an Extensible Document in Excel, users can also use the Object Lookup to insert Parameters, Substitution Variables, or Image Content.Select Member Select a Dimension Type from the drop-down list to view the Members of that Dimension. Select a Member of the hierarch, and the Member name will display in the selected cell.Save Offline Copy Use this to save an offline copy of the current worksheet without the XF functions. Users without the Excel Add-In can open this copy and see the saved values.SpreadingThis allows users to enter data into an aggregate Member, likean annual time period, and spread values over several columnsor rows without having to type in each cell’s values.Spreading Type•No Spreading Spreading will not apply to the selected cells.•Distribute Evenly This distributes the active cell amount evenly across all selected cells.•Distribute 445 This distributes the active cell amount using a weighted 445 pattern across all selected cells.•Distribute 454 This distributes the active cell amount using a weighted 454 pattern across all selected cells.•Distribute 544 This distributes the active cell amount using a weighted 544 pattern across all selected cells.•Factor Multiply all cells by the specified rate.•Accumulate This starts with the active cell amount and cumulatively multiplies it by the specified rate.•Rate Enter the spreading rate to be used with the Factor Spreading Type.•Apply Spreading Select this to apply the spreading to the selected cells.AdministrationDisplay Context PaneIn order to display the OneStream task pane onthe right-hand side of the screen, check thisbox. To hide the task pane, uncheck the box.PreferencesGeneralEnable Macros for XF Event Processing If set to True,this enables Excel macros for OneStream XF api calls.The default is False.Invalidate Old Data When Workbook is OpenedIf set to True, this will force a data refresh on theopened workbook. The default is False.Quick View Double-Click BehaviorDefault Expansion for Rows/ColumnsThis determines what level of expansion displayswhen a user double-clicks a Quick View Row orColumn Header. NextLevel is the default settingand allows multiple expansion paths when a userdouble clicks a row or column header. There isalso the ability to double-click an expanded itemto collapse it again. This feature only works withthe NextLevel setting. For the following properties,See Quick View in Chapter 21: Getting Started theExcel-Add InExcel CalculationThe Excel Calculation icon has the option of Automatic, Automatic Except for Data Tables, and Manual. It is recommended that the Calculation be set to Manual when using OneStream spreadsheets because the Automatic setting results in an Excel re-calculation every time an OneStream’s interactive workbook changes data (e.g., when navigating a Quick View.) However, this is not forced because a user might prefer Excel’s Automatic calculation, especially when there is not a significant amount of OneStream data in the workbook.ConclusionStay tuned for Part 2 where we will review the core features of the OneStream Add-in Quick View, including setup of grids, Point-of-View selection, pivoting, and access to cube views. In Part 3, we will explore Add-In formulas, new features, and key comparisons between OneStream Quick View vs. Oracle’s offering.MindStream Analytics, a OneStream Platinum Partner and leading corporate performance management advisory firm, focuses on helping clients improve business understanding and decision making. Leveraging years of experience and expertise in analytics and financial management, our company assists with software selection, implementation, training, hosting, and application managed services designed to fit our client’s specific business needs.For more information about MindStream Analytics and OneStream Software, please visit our website at or call us at 1-800-497-0151.。