Eclipse安装python插件
- 格式:doc
- 大小:365.50 KB
- 文档页数:9

eclipse的插件安装方法Eclipse的插件机制是轻型软件组件化架构。
在客户机平台上,Eclipse使用插件来提供所有的附加功能,例如支持Jav a以外的其他语言。
已有的分离的插件已经能够支持C/C++(CDT)、Perl、Ruby,Python、telnet和数据库开发。
插件架构能够支持将任意的扩展加入到现有环境中,例如配置管理,而决不仅仅限于支持各种编程语言。
Eclipse的设计思想是:一切皆插件。
Eclipse核心很小,其它所有功能都以插件的形式附加于Ecl ipse核心之上。
Eclipse基本内核包括:图形API (SWT/Jface),Java开发环境插件(JDT ),插件开发环境(PDE)等。
Eclipse插件的安装方法大体有以下几种方式:第一种:直接复制法假设Eclip se的安装目录在C:\eclipse,解压下载的ec lipse插件或者安装e clipse插件到指定目录AA(如:c:\AA)文件夹,打开AA 文件夹,在AA文件夹里分别包含两个文件夹fea tures和plugin s ,然后把两个文件夹里的文件分别复制到C:\eclipse下所对应的文件夹下的fe atures和plugin s 下,一般的把插件文件直接复制到eclips e目录里是最直接也是最愚蠢的一种方法!因为日后想要删除这些插件会非常的困难,不推荐使用。
注意:直接将插件包解压到plug ins文件夹下之后,重启eclip se,可能不会加载新的插件。
解决方法是:1、打开命令行,到当前ecli pse的目录下,输入eclip se -clean,重新启动ecl ipse,这样eclip se 就会加上新的插件了。
2、如果插件不能生效,则请将ecli pse\configu ration\org.eclipse.update目录删除后再启动eclip se;你可以在ecl ipse的菜单"Help"-->"About Eclipse SDK"-->"Feature Details" 和"Plug-in Details"中看到新安装的插件。

Installing with the update siteNote: Instructions are targeted at Eclipse 3.5 and 3.6To install PyDev and PyDev Extensions using the Eclipse Update Manager, you need to use the Help > Install New Software... menu (note that in older versions, this would be the 'Find and Install' menu).In the next screen, add the update site(s) you want to work with (See below for a list with the available update sites).Available update sites∙/updatesMain:∙/nightlyNightly builds:After entering the update sites, select the update site you entered or select "All available sites" and add a filter for PyDev, so that it shows the contents of all the upda te sites that havePyDev, then select what you want to install and click 'Next'.Then, UNCHECK the 'Contact all update sites during install to find required software' and press 'Next' again to confirm your selection.And finally, read the license agreement and if you accept, select the accept radio button and click 'Finish'.At that point, Eclipse should automa tically download the plugin contents and present you toa dialog asking if you want to restart (to which you should say yes).Possible issue on downloadIf you have any problem at this point with a message such as:An error occurred while collecting items to be installedNo repository found containing:org.python.pydev/osgi.bundle/1.4.7.2843No repository found containing:org.python.pydev.ast/osgi.bundle/1.4.7.2843that might indicate that the mirror you selected is having some network problem at that time, so, please follow the same steps with another mirror.Installing with the zip fileThe available locations for the zip files are:SourceForge downloadAfter downloading the zip file:Eclipse 3.4 and 3.5Extract the contents of the zip file in the eclipse/dropins folder and restart Eclipse.Before Eclipse 3.4Extract the contents of the zip file on top of Eclipse, making sure the plugins folder is extracted on top of the eclipse/plugins folder and the features is on top of theeclipse/features folder. After that, restart Eclipse with the '-clean' flag, so tha t Eclipse finds out about it.Checking the installationYou can verify if it is correctly installed going to the menu 'window > preferences' and checking if there is a PyDev item under that.UninstallingFollow the instructons below if a t any time you wish to stop using the PyDev plugin (or any other Eclipse plugin):Eclipse 3.5If you installed with the update site, go to the menu help > about > installation details then on the Installed Software tab, select the plugins you want to uninstall and click Uninstall.If you installed with the zip file, just remove the com.python.pydev and org.python.pydev features and plugins from the dropins folder.Before Eclipse 3.4Go to the menu help > software updates > manage configuration, select the plugin and click 'disable', then, you have to restart Eclipse, go to the same place again and then click on 'remove' (note that you have a button in the menu that enables you to see the 'disabled' features).Common Install ProblemsWindows Vista/7 UAC (User Access Control)Eclipse 3.3 had issues with the Windows UAC, so, Eclipse must be run as Administrator to install a plugin on Eclipse 3.3.Corrupted installEclipse sometimes is not able to correctly get the plugin, from the updatesite but will do no checking on whe ther it is really correct (no md5 checking),and when this happens, you'll usually get a ClassNotFoundException (similarto the example below).When tha t happens, you should uninstall it and reinstall again with theupdate site... if that still fails, you could try to get the zip files, as it will atleast give you a warning when it is corrupt.Note that the chance of the files being corrupt in the server is pretty low, asthat's something that's always checked in a new release -- but if you'resuspicious about it, please ask in the forum, so that it can bedouble-checked.Also, there have been reports with tha t error where the only solution thathas been consistent has been removing all previous versions of pydev andthen installing the latest version.EXAMPLEUnable to create this part due to an internal error. Reason for the failure:The editor class could not be instantia ted. This usually indicates that theeditor's class name was mistyped in plugin.xml.ng.ClassNotFoundException: org.python.pydev.editor.PyEdit atorg.eclipse.osgi.framework.internal.core.BundleLoader.findClass(BundleLoader.java:405) atorg.eclipse.osgi.framework.internal.core.BundleLoader.findClass(BundleLoader.java:350) atorg.eclipse.osgi.framework.adaptor.core.AbstractClassLoader.loadClass(AbstractClassLoader.java:78) atng.ClassLoader.loadClass(ClassLoader.java:235) atorg.eclipse.osgi.framework.internal.core.BundleLoader.loadClass(BundleLoader.java:275) ...。
myeclipse安装python插件pydev说明应用该功能后,import sys 被成功移至全局范围内,消除了之前的错误。
改变后的代码如下。
Create docstring 功能可以自动为函数添加参数注解。
将光标移至如下代码行,启动快捷键Ctrl+1 激活 CA,标签栏中出现”Make docstring”。
按 Enter 应用该功能后,自动为该函数添加了参数注解。
Assign result to new local variable (or field)CA 还提供一种功能能够将函数返回结果赋给新的内部变量。
以函数 callMethod 为例,将光标移至 a.callMethod() 行激活 CA。
选择”Assign to field(self, callMethod)” 或者”Assign tolocal(callMethod)”,可以将a.callMethod() 结果赋给新的内部变量self.callMethod,改变后的代码如下。
在程序编辑过程中,如果需要把函数参数赋给变量,可以使用 CA 的 Assign parameters to attributes 功能自动完成这样的需求。
将光标移至函数 m1 所在行,激活 CA。
在标签栏中选择”Assign parameters to attributes”,自动生成两行代码将参数 a,b 赋给同名变量。
Surround code with try..except or try..finally对可能产生异常的代码,要进行异常捕获,通常使用 try..except 或者try..finally 语句来捕获异常。
选中一段代码 print usage,激活 CA 的” Surround code with try..except or try..finally”功能,可以自动对 print usage 进行异常捕获。
下面,再介绍 PyDev Extensions 包含的 CA 功能是如何被运用的。
Eclipse+jdk+python安装配置文档
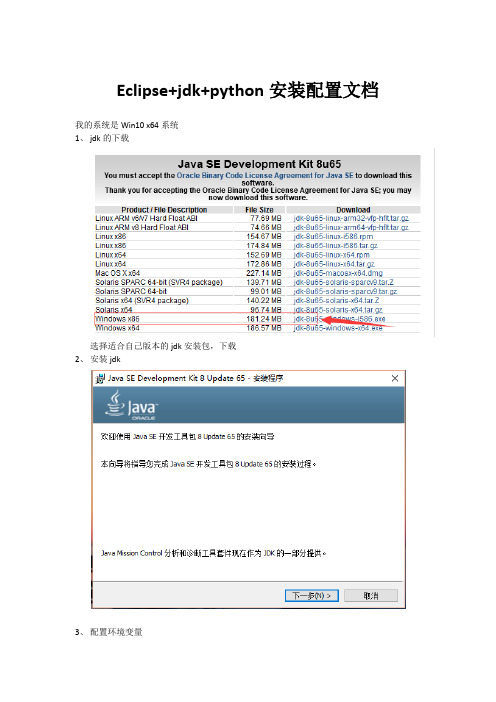
我的系统是Win10 x64系统
1、jdk的下载
选择适合自己版本的jdk安装包,下载
2、安装jdk
3、配置环境变量
配置好之后可以打开命令框输入java –version验证jdk是否安装成功
4、下载eclipse
注意eclipse与jdk的版本要相互匹配。
如同为32位或者同为64位,都则启动eclipse会报错。
5、打开eclipse,安装pyDev插件
安装python过程中可能会报错
An error occurred while collecting items to be installed session context was……
别担心,可能是由于网络不好的原因,多试几次
5、安装好直接创建会报如下错误,原因是未将电脑上的python包导入到eclipse中。
6、在Preference中导入python设置
输入名称和路径即可加载python。
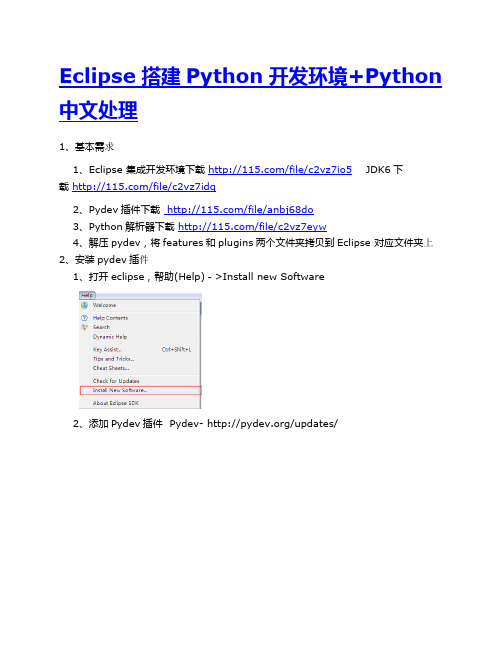
Eclipse搭建Python开发环境+Python 中文处理1、基本需求1、Eclipse 集成开发环境下载/file/c2vz7io5 JDK6下载/file/c2vz7idq2、Pydev插件下载 /file/anbj68do3、Python解析器下载/file/c2vz7eyw4、解压pydev,将features和plugins两个文件夹拷贝到Eclipse 对应文件夹上2、安装pydev插件1、打开eclipse,帮助(Help)->Install new Software2、添加Pydev插件 Pydev- /updates/选中PyDev,next,同意协议后Finish3、 Finish后,eclipse 将下载pydev,等待滚动条完毕后单击Install All开始安装,安装完成重启eclipse生效3、pydev的配置1、打开eclipse,Window - >preferences -> Pydev - > Interpreter - Python 添加python解析器路径正确配置完后将看到python解析器包含的类库4、处理Python中文问题首先要确保eclipse编辑器环境的编码为utf8,这个是大前提;其次如果py文件中含有中文字符的话,需要在py文件中对编码进行声明。
1. 修改eclipse编辑器编码a)设置工作空间编码:窗口->首选项->工作空间->UTF-8b) 设置编辑器编码:窗口->首选项->编辑器->文本编辑器->拼写->UTF-8c) 设置配置编码:打开eclipse安装目录->eclipse.ini,末行加上 -Dfile.encoding=UTF-8d) 修改python文件编码:在py文件首行加上#coding=utf-8,一定要在首行才可以。

eclipse插件安装方法eclipse平台+插件的方式使eclipse很容易扩充,eclipse插件安装的方式有两种:1.一种是内置方式安装,即下载插件后解压缩,然后把解压后插件的plugins和features 目录里面的内容分别复制到eclipse安装目录的plugins和feature目录里面,这种方法安装比较简单,但是问题也比较多,因为所有的插件的文件都混合到了plugins和feature目录里面,eclipse会变得比较臃肿,而且如果你不想再使用某个插件,卸载会是一件非常麻烦的事情。
2.第二种方式就是使用外挂的方法,下面通过eclipse3.2汉化包的安装来说明一下:1)建立一个D:\eclipse3.2.2\myPlugins目录,这个目录是我们准备存放所有eclipse插件的地方3)然后建立一个D:\eclipse.2.2\myPlugins\NLPack1-eclipse-SDK-3.2目录,这个目录是我们存放汉化包的地方4)然后解压eclipse汉化包,NLPack1-eclipse-SDK-3.2.zip,在D:\eclipse3.2.2\myPlugins\NLPack1-eclipse-SDK-3.2目录里面解压缩,解压缩后的内容会在一个名为eclipse目录中5)建立一个D:\eclipse3.2.2\links目录,新建一个文件language.link(文件名可随意),文件的内容只有一行,如下:path=D:\\eclipse3.2.2\\myPlugins\\NLPack1-eclipse-SDK-3.26)启动eclipse,汉化成功tip:其他的插件也可以用这样的方式安装,目录和文件的名字建议保留插件的版本号,这样便于今后对插件进行升级和管理.4.配置SWT Designer6.2.0SWT Designer6.0 下载后是一个文件名为“Designer_v6.0.0_for_Eclipse3.2.zip”的压缩包。
【Eclipse使用方法】Eclipse中安装插件的三种方式Eclipse也用了很久,但是都没有怎么去研究过怎么安装插件,今天正好在自己新买的本上试了一下。
现在将心得写下,以供参考。
目前安装Eclipse插件主要有以下三种方式:在线安装:以TestNG的安装为例来阐述其安装过程。
第一步:点击菜单栏中“Help”菜单,在下拉列中选择“Install New Software...”.此时会弹出“install”的安装框。
第二步:在弹出的“install”框,选择之前已经建立好的site,如果没有建立好,则可以点击“Add”按钮,弹出一个添加site的对话框,在该框中的Name属性后面给该site起一个别名,在location属性后面输入该插件所在的网络位置(该位置一般都会在插件的官方网站上给一个地址,直接copy过来就行。
)。
第三步:点击OK。
系统会自动地将testNG给load出来。
然后选中,点击“next”。
逐步完成即可。
离线侵入式安装:也就是将插件下载下来,解压缩后,会看见features和plugins 两个文件夹,将这两个文件夹中的所有内容相应地拷贝到eclipse的features和plugins文件夹下面,重启eclipse即可。
如果没有这个两个文件夹,那说明所给的插件本身属于plugin,所以只需要将该插件解压缩后放在plugins下面即可。
此处以WTP为例:解压缩后会有features和plugins两个文件夹。
那么直接将这两个文件夹中的内容分别copy到eclipse安装目录下面的features和plugins里面。
然后重启eclipse即可。
以TestNG为例,只需将下载下来的插件jar包Copy到plugins 下面即可。
注:这种方式不太好,因为当你要去卸载或者更新某个插件的时候,去features和plugins里面找某个插件会非常的麻烦。
离线链式安装:在eclipse的安装目录下面,建立一个links的文件夹,在该文件夹下面创建一个以插件名命名的link文件,在该文件中输入以下键值对:path=“插件所在的绝对路径或插件所在的相对路径”。
eclipse 安装php插件和 EclipseHTMLEditor HTML 编辑器插件
打开eclipse 在工具栏中点击安装软件
添加链接
phpEclipse
/update/stable/1.2.x/
然后就下一步下一步了
详细的信息请看官网 /
------------------------------------------------------------
HTML 插件请到这里下载
http://amateras.sourceforge.jp/cgi-bin/fswiki_en/wiki.cgi?page=Eclips eHTMLEditor
网站里面有说明怎么操作的,我下面简单的说下
找到这个
Download & Installation
Download from here. Put the downloaded JAR file into ECLIPSE_HOME/plugins or ECLIPSE_HOME/dropins.
意思就是,点击链接下载,把下载下来到 jar文件放到你eclipse安装目录下plugins 文件夹下或者放到 dropins文件夹下,
我个人建议还是放到 plugins 文件夹下
其实 php 插件也可以直接下载,下载后放到 plugins 文件夹下效果一样的,根据个人爱好来吧。
Python安装、配置图文详解博客分类:PythonPython 安装、配置图文详解目录:一. Python简介二. 安装python1. 在windows下安装2. 在Linux下安装三. 在windows下配置python集成开发环境(IDE)1. 在Eclipse中安装PyDev插件2. 配置Python Interpreters四. 创建Python Project五. 编写HelloWorld六. 小结一. Python简介:Python在Linux、windows、Mac os等操作系统下都有相应的版本,不管在什么操作系统下,它都能够正常工作。
除非使用平台相关功能,或特定平台的程序库,否则可以跨平台使用。
1. python的实现版本也很多,有以下几种:CPython:采用C语言编写。
Jython:Python语言的java实现版本,将代码编译成java字节码。
IronPython:将Python引入了.NET环境。
PyPy:Python解释程序本身就是用Python编写的。
2. Python的特色:简单易学免费开源高层语言可移植性解释性面向对象可扩展性可嵌入性丰富的库二. 安装python1. 在windows下安装Windows之所以使用的这么普遍,是因为在windows下所有的操作都变的非常简单,安装软件只要点点“下一步”就可以了。
Python也不例外,可以到网上下个Windows版的python(网上到处都是)我使用的是python-2.7.2,下好后直接安装就ok了。
最后记得配置一下环境变量,具体操作如下:1)在系统变量中找到path,见(图1)2)编辑path值,添加你安装的python路径,见(图2)3)检验python是否安装配置成功,打开cmd,输入python,如果出现以下界面,则说明你的python安装成功了,见(图3)2. 在Linux下安装1)下载源码:/ftp/python/2.7.3/Python-2.7.3.tar.bz22)安装,一般来说不会出现太大的问题吧,可能有权限的问题,只要在命令前添加sudo就可以解决了。
Eclipse下python插件(PyDev)的配置1、所需软件及插件安装顺序先安装好eclipse,然后安装python-2.76,然后是pynaoqi-python-2.7-naoqi-1.14.5,然后给eclipse配置Pydev插件。
2, eclipse插件的安装方法大体有以下三种:第一种:直接复制法:假设你的Eclipse的在(C:\eclipse), 解压你下载的eclipse 插件或者安装eclipse 插件到指定目录AA(c:\AA)文件夹,打开AA 文件夹,在AA文件夹里分别包含两个文件夹features和plugins ,然后把两个文件夹里的文件分别复制到eclipse 下所对应的文件夹下的features 和plugins 下,一般的把插件文件直接复制到eclipse目录里是最直接也是最愚蠢的一种方法!因为日后想要删除这些插件会非常的困难!强列的不推荐使用!!注意:直接将插件包解压到plugins文件夹下之后,重启eclipse,可能不会加载新的插件。
解决方法是:1、打开命令行,到当前eclipse的目录下,输入eclipse -clean,重新启动eclipse,这样eclipse就会加上新的插件了。
2、如果插件不能升效,则请将eclipse\configuration\org.eclipse.update目录删除后再启动eclipse:)你可以在eclipse的菜单"Help"-->"About Eclipse SDK"-->"Feature Details" 和"Plug-in Details"中看到新安装的插件。
第二种(我使用的是此种方式):下载下来的插件可能有这几种形式:一是单独的jar文件,二是plugins和features两个文件夹,三是一个单独的eclipse文件夹。