东集Q7S说明书
- 格式:docx
- 大小:14.62 KB
- 文档页数:3

MDYA-200型液压棉花打包机说明书山东欣弘发机械有限公司地址:山东省临清市东外环路欣弘发工业园电话:0635-2421949传真:0635-2429459Email: lqqzg171819@网址:前言感谢您使用本公司MDYA-200型液压打包机,很荣幸能为您的棉花加工提供服务。
本说明书能帮您尽快的熟悉MDYA-200型液压打包机各项功能,了解液压打包机工作原理、安装调试和故障诊断等各方面的知识。
在安装使用打包机之前,请务必仔细阅读本说明书,这会有助于您更好的使用打包机,同时也请您把本手册在一个可靠的地方,以备随时查阅。
本说明书的编排力求全面、简介、正确、可靠,但难免会存在我们未意识到的疏忽,如果您在使用说明书中发现有错误或任何不明确的问题,请与我们联系。
我们将非常感谢。
我们是专业生产打包机的企业,为了提高打包机的性能,我们会随时对打包机的各个方面进行改进和完善,所以有可能造成说明书内容与打包机的实际配置有所出入,请您以实际配置为准;如有改动,恕不另行通知。
我们对可能给您造成的不便表示歉意。
为了了解你的实际使用情况,请在使用本机一个轧花季节后,请提出您的宝贵建议(见本说明书后附《用户意见反馈单》)。
我们将参考您的宝贵意见,做出改进和完善,以使我们能为您提供更好的产品。
再次感谢您使用MDAY-200型打包机寄函:山东欣弘发机械有限公司技术部地址:山东省临清市东外环路(路东)邮编:252600电话:0635-241949Email: lqqzg171819@山东欣弘发机械有限公司一、概述1. 名称:液压棉花打包机2. 型号:MDYA-200型3. 特点:该机是我公司与国际接轨使我国的棉机成套设备走向国际市场,满足配套要求研制的新产品。
它具有结构新颖、刚性和稳定性好、自动化程度高、造型美观、安全可靠、操作简单、维修方便、设备基础工程费用低等特点。
本机从设计开始就始终瞄准国际先进设计水平,广泛采用新技术、新工艺、新材料、是我公司研制的集机、电、液于一体的适应市场需求的新产品。
欢迎您使用苏州镭射光电科技有限公司生产的AQS系列声光Q开关驱动器!为确保驱动器能够安全、正常、高效地为您工作,在使用Q系列Q开关驱动器之前,请您务必仔细阅读本手册。
本手册适用于Q系列标准产品。
对于用户有特殊要求的特制产品,请仔细阅读手册中另附的特别说明。
请您打开包装箱,核对随机附件。
使用手册一份电源线一根15芯计算机针式插头一只射频线一根目录1. 简介 (2)2. 安装及操作说明 (3)3. 控制面板及对外接口 (6)3.1.控制面板 (6)3.1.1.数码窗 (6)3.1.2.RUN/STOP(运行)指示灯 (6)3.1.3.ALARM(报警)指示灯 (6)3.1.4.M1、M2、M3指示灯 (6)3.1.5.按键说明 (6)3.2.对外接口 (7)3.2.1.外控接口的定义及应用 (8)3.2.2.与上位机的通信 (11)4. 结构及工作原理 (12)4.1.Q开关元件的工作原理 (12)4.2.控制方式 (12)4.2.1.M1控制方式 (12)4.2.2.M2控制方式 (14)4.2.3.M3控制方式 (14)4.2.4.M4控制方式 (15)4.2.5.M5控制方式 (15)4.3.调制脉冲及出光控制有效电平的设置 (16)4.4.保护逻辑 (16)5. 异常现象释疑 (17)联系方法 (18)1. 简介1.1. 概述Q系列声光Q开关驱动器是本公司精心设计的高品质的声光Q开关(Acousto-Otipc Q-switch)驱动电源,内部由多个单片机进行控制。
它能接受外部的控制信号,产生带调制的射频信号输出到Q开关元件,从而对固体YAG激光进行开、关控制和波形调制。
凭借着独特的控制方式和调制技术,Q系列声光Q开关驱动器高频功率稳定,工作可靠性高,关断激光功率大。
驱动器包括AQS2750A、AQS2775A;AQS2750B、AQS2775B;AQS2750C、AQS2775C;AQS2750D、AQS2775D等型号,其中1)B系列较A系列更加小巧便捷,去掉了按键显示功能,通过EPP并口线与计算机连接,有计算机直接控制驱动器参数。
使用说明冷冻柜202307197088041 - 01SGN(ef) 3036内容1设备一览.................................................................21.1设备和装备一览.............................................................21.2设备的使用范围.............................................................21.3一致性.............................................................................31.4配置尺寸.........................................................................31.5节能.................................................................................32一般安全提示..........................................................33操作和显示元件.......................................................43.1操作和控制元件.............................................................43.2温度显示器.....................................................................44投入使用.................................................................44.1运输设备.........................................................................44.2安装设备.........................................................................54.3门止挡更换.....................................................................54.4插入橱柜.........................................................................74.5处理包装.........................................................................74.6连接设备.........................................................................74.7接通设备电源.................................................................75操作........................................................................75.1温度显示器的亮度.........................................................75.2儿童锁.............................................................................85.3门开警报.........................................................................85.4温度警报.........................................................................85.5冷冻食品.........................................................................85.6食品解冻.........................................................................85.7温度设置.........................................................................85.8速冻 (SuperFrost).........................................................85.9抽屉.................................................................................95.10存放架.............................................................................95.11变间距.............................................................................95.12香草和浆果盒.................................................................96维护........................................................................96.1用 NoFrost 除冰.............................................................96.2清洁设备.........................................................................96.3客户服务.........................................................................107故障........................................................................108停止使用.................................................................118.1关闭设备.........................................................................118.2停机.................................................................................119废弃处理.................................................................119.1设备废弃处理准备.........................................................119.2以环保方式对设备进行废弃处理. (1110)产品中有害物质的名称及含量.................................12制造商不断致力于所有型号和品牌的进一步开发。

Quick Start GuideCLASS 110 PORTABLESAQ 110, CO 110, CT 110, HD 110, LV 110-111-117, LV 130,MP 110-111-115-112, MP 120, MP 130, VT 110-115Switch on the instrument by pressing briefly onthe instrument displays its name then a 5 s (CO110) or 10 s (AQ 110) countdown. This count corresponds to the preheating time of the sensor. At the end of the countdown, the measured value of CO 9. Batteries replacementThe instrument is OFF.Remove the front part at the back of the instrument.Replace used batteries by new batteries AAA LR03 1.5 V.Replace the front.To ensure safety, replace batteries with the same type.Not doing so might lead to explosion. Dispose of used batteries according to instructions.8. Activate or deactivate the keys beepThe device is on and displays the measurements.Press "Select" until "BEEP" blinks on the screen and follow the instructions above:Bottom of the hotwire probe Bottom of the hotwire probeBas de la sonde fil chaud 9. Remplacer les pilesL'appareil est éteint.Ouvrir la trappe à piles située à l'arrière de l'appareil.Remplacer les piles usagées par des piles AAA LR03 1,5 V.Replacer la trappe à piles.Il y a risque d'explosion si les piles sont remplacées par des piles de type incorrect.Mettre au rebut les piles usagées conformément aux instructions.TOUCHEAllumer l'appareil en appuyant sur la touche “On/Off/Hold”L'appareil affiche son nom puis la valeur mesurée.l'appareil affiche son nom puis un décompte de 5 s (CO110) ou 10 s (AQ 110). Ce décompte correspond au temps de préchauffage du capteur. A la fin du décompte, la valeur mesurée du CO et du CO 8. Activer ou désactiver le bip des touchesL'appareil est allumé et affiche les mesures.Appuyer sur "Select" jusqu'à ce que "BEEP" clignote à l'écran et suivre les instructions suivantes :Bas de la sonde fil chaud télescopique9. Cambio de pilas El instrumento está apagado.Extraiga la tapa ubicada en la parte posterior del instrumento.Saque las pilas usadas y replácelas por unas nuevas, respetando la polaridad. El tipo de pila debe ser AAA LR03 1,5 V. Recoloque la tapa.Existe un riesgo de explosión si se sustituyen las pilas por otras de tipo incorrecto.Deseche las pilas usadas de acuerdo con las instrucciones.TECLA PUNTO ROJO: en labase de la sonda Encienda el instrumento pulsando brevemente “El instrumento mostrará su nombre y se mostrará el valor medido.el instrumento mostrará su nombre y, posteriormente, se iniciará una cuenta atrás de 5 s (CO110) o 10 s (AQ 110). correspondiente al calentamiento del sensor. Una vez finalizada, se mostrará el valor8. Activación o desactivación del sonido del teclado Con el instrumento encendido y mostrando los valores medidos.Pulse la tecla "Select" hasta que el mensaje "BEEP" parpadee en la pantalla y siga las siguientes instrucciones:Base de la sonda telescópicade hilo caliente屏幕显示仪器型号, 然后开始执行测量。

Philips 6000 series Smart LED TV with Ambilight Spectra 2 and Pixel Precise HD81 cm (32")Easy 3D DVB-T2/C32PFL6007TBe part of the action!Enjoy 3D and Smart TV with AmbilightExperience a world of content with a Philips 32PFL6007 3D Smart LED TV. Enjoy powerful Full HD LED pictures and endless possibilities of Smart TV Premium with immersive Ambilight. Be part of the action with the most comfortable 3D!Enjoy a world of content with Smart TV Premium •Integrated Wi-Fi to use Smart TV wirelessly•A wealth of online apps, videos to rent and catch-up TV •Control the TV with your smart phone, tablet or keyboard •Find, schedule, record* & pause TV•Watch TV wherever you like at home with Wi-Fi smart screen*•Make voice and video calls with Skype™ on your TVFascinating viewing experience in your living room •Ambilight Spectra 2-sided intensifies the viewing experience •Easy 3D Clarity 700 for a comfortable 3D movie experience •Enjoy any 2D content in flawless 3D at a push of a button •Unique 3D depth adjustment to view 3D the way you like it•Unique Two Player Full Screen Gaming mode for your 2D games •Full HD TV with Pixel Precise HD for details in action•400Hz Perfect Motion Rate (PMR) for superb motion sharpnessHighlightsAmbilight Spectra 2Add a new dimension to your viewing experience with Ambilight Spectra 2. This patented Philips technology enlarges the screen by projecting a glow of light from 2 sides of the back of the TV screen onto the surrounding wall. Ambilight automatically adjusts the color and brightness of the light to match the TV picture. Thanks to the wall-adaptive function, the color of the light is perfect, regardless of your wall color.3D ConversionWatch your entire movie collection in vivid and flawless 3D – even old black-and-white classics. Philips offers real-time high-quality conversion of any 2D content at the push of a button. It ensures that subtitles are shown at a constant depth and that there are no errors such as the background appearing in the foreground.3D Depth AdjustmentEveryone perceives 3D differently. This is why Philips offers you the possibility of customizing the 3D depth level to your personal liking. The unique 3D depth adjustment allows you to choose the image depth that best suits the content on-screen and your personal preference. This also makes it morecomfortable for your eyes. Now you can fully enjoy the 3D experience.Pixel Precise HDPixel Precise HD builds on the award winning Pixel Plus foundation. It brings the highdefinition picture quality to the next level with 4 trillion colours. With Super Resolution, Pixel Precise HD now brings you the best HD TV picture quality whether you are watching a video from the internet or good quality Blu-ray movies.400Hz Perfect Motion Rate400Hz Perfect Motion Rate (PMR) creates extreme motion sharpness for clear andvibrant images in fast action movies. The new Philips PMR standard shows the combined visible effect of the fastest panel refresh rate, HD Natural Motion and unique processing formula, for unprecedented motion sharpness.Skype™ on your TVAdd a new dimension to your calls and share experiences with the people that matter to you, wherever they are. With Skype™ on your TV, make voice and video calls from your living room. Just plug in the optional Philips TV camera (PTA317/00) to your TV and enjoy excellent video and sound quality from the comfort of your couch.Two Player Full Screen GamingWith Philips Two Player Full Screen Gaming glasses (PTA436/00), your TV can deliver the ultimate Two Player Full Screen Gaming experience. In 2D two-player games, each gamer usually sees their game on half the screen. Using 3D technology, each player cannow enjoy the game in 2D in full screen at thesame time.Smart TV PremiumA world of content for you. Enjoy the freedom to watch your program on a tablet, smart phone or TV.With the new Smart TV home screen, access a broad selection of apps easily. With Wi-Fi smart screen*, your iPhone/iPad interacts wirelessly with your Philips Smart LED TV so that you can easily pull digital TV towards the device and enjoy your favorite shows anywhere at home! Also, you can pause your TV program easily - simply connect a USB hard disk to your TV and record digital TV broadcasts.Philips MyRemote AppThe Philips MyRemote App is a smart app to organize your TV viewing experiencearound you.Enjoy a great variety of possibilities: browse through the Program Guide onyour tablet whilst watching TV. Additional features like easy text entry, volume and program control as well as pushingpictures, videos or music to your TV really turn your smart devices into smart remote controls. Download theMyRemote App now from the iTunes AppStore or Android Market.Issue date 2019-06-22 Version: 6.0.712 NC: 8670 000 86016 EAN: 87 12581 63033 1© 2019 Koninklijke Philips N.V.All Rights reserved.Specifications are subject to change without notice. Trademarks are the property of Koninklijke Philips N.V. or their respective owners.SpecificationsAmbilight•Ambilight Version: 2 sided•Ambilight Features: Wall colour adaptive, Lounge light modePicture/Display•Display: LED Full HD•Diagonal screen size: 32 inch / 81 cm•Panel resolution: 1920x1080p•3D: Easy 3D Clarity 700, 2 Player Full Screen Gaming*, 3D Depth adjustment, 2D to 3D conversion•Aspect ratio: 16:9•Brightness: 400 cd/m²•Dynamic screen contrast: 500,000 : 1•Picture enhancement: Pixel precise HD, 400 Hz Perfect Motion Rate, Micro DimmingCPU•Processor type: Dual-CoreSmart TV Applications•Net TV: Catch-up TV, Online Video stores, Open Internet browser, Online apps•Control: MyRemote app (iOS & Android), USB Keyboard & Mouse support •SimplyShare: DLNA media browser, USB media browser, WiFi Smart Screen•Program: Pause TV, USB recordingSound•Output power (RMS): 20W (2 x 10W)•Sound Enhancement: Auto Volume Leveller, Clear Sound, Incredible Surround, Pure Bass Connectivity•Number of HDMI connections: 4•Number of component in (YPbPr): 1•Number of scarts(RGB/CVBS):1•Number of USBs: 3•Wireless connections: WiFi Certified•Other connections: Antenna IEC75, Common Interface Plus (CI+), Ethernet-LAN RJ-45, Digital audio out (optical), PC-in VGA + Audio L/R in, Headphone out, Service connector•HDMI features: 3D, Audio Return Channel •EasyLink (HDMI-CEC): Remote control pass-through, System audio control, System standby, Plug & play add to Homescreen, Auto subtitle shift(Philips), Pixel Plus link (Philips), One touch playMultimedia Applications•Video Playback Formats: Containers: AVI, MKV,H264/MPEG-4 AVC, MPEG-1, MPEG-2, MPEG-4,WMV9/VC1•Music Playback Formats: AAC, MP3, WMA (v2 upto v9.2)•Picture Playback Formats: JPEGSupported Display Resolution•Computer inputs: up to 1920x1080 @ 60Hz•Video inputs: 24, 25, 30, 50, 60 Hz, up to1920x1080pConvenience•PC network link: SimplyShare•Ease of Installation: Auto detect Philips devices,Device connection wizard, Network installationwizard, Settings assistant wizard•Ease of Use: One-stop Home button, OnscreenUsermanual•Screen Format Adjustments: Autofill, Autozoom,Movie expand 16:9, Super Zoom, Unscaled,Widescreen•Signal strength indication•Teletext: 1200 page Hypertext•Firmware upgradeable: Firmware auto upgradewizard, Firmware upgradeable via USB, Onlinefirmware upgrade•Electronic Program Guide: 8 day ElectronicProgram GuideTuner/Reception/Transmission•Digital TV: DVB-C MPEG2*, DVB-C MPEG4*,DVB-T MPEG2*, DVB-T MPEG4*, DVB-T2,Freeview HD•Video Playback: NTSC, PAL, SECAMPower•Mains power: AC 220 - 240 V 50/60Hz•Ambient temperature: 5 °C to 35 °C•Energy Label Class: B•Eu Energy Label power: 48 W•Annual energy consumption: 66 kW·h•Standby power consumption: < 0.15 W•Power Saving Features: Auto switch-off timer, Ecomode, Light sensor, Picture mute (for radio)•Off mode power consumption: < 0.01 WDimensions•Box dimensions(W x H x D):792 x 620 x 130 mm•Set dimensions(W x H x D):724.4 x 453.1 x 34.26 mm•Set dimensions with stand (W x H x D):724.4 x 505.6 x 218 mm•Product weight: 7.85 kg•Product weight (+stand): 10 kg•Compatible wall mount: 200 x 200mmAccessories•Included accessories: Power cord, RemoteControl, 2 x AAA Batteries, 2 x 3D Glasses,Tabletop swivel stand, Quick start guide, Legal andsafety brochure, DC power adapter, Componentcable adaptor, Smart TV Quick Guide, WarrantyLeaflet•Optional accessories: 3D glasses PTA416, 3Dglasses PTA426, 3D glasses Game kit PTA436*Net TV: Visit /smarttv to discover the servicesoffering in your country.*USB recording only for digital channels covered by the TV IP basesElectronic Programme Guide (country and channel restrictions mayapply), recordings may be limited by broadcast copy protection(CI+). An internet connection is required.*Wi-Fi smart screen available via software update in autumn 2012*DivX Certified® to play DivX® video up to HD 1080p, includingpremium content.*Skype camera is sold separately*Parents should monitor their children during 3D viewing and ensurethey do not experience any discomfort as mentioned above.Watching 3D is not recommended for children under 6 years of ageas their visual system is not fully developed yet.*The TV supports DVB reception for 'Free to air' broadcast. SpecificDVB operators may not be supported. An up to date list can befound in the FAQ section of the Philips support website. For someoperators Conditional Access and subscripction are required.Contact your operator for more information.*Energy consumption in kWh per year, based on the powerconsumption of the television operating 4 hours per day for 365days. The actual energy consumption will depend on how thetelevision is used.*8 days EPG, service not available in all countries*In Nordic countries, the TV provides limited support for subtitleswhile recording TV programs.。
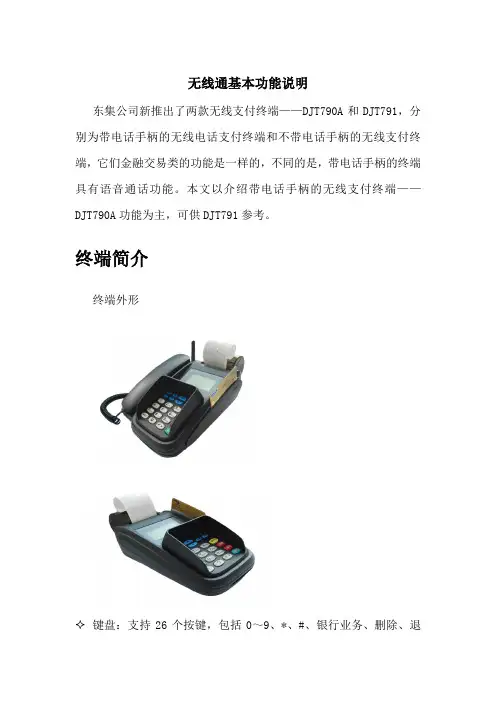
无线通基本功能说明东集公司新推出了两款无线支付终端——DJT790A和DJT791,分别为带电话手柄的无线电话支付终端和不带电话手柄的无线支付终端,它们金融交易类的功能是一样的,不同的是,带电话手柄的终端具有语音通话功能。
本文以介绍带电话手柄的无线支付终端——DJT790A功能为主,可供DJT791参考。
终端简介终端外形键盘:支持26个按键,包括0~9、*、#、银行业务、删除、退出、确认、菜单、免提、售后热线、电话银行、走纸、F1/F2功能键、上翻/下翻;✧液晶显示屏:132×64点阵的液晶显示屏,可显示5行、每行10个中文汉字,支持GB2312编码一二级12*12点阵汉字字库;✧指示灯:1个电源指示灯、1个缺纸指示灯和1个数据通信指示灯;✧外部接口:1个RJ45串口接口、1个9VAC电源输入插口、1个SIM卡插座(1.8V和3V兼容)、1个PSAM卡插座和外置7.4V锂离子充电池接口、1个IC读卡器插座(可扩展),其中SIM卡和PSAM 插座以及锂离子充电池接口置于电池仓内部,开启电池仓后盖方可进行插拔操作,提高安全性;✧射频天线:外置900MHz/1800MHz/1900MHz三频段天线;✧大容量充电电池:1800mAh的锂离子充电电池,保障无外电插入时200笔以上交易;功能介绍按键功能快速响应键盘操作。
键盘有免提,重拨,上翻/下翻,菜单,电话银行,银行业务,确认键,退出键,数字键,F1/F2功能键,走纸键。
免提键:免提拨号,直接进入拨号界面,扬声器拨出声音提示免提拨号状态,摁下键拨号输入框显示相应数字,扬声器拨出按键音;重拨键:手柄未抬起时,直接进入拨出界面,拨打最后一次拨打的电话号码;手柄抬起时,界面已经进入拨号界面,按重拨键则将最后一次拨打的电话号码输入拨号输入框,并触发拨出界面,相当于拨号界面输入完电话号码后按确认键;上翻键:去电查询,进入通话记录的已拨电话显示界面,显示通话记录中的已拨电话,再次按上下翻键,可选择不同电话号码;下翻键:来电查询,进入通话记录的已接来电显示界面,上下翻可选择不同电话号码;电话银行:进入拨号界面,直接拨打电话银行95599号码;银行业务:在线模式下,直接发起连接银行业务请求,下载交易菜单;确认键:显示终端ID编号;退出键:待机界面此键无效;数字键:进入拨号界面准备输入电话号码拨打电话;F1键:设置菜单快捷键;F2键:未定义;走纸键:打印机走纸。


BLACK SERIES2Most products can be placed on any wall withany stud spacing.Upgraded post-install adjustments for evengreater flexibilityUniversal hardware package ensures compatibilityMost products offer ability to add a padlock for security.**Excludes CILF130 & CILF1243Easily access cables and wires behind TV while it’sstill mountedMASTER PACKAGEWEIGHT44.1 lbsMODELCILF230-G1UPC793795533913MSRP$409.99LIST PRICE$499.99MOUNTING PATTERNS - VESADEPTH2.46"SUGGESTED TV SIZE RANGE46"–95"(w x d x h)36.73" x 2.46"–30" x 22.03"CILF230 – LARGE FULL MOTION MOUNTSERIESBLACK 615.75in 400mm CILF230 – LARGE FULL MOTION MOUNTSIDE VIEWTOP VIEW - EXTENDEDTV INTERFACE - VESAWALL PLATE FULLY ASSEMBLED MOUNT7MASTER PACKAGEWEIGHT31.5 lbsMODELCILF226-B1UPC793795533876MSRP$259.99LIST PRICE$299.99MOUNTING PATTERNS - VESADEPTH2.4"SUGGESTED TV SIZE RANGE37"–80"(w x d x h)27.59" x 2.40 x 19.55""CILF226 – LARGE FULL MOTION MOUNTFluidMotion™ provides unparalleled smoothness and effortless TV movement.Provides ultimate stability by firmly holding TV in thedesired position.Slim profile holds TV close to the wall for a sleek look.Virtual Axis™ fingertip tilt allows for easy TV adjustments and quickaccess to cables.Cable management channels secure cables along mount arm for a clean look.MASTER PACKAGEWEIGHT44.1 lbs$279.99MOUNTING PATTERNS - VESA(w x d x h)30" x 2.74"–5.74" x 18.11"CIL T2 – LARGE ADVANCED TIL T MOUNTm ounting directly Offers maximum tiltingr ange for large TVs.SERIESBLACK 7deg12deg1" HEIGHT ADJUST145.9mm 5.74in600mm 23.62in430mm 16.93in200mm 7.87inTV INTERFACESIDE VIEWTOP VIEW - EXTENDEDTV INTERFACE - VESACILT2 – LARGEADVANCED TILT MOUNTDMASTER PACKAGE WEIGHT 40.1 lbs MODEL CILT1-B1UPC793795529831MSRP $154.99LIST PRICE $249.99MOUNTING PATTERNS - VESA DEPTH 2.2"SUGGESTED TV SIZE RANGE 37"–95" TILTS +7º/-10º(w x d x h)30" x 2.18" x 17.53"CILT1 – LARGE TILTING MOUNTOpen wall plate design allows mounting directly over most wall boxes and electrical outlets.Virtual Axis ™ Fingertip tiltallows for easy TV adjustments and quick access to cables.New ProSet Plus ™ post install height and leveladjustments allow for up to one full inch of height and level adjustment.Save time by using the leveling notch to hang the wall plate on a temporary nail while leveling the wall plate and marking holes to drill.High quality Quick-Release tabs instantly unlock the TV from the wall plate and adjust to line up with the bottom of the TV. Optional padlockadds security.DETAIL A SCALE 1 : 41" POST INSTALL HEIGHT ADJUST17.53445.3FOR SMALL PARTS PANEL 27.269016.7425 7.92005.55141.07.00177.88.00203.28.86225.0 16.00406.4MASTER PACKAGEWEIGHT44.4 lbsMODELCIXT1-B1UPC793795529848MSRP$204.99LIST PRICE$299.99MOUNTING PATTERNS - VESADEPTH2.5"SUGGESTED TV SIZE RANGE40"–110"TILTS+7º/-10ºPRODUCT DIMENSIONS(w x d x h)33.43"–52.93" x 2.41" x 17.53-32.49""CIXT1 – EXTRA LARGE TILTING MOUNTCIXT1 comes with extender brackets that easily attach to accommodate large hole patterns. Brackets are also compatible with CILT1 and CILL1.New ProSet Plus ™ post install height and leveladjustments allow for up to one full inch of height and level adjustment.Virtual Axis ™ Fingertip tiltallows for easy TV adjustmentsand quick access to cables.High quality Quick-Release tabs instantly unlock the TV from the wall plate and adjust to line up with the bottom of the TV. Optional padlock adds security.Open wall plate design allows mounting directly over most wall boxesand electrical outlets.DETAIL A SCALE 1 : 21" POST INSTALLMENT HEIGHT ADJUST33.43849.1MIN WALL PLATE32.49825.352.931344.5MAX WALL PLATE17.53445.3 7.87200.016.73425.031.50 800.043.31 1100.012.20310.0 5.50139.710.93277.7 6.22157.98.00203.2 300.016.00406.4450.024.00 8.86225.0304.8304.88.00203.2WALL PLATEMASTER PACK QUANTITY 3MASTER PACKAGE DIMENSIONS (w x d x h) 33.6" x 8.23" x 6.45"MASTER PACKAGE WEIGHT 36.5 lbsMODEL CILL2-B1UPC793795531537MSRP $109.99LIST PRICE $199.99MOUNTING PATTERNS - VESA Min: 100 x 100 | Max: 825 x 500 WEIGHT CAPACITY 150 lbsDEPTH 0.55"SUGGESTED TV SIZE RANGE 37"–90"PRODUCT DIMENSIONS (w x d x h)35.26" x 0.55" x 22.10"PACKAGE DIMENSIONS (w x d x h)38.31" x 7.11" x 2.01"PACKAGE WEIGHT 11.7 lbsCILL2 – LARGE FIXED MOUNTSlide TV side-to-side for perfect positioning on the wall.Safety tab and clickstands provide a secure connection and easyaccess to your cables.Easily adjust height andlevel after installation.Super Slim mount places TV just 0.55” from wall.8.25°3.6291.914.0 0.5514.0TOP VIEW - RETRACTED20.08510.02.5665.0TOP VIEW - RETRACTED35.26895.522.10561.3FULLY ASSEMBLED MOUNT3.1580.04.88124.016.00406.424.00609.6WALL PLATEWALL PLATEFULLY ASSEMBLED MOUNTWEIGHT 37 lbs MODEL CILL1-B1UPC793795529824MSRP $99.99LIST PRICE $199.99MOUNTING PATTERNS - VESA Min: 200 x 200 | Max: 690 x 415 WEIGHT CAPACITY 180 lbsDEPTH 1.6"SUGGESTED TV SIZE RANGE 37"–95"(w x d x h)30" x 1.6" x 17.53"PACKAGE DIMENSIONS (w x d x h)32.74" x 10.76" x 3.12"High quality Quick-Release tabs instantly unlock the TV from the wall plate and adjust to line up with the bottom of the TV. Optional padlock adds security.Save time by using the leveling notch to hang the wall plate on a temporary nail while leveling the wall plate and marking holes to drill.CILL1 – LARGE FIXED MOUNTSlim profile allows mount to sit just 1.6" from the wall.New ProSet Plus ™ post install height and leveladjustments allow for up to one full inch of height and level adjustment.Open wall plate design allows mounting directly over most wall boxesand electrical outlets.SERIESBLACKDETAIL A SCALE 1 : 4TV INTERFACECILL1 –LARGE FIXED MOUNTTV INTERFACE - VESASIDE VIEW - HEIGHT ADJUSTMENTFRONT VIEW318.00203.211.81300.016.00406.412.00304.8450.08.86225.0 WALL PLATEMODEL CIASP1-B1UPC793795529817 MSRP $29.99 LIST PRICE $39.99COMPATIBILITYWEIGHT CAPACITY 15 lbsPRODUCT DIMENSIONS (w x d x h)7.74" x 0.38" x 9.62" PACKAGE DIMENSIONS (w x d x h)10.84" x 8.15" x 1.46" PACKAGE WEIGHT MASTER PACKAGE WEIGHT 12.76 lbsCIASP1 – SMALL PARTS PANELStick on anti-slide materialcan be cut to size forsecure no-slip mounting.Two twist on hook and loop tiedown fasteners can be locatedand oriented anywhere onthe panel. Can be attached toitself, the panel or another tiedown fastener as a support ortie down.Special small parts tab tosecurely fasten the CIASP1to the TV interface.Secures streaming devices likeApple TV®, Roku®, DirecTVGenie™, TiVo® mini, Sonos®CONNECT:AMP™, networkswitchers, HDMI baluns, controlprocessors and signal converters.Raised panel for ventilation.SERIES BLACK34.389.69.62244.37.74196.7TOP VIEW - EXTENDED1.0025.4.358.9.6616.61.9148.5TV INTERFACECIASP1 –SMALL PARTSPANELTV INTERFACESIDE VIEWFRONT VIEW35.7017.86.53165.86.85174L PLATEWALL PLATEHOOK & LOOPSTRAPSpecifications are subject to change.Visit us at © 2019 Legrand AV Inc.SANBLK0919。


Translation of the original operating manualRotary moduleRM 50 - 310Assembly and Operating ManualSuperior Clamping and GrippingImprint2ImprintCopyright:This manual remains the copyrighted property of SCHUNK GmbH & Co. KG. It is solely supplied to our customers and operators of our products and forms part of the product. This documentation may not be duplicated or made accessible to third parties, in particu-lar competitive companies,without our prior permission.Technical changes:We reserve the right to make alterations for the purpose of technical improvement. Document number: 0389388Edition: 05.00 |25/07/2013|en© SCHUNK GmbH & Co. KGAll rights reserved.Dear customer,congratulations on choosing a SCHUNK product. By choosing SCHUNK, you have opted for the highest precision, top quality and best service.You are going to increase the process reliability of your production and achieve best machining results – to the customer's complete satisfaction.SCHUNK products are inspiring.Our detailed assembly and operation manual will support you.Do you have further questions? You may contact us at any time – even after purchase.Kindest Regards Yours SCHUNK GmbH & Co. KGSpann- und GreiftechnikBahnhofstr. 106 – 134D-74348 Lauffen/NeckarTel. +49-7133-103-0Fax +49-7133-103-2399**************.comTable of contents05.00|RM 50 - 310 |en 3Table of contents1 About this manual (5)1.1 Warnings (5)1.1.1 Key words (5)1.1.2 Symbols (5)1.2 Applicable documents (5)2 Basic safety notes (6)2.1 Intended use (6)2.2 Not intended use (6)2.3 Environmental and operating conditions (6)2.4 Product safety (7)2.4.1 Protective equipment (7)2.4.2 Constructional changes, attachments, or modifications (7)2.5 Personnel qualification (7)2.6 Using personal protective equipment (7)2.7 Notes on particular risks (8)3 Warranty (9)4 Scope of delivery (9)5 Accessories (10)5.1 Sensors (10)6 Technical data (11)7 Assembly and settings (12)7.1 Mechanical connection (12)7.2 Air connections (13)7.3 Adjusting the end positions (14)7.3.1 Angle of rotation fine adjustment (15)7.3.2 Dampening adjustment (15)7.4 End position monitoring (16)8 Start-up (17)9 Troubleshooting (18)9.1 Modul does not move? (18)9.2 Does the module not travel through the rotating angle? (18)9.3 End position signal not present? (18)9.4 Is torque dropping? (19)9.5 Does the module rotate abruptly? (19)9.6 Does the module move hard against the end positions? (19)Table of contents410 Maintenance and care (20)10.1 Shock absorber (20)10.2 Maintenance and lubrication intervals (20)10.3 Lubricants/Lubrication points (basic lubrication) (21)10.4 Dismantling the module (21)10.5 Assembling the module (22)11 Spare parts (22)11.1 Sealing kit (22)12 Assembly drawing (23)13 Translation of original declaration of incorporation (24)About this manual05.00|RM 50 - 310 |en 5About this manualThis instruction is an integral part of the product and contains impor-tant information for a safe and proper assembly, commissioning, op-eration, maintenance and help for easier trouble shooting.Before using the product, read and note the instructions, especial-ly the chapter "Basic safety notes".WarningsThe following key words and symbols are used to highlight dangers.Key wordsSymbolsApplicable documents• General terms of business• SCHUNK catalog Modular Assembly Automation• Assembly and Operating Manuals of the accessories • "Gemotec Toolbox Rotation" programThe documents listed up here, can be download on our homepage 1 1.1 1.1.1 1.1.2 1.2 Basic safety notes6Basic safety notesIntended useThe module was designed to swivel permissible attachments or workpieces.The module is intended for installation in a machine/system. The requirements of the applicable guidelines must be observed and complied with.The module may be used only in the context of its defined applica-tion parameters (☞ 6, Page 11).To use this unit as intended, it is also essential to observe the technical data and installation and operation notes in this manual and to comply with the maintenance intervals.Not intended useIt is not an intended use if the module is used, for example, as a pressing tool, stamping tool, lifting gear, guide for tools, cutting tool, clamping device or a drilling tool.Environmental and operating conditions• The module may be used only within its defined application pa-rameters.• Ensure that the environment is clean. Observe the lubrication intervals (☞ 10.2, Page 20).• Ensure that the environment is free of splashing water and va-pors, and also of abrasive dust and process dust. This does not apply to modules designed especially for unclean environ-ments.• Do not subject the module to excessive vibrations and/or me-chanical shocks.• Strong magnetic fields can impair the function of the module. If the product is to be used in strong magnetic fields, contact your SCHUNK partner.2 2.1 2.2 2.3 Basic safety notes05.00|RM 50 - 310 |en 7Product safetyDangers arise from the module, if:• the module is not used in accordance with its intended purpose. • the module is not installed or maintained properly.• the safety and installation notes are not observed.Avoid any manner of working that may interfere with the function and operational safety of the module.Wear protective equipment. NOTEMore information are contained in the relevant chapters.Protective equipmentProvide protective equipment per EC Machinery Directive.Constructional changes, attachments, or modificationsAdditional drill holes, threads, or attachments that are not offered as accessories by SCHUNK may be attached only with permission of SCHUNK.Personnel qualificationThe assembly, initial commissioning, maintenance, and repair of the module may be performed only by trained specialist person-nel. Every person called upon by the operator to work on the module must have read and understood the complete assembly and operating manual, especially the chapter "Basic safety notes" ( 2, Page 6). This applies particularly to personnel only used oc-casionally, such as maintenance personnel.Using personal protective equipmentWhen using this product, observe the relevant industrial safety regulations and use the personal protective equipment (PPE) re-quired!• Use protective gloves, safety shoes and safety goggles. • Observe safe distances.• Minimal safety requirements for the use of equipment. 2.4 2.4.1 2.4.2 2.5 2.6 Basic safety notes8 05.00|RM 50 - 310 |enNotes on particular risksGenerally valid:• Remove the energy supplies before installation, modification, maintenance, or adjustment work.• Make sure, that no residual energy remains in the system. • Do not move parts by hand when the energy supply is con-nected.• Do not reach into the open mechanism or the movement area of the module.• Perform maintenance, modifications, and additions outside the danger zone.• For all work, secure the unit against accidental operation. • Take a precautionary approach by maintenance and disassem-bly.• Only specially trained staff should disassemble the module.2.7 Scope of delivery05.00|RM 50 - 310 |en 9WarrantyThe warranty is valid for 24 months from the delivery date to the production facility under the following conditions:• Intended use in 1-shift operation• Observe the mandatory maintenance and lubrication intervals • Observe the environmental and operating conditionsParts touching the work piece and wear parts are not part of the warranty.Scope of deliveryThe scope of delivery includes:• Rotary Actuator RM in the ordered model.• Exhaust air throttles• Accessory pack3 4 Accessories10AccessoriesThe following accessories that are required for the module must be ordered seperately:• End-position monitoring• SensorsFor information about which accessories can be used with the ap-propriate product version ☞ catalog.SensorsOverview of the compatible sensors• Exact type designation of the compatible sensors see ☞ catalog • If you require further information on sensor operation, contact your SCHUNK contact person or download information from our homepage.5 5.1 Technical data Technical data6Further technical data can be found in the catalog data sheet.The most recent version applies.Assembly and settings12Assembly and settingsAssembly measures•When mounting loads, do not allow impermissible forces andmoments to be exerted (see catalog data).•Select the suitable screw tightening torque when assemblingthe module or loads at the module in accordance with thegenerally accepted guidelines for screw connections.•Secure all screws using a suitable chemical screw lock.Mechanical connectionThe values relate to the entire bolting surface.Requirements for levelness of the bolting surface (Dimensions in mm)The connection geometries are above, below and at the side of therotary module.Dimensions for the position and size of the connection geometries,☞ Catalog data sheet.NOTE•When mounting the module from the rear or on the side,mount the module using the fixing bores provided.•Mount the modules using the fixing bores provided.77.1Check the evennessof the bolting surfaceMountingAssembly and settings 7.2Air connectionsPressure medium:The unit must not under any circumstances be operated withoiled air before operation with unoiled air (washing out of factory lubrication).Observe the requirements for the air supply.( 6, Page 11) "Technical Data"Use connecting wires with the same or a larger cross-section asthe connection thread.See the catalog for precise information about the position and size of the connection geometries.Assembly and settings14Adjusting the end positionsThe parts listed below are included within the scope of delivery of every rotary module for angle of rotation fine adjustment and ad-justment of the end position dampening to the mass moment of inertia occurring in operation.•Counter nut (10)•Stop coupling (13)•Rod (14)•Shock absorber (22)•Counter nut (23)Fig. 1 Adjusting the end positions7.3Assembly and settingsAngle of rotation fine adjustment1 Release counter nut (10).2 By twisting the stop coupling (13) with the rod (14) and shock absorber (22) that are integrated in it, the angle of rotation in both end positions can be set by ±5° from the nominal angle of rotation. The nominal rotation angle has to be specified for the order and can be selected without steps between 5° and 180°. Standard angles are 90° and 180°.3 Tighten the stop coupling again with the counter nut.Dampening adjustmentUse the shock absorber!Operation without the shock absorber included within the scope of delivery is not permitted.• Observe the maximum mass moment of inertia (☞ catalog da-ta).• Adjust the dampening at the mass moment of inertia.✓ The desired angle of rotation has been set (☞ 7.3.1, Page 15). 1 Release counter nut (23).2 By turning the shock absorber (22) in and out, the stroke of the shock absorber (and therefore the shock absorber charac-teristic curve) can be adjusted to the mass moment of inertia occurring in operation. The previously adjusted angle of rota-tion is not influenced by this.3 Tighten the absorber again with the counter nut.7.3.1 7.3.2Assembly and settings16End position monitoringTo monitor the end positions, standardized monitoring sets for di-rect installation are available.The stop level that is integrated in the rotary module is directlymonitored.Proximity switch monitoring: GMNS-...Scope of delivery of the monitoring set:•1 x retaining plate•1 x Proximity switch•1 x connection cableFig. 2Position of the proximity switches1 Undo the attachment screw.2 Set the sensor via the retainer plate.3 Fix the sensor via the attachment screw.7.4Setting themonitoringStart-up Start-up8•Check the technical specifications (☞ 6, Page 11).•Check the permissible loading specifications (see catalog).•Do not use the module until trouble-free operation has beenchecked taking all permissible operating parameters into ac-count.•Set the speed of the movement in such a way that the permit-ted swiveling time is not exceeded. Use the "Gemotec Toolbox"program for calculation ().•The movement speed is ideally regulated via throttle checkvalves (☞ 7.2, Page 13). The speed is always set so that it starts at a low speed and increases to a higher speed until the desired operating speed has been reached.•Operate the device in such a way that the permissible cyclenumber per minute is not exceeded. Use the "Gemotec Tool-box" program for calculation ().Troubleshooting1805.00|RM 50 - 310 |enTroubleshootingModul does not move?Does the module not travel through the rotating angle?End position signal not present?9 9.1 9.2 9.3TroubleshootingIs torque dropping?Does the module rotate abruptly?Does the module move hard against the end positions?9.4 9.5 9.6Maintenance and care20Maintenance and careShock absorberSerious mechanical damage due to failure of the shock absor-bers.The shock absorbers have a limited service life span. A shock ab-sorber failure can lead to serious mechanical damage; for thisreason, they must be checked regularly for proper function. Theshock absorber is working correctly if the device reaches its endposition swiftly without any mechanical impact.Overloading of the unit or exceeding the permitted swivel speed can lead to drastic reduction of the service life.•Determine the swiveling times and the permitted stroke fre-quency with "Gemotec Toolbox".•Regularly check the shock absorber.•Observe the recommended maintenance intervals.Maintenance and lubrication intervalsAt ambient tempertature above 60°C the lubricanscure out faster•Interval decrease accordingly.1010.110.2Maintenance and careLubricants/Lubrication points (basic lubrication)• All module bearings are life-time lubricated and do not need to be re-lubricated. • When disassembling the module for repairs, all bearings have to be cleaned and re-lubricated.We recommend the lubricants listed.During maintenance, treat all greased areas with lubricant. Thinly apply lubricant with a lint-free cloth.Greasing areas, grease* Only after disassembling the module for repairsDismantling the moduleNOTICEA high degree of expertise is required for the disassembly and assembly of the module, (☞ 2.5, Page 7).The repair or elimination of defects by the customer on the mod-ule results in the termination of the warranty and liability for all resulting warranty and subsequent damage.• It is recommended to have SCHUNK repair damaged and de-fective modules.• Disassemble the module as shown in the "Assembly drawings", (☞ 12, Page 23). • Only disassemble the rotation module for repair purposes.10.3 10.4Maintenance and care22Assembling the module•Clean all parts thoroughly and check for damage and wear.•Treat all grease areas with lubricant.( 10.3, Page 21)•Oil or grease bare outside steel parts.Assembly takes place in the opposite order to disassembly. Ob-serve the following:•Unless otherwise specified, secure all screws and nuts with Loc-tite no. 243 and tighten with the appropriate tightening torque.Select suitable tightening torques for screws when assemblingthe module in accordance with generally accepted guidelinesfor screw connections.Spare partsSealing kitID.-No. of the seal kit10.5MaintenanceAssembly1111.1Assembly drawingAssembly drawing12The following figure is an example image.It serves for illustration and assignment of the spare parts.Variations are possible depending on size and variant.Fig. 3 Assembly of RM 06Translation of original declaration of incorporation2405.00|RM 50 - 310 |enTranslation of original declaration of incorporationmeets the applicable basic requirements of the Machinery Directive (2006/42/EC). The incomplete machine may not be put into operation until conformity of the machine into which the incomplete machine is to be installed with the provisions of the MachineryDirective (2006/42/EC) is confirmed.The manufacturer agrees to forward on demand the special technical documents for the incomplete machine to state offices.The special technical documents according to Annex VII, Part B, belonging to the incom-plete machine have been created.Person responsible for documentation: Mr. Robert Leuthner, Address: see address of the manufacturerRalf Winkler;Business Unit ManagerR & D Mechanical Gripping Systems13。
您的产品包装箱内物品摆放位置附件包放置在机台的背部,如图示。
*附件包内包含快速使用指南,保修卡,电池。
2目录您的产品包装箱内物品摆放位置 2重要信息 4安装底座 7连接 10电池安装方式 13打开电视 14操作导引 14主要配置介绍 15电子电气产品有害物质限制使用标识要求 163小心人身伤害或电视机损坏!••需由两个人搬运重量超过25千克的电视机。
••将电视机安装在机座上时,请仅使用提供的机座。
将机座牢固地固定到电视机上。
将电视机放在水平、平坦且可承受电视机和机座总重量的表面上。
••采用壁挂方式安装电视时,请仅使用可承受电视机重量的壁挂安装托架。
将壁挂安装托架固定到可承受电视机和壁挂安装托架总重量的墙壁上。
TPV Display Technology(Xiamen)Co.,Ltd.对由于安装不当而造成的事故、人身伤害或损失不负任何责任。
小心伤害儿童!请遵循以下注意事项,以避免因电视机掉落而导致儿童受伤:••切勿将电视机放在由可拉动的布或其它材料覆盖的表面上。
••确保电视机的任何部分均位于表面边缘以内。
••将电视机放在较高的家具(如书柜)上时,一定要将家具和电视机都固定到墙壁或适当的支撑物上。
••告知儿童爬上家具触摸电视机可能带来的危险。
小心误食电池!••此产品的遥控器含有电池,有可能被孩童误食,请将电池放于孩童无法接触的位置。
56小心过热!••切勿将电视机安装在封闭空间内。
•始终在电视机周围留出至少4英寸或10厘米的空间以便通风。
确保窗帘或其它物体不会遮挡电视机上的通风槽。
小心损坏电视机!••在将电视机连接到电源插座上之前,请确保电源电压与电视机背面印刷的值相匹配。
如果电压不同,切勿将电视机连接到电源插座上。
••电视长期不使用的情况下,请切断电源。
小心人身伤害、起火或电源线损坏!••切勿将电视机或任何物体放在电源线上。
••电源插头作为断开装置,应当保持能方便地操作。
••断开电源线时,应始终握住插头,而不能拉电缆。
三相7P电表说明书适用型号:LH-DTSD5111修订记录:目录1.产品介绍 (3)2.规格参数 (3)3.产品尺寸 (5)4.485通信协议与数据格式 (6)4.1.通讯基本参数 (6)4.2.数据帧格式定义 (7)4.3.寄存器地址 (8)4.4.参数读取 (14)5.电气接线 (14)5.1.功能端子接线图 (14)5.2.相线接线图 (15)5.3.脉冲接线图 (15)5.4.RS485接线图 (15)6.按键与显示 (16)7.常见故障 (17)7.1.辅助电源故障 (17)7.2.信号输入故障 (17)7.3.通讯故障 (17)8.售后服务 (17)8.1.售后服务承诺 (17)8.2.免责声明 (18)8.3.联系方式 (18)1.产品介绍LH-DTSD5111三相电子式多功能电能表,广泛应用于配电场所、能耗管理、远程抄表、低压配电监控系统等。
该仪表可以高精度测量三相电压、电流、功率、功率因数、频率、有功电能、无功电能、复费率电能等全电力参数,可灵活安装于配电箱内,实现对不同区域和不同负荷的分项电能计量。
产品采用LCD大屏显示,可快速查询一次侧电能,免换算;具有RS485通讯接口,带有远程分合闸功能,方便用户进行集抄和远程断电控制。
产品符合国家标准GB/T17215.321-2008的技术要求,提供0.5S精度等级的电能计量。
2.规格参数3.产品尺寸图3.1⏹尺寸:126.5mm×98mm×75mm(长×宽×高)⏹安装方式:标准35mm导轨式安装安装注意事项:危危险⏹只有熟悉相关操作和规程的相关有资格人员才能进行对本电表的安装⏹安装时要用绝缘工具⏹当保险丝、熔断器断开或断路器不能合上的时候不要强行通电⏹电表的铅封不要损坏警告⏹在进行安装前,关掉所有相关的电源⏹使用测量仪器确保电源已经关闭4.485通信协议与数据格式本电能表支持MODBUS-RTU协议或DL/T645规约。
组合仪表内的控制单元J285S360_155 执行元件燃油泵控制单元J538预供油燃油泵G61 - 6缸喷油阀N30, N31, N32, N33, N83, N84带有末极功放的1-6缸点火线圈N70, N127, N291, N292, N323, N324节气门单元J338带有用于电子油门的节气门驱动器G186燃油压力调节阀N276活性炭罐电磁阀N80进气歧管翻板阀N316凸轮轴调节阀N205凸轮轴调节阀(排气侧)N318λ传感器加热器Z19λ传感器加热器2 Z28催化净化器后的λ传感器加热器1 Z29催化净化器后的λ传感器加热器2 Z30散热器风扇控制单元J283散热器风扇V7散热器风扇2V177循环泵继电器 J160 循环泵 V55V O R A B S T A N D 22.03.200631发动机管理系统传感器发动机转速传感器 G28该传感器用螺栓拧在缸体的侧面,它扫描曲轴上的靶轮。
信号应用从发动机转速传感器的信号可以获知发动机的转速和曲轴相对于凸轮轴的准确位置。
这些信息用于计算喷油量和喷油始点。
V O R A B S T A N D 22.03.2006S360_01 1信号中断的影响如果信号中断,那么发动机立即熄火,且无法再起动。
2空气流量计 G703,2L和3,6L-FSI-发动机使用的是第6代热膜式 (HFM6)空气流量计。
这种流量计安装在发动机的进气道内,与前一代一样,也是根据热量测量的原理来工作的。
特点:●带有回流识别的微型传感器元件●具有温度补偿的信号处理●测量精度高●传感器稳定性好插头传感器电子装置吸入的空气V O R A B S T A N D 22.03.200633发动机管理系统工作过程:空气流量计的传感器元件耸立在发动机吸入的气 流中。
一部分空气流经空气流量计的旁通气道。
旁通气道内有传感器电子装置,该电子装置上集 成有一个加热电阻和两个温度传感器。
这两个温度传感器用来识别空气的流动方向:吸入空气的测量空气流量计剖面V O R A B S T A N D 22.03.2006- 吸入的空气首先经过温度传感器1- 从关闭的气门回流的空气首先经过温度传感器2与加热电阻合用,发动机控制单元就可计算出吸 入空气中的氧含量。