HH44X使用说明书-中英文
- 格式:doc
- 大小:212.50 KB
- 文档页数:10

H400-450XD SERIESHEAVY DUTY FORKLIFT TRUCK2H400-450XD SERIES* Results will vary based on application, physical environment, fuel quality, etc.HIGH CAPACITY TRUCKS FOR HEAVY DUTY APPLICATIONSHyster Company has a long history of designing and building high capacity forklift trucks. The Hyster ® H400-450XD series offers a Tier 4 Final powertrain featuring the Cummins QSB 6.7L engine with cooled Exhaust Gas Recirculation (EGR) and Selective Catalytic Reduction (SCR). Using tested and proven components to help provide high productivity, reliability and overall lower ownership costs, this truck offers a strong performance solution for your unique application. The truck has been engineered for ease of service while offering up to 22% lower fuel consumption* over prior Tier 3 products. The H400-450XD forklift series is also available with a Tier 3 engine for certain markets without reliable access to Ultra Low Sulfur Diesel Fuel (ULSD).Over 90 years of heritage building tough forklift trucks is brought to bear in the H400-450XD forklift, available in four models for use in applications such as steel, breakbulk/stevedoring, concrete and mining.34Quick disconnect, hook-typedual function sideshift forkpositionerPin-type dual functionsideshift fork positionerENGINEERED FOR TOUGH APPLICATIONSHEAVY DUTY MASTS & CARRIAGESThe Hyster® H400-450XD forklift, has been designed and suited for particularly tough applications and engineered for long load centers, wide loads and heavy duty-cycle conditions. Carriages are available in two options: hook type dual function sideshift fork positioners and pin type dual function sideshift fork positioner.The mast, with robust mast channels, rollers, stub shafts and chain anchors, is designed to excel in heavy duty applications. The sturdy mast design for this truck series enables less mast deflections while offering a number of 2-stage mast options for a wide variety of applications in multiple industries.Greaseable load rollers with roller bearings can provide years of dependable performance in the front end. Carriages are designed to have minimal capacity derate on sideshifting carriages, enabling the truck to provide close to full rated capacity under all operating conditions.CARRIAGE & FORK OPTIONSDifferent applications require different tools - customize your truck with available carriage and fork options on theH400-450XD truck series.Hook type carriages allow for quick connect coupling of forks enabling increased flexibility in the use of the truck for other applications. Pin type dual function carriages provide a rugged heavy duty solution for dedicated forklift applications.SHORT WHEEL BASEHyster short wheel base forklift trucks deliver an optimum combination of compactness, nimbleness and agility for applications with space constraints requiring a tighter turning radius.POWERTRAIN• Cummins QSB 6.7L engine providing 230 peak horsepower (220 hp rated).• ZF WG 211 5-speed powershift transmission with proven field experience and reliability. The 5-speed transmission features improved shift point selection with an overdrive gear enabling maximum efficiency of the drivetrain while limiting fuel consumption.• The Tier 4 Final drivetrain includes an emission reduction package featuring cooled Exhaust Gas Recirculation (EGR), a Selective Catalytic Reduction (SCR) system for NOx reduction, a Diesel Oxidation Catalyst (DOC) for particulate matter (PM) removal and a Diesel Exhaust Fluid (DEF) delivery system.• Tier 3 engines are available as an option for non-regulated markets, featuring a CumminsQSB 6.7L engine and ZF WG 211 5-speed powershift transmission for all models.HIGH CAPACITY COOLING SYSTEM• High capacity cooling system is designed for high ambient temperature conditions up to 113° F (45°C).• Puller fan enables the cooling system to operate more efficiently by drawing cool, clean air from above through the radiator.• Components last longer with cooler fluid temperatures.HEAVY DUTY STEER AND DRIVE AXLESThe Hyster H400-450XD forklift uses a heavy duty drive axle with wet disc brakes to provide long life. The sturdy design enables extended service intervals on wearable service components.Heavy duty planetary drive axleH400-450XDTier 4 final powertrain56LOWEST COST OF OWNERSHIPHyster understands that your total cost of ownership extends beyond initial acquisition costs.Hyster has engineered a well-integrated system to help reduce your overall cost of operationsover the life of the truck.INTEGRATED SYSTEMS DESIGNUnique partnership with Cummins enables a harmonized powertrain featuring a CumminsQSB 6.7L engine paired with the ZF WG 211 transmission.• Powertrain solution is optimized for maximum performance and improved fuel economy.• Low-hassle Tier 4 Final solution requires no use of Diesel Particulate Filter (DPF) or activeregeneration; utilizes urea-based SCR system with a diluter for lower exhaust temperatures.• Innovative ECO modes: Hi-P and e-Lo (Tier 4 Final)– Hi-P provides maximum performance and good fuel economy.– e-Lo provides minimum fuel consumption while maintaining good productivity.Tier 3• The Tier 3 solution with no after-treatment continues to be available in all non-EPAregulated markets including Latin America and Brazil.ON-DEMAND COOLING (TIER 4)• This state-of-the-art feature provides on-demand cooling to match the required coolingexpectations.• Cooling fan draws power only when cooling is required, unlike direct drive fans which drawhigh levels of power at all times.• Reduces accessory loads on the powertrain, consumes less fuel and lowers noise levels.TOTAL SYSTEM FUEL SAVINGS*Fuel consumption is a key driver to the total cost of ownership for high capacity lift trucks.Hyster provides a truck with superior fuel consumption characteristics compared to similarlysized trucks offered by the competition. A number of complementary technologies worktogether to deliver total system fuel savings including:• On-Demand Hydraulics - Up to 10% fuel savings.• Intelligent Powertrain design with ZF transmission and advanced controls featuring ECOselectable modes- Up to 10% fuel savings.• On-Demand Cooling - Up to 5% fuel savings.Advanced controls enable Hyster® model series H400-450XD trucks to provide peakperformance and operating efficiency while delivering cumulative great fuel economyand durability.Cummins QSB 6.7LTier 4 Final Engine withAftertreatmentOn-demand cooling fanCummins QSB 6.7LTier 3 Engine*Cumulative fuel savings results will vary based on application, physical environment, fuel quality, etc.ON-DEMAND HYDRAULICSThe Hyster on-demand, load-sensing hydraulic system is designed to deliver flow only when required. A variable displacement pump, capable of more oil displacement even at low pump speeds, means the engine runs at lower speeds, extending the life of components while operating more quietly. The system consumes up to 10% less fuel than a typical fixed displacement hydraulic system while producing less heat. Oil and filters last longer; hoses, seals and components also wear less and last longer.TRAVEL SPEED LIMITERS (OPTIONAL)This system reduces traction speeds and can be pre-setto suit varying customer applications:• Unconditional travel speed limiter to setthe maximum speed.*• Loaded travel speed limiter – limits traction speedsto a set point when a specified load weight is sensedon the forks Factory preset to 8 mph.This feature helps drivers to operate the truck in an optimal manner with regard to site limitations. Unconditional travel speed limiter is customer adjustable.AUTOMATIC THROTTLE-UPAutomatic throttle-up, available on Hyster® H400-450XD trucks, provides automatic response to lift inputs from the operator when the lift lever is activated. A single-touch leveror joystick-controlled rev-up keeps the engine in the most efficient band delivering good fuel economy. Given the improved operator ergonomics, this feature helps enhance productivity. Automatic throttle-up feature applies only when the truck is in neutral.AUTOMATIC ENGINE SHUTDOWN WITH TIMER (OPTIONAL)An optional empty seat engine shutdown function reducesfuel consumption by shutting the truck down when the operator is out of the seat for extended periods, thus limiting idle hours on the truck.AUTOMATIC GREASINGAn automatic greasing system is optional on many HysterBig Trucks. This ingenious option lowers your service and labor costs by providing greasing to your truck at all times while ensuring that it gets done. Automatic greasing is provided for the base truck and outer mast.* Less speed means lower fuel consumption7ACCESS MAJOR COMPONENTS IN SECONDSEASE OF SERVICEHyster ® trucks have been designed with the servicetechnician in mind. Gull-wing hoods provide quick access to key components, and daily checks don’t require tilting the cab. A tilting cab provides easy access to hydraulic components in seconds. Broad, slip-resistant runningboards foster quick daily checks, while ample room enables easy access for radiator cleaning. A hydraulic sight gauge enables at-a-glance fluid level checks.ON-BOARD DIAGNOSTICSCANbus on-board diagnostics is available for easy servicing and troubleshooting. Fault codes and system notifications are provided through the Integrated Performance Display for quick and effective identification of service issueswhile enabling rapid implementation of remedies, reducing downtime and frequency of repairs.Wide running boardsHydraulic sight gaugeGull-wing hoods89EXTENDED SERVICE INTERVALSMajor engine and drivetrain components are engineered to operate on 500-hour service intervals. Extended hydraulic oil change intervals of up to 10,000 hours (with sampling)allow the truck to remain in operation with more time between oil changes or servicing.COOLING SYSTEM• Designed for heavy duty cooling applications requiring additional cooling capacity.• Cooling cores are packaged such that cool air (not pre-heated air) is channeled across cores.• Quad-core radiator features four separate cooler cores.• Cool overhead air is drawn in for more efficient cooling than in stacked radiator configurations.• Louvered cooling fins for maximum air flow to radiator.• Hinged hood pivots at wide angles to provide easy access to cooling system.• Easy to clean since coolers are not stacked in front of each other.Hinged cover enables easyserviceability access to radiator coolerQuad-core configuration enables efficient coolingCharge–Air Cooler Engine Coolant Core Hydraulic Oil Cooler Transmission CoolerCab tilt provides easy access to major hydraulic componentsDESIGNED AROUND THE OPERATORCAB COMFORTWith the largest cabin entry area in the industry, the operator cabin on the Hyster H400-450XD series provides ample space for operators of any size to easily and more comfortably enter and exit the cabin. Once inside, operators enjoy the comfort of a spacious cockpit style cabin that keeps all truck information and controls within reach.The ergonomically designed, seat-mounted controlarm is fully adjustable and includes a wrist cushion and TouchPoint™ mini-levers to help reduce fatigue when operating the hydraulics. The reliable CANBUS controls for all main components and modular design of the control arm makes it possible to cover almost any possible truck configuration while being easily serviceable.The 7” full color, touchscreen Integrated Performance Display tracks all truck activity, allows for easy access to change or calibrate truck settings and is integrated with Hyster Tracker telemetry system. The display also offers high-level onboard diagnostics allowing for advanced and quick troubleshooting.A variety of seat configurations are offered to suit operator preference including mechanical or air suspension, cloth or vinyl cover, lumbar support and ventilated or heated seats. The air conditioning system can be pre-set for automatic climate control and the unique high and rear louvers provide direct air flow toward the operator.OUTSTANDING ALL-AROUND VISIBILITYA low profile carriage enables a clear line of vision for an optimized view of fork tips. Forward visibility is uncluttered by the position of hydraulic valves, hoses or mast cross-members with a clear view through the mast window. Canted hoses are arranged along the line of sight so the operator sees only one hose and has good visibility.Curved, scratch resistant, tempered glass front and rear windshields, armored glass top window and steel-framed glass doors provide operators with excellent all-around visibility. On the exterior, sloping counterweights enhance visibility of steer tires for improved maneuverability andreduced tire gouging.A 7 inch full-color IntegratedPerformance Display providestruck performance data in oneclear screen.10MORE LOADS MOVED PER HOURAUTO-SHIFTING TRANSMISSIONWITH TRUE INCHINGThis truck series is equipped with ZF transmissions pairedwith Cummins engines to provide inching capability andbetter controllability. The auto-shift transmissions enablesmooth shifts that enhance the longevity of the drivetrainand operator comfort by reducing jolt.* A verage speed calculated using: laden lift speed (ft/min) at full rated capacity; unladen liftspeed; laden lowering speed at full rated capacity; unladen lowering speed.HYSTER TRACKER - WIRELESS ASSET MANAGEMENTTake your fleet operation to the next level with wireless asset management from Hyster. Hyster Tracker, standard on the H400-450XD, provides a scalable solution for fleets. From monitoring truck utilization to limiting operator access, Hyster Tracker allows you to track your fleet at your fingertips.TRACKER 11For more than 90 years, Hyster has conquered the world’s most demanding applications. In the 1920s Hyster ® started as a manufacturer of lifting machines used in the rigorous logging industry of the United States’ Pacific Northwest.A few years later the first forklift trucks were invented and the Hyster ® brand quickly gained its reputation for rugged quality. Hyster ® lift trucks are designed to lower your cost of operations. Every truck we make — whether poweredby gasoline, LPG, diesel, electric, CNG, lithium-ion or hydrogen fuel cells — is purpose-built to excel in its application. Every truck is also backed by an unmatched network of specialists.Special Products Engineering Department (SPED) — Different materials require different handling. That’s why we can work with you to customize your lift trucks. From strobe lights to specially made forks, SPED has the tools to help you get the job done right.Dealer Network — Our Dealer Network can offer the expertise of fleet managers, parts suppliers, capital procurement specialists and trainers. Carefully chosen dealers fully understand customer applications, assist in selecting the right lift truck and provide fast, reliable support.Hyster Fleet Services — Even if you operate other brands, we can manage your maintenance and replacement plan. We can offer complete fleet analysis, fleet history summary and a cost-effective proposal for replacement and scheduled maintenance.Hyster Capital — We can arrange solutions for special financing requirements, taking the difficulties out of buying the equipment you need. Whether you purchase or lease a new or used lift truck, Hyster Capital offers superior service and competitive rates.Operator Training — Proper education in operating lift trucks minimizes the risk of injuries due to accidents while increasing productivity. Hyster offers OSHA-compliant materials that support the training of qualified operators.Parts — With genuine Hyster ® replacement parts and UNISOURCE TM parts for all makes of lift trucks, we are your one-stop source for lift truck parts. In fact, we offer more than 7 million part number crosses for most brands of materials handling and other in-plant mobile equipment.Rental Products — When leasing or buying isn’t a practical option, we have access to more than 14,000 units for short- and long-term rental. We’ll help you maintain output in a cost-effective manner.Service — Your local Hyster ® dealer offers a flexible, customized and comprehensive maintenance plan based on each lift truck’s operation environment. Hyster service programs offer scheduled inspections and maintenance, along with quick, responsive service dispatched to your location. INNOVATIVE TRUCKS ENGINEERED TO MEETTHE MOST DEMANDING APPLICATIONSHyster Company P.O. Box 7006Greenville, North Carolina 27835-7006Part No. H400-450XD-B 8/2021 Litho in U.S.A.© Hyster Company . 2021, all rights reserved. Hyster , and STRONG PARTNERS. TOUGH TRUCKS. are trademarks of Hyster-Yale Group, Inc.Hyster products are subject to change without notice. T rucks may be shown with optional equipment.Visit us online at or call us at 1-800-HYSTER-1.5019HGC5BC001_E_EN-US_V1R0_082021。
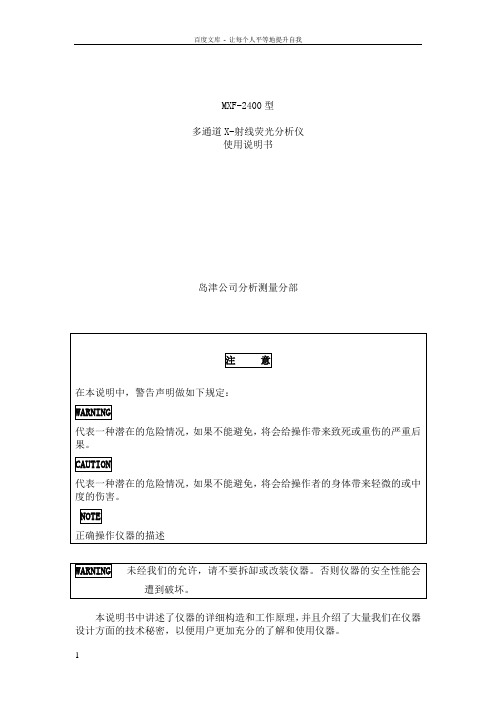
MXF-2400型多通道X-射线荧光分析仪使用说明书岛津公司分析测量分部本说明书中讲述了仪器的详细构造和工作原理,并且介绍了大量我们在仪器设计方面的技术秘密,以便用户更加充分的了解和使用仪器。
我们敬请广大用户不要把本说明书送给或借给他人;也不要向他人描述本说明书中的内容。
安全使用仪器内部会产生对人体有害的X-射线和高压。
为了安全使用仪器要注意下面的内容。
关于X-射线疾病预防1、本仪器属于“X-射线设备”。
它符合“电磁辐射疾病1、原理和构造测量原理当X-射线管产生的X-射线(以下叫做初始X-射线)照射到被测样品时,组成样品的每一种元素都会反射出具有特殊波长的X射线(以下叫做特征X-射线或荧光X-射线)。
由于样品是由多种成分组成的,所以该荧光X-射线是由各种特征X-射线混合而成的。
每一个量角仪都是根据每种特征X-射线的波长设置的。
因此,如果该混合荧光被反射到某一个量角仪上,那么只有相应组分发出的特征X-射线才会被量角仪中的晶体有选择性地反射到探测器上。
探测器也安装于量角仪上。
被检测到的X-射线的强度同相应组分的含量成比例。
因此,通过测量一定时间内检测到的X-射线的总量就可以得到相应组分的含量。
本仪器可以同时检测、测量并记录下各种元素所发出的X-射线。
X-射线管X-射线管直立于主机的中心部位。
它是由美国VARIAN公司制造的.激发灯丝所产生热电子通过高压被加速。
当这些被加速的热电子撞击到靶金属(以下叫做靶)时,靶会产生连续波长的X射线(以下叫做连续X-射线)和靶金属的特征X-射线。
这两种射线混合后组成的光束即初始X-射线。
初始X射线通过一个位于X-射线管底部的厚的铍窗照射到被测样品上。
X-射线管的靶金属是铑,所以初始X射线就是由X-射线和和靶金属的特征X射线混合而成的。
(RHK,RHL)。
RH-K线和RH-L线有助于X-射线分别激发样品中的重元素和轻元素。
当热电子光束撞击靶时,超过99%的动能转化成热能,在转化中靶会被加热。

H40-60XT SERIESTECHNICAL GUIDE15151011372235C38E7XWDT HEAD CLEARANCESEE CHART 182019H40-50XT 44.4 (1129)H60XT 45.2 (1149)17b 2116Circled dimensions correspond to the line numbers on the tabulated chart inside the Technical Guide. Dimensions are in inches (mm).DIMENSIONS151011372235C 38E 7XWDTHEAD CLEARANCESEE CHART182019H40-50XT 44.4 (1129)H60XT 45.2 (1149)17a17b2116TRUCKMODEL C D E TW X in (mm)percentpercentin (mm)in (mm)in (mm)H40XT 17.1 (434)7053 6.6 (168)13.7 (349)27.6 (702)H50XT 19.5 (495)5553 6.6 (168)13.7 (349)27.6 (702)H60XT20.4 (518)58587.4 (168)14.5 (369)28.4 (722)HEAD CLEARANCESeat TypeStandard OHG*Optional OHG*Non-Suspension 46.9 (1192)43.0 (1092)36.9 (939)Full-Suspension46.9 (1192)N/AN/A* Seat in depressed position* This model may be equipped with an optional load weight system with an auxiliary display. The system must be calibrated for best results. The mast must be vertical and the forks at 350mm (14”). If these procedures are met the weight indicated on the display will be +/- 8%.CERTIFICATION: Hyster lift trucks meet the design and construction requirements of B56.1-1969, per OSHA Section 1910.178(a)(2), and also comply with the B56.1 revision in effect at time of manufacture. Certification of compliance with the applicable ANSI standards appears on the lift truck.Performance specifications / ratings are for truck equipped as described under Standard Equipment in this Technical Guide. Performance specifications are affected by the condition of the vehicle and how it is equipped, as well as by the nature and condition of the operating area. Specifications are subject to change and the proposed application should be discussed with your authorized Hyster Company Dealer.Limited by traction. For further information on this dimension, please contact your local Hyster ® dealer.G E N E R A L1Manufacturer Name Hyster Company 2Model H40XT*H50XT*H60XT*EnginePSI 2.4L 3Rated Capacitylb (kg)4000 (1814)5000 (2268)6000 (2722)4Load Center, Distance in (mm)24 (610)5Power Type - LPG, Dual Fuel LPGDual FuelLPG Dual FuelLPGDual Fuel6Operator Type Sit-Down Rider7Step Heightin (mm)16.3 (415)17.1 (435)8Tire Type - Cushion, Solid, Pneumatic Pneumatic 9Wheels, Number - Front/ Rear 2x/2D I ME N S I O N S 10Lift Height, Top of Fork (TOF)in (mm)129 (3292)126 (3209)11Lift Heights, Standard Limited Free Lift (LFL) w/LBR (TOF)in (mm) 5 (140)Lift Heights, Optional Full Free Lift (FFL) with LBR (TOF)in (mm)58 (1490)12Standard Carriage Widthin (mm)42 (1067)13Forks, Thickness x Width x Length in (mm) 1.6 X 3.9 X 42 (40 X 100 X 1067)15Mast Tilt Angles, Forward/Backward degrees 6/616Length To Face of Forksin (mm)99.5 (2528)101.9 (2589)106.3 (2701)17a Overall Width, Standard Tread in (mm)45.7 (1162)46.9 (1191)17b Overall Width, Wide Treadin (mm)52 (1322)52.2 (1326)18Height, Standard Mast - Loweredin (mm)86 (2170)89 (2245)19Height, Standard Mast - Extended with LBRin (mm)147 (3715)175 (4330)Height, Standard Mast - Extended without LBR in (mm)154 (3904)154 (3905)20Height, Standard Overhead Guardin (mm)87.7 (2228)88.6 (2250)Height, Optional Overhead Guard in (mm)83.8 (2128)84.6 (2150)21Turning Radius, Minimum Outside (OTR)in (mm)85.7 (2178)88 (2236)91.5 (2324)22Length, Center of Wheel to Face of Forksin (mm)18.5 (471)19 (483)23Aisle Width, Right Angle Stack (Add Length of Load) in (mm)104.3 (2649)106.6 (2707)110.3 (2802)24Equal Aisle, 90-Degree Intersecting Aisle in (mm)79.9 (2030)80.9 (2056)83 (2108)P E R F O R M A N C E25Travel Speed, Powershift Transmission RL/NL mph (km/h)11.4/11.6 (18.4/18.6)12.3/12.4 (19.8/20)26Lift Speed, Standard 2-Stage LFL RL/NLft/min (m/s)128/134 (0.65/0.68)112/118 (0.57/0.60)Lift Speed, Optional 3-Stage FFL RL/NLft/min (m/s)120/126 (0.61/0.64)106/112 (0.54/0.57)27Lowering Speed, Standard 2-Stage LFL RL/NLft/min (m/s)114/98 (0.58/0.50)Lowering Speed, Optional 3-Stage FFL RL/NL ft/min (m/s)114/98 (0.58/0.50)28Maximum drawbar pull RL/NLlb (kg)4947/2282 (2244/1035)4916/2217 (2230/1006)4438/2534 (2013/1149)Drawbar Pull, Standard Transmission @ 1 mph RL/NL lb (kg)4186/2282 (1899/1035)4154/2217 (1884/1006)3792/2534 (1720/1149)29Gradeability, Standard Transmission @ 1 mph RL/NL Percent 35.9/31.530.2/27.623.5/27.6W T .31Weight, Standard Truck (2-Stg. LFL 84/127) NLlb (kg)8170 (3705)8910 (4040)10300 (4671)Weight, Standard Truck (2-Stg. LFL 84/127) RL lb (kg)12170 (5520)13910 (6308)16300 (7392)32Axle Loading, Static Front/Rear NLlb (kg)3855/4311 (1748/1955)3695/5210 (1676/2363)4207/6089 (1908/2761)Axle Loading, Static Front/Rear RL lb (kg)10518/1648 (4770/747)12024/1881 (5453/853)14064/2232 (6378/1012)T I R E S & W H E E L S33Tire Size, Front 7.00 x 12 - 1228 x 9 - 1534Tire Size, Rear 6.00 x 9 6.50 x 1035Wheelbasein (mm) 63.9 (1623)66.9 (1700)37Ground Clearance, Lowest Point NL (w/RL subtract-6mm)in (mm) 3.3 (84) 4.1 (104)38Ground Clearance, Center of Wheelbase NL in (mm)7.5 (190)8.3 (210)39Service Brake - Method of Control/Operation Foot/Hydraulic 40Parking Brake - Method of Control/Operation Hand/Mechanical P O W E R T R A I N41Battery TypeMaintenance Free42Volts/Cold Cranking Amps v/cca 12/47543Engine, Manufacturer/Model PSI 2.4L44Permanent Output @ Rated RPM hp (kw)62 (46) @ 2700 RPM 45Torque @ Rated RPMft/lbs (kg/m)124 (17.1) @ 1600 RPM46Number of Cylinders/Displacement No/cc (ci)4/2351 (143)47Transmission Type, StandardElectronic PowershiftStandard Speeds, Forward - Reverse 1-149Hydraulic Tank Capacity (Drain and Refill)gal (liter)11.1 (42)50Fuel Tank Capacity (LPG & Duel Fuel Powered Units Only)gal (liter)18.2 (69)51Auxiliary Hydraulic Pressure Relief for AttachmentsPSI (Mpa)2550 (17.6)SPECIFICATIONSMAST SPECIFICATIONSH40-50XT MAST SPECIFICATIONSMaximum Fork Height (TOF) †OverallLoweredHeightOverall Extended Height Free-Lift (TOF)Approximate Total Weight ofStandard Equipped Truck* w/ Load Backrest w/o Load Backrest w/ Load Backrest w/o Load Backrest H40XT H50XTin (mm)in (mm)in (mm)in (mm)in (mm)in (mm)lbs (kg)lbs (kg) 2-STAGE LIMITED FREE-LIFT (LFL) VISTA™PLUS MAST129 (3290)86 (2170)178 (4515)154 (3904) 5 (140) 5 (140)7990 (3624)8720 (3955) 3-STAGE FULL FREE-LIFT (FFL) VISTA™PLUS MAST171 (4350)78 (1970)220 (5570)195 (4935)29 (750)54 (1390)8270 (3751)9000 (4082) 189 (4800)84 (2120)237 (6020)213 (5385)35 (900)60 (1540)8340 (3783)9080 (4119) 194 (4950)86 (2170)243 (6170)218 (5535)37 (950)62 (1590)8370 (3797)9110 (4132) 200 (5100)90 (2270)249 (6320)224 (5685)41 (1050)66 (1690)8410 (3815)9150 (4150) 218 (5550)96 (2420)267 (6770)242 (6135)47 (1200)72 (1840)8500 (3856)9240 (4191)†Lift heights over 171.5” (4356 mm) max. fork height are considered highlifts and require reduced capacity and restricted back tilt.* Total approximate weights listed include mast, standard carriage, load backrest extension, pneumatic tires and 70 lbs. LP tank and tank bracket.RL = Rated Load NL = No LoadH60XT MAST SPECIFICATIONSMaximum Fork Height (TOF) †OverallLoweredHeightOverall Extended Height Free-Lift (TOF)Approximate Total Weight ofStandard Equipped Truck* w/ Load Backrest w/o Load Backrest w/ Load Backrest w/o Load Backrest H60XTin (mm)in (mm)in (mm)in (mm)in (mm)in (mm)lbs (kg) 2-STAGE LIMITED FREE-LIFT (LFL) VISTA™PLUS MAST126 (3209)89 (2245)175 (4430)154 (3905) 5 (150) 5 (150)10050 (4559) 3-STAGE FULL FREE-LIFT (FFL) VISTA™PLUS MAST181 (4615)87 (2195)230 (5840)208 (5260)37 (965)63 (1600)10410 (4722) 187 (4768)91 (2295)236 (5990)213 (5410)41 (1065)65 (1655)10460 (4745) 211 (5368)101 (2545)260 (6590)237 (6010)51 (1315)75 (1905)10590 (4804) 228 (5815)107 (2695)278 (7040)256 (6495)57 (1465)80 (2055)10770 (4885)†Lift heights over 171.5” (4356 mm) max. fork height are considered highlifts and require reduced capacity and restricted back tilt.* Total approximate weights listed include mast, standard carriage, load backrest extension, pneumatic tires and 70 lbs. LP tank and tank bracket.RL = Rated Load NL = No LoadPSI 2.4L LPG engineElectronic powershift transmissionMonotrol® pedal directional control2-stage LFL VISTA TM PLUS mast42" wide hook-type carriage with 48" tall load backrest 42" forks6° forward / 6° back tilt3-function hydraulic control valveIntegrated dashboard displayHydrostatic power steeringNon-suspension vinyl seat with non-cinch seat belt Electronic hornKeyswitch startAdjustable steer columnPSI 2.4L dual fuel engineColumn-mounted directional shift leverHigh air intake with pre-cleanerAccumulatorKeyless start (with auxiliary key switch)Front and rear halogen or LED work lightsAnti-clog plus radiatorFire extinguisherLoad weight displaySwing-out LPG tank bracketTouchPoint mini-lever hydraulic controlsReturn-to-set-tilt (cowl mounted mechanical levers only) Rear drive handle with horn button10° forward / 6° back tiltClamping hydraulic control with detent4-function hydraulic control valve84" overhead guardOperator cab kit with heater12-volt power supplyBelly screenFrame mounted external tie downs Rubber floor matHigh air intakeIntegral tie downsOperator restraint systemAluminum core, anti-clog radiatorSingle pedal inch brakeHyster Stability System (HSS®)Cowl-mounted mechanical hydraulic control levers Fixed LPG tank bracket88" overhead guardUL classification LPCounterweight exhaust1 year / 2,000 hour full truck warranty3 years / 6,000 hour powertrain warrantySTANDARD EQUIPMENTOPTIONAL EQUIPMENTFull suspension seat – vinyl or clothRed, high-visibility, non-cinch seat beltGlass or polycarbonate overhead guard rain topIntegral sideshifterIntegral sideshifting fork positionerDual inch brake pedalsDual side view mirrorsAudible alarm – reverse activatedVisible alarm – amber strobeVisible alarm – blue spot lightVarious light packagesOverhead exhaustPneumatic shaped solid tiresNon-marking pneumatic shaped solid tiresWide treadTilt cylinder bootsTraction speed limiterTelemetry (3 levels)L1: Wireless monitoring (cellular or WiFi)L2: Wireless access (for use with operator swipe cards)L3: Wireless verification (facilitates operator checklistfunctionality)FEATURES AND OPTIONSHyster Company P .O. Box 7006Greenville, North Carolina 27835-7006Part No. H40-60XT/TG 2/2018 Litho in U.S.A.Trucks may be shown with optional equipment. © 2018 Hyster Company. All rights reserved.Hyster, , and STRONG PARTNERS. TOUGH TRUCKS. and MONOTROL are registered trademarks in the United States and certain other jurisdictions. Hyster products are subject to change without notice.Visit us online at or call us at 1-800-HYSTER-1.。

VIVA XXLSpare PartsDieser Ersatzteilkatalog ist gültig –für Geräte ab Baujahr 1998–ab Geräte-Nr. 237434TypenübersichtCONTENTS NOTE:bremer XXL CASING (4)XXL CASINGPos. Sach-Nr. HOBART PART,No Description1 195448 143427-276cap nut M42 043621 00-737971-1screw M4x83 684031 00-737971-2coffee grounds drawer abridged4 645184 144986-1side section left/right5 025097 144986-48nut M5, self-locking6 012556 144986-307serrated lock washer M 5A7 682284 00-737971-3bolt8 682276 00-737971-4grill9 670294 00-737971-5frontpanel.10 037311 143427-170screw M 4x1611 682764 00-737971-6nozzle cap12 645338 144986-4grill13 070939 144986-5screw M 4x3014 652466 144986-6drip tray15 303100 143427-419profile packing16 682713 00-737971-7lid17 682748 00-737971-8covering cpl.18 685763 144986-452plug19 645176 144986-7bottom drip tray20 014222 144986-9screw M3x8 1.4301 DIN 96621 653497 144986-10cover22 00-737971-58rack23 001015 144986-391screw M 4x824 684589 00-737971-9handle plug25 252417 00-737971-10o-ring D 20.00x226 683078 00-737971-11pipe27 031720 144986-16sheet-metal screw B 3.9x9.5, steel chrom.28 670278 00-737971-12rear panel29 653489 144986-402set screw M8x3030 305111 143427-422embossed work31 248002 143427-356terminal32 248703 144986-311sheet-metal screw B 3.9x3233 217360 143427-290adhesive label, equalization34 010731 144986-423screw M 6x2035 006777 144986-301serrated lock washer A6.4, A 6 DIN 689836 251887 144986-302nut M 637 223697 144986-303terminal clamp M 638 004014 144986-300washer A 6.4XXL POT / JUG TRAYPos.Sach-Nr.Teile Benennung Description1 673846 00-737971-13pot tray outlet1.1 682055 00-737971-14pot outlet ( 160mm )728438 pot outlet ( 500mm ) 1.2 682969 00-737971-15extension pot tray1.3 682888 00-737971-16pot tray1.4 682934 00-737971-17elbow left1.5 682942 00-737971-18elbow right1.6 682950 00-737971-19guiding cpl.1.7 377740 00-737971-20nut w. washer assemblyPos. Sach-Nr. HOBART PART,No Description1 685925 00-737971-21coffee ground container cpl.2 686484 00-737971-22angle bracket3 664669 00-737971-23IR-receiver4 003999 00-737971-24sheet-metal screw B 2.9x9.5, steel chrom.5 003891 00-737971-25sheet-metal screw B 2.9x6.5, steel chrom.6 657263 00-737971-26hopper base7 362352 00-737971-27nut, self-locking M38 683027 00-737971-28geared motor9 285161 00-737971-29screw M5x6 1.4301 DIN 92110 685402 00-737971-30indicator rod11 001325 00-737971-31washer A8.4 1.430112 687863 00-737971-32washer A8.4 PP13 681997 00-737971-33distributor cpl.14 011363 00-737971-34hex.socket screw M6x10 DIN 91215 003980 144986-49washer A 5.316 681954 00-737971-35reinforcement17 025097 144986-48nut M5, self-locking18 010421 00-737971-36screw M 3x1219 005355 00-737971-37sheet-metal screw B 3.5x9.5, steel chrom.20 680885 00-737971-40coupling21 381624 143427-557 coupling ring gear22 680893 00-737971-41drive shaft23 681970 00-737971-42mounting plate cpl.24 706175 00-737971-216hopped lid cpl.25 663603 00-737971-38 o-ring26 687855 00-737971-39extension27 664677 00-737971-43IR-transmitter28 704075 00-737971-44feed screw assy29 663611 00-737971-45o-ring D8,73x1,78 Viton Shorehaerte 7030 657123 00-737971-46bearing bush assy31 685933 00-737971-47air segment32 186465 00-737971-48sheet-metal screw B3.5x2033 653713 144986-22cylinder lock33.1 660116 144986-21replacement key33.2 00-737971-49nut M19x133.3 00-737971-50nut M10x134 719366 .717576 .717584 .719757 .686425 00-737971-51lid for coffee container69590435 684961 00-737971-52boltXXL BREWING CHAMBER LOWERPos. Sach-Nr. HOBART PART,No Description1 731617 144986-509coffee filter 1,3 x 0,04731846 144986-510coffee filter 0,47 x 0,042 729418 144986-511o-ring 63 x 23 300829 143427-413seal silicone 172x155x3 shore 604 385743 143427-565NTC sensor cpl.5 257478 00-737971-86screw M8x166 003972 00-737971-87spring lock washer, a 8 steel galvanized7 001325 00-737971-31washer A 8.48 672718 00-737971-88guide sleeve PTFE9 395110 144986-249o-ring 14x2,5 EPDM10 675237 00-737971-89thrust washer11 675210 00-737971-90pressure spring 2,5 1.430112 687979 00-737971-55friction bearing 6,213 672637 00-737971-91guiding arbor14 672688 00-737971-92sleeve 8,5 x 4,815 678279 00-737971-93pressure spring16 672629 00-737971-94spacer sleeve17 672661 00-737971-193guiding rod18 644978 144986-65interrupter disc19 096954 144986-54retaining ring20 651842 144986-56photo barrier21 010502 144986-55bolt M 4x10²² 672610 00-737971-95bolt23 697044 00-737971-96gear with motor23.1 719412 spindel (with mech end switch)24 025097 144986-48nut M5 self-locking25 681482 00-737971-71pipe 8x626 681199 00-737971-70elbow quick coupling27 675172 00-737971-97funnel cpl.28 686166 00-737971-98cover sheet29 046337 00-737971-99 PVC U-Profil45 mm310 mm110 mm550 mm12345.156768910111213614121521416986771718Pos. Sach-Nr. HOBART PART,No Description1 210048 143427-278diaphram pump2 377740 00-737971-20nut w. washer assembly3 702102 144986-519 screw connection4 681474 00-737971-59FEP tube5 247723 143427-351detachable filter for diaphrag5.1 039837 hose6 277665 143427-395hose clamp NS7 228036 143427-311hose D 6 x D 11.58 213896 143427-281hose connector9 214833 144986-244sealing ring A10x13.5x110 164763 00-737971-102vibration absorber11 542237 00-737971-103screw M4x512 050849 144986-413toothed lock washer J 4.313 334332 143427-482filter14 001015 144986-391screw M 4x815 730602 bracket16 645389 144986-218solenoid valve 3/217 730963 hose connector18 731781 sealing ring A5,5 x 8 x 1 Cu DIN 7603XXL STORAGE CONTAINERPos. Sach-Nr. HOBART.PART,No Description1 681652 00-737971-81cable harness cpl.2 396702 143427-579sensor cpl.3 681482 00-737971-71pipe FEP4 681199 00-737971-70elbow quick coupling5 682853 00-737971-195fan6 227803 00-737971-104screw M3x357 682039 00-737971-105warmer outlet cpl.8 076031 00-737971-74silicone shaped seal 171.6x159.6x5.5mm9 670774 00-737971-106storage container 4 l10 148008 00-737971-107flat heating element11 670790 00-737971-108spanner plate12 373494 144986-118retaining clamp13 374237 143429-237NTC sensor cpl.14 316741 00-737971-109grub screw M4x35 DIN 91315 001015 144986-391screw M4x816 050849 144986-413toothed lock washer J4.317 055832 144986-246cap nut 1/818 659665 144986-203crimped nippl19 362352 00-737971-27nut self-locking M320 541397 144986-79nut with washer assem b ly21 670812 00-737971-110lid22 252867 143427-365nut M 523 679232 00-737971-111tie rod24 670782 00-737971-112electrode cpl.25 685496 00-737971-113insulation, storage container389366 00-737971-114adhesive fabric tape 50m 50mm26 003980 144986-49washer A5,3 1.4301 DIN12527 682020 00-737971-115terminal clamp28 670804 00-737971-116nut M16x129 039756 00-737971-56hose D10x230 676888 00-737971-117solenoid valve30.1 715069 00-737971-118o-ringXXL HOT WATER BOILER TOP / ELEMENTS1 23 4 56 32 7 891011121314151617181119818XXL HOT WATER BOILER 11.2 1.31.42.1 22.21.134566.178910111213141516171819150mm1500mmVon 7.99bis 7.2000ab 7.2000bis 7.99Pos. Sach-Nr. HOBART PART,No Description1 331074 pressure reducer1.1 751413 cartridge for pressure reducer1.2 751421 o-ring1.3 7514051.4Schlauchanschluß G3/8A2 3253682.1 257311 00-737971-214 seal 15x8x22.2 0500163 220515 143427-295safety valv e4 246263 143427-346o-ring D13x1.5 N5 679755 00-737971-129coupling cpl.6 700517 pressure reducer6.1 751413 cartridge for pressure reducer 6526527 395110 144986-249o-ring 14x2.58 653160 144986-156hose connector G3/8Z.-DA7/DI5 MS 589 277665 143427-395hose clamp NS10 272159 143427-391hose D12 x D18,5 silicon 5,5 bar11 039756 00-737971-56hose D10x2 solicone rubber12 659479 144986-220hose connector G3/4A G1/213 659665 144986-203crimped nippl14 055832 144986-246cap nut 1/815 352365 144986-233NTC sensor plc. - boiler16 670235 00-737971-125boiler cpl.17 673862 00-737971-132insulation389366 00-737971-114adhesive fabric tape 50m-50mm18 251550 143427-362sealing ring A 13,5x18x219 162574 143427-251box nut width A/F 24400 mm500 mmBis 4.2000Ab 4.200012123456789101111.112131415161718192021226238Pos. Sach-Nr. HOBART PART,No Description1 276642 143427-394hose clamp NS2 272159 143427-391hose D12 x D18,5 silocon 5,5 bar3 679763 00-737971-128hose container4 103020 143429-120bracket 90 degrees5 109339 144986-217nut 1/86 645370 144986-243solenoid valve 2/27 681156 143427-652 connection8 681474 00-737971-59FEP-pipe9 325600 143427-469flowmeter cpl.10 382329 143427-559cover, grey PVC, 0.5 mm11 158658 143427-244double IR detector for flowmeter11.1 143324 143427-240mount for flowmeter12 003999 00-737971-24sheet-metal screw B 2.9x9.5 steel chrom.13 164879 144986-163PTFE-pipe14 702102 144986-519 screw connection15 659495 144986-185 sealing16 246263 143427-346o-ring D13x1.5 N17 679291 00-737971-130coupling cpl. boiler18 686158 00-737971-131 angle bracket19 542237 00-737971-103screw M4x5 1.4301 DIN 798520 012548 00-737971-120serrated lock washer M 4A, A 4.3 DIN 679821 242160 143429-129 hose connection piece22 214833 144986-244 sealing a 10 x 13.5 x123 705209Pos. Sach-Nr. HOBART PART,No Description1 652466 144986-6drip tray2 228419 143427-312hose clip3 373915 00-737971-133shaped hose4 706213 144986-512pipe FEP5 706205 144986-513srew-in hose connection6 706183 144986-514reducing piece7 612626 144986-265o-ring8 671479 00-737971-135double solenoid valve 8.1 679534 00-737971-136solenoid coil8.2 324353 143427-464filter9 335800 00-737971-137supply hose cpl.10 681482 00-737971-71pipe FEP11 681164 00-737971-134srew-in hose connection12 039756 00-737971-56hose D10x213 676969 00-737971-138drain cpl.14 039713 00-737971-79hose D27x315 686352 00-737971-139Y-piecePos. Sach-Nr. HOBART PART,No Description1 670286 00-737971-140front panel top2 693596 00-737971-141coffee outlet covering cpl. 160 mm3 693588 00-737971-142coffee outlet covering cpl. 60 mm4 676888 00-737971-117solenoid valve 2/24.1 715069 o-ring5 680265 00-737971-144coffee spout cpl.5.1 289108 143427-404perlator star6 382329 143427-559cover grey PVC, 0.5 MM7 633445 00-737971-145Pharmed hose D9,5x3,28 158658 143427-244double IR detector for flowmeter8.1 143324 143427-240mount for flowmeter9 325600 143427-469flowmeter cpl.10 003905 144986-286nut M4 1.4301 DIN 93411 068217 00-737971-146screw M4x10 1.4301 DIN 93312 316741 grub screw M4x35 DIN 91313 682039 00-737971-105warmer outlet cpl.14 681652 00-737971-81cable harness cpl.15 003999 00-737971-24sheet-metal screw B 2.9x9.5, steel chrom.Pos. Sach-Nr. HOBART PART,No Description1 670286 00-737971-140front panel top2 015113 144986-360pressure spring3 652946 144986-264ball nipple4 653691 144986-263rosette5 692050 00-737971-148bushing hot water6 694088 00-737971-149grub screw7 612626 144986-265o-ring 8x1.58 652768 144986-266hot water pipe9 652776 144986-267cone hot water pipe10 607630 143427-608screw-in nozzle MS 5811 133817 144986-269perlator12 645370 144986-243solenoid valve 2/213 214833 144986-244sealing ring A10x13.5x114 395633 144986-245threaded connect piece G1/8A15 055832 144986-246cap nut 1/816 055476 144986-247crimped nippl17 652687 144986-248connecting nipple18 395110 144986-249o-ring 14x2.519 109339 144986-217nut 1/8”20 103020 143429-120bracket 90 degrees21 252700 plug connector22 375446 144986-214adjusting angl e23 681156 143427-65224 329967 144986-144t-piece25 616346 144986-162tubular rivet 4x0.4x1526 164879 144986-163PTFE tub ePos. Sach-Nr. HOBART PART,No Description1 690813 00-737971-150crimped nipple2 055832 144986-246cap nut 1/83 237337 00-737971-151pipe D=4x0,5/554 681474 00-737971-59FEP-pipe AD6 ID45 026301 00-737971-152cable clip 31,7x28.66 248002 143427-356terminal7 307416 143427-438filling level electrod7.1 254479 00-737971-153pin7.2 254460 00-737971-154pin housing7.3 307599 143427-440cable compl. electrod7.4 106054 143427-221PVC tube length 300 mm7.5 307386 143427-436spacer7.6 079197 00-737971-155suction strainer compl.7.7 307394 143427-437coupling no. 517.8 050121 144986-454cable binder7.9 161179 143427-245cable binder7.10 329908 143427-479terminal7.11 047406 00-737971-156cap nut7.12 045780 144986-234crimped nipple, teflon 8 x 6 x 6,5 7.13 329835 143427-478spacer7.14 307378 143427-435threaded section cpl.7.15 307475 143427-439electrode cpl.8 616346 144986-162tubular rivet D4x0.4x159 363162 143427-519hose clamp10 003743 00-737971-157screw M 5x10¹¹ 012556 144986-307serrated lock washer M 5A12 688274 00-737971-158mounting plate13 688185 00-737971-159hose pump cpl. SR25 24V13.1 385344 143427-563hose cpl SR2514 277665 143427-395hose clamp15 175781 144986-128hose D 6 x 1216 039985 00-737971-160hose D6x1,5 PVC17 363162 143427-519hose clampXXL LAB EL SPos. Sach-Nr.T HOBART PART,No Description1 682756 X691054 00-737971-192 adhesive lable ( ENGLISH )2 365777 144986-508 cable connections3 644994 144986-270front outlet foil4 653136 00-737971-170front outlet foil prod. left666483 00-737971-171front outlet foil left688215 00-737971-172front outlet foil left pott5 668699 00-737971-175front outlet foil left hot water6 668168 00-737971-176front outlet foil right7 668702 00-737971-177front outlet foil right hot water8 668176 x690996 00-737971-184 lable ( cup of coffee )9 668184 x691011 00-737971-185 lable ( small pot of coffee )10 668230 x691038 00-737971-186 lable ( pot of coffee )11 668192 x691046 00-737971-187 lable ( large pot of coffee )12 717274 ????????? ??????????13 715123 Getränkeschild Tasse, Pott, Kännchen, Kanne14 714682 Eingabefolie links blau 4xSTART15 717231 Eingabefolie Heisswasser rechts gross blau16 717223 Eingabefolie Heisswasser links klein blau17 652628 Blindfolie rechts18 655430 E00-737971-178front outlet foil right19 348546 Getränkeschild Tasse deutsch20 714747 Eingabefolie links blau 1xSTART21 692816 Klebeschild SB Teewasser22 348538 Getränkeschild Pott deutsch626880 Folie Silbermatallic A4, Sis Signolit Ink-Jet(für Tintenstrahldrucker, zurHerstellung von Getränkeschildern, 4 Stück pro Folie A4)VIVA XXL Kabel, Zubehör (ohne Abbildung)Pos.Sach-Nr.Teile Benennung DescriptionKabel kpl.031542Kabel kpl. H05V-K 0,75 QMM GNGE L=180cable cpl. H05V-K128813Kabel kpl. SIF 4,0 QMM SW L=200cable cpl.128821Kabel kpl. SIF 4,0 QMM SW L=150cable cpl. sif star connection241318Kabel Erdung kpl. (bis 12.1999)cable cpl.307599Kabel kpl. Fuellstandselektrod cable compl. electrodeKabelbäume kpl.655848Kabelbaum kpl. Entstoereinheit cable harness cpl.681628Kabelbaum kpl. Kesselheizung cable harness cpl.681636Kabelbaum kpl. Netzspannung cable harness cpl.681644Kabelbaum kpl. Niederspannung cable harness cpl.681652Kabelbaum kpl. Sensorik cable harness cpl.681660Kabelbaum kpl. Ventil cable harness cpl.HOBART PART,No For connection with water softener 009881 00-737971-208connector cpl.215821 00-737971-209sealing ring A 17x21x1.5055514 00-737971-210reducing nipple MS265187 00-737971-211seal 17x23x1.5 17x23x1,5HOBART PART,No For connection without water softener 051381 144986-316filter035629 00-737971-213cap nut R 3/8257311 00-737971-214seal 15x8x2 novapress 800 f/universal 298212 00-737971-215hose connector277665 143427-395hose clamp NSVIVA XXLPos.Sach-Nr.Teile Benennung DescriptionErsatzteilkatalog bremer VIVA XXL 2.2001Artikel-Nr.:670324。

01 060207030804090510MG44GASKETS: Each end of the coupler is sealedby a black rubber gasket. These may becomeworn over time due to overtightening orconnecting to damaged male fittings.1. Use needle nose pliers or a similar tool to unscrew the Schradervalve depressor from the gasket.2. Remove and replace the worn gasket.3. Screw the depressor back into the gasket.Reversible CouplerIt's best to avoid using a hose to connectyour vacuum gauge to the system. The couplermakes it easy to connect the gauge directly to aservice port or valve core removal tool.Each end has a valve depressor and gasket soyou can flip the coupler to best fit the systemand your viewing angle. Rotate and tighteneach end independently for optimal viewingand control.Quick Start1. Unscrew the battery cover and install (2) AAalkaline batteries.2. Hold to power on.Wireless setting is briefly displayed (ON/OFF).Activate wireless in the menu to send measure-ments to compatible Job Link® system tools.3. C onnect to the equipment you're evacuating.Connect directly to an unused service port or toa Schrader valve core removal tool.4. View the live measurement on the top line.5. Press NEXT to change bottom line view.What's Included(1) MG44 Wireless Vacuum Gauge(1) Reversible 1/4" angled (45°) coupler(2) AA Batteries(1) Operator's manual(1) Year limited warrantyDescriptionUse the MG44 Wireless Vacuum Gaugeto reliably monitor your evacuations in thefield. Long range wireless technology sendsdeep vacuum measurements up to 1000 feet(305 meters) away. View live on your SMAN TMmanifold, in the Job Link® mobile app, or directlyon the MG44.Save time by wirelessly monitoring yourevacuations. Remotely view trending on theJob Link mobile app so you know when an extranitrogen purge is required, a leak is suspected,or just watch everything pull as planned.Reduce the misleading nature of dynamicvacuum measurement during pull down byconnecting MG44 directly to the system. Thereversible angled coupler makes it easy to orientthe gauge so that it's out of the way and easyto see.Select one of three unique views, including anew Rate Meter that provides a great feel anda Bar Graph that has a range up to atmosphere.Built for demanding field use, the overmoldedcase resists damage from physical impact andwater ingress.MaintenanceCLEANING: Clean the exterior with a dampcloth. Do not use detergents or solvents.SENSOR: Clean the sensor on a regular basisto prevent the build up of oils and contaminents.DO NOT use an object such as a cotton swab toclean the sensor. This may damage the sensor.1. Power off MG44.2. If attached, remove the coupler from MG44 to expose the cavity ofthe 1/4" male fitting.3. Fill up about half of the cavity with isopropyl (rubbing) alcohol orAC system flush.4. Cover the cavity and gently shake it for about 15-30 seconds.5. Pour out the dirty solution and let the vacuum sensor dry with thefitting facing down.BATTERIES: An empty battery iconindicates batteries need to be replaced. Whenpower is too low to operate, "LoBatt" is displayed5 sec before powering off automatically. You canalso monitor battery life in the Job Link app toolmanager.1. Power off MG44.2. Unscrew the battery cover (2 screws) and dispose of batteriesaccording to local law.3. Install (2) new alkaline AA batteries.4. Reinstall cover.WirelessVacuumGaugeOPERATOR'SMANUALModel MG44OperationButtonsUnless muted, each button press triggersa beep. An inactive button press triggers adouble beep.Hold to toggle power.Toggle backlight.Silence alarm.Hold to enter MENU.Hold to exit MENU without saving.ENTER selection.Stop low alarm and start high alarm.NEXT view.NEXT menu item or increase value.Hold to toggle ALARM mode.Silence alarm.DisplayIn standard operating mode, the top lineshows the live measurement. The bottom lineshows one of three selectable views.: Auto Power Off Enabled: Battery Level: Low Alarm: High Alarm: Muted: Rate (differential per minute): Wireless Enabled (shown at startup): Wireless Disabled (shown at startup)ViewsPress NEXT to change the content of thebottom line. Each view provides a unique wayto monitor your evacuation.RATE: The running 10-second average of themeasurement's change per minute. Negativerates indicate the vacuum is getting deeper.RATE METER: The graphical representationof the measurement's real-time change perminute. The scale is dynamic (i.e. relative to themeasurement) making changes easy to see.DecreasingStableIncreasingBAR GRAPH: The graphical representationof the measurement. The scale is static andnonlinear for increased resolution at deepervacuums. Full bars indicates atmosphericpressure.~3500 micronHgAlarm ModeEvery evacuation is different. Some requiremultiple purges of dry nitrogen, while some takeless time than a phone call. Activate alarm modeso you can get other things handled withoutbabysitting your gauge.Follow recommended evacuation practicesfrom the equipment manufacturer and training.Alarm levels can be adjusted in the menu.1. H old ALARM to activate* low alarm (L).Stopwatch starts. APO deactivates.Turn on your vacuum pump.2. O nce the low alarm level is reached, the back-light blinks and the alarm sounds.To silence the alarm, press or NEXT.Isolate the vacuum pump from the system.3. P ress ENTER to activate high alarm (H).Stopwatch restarts.4. Once the high alarm level is reached, thebacklight blinks and the alarm sounds.To silence the alarm, press or NEXT.Stopwatch stops.5. Press ENTER to exit alarm mode.APO reactivates.* Hold ALARM to exit alarm mode at any time.SpecificationsConnector Type: 1/4'' SAE male fitting. Includes reversible 1/4"angled (45°) coupler with Schrader depressors.Max Pressure: 870 psig (60 bar)Refresh Rate: 0.5 secondsAccuracy: ±(5% reading + 5 micron) at 77°F (25°C), 50 to 2000 micronMeasurement Range and Units:50 to 25000 micronHg (mTorr); 0.05 to 25 mmHg (Torr);6 to 3333 Pascals; 0.06 to 33.33 mBarBar Graph Range: ultimate vacuum to atmospheric pressureBest Resolution:1 micronHg(mTorr), below 2000; 0.001 mmHg (Torr), below 2.5;1 Pascal, below 250; 0.001 mBar, below 2.5;Battery Type: 2 x AA Alkaline, NEDA 15A, JIS UM3, IEC LR6Battery Life: 50 hours typical alkalineAuto Power Off: 15 minutes default (APO adjustable)Wireless Range: 1000 feet (305 meters) line of sight.Obstructions affect distance.Radio Frequency: 2.4 GHzWireless Device Requirements:(Latest compatibility and firmware at )Job Link® app: BLE 4.0 devices with iOS® 7.0 or Android™ 5.0SMAN TM manifold: Models SM380V/SM480V with latestfirmware installed.Water Resistance: IP54Operating Environment: 14°F to 122°F (-10°C to 50°C) at<75%RHStorage Temperature: -4°F to 140°F (-20°C to 60°C) at <80%RH(with batteries removed)Weight: 0.66 lbs (300 g)US Patent: /patents! WARNINGSDisconnect MG44 from system before applying pressure; pressures above870 psig (60 bar) can damage the vacuum gauge.Hand tighten fittings; overtightening may damage seals.Follow all equipment manufacturer’s testing procedures above those inthis manual in regards to properly servicing their equipment.11 161217131814191520Settings MenuThe settings menu can be entered whenin standard operating mode. Selecting a newsetting automatically exits the menu. This savestime getting in and out of the menu quicklyfor your most commonly changed setting (e.g.wireless).1. H old ENTER to enter* the settings menu.The menu starts where you last exited.2. P ress NEXT to view next setting.The menu loops so keep going if you skippedthe setting you want to change.3. Press ENTER to select the setting.4. Press NEXT to increase the setting value.The setting values loop so keep going if youskipped the value you want to save.5. Press ENTER to save* the new value and exit.*Hold ENTER to exit the menu without saving.List of SettingsStart : Enable Wireless (if off)Stop: Disable Wireless (if on)Auto Off: Set Auto Off TimerUnits: Set Unit of MeasureAlarm Lo: Set Low Alarm LevelAlarm Hi: Set High Alarm LevelMute: Enable Speaker (if off)Unmute: Disable Speaker (if on)BkLtTime: Set Backlight TimerFirmware: View and Update FirmwareRestore: Restore Default SettingsWirelessStart or stop sending wireless measurements.Live measurements can be sent to SMANmanifold (overrides its internal vacuum gauge),and to the Job Link mobile app for addedcapabilities such as live trending. Wireless isdisabled by default to maximize battery life.Auto Power Off Timer (APO)Set the timer for the gauge automaticallypowering off. The timer is reset when a buttonis pressed. The timer is disabled in alarm mode.(15min, 30min, 45min, 60min, Disabled)UnitsSet the unit of vacuum measurement. Alarmlevels are automatically converted to match theunit setting.(Microns, Pascals, mBar, mTorr, Torr, mmHg)Low Alarm Level ()Set the vacuum level required to trigger thelow alarm. Hold NEXT for quicker scrolling.(50 - 500 - High Alarm)High Alarm Level ()Set the vacuum level required to trigger thehigh alarm. Hold NEXT for quicker scrolling.(Low Alarm - 1000 - 9000)Mute ()Mute or unmute the speaker. Button pressesand alarms remain silent if the speaker is muted.The icon appears if the speaker is muted.Backlight TimerSet the timer for the backlight automaticallyturning off. The timer is reset when a button ispressed.(10s, 20s, 1min, 2min, 5min, 10min, 15min, 30min)FirmwareCheck the firmware version (X.XXX.X) byreading the first 4 digits. If a new version isavailable from the Job Link mobile app, initiatethe update from your mobile device.RestoreTo restore all settings to their factory defaults,press NEXT until "YES" is displayed and pressENTER to confirm. To exit without restoring,select "no" or hold ENTER.Evacuation TipsMAXIMIZE FLOW• Remove Schrader valve cores with a removaltool.• Remove valve depressors from hoses.• Use shortest vacuum rated hoses with largestdiameter available.• Do not evacuate through hoses with low lossfittings.TRUST YOUR TEST• Inspect the rubber seals at both ends of yourhoses for damage. Replace as needed.• Change pump oil before and during the job.Change pump oil on-the-fly without losingvacuum with Fieldpiece vacuum pumps.• When the vacuum pump is isolated from thesystem, a slow rise that stabilizes may signifymoisture is still present in the system. A con-tinuous rise to atmosphere indicates a leak.Check hoses, tools, or the system itself.• Measurements are less representative of theentire system when the vacuum pump is onbecause pumping creates a pressure gradi-ent. Isolate the pump and allow the system tostabilize before assuming the measurementrepresents the entire system.Certificationsand Module IDsFCC StatementThis equipment has been tested and found to comply with the limitsfor a Class B digital device, pursuant to Part 15 of the FCC Rules. Theselimits are designed to provide reasonable protection against harmfulinterference in a residential installation.This equipment generates, uses and can radiate radio frequencyenergy and, if not installed and used in accordance with the instructions,may cause harmful interference to radio communications. However,there is no guarantee that interference will not occur in a particularinstallation. If this equipment does cause harmful interference toradio or television reception, which can be determined by turningthe equipment off and on, the user is encouraged to try to correct theinterference by one of the following measures:. Reorient or relocate the receiving antenna.. Increase the separation between the equipment and receiver.. Connect the equipment into an outlet on a circuit different from thatto which the receiver is connected.. Consult the dealer or an experienced radio/TV technician for help.FCC Caution: To assure continued compliance, any changes ormodifications not expressly approved by the party responsible forcompliance could void the user's authority to operate this equipment.(Example - use only shielded interface cables when connecting tocomputer or peripheral devices).This device complies with Part 15 of the FCC Rules. Operation issubject to the following two conditions: (1) this device may not causeharmful interference, and (2) this device must accept any interferencereceived, including interference that may cause undesired operation.This device complies with Industry Canada licence-exempt RSS-247standard. Operation is subject to the following two conditions: (1) thisdevice may not cause interference, and (2) this device must accept anyinterference, including interference that may cause undesired operationof the device.IC Radiation Exposure Statement: This equipment complieswith IC RSS-102 radiation exposure limit set forth for an uncontrolledenvironment. This equipment should be installed and operated withminimum distance 0.5 cm between the radiator and your body.Fieldpiece Instruments 1636 West Collins Avenue, Orange, CA 92867IFETEL StatementLa operación de este equipo está sujeta a las siguientes dos condiciones:(1) es posible que este equipo o dispositivo no cause interferenciaperjudicial y (2) este equipo o dispositivo debe aceptar cualquierinterferencia, incluyendo la que pueda causar su operación no deseada.The operation of this equipment is subject to the following twoconditions: (1) this device or device may not cause harmful interference,and (2) this device or device must accept any interference, includinginterference that may cause undesired operation.ANATEL StatementEste equipamento não tem direito à proteção contra interferênciaprejudicial e não pode causar interferência em sistemas devidamenteautorizados.This equipment is not subject to the protection from harmfulinterference and may not cause interference with duly authorizedsystems.Limited WarrantyThis product is warranted against defects in material andworkmanship for one year from date of purchase from an authorizedFieldpiece dealer. Fieldpiece will replace or repair the defective unit,at its option, subject to verification of the defect.This warranty does not apply to defects resulting from abuse,neglect, accident, unauthorized repair, alteration, or unreasonableuse of the instrument.Any implied warranties arising from the sale of a Fieldpiece product,including but not limited to implied warranties of merchantability andfitness for a particular purpose, are limited to the above. Fieldpieceshall not be liable for loss of use of the instrument or other incidentalor consequential damages, expenses, or economic loss, or for any claimof such damage, expenses, or economic loss.State laws vary. The above limitations or exclusions may not applyto you.Obtaining ServiceFor international customers, warranty for products purchasedoutside of the U.S. should be handled through local distributors. Visitour website to find your local distributor.© Fieldpiece Instruments, Inc 2021; v01 EN 300 3282ALHR00300263-18-10972IC: Industry Canada22518-BT003IFETEL: Federal Telecom InstituteRCPFI2A18-0235Regulatory Compliance MarkWaste Electrical andElectronic EquipmentRestriction of HazardousSubstances Compliant。

TRAILER TOWING SELECTORRequired EquipmentIncludes items that must be installed.* Your New VehicleLimited Warranty (see your dealer for a copy) may bevoided if you tow without them.For trailers over 3,500 pounds – Trailer Tow Package (53R)*Check with your dealer for additional requirements, restrictions and limitedwarranty details.1Towing Package (53R).®• Do not exceed trailer weight of 3,500 lbs. when towing withbumper only.TOWING BASICSTowing a trailer is demanding on your vehicle, your trailer and your personal drivingskills. Follow some basic rules that will help you tow safely and have a lotmore fun.For the latest RV& Trailer Towing information, check out www.fleet.ford. com/towing-guides or go to esourcebook. .Photography, illustrations and information presentedherein were correct when approved for publishing. FordMotor Company reservesthe right to discontinueor change at any time thespecifications or designs without incurring obligation.Some features shown ordescribed are optional at extra cost. Some options are required in combination with other options. Consult your dealer for the latest, mostcomplete information on models, features, prices andavailability.Many of the recreational vehicles shown in this brochure are modified or manufacturedby companies other than Ford Motor Company. Ford assumes no responsibilityfor such modifications ormanufacturing.Cargo and WeightDistributionFor optimum handling and braking, the loadmust be properly distributedKeep center of gravity low for best handlingApproximately 60% of the allowable cargoweight should be in the front half of thetrailer and 40% in the rear (withinlimits of tongue load or king pin weight)Load should be balanced from side-to-sideto optimize handling and tire wearLoad must be firmly secured to preventshifting during cornering or braking, whichcould result in a sudden loss of controlBefore StartingBefore setting out on a trip, practice turning,stopping and backing up your trailer in anarea away from heavy trafficKnow clearance required for trailer roofCheck equipment (make a checklist)Backing UpBack up slowly, with someone spottingnear the rear of the trailer to guide youPlace one hand at bottom of steeringwheel and move it in the direction youwant the trailer to goMake small steering inputs – slightmovement of steering wheel results inmuch greater movement in rear of trailerTurningWhen turning, be sure to swing wideenough to allow trailer to avoid curbs andother obstructions.BrakingAllow considerably more distance forstopping with trailer attachedRemember, the braking system of thetow vehicle is rated for operation at theGVWR, not GCWRIf your tow vehicle is an F-150, F-SeriesSuper Duty ®, Transit or Expeditionand your trailer has electric brakes,the optional Integrated Trailer BrakeController (TBC) assists in smooth andeffective trailer braking by powering thetrailer’s electric or electric-over-hydraulicbrakes with proportional output based onthe towing vehicle’s brake pressureIf you are experiencing trailer sway andyour vehicle is equipped with electricbrakes and a brake controller, activate thetrailer brakes with the brake controller byhand. Do not apply the tow vehicle brakesas this can result in increased swayTowing On HillsDownshift the transmission to assistbraking on steep downgrades and toincrease power (reduce lugging)when climbing hillsWith TorqShift® transmission, selecttow/haul mode to automaticallyeliminate unwanted gear search whengoing uphill and help control vehiclespeed when going downhillParking With A TrailerWhenever possible, vehicles with trailersshould not be parked on a grade. However,if it is necessary, place wheel chocksunder the trailer’s wheels, following theinstructions below.Apply the foot service brakes and holdHave another person place the wheelchocks under the trailer wheels on thedowngrade sideOnce the chocks are in place, release brakepedal, making sure the chocks will holdthe vehicle and trailerApply the parking brakeShift automatic transmission into park, ormanual transmission into reverseWith 4-wheel drive, make sure the transfercase is not in neutral (if applicable)Starting Out ParkedOn A GradeApply the foot service brake and holdStart the engine with transmission in park(automatic) or neutral (manual)Shift the transmission into gear andrelease the parking brakeRelease the brake pedal and move thevehicle uphill to free the chocksApply the brake pedal while anotherperson retrieves the chocksAcceleration And PassingThe added weight of the trailer candramatically decrease the acceleration ofthe towing vehicle – exercise caution.When passing a slower vehicle, be sureto allow extra distance. Remember, theadded length of the trailer must clear theother vehicle before you can pull back inSignal and make your pass on level terrainwith plenty of clearanceIf necessary, downshift forimproved accelerationDriving With An AutomaticOverdrive TransmissionWith certain automatic overdrivetransmissions, towing – especially inhilly areas – may cause excessive shiftingbetween overdrive and the next lower gear.To eliminate this condition and achievesteadier performance, overdrive can belocked out (see vehicle owner’s manual)If excessive shifting does not occur, useoverdrive to help enhance performanceOverdrive may also be locked out toobtain engine braking on downgradesWhen available, select tow/haul mode toautomatically eliminate unwanted gearsearch and help control vehicle speedwhen going downhillDriving With Cruise ControlTurn off the cruise control with heavyloads or in hilly terrain. The cruise controlmay turn off automatically when youare towing on long, steep grades. Usecaution while driving on wet roads andavoid using cruise control in rainy or winterweather conditions.Tire PressureUnderinflated tires get hot and may fail,leading to possible loss of vehicle controlOverinflated tires may wear unevenly andcompromise traction andstopping capabilityTires should be checked often forconformance to recommended coldinflation pressuresSpare Tire UseA conventional, identical full-size sparetire is required for trailer towing (mini,compact and dissimilar full-size sparetires should not be used; always replacethe spare tire with a new road tireas soon as possible).On The RoadAfter about 50 miles, stop in a protectedlocation and double-check:Trailer hitch attachmentLights and electrical connectionsTrailer wheel lug nuts for tightnessEngine oil – check regularlythroughout your tripHigh Altitude OperationYour vehicle may have reducedperformance when operating at highaltitudes and when heavily loaded ortowing a trailer. While driving at elevation,in order to match driving performance asperceived at sea level, reduce GVWs andGCWs by 2% per 1,000 ft. elevation.Powertrain/Frontal AreaConsiderationsThe charts in this Guide show theminimum powertrain needed to achievean acceptable towing performance for thelisted GCW of tow vehicle and trailerUnder certain conditions, however,(e.g., when the trailer has a large frontalarea that adds substantial air drag orwhen trailering in hilly or mountainousterrain) it is wise to choose a vehiclewith a higher ratingTowing performance is maximized with alow-drag, rounded front design trailerSelecting a Trim SeriesYour specific vehicle’s tow capability couldbe reduced based on weight of selectedtrim series and option content.Note: For additional trailering informationpertaining to your vehicle, refer to thevehicle owner’s manual.。
SERVICE MANUALSUZUKI MUSICAL INST.MFG.CO.,LTD.2-25-12, RYOKE, NAKAKU, HAMAMATSU, JAPANDEC.2008HAMMOND 44PRO-44H12-1,2-23-1~3-3456-1~6-41.SPECIFICATIONS2.INSPECTION SPCIFICATION3.DISASSEMBLY PROCEDURE4.WIRING CONNECTION5.SCHEMATICS VRS-38A6.PARTS LISTPRO-44H-Table of Contents-1.SPECIFICATIONSKeyboard Reeds Reed plates 1/4 inch output jack Microphone Control Dimensions Weight Accessoriesc~g3, Alto 44keysPhosphor bronze tapered reeds Brass Standard 1/4"Internal dynamic lavalier Volume563mm(W)x106mm(D)x52mm(H) (22.17"x 4.17"x 2.05")1200g(2.65lb)Special short mouthpiece MP-141, Flexible mouthpiece,Mouthpiece with tube and L-shaped joint,Cleaning cloth, Soft case2.INSPECTION SPECIFICATION0.Required Equipment0-1Mixer and Headphone (You need a equipment which you can listen to the microphone sound with a headphone)orAmplifier (which produces the bigger sound than live sound, and also the microphone level is available)1.Sound Inspection1-1Insert a mouthpiece into Hammond 44.1-2Insert the plug into Hammond 44’s jack output and connect to the above equipment (0-1) at input terminal.1-3Turn Hammond 44’s volume to max.1-4Blow kind of strongly without pressing any key and make sure there is no air leakage.1-5Check each key from bass to treble with kind of strong and stable blow.Is there hollow sound?Is there strange sound?Check if the volume is too small by each key, or if overtone is unstable by each key.2.Key sound Inspection2-1Hold a mouthpiece in your mouth without blowing, and press each key from bass to treble. Check if there is any unexpected sound or clang.3.Reed Inspection3-1Hold blowing kind of strongly and fillip strongly each key from bass to treble.Check if there is any clink besides overtone.3-2In case you find a wrong key, check that key and next key alternately with blowing gently. If there is no clink besides overtone, it is OK.4.Tuning Inspection4-1Play in octave unison from bass to treble, and check if undulation is not too fast.2-15.Blowing Inspection5-1Check the lowest CEG chord in low volume and see if there is any fluttering sound.Check other chord DFA, EGB … to BDF in the same way. In case you finda wrong key, check again after blowing strongly without sound.5-2Check if overtone sounds equally overall.5-3Play around and see if there is any discomfort.2-2PRO-44HUnscrew 6 cover screws.(Screw : M3x8, Ni)1.REMOVE THE COVER ASS'Y :2.REMOVE THE AIR BOX:3.DISASSEMBLING PROCEDUREUnscrew 5 air box screws.(screw : M3x15, BsNi)Press the spit-valve and hold open. Pull out the air box upward.3.DISASSEMBLE EACH READ PLATEUnscrew reed plate screws.(screw : Tapping screw, round, 2.3x6.5, BsNi)1 2 34Top high notes : 10 screws High notes : 18 screws Middle notes : 18 screwsBass notes : 8 screwsJoint parts are fixed together by 2 screws.(2 plates share 2 screws)Unscrew this screw (small, truss screw, M3x16) and remove awasher and strap pin.4.REMOVE TREBLE SIDE COVERUnscrew 3 screws (Tapping screw, round, 2.3x6.5, BsNi).Remove a jack volume Assy's connector.To prevent the cable cut off, please hold the connector's base.PRO-44H5.REMOVE THE DYNAMIC MIKE UNIT:6.REMOVE THE JACK VOLUME ASS'Y:Remove a hexagonal jack volume ass'ys nut ( A , M9).Pull out a volume knob B . Remove the hexagonal nut C .Pull out an earth, then take the jack volume ass'y out fromthe side cover.4.WIRING CONNECTIONPRO-44H(JACK VOLUME ASS'Y)S olde r t o V RS -38 LA ND re d : S b la c k : G g re e n : F G(m a rk is on t h e s ilk s ide )F GGSV R S-38A A s s 'yE 01C O 1-1M J-159M RoH SS olde r t o M J-159M re d c a b le : c h ip s ide b la c k c a b le : rin g s ideJu m p e r c a b le UL 1007 #20 re d L =35R in g s ideC h ip s id eJu m p e r c a b leUL 1007 #20 gre e n L =45Ju m p e r c a b l eU L 1007 #20 b la c k L =60Front sideBack sideS o l d e r t oE 01C 0-1 f l a t s i d e6.PARTS LISTPRO-44H1.FAINAL ASS'Y(10051-01101)10051-021*******-0003900290-0004000290-0004100290-0004210051-02102Middle plate ass'y High plate ass'y Top high plate ass'y Air box ass'y Keyboard ass'y Bass plate ass'y 21345610051-02103Bass side cover ass'y710051-02104Treble side cover ass'y 810051-021*******-010*******-0005800620-0230100709-23015Sheet packingTapping screw type2(Round head, 2.3x6.5, BsNi)Machine screw(Oval head M3x15, BsNi)Cover ass'yStrap pin(Shoulder strap pin, black)10911121301703-63016Machine screw(Truss, M3x16,Trivalent black)1400700-03006Machine screw(Super thin, flat screw, M3x8, Ni)1501753-33000Washer Ø3, Trivalent black162.KEYBOARD ASS'Y(10051-02101)PRO-44H00452-0001700290-0001400452-0003100453-0005900453-0006100453-00062Air lid 1Keyboard cushion Rear rim Valve packingBodyKeyboard set 1421345600451-0010000451-0015001724-6300000453-0004900412-13018Square nut(Trivalent white)Key cushion White LabelCoil spring Insert nut8791011- Keyboard set 14 -1.White key C 2.White key D 3.White key E 4.White key F 5.White key G 6.White key A 7.White key B 8.White key RG 9.Black key00452-0025900452-0026000452-0026100452-0025500452-0025600452-0025700452-0025800452-0027900452-00263A - APRO-44H00452-0011000453-0006300452-00032Air lid 2Air boxAir box packing C 21300451-00172Cup400453-00070Rubber Rubber 1500453-00057Rubber Rubber 263.AIR BOX ASS'Y(10051-02102)4.BASS SIDE COVER ASS'Y(10051-02103)00452-0008600453-4011601724-63000Square nut(M3, Trivalent white)Bass side coverSW urethan stopper2135.TREBLE SIDE COVER ASS'Y(10051-02104)00452-0008700453-4011600453-00064Tripod fixing rubber for mike00315-15007Dynamic mike unitTreble side cover SW urethan stopper 21300453-00321Volume knob 400453-00065Nonwoven cloth 500452-00324Spit-valve 600453-00066Spit-valve packing 700451-00100Coil spring 800451-00180Spit-valve shaft 900620-02301Tapping screw type 2(Round head, 2.3x6.5, BsNi)1001724-63000Square nut(M3,Trivalent white)1110051-02106Jack volume Ass'y 1200318-04122Jack MJ-159M-RoHS 1300335-02016EC1C01-114132645312(These 2 parts are sold in sets. Please order by the set. You will receive an assembled parts.)6-4PRO-44H6.FLEXIBLE MOUTHPIECE ASS'Y(00290-00084)7.MOUTHPIECE WITH TUBE AND L-SHAPED JOINT(00290-00092)00453-00032O-ring100453-00032O-ring 100290-0009200290-0008400290-00083Short mouthpieceMouthpiece with tube and L-shaped joint Flexible mouthpiece 21300453-00072Soft case PRO-44H 400457-00010Manual 500453-00045Cleaning cloth68.ACCESSORIES2156437.HOW TO ADJUST THE REED1.Required JIG to adjust reedsWe recommend the following toolset.Product name : Harmonica repairing tool set (Code : 11790)Contents : spatula for reed, screw driver (+), edge file (kishage)2.How to adjust the reed1.Follow "Disassembling procedure". Remove the cover ass'y and the air box.2.Adjust reed as follows.(Please do not file too much. It will make the reed lIfe shorter.)73.Assemble the air box and check the sound by a tuner.4.Repeat procedure 2 and 3 until you adjust rightly.5.Assemble the cover via backward process of procedure 1.。
Installation, Operation, and Care ofMODELS VSX3, VSX4, VSX5ELECTRIC COUNTER CONVECTION STEAMERSKEEP THIS MANUALGENERALThe VSX 3, 4, and 5 Steamers are single compartment electric pressureless steam cookers with an internal electric steam generator that maintains water temperature at approximately 205°F. VSX3 is rated 7.5kw as standard; 10kw is optional. VSX4 is rated 10kw. VSX5 is rated 15kw.At high altitude locations a lower temperature is required to achieve atmospheric steaming. Contact your Vulcan-authorized service office to have the thermostat adjusted if the steamer will be operated at high altitudes.INSTALLATIONUNPACKINGImmediately after unpacking the steamer, check for possible shipping damage. If the steamer is found to be damaged, save the packaging material and contact the carrier within 15 days of delivery.Prior to installation, verify that the electrical service agrees with the specifications on the machine data plate which is located on the left side panel.LOCATIONAllow space for plumbing and electrical connections. Minimum clearances are 2" on the sides and 6" on the back for proper air circulation. Allow adequate access for operating and servicing the steamer (36" at the front of the steamer and 15" above the steamer).LEVELING FEET (Standard) OR 4"ADJUSTABLE LEGS (Optional)Thread the four 2" leveling feet shipped in a bag inside the steamer cabinet into the threaded holes on the bottom corners of the steamer. Or, thread the four optional 4" adjustable legs into the threaded holes on the bottom corners of the steamer.LEVELINGUsing a spirit level or pan of water in the bottom of the steamer, adjust the leveling feet or the feet on the adjustable legs to level the steamer front-to-back and side-to-side. After the drain is connected, check for level by pouring water onto the floor of the compartment. All water should drain through the opening at the back of the compartment cavity.1.Place steamer in the desired location on theleveled counter top and mark four corners.Remove the steamer and drill 1/2" holes asindicated in Fig. 1.2.Apply a bead of RTV or other equivalent sealantaround the bottom perimeter edge of the steamer.If anchoring the steamer, this bottom seal isnecessary to meet NSF requirements.3.Set steamer on counter and bolt down securelywith 3/8 - 16 bolts (not supplied).STACKING KITFollow instructions in the stacking kit when installingstacked convection steamers.Fig. 1ELECTRICAL CONNECTIONWARNING: ELECTRICAL AND GROUNDING CONNECTIONS MUST COMPLY WITH APPLICABLE PORTIONS OF THE NATIONAL ELECTRICAL CODE AND/OR OTHER LOCAL ELECTRICAL CODES. WARNING:DISCONNECT ELECTRICAL POWER SUPPLY AND PLACE A TAG AT THE DISCONNECT SWITCH INDICATING THAT YOU ARE WORKING ON THE CIRCUIT.PLUMBING CONNECTIONSWARNING: PLUMBING CONNECTIONS MUST COMPLY WITH APPLICABLE SANITARY, SAFETY AND PLUMBING CODES.Connect the water supply line to the 3/8" NPT (internal thread) copper tube inlet. The 3/8" water line supplies water to both the generator tank and the cooling system where steam is condensed before entering the drain line. Install the line strainer provided. A manual shutoff valve must be provided convenient to the steamer.DRAIN CONNECTIONSThe drain connection (Fig. 2) must be 1" IPS down, preferably with one elbow only, maximum length of 6 feet, and piped to an open gap type drain. CAUTION: In order to avoid any back pressure in the steamer, do not connect solidly to any drain connection.PL-50880GAP DRAINBY CUSTOMER DRAIN VENTFig. 2WATER QUALITYThe water supply connected to this steamer should contain no more than 2.0 grains of hardness per gallon with pH from 6.5 to 8.0. This degree of hardness and pH can easily be obtained with the use of a properly maintained water softener.Water supplies vary from one location to another. A local water treatment specialist should be consulted before installing any steam generating equipment.Untreated water contains scale producing minerals which can precipitate onto the surfaces in the boiler. Due to the temperatures in the boiler, the minerals can bake onto the surfaces and components. This can result in early component failure and reduced product life.Mineral scale on components causes several problems:1.The surfaces of the heating devices become coated with scale, reducing the heat transferefficiency. This can produce hot spots on the heating elements and result in premature failure.2.The water level probes become coated with scale. Scale will bridge across the probe insulator fromthe metal extension which senses the water level in the boiler shell. Once this scale becomes wet, the water level control is unable to maintain the proper water level in the boiler. This situation may cause an electric heating element to fail if the element is not adequately covered by water. Strainers and filters will NOT remove minerals from the water.Refer to REMOVAL OF LIME SCALE DEPOSITS, page 12.VENT HOODSome local codes may require the steamer to be located under an exhaust hood. Information on the construction and installation of ventilating hoods may be obtained from Vapor Removal from Cooking Equipment, NFPA standard No. 96 (latest edition).TESTING PROCEDUREWARNING:THE STEAMER AND ITS PARTS ARE HOT. USE CARE WHEN OPERATING, CLEANING OR SERVICING THE STEAMER. THE COOKING COMPARTMENT CONTAINS LIVE STEAM. STAY CLEAR WHILE OPENING THE DOOR.Once the steamer is installed and all mechanical connections have been made, thoroughly test the steamer before operation.1.Check that proper water, drain, and electrical connections have been made.2.Open water valve. Turn main power switch ON. After approximately 15 minutes, the READY lightshould come on, indicating that the water temperature is 205°F.3.When the READY light comes on, turn the dial timer to 5 minutes. With door open, observe thatno steam is entering the compartment and the COOKING light is not lit.4.Close compartment door. The COOK ING light is lit and steam should be heard entering thecompartment.5.Check drain line to ensure that water from the cold water condenser is flowing through the drainline.6.Open compartment door and observe that steam supply to the chamber is cut off. The READY lightshould come on; the COOKING light goes off.7.Close compartment door and let cooking cycle finish. When timer returns to 0, a buzzer will soundsignalling the end of the cooking cycle. To silence the buzzer, turn the dial timer to OFF.8.To turn the steamer off, turn the main power switch OFF — the steam generator will drain. Leavethe door open to allow the inside to dry out.OPERATIONWARNING: THE STEAMER AND ITS PARTS ARE HOT. USE CARE WHEN OPERATING, CLEANING OR SERVICING THE STEAMER. THE COOKING COMPARTMENT CONTAINS LIVE STEAM. STAY CLEAR WHEN OPENING DOOR.CONTROLSMain Power switchON The boiler will automatically fill and begin heating to the preset temperature.OFF The boiler will drain.DELIME Closes the drain valve while CLR liquid is being poured into the generatorduring the Delime procedure.Ready light Indicates the temperature has reached 205°F and that the steamer is readyto begin cooking.Cooking light Indicates that a cooking cycle is in progress.Timer Set the cooking time (0 to 60 minutes) — steam cooking will begin when thedoor is closed. The cooking cycle will be interrupted if the door is openduring the cooking cycle; resume cooking by closing the door.When done, a buzzer sounds and steam stops being supplied to the cookingchamber. Turn the timer OFF to stop the buzzer.Delime Generator light Indicates that lime scale deposits have accumulated in the steam generatorand that a DELIME procedure should be performed at the next convenientopportunity. See Maintenance, page 12.PREHEATTurn the main power switch ON. When the READY light comes on, set the timer to 1 minute to preheat the compartment. This should be done when the steamer is first used for the day or whenever the chamber is cold. The door should be closed during the preheat cycle. COOKING light is lit.When the buzzer sounds, turn the timer to OFF. The steamer is now ready to cook.COOKAfter the preheat cycle, the READY light should be ON.Place pans of food in the cooking chamber. Close the door. Set the timer. Steam flows into the compartment and the COOKING light is lit. Opening the door will interrupt cooking; resume by closing the door.At the end of the cooking cycle, the COOKING light goes off, the buzzer sounds and steam stops being supplied to the cooking chamber. To stop the buzzer, turn the timer to OFF.SHUTDOWNTurn the main power switch OFF — the boiler will automatically blow down. Leave the compartment door open to allow the inside to dry out.For an extended shutdown, turn the main power switch OFF; turn power and water supply OFF.COOKING HINTSThe steamer efficiently cooks vegetables or other foods for immediate serving. Steam cooking should be carefully time controlled. Keep hot food holding-time to a minimum to produce the most appetizing results. Prepare small batches, cook only enough to start serving, then cook additional amounts to meet demand.PreparationPrepare vegetables, fruits, meats, seafood and poultry normally by cleaning, separating, cutting, removing stems, etc. Cook root vegetables in a perforated pan. Other vegetables may be cooked in a perforated pan unless juices are being saved. Liquids can be collected in a solid 12" x 20" pan placed under a perforated pan.Perforated pans are used for frankfurters, wieners and similar items when juices do not need to be preserved. Solid pans are good for cooking puddings, rice, and hot breakfast cereals. Vegetables and fruits are cooked in solid pans in their own juice. Meats and poultry are cooked in solid pans to preserve their juice or retain broth.Canned foods can be heated in their opened cans (cans placed in 12" x 20" solid pans) or the contents may be poured into solid pans. DO NOT place unopened cans in the steamer.Frozen Food ItemsSeparate frozen foods into smaller pieces to allow more efficient cooking.Use a pan cover for precooked frozen dishes that cannot be cooked in the covered containers in which they are packed if they require more than 15 minutes of cooking time. When a cover is used, approximately one-third additional cooking time is necessary.Cooking time for frozen foods depends on the amount of defrosting required. If time permits, allow frozen foods to partially thaw overnight in a refrigerator. This will reduce their cooking time. Acceptable Pan SizesThe steamer accommodates combinations of 12 x 20" pans, solid or perforated.Model Number of Pans AccommodatedDepth of Pan1" 2.5"4"6"VSX3 VSX4 VSX56810345223122DRAINING THE BOILERDrain the boiler after each day's use to flush out minerals and minimize scale build-up. The boiler drains automatically for approximately 4 – 6 minutes after the main power switch is turned OFF.CLEANINGAt the end of each day, or between cooking cycles if necessary . . .Turn main power switch OFF.Remove pans and racks from compartment and wash in sink.Wash compartment interior with clean water. Never use steel wool or abrasive scouring pads as they will scratch and ruin the general surface appearance of the steamer.Use warm soapy water with a cloth or sponge to clean the door gasket, rinse with warm clear water, and wipe with a dry cloth.Wipe surfaces which touch the door gasket with a cloth or sponge and warm soapy water, rinse with warm clear water and wipe with a dry cloth. CAUTION: Do not allow the door gasket to come in contact with food oils, petroleum solvents, or lubricants.Keep the cooking compartment drain working freely. After cooking grease producing foods, operate the steamer with the compartment empty for 30 minutes at the end of the day, or pour 1/2 gallon of warm soapy water down the drain, followed by 1/2 gallon of warm clear water.Use a clean damp cloth to wipe down the exterior of your steamer.Leave the door slightly open when the steamer is not in use to allow the inside to dry out. Weekly, or more often if necessary . . .Clean exterior with a damp cloth and polish with a soft dry cloth.Use a non-abrasive cleaner to remove discolorations.COOKING GUIDELINESThe steamer steam cooks vegetables, frankfurters, eggs in their shells, and certain other meats or food items at atmospheric pressure.These cooking guidelines are suggestions only. You should experiment with your food products to determine the cooking times that will give you the best results. Variables which affect cooking time include size, weight, thickness of foods, temperature, density, previous condition of the foods (fresh, pre-blanched or frozen) and degree of doneness desired.COOK IN SOLID PANSPRODUCT TIME (minutes)WEIGHT PER PANEggs, Scrambled10 – 128 Doz.Rice, Long Grain25 2 Lb.(Cover with 4 cups water per pound.)Pasta (Place perforated pan insidesolid pan, cover pasta with cold water)Spaghetti, Regular/Vermicelli12 – 15Macaroni, Shells/Elbows15 – 18Noodles, 1/2" wide12 – 15Lasagna Noodles15 – 18Frozen Casseroles, Lasagna35Full PanMeat Loaf, 3 – 5 pound each4015 Lb.BeefGround Chuck20 – 2510 Lb.Sliced as Purchased35 – 4010 Lb.Shrimp, Frozen, 10 per pound5 4 Lb.BeansBaked910 Lb. Can Refried910 Lb. CanCanned Vegetables610 Lb. CanPrunes, Dried12 – 15COOK IN PERFORATED PANSPRODUCT TIME (minutes)WEIGHT PER PAN SEAFOODClamsFrozen10 – 12 3 Doz. Fresh, Cherrystone 5 – 6 3 Doz.King Crab, FrozenClaws421/2 Lb.Legs 4 –641/2 Lb.Lobster Tail, Frozen610 Lb.Lobster, Live, 10 – 12"5 4 Per PanSalmon Fillets, Frozen, 8 ounce each571/2 Lb.Scallops, Fresh4 3 Lb.Scrod Fillets, Fresh 3 – 5 4 Lb.EggsHard Cooked15 4 Doz.Soft Cooked9 – 10 4 Doz.Soft Yoke for Caesar Salad 6 – 8 4 Doz.Chicken — Breasts, Legs, Thighs2015 Lb.Turkey, FrozenBreasts (2)90 6 – 7 Lb. Each Cut Lengthwise5520 – 25 Lb.Corned Beef40 – 75 6 – 8 Lb.Hot Dogs or Wieners380 – 100 Count VEGETABLESAsparagus SpearsFrozen10 – 12 3 Doz. Fresh5 5 Lb.BeansGreen, 2" Cut, Frozen / Fresh6 5 Lb. Lima, Frozen8 5 Lb.Baby Lima, Frozen5 5 Lb.Brussel Sprouts, Frozen6 5 Lb.COOK IN PERFORATED PANSPRODUCT TIME (minutes)WEIGHT PER PAN VEGETABLES, (Cont'd.)BroccoliSpears, Frozen8 4 Lb. Spears, Fresh6 5 Lb. Flowerettes, Frozen6 5 Lb.Cabbage, Fresh, 1/6 Cut8 5 Lb.CarrotsBaby Whole, Frozen87 Lb. Crinkle Cut, Frozen7–8 4 Lb. Sliced, Fresh119 Lb .Cauliflower, FlowerettesFrozen6 4 Lb.Fresh7–8 5 Lb.Celery, 1" Diagonal Cut7 5 Lb.CornYellow Whole Kernal, Frozen5 5 Lb. Cobbettes, Frozen827 Ears16–1880 EarsCorn-On-Cob, Fresh10–1218 Ears16–1854 EarsPeas, Green6 5 Lb.Potatoes, Whole Russet5540 Lb.SpinachChopped, Frozen17 6 Lb. Defrosted5 6 Lb.Fresh Cut3 2 Lb.Squash, Acorn Halves2510 HalvesZucchini, Slices810 Lb.Frozen Mixed Vegetables6–7 5 Lb.FRUITFruit, Blanch for Peeling,Grapefruit, Oranges3Pineapple, Whole for Cutting4MAINTENANCEWARNING: THE STEAMER AND ITS PARTS ARE HOT. USE CARE WHEN OPERATING, CLEANING OR SERVICING THE STEAMER. THE COOKING COMPARTMENT CONTAINS LIVE STEAM. STAY CLEAR WHEN OPENING DOOR.REMOVAL OF LIME SCALE DEPOSITSThe steamer should be delimed at a convenient time after the DELIME GENERATOR light comes on. Use the CLR TREATMENT K IT available from your Vulcan-authorized service office. Follow the instructions in the Kit to delime the steam generator.COLD WATER CONDENSERThe steamer is equipped with a cold water condenser in the rear of the cooking chamber which helps to condense the steam prior to discharge into the drain. The steamer freely vents itself by the negative pressure created by the condensate water drainage. This negative pressure prevents steam leakage around the door gasket and helps draw the steam through the cooking compartment. Steam leakage at the door may indicate a plugged or improperly installed drain.SERVICEContact your local Vulcan-authorized service office for any repairs or adjustments needed on this equipment.。
VS-44UHD Quick Start (P/N: 2900-300889QS REV 1)P/N:Scan for full manualVS-44UHD Quick Start GuideThis guide helps you install and use your VS-44UHD for the first time.Step 1: Check w hat’s in the boxVS-44UHD 4x4 UHD Matrix Switcher1 Quick start guide1 Set of rack ears1 Power cord4 Rubber feetStep 2: Get to know your VS-44UHDStep 3: Install the VS-44UHDInstall VS-44UHD using one of the following methods:∙Remove the three screws from each side of the unit, reinsert those screws through therack ears and mount on a 19" rack.∙Attach the rubber feet and place the unit on a flat surface.Step 4: Connect the inputs and outputsAlways switch OFF the power on each device before connecting it to your VS-44UHD. For best results, we recommend that you always use Kramer high-performance cables to connect AV equipment to the VS-44UHD.RJ-45 Pinout:For the Ethernet connector, see the wiring diagram below:PIN EIA /TIA 568B PIN 1 2 3 456 78For optimum range and performance use the recommended Kramer cables available at /product/VS-44UHD .Step 5: Connect the powerConnect the power cord to VS-44UHD and plug it into the mains electricity.Safety InstructionsCaution: There are no operator serviceable parts inside the unit.Warning: Use only the power cord that is supplied with the unit.Warning: Do not open the unit. High voltages can cause electrical shock! Servicing by qualified personnel only. Warning: Disconnect the power and unplug the unit from the wall before installing. See for updated safety information.Step 6: Operate the VS-44UHD via:Web pages:RS-232 and Ethernet:RS-232/Ethernet Baud Rate: Data Bits: Stop Bits:Example (Route input 1 to output 1): Ethernet Parameters IP Address: Subnet Mask: Default Gateway: Full Factory Reset Front panel:Protocol 3000: Web Pages:Front panel buttons:The 7-segment display shows the status of VS-44UHD during normal operation and displays device information.Generally, to switch an input to an output, select the switching mode and then:∙Press an output button and then an input button.∙Press ALL to route a selected input to all outputs.To set the switching mode:∙Press VIDEO to switch the video signal of a selected input to the selected output.∙Press D-AUDIO (HDMI embedded audio signal) to switch the digital audio signal of a selected input to the selected output.∙Press VIDEO + D-AUDIO simultaneously to switch the video and digital audio signals of a selected input to the selected output.∙Press MUTE/PATTERN to switch the pattern signal of a selected input to the selected output.∙Press ARC, an input button, and then an output button. The selected output port sources its ARC to the selected input port ARC.7-segment display exampleWhen in Video mode, the 7-segment display shows the input-output status:In this example: Input 1 is routed to output 1, input 3 is routed to output 2, a pattern is routed to output 3, and output 4 is set to mute. Read and store the EDID via the front panel buttonsTo read the EDID from the output:1. Press EDID+STO.The EDID and STO button LEDs light. The 7-segment display shows the current EDID status.2. Press one or more input buttons or press ALL, the corresponding 7-segment LEDs flash.3. Press an output button that is connected to a display. The 7-segment LEDs show the output number from which the EDID isread.4. Press EDID. Wait approx. 5 seconds. The EDID of the display is copied to the input port/s and the device exits EDID mode.To revert to the default EDID:1. Press EDID+STO.The EDID and STO button LEDs light. The 7-segment display shows the current EDID status.2. Press one or more input buttons or press ALL, the corresponding 7-segment LEDs flash.3. Press MUTE/PATTERN. The 7-segment LED flashes and shows “d”.4. Press EDID. Wait approx. 5 seconds. The default EDID is copied to the input port/s and the device exits EDID mode.Use the VS-44UHD Web pagesSwitching: Set input and output parameters (HDCP support, switching speed, and so on), select switching modes, set test patterns, perform switching operations, and so on.Device Settings: View device parameters (model, name, serial number, and so on), set network parameters, perform firmware upgrade, and reset to factory defaults.Authentication: Set password for Admin.Timeout Settings: Set the timeout per output when no signal is detected.Auto Switch Settings: Set switch mode (manual, last connected, or priority), select the ports included in the last connected mode, and set the priority order.Step-in Settings: Control Step-in devices that are connected to the inputs. Select a device (that is connected to a VS-44UHD input), set the input signal type, and set the outputs to which the input signal is switched when the Step-in button is pressed (on the Step-in device).EDID Management: Set the default EDID or read the EDID from an output or file to one or more of the inputs.。
HH44X型微阻缓闭止回阀HH44X micro Slow Close Check Valve使用说明书Product manual一、用途及特性Usage and features本阀主要用于工业循环供排水、城市供排水、高层建筑及宾馆酒店的加压输水泵的出口处,用来截止水倒流和消除破坏性水锤,保障管网安全运行。
在设计上充分考虑了使用环境的要求,达到无震动、无噪音,运行平稳,确保宾馆酒店、住宅的环境安静,并具有节电等功能。
为了安装方便,有立式安装和卧式安装两种,以供选用。
The valve is mainly used in industrial circulating water supply and drainage , urban water supply and drainage , high-rise buildings and hotels of pressurized water outlet of the pump , used to cut back water and the elimination of destructive water hammer , guarantee the safe operation of the pipe network . Designed to take full account of the environmental requirements , no vibration, no noise , smooth operation , ensure that hotels, residential quiet and has a power-saving functions. There are vertical installation and horizontal installation , for selection .1、节能:由于阀板采用轻体结构(橡胶与金属组合结构),有平衡锤,局部阻力小,开启度大。
与旋启式止回阀相比,输送每千吨水可节电15~25度。
2、限制、消除破坏性水锤:由于阀门关闭系统采用后段关闭阻尼机构,用延缓关闭的方式使局部倒流的水向系统泄流,阀板遵循先速闭后缓闭,从而大大降低停泵倒流时的水压冲击力,消除破坏性水锤峰值的产生。
3、耐磨损、使用寿命长。
同旋启式止回阀相比,提高使用寿命5~7倍4、截流封闭性能好。
逆止口与阀板之间为橡胶软密封。
5、运行平稳、无震动、噪音低。
6、维修费用低。
与旋启式止回阀相比,降低维修费用80%。
1.Energy saving : since the valve plate with a light body structure ( rubber and metal composite structure ) , there is a counterweight , the local resistance is small, big open -degree . Compared with swing check valves , conveyor per thousand tons of water can save 15 to 25 degrees.2 . Elimination of destructive water hammer : As the valve shut down the system uses the rear sectionclosed damping mechanism , with the extension. Slow off the way so that the local backflow of water to follow after the first closing fast closing slow discharge into the system , the valve plate , thereby greatly reducing the impact pressure backflow when the pump stops , the elimination of destructive water hammer peak production.3 .Wear-resistant , long service life. Compared with swing check valves , to improve the life of 5 to 7 times4 .Closed good performance. Soft rubber seal between the port and the check valve plate .5 .Running smoothly, no vibration, low noise.6 .Low maintenance costs . Compared with swing check valves , lower maintenance costs by 80%.二、工作原理及调试方法Works and debugging methods1、本止回阀主要由阀体、阀盖、阀板组件、平衡锤、活塞组件及针型调节阀等组成。
启动水泵时,依靠阀门进口介质的压力作用,压力水通过疏水导管进入活塞腔,使活塞伸出并与流通介质共同推动阀板开启,同时使活塞伸出部分预置到位,平衡锤越过最高点,这样保证阀板的最大开度,使之不上下摆动。
当水流停止时(水泵停机)由于阀板的自重使阀板自由下落关闭,但由于活塞处于伸出位置顶着阀板,使阀板不能全部关闭,还剩下约1/5左右的开启间隙,这样介质可以通过,减弱了水锤峰值压力,限制了破坏性水锤的发生。
阀板压在活塞端部,活塞腔的水阻碍了活塞的快速回伸,阻止阀板的关闭,这时阀板在介质的背向压力作用下,推动活塞向后滑移,在活塞的推动下,活塞里介质通过调节阀又回到了系统中,活塞也缓慢回到原来位置,阀板最终完全关闭。
1.the check valve consists of valve body, valve cover, valve plate assembly, the counterweight, the piston assembly and the needle valve and other components.When start the pump, relying on imports of medium pressure valves, pressure water into the piston chamber through hydrophobic catheter inside, the piston extends with the flow of the medium to jointly promote the valve plate open, while the piston out part preset position, the counterweight over the highest point, so to ensure maximum opening of the valve plate, so as not to swing up and down.When the water stops (pump down) since the valve plate of the weight of the valve plate free-fall off, but since the piston in the extended position against the valve plate, the valve plate is not fully closed, leaving about 1/5 or so of open space This medium can be, and has reduced water hammer peak pressure,limiting the destructive water hammer occurs.The valve plate against the piston end, piston cavity water hinders rapid piston back stretch, stop valve plate closed, then the valve plate at medium back pressure, push the piston back slip, the piston driven by the piston in the media through the valve back to the system, the piston is also slowly return to its original position, the valve plate eventually completely closed.2、阀板缓闭开度的调整slow closing valve plate to adjust the degree of opening活塞伸出的长短,调节阀开度的大小,控制着活塞腔的容量和阀板关闭的延缓时间。
缓闭开度大,泄水时间长,水锤小;反之开度小,泄水时间短,水锤的形成就可能大,因此在结构上缓闭开度调节器,用拉杆来控制活塞的伸出长度。
开始调试时,可将活塞伸出总长(拉杆退出长度即活塞总长)的三分之二,然后停泵,检查水锤的大小和阀板能否关闭,水锤大,说明开度小;如果阀板关闭太慢,说明活塞伸出太长。
经调试到理想开度后,即可用调节螺母固定拉杆,确定活塞伸出的长度。
应该注意的是:活塞伸出的长短的调整与供水压力,输水距离,相对高差等工况有很大关系,它们之间是成正比例关系。
另外,缓闭时间的长短,还可用针型调节阀的开度大小来控制,这个时间可控制在0~60秒,或者更长些。
Extending the length of the piston to adjust the size of the valve opening , the control piston chamber and the valve plate closing capacity extensionSlow time . Slow closing the opening of a large , long discharge time , water hammer small ; otherwise the opening is small, discharge time is short, it is possible to form a water hammer large , so the structure slowly closing the opening of the regulator , with the piston rod to control extended length .Start debugging , you can extend two-thirds of the total length of the piston ( ie piston rod length to exit the total length ) , and then stop the pump, check the size of the water hammer and the valve plate can closed , water hammer , which meant that small opening ; if valve plate closed too slowly , indicating piston out too long. After commissioning the ideal degree of opening , the lever can be fixed by adjusting the nut , determine the length of the piston out . It should be noted that: the length of the piston out of adjustment and water pressure , water distance , relative elevation and other conditions have a great relationship , it is proportional to the relationship between them. In addition, the slow closing length of time, but also with a needle valve to control the size of the opening degree , this time can be controlled from 0 to 60 seconds or longer.三、主要性能参数:Main technical parameter1、阀门的法兰尺寸、结构长度符合GB/T9113,GB/T17241.6、 GB/T12221标准。