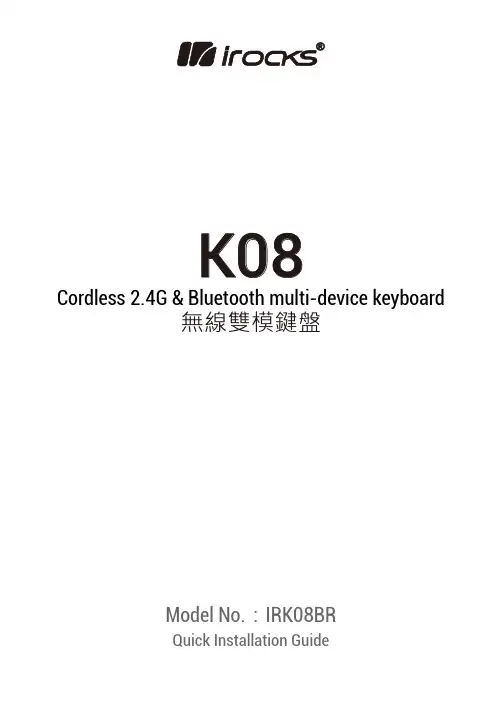
创高无线键盘KP-700说明书
- 格式:pdf
- 大小:3.19 MB
- 文档页数:16
无线键盘怎么用无线键盘怎么用无线键盘的用法设备充电如果设备是新的Bluetooth设备,确保在进行连接或打开前已充电。
尤其是Bluetooth耳机,使用前必须充电。
设备开机打开需要配对设备的电源。
对于某些设备,如Bluetooth无线耳机,设备开机的同时即启动配对过程。
开启Bluetooth功能在您收到设备时,该设备的Bluetooth功能可能已经开启,也可能尚未开启。
对于多数计算机,用户需要从控制面板或系统首选项中开启Bluetooth射频功能。
将设备设置为可见作为安全措施,某些设备可将Bluetooth功能设置为关闭、隐藏或可见。
尝试连接设备时,用户应将设备设置为可见,这样才能为彼此所发现。
完成设备配对后,如果用户担心设备会被其它设备发现,可以将设备设置为隐藏。
将两个设备设为连接模式两个设备都充好电后,打开设备电源并开启Bluetooth功能,每个设备都需要初始化通信会话。
通常,在两个设备之间连接时,一个设备会作为“主机”,而另一个设备则作为“访客”。
主机设备是具有用户界面的设备,多数连接设置都将从此进行。
一个设备可以是另一个设备的主机,也可以作为其它设备的访客。
例如,手机与无线耳机配对时,该手机就是主机。
但是,手机与膝上型计算机配对时,膝上型计算机就是主机。
输入密码设备彼此发现对方后,用户将被要求在一个或两个设备中输入密码。
某些情况下,如连接无线耳机时,密码是由制造商为耳机指定的固定密码。
此时,用户需要在主机设备中输入此指定的密码。
用户可在用户手册中找到此密码。
在其它情况下,用户可输入他/她自己的密码。
在这些情况下,用户将在两个设备中输入密码各一次。
强烈建议用户为一次配对过程设定8位字母数字字符密码。
输入密码后,设备将彼此验证并完成建立信任连接。
删除或断开与信任设备的连接用户应何时删除或断开与信任设备的连接?如果您的其中一个Bluetooth设备丢失或被偷,您应取消以前与该设备配对的所有设备的配对设置。
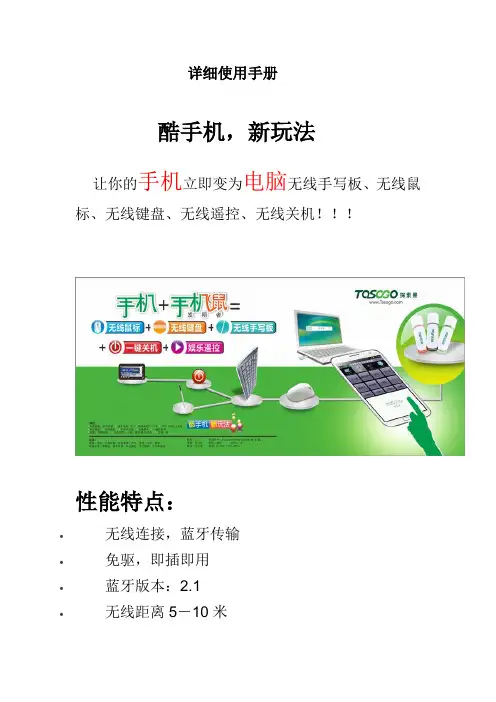
详细使用手册酷手机,新玩法让你的手机立即变为电脑无线手写板、无线鼠标、无线键盘、无线遥控、无线关机!!!性能特点:∙无线连接,蓝牙传输∙免驱,即插即用∙蓝牙版本:2.1∙无线距离5-10米∙USB: USB2.0全速功能:∙无线手写板∙无线鼠标∙无线键盘∙娱乐遥控∙无线关电脑使用说明:一、原理:用手机遥控电脑是利用手机的蓝牙功能,通过蓝牙SPP协议把文字信息、鼠标信息、遥控信息等传输到手机飞鼠接收器,通过标准的USB鼠标键盘接口传送到电脑。
二、基本要求1 要把手机飞鼠插入到电脑的USB口2 手机装一个探索果手机飞鼠的APP三、手机软件使用1 安装在手机打开360手机助手,触摸箭头位置输入“探索果”,点击搜索出现探索果手机飞鼠,点击打开,下载安装在应用程序列表里就能看到探索果手机飞鼠的APP2 蓝牙配对1 进入手机系统设置,点击蓝牙。
2 搜索蓝牙设备,出现Tasogo蓝牙设备3 点击Tasogo蓝牙设备,输入PIN码:0000,完成配对3 使用1在应用程序列表里就找到探索果手机飞鼠的APP,点击运行2 第一次运行时,会出现请选择设备,要是正确配对了的话出现Tasogo,点击就可以了,在随后的选择中将此设备设为默认设备。
3 按手机系统菜单键,会出现子菜单:分别是连接,默认设备,断开连接,检查更新,关于,退出。
连接:在断开状态时,点击连接使手机重新连接上默认设备:设置下次开机时自动连接的设备断开连接:断开手机与手机飞鼠的蓝牙连接。
检查更新:软件版本升级关于:公司信息和软件版本退出:退出应用4 APP主菜单的第一个功能是手写板,在主菜单的下方是输入框,点击在输入框就可以写入您想输入的信息了,在输入框中满12个字符就会自己输入到电脑,不满12字需要点击“完成输入”。
APP主菜单的第二个功能是娱乐,听音乐,看电视时可以调节音量等功能,还可以实现一键盘关机。
APP主菜单的第三个功能是鼠标和键盘,上方是键盘区域,下是白色的是鼠标区域,在鼠标区域移动,电脑上的鼠标随之移动。

通用控制键盘说明书为标准网络接口,该接口主要用于短距离(距离小于7.6米)连接矩阵。
具体请参照“2.3连接矩阵”。
6位连接座电源端口图2-1.1图2-1.22.1键盘接口说明2.键盘连接2键盘接口在键盘的背面,该键盘配备了多种通讯接口:RS422、RS485、RJ45,便于与连接与控制多种外部设备。
键盘连接2.1.1RS422与RS485接口RS422与RS485接口在键盘6位连接座上,键盘直接控制模式下,RS485(A+,B-)连接球机;在矩阵控制模式下,RS485(A+,B-)可连接其它键盘。
RS422(T+,T-)为信号发送端,RS422(R+,R-)为信号接收端,可连接矩阵。
2.1.2RJ45接口32.2连接矩阵该键盘可以对PELCO CM6700、CM6800矩阵进行控制。
下面以键盘连接P ELCO 的CM6700矩阵为例,说明键盘与矩阵的连接。
CM6700矩阵后盖板上有两种连接键盘接口,一种是本地键盘接口RJ45(“LOCAL KEYBOARD"),可以连接距离在7.6米内的单个键盘;另一种是键盘远程接口RS422(“REMOTE KEYBOARD(s)”),连接到键盘RS422接口上,最大距离为1200M 。
将RJ45连接线一端的水晶头插键盘的RJ45接口,另一端水晶头插CM6700矩阵的RJ45接口(“LOCAL KEYBOARD ”)。
2.2.1RJ45本地连接RS422连接线,一端连接CM6700后盖板上的RS422接口(REMOTE KEYBOARD(s)),另一端连接键盘的RS422接口,键盘接口Rs22(R+R-)对应矩阵接口RS422(T+T-),键盘接口RS422(T+T-)对应矩阵接口RS422(R+R-)。
2.2.2Rs422远程连接图2-2.1键盘连接2.3直接连接球机键盘通过RS485接口连接球机。
球机的RS485接口在球机上罩内悬挂吊架的转接板上。

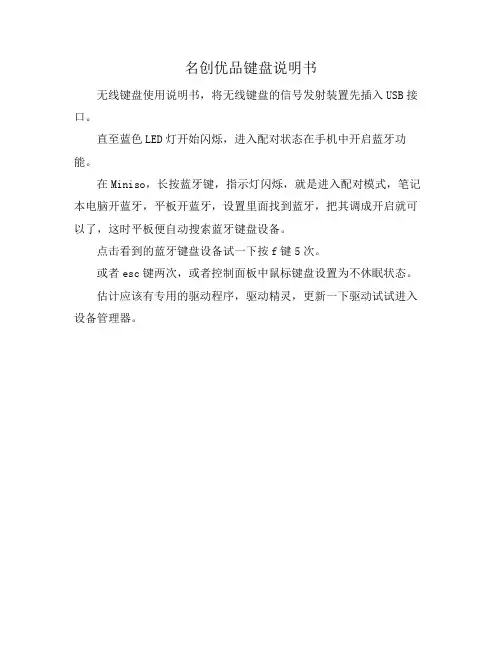
名创优品键盘说明书
无线键盘使用说明书,将无线键盘的信号发射装置先插入USB接口。
直至蓝色LED灯开始闪烁,进入配对状态在手机中开启蓝牙功能。
在Miniso,长按蓝牙键,指示灯闪烁,就是进入配对模式,笔记本电脑开蓝牙,平板开蓝牙,设置里面找到蓝牙,把其调成开启就可以了,这时平板便自动搜索蓝牙键盘设备。
点击看到的蓝牙键盘设备试一下按f键5次。
或者esc键两次,或者控制面板中鼠标键盘设置为不休眠状态。
估计应该有专用的驱动程序,驱动精灵,更新一下驱动试试进入设备管理器。
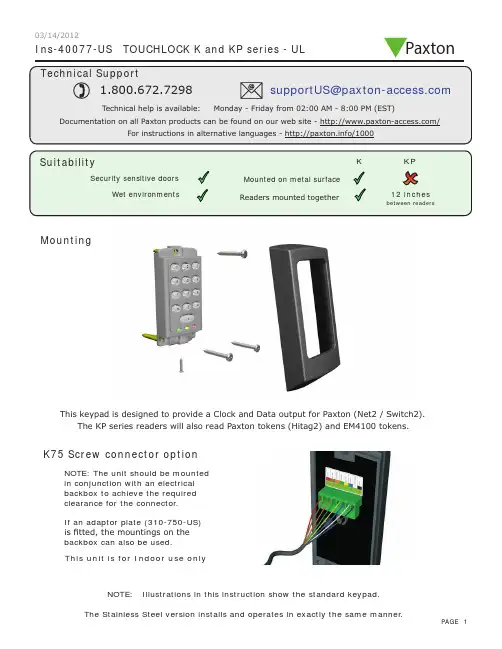
Ins-40077-US TOUCHLOCK K and KP series - ULMountingK75 Screw connector optionNOTE: The unit should be mounted in conjunction with an electrical backbox to achieve the required clearance for the connector .If an adaptor plate (310-750-US) is fitted, the mountings on the backbox can also be used.This keypad is designed to provide a Clock and Data output for Paxton (Net2 / Switch2).This unit is for Indoor use onlyNOTE: Illustrations in this instruction show the standard keypad.The KP series readers will also read Paxton tokens (Hitag2) and EM4100 tokens.Paxton03/14/2012Cable extensionsWiringNet2 control unitSwitch2 control unitStandard Unit - Drill a hole in the surface for the rear data cable. Secure the unit to the surface with three screws as per fitting diagram on page 1. 3 suitable screws and fixings are provided for fitting the unit to a wall. Ensure the data cable has free access at the rear .A choice of black and white covers are also provided. Hook the required cover over the top of the reader , press home at the bottom and secure with the single fixing screw.Screw Terminal Unit - The adapter (310-750-US) is mounted to a standard backbox using the fixing screws provided. The 75mm reader is then mounted onto the adapter using the fitting kit provided with the reader .KP series - When chosing a location for the reader , ensure that it is a least 12 inches from other readers. This will include readers mounted on the other side of the same wall as the radio signal will cause interference and reduce the read range. The reader should not be used on metal surfaces as the reflected signal will also reduce the range.Powering up the keypad will cause all the LEDs to come on. Once the control unit has been configured to accept keypad input (see controller instructions) pressing any key will make the keypad sound a bleep. Check the following FAQ section for assssistance if any problems are encountered.FCC ComplianceClass B digital devices.This equipment has been tested and found to comply with the limits for a Class B digital device, pursuant to Part 15 of theFCC Rules. These limits are designed to provide reasonable protection against harmful interference in a residential installation. This equipment generates, uses and can radiate radio frequency energy and, if not installed and used in accordance with the instructions, may cause harmful interference to radio communications. However , there is no guarantee that interference will not occur in a particular installation. If this equipment does cause harmful interference to radio or television reception, which can be determined by turning the equipment off and on, the user is encouraged to try to correct the interference by one or more of the following measures:-- Reorient or relocate the receiving antenna.-- Increase the separation between the equipment and receiver .-- Connect the equipment into an outlet on a circuit different from that to which the receiver is connected.-- Consult the dealer or an experienced radio/TV technician for help.Class A digital devices.This equipment has been tested and found to comply with the limits for a Class A digital device, pursuant to part 15 of the FCC Rules. These limits are designed to provide reasonable protection against harmful interference when the equipment is operated in a commercial environment. This equipment generates, uses, and can radiate radio energy and, if not installed and used in accordance with the instruction manual, may cause harmful interference to radio communications. Operation of this equipment in a residential area is likely to cause harmful interference in which case the user will be required to correct the interference at his own expense.This device complies with Part 15 of the FCC Rules. Operation is subject to the following two conditions:(1) this device may not cause harmful interference, and (2) this device must accept any interference received, including interference that may cause undesired operation. Changes or modifications not expressly approved by the party responsible for compliance could void the user's authority to operate the equipment.This unit is for Indoor use onlyFollowing the completed installation of this equipment, no further maintenance or testing is required.It is advisable to ensure that any third party backup power supplies or recovery procedures are checked regularly to ensure that the operation of the Paxton system is not compromised.Unit installation / test Maintenance/The use of any add-on, expansion, memory or other module manufactured or supplied by the manufacturer's representative will invalidate the CAN/ULC-S319 certification.For CAN/ULC-S319 installations, terminals, leads and wiring methods must comply with CSA, C22.1, Canadian electrical code, Part 1, safety standards for electrical installations.Product compliance and limitationsTo comply as a UL listed installation, the following conditions must apply:-Server based functions (Antipassback, Time and Attendance, etc) have not been evaluated by UL and cannot be used for UL 294 installations.The use of Wiegand readers and the configuration software has not been evaluated by 'UL' Wiring: - Where an equivalent cable / wire is used it must be ' UL Listed ' All interconnecting devices must be UL Listed.Wiring methods shall be in accordance with the National Electrical Code (ANSI/NFPA70), local codes, and the authorities having jurisdiction.This device complies with Industry Canada licence-exempt RSS standard(s). Operation is subject to the following two conditions: (1) this device may not cause interference, and (2) this device must accept any interference, including interference that may cause undesired operation of the device.。
备注:请将各条填写清楚,请勿擅自涂改,并妥善保管好本保修服务卡,以维护您的合法权益。
如需服务或有任何疑问, 请咨询当地经销商或与我们联系。
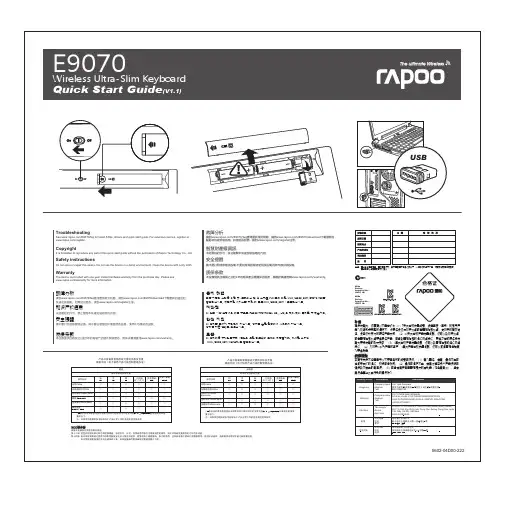
USBE9070Wireless Ultra-Slim KeyboardQuick Start Guide (V1.1)M/N :Rating: Approval No: CMIIT ID:M/N : Rating: Approval No: CMIIT ID:5602-04D00-222WarrantyThe device is provided with one-year limited hardware warranty from the purchase day. Please see /warranty for more information.See /E9070/faq for latest FAQs, drivers and quick start guide. For extensive service, register at /register.TroubleshootingDo not open or repair this device. Do not use the device in a damp environment. Clean the device with a dry cloth.Safety instructionsCopyrightIt is forbidden to reproduce any part of this quick start guide without the permission of Rapoo Technology Co., Ltd.质保条款本設備提供自購買之日起1年的有限產品硬體保固服務,具體詳情請查閱/warranty。
請到/E9070/faq查閱最新常見問題、請到/E9070/download下載最新的驅動和快速安裝指南。
无线键鼠套装使用说明书企业标准:Q/CF-2011出品:深圳市世纪飞扬电子有限公司地址:深圳市龙岗区坂田风门路禾坪岗高科技工业区A栋5楼免费服务热线:400-882-0755电子信箱:support@包装附件:2.4G无线键盘1PCS 超微型接收器1PCS2.4G无线鼠标1PCS 碱性5号/AA电池2PCS说明书,质保卡,合格证1PCS技术参考:无线键鼠频率:2402MHZ ~ 2480MHZ 无线额定电压:1.5V无线键鼠频道:16个自动跳频USB接口:1.1(接收器)无线额定电流:15MA(鼠标) 6MA(键盘)鼠标分辨率:500/1000CPI可调无线传输距离:16米(视使用时周边的无线环境而异,当周边较多无线设备干扰时,可能会影响传输距离)安装步骤:1.取出包装盒内无线键盘产品,无线鼠标产品。
2.取出装于鼠标底部的微型接收器,将接收器插入到电脑空余的USB接口,(建议将接收器插在电脑前面板的USB接口,如需要使用电脑后面USB接口请使用延长线配合使用)。
3.当第一次插入微型接收器时电脑右下角会弹出新设备名称且自动完成安装无需任何驱动程序,即插即用。
4.取出装配在包装盒内的AA碱性电池分别装于无线键盘内与无线鼠标内。
5.打开键盘底部电池盖,装入一节AA碱性电池(安装时请按外壳标识的极性装入! 电池安装完成后请盖上电池盖)。
6. 打开鼠标底部电池盖,装入一节AA碱性电池(安装时请按外壳标识的极性装入! 电池安装完成后请盖上电池盖)。
完成以上安装后即可正常使用。
键盘使用说明:1.当电脑正常识别到微型接收器后,按下键盘的“”键,如果能够从电脑左下角开始位置弹出列表表明键盘已经可以正常使用。
需要使用无线键盘数字功能区时请按下NumLock键开启数字键功能区, 此时您可以自由操作数字键功能区(此操作仅限数字功能区)。
2.键盘数字键功能区关闭后其他数字键功能可正常使用。
3.如果您的无线键盘配合笔记本电脑使用时,当使用无线键盘数字键时则笔记本电脑的数字键会自动封锁。
一、键盘简介键盘是计算机使用者向计算机输入数据或命令的最基本的设备。
常用的键盘上有 101 个键或 103 个键,分别排列在四个主要部分:打字键区、功能键区、编辑键区、小键盘区。
现将键盘的分区以及一些常用键的操作说明如下:( 一) 打字键区它是键盘的主要组成部分,它的键位排列与标准英文打字机的键位排列一样。
该键区包括了数字键、字母键、常用运算符以及标点符号键,除此之外还有几个必要的控制键。
下面对几个特殊的键及用法作简单介绍。
键的名称主要功能说明空格键键盘上最长的条形键。
每按一次该键,将在当前光标的位置上空出一个字符的位置。
[Enter ↙]回车键(1)每按一次该键,将换到下一行的行首输入。
就是说,按下该键后,表示输入的当前行结束,以后的输入将另起一行。
(2)或在输入完命令后,按下该键,则表示确认命令并执行。
[CapsLock] 大写字母锁定键在打字键区右边。
该键是一个开关键,用来转换字母大小写状态。
每按一次该键,键盘右上角标有CapsLock 的指示灯会由不亮变成发亮,或由发亮变成不亮。
这时:(1) 如果 CapsLock 指示灯发亮,则键盘处于大写字母锁定状态: 1) 这时直接按下字母键,则输入为大写字母;2) 如果按住 [Shif] 键的同时,再按字母键,输入的反而是小写字母。
(2) 如果这时CapsLock 指示灯不亮,则大写字母锁定状态被取消。
[Shift]换档键换档键在打字键区共有两个,它们分别在主键盘区(从上往下数,下同)第四排左右两边对称的位置上。
(1)对于符号键(键面上标有两个符号的键,例如:等,这些键也称为上下档键或双字符键)来说,直接按下这些键时,所输入的是该键键面下半部所标的那个符号(称为下档键);如果按住 [Shift] 键同时再按下双字符键,则输入为键面上半部所标的那个符号(称为上档键)。
如: [Shift]+=%(2)对于字母键而言:当键盘右上角标有 CapsLock 的指示灯不亮时,按住 [Shift] 键的同时再按字母键,输入的是大写字母。
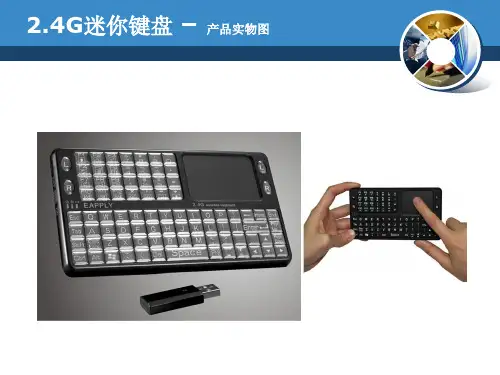
无线键盘激光笔使用说明型号:KP-810-05版本: 1.0无线键盘激光笔是UNISEN公司在前面无线键盘触摸板系列上增加的又一款新产品,继承了前一系列产品结构简单,小巧,携带方便等特点,并在此基础上增加了激光笔,F1,F2,...F10等功能键,集鼠标,键盘,以及激光笔等功能于一体,是当今世界上体积最小,功能最为齐全的一款键盘,无论是会议主持演讲,教育培训,还是家庭电脑娱乐,拥有一款无线键盘激光笔,会让你轻松自如地远距离控制你的电脑。
是一款真正的电脑遥控器.作为一款新型的无线键盘激光笔,采用2.4G无线技术, 集无线发射模块和矩阵控制模块于一体.遥控达10米半径范围.通过USB接口实现数据的接收与传输,即插即用.该无线键盘采用QWERTY式键盘布局, 包含了标准键盘所有常用功能键和字符键, 方便实用该产品的触摸板采用电容感应式触摸板,为你的提供准确的鼠标指针定位. 与分体式鼠标一样的方便使用,亦可进行多媒体会议或演讲手写标注.一, 特点与规格:1. 无线(RF2.4G) 连接,智能 &轻便,达10米半径.2. USB连接器, 即插即用.3. 支持背光灯显示。
4.QWERTY 键盘布局5. 增加对码功能,排除无线干扰6. 超大触摸屏,适用于手写输入.7. 内置激光笔。
8. 造型小巧, 85*135*10 毫米/重量: 60克二.应用领域该款手持式无线键盘激光笔是目前世界上外形尺寸最小的键盘鼠标一体化电脑无线输入设备,它集成了一个触摸板和一个小型键盘,以及激光笔,通过2.4G无线射频信号与电脑主机上的USB接收器连接。
有效地解决了无线操作电脑以及当市场上的键盘和鼠标体积过大的问题。
在电脑以及电脑娱乐日益发达的今天,该款手持式无线键盘激光笔有着广泛的应用。
●家庭娱乐:该产品采用2.4G无线连接,用户可以远离电脑,坐在沙发上轻轻移动你的手指就可以进行网页浏览,网络电影播放,中英文输入以及网上聊天,游戏。
EKB700 KeyboardUser’s ManualCopyright © EverFocus Electronics Corp.Release Date: March, 2019DisclaimerAll the images including product pictures or screen shots in this document are for example only. The images may vary depending on the product and software version. Information contained in this document is subject to change without notice.CopyrightAll rights reserved. No part of the contents of this manual may be reproduced or transmitted in any form or by any means without written permission of the EverFocus Electronics Corporation.EverFocus Taiwan:2F., No.12, Ln. 270, Sec. 3, Beishen Rd., Shenkeng Dist., New Taipei City 222, TaiwanTEL: +886 2 2662 2338 FAX: +886 2 2662 3632 ***********************.twEKB700 Keyboard1. IntroductionThe EKB700 keyboard (RS-485) is designed for telemetry control of speed dome cameras. Featured with ergonomic key alignment and the joystick, the keyboard brings convenient operation for controlling the speed dome cameras.LCD DisplayVector JoystickControl Keys12VDC Power InputCOMM PortCOMM IndicatorPower Indicator12VDC Power Input: Connect to the 12VDC power source.COMM Port: Connect to RS-485 wires of speed dome cameras. Connect T+ to RS-485+; connect T- to RS-485-; R+ and R- are reserved.Power Indicator: Indicates the power status. The power indicator will light on when power is connected properly. COMM Indicator: The COMM indicator will light on when keyboard is connected to speed dome cameras properly.1.1 Features● Address can be set from 0~255● Up to 128 devices can be connected in parallel● Lightning protection design of all input and output communication ports ● High anti-jamming ability● Up to 1.2km transmission distance● Full functionalities for controlling the speed dome cameras ● Built-in multiple protocols ● Supports OSD●Supports key sound on/off function1.2 Packing List1. Keyboard x 12. Power supply x 13. 4-Pin line pressing terminals x 14. User Manual x 1Note : Please keep the shipping carton for possible future use. Contact the shipper if any items appear to have been damaged in the shipping process.Dimensions of the keyboard220mm / 8.67"130m m / 5.12"40m m / 1.57"Before installation, please ensure the power of all devices is off. Communication cables used to connectbetween the devices should be twisted-pair with shielding.The control system of controlling multiple speed dome cameras is shown as below:Note: Before using the keyboard to control speed dome camera, please make sure the address, protocol, baud rate setup on the keyboard is the same with those setup on the speed dome camera, otherwise, the speed dome cameras cannot be controlled.3.1Keyboard Self-DetectionSYSTEM STARTUPPELCO-D 2400 000< < < < < <Figure 3.1.1Figure 3.1.2After power on, the keyboard take the following actions automatically:1.Self-Detecting: The first line on the LCD display shows “SYSTEM STARTUP”. The second line shows “<”and “<” increases successively till it fills the screen with a sound “di”. If keyboard sound is turned on, “<” increases successively with sound “di,di…” (Figure 3.1.1)2.When Selft-Detection is Complete: The keyboard will get the current parameters automatically andclear the contents of the second line on the LCD display. As shown in Figure 3.1.2, the first line of LCD display shows “PELCO-D 2400 000”, which represents the communication protocol, baud rate and address respectively.3.2Joystick OperationYou can use the Joystick to control the rotation, pan/tilt direction and speed of the speed dome cameras. Changing the tilt angle of the Joystick can adjust controlling speed.1.Rotation Control: Push the joystick in any direction to control the camera directions. At the sametime, the LCD displays "PTZ <<<<<", where "<" indicates the control speed. The more the "<" displays on the LCD screen, the faster the control speed. To control the speed, tilts the joystick. The more the tilt angle, the faster the speed.2.Zoom Control: Rotate the joystick grip to adjust focal length of the lens. Clockwise rotation of Joystickgrip can zoom in and the image gets closer and larger; Counterclockwise rotation of joystick grip can zoom out and image gets farther and smaller. When rotating the joystick, the LCD will display"PTZ<<<<<", where "<" indicates the control speed. The more the "<" displays on the LCD screen, the faster the control speed.3.OSD Control: Push the joystick up to select previous menu option; push the joystick down to selectthe next menu option. Push the joystick left or right can change parameters of the selected menu (as described in 3.4 OSD Menu on LCD).【Focus+】: Manual focus on far object. The far objects come clear and the near objects come blurring.【Focus-】: Manual focus on near object. The near objects come clear and the far objects come blurring.【Zoom+】: Zoom in to enlarge object.【Zoom-】: Zoom out the lens to view wider field. The object becomes smaller.【Iris+】: Increase aperture gradually. The picture becomes brighter.【Iris-】: Downsize aperture. The picture becomes darker.【Setup】: Set key, [Setup]+number+[Enter] to set up the preset point of the camera or set up the short commands of the keyboard ( refer to 3.5 Keyboard Short Commands).【Preset】: Run key, [Preset]+number+[Enter] to run the preset point.【Menu】: Menu key, to enter Menu.【Addr】: Address key, [Addr]+number+[Enter] to choose the communication address.【0】~【9】: Number keys [0], [1], [2], [3], [4], [5], [6], [7], [8], [9].【Clear】: Delete key, [Clear]+number+[Enter] to delete the preset point.【Enter】: Confirm key, to confirm the present operation.【Aux ON】: Aux ON.【Aux OFF】: Aux OFF.3.4OSD Menu on LCDTo enter the OSD menu on LCD screen, press the【Menu】key (Figure 3.4.1).To exit the OSD menu using the keys on the keyboard, select a random function key, except【Menu】key, to exit the current menu and enter the corresponding menu (depends on the function key you press). For example, press 【Focus+】to exit the current menu and enter focus setting (Figure 3.4.2).LCD screenLCD MENU PROTOCOL PELCO-D PELCO-D 2400 000 FOCUS+Figure 3.4.1Figure 3.4.2There are two ways to operate the menu options: Use the Joystick or Use the Keys. Please note that when Joystick and Keys are being operated at the same time, the control goes to Joystick.Joystick Operation:•Push the joystick up or down to flip the menu.•Push the joystick left or right to select among the parameters and then press the 【Enter】key to confirm setting.•Rotating the joystick to any direction can exit the current setup page except the 【Menu】page.•When entering the OSD menu on the LCD screen, the joystick can only be used to operate the OSD menu and cannot be used to control the actions of speed dome camera.Key Operation:•Press [2] or [8] to flip the menu; Press [4] or [6] to select among the parameters.•Press the 【Enter】key to confirm and save changes each time when setting up a function.•When entering the OSD menu on the LCD screen, the number keys [0], [1], [3], [5], [7], [9] will be invalid. The [2], [8], [4], [6] keys can only be used to operate the OSD menu as up, down, left and right keys.•When entering the address page, the [2], [8], [4], [6] keys can only be used as number keys.•The [2], [8], [4], [6] keys can be used as joystick to control the direction (up, down, left and right) of the speed dome camera only when:1)Exiting the OSD menu on the LCD screen.2)The second line on LCD screen shows blank (Figure 3.4.1.1), the number keys [2], [8], [4] and[6] can be used as joystick to control the direction (up, down, left and right) of the speeddome camera. The rotation speed is fixed to fastest and cannot be adjusted (Figure 3.4.1.2).PELCO-D 2400 000PELCO-D 2400 000PT->UPFigure 3.4.1.1Figure 3.4.1.23.4.2Index of MenuThe menu contains 5 categories, which include Protocol, Language, Sound, Address and Baud Rate.LCD MENU PROTOCOL PELCO-DLCD MENULANGUAGE ENGLISHLCD MENUSOUND OFFLCD MENUADDRESS 000LCD MENUBAUD RATE 2400Protocol: Options include Pelco-P, Pelco-D, Samsung, Yaan and SAE.Language: English.Sound: Select On to turn on key sound; select Off to turn off key sound.Address: Set up an address from 000 to 255.Baud Rate: Options include 1200bps, 2400bps, 4800bps, 9600bps and 19200bps.After setting up the Address and pressing the 【Enter】key, the OSD menu will enter the Baud Rate menu [BAUD RATE 2400]. When users go back to Address menu again, the OSD menu will display [ADDRESS 000] as the present setting of the Address cannot be seen. However, when users exit the OSD menu, the first line on the LCD screen will display the current communication address.3.5Keyboard Short CommandsCombination key: [Setup]+number+[Enter]Number Function700 Turn off key sound701 Turn on key sound812 Set baud rate to 1200bps824 Set baud rate to 2400bps848 Set baud rate to 4800bps896 Set baud rate to 9600bps819 Set baud rate to 19200bps4.SpecificationsEKB700 KeyboardPower Supply 12VDC + 10% / 500mAOperating Temperature -20°C ~ +55°C / -4°F ~ 131°FOperating Humidity ≤90% non-condensingCommunication RS-485Interface 4-PIN terminals (RS-485)Baud Rate 1200bps, 2400bps, 4800bps, 9600bps, 19200bpsCommunication Protocol PELCO-D, PELCO-P, SAMSUNG, YAAN, SAECommunication betweenCamera and KeyboardOne point to multi-points Half-duplexJoystick Vector joystickDisplay LCDCommunication Distance 1.2kmControl Camera Quantity 128OSD Menu Language EnglishDimensions (W x D x H) 220 x 130 x 10mm / 8.67” x 5.12” x 1.57”5.The below solutions of common issues are just for your reference. If there are some special issues, please contact your dealer to get technical support.Issue Possible Reason SolutionNothing on LCD screenafter turning on the keyboard No powerCheck the power cable and whether the powercable is connected properlyMake sure the power source is 12VDCCannot control the target dome camera Protocol is wrongCheck protocol of keyboard. Make sure it is thesame with the speed dome camera.Baud rate is wrongCheck baud rate of keyboard. Make sure it is thesame with the speed dome camera.Address is wrongCheck address of keyboard. Make sure it is thesame with the speed dome camera.。
iPad super slim bluetooth keyboard manual(For iPad User) Folding Leather Protective Case With Bluetooth KeyboardCaution: To make you use it properly, please read this manual carefully before you start to use the keyboard.Welcome to select our super slim iPad Folding Leather Protective Case with Bluetooth Keyboard! This product is special designed for iPad to protect your iPad from scratches, and at the same time equip your iPad with standard layout keyboard and special iPad function keys. It is built by silicone green material, its wireless connection will bring the total fresh experience to you, just enjoy the fun of wireless connection!Packing Contents:1. PU Leather Case with Bluetooth Keyboard2. USB Charging Cable3. User manualProduct Features:1. Built-in wireless Bluetooth 3.0 silicone keyboard2. Stylish protective PU leather case designed for iPad.3. iPad display stand for easy viewing.4. Built-in Rechargeable lithium battery5. Special [home] screen key for one touch from variety of application.6. Light weight, quiet keystrokes. waterproof and dust-proof design7. Energy saving keyboard sleep modeKeyboard Specification1. Bluetooth 3.0 interface standard2. Operating Distance range to 10 meters3. Operating Voltage: 3.0-5.0V4. Working Current: <4.0mA5. Standby Current: 2.5mA6. Sleeping Current: <200μA7. Charging Current: -100mA8. Standby Time: 80 days9. Charging Time: 3-4hours10. Lithium Battery Capacity:380mA11. Continuous Working Time: About 40 hours12. Lithium Battery Life: 3 years12. Key Strength: 80±10g13. Key Life: 5 million strokes14. Operation Temperature: -10 — 65 ℃Bluetooth Keyboard PairingStep 1: Turn on the power switch. The [power] and [Bluetooth] light will keep lighting 5 seconds, then it will be off.Step 2: Press on the [connect] button, the [Bluetooth] indicator light will be flashing ,and the [power] Indicatorwill be on. The keyboard now is ready for connecting to iPadStep 3: Click the iPad [setting] icon, in the settings menu, select item [General] to access [Bluetooth] settingsStep 4:Click on [Bluetooth] to turn on the connection. iPad will automatically search Bluetooth devicesStep 5: Bluetooth Keyboard found. Click on the device to connectStep 6: Enter the password code as displayed On screenStep 7: Password accepted and Bluetooth keyboard connected Successfully. [power] indicatorlight will stay on until the keyboard is switched offSpecial Note:The bluetooth keyboard can be connectedto iPAD2,iPAD3.iphone3G, 3GS, 4G and ipod Touch thathad installed iOS 4.0 or later version. For otherBluetooth enabled device, please verify theBluetooth standard & compatibility before youattempt to connect to the keyboard.ChargingWhen the battery power is low, the [power] indicator light will keep flashing, It is time to charge the keyboard. Step 1: Connect USB-B of the native USB power cable to the keyboard charging interfaceStep 2: Connect USB-A to the power adaptor or computer's USB interfaceStep 3:The [charge] red indicator light will stay on when the keyboard is charging. Once it finished charging, the [charge] Indicator light will turn offTroubleshooting(A) Unable to connect1. Make sure the power switch is turned on2. Make sure the keyboard is within theoperating distance3. Make sure the battery is charged4. Make sure iPad Bluetooth setting is at on status5. Make sure wireless keyboard is connected to iPad6. Make sure the wireless keyboard hasbeen paired with the iPad(B) Unable to charge keyboardMake sure the USB power cable is connected properly to the keyboard and the power sourceFCC 6WDWHPHQWFederal Communication Commission Interference StatementThis equipment has been tested and found to comply with the limits for a Class B digital device, pursuant to Part 15 of the FCC Rules. These limits are designed to provide reasonable protection against harmful interference in a residential installation. This equipment generates, uses and can radiate radio frequency energy and, if not installed and used in accordance with the instructions, may cause harmful interference to radio communications. H owever, there is no guarantee that interference will not occur in a particular installation. If this equipment does cause harmful interference to radio or television reception, which can be determined by turning the equipment off and on, the user is encouraged to try to correct the interference by one of the following measures:-Reorient or relocate the receiving antenna.-Increase the separation between the equipment and receiver.-Connect the equipment into an outlet on a circuit different from that to which the receiver is connected.-Consult the dealer or an experienced radio/TV technician for help.This device complies with Part 15 of the FCC Rules. Operation is subject to the following two conditions: (1) This device may not cause harmful interference, and (2) this device must accept any interference received, including interference that may cause undesired operation.FCC Caution: Any changes or modifications not expressly approved by the party responsible for compliance could void the user's authority to operate this equipment.LABEL ARTWORK AND LOCATIONLabel Size: L*W=18mm*8mm。
Radio Wireless Keyboard User’s GuideBrand : A4TECHModel: RFKB-23THIS DEVICE COMPLIES WITH PART 15 OF THE FCC RULES. OPERATION IS SUBJECT TO THE FOLLOWING TWO CONDITIONS: (1) THIS DEVICE MAY NOT CAUSE HARMFUL INTERFERENCE AND (2) THIS DEVICE MUST ACCEPT ANY INTERFERENCE RECEIVED, INCLUDING INTERFERENCE THAT MAY CAUSE UNDESIRED OPERATION.Federal Communications Commission RequirementsThe equipment has been tested and found to comply with the limits for Class B Digital Device, pursuant to part 15 of the FCC Rules. These limits are designed to provide reasonable protection against harmful interference in a residential installation. This equipment generates, uses and can radiate radio frequency energy and, if not installed and used in accordance with the instruction, may cause harmful interference to radio communication. However, there is no guarantee that interference will not occur in a particular installation. If this equipment does cause harmful interference to radio or television reception, which can be determined by turning the equipment off and on, the user is encouraged to try to correct the interference by one or more of the following measures:z Reorient of relocate the receiving antenna.z Increase the separation between the equipment and receiver.z Connect the equipment into an outlet on a circuit different from that to which the receiver is connected.z Consult the dealer or an experienced radio/TV technician for help.The changes or modifications not expressly approved by the party responsible for compliance could void the user's authority to operate the equipment.Getting Ready1.Turn off the power of your computer.2.Remove the existing keyboard (and mouse for the A4Tech® WirelessDesktop).3.Install the AA alkaline batteries in the Wireless keyboard. Remove the batterycompartment cover on the bottom of the keyboard by squeezing the cover infrom the tab to release it.4.Install the AAA alkaline batteries in the Wireless mouse (for the A4Tech WirelessDesktop).(a) Remove the battery compartment cover on the bottom of the mouse bypressing down on the tab. Insert the batteries as shown in side the batterycompartment. Replace the cover.(b)Or press the up cover and move backward as shown here, and by sliding the cover off. Insert thebatteries as shown inside the battery compartment. Replace the cover.Setting Up the Keyboard or Wireless Desktop1.Make sure that your computer is turned off.2.Connecting the Receiver’s Keyboard Cable:(a)When connecting to an IBM AT keyboard port, use the 5-pin DIN connector already attached to the keyboard cable.(b)When connecting to a PS/2-style with adapter, 6-pin DIN keyboard port, it work only for the signal of keyboard..(c)When connecting to USB port, it can work to receive the signal of keyboard and mouse.3.Connecting the Receiver’s Mouse Cable (Wireless Desktop): Connect the receiver’s green mouse cable to the computer’s PS/2 mouse port4.Place the receiver eight inches (20 centimeters) from anyelectromechanical device.Installing the Mouse Software-iWheelWorks andKeyboard software-iKeyWorksOfficeBefore you can take advantage of the many features your mouse and keyboardoffers, you must install the driver. The driver is in the installation diskette thatcame packaged with your mouse and keyboardWindows 95/98/Me/2000/NT4.0 installationInsert the installation diskette into your floppy disk drive.Click the Start button and then click Run.In the Run dialog window, type A:\setup, where “A” is the letter of your floppy disk drive.Click OK and follow the instructions on your screen to complete the installation.Selecting the Frequency ChannelThe Wireless keyboard and Mouse operates on two frequency channels. To prevent interference when using twoRF Mice in close proximity a different frequency channel should be used for each mouse. Refer to thefollowing to change the frequency channel for your keyboard and mouse: Set the frequency channel on the receiver to 1 or 2. Set the frequency channel on the keyboard and mouse to 1 or 2.The Wireless keyboard and mouse ID codeEach keyboard and mouse is assigned a unique ID code at manufacture, so the receiver only picks up the signal from your mouse and prevents other Wireless keyboard or mouse radio signals from operating on your computer. This feature can also be disabled, allowing other Wireless pointingdevices to operate your computer.Connecting the Wireless Mouse ID CodeWhen the driver installation is finished your computer reboots and the Wireless Mouse window (shown on the right)appears.CONNECT ID: Move the Wireless Mouse for a few seconds to establish a connection, then click Connect ID. Theunique ID code of your mouse is recognized and another RF pointing device will not function on your computer.Exit: Click Exit if no other RF pointing devices are within 3 meters range or if you want other RF pointing devices to beable to access your computer.Changing the Wireless Mouse ID CodeYou can use a new Wireless Mouse on your computer without changing the Radio receiver; you just need to change the ID code. Refer to the following:1. Press [Shift + Alt + F11] or [Shift + Alt + F12] to call up the Wireless Mouse ID Code window.2. Move the Wireless Mouse for a few seconds to establish a connection, then click Connect ID.3. The new ID code is connected and the Wireless Mouse window closes.4. Click Exit to close the Wireless Mouse ID code window.Connecting the Wireless Keyboard ID CodeManually establish communication between the receiver and keyboard.(a) Press any key from the keyboard(b) Press the ID Connect button on the receiver the green LED light will show you the keyboard ID be connect. If the green LED light is off then keyboard ID is disconnect.。