XQG65-L903BS_BXS说明书
- 格式:pdf
- 大小:5.84 MB
- 文档页数:11

31 SCHEMATICS 12/1/2005INDEXPAGE3.AC Panel4.230V AC Panel5.AC Panel Schematic6.230v AC Panel Schematic7.AC Wire Kit8.Stage Wire Kits-DVD Option Kit10.DC Panel11.DC Panel Schematic12.DC Panel Connectors14. Hull Harness15. Hull Harness Wire List16. Hull Harness Connectors17. Deck Harness18. Deck Harness Wire List19. Deck Harness Connectors20. Auto Fire System Schematic21. High Water Pump System Schematic22. Engine Panel Area SchematicPage 1REVISION DATE: 11/16/05 31 WIRE KITS WIRE SIZE COLOR LENGTH EYE EYE DESCRIPTION HOUSE BATTERY #11/ORED 10'3/8"3/8"BATT TO SW-HOUSE11/OYELLOW 9.5'5/16"3/8"BATT TO GND-HOUSE1YANMAR STARTER 2 GARED 8' 6"5/16"3/8"START TO STUD-YAN 2 GAYELLOW 8'3/8"3/8"ENGINE TO GND-YAN GNDS 6 GAGREEN/YELLOW 23'1/4"3/8"ARCH GND 6 GAGREEN/YELLOW 10' 6"1/4"5/8"CHAINPLATE PORT 6 GAGREEN/YELLOW 10' 6"1/4"5/8"CHAINPLATE STBD 10 GAGREEN/YELLOW 20'FUEL FILL GRD4 GA GREEN/YELLOW 30"1/4"3/8"MAST POST TO KEEL WIRE SIZE COLOR LENGTH EYE EYE DESCRIPTION SHORE POWER10-3ROMEX 15'SP1GNDS 6 GA GREEN/YELLOW 8'3/8"1/2"PEDESTAL GND WIRE SIZE COLOR LENGTH EYE EYE DESCRIPTION HOUSE BATTERY #21/ORED 11'3/8"3/8"BATT TO SW-HOUSE21/OYELLOW 2'3/8"3/8"BATT TO GND-HOUSE2BATT. CHAR. P/N 100284014-3ROMEX 7'BATT CHARGER INVERTER (120V)1/ORED 12"3/8"3/8"INV TO FUSE 1/ORED 18"3/8"3/8"FUSE TO SW 1/OYELLOW 18"5/16"3/8"INV TO GND 1/OGREEN/YELLOW 18"5/16"1/4"INV CASE TO GND 10-3ROMEX 7'INV IN 10-3ROMEX 7'INV OUT INVERTER (230V)1/ORED 1'3/8"3/8"FUSE TO SW 1/OGREEN/YELLOW 18"5/16"1/4"INV CASE TO GND 10-3ROMEX 7'INV IN 10-3ROMEX 7'INV OUT WINDLASS 2 GARED 24'1/4"5/16"BREAKER TO BOX-WL 2 GAYELLOW 24'3/8"5/16"GND TO BOX-WL 2 GARED 16"3/8"1/4"WINDLASS JUMPER BILGE KEEL 12 GABROWN 12' BILGE PUMP (+) 12 GAYELLOW 12' BILGE PUMP (-)AIR CONDITIONING 10-3ROMEX 18' AIR COND 14-3ROMEX 8'AC PUMP WIRE SIZE COLOR LENGTH EYE EYE DESCRIPTION WINDLASS2 GA RED 1' 6"5/16"5/16"BOX TO MOTOR-WL2 GA RED 1' 6"5/16"5/16"BOX TO MOTOR-WL 16 GA YELLOW 1' 6"5/16"F-spade CONTROL BOX NEG.ELECTRICAL STAGE 56STAGE 24A-MODULE P/NMODULE STAGE 24AOPTIONSSTAGE 34-DECK RIGGING P/N 1013359HUNTER 31 DC HULL HARNESS11/18/2005 WIRE#GAUGE COLOR LENGTH FUNCTION110RED/BLACK138"REFRIGERATION210YELLOW120"REFRIGERATION NEG.316ORANGE/RED134"LPG PANEL SW416YELLOW116"LPG INDICATOR NEG.3A16ORANGE/GREEN260"LPG SOLENOID (+)4A16YELLOW296"LPG SOLENOID (-)512BROWN/RED110"BILGE MANUAL SW612BROWN/ORANGE96"BILGE AUTO712YELLOW92"BILGE NEG.86YELLOW68"DC MDP NEG.96ORANGE/RED64"DC MDP POWER1012TAN46"BILGE POWER118ORANGE/GREEN34"BATTERY CHARGER128ORANGE/RED34"BATTERY CHARGER138YELLOW36"BATTERY CHARGER NEG1816PINK/BLACK206"WATER SENSOR (S)1916YELLOW202"WATER SENSOR (-)2212BROWN/BLUE310"BLOWER2312YELLOW292"BLOWER NEG.2412BROWN130"WATER PUMP2512YELLOW112"WATER PUMP NEG.2812BROWN/BLACK140"SUMP PUMP SW28A12BROWN/BLACK132"SUMP PUMP2912YELLOW62"SUMP PUMP NEG.3216RED/BLUE222"CO DETECTOR3316YELLOW204"CO DETECTOR NEG.32A16RED/BLUE388"CO DETECTOR33A16YELLOW354"CO DETECTOR NEG.3412RED174"12V OUTLET3512YELLOW156"12V OUTLET NEG.OUTLET3612RED 236"12V3712YELLOW202"12V OUTLET NEG.4116PINK184"FUEL SENSOR (S)4216YELLOW184"FUEL SENSOR (-)506YELLOW32"NEG BUS JUMPER6110WHITE/GREEN106"HW PUMP AUTO6210WHITE/RED100"HW PUMP MANUAL6310YELLOW88"HW PUMP NEG6416YELLOW/BROWN362"HW RELAY SW6516BROWN/RED362"HW ALARM IND6616YELLOW350"HW ALARM NEG6716BLACK/YELLOW222"FIRE EXT.67A16BLACK/YELLOW240"FIRE EXT. - SHUTDOWN6816BROWN/BLUE182"BLOWER RELAY6916YELLOW362"FIRE EXT. - SHUTDOWN BOX 7016RED72"IGNITION SWITCH7316WHITE/BROWN72"ENGINE STOP7416RED60"FUEL GAUGE POWER7516YELLOW48"FUEL GAUGE NEGATIVE7616RED6"FUEL GAUGE LIGHTHUNTER 31 DECK HARNESS REV.-B1/3/2005 WIRE#GAUGE COLOR LENGTH FUNCTION116BLUE312"CABIN LIGHTS216YELLOW306"CABIN LIGHTS NEG.316BLUE454"CABIN LIGHTS416YELLOW448"CABIN LIGHTS NEG.514GRAY/RED194"ANCHOR LIGHT614GRAY/GREEN194"STEAMING LIGHT716GRAY214"DECK LIGHT810YELLOW188"MAST LIGHTS NEG.916WHITE/ORANGE144"PORT MAIN SPEAKER1016WHITE/YELLOW144"PORT MAIN SPEAKER NEG.1116BLUE388"CABIN LIGHTS1216YELLOW382"CABIN LIGHTS NEG.1316BLUE292"CABIN LIGHTS1416YELLOW286"CABIN LIGHTS NEG.1516GRAY/YELLOW394"STERN LIGHT1616RED/BLACK324"GPS1816YELLOW388"STERN LIGHT NEG.1916BLUE/WHITE168"ARCH LIGHT2016YELLOW162"ARCH LIGHT NEG.2116WHITE/PINK162"PORT ARCH SPEAKER2216WHITE/YELLOW162"PORT ARCH SPEAKER NEG.2316WHITE/GRAY162"STBD ARCH SPEAKER2416WHITE/BLACK162"STBD ARCH SPEAKER NEG.2516GRAY/WHITE260"BOW LIGHT2616YELLOW254"BOW LIGHT NEG.2716TAN260"WINDLASS3016WHITE/BLUE346"STBD MAIN SPEAKER3116WHITE/BLACK346"STBD MAIN SPEAKER NEG.32RG-8X WHITE188"VHF COAX3910RED324"AUTO PILOT4010YELLOW318"AUTO PILOT NEG.4116YELLOW42"GPS NEG42WIND SP CABLE416"WIND SPEED436YELLOW24"NEG JUMPER。

数码超声波清洗机使用说明书□请在使用本产品前认真阅读使用说明书□请保存好此使用说明书感谢您购买本公司生产的智能双频双功率超声波清洗机,希望本公司的产品能给您工作和生活带来更多便利。
在您使用本产品前,请仔细阅读本使用说明书。
一、机器组成部份:a)主机一台,b)隔音盖子一个,c)电源线一条,d)清洗篮一个(可选配件),e)滤网一个(有排水时)二、应用范围:超声波清洗机具有其它物理清洗或化学清洗无可比拟的优越性,因此广泛应用于服务业、电子业、医药业、实验室、机械业、硬质合金业、化学工业等诸多领域。
三、产品特点:1)超声波电路技术全面提升,标志行业尖端的电路彻底解决行业应用困境;2)清洗更精细,彻底解决超声波清洗盲区;3)电路转换效率高:98%,无功损耗极低;4)智能人性化控制电路全方位保障产品可靠性,延长产品使用寿命;5)人性化数码显示断电记忆功能,操作更简便快捷;6)产品工作槽采用优质SUS304不锈钢一次冲压成形,寿命长、美观大方;7)6L及以上规格具有排水装置,快速排出废液8)SUS304材质专用清洗蓝可选;四、技术参数:ModelTank Size Overall Size Volume PowerFrequencyHeatingPowerTimesettingTemperature (L*W*H)mm(L*W*H)mm L W KHz W Min℃PS-08A150×140×65190×170×150 1.360401001-990-80PS-10A150×140×100190×170×1952601001-990-80 PS-20A240×140×100270×170×220 3.21201001-990-80 PS-30A300×155×150330×180×280 6.51803001-990-80 PS-40A300×240×150330×270×280102403001-990-80 PS-60A330×300×150360×330×280153604001-990-80 PS-80A500×300×150550×330×280224805001-990-80 PS-100A500×300×200550×330×330306005001-990-80五、安装与准备:a)开箱后,检查零件有无松脱b)机器放置在通风干燥的地方,确保机器处于水平位置c)正确连接电源插头,确保联接牢固(一定要使用三孔插座,有可靠接地线,以保证安全)d)按清洗所需加入适量的清洗液六、清洗方法:普通清洗使用水即可清洗。

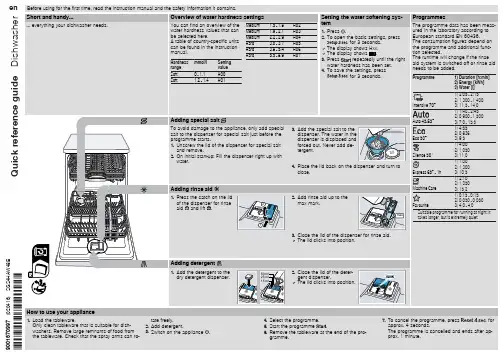
滚筒洗衣干衣机使用说明书微信服务二维码目录快速入门使用说明服务指南控制面板介绍 ...........................................洗涤剂盒介绍............................................程序/功能介绍 ..........................................智能配网介绍 ...........................................清洁保养..................................................故障现象及处理方法...................................规格及技术参数.........................................售后服务..................................................包修卡.....................................................快速入门..................................................安全警示安全警示 .................................................235 5 10 1011 13 14 15 15执行标准:GB/T4288 GB4706.1 GB4706.24 GB4343.1 GB17625.1 GB19606 GB12021.4 GB4706.20快速入门安全警示使用说明服务指南快速入门注意:.在您使用本机器前,请确保机器已经按照安装说明正确安装好。
2.首次使用,建议您在没有衣物的情况下完成一次“筒自洁”或其他高温程序 洗涤。
1二.开始洗衣三.洗衣结束注意:如果选择默认参数无需操作"设置参数/功能"步骤, 4.关闭机门 插头打开电源设置参数/功能启动当洗衣结束后洗衣机会有声音提示; 显示屏显示"End"字样。
洗衣机使用说明书1. 使用前须知连接进水管1. 选择适合的水龙头(前段长度必须大于10mm,假设水龙头出口端面不平整,请用锉刀锉平,以免漏水) 2. 取下进水管接头①②③④①按住锁紧杆下端;②握住进水管,向下压滑动器,取下进水管接头;③接下标记牌。
3.安装进水管接头①拧动螺母,露出3至4圈螺纹;②将进水管接头的四颗螺钉拧松至可将进水管接头套在水龙头上;③如果进水管水龙头无法套在水龙头上,请取下衬套在安装;④将其中一个螺钉事先旋到大致适合位置,在将进水管套在水龙头上,将其余三颗螺钉均匀拧紧,确认到位后,旋紧螺母。
4.连接进水管①压下滑动器,将水管插入进水管接头;②用锁紧杆挂住水管接头,然后松开滑动器,直到听到“啪〞的一声。
5.连接洗衣机①将进水管另一端的螺母套到进水阀接头上;②拧紧进水管螺母并确认螺母紧固到位。
6.检查进水管是否连接好①检查连接是否牢固;②安装完毕后,翻开水龙头,检查是否漏水;③每次使用洗衣机前,请检查确认进水管与水龙头连接牢靠④切勿强力弯曲进水管。
粘贴毛毡,安装降噪板1. 将毛毡粘贴在降噪板的一侧。
2. 将洗衣机向后倾斜,卸下四个底脚。
3. 降噪板附有毛毡的一面朝内,将将底脚螺栓穿过四个孔装在壳体上旋紧,重新放平机器。
排水管排水管出水端高度必须大于80cm,最高点必须小于100cm,为防止排水管脱落,可将排水管固定在机器后的排水管卡上或使用排水支架固定,建议不要加长排水管,加长局部假设超过2.5m,易出现边进水边排水现象。
延长排水管,请联系本公司售后效劳部门。
调整底脚使用之前应先调节四个底脚,使洗衣机处于平衡状态。
底脚调节完毕后,要把底脚支撑螺母旋至紧贴壳体位置处,以支撑洗衣机。
分配器盒〔每次只放入一次洗涤所需的洗涤剂〕预洗洗涤剂投入室主洗洗涤剂投入室软化剂,漂白剂投入室选择预洗的功能时,在预洗室投入洗涤剂预先洗涤衣物;洗涤剂的用量请参照洗涤剂的使用说明,过量的洗涤剂会产生大量泡沫,易溢出,且影响洗涤剂的溶解;应使用滚筒洗衣机专用低泡洗涤剂,假设洗涤合成或羊毛织物时,那么应该用为其特制得洗涤剂软化剂或漂白剂的最高液面不要超过分配器盒的MAX标识。
五款高端变频滚筒洗衣机横评洗衣机相信是现在每个家庭的必备品,而且随着科技水平的不断提高,洗衣机的性能和功能也开是逐渐增强,目前市场上最高端的要数滚筒洗衣机,宣传的卖点也是只要按个键,就可以无人看管,全自动洗涤、脱水、甩干、漂洗。
但是种类繁多的高端滚筒洗衣机,到底有什么样的区别呢?哪个使用更加方便呢。
泡泡网数字机家电频道联合百姓家电网结合了目前卖场中具有高品质的五款变频滚筒洗衣机,进行功率、洗净度、使用方便性、以及消费者比较关心的噪音和甩干湿度等问题,进行了综合评测。
这五款机器分别为三洋XQG65-L903BHX,松下XQG72-VD72ZS,三星WD8754CJZ,海尔XQG80-HB1286,LG WD-A12255DS,是目前卖场中比较高端的产品。
首先来介绍下评测所用到工具以及常见污渍的选择。
● 测试方法及测试工具详解在洗净度方面挑选了几种比较常见的难洗的污渍,分别为混合果汁(桔子、西红柿、芒果),辣椒油(主要测试对油类污渍的洗涤),以及墨水,每次洗涤均量取10ML的固定量。
而且为了能充分显示这几款机器的清洁程度有何不同,本次评测均未加入任何洗衣粉和洗涤液。
从左至右分别为墨水、辣椒油、果汁测试用功耗仪由于每台机器在洗涤、甩干、烘干、脱水时的功率各不相同,而且这五台高端机型均是变频系列,所以在评测时用功率仪分别记录了在各个不同时刻的功率变化范围。
测试噪音的仪器洗衣机的噪音也是很多消费者关注的问题,在洗涤和甩干、烘干时的噪音比较明显。
所以分别测试了机器在洗涤和甩干和烘干时的噪音。
而且噪音分为两部分,噪音仪上分别可以测量人耳噪音和机械噪音,本文所表现的噪音为人耳噪音,因为人耳噪音是能真正体会的,也是与消费者最密切相关的参数。
测试湿度仪器为了测试甩干和烘干的效果,最后又增加了一项,单独测试同等条件下的甩干和烘干对比,在同等条件下,同等湿度的毛巾甩干和烘干后的湿度也是不一样的。
● 海尔洗衣机外观功能介绍海尔XQG80-HB1286外观上,采用了灰色箱体+蓝色操作面板的经典配合,大视窗和LED屏的设计十分亮眼。
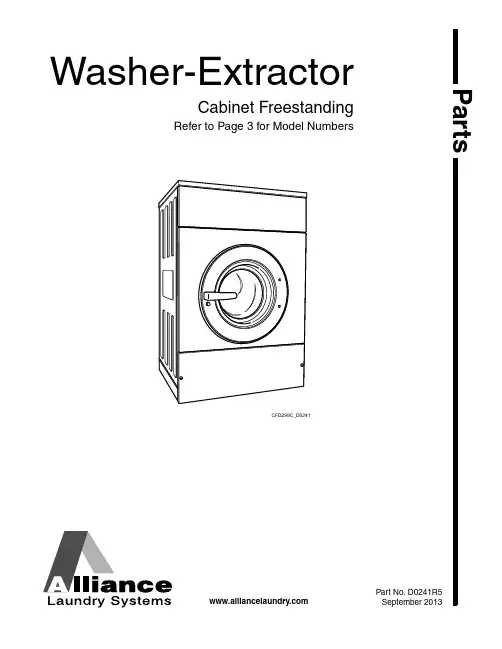
PartsWasher-ExtractorCabinet FreestandingRefer to Page 3 for Model NumbersPart No. D0241R5September 2013Model Identification Information in this manual is applicable to these washer models: HW131_MICRO-20HW131_PS40HW131_SIGMAHW164_MICRO-20HW164_PS40HW164_SIGMAIHW035ANHREF PART NO.DESCRIPTION COMMENTS1-Product Family HWIHW2-Capacity0351311643-Control A (PS40F)M (Micro-20)PS40S (Sigma)4-Actuation N (Non-Coin)5-Speed H (High)6-Voltage N (440-480/50-60/3/3)P (380-415/50-60/3/3)Q (208-240/50-60/3/3)X (200-240/50-60/1/3) 7-Design1REF PART NO.DESCRIPTION COMMENTS1204/00111/00Nut2201/00005/00Washer3203/00001/00Washer4206/00053/00Screw5201/00014/00Washer6206/00055/00Screw7201/00001/00Washer8206/00047/00Bolt9113/00036/00Counterweight10113/00035/00Counterweight11204/00113/00Nut12152/00049/50Frame*131 models 152/00050/50Frame*35 and *164 models 13206/00014/00Bolt14204/00005/00Nut15152/00046/00Tub Support*131 models 152/00047/00Tub Support*35 and *164 modelsREF PART NO.DESCRIPTION COMMENTS1204/00110/00Nut2201/00015/00Washer3247/00007/00Fastening Rubber4247/00006/00Fastening Rubber5247/00001/04Spring Holder Top6247/00002/02Shock Absorber247/00003/00Shock Absorber Includes items 2, 4-6, 8 and 247/00002/01 SuspensionSpring7247/00002/01Suspension Spring Blue; 5.5 mm diameter247/00001/01Suspension Spring Black; 4.8 mm diameter247/00002/00Shock Absorber Includes items 2, 4 and 247/00001/01 SuspensionSpring8247/00001/03Spring Seat Bottom9208/00030/00Bolt10203/00002/00Washer11204/00003/00Nut12247/00004/00Shock AbsorberREF PART NO.DESCRIPTION COMMENTS1118/10070/00T ub*131 models; Electric and steam 118/10071/00T ub*131 models; Boiler118/10072/00T ub*35 and *164 models; Electric and steam 118/10073/00T ub*35 and *164 models; Boiler2204/00009/00Nut3202/00003/00Washer4206/00011/00Bolt5217/00008/00T ub Front Panel Clip6238/00017/00Clamp7223/00122/00Door Boot8238/00013/00Fastening Ring9238/00014/00Spring10119/00049/00T ub Front Panel11223/00242/00T ub Front Gasket12136/10017/00Drum and Axle*131 models111/01962/00Cylinder and Trunnion Assembly*35 and *164 models13219/00007/00T ub Front Ring ClampREF PART NO.DESCRIPTION COMMENTS1204/00112/00Nut2201/00012/00Washer3206/00057/00Screw4201/00201/00Washer5205/00102/00Bolt6224/00051/00Caddy Bracket4H58-4224/00052/00Caddy Bracket4H9127217/00002/00O-Ring8117/00001/01Shaft Seal Holder9219/00003/00Shaft Seal10119/00001/01Seal Holder Assembly11216/00001/03Ball Bearing12212/00031/00Retainer Ring13212/00029/00Retainer Ring14209/00400/00Speed Detector15203/00004/00Washer16205/00104/00Bolt17152/00055/00Speed Detector Bracket18116/00301/01Bearing Assembly Includes items 11-13, 19 and 20 19212/00038/00Retaining Ring20216/00001/02Ball BearingREF PART NO.DESCRIPTION COMMENTS 1216/00002/04Cylinder Shaft Key2226/00114/00Belt3206/00003/00Bolt4203/00001/00Washer5203/00011/00Washer6206/00056/00Screw7226/00070/00Pulley8219/00004/00Counter RingREF PART NO.DESCRIPTION COMMENTS 1152/00054/00Motor Plate2206/00005/00Bolt3113/00038/00Belt Rod4204/00012/00Nut5201/00001/00Washer6206/00127/00Bolt7204/00110/00Nut8226/00062/00Pulley9206/00056/00Screw10227/00127/00Motor11211/00117/00Cordlock12207/00021/00Screw13201/00008/00Washer14204/00114/00Nut15209/00465/00FanREF PART NO.DESCRIPTION COMMENTS 1206/00033/00Bolt2201/00007/00Washer3101/00007/00Outlet Pipe Plate Assembly4206/00101/00Nut5223/00014/00Hose Clamp6223/00189/00Valve Hose7223/00013/00Hose Clamp8204/00009/00Nut9152/00041/06Drain Valve Plate10203/00004/00Washer11206/00086/00Screw12114/00030/00Drain Valve Plate Assembly13223/00086/00Drain Valve Overflow Plug14223/00012/00Hose Clamp15209/00051/00Drain Valve16223/00190/00Drain Valve Hose17223/00105/00Drain Pipe18223/00100/00Overflow HoseREF PART NO.DESCRIPTION COMMENTS 1217/00052/01A Door Lock Assembly2217/00052/02Door Lock Pin Kit3205/00115/00Bolt4202/00101/00Washer5217/00017/03Lock Shaft6207/00009/00Screw7201/00018/00Washer8209/00273/00Light Microswitch9203/00007/00Washer10207/00135/00Screw11209/00274/00Door Lock Solenoid12224/00049/00Door Lock Spring13201/00017/00Washer14201/00006/00Washer15204/00009/00Nut16224/00043/00Interlock Coil Spring17217/00052/07Door Release Wire18217/00052/04Interlock Lever19217/00052/03Door Lock Spacer20217/00052/05Switch Lever21224/00040/00Lever Spring22117/00052/08Lock Protection Plate23210/10015/00Ground Terminal24204/00008/00Nut25205/00103/00Bolt26209/00272/00Door Lock MicroswitchREF PART NO.DESCRIPTION COMMENTS 1217/00059/00Door Handle2217/00016/00Door Handle Stop3B12500801Screw4204/00103/00Nut5202/00111/00Washer6211/00109/01Door Lock Pin Kit7217/00022/00Door Glass8217/00015/00Door Glass Seal9118/00046/10Door Frame10204/00106/00Nut11202/00108/00Washer12217/00009/02Door Hinge Assembly13202/00104/00Washer14117/00011/00Door Hinge Spacer 2 mm 15117/00010/00Door Hinge Spacer 1 mm 16207/00126/00Screw M6 x 35 207/00125/00Bolt M6 x 25 17221/00005/00Door Hinge18118/00065/00Door Hinge Plate Assembly19202/00101/00Washer20205/00107/00BoltREF PART NO.DESCRIPTION COMMENTS1229/00262/00Circuit Board Cover2209/00440/70Printboard3204/00116/00Nut4211/00122/00Standoff5203/00006/00Washer6229/00255/00Insulating Sticker7111/00257/00Coin Meter Plate8204/00009/00Nut9201/00008/00Washer10111/01703/00Front Panel OPL111/01704/00Front Panel Coin11225/00407/00Keypad Sticker OPL225/00406/00Operating Label Coin225/00408/00Operating Sticker Coin models with central payment 12225/00316/00Plexi Frame13209/00248/20Mushroom Pushbutton14209/00520/00Telem Sticker15209/00099/26Contact Switch16209/00266/01Eprom Standard software17209/00439/00Fuse500 mAREF PART NO.DESCRIPTION COMMENTS1229/00262/00Circuit Board Cover2209/00547/00Control Board3204/00116/00Nut4211/00122/00Standoff For printboards5229/00255/00Insulating Sticker6111/00257/00Coin Meter Plate7204/00009/00Nut8201/00008/00Washer9111/01703/00Front Panel OPL111/01704/00Front Panel Coin10225/00404/00Operating Sticker OPL225/00403/00Decal Coin225/00405/00Operating Sticker Coin models with central payment 11210/00902/00Infrared Cable12225/00316/00Plexi Frame13202/00120/00Metal Disc14209/00248/20Mushroom Pushbutton15209/00520/00Telem Sticker16209/00099/26Contact Switch17209/00439/00Fuse500 mAREF PART NO.DESCRIPTION COMMENTS 1209/00372/01Fuse2B12351701Main Board3229/00255/00Insulating Sticker4204/00116/00Nut5211/00122/00Standoff6111/01705/00Front Panel7209/00099/26Contact Switch8209/00099/25Switch Base9209/00099/29Switch Knob10209/00520/00Telem Sticker11209/00248/20Mushroom Pushbutton12209/00326/20Programming Key Contact Switch13210/00902/00Infrared Cable14225/00397/00Label15225/00400/00Operating Sticker16202/00120/00Metal Disc17223/00123/00Washer18223/00051/10Washer19204/00116/00Nut20209/00552/01Keypad21229/00262/00Circuit Board CoverREF PART NO.DESCRIPTION COMMENTS 1206/00033/00Bolt2211/00070/01Outer Cabinet Lock3211/00070/02Washer4211/00070/04Spring5211/00070/03Inner Coin Box6203/00004/00Washer7204/00005/00Nut8211/00071/00Coin Box9208/00007/00Screw10211/00100/00Outer Coin Box11209/00396/00Pushbutton12207/00009/00Screw13203/00007/00Washer14209/00060/12Coin Drop Microswitch15204/00116/00Nut16207/00108/00Screw17111/00100/00Coin Box Ring Assembly18211/00065/02Coin Box Key19211/00065/00Coin Box Lock20211/00065/01Nut21111/00066/00Coin Box Ring22206/00099/00Bolt23111/00068/00Front Plate24111/00101/00Coin Box25206/00038/00Screw26111/00069/00Spindle27208/00013/00Roll PinREF PART NO.DESCRIPTION COMMENTS1209/00389/00Coin Meter Euro; .10209/00388/00Coin Meter Euro; .20209/00387/00Coin Meter Euro; .50209/00390/00Coin Meter Euro; 1.00209/00391/00Coin Meter Euro; 1.00 (LVN)209/00119/00Coin Meter Euro; .20 and .50209/00120/00Coin Meter Euro; 1.00 and .20209/00166/00Coin Meter Euro; 1.00 and .50209/00576/00Coin Meter Euro; 2.00 and .50209/00111/00Coin Meter$.25209/00414/00Coin Meter Canada; .25 and 1.00209/00378/00Coin Meter Australia; 1.00 and 2.00209/00229/00Coin Meter Australia; 1.00 and .20209/00065/00Coin Meter Hong Kong; 1 dollar209/00418/00Coin Meter Malaysia; 1 dollar209/00364/00Coin Meter England; 1 pound and 20 pence209/00437/00Coin Meter South Africa; 1 rand and 2 rand209/00442/00Coin Meter Israel; 1 shekel and 5 shekel209/00375/00Coin Meter Singapore; 1 dollar209/00383/00Coin Meter New Zealand; 2 dollar and 1 dollar 209/00500/00Coin Meter Morocco; 5 MDh and 10 MDh209/00404/00Coin Meter 5 NoCr and 10 NoCr209/00402/00Coin Meter10 dek and 2 dek209/00460/00Coin Meter 2 dek209/00064/00Coin Meter Australia; .20209/00415/00Coin Meter Hong Kong; 5 dollar209/00501/00Coin Meter Norway; 50 kronur and 100 kronur 209/00402/01Coin Meter Token; .800209/00402/03Coin Meter Token; Coin meter token209/00502/00Coin Meter Token; Small Muller209/00402/04Coin Meter Token; Prinz; 28 x 2.7 mm209/00402/02Coin Meter Token; Prinz; 22.85 x 2.1 mm209/00407/00Coin Meter Token; Prinz 26 x 2.05 mm209/00469/00Coin Meter NRI; Electronic209/00216/00Coin Meter Japan; 100 yen209/00278/00Coin Meter Japan; 100 yen and 500 yen209/00373/00Coin Meter Korea; 500 won209/00522/00Coin Meter Trenner; Electronic209/00061/00Coin Meter Token; 7K209/00068/00Coin Meter Token; 10K209/00069/00Coin Meter Token; 12K209/00070/00Coin Meter Token; 15K209/00121/00Coin Meter Profiled token209/00161/00Coin Meter 1 dek209/00158/00Coin Meter 1 rial209/00160/00Coin Meter 5 dek209/00269/00Coin Meter Korea; 100 won and 500 won209/00162/00Coin Meter Token; Vasketeria and 5 DK209/00066/00Coin Meter Token; Vasketeria and 2x1 DK209/00553/00Coin Meter USA; $1.00 and $.25209/00548/00Coin Meter100 pesetas and 25 pesetasREF PART NO.DESCRIPTION COMMENTS1111/01164/90Backbridge2206/00099/00Bolt3204/00005/00Nut4111/10099/00Rear Plate5111/10098/00Front Plate6111/10093/00Mounting Plate7206/00101/00Nut8205/00106/00Bolt9202/00003/00Washer10117/00042/00Retaining Ring11203/00005/00Washer12204/00006/00Nut13111/01703/00Front Panel OPL111/01704/00Front Panel Coin14111/00109/00Triangle Support Right111/00118/00Triangle Support Left15204/00003/00Nut16203/00002/00Washer17201/00010/00Washer18206/00005/00Bolt19208/00009/00Washer20207/00130/00Screw21111/22731/00Lower Front Panel Stainless steel111/23731/00Lower Front Panel Epoxy22246/00079/00Side Panel Gasket23111/22723/10Side Panel*131 models; Stainless steel 111/22728/10Side Panel*35 and *164 models; Stainless steel 111/22723/20Side Panel*131 models; Epoxy111/22728/20Side Panel*35 and *164 models; Epoxy24204/00009/00Nut25101/00007/00Outlet Pipe Plate Assembly26205/00104/00Bolt27206/00027/00Bolt28202/00004/00Washer29204/00114/00Nut30201/00006/00Washer31203/00015/00Washer32208/00001/00Screw33208/00025/00NutREF PART NO.DESCRIPTION COMMENTS1223/00103/04Soap Dispenser Cover Hinge Rod 2 required2223/00103/01Soap Dispenser Cover3205/00108/00Bolt4202/00101/00Washer5223/00103/03Soap Dispenser Frame6208/00104/00Nut7206/00099/00Bolt8111/10094/00Lower Front Panel OPL; Stainless steel111/10095/00Lower Front Panel Coin; Stainless steel111/10094/10Lower Front Panel OPL; Epoxy111/10095/10Lower Front Panel Coin; Epoxy9111/22723/10Side Panel*131 models; Stainless steel 111/22728/10Side Panel*35 and *164 models; Stainless steel111/22723/20Side Panel*131 models; Epoxy111/22728/20Side Panel*35 and *164 models; Epoxy10246/00079/00Side Panel Gasket11111/10089/01Reinforcement Plate12206/00114/00Bolt13152/00053/02Back Panel14111/22741/00Top Panel*131 models; Stainless steel 111/22742/00Top Panel*131 models; Stainless steel with lock111/23741/00Top Panel*131 models; White111/22743/00Top Panel*35 and *164 models; Stainless steel111/22744/00Top Panel*35 and *164 models; Stainless steel with lock 111/23743/00Top Panel*35 and *164 models; WhiteREF PART NO.DESCRIPTION COMMENTSF8410901Parameter Unit Assembly Mounts to inverter drive; Used with 500-series inverterdrives227/00171/00Parameter Unit Assembly Hand held1206/00099/00Bolt2208/00130/00Screw3111/01164/90Backbridge4223/00174/00Grommet5206/00088/00Bolt6203/00006/00Washer7204/00007/00Nut8204/00114/00Nut9F8420608Inverter Drive Kit HW131 models; 200 Volt/1 Phase; Used to convertfrom 500 to 700-series inverter drive; IncludesF8420708 Inverter Drive, F8409501 Mounting PlateAssembly and F430903 ScrewF8420708Inverter Drive HW131 models; 200 Volt/1 Phase; 700-seriesF8420609Inverter Drive Kit HW131 models; 400 Volt/3 Phase; Used to convertfrom 500 to 700-series inverter drive; IncludesF8420709 Inverter Drive, F8409501 Mounting PlateAssembly and F430903 ScrewF8420709Inverter Drive HW131 models; 400 Volt/3 Phase; 700-seriesF8420610Inverter Drive Kit HW164 and IHW035 models; 200 Volt/1 Phase; Usedto convert from 500 to 700-series inverter drive;Includes F8420710 Inverter Drive, F8409501 MountingPlate Assembly and F430903 Screw F8420710Inverter Drive HW164 and IHW035 models; 200 Volt/1 Phase;700-seriesF8420611Inverter Drive Kit HW164 and IHW035 models; 400 Volt/3 Phase; Usedto convert from 500 to 700-series inverter drive;Includes F8420711 Inverter Drive, F8409501 MountingPlate Assembly and F430903 Screw F8420711Inverter Drive HW164 and IHW035 models; 400 Volt/3 Phase;700-series10223/00250/00Liquid Soap Manifold11111/01174/00Inverter Drive Box12209/00287/00Cooling Fan13111/01174/01Inverter Box Cover14207/00121/00Screw15202/00004/00Washer16223/00179/10Pressure Hose17B12355001Voltage Discharge Decal Inverter drive dischargeREF PART NO.DESCRIPTION COMMENTS1211/00093/00Rivet2223/00102/07Hose Vent3111/01164/90Backbridge4208/00001/00Screw5201/00006/00Washer6208/00002/00Nut7223/00010/00Hose Clamp8223/00044/01Water Hose Sold per meter9209/00110/002-Way Inlet ValveB125195012-Way Inlet Valve G581P3 Diaphragm and Guide Kit 10206/00027/00Bolt11211/00091/00Plug12111/00188/06Electrical Connection Plate13208/00017/00Rivet14211/00087/00Plug15223/00044/00Water Hose Sold per meter16204/00201/00Nut17201/00002/00Washer18206/00099/00Bolt19223/00001/04Prewash and Mainwash Nozzle20202/00004/00Washer21206/00014/00Bolt22111/00094/10Electrical Connection Plate23229/00068/02Electrical Connection StickerREF PART NO.DESCRIPTION COMMENTS1223/00226/00Vent Tube2111/01164/85Backbridge3208/00001/00Screw4201/00006/00Washer5208/00002/00Nut6208/00130/00Screw7223/00250/00Liquid Soap Manifold8223/00010/00Hose Clamp9223/00044/01Water Hose Sold per meter10209/00110/002-Way Inlet Valve Metric threadB125195012-Way Inlet Valve Standard thread; G581P3 Diaphragm and Guide Kit 11206/00027/00Bolt12211/00091/00Plug13111/00188/06Electrical Connection Plate14208/00017/00Rivet15211/00087/00Plug16223/00044/00Water Hose Sold per meter17204/00201/00Nut18201/00002/00Washer19206/00099/00Bolt20223/00001/04Prewash and Mainwash Nozzle21202/00004/00Washer22206/00014/00Bolt23111/00094/10Electrical Connection Plate24229/00068/02Electrical Connection StickerREF PART NO.DESCRIPTION COMMENTS 1211/00120/00Standoff2203/00006/00Washer3204/00007/00Nut4223/00203/00Grommet5207/00031/00Screw6209/00058/00Terminal Block7209/00438/50Central Control Board8209/00218/13Soap Injection PCB with Fuse9209/00468/00Fuse10209/00202/00Fuse Holder209/00202/01Fuse Holder Includes item 9 11209/00540/00Network Connection Printboard12206/00027/00Bolt13227/00177/00Filter16A1 227/00242/00Noise Filter16A3227/00179/00Filter40A3227/00180/00Filter45A1227/00183/00Filter53A314111/00188/06Electrical Connection PlateREF PART NO.DESCRIPTION COMMENTS 1206/00099/00Bolt2209/00007/50Pressure Switch3209/00148/02Contactor LC1D1810M7 209/00041/04Contactor LC1D0901M7 4209/00356/00Noise Suppressor5223/00198/00Grommet6111/10002/00Mounting Plate7111/10001/10Mounting Plate8223/00011/00Hose Clamp9223/00210/00Pressure Switch Elbow10223/00016/00Hose Barb11223/00212/00Pressure Switch Hose12223/00173/10Pressure Switch Hose Tee13209/00309/02Thermostat Assembly14225/10004/00Thermostat SealREF PART NO.DESCRIPTION COMMENTS 1204/00110/00Nut2201/00010/00Washer3111/00108/01Tilt Detector Plate4223/00246/00Out-of-Balance Switch Boot5207/00018/00Screw6203/00006/00Washer7209/00255/00Out-of-Balance Switch8111/00107/01Tilt Switch Bracket9204/00007/00Nut10208/00120/00Screw11206/00101/00NutREF PART NO.DESCRIPTION COMMENTS1223/00014/00Hose Clamp2223/00107/00Soap Dispenser Air Breather Hose3223/00044/01Water Hose4223/00109/00Soap Dispenser Gasket5208/00130/00Screw6223/00102/06Soap Spray Nozzle7123/00107/00Anti-Splash Plate Sigma models 123/00103/06Soap Box Assembly Plate All other models 8223/00102/30Soap Dispenser Assembly9223/00195/00Dispenser Drain Funnel10223/00102/50Soap Dispenser Assembly11223/00102/08Liquid Soap Dispenser Insert12223/00102/04Soap Dispenser Rinse Siphon13223/00102/03Rinse Insert14223/00102/05Softener Spray Nozzle15223/00266/00Siphon Break Hose16223/00013/00Hose Clamp17223/00261/00Soap Dispenser Hose*131 models 223/00260/00Siphon Break Dispenser Hose*35 and *164 models 18223/00250/00Liquid Soap Manifold19223/00010/00Hose Clamp。
1引言本篇设计说明书针对全自动滚筒洗衣机的基本整体结构、传动部分、控制部分进行详细的计算说明,并结合数据绘制三维装配图。
采用PLC为基础的主控制电路编制程序。
该设计包括全自动滚筒洗衣机的PLC控制,主要介绍了全自动洗衣机的工作原理,控制系统的PLC的选型和资源的配置,控制系统程序设计与调试,控制系统PLC程序。
传动系统设计,主要包括带轮的设计,滚筒轴系的设计,V带的设计。
2.全自动滚筒洗衣机的总体设计方案2.1滚筒洗衣机的基本结构滚筒洗衣机种类很多,但是通常情况下其大致结构可分为四部分:外观支撑部分、给水排水部分、传动部分、电气控制和操作系统部分。
外观支撑部分主要是滚筒洗衣机的外形框架,给水排水部分主要指洗衣机的给水系统和排水系统,传动部分主要指洗衣机的带传动及滚筒轮系的传动结构,电气控制部分主要指洗衣机依靠各种电器元件及控制器实现的自动控制部分。
个部分具体组成如下:(1)外观部分包括:箱体、后盖、过滤器门、底板等(2)给水排水部分包括:进水管、排水管、储水槽、电磁阀、洗涤剂回收槽等(3)传动部分包括:多频电机、V带、大小带轮、滚筒轴系等(4)控制部分包括:电脑版、电子模块、电磁阀、程控器、温控器、水位压力开关、水加热管、恒温器、电容、定时器等(5)操作部分包括:操作面板、程序标牌、琴键开关、琴键按钮、调温器旋钮、程控器旋钮、指示灯等12.2滚筒洗衣机各部分的设计方案2.2.1主体部分洗涤部分主要由内筒(不锈钢滚筒)、外筒(盛洗涤液用,又称盛水桶)、内筒叉形架、转轴、外筒叉形架、滚动轴承等组成。
(1)内筒及内筒叉形架内筒又称滚筒。
滚筒是滚筒式洗衣机对衣物进行洗涤,洗涤效果有着直接关系。
内筒用厚度为2-3毫米的抛光不锈钢板卷制而成的。
有直径为3.5-5毫米的圆孔,孔与孔之间的距离大约为15-20毫米。
圆孔自内向外冲刷,翻边向外,内壁光滑,以防洗涤时刮伤衣物。
在滚筒内壁沿轴向有三条凸筋,这三条凸筋在洗涤过程中起举升织物的作用。
MODEL:MFC80-JS1403B/C14E-AU(45)CONTENTS Safety InstructionsSafety Instructions .................................................. InstallationProduct Description ................................................OperationsQuick Start .............................................................Before Each Washing ..............................................Detergent Dispenser ...............................................Control Panel .........................................................Option....................................................................Programmes ..........................................................Washing Programmes Table ..................................... MaintenancesCleaning and Care .................................................Trouble Shooting ....................................................Technical Specifications .........................................Testing methods .....................................................2891213141516202122252627Safety InstructionsFor your safety,the information in this manual must be followed to minimize the risk of fire or explosion, electric shock, or to prevent property damage, personal injury or loss of life. Explanation of the symbols:• The new hose-sets supplied with the appliance are to be used and that old hose-sets should not be reused.• Before any maintenance the device, unplug the appliance from the mains.• Always unplug the machine and turn off the water supply after use. The max. inlet water pressure, in pascals. The min. inlet water pressure, in pascals.• To ensure your safety, power plug must be inserted into an earthed three-pole socket. Check carefully and make sure that your socket is properly and reliably earthed.• Make sure that the water and electrical devices must be connected by a qualified technician in accordance with the manufacturer's instructions and local safety regulations.Risk to children !• This appliance is not intended for use by persons (including children) with reduced physical, sensory or mental capabilities or lack of experience and knowledge unless they have been given supervision or instruction concerning use of the appliance by a person responsible for their safety.• Children of less than 3years should be supervised to ensure that they do not play with appliance.• Animals and children may climb into the machine. Check the machine before every operation.• Children should be supervised to ensure that they do not play with the appliance .The electric shock!• Remove all packages and transport bolts before using the appliance. Otherwise, serious damage may result.• Glass door may be very hot during the operation. Keep kids and pets far away from the machine during the operation very wet rooms as well as in the rooms with explosive or caustic gas.• Plug must be accessible after installation.Risk of explosion!• • Do not wash or dry articles that have been cleaned in, washed in, soaked in, or dabbed with combustible or explosive substances( such as wax, oil, paint, gasoline, degreasers, dry-cleaning solvents, kerosene, etc.) This may result in fire or explosion.Before hand thoroughly rinse items of washing by hand.Installing the product!• The maximum inlet water pressure:1.0Mpa.• The minimum inlet water pressure:0.05Mpa.• This washing machine is for indoor use only.• It isn't intended to be built-in using.• The openings must not be obstructed by a carpet.• Washing machine shall not be installed in bath room or very wet rooms as well as in the rooms with explosive or caustic gases.• The washing machine with single inlet valve only can be connected to the cold water supply. The product withdouble inlet valves should be correctly connected to the hot water and cold water supply.• Plug must be accessible after installation.• Remove all packages and transport bolts before using the appliance. Otherwise, serious damage may result.Risk of damaging appliance!• Your product is only for home use and is only designed for the textiles suitable for machine washing.• Do not climb up and sit on top cover of the machine.• Do not lean against machine door.• Cautions during Handling Machine:1.Transport bolts shall be reinstalled to the machine bya specialized person.2.The accumulated water shall be drained out of themachine.3.Handle the machine carefully. Never hold each protruded part on the machine while lifting. Machine door cannot be used as the handle during the conveyance.4.This appliance is heavy. Transport with care.• Please do not close the door with excessive forces. If it is found difficult to close the door, please check if theclothes are put in or distributed well.• It is forbidden to wash carpets.Operating the appliance!• The maximum mass of dry cloth in kilograms: 8.0kg.• Before washing the clothes at first time, the productshall be operated in one round of the whole procedures without the clothes inside.• Flammable and explosive or toxic solvents are forbidden. Gasoline and alcohol etc.Shall not be used as detergents. Please only select the detergents suitable for machine washing, especially for drum.• Make sure that all pockets are emptied. Sharp and rigid items such as coin,brooch,nail,screw or stone etc. may cause serious damages to this machine.• Please check whether the water inside the drum has been drained before opening its door.Please do not open the door if there is any water visible.• Be careful of burning when the product drains hot washing water.• Never refill the water by hand during washing.• After the program is completed, Please wait for two minutes to open the door. This marking indicates that this product should not be disposed with other household wastes throughoutthe EU .To prevent possible harm to the environment or human health from uncontrolled waste disposal,recycle it responsibly to promote the sustainable reuse ofmaterial resources .To return your used device, please use the collection systems or contact the retailer where the product was purchased. They return and can take this product for environmental safe recycling.AccessoriesProduct DescriptionTransportplug hole Supply hose cold waterOwner’s manualInstallationBefore installing the machine, the location characterizedfollows shall be selected:1.Rigid, dry, and level surface2.Avoid direct sunlight3.Sufficient ventilation4.Room temperature is above 0℃5.Keep far away from the heat resources such as coal or gas.as Unpacking the washing machine1. Remove the cardboard box and styrofoam packing.2. Lift the washing machine and remove the base packing.3. Remove the tape securing the power supply cord and drain hose.4. Remove the inlet hose from the drum.Make sure the small triangle foam is removed with the bottom one together. If not, lay the unit down with side surface, then remove the small foam from the unit bottom manually.Please take the following steps to remove the bolts:1.Loosen 4 bolts with spanner and then remove them.2.Stop the holes with transport hole plugs.3.Keep the transport bolts properly for future use.Remove transport boltsInstallation area1.Check if the legs are closely attached to the cabinet. If not, please turn them totheir original positions tighten the nuts.2.Loosen the lock nut turn the feet until it closely contacts with the floor.3.Adjust the legs and lock them with a spanner, make sure the machine is steady.Connect Water Supply HoseConnect the inlet pipe as indicated, There are two ways to connect the inlet pipe.1.Connection between ordinary tap and inlet hose.Loosen clamp nut and four boltsTighten clamp nut Press slide bushing, insert inlet hose into connecting baseConnection finished Tap with threads and inlet hose2.Connection between screw tap and inlet hose.Drain HoseThere are two ways to place the end of drain hose:1.Put it into the water trough. 2.Connect it to the branch drain pipe ofthe trough.Connect the other end of inlet pipe to the inlet valve at the backside of product1. Before WashingBuzzer beep or “End” on display.Open tap Load Close door Plug in Add detergentQuick Start3. After Washing2. WashingPower OnSelect Programme Select function orStart upKnot the long strips,zip or button• The working condition of the washer should be(0-40)°C.If used under 0°C,the inlet valve and draining system may be damaged. If the machine is placed under condition of 0°C or less, then it should be transferred to normal ambient temperature to ensure the water supply hose and drain hose are not frozen before use.• Please check the labels and the explanation of using detergent before wash. Use non-foaming or less-foaming detergent suitable for machine washing properly.Take out the items out of the pockets Put small clothes into the pillow slipCheck the labelBefore Each WashingTurn easy-pilling and long-pile fabric inside out Separate clothes with different texturesDetergent DispenserPre wash Main wash SoftenerI Release button to pull out the dispenserControl Panelfunction and will light when selected.for your washer. The display will remain on through the cycle.OptionOption1400Quick 15‘Rapid 45' Sport Wear Wool Delicate Cotton ECO Intensive Spin Only Rinse & Spin 20℃MixJeans Sterilization Synthetic CottonDelayDelayDelayDelayDelayDelayDelayDelayDelayDelayDelayDelayDelayDelayDelay Cold402040303040----204060--4040800800800600600100080010001000100080080080012001400DefaultTemp.(℃)Default spinspeed in rpmProgrammesProgrammes are available according to the laundry type.Washing Programmes TableSpeed: the highest speed; Other as the default.• ℃• “Cotton ECO ” is the standard washing programs to which the information in the label and the fiche relates, Energy test program: Cotton ECO,60.and they are suitable to clean normally soiledcotton laundry and that they are the most efficient programmes in terms of combined energy and water consumptions for washing that type of cotton laundry,that the actual watertemperature may differ from the declared cycle temperature.Cleaning The CabinetCleaning The DrumCleaning The Door Seal And GlassCleaning And CareThe rusts left inside the drum by the metal articles shall be removed immediately with chlorine-free detergents.Never use steel wool.Proper maintenance on the washing machine can extend its working life. The surface can be cleaned with dilutednon-abrasive neutral detergents when necessary. If there isany water overflow, use the wet cloth to wipe it off immediately. No sharp items are allowed.Wipe the glass and seal after each wash to remove lint and stains. If lint builds up it can cause leaks.Remove any coins, buttons and other objects from the seal after each wash.hose from it.2. Clean the filter with a brush.3. Unscrew the water supply hose from the backside of the machine. Pull out the filter with long nose pliers.4. Use a brush to clean the filter.5. Reinstall the filter to the water inlet and reconnect the water supply hose.6. Clean the Inlet filter every 3 months to ensure the normal operation of the appliance.Cleaning the Inlet FilterClean The Detergent DispenserPress the release and remove the dispenser drawer Clean the dispenser drawer and the softener cover under waterClean the recess with an soft brush Insert the dispenser drawer1. Press down the release [ ] on the softener cover and pull the dispenser drawer out of the recess. Clean the inside of the recess with a brush.2. Lift the softener cover off the dispenser drawer and wash both items with water.3. Restore the softener cover and push the drawer back into the recess.Cleaning The Drain Pump FilterOpen the lower cover capOpen the filter by turning to the counter clockwiseRemove extraneous matter Close the lower cover capTrouble ShootingThe start of the appliance does not work or it stops during operation .First try to find a solution to the problem, If not , contact the service centre .DescriptionReasonSolutionRestart after the door is closed Check if the clothes is stuck Door is not closed properly Door can’t be opened Washer's safetyprotection design is working Disconnect the power, restart the productWater leakageThe connection between inlet pipe or outlet hose is not tightCheck and fasten water pipes Clean up outlet hoseClean and wipe the detergent boxAbnormal noiseCheck if the fixing (bolts) have been removedit’s installed on a solid and level floorCheck Indicator or display does not lightDisconnect the powerPC board or harness has connection problem Check if the power is shut down and the power plug is connected correctlyWashing machine cannot start up Detergent residues in the box Detergent is dampened or agglomerated Description ReasonSolutionservice line if there are still OthersRestart after the door is closed Door is not closed properlyTechnical SpecificationsMAX.CurrentStandard Water PressurePower Supply 10A0.05MPa~1MPa220-240V~,50HzTesting methodsModel:MFC80-JS1403B/C14E-AU(45)ADDITIONAL INFORMATION FOR Standard performance TESTING:(AS/NZS 2040.1:2005+ Amdt1-2007+Amdt2-2009)1. Water connections:Cold &hot water connection2. Water supply pressure:320 kPa3. Warm wash Program:Cotton ECO,60℃,Spin 1400,Display:6:48Cold wash program: Cotton Cold( no temperature display is cold wash)4. Detergent type:Drum detergent5. Detergent quantity:Default6. Adding detergent:The detergent is dissolved and added as Paragraph B7.3of AS/NZS 2040.1The detergent shall be dissolved in 1 L of water7. Anti-sudsing agent:Max8. Test load mass:8.0kg9. Water consumption:81L10.Test Voltage:220-240V~,50HzV1.0 16138100A33285。

使用说明书滚筒洗衣干衣机微信服务二维码目录快速入门使用说明服务指南控制面板介绍 ...........................................洗涤剂盒介绍............................................程序/功能介绍 ..........................................智能配网介绍 ...........................................清洁保养..................................................故障现象及处理方法...................................规格及技术参数.........................................售后服务..................................................包修卡.....................................................快速入门..................................................安全警示安全警示 .................................................235 5 10 1011 13 14 15 15执行标准:GB/T4288 GB4706.1 GB4706.24 GB4343.1 GB17625.1 GB19606 GB12021.4 GB4706.20快速入门安全警示使用说明服务指南快速入门注意:.在您使用本机器前,请确保机器已经按照安装说明正确安装好。
2.首次使用,建议您在没有衣物的情况下完成一次“筒自洁”或其他高温程序 洗涤。
1二.开始洗衣三.洗衣结束注意:只有机器带预洗功能选择了预洗功能后洗涤剂盒中加入洗涤 剂,,才需要向预洗。
OWNER’S MANUALWASHING MACHINEPlease read this manual carefully before operatingyour washing machine and retain it for future reference.T1103TEF1T1503TEF2T1503TEF0T1503TEF3T1503TEF1T151103TEF1P/No.: The sensor automatically detects the quantity of a Detergent put by a user and the temperature and the quality of water to make the best washing algorithm forwashing and rinsing, which can give the best washing effect.SMART CLEANINGThe purpose of this cycle is to optimize detergent residues during the washing and rising cycles,in order to implement this effect,the washer adds more rinsing times by I-sensor. Rinse can be added until max 5 times.FUZZY logic controlA built-in load sensor automatically detects the laundry load and amicroprocessor optimizes washing conditions such as ideal WATERLEVEL and washing time.STARTAdvanced technology is built into the Electronic Control System whichensures the best washing result.Turbo drum washingWhen "Punch + 3" washing wings turn, the washingtub turns in the opposite direction. This makes theboth sides current of water which improve wash-performance by rubbing clothes strongly.3 step washing makes the best washing performance with low tangling.” Part can be different according to the model.Nylon net is not supplied by LG.Using Fabric SoftenerDo not mix with Detergent or bleach.Never pour fabric softener directly on clothes. It may stain them.Do not stop the washer during the first spin for timely dispensing.Option washing is not designed to be used with fabric softener dispenser.If desired, pour the recommended amount of liquid fabric softener into the right-hand e only liquid fabric softener.Dilute with water to the maximum fill line.Scrud(Waxy Build up)Scrud is the name given to the waxy build-up that can occur within any washer when the fabric softener comes into contact with Detergent. This build-up is not brought about by a fault in the machine. If scrud is allowed to build-up in the machine it can result in stains on your clothes or an unpleasant Never pour undiluted liquid bleach directly onto clothes or into the wash basket.This may cause change of color or damage the laundry.Do not pour powdered bleach into bleach dispenser.Do not use or mix liquid chlorine bleach with other household chemicals such as toilet cleaners, rust removers, acid or products containing ammonia. These mixtures can produce dangerous fumes which can cause serious injury or death. To reduce the risk of fire or serious injury to persons or property, comply with the basic warnings listed below:• Read and comply with all instructions on stain removal products.• Keep stain removal products in their original labeled containers and out of children’s reach.• Thoroughly wash any utensil used.• Do not combine stain removal products, especially ammonia and chlorine bleach. Dangerous fumes may result.• Never wash items which have been previously cleaned in, washed in, soaked in or spotted with gasoline, dry cleaning solventspushed7 8 • 9 10 1 2 • 3 4 5 • 6 7TUB DRY 60 90 120TUB DRY as the button is pushed.you to select COLD WARM (HOT&COLD) HOT COLD respectively.Default setting is COLD.* Because the detecting ability of the sensor may be decreased by using it for a long time, periodically use (refer to page 21)• The following settings are indicated 4 512 1416...46483 HOUR.• To cancel delay time, turn the power switch off.(refer to page 24)follows:If the current washing condition (Detergent quantity, Water Temperature, water quality, etc.) is determined as better than the standard one, it optimizes the algorithm to save the energy by decreasing washing time/strength,and the LED automatically turns to red.If the current washing condition is determined as worse than the standard one, it optimizes the algorithm by increasing washing time/strength, and the LED automatically turns to orange.If the current washing condition is determined as equal to the standard one, the algorithm has no change and the LED turns to green.• program selections light up in sequence as follows: FUZZY(Normal)WOOL QUICK WASH JEANS SMART CLEANING SILENT FAVORITE TUB CLEAN FUZZY(Normal) etc.Select the desired program by pressing the button.laundrythe Detergentmode automatically selects the .AUTO OFF1125432• Select theQUICK • Add the appropriate quantity of Detergent as manufacturer’s instructions• Add the appropriate quantity of Detergent as indicated by theWATER LEVEL next to manufacturer’s instructions1532• Select the panel.• Spread1532• Select the delicate fabrics such as lingerie and • Use neutral Detergentappropriate for the washing wool.1532• Select theClose the lidFinishSTART PAUSE• The pulsator rotates for 8 seconds to detect the laundry load.• Then the WATER LEVEL and the amount of Detergent to be used will be shown and water will be supplied.• Water will be supplied for 2has absorbed.• When the wash program ends, the automatically.356767644764764POWER Ex-Large WATER is set automatically.Select "Air Dry" 30min-Use this mode to keep inner tub from getting moldy caused by remaining moisture.- Do not place any laundry inside tub.- Use this mode once a week.Caution) For better performance, put drain hose down to the floor so that water inside will be completely drained out.Select “Air Dry” above 1 hour- Use this mode to reduce the drying time by minimizing remaining moisture on the laundry. - In general, this is very effective on synthetic items(100% polyester).- Do place laundry which is evenly distributed(Under 2kg).- For normal clothes : Select 1 hour- For synthetic items(100% polyester): Select 2 hours or 3 hours(on some models)Installing the Anti-Rat Cover (option) Insert the anti-rat cover to be firmly fixed from the back or front of washing machine and screw it632(W) 670(D) 1020(H)In our continuing effort to improve the quality of our appliances, it may be necessary to make changes to the appliance without revising this manual.For any Suggestion, Opinion & Complaints,T1503TEF2T1103TEF1 T1503TEF3T1503TEF0 T151103TEF1T1503TEF1。
PartsWasher-ExtractorCabinet FreestandingRefer to Page 3 for Model NumbersPart No. D0248R5September 2013Model Identification Information in this manual is applicable to these washer-extractor models: HF245_CAM-TIMERHF245_MICRO-20_COINHF245_MICRO-20_OPLHF245_PC30HF245_PS40HF245_PS40FHF245_SIGMA_COINHF245_SIGMA_OPLREF PART NO.DESCRIPTION COMMENTS 1-Product Family HF2-Capacity245REF PART NO.DESCRIPTION COMMENTS 1223/00131/01Overflow Hose2223/00011/00Hose Clamp3209/00075/00Drain Valve NO 209/00171/00Drain Valve NC4223/00013/00Hose Clamp5115/00147/00Drain Valve Plate Assembly6223/00141/00Drain Valve to Drain Pipe Hose7223/00036/00Pressure Hose8223/00035/02Pressure Switch Cap9223/00035/03O-Ring10223/00083/00Pressure Hose11223/00057/00Clamp12204/00109/00Nut13202/00002/00Washer14206/00009/00BoltREF PART NO.DESCRIPTION COMMENTS1209/00052/11Drain Valve Motor110 Volt/60 Hertz 209/00051/11Drain Valve Motor220 Volt/50 or 60 Hertz 209/00203/11Drain Valve Motor2209/00170/05Screw3209/00025/07Drain Valve Motor Mounting Plate4209/00025/08Screw5209/00075/05Drain Valve6209/00025/10Drain Valve Shaft Seal7209/00170/09Washer8209/00170/10Drain Valve Shaft9209/00025/13Drain Valve Spring10209/00203/21Coil24 Volt209/00052/21Coil115 Volt/60 Hertz209/00051/21Coil220 Volt/50 or 60 Hertz 11209/00170/07ScrewREF PART NO.DESCRIPTION COMMENTS1209/00203/12Drain Valve Motor24 Volt209/00052/12Drain Valve Motor110 Volt/50 Hertz209/00170/06Drain Valve Motor Assembly220 Volt/50 or 60 Hertz 2209/00170/05Screw3209/00171/03Motor Plate4209/00025/08Screw5209/00075/05Drain Valve6209/00025/10Drain Valve Shaft Seal7209/00115/11Drain Valve Handle8209/00170/09Washer9209/00170/10Drain Valve Shaft10209/00170/02Drain Valve Spring11209/00212/11Coil24 Volt209/00052/21Coil115 Volt/60 Hertz209/00170/11Coil220 Volt/50 or 60 Hertz 12209/00170/07ScrewREF PART NO.DESCRIPTION COMMENTS 1207/00014/00Screw2202/00004/00Washer3209/00057/00Terminal 3 pole 209/00291/00Terminal12 pole4204/00008/00Nut5203/00007/00Washer6206/00027/00Bolt7229/00001/00Sticker8140/00010/00Cover Plate9209/00006/00Terminal10203/00006/00Washer11204/00007/00Nut12207/00003/00Screw13209/00005/00Terminal Block14211/00084/00Plug20.5 mm diameter 211/00085/00Stopper25.5 mm diameter211/00086/00Stopper28 mm diameter211/00087/00Plug30 mm diameter 15133/00001/00Backbridge16209/00195/00Fuse17209/00202/00Fuse Holder18211/00022/00Nut19211/00023/00Nut20204/00005/00Nut21203/00004/00Washer22140/00011/BO Contactor Plate23201/00007/00Washer24206/00014/00Bolt25209/00041/04Contactor LC1-D0901M5 209/00148/02Contactor LC1-D1810M5 26209/00149/02Contactor LC1-D3210M5 209/06150/02Contactor LC1-D5011M5209/00177/02Contactor LC1-D2510M5209/00056/02Contactor LC1-D4011M5REF PART NO.DESCRIPTION COMMENTS1209/00007/10Water Level Switch2210/10007/00Connection3204/00007/00Nut4203/00006/00Washer5207/00003/00Screw6209/00041/03Contactor LC1-D09019M7 209/00041/04Contactor LC1-D0901M5209/00056/02Contactor LC1-D4011M5209/00136/02Contactor LC1-D12109M7209/00148/02Contactor LC1-D1810M5209/00149/02Contactor LC1-D3210M5209/06150/02Contactor LC1-D5011M5209/00177/02Contactor LC1-D2510M5209/00180/03Contactor LC1-D12019M7 7209/00139/02Contactor8209/00180/03Contactor9209/00041/03Contactor10209/00103/02Switch11209/00263/00Protector LR2-D1308; 2.5-4A 209/00264/00Protector LR2-D1310; 4-6A209/00285/00Protector LR2-D1312; 5.5-8A209/00265/00Protector LR2-D1314; 7-10A 12209/00408/00Printboard13111/00035/00Mounting Plate14209/00005/00Terminal Block15206/00021/00Screw16204/00008/00Nut17223/00123/00Washer18207/00014/00Screw19211/00106/00Spacer20209/00012/00Reversing Timer50 Hertz 209/00013/00Reversing Timer60 Hertz21223/00011/00Hose Clamp22204/00005/00Nut23203/00004/00Washer24206/00015/00Bolt25223/00127/00Sleeve26140/00011/BO Contactor Plate27209/00257/00Card Reader28140/00011/B2Electrical Components Plate29207/00004/00Screw30201/00007/00Washer31206/00014/00Bolt32209/00141/00PlugREF PART NO.DESCRIPTION COMMENTS1209/00007/30Pressure Switch2208/00007/00Screw3209/00243/00Thermostat4209/00180/03Contactor5209/00041/03Contactor6209/00263/00Protector LR2-D1308; 2.5-4A 209/00264/00Protector LR2-D1310; 4-6A209/00285/00Protector LR2-D1312; 5.5-8A209/00265/00Protector LR2-D1314; 7-10A 7204/00008/00Nut8223/00123/00Washer9211/00106/00Spacer10203/00007/00Washer11207/00025/00Screw12209/00266/00Timer111/32106/00Plate13207/00003/00Screw14203/00006/00Washer15204/00007/00Nut16209/00005/00Terminal Block17204/00005/00Nut18203/00004/00Washer19206/00015/00Bolt20140/00011/BO Contactor Plate21206/00021/00Screw22225/10004/00Thermostat Seal23140/00011/B2Electrical Components Plate24201/00007/00Washer25206/00014/00Bolt26201/00007/00Washer203/00004/00Washer27209/00180/03Contactor LC1-D12019M7 209/00149/02Contactor LC1-D3210M5209/00041/04Contactor LC1-D0901M5209/00136/02Contactor LC1-D12109M7209/00148/02Contactor LC1-D1810M5209/00041/03Contactor LC1-D09019M7209/06150/02Contactor LC1-D5011M5209/00177/02Contactor LC1-D2510M5209/00056/02Contactor LC1-D4011M5 28111/00424/00Pressure Switch BracketREF PART NO.DESCRIPTION COMMENTS 1133/00001/00Backbridge2209/00276/00Inlet Valve3223/00060/01Ring4223/00060/00Filter5223/00058/00Mounting Piece6223/00044/00Water Hose7223/00010/00Hose Clamp8209/00110/002-Way Inlet Valve9209/00277/003-Way Inlet Valve10206/00015/00Bolt11202/00003/00WasherREF PART NO.DESCRIPTION COMMENTS 1209/00001/01Coil2209/00001/02Screw3209/00001/111-Way Plate4209/00001/04Core Holder5209/00001/032-Way Plate6209/00001/05Spring7209/00001/06Core8209/00001/07Diaphragm9209/00001/083-Way Inlet Valve10223/00051/01Screw11223/00051/022-Way Inlet Valve12223/00051/03Core Holder13223/00051/04Spring14223/00051/05Core15223/00051/06Diaphragm16223/00051/072-Way Inlet Valve17209/00048/081-Way Inlet Valve18209/00048/031-Outlet PlateREF PART NO.DESCRIPTION COMMENTS 1223/00051/01Screw2223/00051/11Coil3223/00051/03Core Holder4223/00051/04Spring5223/00051/05Core6223/00051/06Diaphragm7223/00051/09Plate8223/00051/121-Way Inlet Valve9223/00051/133-Way Inlet Valve10223/00051/022-Way Inlet ValveREF PART NO.DESCRIPTION COMMENTS 1209/01306/00Nut2209/02306/00Clip3209/00306/02Coil4209/00306/04Core Holder5209/00306/07Screw6209/00306/09Washer7209/00306/10O-Ring8209/00306/11Screw9209/00306/15Chair10209/00306/12O-Ring11209/00306/14Diaphragm12209/00306/13Spring13209/00306/08Chair14209/00306/06O-Ring15209/00306/05Core16209/00306/16Screw17209/00306/17Seal18209/00306/18T erminal Connector19209/00306/19ScrewREF PART NO.DESCRIPTION COMMENTS1223/00102/07Hose Vent2223/00014/00Hose Clamp3223/00107/04Hose Vent4223/00109/00Soap Dispenser Gasket5223/00102/06Soap Spray Nozzle6123/00107/00Anti-Splash Plate Models HF245_SIGMA_COIN and HF245_SIGMA_OPL 123/00103/06Soap Box Assembly Plate All other models7223/00102/05Softener Spray Nozzle8223/00102/03Rinse Insert9223/00102/04Soap Dispenser Rinse Siphon10208/00130/00Screw11223/00102/30Soap Dispenser Assembly12223/00023/00Hose Clamp13223/00115/00Hose14223/00010/00Hose Clamp15223/00044/00Water Hose16204/00007/00Nut17203/00006/00Washer M6202/00004/00Washer M418206/00027/00BoltREF PART NO.DESCRIPTION COMMENTS1223/00102/07Hose Vent2223/00014/00Hose Clamp3223/00107/04Hose Vent4223/00109/00Soap Dispenser Gasket5223/00102/06Soap Spray Nozzle6123/00107/00Anti-Splash Plate Models HF245_SIGMA_COIN and HF245_SIGMA_OPL 123/00103/06Soap Box Assembly Plate All other models7223/00102/05Softener Spray Nozzle8223/00102/03Rinse Insert9223/00102/04Soap Dispenser Rinse Siphon10208/00130/00Screw11223/00102/30Soap Dispenser Assembly12223/00023/00Hose Clamp13223/00115/00Hose14211/10147/00Mounting Piece15223/00011/00Hose Clamp16223/00059/00Water Hose17211/10149/00Flow Nozzle18204/00007/00Nut19203/00006/00Washer M4202/00004/00Washer M620206/00027/00BoltREF PART NO.DESCRIPTION COMMENTS1209/00143/00Thermostat 3 temperature 209/00144/00Thermostat 2 temperature2204/00003/00Nut3203/00002/00Washer4201/00010/00Washer5111/32959/00Out-of-Balance Switch Bracket6209/00255/00Out-of-Balance Switch7204/00007/00Nut8204/00009/00Nut9201/00007/00Washer10204/00005/00Nut11209/00255/01Switch12203/00004/00Washer13206/00014/00Bolt14206/00015/00Bolt15111/32949/00Front Panel16209/00253/00Emergency Stop Button Kit Includes frame and contact 209/00099/06Contact Switch Contact only; NC17209/00248/00Mushroom Pushbutton18225/00257/OBL Panel19209/00099/05Contact Includes frame and contact 209/00099/06Contact Switch Contact only; NO20209/00099/08Button21209/00252/00Button22209/00251/00Button23209/00250/00Button24209/00249/00Pilot Light25209/00254/00Pushbutton26209/00099/04Button27209/00254/21Pushbutton28223/00065/01Washer29223/00038/01Nut30223/00065/02Thermostat Joint31223/00065/00Thermostat Seal32201/00008/00Washer33206/00005/00Bolt34111/00107/00Tilt Switch Bracket35203/00006/00Washer36207/00018/00ScrewREF PART NO.DESCRIPTION COMMENTS 1211/00115/00Thermostat2204/00003/00Nut3203/00002/00Washer4201/00010/00Washer5111/32959/00Out-of-Balance Switch Bracket6209/00255/00Out-of-Balance Switch7204/00007/00Nut8204/00005/00Nut9201/00007/00Washer10204/00009/00Nut11111/00107/00Tilt Switch Bracket12209/00255/01Switch13203/00004/00Washer14206/00014/00Bolt15206/00015/00Bolt16111/32949/00Front Panel17223/10066/00Display18225/00264/AOL Panel19209/00099/04Button20209/00253/00Emergency Stop Button Kit21209/00252/00Button22209/00254/21Pushbutton23209/00249/00Pilot Light24209/00254/00Pushbutton25209/00152/00Lens Cover209/00151/00Lamp26223/00065/00Thermostat Seal27201/00008/00Washer28206/00005/00Bolt29203/00006/00Washer30207/00018/00ScrewREF PART NO.DESCRIPTION COMMENTS 1205/00105/00Bolt2203/00004/00Washer3124/00035/00Spindle4202/00003/00Washer5246/00079/01Insulation6209/00220/00Plate7209/00017/00Door Interlock Coil50 Hertz 209/00018/00Door Interlock Coil60 Hertz 8208/00003/00Cotter Pin9124/00005/00Wire Bridge10204/00009/00Nut11119/00212/00Cover Plate12224/00015/00Door Latch Cord13224/00009/00Door Lock Spring14204/00008/00Nut15203/00007/00Washer16207/00019/00ScrewREF PART NO.DESCRIPTION COMMENTS 1201/00017/00Washer2217/00052/05Switch Lever3217/00052/04Interlock Lever4203/00007/00Washer5204/00008/00Nut6211/00106/00Spacer7207/00006/00Screw8209/00275/04Door Lock Board9207/00135/00Screw10224/00040/00Lever Spring11217/00021/00O-Ring12207/00103/00Screw13217/00052/01Door Lock Assembly14217/00052/02Door Lock Pin Kit15211/00109/00Door Lock Pin Kit16204/00103/00Nut17209/00271/00Microswitch18209/00272/00Door Lock Microswitch19207/00102/00Screw20217/00017/03Lock Shaft21201/00018/00Washer22207/00009/00Screw23209/00273/00Light Microswitch24209/00274/00Door Lock Solenoid25224/00043/00Interlock Coil Spring26211/00110/00Lock27224/00015/00Door Latch Cord28217/00052/03Door Lock SpacerREF PART NO.DESCRIPTION COMMENTS 1204/00106/00Nut2202/00101/00Washer3217/00009/02Door Hinge Assembly4117/00010/00Door Hinge Spacer 1 mm 117/00011/00Door Hinge Spacer 2 mm5118/00125/00Door6205/00103/00Bolt7131/00046/00Hinge8217/00021/00O-Ring9131/00002/00Front Panel10205/00104/00Bolt11B12449801Door Glass12223/00068/00Door Glass Seal13207/00020/00Screw14203/00008/00Washer15217/00016/00Door Handle Stop16217/00051/00Door Handle17204/00103/00Nut18217/00020/00Spring19211/00105/00Pin20217/00019/00Holder21207/00102/00Screw22203/00010/00Washer23207/00103/00Screw24217/00017/02Protection Block25217/00017/00Door Lock Assembly26209/00023/00Door Switch27207/00108/00Screw28207/00109/00Screw29217/00038/00Insulation Plate30224/00003/00Interlock Pin31208/00004/00Pin32124/00005/00Wire BridgeREF PART NO.DESCRIPTION COMMENTS 1217/00013/02Door Handle2217/00013/03Door Lock Spring3217/00051/00Door Handle4217/00013/09Door Mounting Pin5217/00013/11Door Circlip6217/00013/12Door Handle7217/00013/13Door Handle Hook8217/00013/15Door Handle Locking Pin9217/00013/14Door Handle Spring10217/00013/16Door Handle Assembly Plate11217/00051/10Door Handle12217/00013/08Door Locking Pin13217/00013/07Door Locking Grip14217/00013/06Door Roller15217/00013/05Door Axle Roller16217/00013/04Door Handle LatchREF PART NO.DESCRIPTION COMMENTS1204/00110/00Nut2206/00111/00Screw3115/00123/00T ub Mounting Ring4115/00127/00Ring5206/00005/00Bolt6202/00001/00Washer7115/00163/00T ub Tightening Ring8204/00005/00Nut9202/00003/00Washer10206/00011/00Bolt11209/00116/00Heating Element1400W; 220 Volt 209/00563/30Heating Element2000W; 220/240 Volt209/00049/00Heating Element3000W; 220/240 Volt209/00581/00Heating Element4000W; 380 Volt 12206/00066/00Bolt13204/00113/00Nut14201/00001/00Washer15115/00151/00Spacer16248/00115/00Bolt17202/00101/00Washer18205/00103/00Bolt19111/32945/00Door Front Panel20115/00136/00Counterweight21246/00092/00Gasket22217/00008/00T ub Front Panel Clip23131/00002/00Front Panel24231/00001/00T ub Front Gasket25131/00005/02Clip26231/00010/00T ub Front Ring Clamp27119/00204/00T ub119/00206/00T ub119/00207/00T ub28118/00087/00Steam Injector29217/00025/00Steam Hose30118/00063/01Steam Connection Plate31118/00063/00Steam Hose Connector32206/00013/00BoltREF PART NO.DESCRIPTION COMMENTS 1239/00005/01W Pipe Clip2204/00108/00Nut3132/00020/00Washer4119/00079/99Cylinder123/00007/00Cylinder and Axle Includes axle 5132/00003/00Stiffening PlateREF PART NO.DESCRIPTION COMMENTS 1239/00005/01W Pipe Clip2207/00110/00Screw3232/00008/00Counter Ring4132/00009/00Shaft Seal5212/00005/00Roller Bearing6132/00010/00Pipe7132/00011/00Pipe8212/00026/00Key9226/00090/01Pulley10201/00011/00Washer11203/00001/00Washer12206/00004/00Bolt13212/00009/02Bolt14212/00009/01Pulley HubREF PART NO.DESCRIPTION COMMENTS 1231/00037/00Shaft Seal2205/00104/00Bolt3201/00202/00Washer4131/00035/00Seal Cover Plate5131/00036/00O-Ring6212/00007/00Grease Ring7212/00006/00Retainer Ring8212/00005/00Roller Bearing9212/00001/01Bearing Housing Assembly10212/00004/00Ball Bearing11112/00003/00Bearing Cover12203/00003/00Washer13206/00010/00Bolt14212/00011/00Connector15212/00010/00Grease Pipe16201/00001/00Washer17204/00012/00Nut18204/00113/00Nut19212/00012/00ElbowREF PART NO.DESCRIPTION COMMENTS 1131/00035/00Seal Cover Plate2231/00036/00O-Ring3205/00104/00Bolt4201/00202/00Washer5231/00037/00Shaft Seal6212/00001/01Bearing Housing Assembly7212/00002/00Lubricator8112/00003/00Bearing Cover9203/00003/00Washer10206/00010/00Bolt11212/00004/00Ball Bearing12212/00005/00Roller Bearing13212/00006/00Retainer Ring14212/00007/00Grease Ring。
lg自动洗衣机说明书篇一:LG波轮式洗衣机洗衣特点LG波轮式洗衣机洗衣特点:微电脑控制洗衣及甩干功能、省时省力。
缺点:耗电、耗水、国内一般还是选用波轮式洗衣机品牌首选海尔,因为海尔已经做成了波轮式的第一品牌, 其次,松下,LG,夏在正确安装好全自动洗衣机以后,具体的操作使用方法如下: (1)插上电源插头,放下或接好排水管,打开自来水龙头,把要洗涤的衣物和洗衣粉及添加剂(软化剂、漂白剂等)故入洗衣机内,并将机盖关上; (2)按 1.滚筒洗衣机因为有加热功能,最好使用滚筒专用洗衣粉“高效低泡”洗衣粉,好处是可以泡沫效底不会溢出桶 LG WD-N12155D 正确操作方法是:开水龙头-插电-放入洗衣粉-放好衣物-按电源键-按启动。
这是最标准的操作方一般不会出现你说的问题。
你说漏水有两种可能:一、洗衣机龙头和墙面内丝连接不紧,可能是龙头或内丝有问题,或者没有使用生料带。
二、洗衣机龙头和洗衣机进水管没有连接好,建议仔细看看说明书,按照正确的首先建议您首先检查进水管是否堵塞,是否正确操作,如果还没有检查出问题,请您拨打售后维修电话咨询,会有LG专业人员为您解决。
售后电话: 400-819-9999。
洗衣机水龙头一般都是通用的,搞不懂LG为什么不能通用。
如果实在不行的话,可不可以变通一下,换一根进水管。
你把LG配套的进水管带上,配一根别的牌子的进水管,只要丝扣能配套就行。
这样的话水龙头就可以随意买了另外LG目前所有滚筒洗衣机都具有洁桶洗功能,你可以选择该程序,定期为洗衣机洗个“澡”,保持洗涤环境的清洁,LG蒸气洗衣机具有的杀菌防过敏功能,非常适合宝宝的衣服洗涤。
篇二:滚筒洗衣机的使用方法滚筒洗衣机的使用方法目前市场上销售的洗衣机产品主要分为波轮和滚筒两种类型,随着人们对于洗衣要求的不断提高,滚筒洗衣机日益走进寻常百姓家,今天本文库就来给大家说说洗衣机如何用才能更加顺手、好用。
一、如何使衣物洗得更干净:1.加温洗涤。