高效诊断便携式心电监护仪使用说明
- 格式:docx
- 大小:37.50 KB
- 文档页数:3

便携式监护仪的使用流程1. 简介便携式监护仪是一种用于监测患者重要生命体征的医疗设备。
它具有体积小、重量轻、便于携带的特点,广泛应用于急救、病房护理、家庭监护等场景。
本文档将介绍便携式监护仪的使用流程,包括准备、操作和注意事项等内容。
2. 准备工作在使用便携式监护仪之前,需要进行以下准备工作:•确保便携式监护仪已经充电,并且电量足够使用;•检查监护仪的连接线、传感器等部件是否完好;•准备好监护仪的使用说明书,以便在需要时进行参考。
3. 操作步骤使用便携式监护仪的步骤如下:3.1 步骤一:确定患者信息在使用便携式监护仪之前,需要确定患者的基本信息,包括姓名、性别、年龄等。
这些信息将用于记录患者的监护数据。
3.2 步骤二:连接传感器将便携式监护仪的传感器与患者的身体部位进行连接,以便监测患者的生命体征数据。
常见的传感器包括血氧饱和度传感器、心电图传感器、血压传感器等。
3.3 步骤三:开机启动按下便携式监护仪的电源按钮,等待监护仪开机启动完成。
在启动过程中,监护仪将进行自检,确保各项功能正常。
3.4 步骤四:选择监护模式根据患者的需要,选择合适的监护模式。
常见的监护模式包括血氧监护、心电监护、呼吸监护等。
根据监护模式的不同,需要连接相应的传感器。
3.5 步骤五:开始监护点击监护仪上的开始按钮,启动监护过程。
监护仪将开始收集患者的生命体征数据,并进行实时显示。
同时,监护仪还会记录这些数据,以便后续分析和报告。
3.6 步骤六:监护结束在需要结束监护时,点击监护仪上的停止按钮,停止监护过程。
监护仪将停止收集患者数据,并显示监护结果。
4. 注意事项在使用便携式监护仪时,需要注意以下事项:•确保便携式监护仪的传感器连接稳定,避免松动或脱落,以免干扰监护数据的准确性;•定期清洁便携式监护仪及传感器,保持其清洁卫生;•防止便携式监护仪接触水或其他液体,以免损坏设备;•若出现异常情况或故障,应立即停止使用,并咨询专业技术人员进行维修;•定期检查便携式监护仪的电池电量,确保充足。

监护仪使⽤⼼电监护仪的使⽤⽅法⼀.监护仪意义和作⽤1.监护仪是⼀种以测量和控制病⼈⽣理参数,并可与已知设定值进⾏⽐较,如果出现超标可发出警报的装置或系统。
2.监护仪与监护诊断仪器不同,它必须24⼩时连续监护病⼈的⽣理参数,检出变化趋势,指出临危情况,供医⽣应急处理和进⾏治疗的依据,使并发症减到最少达到缓解并消除病情的⽬的。
监护仪的⽤途除测量和监护⽣理参数外,还包括监视和处理⽤药及⼿术前后的状况。
3.监护仪可选的参数:⼼电、呼吸、⾎压(有⽆创和有创两种)、⾎氧饱和度、脉率、体温、呼吸末⼆氧化碳、呼吸⼒学、⿇醉⽓体、⼼输出量(有创和⽆创)、脑电双频指数等⼆.监护仪临床应⽤范围⼿术中、⼿术后、外伤护理、冠⼼病、危重病⼈、新⽣⼉、早产⼉、⾼压氧舱、分娩室等。
三.监护仪分类1.根据结构分为四类:便携式监护仪、插件式监护仪、遥测监护仪、HOLTER(24⼩时动态⼼电图)⼼电监护仪。
2.根据功能分为三类:床边监护仪、中央监护仪、离院监护仪(遥测监护仪)。
床边监护仪是设置在病床边与病⼈连接在⼀起的仪器,能够对病⼈的各种⽣理参数或某些状态进⾏连续的监测,予以显⽰报警或记录,它也可以与中央监护仪构成⼀个整体来进⾏⼯作。
中央监护仪⼜称中央系统监护仪,它是由主监护仪和若⼲床边监护仪组成的,通过主监护仪可以控制各床边监护仪的⼯作,对多个被监护对象的情况进⾏同时监护,它的⼀个重要任务是完成对各种异常的⽣理参数和病历的⾃动记录。
离院监护仪(遥测监护仪)使病⼈可以随⾝携带的⼩型电⼦监护仪,可以在医院内外对病⼈的某种⽣理参数进⾏连续监护,供医⽣进⾏⾮实时性的检查。
四.监护⽣理参数的测量⽅法1.⼼电图是监护仪器最基本的监护项⽬之⼀,⼼电信号是通过电极获得,监护⽤电极是⼀次性AS-AGCI纽扣式电极。
2.⼼率是指⼼脏每分钟博动的次数。
⼼率测量是根据⼼电波形,测定瞬时⼼率和平均⼼率。
健康的成年⼈在安静状态下平均⼼率是不是75次/分,正常范围为60-100次/分。
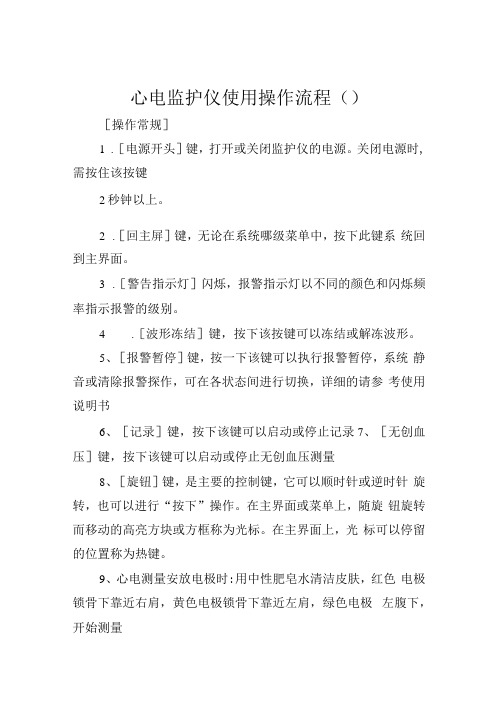
心电监护仪使用操作流程()[操作常规]1.[电源开头]键,打开或关闭监护仪的电源。
关闭电源时, 需按住该按键2秒钟以上。
2.[回主屏]键,无论在系统哪级菜单中,按下此键系统回到主界面。
3.[警告指示灯]闪烁,报警指示灯以不同的颜色和闪烁频率指示报警的级别。
4.[波形冻结]键,按下该按键可以冻结或解冻波形。
5、[报警暂停]键,按一下该键可以执行报警暂停,系统静音或清除报警探作,可在各状态间进行切换,详细的请参考使用说明书6、[记录]键,按下该键可以启动或停止记录7、[无创血压]键,按下该键可以启动或停止无创血压测量8、[旋钮]键,是主要的控制键,它可以顺时针或逆时针旋转,也可以进行“按下”操作。
在主界面或菜单上,随旋钮旋转而移动的高亮方块或方框称为光标。
在主界面上,光标可以停留的位置称为热键。
9、心电测量安放电极时:用中性肥皂水清洁皮肤,红色电极锁骨下靠近右肩,黄色电极锁骨下靠近左肩,绿色电极左腹下,开始测量10、无创血压测量:在病人上肩和大腿上安装袖带,三种测压模式(自动间隔一定时间、手动测量、5分值内连续测量),两种模式可选(成人配置和儿童模式)。
11、血压饱和度的测量:剪掉指甲、丢掉指甲油,如用耳式的除去耳环,将血氧探头贴附到病人身上。
12、使用后,关机、切断电源。
[临床保养常规]1,用中性肥皂水擦拭仪器表面、清洁时需要使用软布,电源处于断开状态2.每日对使用后的电缆及导联线进行检查, 看有无破损情况,并对电缆使用弱消毒液清洁和消毒。
[使用注意事项]L进行测量前,必须确认选定了正确的病人类型,错误的病人类型有可能危及病人安全,较高的成人血压水平不适用于小儿和新生儿。
2.建议给仪器安装地线,否则信号可能受到干扰。
3.安装记录仪纸后,必须把控制杆拨回原位置,否则记录仪不能打印。
4,进行ECG之前,请认真清洁病人皮肤并选用完好的心电电极片。
5,仅适用指定的附件,使用其他附件可能会损坏本监护仪。
[应急措施]L当设备工作出现异常声音,火光,烟雾等情况时,应立即切断电源,使该设备停止工作。

轻松操作便携式心电监护仪使用说明为方便广大用户正确地使用便携式心电监护仪,以下是使用说明。
一、产品概述便携式心电监护仪是一种紧凑轻便的医疗设备,用于监测患者的心脏电活动。
其小巧的设计使得患者可以方便地在日常生活中佩戴,并记录心电图数据,以供医生进行诊断。
二、操作步骤1. 准备工作在操作便携式心电监护仪之前,请确保以下准备工作已经完成:- 确保胸部皮肤干燥、清洁,无药物残留或其他物质。
- 确保设备电量充足,必要时请使用充电器进行充电。
- 开启设备并将其与您的智能设备(如手机或平板电脑)进行蓝牙配对。
2. 使用方法a) 佩戴心电贴片将心电贴片粘贴在胸部适当位置,确保其与皮肤充分贴合,并保持良好的电接触,以确保准确的信号传输。
b) 启动监护仪按下心电监护仪上的电源键,等待设备启动成功,指示灯亮起,屏幕显示正常。
c) 连接智能设备打开您的手机或平板电脑上的心电监护应用程序,并按照应用程序提供的操作指南进行蓝牙配对。
一旦成功连接,设备将开始实时监测,并显示心电图波形。
d) 结束监测监测结束后,您可以手动停止监测,或者等待设备自动停止。
请根据实际情况选择适当的操作。
e) 查看心电图数据使用应用程序上的相关功能,您可以查看实时心电图波形,并将数据保存到智能设备上,以便与医生进行分享或进行进一步分析。
三、注意事项1. 请谨慎使用该设备,确保不会对其进行过度的物理冲击,以免损坏。
2. 使用前请仔细阅读用户手册,并按照要求正确佩戴设备,以确保信号的准确传输。
3. 如果您发现心电图波形异常或不明确,请及时咨询医生以获取专业的建议和指导。
4. 在佩戴过程中,如出现皮肤不适,请立即停止使用并与医生联系。
5. 请勿私自修改设备设置或进行维修,如有问题请联系相关服务人员。
四、使用须知1. 本产品适用于12岁以上人群使用。
2. 请遵循医生的建议,在正确的时间和频率下使用设备。
3. 监护仪需要与智能设备配对使用,请确保您的智能设备具备最新版本的操作系统和稳定的蓝牙连接。

心电监护仪的操作流程心电监护仪是一种用于监测患者心脏电活动的重要医疗设备,它能够实时记录心电图,并帮助医护人员及时发现心脏异常。
正确的操作流程对于保障患者的健康安全至关重要。
接下来,我们将详细介绍心电监护仪的操作流程。
1. 准备工作。
在使用心电监护仪之前,首先需要进行一些准备工作。
确保设备处于正常工作状态,检查电源是否接通,设备是否完好无损。
同时,准备好所需的导联电极、导联线等配件,并进行消毒处理,以确保患者在使用过程中不会受到交叉感染。
2. 安装导联电极。
将导联电极正确安装在患者身上,通常情况下,需要安装4至12个导联电极,具体数量根据医生的要求而定。
正确的导联电极安装能够有效地提高心电监护仪的监测准确性,减少干扰,保障监护效果。
3. 连接导联线。
将导联电极与心电监护仪本体通过导联线连接起来,确保连接稳固可靠。
在连接过程中,需要注意导联线的走向,避免交叉、缠绕等情况发生,以免影响监护效果。
4. 启动设备。
确认所有准备工作完成后,启动心电监护仪设备。
在启动过程中,需要关注设备显示屏上的各项指标,确保设备能够正常工作。
同时,也需要留意设备是否发出异常声音或报警,及时排除故障。
5. 开始监护。
当设备正常启动后,即可开始进行心电监护。
监护过程中,医护人员需要密切关注设备显示屏上的心电图波形,及时发现异常情况。
同时,还需要关注设备上的各项参数指标,如心率、心律等,确保患者的心脏状况得到全面监测。
6. 结束监护。
当监护结束时,需要按照操作流程逆序进行操作。
首先关闭设备,然后拆除导联线和导联电极,进行消毒处理。
最后,将设备及配件归置到指定位置,做好设备的清洁和维护工作。
通过上述操作流程,我们可以正确地使用心电监护仪,确保患者得到有效的心脏监护。
在操作过程中,医护人员需要严格按照操作规程进行,做好设备的维护保养工作,确保设备处于良好状态。
只有这样,才能更好地保障患者的健康安全,提高医疗护理质量。
(三)床旁便携式监护仪操作技术一、技术规范二、操作流程床旁便携式监护仪操作考核流程护士甲沟通三、操作考核评分标准项目标准分值质量标准评分等级A B C D准备6分2221.着装符合要求,洗手、戴口罩。
2.物品准备齐全,放置合理有序。
用物准备:心电监护仪(包括监护导线,电源线),电极片(3-6个),75%酒精,棉签,弯盘,纱布,治疗车。
3.环境:安静、清洁、无电磁波干扰。
222111查对解释评估8分3231.查对患者、医嘱执行单2.对清醒患者告知监测的目的及方法,取得合作。
3.评估患者病情、合作程度等;评估患者皮肤状况,必要时关闭门窗,屏风遮挡。
32321211正确连接并调节66分88151510101.核对患者,询问是否可以开始。
根据病情帮助患者取舒适体位,注意保暖。
2.接通电源线,连接监护导联线,开机,检查心电监护仪性能、血氧饱和度夹子性能是否正常,导线连接性能是否正常。
3.解开患者上衣纽扣,暴露胸部(一般选择左、右锁骨中线第二肋间,左腋中线第五肋间);先用(电极片上的)小砂纸擦拭皮肤去脂,擦拭范围与电极膜等大,再用酒精棉签清洁,以保证电极与皮肤表面接触良好;清洁患者局部皮肤及指(趾)甲。
4.连接监护导联线,先将电极片与导联线连接,再按照监测标示要求将电极片贴于患者胸部正确部位,避开伤口,避开除颤部位。
5.需监护血氧饱和度时将传感器指夹夹于患者循环良好的指(趾)端(必要时也可置于耳廓处),使其光源透过局部组织,保证接触良好;需监护血压时,将袖带按需求缠于一侧上臂,松紧一指为宜,盖好棉被。
6.根据患者病情情况,选择适当的导联,保证监测波形清晰无干扰,正确设置合适振幅及各监测项目的报警界限,不能关闭报警声音。
88151510106613138844101156整理解释记录12分22531.再次核对医嘱、患者。
2.协助患者取舒适卧位,整理床单位。
3.询问患者感觉,告知注意事项。
4.正确处理用物,洗手、记录。
CONTEC MEDICAL SYSTEMS CO., LTDNo.112 Qinhuang West Street, Economic & Technical Development Zone, Qinhuangdao, Hebei Province, PEOPLE’S REPUBLIC OF CHINA Made in P.R.C.Shanghai International Holding Corp. GmbH (Europe)Eiffestrasse 80, 20537 Hamburg, GermanyENGLISHForewordThankyou very much for purchasing the Portable ECG Monitor.This user manual introduces detail product information about its character, requirement, structure, performance, specification, appropriate methods of transportation, installation, usage, operation, repair, maintenance and storage, and safety measures of how to protect the operator and product. Please read details in the following chapters.Please read the user manual carefully before using the product and strictly follow its regulations to operate. the user manual indicates the operations that users need to pay much attention to, that may lead to abnormality, or may danger to the device or human body during using. Our company will not response the security, reliability and performance for any abnormality or device and human body damage causedby not following this user manual to use, maintain and store, not provide free service for any situations above. We apologize for the ccontent in the manual is subject to change according to product upgrades without notice.The product is reusable as a medical instrument.Warning:•The product is not a examination device apllied in clinical medicine, and its results can not serve as the basis for diagnosis, but cn be used as a reference for patient to take further medical treatment and reference for doctor to diagnose.•The reliability depends on whether users are following the operation and maintenance in the user manual or not.•All servicing and future upgrade to the device must be carried out by personnel trained and authorized by our company, and using the original fitting for maintenance.This iser manual contains proprietary information, wich is protected by copyright. All rightsreserved. Reproduction, adaption or translation, for any part of the manual without prior written permission, is prohibited.Our company takes the responsabilities as follows:1. To provide qualifield products according to enterprise standard for users;2. To provide services of installation, debugging and training according to the contract;3. To provide one year warranty and product maintenance after warranty period according to the contract;4. To respond user’s requests in time.Chapter 1 Notice1.1 Generic notice1) Do not use the device in locations subject to high temperatures or humidity. Use in the temperaturewithin 5 to 40°C and humidity within 25% to 80% RH.2) Do not wash the device with water.3) Do not use or store the device in the following ambient conditions:•Near fires or open flames•Locations exposed to strong vibration•Locations exposed to strong electromagnetic fields4) Do not sterilize the device in autoclave or gas sterilizer.5) The device service life is 3 years. Do not throw away the device and accessories when they can’t work.If the device needs to dispose, it should meet the local laws and regulations requirement.1.2 Measurement noticeIf your skin is dry, wipe them with disinfectant alcohol or electric salve to strengthen the electric capability You are better to confortably sit, draw yourself up, begin to measure when the waveform level off.When measuring, the finger and chest electrodes should touch your skin exactly, roundly and well.1.3 Safety notice1) No sampling in the battery-charging.2) Lay the device in shady and cool environment when you are not going to use it for a long period oftime, and electrify per three months.3) Do not use the device in the environment placed inflammable objects, such as anesthetic.1.4 EMC noticePlease note the effect from EMC when using the device, because it can ben influenced by portableor movable high electromagnetic compatibility RF devices.Chapter 2 IntroductionThe portable ECG monitor is designed for family and individual users. It is a good helper for family members to prevent from cardiovascular disease, as it can monitor patients ECG anytime at anyplace with easy operation. The devic e can record, analize and display user’s ECG waveform, capture the pathological ECG waveform when user happen to heart attack or other unpleasant symptoms. The ECG monitor can be conducted not limited in the hospital, which saves money from the physical check-up for users. After connected with a computer, users can print their ECG waveform, which provides data reference for doctors.2.1 Characteristics1) Handsome shape, handy operation, convenient tote.2) Monitor and record real-time ECG waveform and HR anytime and anywhere.3) Built-in large capability rechargeable lithium battery, continuously sample 200 ECG waveform aftercharged once.2.2 Application1) Occaasion: family, medical clinic and hospital. The device can’t be used as a generalelectrocardiogram for clinical examination.2) Object: people under high pressure and workload for long time, heart disease patients, middle agedand aged poeple, sub-health people.3) Purpose: the device is only used for ECG monitoring and data storage. It is not a therapy equipment.Operation method is simple and less requirement for the operating personnel.Chapter 3 Primary Technical Orders3.1 normal work environment1) Operation environment•Temperature: +5°C~+40°C•Relative humidity: 25%~80%•Power supply: built-in rechargeable lithium battery, voltage: 3.7V2) Transportation and storage environment• Temperature: -40°C~+55°C• Relative humidity:3.2 Basic parameters1) Calibration voltage: 1mV±5%.2) Standard sensitivity: 10mm/mV±5%.3) Amplitude frequency characteristic: standard: 10Hz; 1Hz-20Hz; (+0.4dB, -3dB). 4) Noise level: <30μV.5) CMRR: >60dB.6) Scanning speed: 25mm/s+5%.7) Sampling rate: 250 dots/s.8) HR measurement range: 30bpm-300bpm, error: ±1bpm or 1%.9) Type of protection against electric shock: Internal power device.Figure 4.1 Pre-sample InterfaceWhen the waveform becomes stable, the device will start formal sampling automatically, the color of waveform turns to green, sample time countdown on the bottom right corner begins until finished one sample. See figure 4.2:Figure 4.2 Formal Sample InterfaceThe device will enter into case review interface after completed sampling.Case review interface displays the sampling start time, heart rate and diagnosis (including normaland different kinds of arrhythmia), shown as Figure 4.3 and Figure 4.4.Figure 4.3 Case Review Interface (Normal)Figure 4.4 Case Review InterfaceWhen the device enters into case review interface, it will display the latest sampled case. Click the button to review other cases information. The device can store 99 pieces of cases at most. If reaches to the limit, new stored case will cover the original case, the one that stored at the esrliest, piece by piece.The device will automatically turn to sampling interface to continue if the user holds the electrode at both ends again when the device is under the case review interface. 3) ChargeTwo method for charging:a) Connect the device with a computer by using Micro USB cable, charging completedafterabout 2~4 hours.b) Use a Micro USB to connect the device with a power adapter (output current > 500mA, 5V),Charging completed after about 2 hours.4) Auto power offThe device will automatically shut down after no operations within 2 minutes.4.3 Sync software operationsSome operations can be done (including sample mode and time setting, case upload, review, measureand print, etc.) in the PC sync software. Please refer to operation direction of PC sync software for details. Chapter 5 Trouble Shooting and SolutionIf the device has a problem account, please look up the following sheet for solutions first, it not included in6.1 Cleaning and sterilizingTurn off the device before cleaning. Medical alcohol is available for the device sterilization, then air dry. Or just wipe it with a dry and clean cloth for cleaning. Do not allow any liquid to enter the device.6.2 Maintenance1) Non - maintenance personnel designated by our company, do not open the device case so as to avoiddamage to internal components.2) Any equipment maintenance and upgrades must be carried out by the professionals who are trainedand authorized of the company.3) Prevent any liquid from seeping into the device as it will affect the safety and performance of thedevice.4) The device should avoid violent shaking or impact.5) Do not place objects on the device. This could damage the touch screen.6.3 Transport and storage1) The device transportation adopts general transportation means or follows the contract requirements.Avoid violent shock, vibration, rain and snow splash during the process of transportation.2) Store the packaged device in an environment with temperature -40°C~+55°C, relative humidity no morethan 95%, atmospheric pressure 500hPa~1060hPa, no corrosion gas and well-ventilated room.Instructions to use the applicationYou can download the APP by scan the QR code (for Android device),Search PHMS on APP store (for iOS device)Before you use this APP, please follow the steps to register first.Please use your phone number to register. You will receive a verification, type it on the blank, and finish the register. Your password is the last 6bit of TEL NUM.Now you can login in and start using.Turn on your PM10 device, and push the “new device” button, you will see your device, please notice, every device has a number (RED), please see it on you device.Add it and it will upload the data auto, and cancel the data on your device.。
高效诊断便携式心电监护仪使用说明随着医疗技术的不断进步,便携式心电监护仪作为一种便捷、高效的医疗设备,被广泛应用于医疗机构和家庭护理中。
本文将为您详细介绍使用便携式心电监护仪的方法和注意事项,以确保您能正确合理地使用该设备进行心电监测和诊断。
1. 准备工作
在使用便携式心电监护仪之前,首先需要进行一些准备工作:
1.1 确保便携式心电监护仪已经充电,电源充足。
1.2 检查监护仪电极的粘性胶贴是否完好,是否需要更换。
确保电极与皮肤接触良好,以确保监护结果的准确性。
2. 使用方法
以下是使用便携式心电监护仪的步骤:
2.1 清洁患者皮肤。
使用温和的皂液和清水清洁患者胸部及四肢等需要监测的部位。
确保皮肤干燥后,用酒精棉球擦拭监护仪电极的接触面。
2.2 选择正确的心电监护仪模式。
根据具体需求,选择适当的监护模式,如测量心率、分析心电图等。
2.3 将心电监护仪正确安装在患者身上。
根据监护仪的设计,将仪器的电极贴片粘贴在患者的胸部或四肢上,确保粘贴位置正确,以保证监测数据的准确性。
2.4 启动心电监护仪。
按下仪器上的启动按钮,心电监护仪将开始采集和分析心电信号。
2.5 完成监护记录。
根据需要,监护仪可以进行长时间记录或短时间记录。
长时间记录可以持续监测患者的心电信号,并生成相应的心电图报告。
短时间记录则可用于日常健康检查或临时心电监测。
3. 注意事项
为了确保使用便携式心电监护仪的效果和安全性,您需要注意以下事项:
3.1 确保心电监护仪的存储和使用环境干燥清洁。
避免接触水分或污染物质,以免影响设备的正常工作和测量结果的准确性。
3.2 在使用过程中,避免使用过多的电极胶贴,确保每个电极的贴片与皮肤完全贴合。
同时,定期更换电极贴片,以免粘性减弱影响监护结果的准确性。
3.3 使用便携式心电监护仪时,要确保患者处于放松状态,避免受到其他干扰和刺激,尽量保持平静。
3.4 在使用过程中,要随时关注监护仪显示屏上的数据。
如有异常情况或警告提示,应及时采取相应措施,如调整监护仪的位置、检查电极连接等。
4. 结束使用
如已完成监护记录或需要结束使用,您可以按照以下步骤进行:
4.1 将心电监护仪从患者身上取下,并将电极贴片从患者皮肤上撕开。
4.2 清洁心电监护仪。
用干净的布或纸巾擦拭仪器表面,确保除去
胶渍、水滴或其他污物。
4.3 关闭心电监护仪。
按下仪器上的关机按钮,设备将停止工作。
4.4 将便携式心电监护仪正确存放,避免暴露在直射阳光下或高温、潮湿的环境中。
本文为您介绍了便携式心电监护仪的使用方法和注意事项。
通过正
确使用该设备,能够准确高效地进行心电监测和诊断,提高医疗效率
和患者的健康质量。
使用时请参考说明书,如有疑问请咨询专业人员。