卡西欧gw5600说明手册
- 格式:doc
- 大小:65.50 KB
- 文档页数:4
卡西欧运动手表说明书
通过CASIO 3264 AE-1100W案例讲解
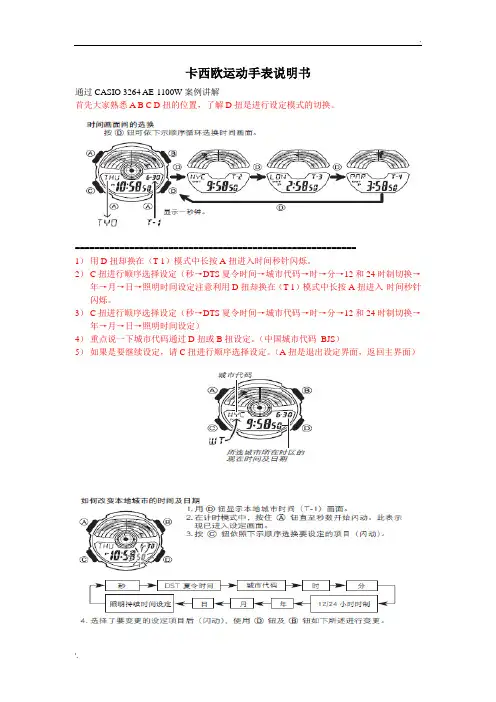
首先大家熟悉A B C D扭的位置,了解D扭是进行设定模式的切换。
=========================================================
1)用D扭却换在(T-1)模式中长按A扭进入时间秒针闪烁。
2)C扭进行顺序选择设定(秒→DTS夏令时间→城市代码→时→分→12和24时制切换→年→月→日→照明时间设定注意利用D扭却换在(T-1)模式中长按A扭进入-时间秒针闪烁。
3)C扭进行顺序选择设定(秒→DTS夏令时间→城市代码→时→分→12和24时制切换→年→月→日→照明时间设定)
4)重点说一下城市代码通过D扭或B扭设定。
(中国城市代码BJS)
5)如果是要继续设定,请C扭进行顺序选择设定。
(A扭是退出设定界面,返回主界面)
==========================================================
====文档结束===。
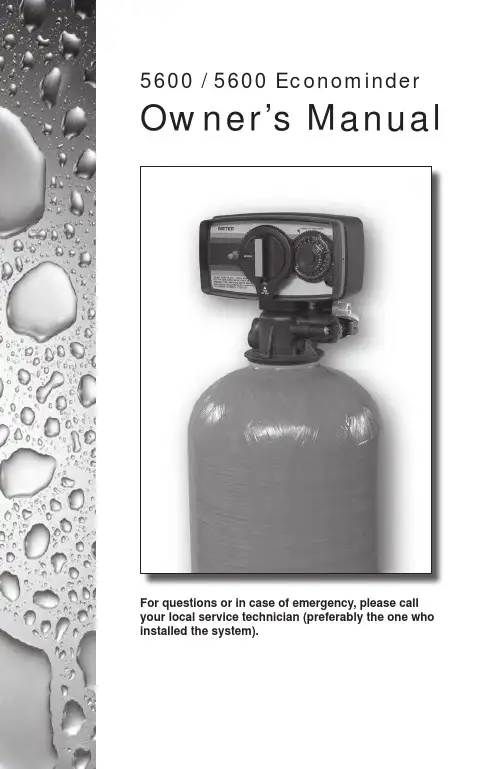
For questions or in case of emergency, please call your local service technician (preferably the one whoinstalled the system).IMPORTANT: The information, specifications and illustrations in this manual are based on the latest information available at the time of printing. The manufacturer reserves the right to make changes at any time without notice.Setting the Time of Day:To set the time of day, push the red button and spin the 24-hour gear until the present time of day is visible above the time of day arrow.Forcing a Manual Regeneration:To manually regenerate the valve, turn the manual regeneration knob clockwise until it reads“REGEN.”5600 ModelSetting the Time of Day:To set the time of day, push the red button and spin the 24-hour gear until the present time of day is visible above the time of day arrow.Setting the Program Wheel:To set the program wheel, lift the “people” dial and rotate it so that the number of people in the household is aligned with the household grains per gallon water hardness. Release the dial and check for firm alignment at the setting. This provides reserve capacity based on 75 gallons per person.Forcing a Manual Regeneration:To manually regenerate valve, turn the manual regeneration knob clockwise until it reads “REGEN.”NOTE: Unit will regenerate tonight when the gallon capacity reaches zero.5600 Econominder Model Setting Time of Day & Initiating a Manual RegenerationService:Hard water enters unit at valve inlet and flows down through the mineral in the mineral tank. Conditioned water enters center tube through the bottom distributor, then flows up through the center tube, around the piston, and out the outlet of the valve.Preliminary Rinse:Slow rinse of the resin bed. Water flows down through the resin bed up the bottom distributor and out the drain.Backwash:Hard water enters unit at valve inlet, flows through piston, down center tube, through bottom distributor, and up through the mineral, around the piston and out the drain line.Water is passed through the resin bed in the opposite direction of normal flow, which flushes suspended matter out of the resin tank. Backwashing also loosens the resin bed which becomes compacted during the softening (in service) cycle.Brine/Slow Rinse (Softener Only):Hard water enters unit at valve inlet, flows up into injector housing and down through nozzle and throat to draw brine from the brine tank, brine flows down through mineral and enters the center tube through bottom distributor and out through the drain line.The resin beads are washed with the strongsolution of salt water which is called the brinesolution. Since the resin beads prefer calciumand magnesium ions, the slow rinse allowsan overwhelming concentration of sodiumions to overpower and force the calcium andmagnesium ions off of the resin beads and arethen discharged down the drain.Rapid Rinse:The resin bed is rinsed to remove excess brinesolution from the tank and the resin beads arethen ready to produce soft water again.Hard water enters unit at valve inlet, flowsthrough piston, down center tube, throughbottom distributor, and up through the mineral,around the piston and out the drain line.Settling Rinse:Slow rinse of the resin bed. Water flows downthrough the resin bed up the bottom distributorand out the drain.Brine Tank Refill (Softener Only):Hard water enters unit at valve inlet, flows up through the injector housing, through the brine valve to refill the brine tank. Valve is now delivering soft water to the home. Raw water is refilling the brine tank to make a brine solution for the next regeneration.Regeneration:When the valve is in Regeneration, raw water is being passed to service until rapid rinse is complete.Descriptions of Softener & Filter Control Valve PositionsProblemSolution Control valve fails to regenerate Check for power outage and verify unit is plugged in.If this does not work, contact your local water servicetechnician (preferably the one who installed the system).Water does not feel or appear softCheck salt level in brine tank & maintain salt level abovewater level. If problem still exists, contact your localwater service technician.Unit uses too much saltContact your local water service technician.Loss of water pressureIron in conditioned waterExcessive water in brine tankOther problems with the watersoftenerPower Outage Reset the Time of Day in the event of a power outage/failure. See “Setting the Time of Day” page.Adding Salt Ensure that the salt level in the brine tank is always above the water line.Water Pressure Water pressure range of 20-125 psi is required for regeneration valve to operate effectively.Electrical FacilitiesAn uninterrupted alternating current (A/C) supply is required. Please make sure voltage supply is compatible with unit before installation.Existing PlumbingCondition of existing plumbing should be free from lime and iron buildup. Replace piping that has heavy lime and/or iron build-up. If piping is clogged with iron, install a separate iron filter unit ahead of the water softener.Location of Softener, Drain & Brine Tank Locate the softener close to a clean working drain and connect according to local plumbing codes. The brine tank should be located within 20 feet of the water softener. Drain cannot be elevated more than 36 inches or exceed 20 feet in length.Bypass Valves Always provide for the installation of a bypass valve if unit is not equipped with one. If valve is leak-ing, turn bypass from In Service to the Bypass Position.NOTE: If the valve continues to leak after turning the bypass to bypass position, shut off the main water line and call your local service technician (preferably the one who installed the system) IMMEDIATELY.General Residential Checklist & Troubleshooting5600 L-Style Econominder 5600 L-Style EconominderTo download the service manual for this valve, please visit:。
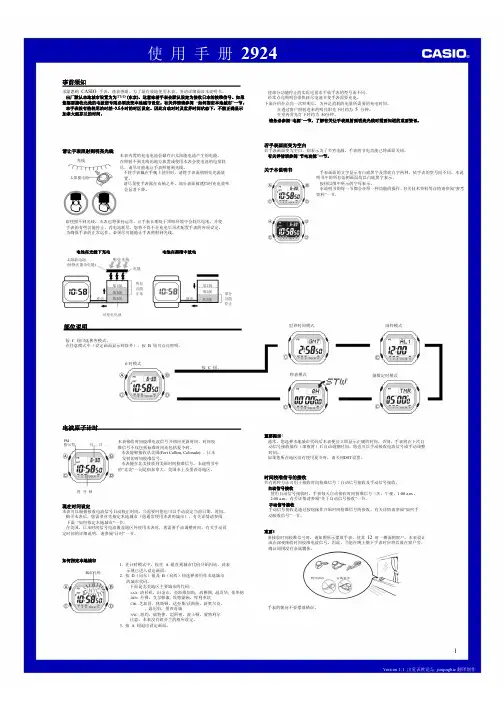
卡西欧g w说明书公司标准化编码 [QQX96QT-XQQB89Q8-NQQJ6Q8-MQM9N]CASIO 卡西欧多功能太阳能电波表 GW-5600J-1卡西欧(机芯2924)简易使用说明商品名称:CASIO 卡西欧多功能太阳能电波表 GW-5600J-1型号:GW-5600J-1商品款式:男款商品驱动:太阳能表镜材质:矿物玻璃商品规格:功能:电波对时功能CASIO Tough Soler 大容量太阳能充电系统矿物强化玻璃防震200防水世界时间EL 背光照明闹铃功能秒表计时全自动日历功能12/24小时制一、按键排序如图所示分为A、B、C、D共4个键位。
二、基本用法1.按A:日期与星期转换2.按B:背光3.按C:转换模式普通时间模式-世界时间模式-闹铃模式-倒数定时器-秒表模式4.按D:收信状况 GET成功 ERR失败三、调整基础城市按A(大约2秒)直到显示当前城市(闪烁),按D或B选择城市(日版貌似只能按d选择),然后按A确定四、调整时分秒等都按A(两秒)到显示当前城市,然后按c换, B、D(上下)NYC等(城市代码) B、D换 (我们选择HKG,如果快一小时,把DST 关掉)DST(夏令时)有A(AUTO) OF 和ON三种,一般选OF ,按D换12H,24H (12小时,24小时)按D换PS:Power Saving (节能模式)按D换选择秒的状态:按D ,秒数复位,变成00按B,选择背光时间,秒-秒时分年月日: D+,B-’13,表示2013年注:按A确定,退出设定五、手动收波(记得先把城市弄成HKG啊)时间模式下,按D两秒,显示RC,手动收波,按一下D,显示收波情况,此时按A可查收波时间六、自动收波(咱收日本波,实际测试时区选HKG能收日本波)按一下D,显示收波状态,按A直到显示设置模式 ,D、B选择 A确定有AUTO,J40,J60,OFF一般选AUTO就行,要不就设置成J60这里不是三格就是0格,三格满表示今天收波成功,0格表示收波失败七、自动背光,按B两秒,出现平时按一下B,亮背光八、闹铃设置,按C进入按D切换,AL1-AL2-AL3—AL4-SNZ-SIG-AL1注:AL1,AL2等为闹铃编号,SIG是整点响报模式(一次性),SNZ是间歇闹铃模式,也可以叫贪睡模式选择好后,按一下A(激活或者取消)激活按A直到时位开始闪烁,进入设定,改闹铃自动开启。

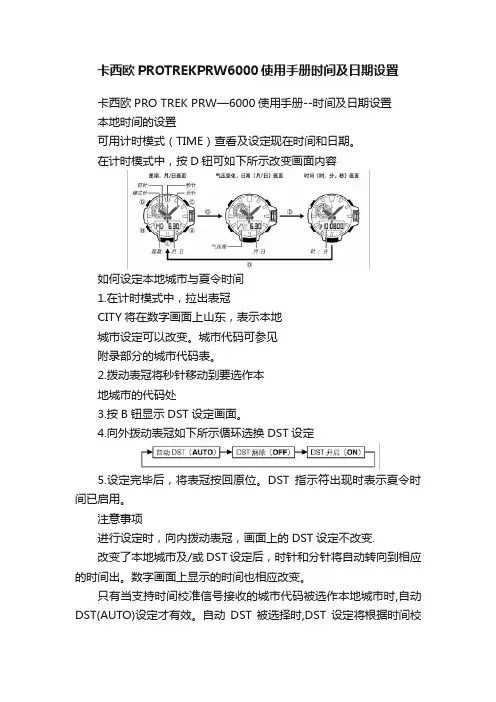
卡西欧PROTREKPRW6000使用手册时间及日期设置卡西欧PRO TREK PRW—6000使用手册--时间及日期设置本地时间的设置可用计时模式(TIME)查看及设定现在时间和日期。
在计时模式中,按D钮可如下所示改变画面内容如何设定本地城市与夏令时间1.在计时模式中,拉出表冠CITY将在数字画面上山东,表示本地城市设定可以改变。
城市代码可参见附录部分的城市代码表。
2.拨动表冠将秒针移动到要选作本地城市的代码处3.按B钮显示DST设定画面。
4.向外拨动表冠如下所示循环选换DST设定5.设定完毕后,将表冠按回原位。
DST指示符出现时表示夏令时间已启用。
注意事项进行设定时,向内拨动表冠,画面上的DST设定不改变.改变了本地城市及/或DST设定后,时针和分针将自动转向到相应的时间出。
数字画面上显示的时间也相应改变。
只有当支持时间校准信号接收的城市代码被选作本地城市时,自动DST(AUTO)设定才有效。
自动DST被选择时,DST设定将根据时间校准信号的数据自动改变。
?当UTC被选作本地城市时,不能切换标准时间及夏令时间(DST)。
指定了城市代码后,本表将用世界时间模式中的UTC时差根据本地城市的现在时间计算其他时区的现在时间。
选择有些城市代码将使手表自动接收相应地区的时间标准电波信号.其他时区时间的设置世界时间模式用于显示全球29个时区(29个城市)及UTC(协调时间时)时区中任意一个的现在时间.当前在世界时间模式中被选择的城市成为“世界时间城市"。
如何进入世界时间模式用B钮选择世界时间模式(WT),WT会出现在数字画面上。
1秒后,时针和分针转动并指示世界时间城市的现在时间。
秒针指向当前所选世界时间城市的代码。
数字画面显示本地城市的现在时间要检查世界时间城市的时间是上午还是下午时,按A钮.此时秒针指向A(上午)或P(下午)。
约3秒后秒针返回通常的计时状态。
按D钮将使秒针转动到当前所选世界时间城市的代码处。
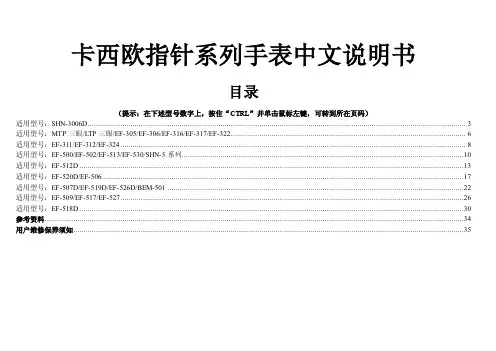
卡西欧指针系列手表中文说明书目录(提示:在下述型号数字上,按住“CTRL”并单击鼠标左键,可转到所在页码)适用型号:SHN-3006D (3)适用型号:MTP三眼/LTP三眼/EF-305/EF-306/EF-316/EF-317/EF-322 (6)适用型号:EF-311/EF-312/EF-324 (8)适用型号:EF-500/EF-502/EF-513/EF-530/SHN-5系列 (10)适用型号:EF-512D (13)适用型号:EF-520D/EF-506 (17)适用型号:EF-507D/EF-519D/EF-526D/BEM-501 (22)适用型号:EF-509/EF-517/EF-527 (26)适用型号:EF-518D (30)参考资料 (34)用户维修保养须知 (35)适用型号:SHN-3006D适用型号:MTP三眼/LTP三眼/EF-305/EF-306/EF-316/EF-317/EF-322适用型号:E适用型号:EF-311/EF-312/EF-324适用型号:EF-500/EF-502/EF-513/EF-530/SHN-5系列适用型号:EF-512D适用型号:EF-520D/EF-506适用型号:EF-507D/EF-519D/EF-526D/BEM-501适用型号:EF-509/EF-517/EF-527适用型号:EF-518D具体的使用方法可以参考CASIO的官方网站说明:/support/wat/faq/faq.php?locID=1132#6966参考资料用户维修保养须知教你如何用WORD文档(2012-06-27 192246)转载▼标签:杂谈1. 问:WORD 里边怎样设置每页不同的页眉?如何使不同的章节显示的页眉不同?2. 问:请问word 中怎样让每一章用不同的页眉?怎么我现在只能用一个页眉,一改就全部改了?答:在插入分隔符里,选插入分节符,可以选连续的那个,然后下一页改页眉前,按一下“同前”钮,再做的改动就不影响前面的了。
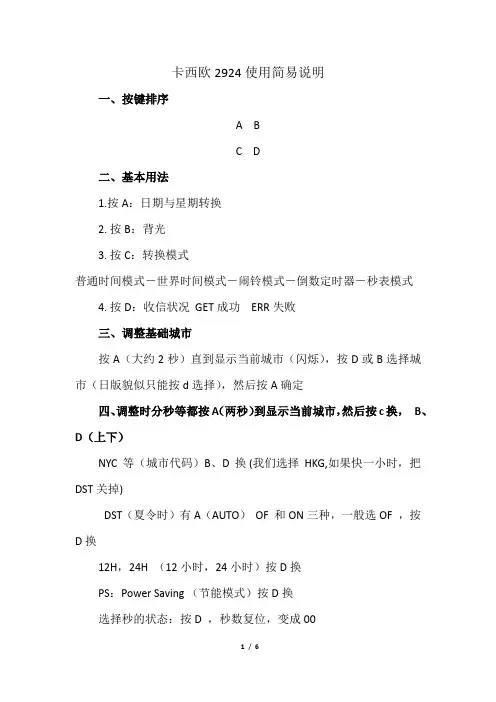
卡西欧2924使用简易说明一、按键排序A BC D二、基本用法1.按A:日期与星期转换2. 按B:背光3. 按C:转换模式普通时间模式-世界时间模式-闹铃模式-倒数定时器-秒表模式4. 按D:收信状况 GET成功 ERR失败三、调整基础城市按A(大约2秒)直到显示当前城市(闪烁),按D或B选择城市(日版貌似只能按d选择),然后按A确定四、调整时分秒等都按A(两秒)到显示当前城市,然后按c换, B、D(上下)NYC等(城市代码)B、D换 (我们选择HKG,如果快一小时,把DST关掉)DST(夏令时)有A(AUTO) OF 和ON三种,一般选OF ,按D换12H,24H (12小时,24小时)按D换PS:Power Saving (节能模式)按D换选择秒的状态:按D ,秒数复位,变成00按B,选择背光时间,1.5秒-2.5秒时分年月日: D+,B-注:按A确定,退出设定五、手动收波(记得先把城市弄成HKG啊)时间模式下,按D两秒,显示RC,手动收波,按一下D,显示收波情况,此时按A可查收波时间六、自动收波(咱收日本波,实际测试时区选HKG能收日本波)按一下D,显示收波状态,按A直到显示设置模式 ,D、B选择A 确定(有AUTO,J40,J60,OFF)一般选AUTO就行,要不就设置成J60这里不是三格就是0格,三格满表示今天收波成功,0格表示收波失败七、自动背光,按B两秒,出现平时按一下B,亮背光八、闹铃设置,按C进入按D切换,AL1-AL2-AL3—AL4-SNZ-SIG-AL1注:AL1,AL2等为闹铃编号,SIG是整点响报模式(一次性),SNZ是间歇闹铃模式,也可以叫贪睡模式选择好后,按一下A(激活或者取消)激活按A直到时位开始闪烁,进入设定,改闹铃自动开启。
然后按C选择时数或者分数,D+、B-设定按A确定退出无论手表的模式如何,到达预设时间,闹铃会响约10秒,间歇闹铃每5分钟响一次,重复7次。
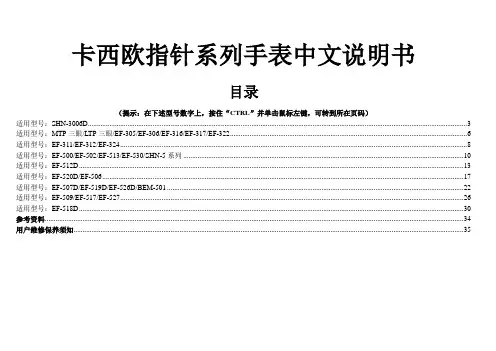
卡西欧指针系列手表中文说明书
目录
(提示:在下述型号数字上,按住“CTRL”并单击鼠标左键,可转到所在页码)
适用型号:SHN-3006D (3)
适用型号:MTP三眼/LTP三眼/EF-305/EF-306/EF-316/EF-317/EF-322 (6)
适用型号:EF-311/EF-312/EF-324 (8)
适用型号:EF-500/EF-502/EF-513/EF-530/SHN-5系列 (10)
适用型号:EF-512D (13)
适用型号:EF-520D/EF-506 (17)
适用型号:EF-507D/EF-519D/EF-526D/BEM-501 (22)
适用型号:EF-509/EF-517/EF-527 (26)
适用型号:EF-518D (30)
参考资料 (34)
用户维修保养须知 (35)
适用型号:SHN-3006D
适用型号:MTP三眼/LTP三眼/EF-305/EF-306/EF-316/EF-317/EF-322
适用型号:
E
适用型号:EF-311/EF-312/EF-324
适用型号:EF-500/EF-502/EF-513/EF-530/SHN-5系列
适用型号:EF-512D
适用型号:EF-520D/EF-506
适用型号:EF-507D/EF-519D/EF-526D/BEM-501
适用型号:EF-509/EF-517/EF-527
适用型号:EF-518D
具体的使用方法可以参考CASIO的官方网站说明:/support/wat/faq/faq.php?locID=1132#6966
参考资料
用户维修保养须知。
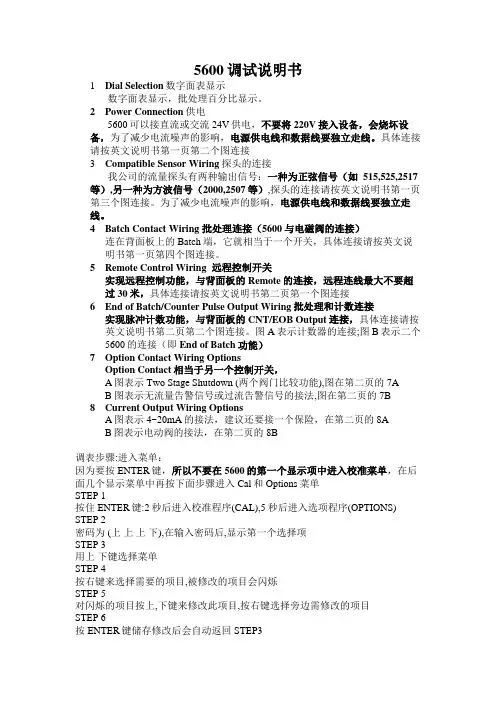
5600调试说明书1Dial Selection数字面表显示数字面表显示,批处理百分比显示。
2Power Connection供电5600可以接直流或交流24V供电,不要将220V接入设备,会烧坏设备,为了减少电流噪声的影响,电源供电线和数据线要独立走线。
具体连接请按英文说明书第一页第二个图连接3Compatible Sensor Wiring探头的连接我公司的流量探头有两种输出信号:一种为正弦信号(如 515,525,2517等),另一种为方波信号(2000,2507等),探头的连接请按英文说明书第一页第三个图连接。
为了减少电流噪声的影响,电源供电线和数据线要独立走线。
4Batch Contact Wiring 批处理连接(5600与电磁阀的连接)连在背面板上的Batch端,它就相当于一个开关,具体连接请按英文说明书第一页第四个图连接。
5Remote Control Wiring 远程控制开关实现远程控制功能,与背面板的Remote的连接,远程连线最大不要超过30米,具体连接请按英文说明书第二页第一个图连接6End of Batch/Counter Pulse Output Wiring批处理和计数连接实现脉冲计数功能,与背面板的CNT/EOB Output连接,具体连接请按英文说明书第二页第二个图连接。
图A表示计数器的连接;图B表示二个5600的连接(即End of Batch功能)7Option Contact Wiring OptionsOption Contact相当于另一个控制开关,A图表示Two Stage Shutdown (两个阀门比较功能),图在第二页的7AB 图表示无流量告警信号或过流告警信号的接法,图在第二页的7B8Current Output Wiring OptionsA图表示4~20mA的接法,建议还要接一个保险,在第二页的8AB图表示电动阀的接法,在第二页的8B调表步骤:进入菜单:因为要按ENTER键,所以不要在5600的第一个显示项中进入校准菜单,在后面几个显示菜单中再按下面步骤进入Cal和Options菜单STEP 1按住ENTER键:2秒后进入校准程序(CAL),5秒后进入选项程序(OPTIONS) STEP 2密码为 (上上上下),在输入密码后,显示第一个选择项STEP 3用上下键选择菜单STEP 4按右键来选择需要的项目,被修改的项目会闪烁STEP 5对闪烁的项目按上,下键来修改此项目,按右键选择旁边需修改的项目STEP 6按ENTER键储存修改后会自动返回STEP3STEP 7同时按下上下键返回正常状态.一 AUTO CAL的使用使用AUTO CAL时,要确定流出液体的体积(可用灌或桶),由于AUTO CAL 要计算时间,所以泵和AUTO CAL要同时开动或停止,这样计出来的时间会较准,操作过程为在Auto Calibrate <Enter> to Start 菜单下,按下Enter,开始计时,在Auto Calibrate <Enter> to Stop菜单下,按下Enter,停止计时,在Volume 菜单中,输入测量值。
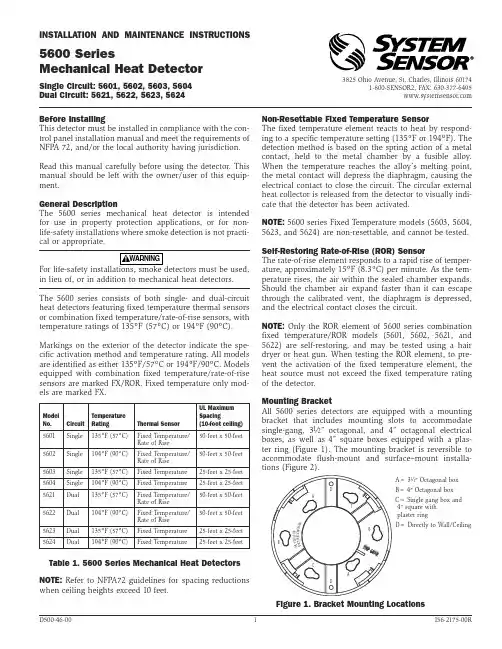
Before InstallingThis detector must be installed in compliance with the con-trol panel installation manual and meet the requirements of NFPA 72, and/or the local authority having jurisdiction. Read this manual carefully before using the detector. This manual should be left with the owner/user of this equip-ment.General DescriptionThe 5600 series mechanical heat detector is intended for use in property protection applications, or for non-life-safety installations where smoke detection is not practi-cal or appropriate.in lieu of, or in addition to mechanical heat detectors. The 5600 series consists of both single- and dual-circuit heat detectors featuring fixed temperature thermal sensors or combination fixed temperature/rate-of-rise sensors, with temperature ratings of 135ºF (57ºC) or 194ºF (90ºC).Markings on the exterior of the detector indicate the spe-cific activation method and temperature rating. All models are identified as either 135ºF/57ºC or 194ºF/90ºC. Models equipped with combination fixed temperature/rate-of-rise sensors are marked FX/ROR. Fixed temperature only mod-els are marked FX.NOTE: Refer to NFPA72 guidelines for spacing reductions when ceiling heights exceed 10 feet.Non-Resettable Fixed Temperature SensorThe fixed temperature element reacts to heat by respond-ing to a specific temperature setting (135ºF or 194ºF). The detection method is based on the spring action of a metal contact, held to the metal chamber by a fusible alloy. When the temperature reaches the alloy’s melting point, the metal contact will depress the diaphragm, causing the electrical contact to close the circuit. The circular external heat collector is released from the detector to visually indi-cate that the detector has been activated.NOTE: 5600 series Fixed T emperature models (5603, 5604, 5623, and 5624) are non-resettable, and cannot be tested.Self-Restoring Rate-of-Rise (ROR) SensorThe rate-of-rise element responds to a rapid rise of temper-ature, approximately 15ºF (8.3ºC) per minute. As the tem-perature rises, the air within the sealed chamber expands. Should the chamber air expand faster than it can escape through the calibrated vent, the diaphragm is depressed, and the electrical contact closes the circuit.NOTE: Only the ROR element of 5600 series combination fixed temperature/ROR models (5601, 5602, 5621, and 5622) are self-restoring, and may be tested using a hair dryer or heat gun. When testing the ROR element, to pre-vent the activation of the fixed temperature element, the heat source must not exceed the fixed temperature rating of the detector.Mounting BracketAll 5600 series detectors are equipped with a mounting bracket that includes mounting slots to accommodate single-gang, 31⁄2″ octagonal, and 4″ octagonal electrical boxes, as well as 4″ square boxes equipped with a plas-ter ring (Figure 1). The mounting bracket is reversible to accommodate flush-mount and surface–mount installa-tions (Figure 2).INSTALLATION AND MAINTENANCE INSTRUCTIONS3825 Ohio Avenue, St. Charles, Illinois 601741-800-SENSOR2, FAX: 630-377-64955600 SeriesMechanical Heat DetectorSingle Circuit: 5601, 5602, 5603, 5604Dual Circuit: 5621, 5622, 5623, 5624Table 1. 5600 Series Mechanical Heat Detectors Figure 1. Bracket Mounting LocationsA= 31⁄2″ Octagonal boxB= 4″ Octagonal box C= Single gang box and 4″ square with plaster ringD= Directly to Wall/CeilingS T R IP G A U G EBCDDAABCModel No.CircuitTemperatureRatingThermal SensorUL Maximum Spacing(10-foot ceiling)5601Single 135ºF (57ºC)Fixed T emperature/Rate of Rise 50-feet x 50-feet 5602Single 194ºF (90ºC)Fixed T emperature/Rate of Rise 50-feet x 50-feet 5603Single 135ºF (57ºC)Fixed T emperature 25-feet x 25-feet 5604Single 194ºF (90ºC)Fixed T emperature 25-feet x 25-feet 5621Dual 135ºF (57ºC)Fixed T emperature/Rate of Rise 50-feet x 50-feet 5622Dual 194ºF (90ºC)Fixed T emperature/Rate of Rise 50-feet x 50-feet5623Dual 135ºF (57ºC)Fixed T emperature 25-feet x 25-feet 5624Dual194ºF (90ºC)Fixed T emperature25-feet x 25-feetWiring Installation GuidelinesAll wiring must be installed in compliance with the National Electrical Code, applicable state and local codes, and any special requirements of the local Authority Having Jurisdiction. Proper wire gauges should be used. The conductors used to connect heat detectors to the alarm control panel and accessory devices should be color-coded to reduce the likelihood of wiring errors. Improper connec-tions can prevent a system from responding properly in the event of a fire.The non-polarized screw terminals on the back of the detector will accept 14–22 A WG wire. For best system performance, all wiring should be installed in separate grounded conduit; do not mix fire alarm system wiring in the same conduit as any other electrical wiring. T wisted pair may be used to provide additional protection against extraneous electrical interference.Wire connections are made by stripping approximately 1⁄4″ of the insulation from the end of the feed wire, inserting it into the proper base terminal, and tightening the screw to secure the wire in place.InstallationRemove power from the alarm control unit or initiating device circuits before installing detectors.1. Detach the detector from the mounting bracket byrotating the detector 1⁄4 turn counter-clockwise.2. Orient the mounting bracket properly for either aflush- or surface-mount installation (Figure 2).3. Select the pair of mounting holes suitable for the junc- tion box, (figure 1) and secure the bracket to the box.4. Connect the wires to the detector per Figure 3 orFigure 4, as applicable.5. Place the detector onto the mounting bracket by rotat- ing clockwise. The detector will lock into place with a “click”.6. After all detectors have been installed, apply power to the alarm control unit.7. T est each detector as described in Testing.8. Reset all the detectors at the alarm control unit.9. Notify the proper authorities that the system is in oper- ation.Figure 3. Wiring Diagram – Single Circuit ModelsFigure 4. Wiring Diagram – Dual Circuit Models Testing/MaintenanceThe rate-of-rise mechanism may be subject to reduced sen-sitivity over time. Annual testing of the rate-of-rise opera-tion is therefore recommened.Before testing, notify the proper authorities that mainte-nance is being performed and the system will be temporar-ily out of service. Disable the zone or system undergoing maintenance to prevent any unwanted alarms.Only the ROR element of 5600 series combination fixed temperature/ROR models (5601, 5602, 5621, and 5622) are self-restoring, and may be tested using a hair dryer or heat gun.Figure 2. Reversible Mounting BracketEOLControlSurface–mountFlush–mountControlEOLWhen testing the ROR element, to prevent the activation of the fixed temperature element, the heat source must not exceed the fixed temperature rating of the detector.5600 series fixed(5603, 5604, 5623, and 5624) are non-resettable, and cannot be tested.Specifications:Operating Voltage /Contact Ratings 6 – 125 V AC / 3A (Resistive) 6 – 28 VDC / 1A 125 VDC / 0.3A 250 VDC / 0.1A Maximum InstallationT emperature Models 5601, 5603, 5621, and 5623: 100°F (38°C) Models 5602, 5604, 5622, and 5624:150°F (65.6°C)Alarm T emperature Models 5601, 5603, 5621, and 5623: 135°F (57°C) Models 5602, 5604, 5622, and 5624: 194°F (90°C)Rate-of-Rise Threshold 15°F (8.3°C) per minute(models 5601, 5602, 5621, and 5622 only) Operating HumidityRange 5 to 95% RH non-condensing Input T erminals 14 - 22 A WG Back Box Mounting 31⁄2″ octagonal 4″ octagonal Single gang4″ square with a square to round plaster ring Dimensions withmounting bracket Diameter: 4.57 inches (11.6cm) Height: 1.69 inches (4.3cm)Weight 6 oz. (170 grams)Please refer to insert for the Limitations of Fire Alarm SystemsSystem Sensor warrants its enclosed module to be free from defects in materials and workmanship under normal use and service for a period of three years from date of manufacture. System Sensor makes no other express warranty for this module. No agent, representative, dealer, or employee of the Company has the authority to increase or alter the obligations or limitations of this Warranty. The Company’s obli-gation of this Warranty shall be limited to the replacement of any part of the module which is found to be defective in materials or workmanship under normal use and service during the three year period commencing with the date of manufacture. After phoning System Sensor’s toll free number 800-SENSOR2 (736-7672) for a Return Authorization number, send defective units postage prepaid to: System Sensor, Repair Department, RA #__________, 3825 Ohio Avenue, St. Charles, IL 60174.FCC StatementThis device complies with part 15 of the FCC Rules. Operation is subject to the following two conditions: (1) This device may not cause harmful interference, and (2) this device must accept any interference received, including interference that may cause undesired operation.Note: This equipment has been tested and found to comply with the limits for a Class B digital device, pursuant to Part 15 of the FCC Rules. These limits are designed toprovide reasonable protection against harmful interference in a residential installation. This equipment generates, uses and can radiate radio frequency energy and, if not installed and used in accordance with the instructions, may cause harmful interference to radio communications. However, there is no guarantee that interference will not occur in a particular installation. If this equipment does cause harmful interference to radio or television reception, which can be determined by turning the equipment off and on, the user is encouraged to try to correct the interference by one or more of the following measures:– Reorient or relocate the receiving antenna. – Increase the separation between the equipment and receiver. – Connect the equipment into an outlet on a circuit different from that to which the receiver is connected. – Consult the dealer or an experienced radio/TV technician for help.Please include a note describing the malfunction and suspected cause of failure. The Company shall not be obligated to replace units which are found to be defective because of damage, unreasonable use, modifications, or alterations occurring after the date of manufacture. In no case shall the Company be liable for any consequen-tial or incidental damages for breach of this or any other Warranty, expressed or implied whatsoever, even if the loss or damage is caused by the Company’s negli-gence or fault. Some states do not allow the exclusion or limitation of incidental or consequential damages, so the above limitation or exclusion may not apply to you. This Warranty gives you specific legal rights, and you may also have other rights which vary from state to state.Three-Year Limited Warranty。
卡西欧PRO TREK PRW-6000使用手册——基础操作手表用途卡西欧PRO TREK PRW-6000系列是卡西欧登山表家族一个系列,目前在国内拥有PRW-6000YT-1B、PRW-6014H-1、PRW-6000Y-1、PRW-6000Y-1A和PRW-6000YT-1共五款产品,它们内置的三重感应器能测量方向、气压、温度及高度,上述测量数值将显示在表盘上,这些功能有助于手表在远足、登山、或进行其他屋外活动时使用。
手表规格常温下的精确度:每月±15秒(无校准信号时)数字计时:时、分、秒、上午(A)/下午(P)、月、日、星期,气压变化指示时制:12小时及24小时日历系统:2000年至2099年间的全自动日历其他:三种数字画面格式(星期,月,日;气压变化,月日;时分秒);本地城市代码(可从29个城市代码中选择);标准时间/夏令时间(日光节约时间)指针计时:时,分(指针每10秒钟转动一下),秒时间校准信号的接收:每天最多自动接收信号6次(中国校准电波信号为每天5次);一次成功后当天便不再自动接收;手动信号接收;信号接收模式可接收的时间校准电波信号:德国 Mainflingen(简称:DCF77,频率:77.5kHz);英国 Anthorn(简称:MSF,频率:60.0kHz);美国科罗拉多州 Fort Collins (简称WWVB,频率:60.0kHz);日本福岛(简称:JJY,频率:40.0kHz);日本福冈/佐贺(简称:JJY,频率:60.0kHz);中国河南省商丘市(简称:BPC,频率:68.5kHz)数码罗盘:60秒钟连续测定;16个方向;角度值0°至359°;测量单位:1°(数字画面)/6°(指针);秒针指示北方:罗盘校准(双向,磁偏角)测高计:测量范围:无参考高度的情况下-700至10000m(或-2300至32800ft.)显示范围:-3000至10000米(或-9840至32800ft.)根据参考高度的测量或由于大旗条件可能会产生负数值。
>>> CASIO G−SHOCK <<<Source: /Archive/Rec/rec.music.early/2009−10/msg00005.html •From: Tania Guthrie <guthriezqqtaniarrf@xxxxxxxxx>•Date: Sun, 4 Oct 2009 06:47:57 −0700 (PDT)..~~~*****~~~====================================================================================================ENTER HERE:http://relevant−/pages/casio−g−shock <<<====================================================================================================.................................................... .. .. .. .. .. .. .. .. .. .. .. .. .. .. .. .. .. .. .. .. .. .. .. .. .. .. .. .. .. .. .. .. .. .. .. .. .. .. .. .. .. .. .. .. .. .. .... .. .. .. .. .. .. .. .. .. .. .. .. .. .. .. .. .. .. .. .. .. .. .. .. .. .. .. .. .. .. .. .. .. .. .. .. .. .. .. .. .. .. .. .. .. .. .... .. .. .. .. .. .. .. .. .. .. .. .. .. .. .. .. .. .. .. .. .. .. .. .. .. .. .. .. .. .. .. .. .. .. .. .. .. .. .. .. .. .. .. .. .. .. .... .. .. .. .. .. .. .. .. .. .. .. .. .. .. .. .. .. .. .. .. .. .. .. .. .. .. .. .. .. .. .. .. .. .. .. .. .. .. .. .. .. .. .. .. .. .. ....................................................................................casio g−shockcasio mtg−520 g−shockcasio g−shock watchcasio g−shock watchescasio baby g−shock frogman watch casio g−shock watch battery replace casio g−shock battery change ctl 1616casio g−shock 1698 dw−003casio g−shock dw−5600ecasio hitachi g−shock nx9200 softwarecasio g−shock reviewscasio g−shock 2327casio men's g−shock atomic solar watch casio g−shock mt−6casio gw1400da−2av g−shockcasio g−shock dw−6600casio g−shock instructionscasio g−shock manualcasio men's referee timer g−shock watch casio g−shock triple sensor watchuser instructions casio g−shockcasio g−shock mudmancasio g−shock replacement partscasio hitachi g−shock nx9200 driverscasio g−shock gw−500a owners manual casio analog g−shock reviewsg−shock casio 6100−1bv watchcasio g−shock compass altimeter usacasio classic g−shock watchcasio g−shock cockpit series manualcasio g−shock analog watchescasio g−shock gw400jcasio g−shock in whitecasio g−shock frogman wikicasio g−shock gs1100−1acasio g−shock compass altimetercasio solar g−shock watchescasio g−shock bathing apecasio g−shock 2688 instructionscasio baby g−shockcasio g−shock atomic watchcasio g−shock mt−g manualcasio g−shock limited editioncasio g−shock frogmancasio g−shock 2688 owners manualcasio g−shock watch instructionscasio atomic g−shockcasio g−shock ceramic bandcasio g−shock compasscasio g−shock owners manualcasio g−shock batterycasio g−shock dw−6100 operating instructions casio g−shock partscasio g−shock seacasio g−shock 5200casio g−shock atomic solarcasio g−shock replacement watch bandscasio atomic solar g−shock digital watch casio g−shock gw−500a instruction manual casio baby g−shock frogman digital watch casio 6100 g−shock watchcasio g−shock watchband dw−5600ecasio g−shock rastacasio g−shock g 2500casio g−shock dw6100casio g−shock solar atomiccasio g−shock g304rl−1a1vwatch setting instructions casio g−shock baby g−shock casiocasio g−shock gulfmancasio g−shock dw−6900casio g−shock giezcasio g−shock atomic watchescasio g−shock atomic timekeeperg−shock casio watchcasio yellow g−shock watchbandcasio g−shock analogcasio g−shock atomic solar watchcasio g−shock articles reviews forumcasio g−shock vibratingcheap casio g−shock watchescasio watch g−shock gw500acasio g−shock bathing ape dw−5600casio g−shock casemtg900 casio atomic solar powered g−shock casio g−shock mudman tancasio digital multi−band 2 g−shock black casio g−shock battery changecasio g−shock tough solarcasio g−shock 1595womens casio g−shock sports watchcasio g−shock setupcasio g−shock thermometercasio g−shock watch waveceptor forum casio g−shock tough solar watch directions casio g−shock velcrocasio g−shock solar atomic watchcasio g−shock solar watch manualcasio g−shock watch bands 16mmcasio g−shock solar atomic watch manual casio g−shock watch batterycasio g−shock watch bandscasio g−shock watch owners manuals casio g−shock watch waveceptorcasio g−shock watch manualscasio g−shock street ridercasio g−shock solarhistoire montre casio g−shockmtg930da casio g−shock module 2688 largest selection of casio g−shock watchesg−shock casiog−shock atomic solar casiog−shock and casiog−shock atomic solar casio 2638 mtg−900g−shock atomic solar casio 2638operating instructions for casio g−shock watch women's casio g−shocksmall g−shock casioatomic solar casio g−shock pathfinder women's g−shock casiosale casio g−shocksreplacement watch bands for casio g−shock replace casio g−shock batteryreplacing casio g−shock batteryreplacing battery casio g−shock 2608 springs casio gl−150 g−shockcasio g−shock wr200 review batterycasio hitachi g−shock nx9200casio gw300a−1v g−shockcasio g−shock waveceptor tough solar manual casio g−shock watchbandscasio g−shock watch waveceptor newsgroup casio g−shock watches manualscasio g−shock watches atcasio men's g−shock manualchange casio g−shock batterycasio watch g−shockdiscount casio g−shock watchesdiscount casio g−shockcasio tough solar power g−shock watch casio module 2453 g−shock batterycasio model 2453 g−shock batterycasio solar g−shockcasio solar atomic g−shockcasio g−shock and manualscasio g−shock and manualcasio g−shock atomiccasio g−shock approved for spaceflightcasio g−shock ana digicasio g−shock 9050 setupcasio g−shock 2821 battery replacement casio g−shock amnualcasio g−shock alarm settingcasio g−shock atomic solar watchescasio g−shock black atomic men's watch casio g−shock band instructionscasio g−shock cockpit watchcasio g−shock baby−g watchescasio g−shock awg100−1a picturescasio g−shock awg100−1acasio g−shock baby gcasio g−shock awg101−1acasio g−shock 2737bezel casio g−shock dw5700battery replacement casio g−shock 2608casio 2453 g−shock batterybracelet montre casio g−shockbattery casio g−shockatomic watch g−shock casioatomic titanium casio andnot g−shock pathfinder batteries for casio g−shock watchesbaby g−shock casio shockcasio and g−shockcasio g−shock 2608casio g−shock 2007casio g−shock 2608 springscasio g−shock 2608 change batterycasio g−shock 1700casio atomic solar g−shock watch women casio atomic solar g−shock watchcasio g−shock 1545 womencasio classic g−shockcasio g−shock mtg−900 manualcasio g−shock mr gcasio g−shock navy sealscasio g−shock mtg900da−8v solar atomic watch casio g−shock model 2548 alarmcasio g−shock manual for model 2548casio g−shock light problemscasio g−shock militarycasio g−shock manualscasio g−shock not receiving time updatescasio g−shock replacement bazelcasio g−shock redcasio g−shock setting instructionscasio g−shock replacement bezelcasio g−shock pathfindercasio g−shock ocean graycasio g−shock o−ringscasio g−shock owner's manualcasio g−shock operation manualcasio g−shock kids watchescasio g−shock dw−9052 manualcasio g−shock dw−6800 manualcasio g−shock frogman whitecasio g−shock forumcasio g−shock dw−6800 manaulcasio g−shock cockpit watchescasio g−shock dw−6100casio g−shock dw 6900 owner's manualcasio g−shock full chargecasio g−shock instructioncasio g−shock gw300a−1vcasio g−shock japancasio g−shock insturtionscasio g−shock gw−500a weatch bandcasio g−shock g9000 3vcasio g−shock g011dcasio g−shock gw−500a watch band replacement casio g−shock gw 330a.......................................................................... .. .. .. .. .. .. .. .. .. .. .. .. .. .. .. .. .. .. .. .. .. .. .. .. .. .. .. .. .. .. .. .. .. .. .. .. .. .. .. .. .. .. .. .. .. .. .... .. .. .. .. .. .. .. .. .. .. .. .. .. .. .. .. .. .. .. .. .. .. .. .. .. .. .. .. .. .. .. .. .. .. .. .. .. .. .. .. .. .. .. .. .. .. .... .. .. .. .. .. .. .. .. .. .. .. .. .. .. .. .. .. .. .. .. .. .. .. .. .. .. .. .. .. .. .. .. .. .. .. .. .. .. .. .. .. .. .. .. .. .。
CASIO卡西欧多功能太阳能电波表GW-5600J-1卡西欧(机芯2924)简易使用说明∙商品名称:CASIO卡西欧多功能太阳能电波表GW-5600J-1∙型号:GW-5600J-1∙商品款式:男款∙商品驱动:太阳能∙∙∙∙∙∙∙∙∙∙∙∙∙∙按A(大约2秒)直到显示当前城市(闪烁),按D或B选择城市(日版貌似只能按d选择),然后按A确定四、调整时分秒等都按A(两秒)到显示当前城市,然后按c换,B、D(上下)NYC等(城市代码)B、D换(我们选择HKG,如果快一小时,把DST关掉)DST(夏令时)有A(AUTO)OF和ON三种,一般选OF,按D换12H,24H(12小时,24小时)按D换PS:PowerSaving(节能模式)按D换选择秒的状态:按D,秒数复位,变成00按B,选择背光时间,1.5秒-2.5秒时分年月日:D+,B-’13,表示2013年注:按A确定,退出设定五、手动收波(记得先把城市弄成HKG啊)时间模式下,按D两秒,显示RC,手动收波,按一下D,显示收波情况,此时按A可查收波时间六、自动收波(咱收日本波,实际测试时区选HKG能收日本波)按一下D,显示收波状态,按A直到显示设置模式,D、B选择A确定有AUTO,J40,J60,OFF这里不是三格就是两秒,出现7(SPL显示)两个完成时间D(开始)-A(中途测量)-D(停止)-A(中途测量解除)-A(清除)(第一个完成时间)(第二个完成时间)十、倒数定时器范围:1分钟-24小时,倒数至0,响10秒,任意键停止闹铃声音设定:1.按A直到倒数开始时间开始闪烁,2.按C选择时或分3.D+,B-4.A确定,退出设定使用:按D开始倒数,再按D暂停,再按D继续,(即使退出倒数模式,倒数仍然继续)要完全停止倒数计时请先按D(停止),再按A(倒数时间会返回其开始值)十一、关于节电功能开启后(显示PS),处于暗处一段时间后将进入休眠状态早上6:00到晚上9:59分之间不会进入休眠状态,但若手表已经处于休眠状态到达早上6:00,那么手表将保持休眠状态。
卡西欧PRO TREK PRW-6000使用手册——电波对时设置(时间调校)电波对时卡西欧PRO TREK PRW-6000接收时间校准电波信号并相应更新时间。
但在时间校准电波信号覆盖地区外使用使用这款手表时,需要手动调整时间。
此手表支持的本地城市设定和可以接收电波信号的来源包括:电波信号大致覆盖范围:为电波信号的接收做准备1.确认手表在计时模式中。
否则,用B钮进入计时模式。
2.这款手表的天线位于12时一侧。
如下图摆放手表,使其12时一侧面朝窗户。
确认附近没有金属物体自动信号接收•使用自动信号接收时,手表每天在午夜至早上5点(按照计时模式中的时间)之间最多自动接收时间校准信号六次(中国信号时为5次)。
自动信号接收成功一次后,当天随后的所有自动接收操作便不再进行。
•校准时间到达时,手表只有在计时模式中时才执行信号接收操作。
若当正在配置设定时到达了校准时间,手表不进行信号接收。
开启或解除自动信号接收功能1.进入信号接收模式(参见本节最后一部分)R/C将出现约1秒钟,然后接收到最终信号的日期和时间在数字画面上交替显示。
破折号(-:--及-.--)在日期和时间的地方交替显示表示信号接收尚未成功过(自购买手表或更换电池之后)。
2.拉出表冠。
此时自动信号接收状态(ON或OFF)在数字画面上闪动计时针(时针、分针、秒针)将移动到2时为止。
对于不能接收时间校准电波信号的城市只有AUTORC OFF显示。
AUTORC ON不显示。
3.拨动表冠选择自动信号接收开启(ON)或自动信号接收解除(OFF)。
4.设定完毕后,按回表冠。
画面返回本操作的第一步中显示的内容如何让手动接收电波信号1.用B钮进入信号接收模式(R/C)(参见本节最后一部分)。
2.按住A钮至少2秒,直到RC闪动,随后RC!出现在数字画面上。
电波信号接收开始后,信号强度指示符(L1、L2或L3)出现在画面上。
直到GET或ERR出现在画面上为止,不要让手表移动或进行任何按钮操作。
操作手册一、准备1、调试机器前,最好能提前半天把机器打开,放置于室温在22度以上的房间中,尤其是秋冬季节2、将刻有“Supply Reservoir”的空瓶中装满去离子水,和刻有“Waste Reservoir”的空瓶按下图位置放好,拧紧盖子。
并将干燥剂插入槽内,干燥剂不分左右。
3、打开电源开关,至显示“READY TO USE”二、校准1、按下“OPEN/CLOSE”键,样品池转出至如下图位置。
2、用镊子夹一片滤纸片放到样品池的凹槽中,确定只放了一片。
3、用移液器取10uL 290mmol/kg的标准液,滴加在滤纸片上注意:1、如使用厂家原装的定量10uL移液器,无需调节加样量,直接使用2、滴加标准液或样品时,请一定滴加在滤纸片上,不要滴在样品池的槽沿上,如果已经滴在槽沿上,应立即擦去4、按下“OPEN/CLOSE”键,样品池关闭5、等待屏幕上的进度条进行到终点,显示测量结果6、按下“CALIBRATE”键,将读数校准至290mmol/kg7、按下“OPEN/CLOSE”键,样品池转出,用镊子夹出滤纸片并丢弃,用无屑纸巾将样品池擦拭干净8、依次用1000 mmol/k g校准液,100 mmol/k g校准液,重复2-7步骤9、如校准过程中,100 mmol/k g校准液的读数值误差>2, 290mmol/k g 校准液的读数值误差>3,1000 mmol/k g校准液的读数值误差>5,则重复2-8步注意:1、校准时,必须以一轮为单位,即290mmol/kg,1000mmol/kg,100mmol/kg,三个点依次校准完毕,如不在误差范围内,则重新再校准一轮或几轮,直至3个点的测量值都在误差范围内,若有一个点不在误差范围内,都应重新校准。
不可以先校准290mmol/kg的,连续校准几遍,至误差范围内,再连续校准1000mmol/kg至误差范围内,再连续校准100mmol/kg的至误差范围内。
CASIO卡西欧多功能太阳能电波表GW-5600J-1卡西欧
(机芯2924)简易使用说明
∙商品名称:CASIO卡西欧多功能太阳能电波表GW-5600J-1
∙型号:GW-5600J-1
∙商品款式:男款
∙商品驱动:太阳能
∙表镜材质:矿物玻璃
∙
∙
∙
∙
∙
∙
∙200
∙
∙EL
∙
∙
∙
∙
一、
二、
1.按
2.按
3.按
4.按
三、
按A(大约2秒)直到显示当前城市(闪烁),按D或B选择城市(日版貌似只能按d选择),然后按A确定
四、调整时分秒等都按A(两秒)到显示当前城市,然后按c换,B、D(上下)
NYC等(城市代码)B、D换(我们选择HKG,如果快一小时,把DST关掉)
DST(夏令时)有A(AUTO)OF和ON三种,一般选OF,按D换
12H,24H(12小时,24小时)按D换
PS:PowerSaving(节能模式)按D换
选择秒的状态:按D,秒数复位,变成00
按B,选择背光时间,1.5秒-2.5秒
时分年月日:D+,B-
’13,表示2013年
注:按A确定,退出设定
五、手动收波(记得先把城市弄成HKG啊)
时间模式下,按D两秒,显示RC,手动收波,
按一下D,显示收波情况,此时按A可查收波时间
六、自动收波(咱收日本波,实际测试时区选HKG能收日本波)
按一下D,显示收波状态,按A直到显示设置模式,D、B选择A确定
有AUTO,J40,J60,OFF
七、两秒,出现
八、
按D
注:
(激活或者取消)激活
按A
7九、
D
D(开始)-A(中途测量)-A(中途测量解除)-D(停止)-A(清除)
(SPL显示)
两个完成时间
D(开始)-A(中途测量)-D(停止)-A(中途测量解除)-A(清除)
(第一个完成时间)(第二个完成时间)
十、倒数定时器
范围:1分钟-24小时,倒数至0,响10秒,任意键停止闹铃声音
设定:1.按A直到倒数开始时间开始闪烁,
2.按C选择时或分
3.D+,B-
4.A确定,退出设定
使用:按D开始倒数,再按D暂停,再按D继续,(即使退出倒数模式,倒数仍然继续)要完全停止倒数计时请先按D(停止),再按A(倒数时间会返回其开始值)
十一、关于节电功能
开启后(显示PS),处于暗处一段时间后将进入休眠状态
早上6:00到晚上9:59分之间不会进入休眠状态,但若手表已经处于休眠状态到达早上6:00,那么手表将保持休眠状态。
H:电量足M:电量中等L:电量低,此时收波不能,亮灯不可
不显示:电量极低,晒太阳去吧。