LG安防产品介绍2008V1(20080220)
- 格式:ppt
- 大小:10.78 MB
- 文档页数:41

LG-DVR2002录像机使用说明书一、开机与关机开机插上电源线,按下后面板的电源开关,电源指示灯亮,录像机开机,开机后视频输出默认为多画面输出模式,若开机启动时间再录像设定时间内,系统将自动启动定时录像功能,相应通道录像指示灯亮。
进入系统菜单正常开机后,按Enter 确认键(或单击鼠标左键)弹出登录对话框,用户在输入框中输入用户名和密码。
出厂时有4 个用户admin,888888,666666 及隐藏的default ,前三个出厂密码与用户名相同。
admin,888888 出厂时默认属于高权限用户,而666666 出厂默认属于低权限用户,仅有监视、回放、备份等权限。
(为安全起见请及时更改默认密码)关机A 进入【主菜单】> 【关闭系统】中选择【关闭机器】(关机时建议使用此方法,以避免意外断电时对DVR 造成的损害。
)B 关机时,按下后面板的电源开关即可关闭电源。
二、录像操作1 、预览设备正常登陆后,直接进入预览画面。
在每个预览画面上有叠加的日期、时间、通道名称,屏幕下方有一行表示每个通道的录像及报警状态图标。
2 、手动录像提示:手动录像要求用户具有“录像操作权”,在进行这项操作前请确认硬盘录像机内已经安装且已经正确格式化硬盘。
2.1 进入手动录像操作界面单击鼠标右键或在【主菜单】> 【高级选项】> 【录像控制】中可进入手动录像操作界面。
在预览模式下按前面板【录像/ ●】兼或遥控器上的【录像】键可进入手动录像操作界面。
2.2 开启/ 关闭某个或某些通道要开启/ 关闭某个通道的录像,首先查看该通道录像状态。
(“○”表示关闭,“●”表示开启)使用左右方向键移动活动框到该通道,使用上下方向键或相应数字键切换开启/ 关闭状态。
2.3 启动/ 关闭全通道录像将录像模式中自动/ 手动“全”切换到“●”状态,即可开启全通道录像,将录像模式中关闭“全”切换到“●”状态,即可关闭全通道录像。
3 、录像查询4 、录像设置硬盘录像机在第一次启动后的默认录像模式时24 小时连续录像。
OWNER’S MANUALVideo Call CameraPlease read this manual carefully before operating your set and retain it for future reference.AN-VC500(Brazil : )2CONTENTSOverview ...............................................................3Installing the Video Call Camera .. (4)Start Skype ...........................................................5Create account / Sign in .....................................5Skype menu (6)Contacts ............................................................................6Add Contact .....................................................................6Call Phones ......................................................................6History .................................................................................7My Information ................................................................7Settings .. (7)Make a Video Call to the Contact ......................8Make a Call (Voice only) to a Contact ...............9Receiving a Call .. (10)Start Skype ...........................................................11Create account / Sign in .....................................11Skype menu .. (12)Contacts ...........................................................................12Add Contact ....................................................................12Call Phones .....................................................................12History ...............................................................................13My PROFILE ...................................................................13Settings . (13)Make a Video Call to the Contact .....................14Make a Call (Voice only) to a Contact ..............15Receiving a Call .. (16)T roubleshooting ..................................................17Product Specifications . (18)3PREPARATIONPREPARATIONOVERVIEWNo emergency calls with SkypeSkype is not a telephone replacement service, and cannotbe used for emergency service dialing.holder4PREPARATIONPREPARATIONINSTALLING THE VIDEO CALL CAMERATVU S B I N 2U S B I N 3Unfold the stand and put it on the top center of the TV set.1Video Call Camera(A)(B)Velcro5USING SkypeUSING Skype (NetCast Smart TV)START SkypeCREATE ACCOUNT / SIGN INAfter selecting the Skype icon from the Premium menu, enter your Skype name and password. Choose “Sign me in when Skype starts” to sign inautomatically when the TV is switched on.MAGIC REMOTE CONTROLREGULAR REMOTE CONTROL2Start Skype .A#1Press2ENTERStartSkype .1PressUSING Skype Skype MENUContactsThis is the list of contacts in your contact list. Formore details about how to make a call, refer to pages9 and 10.Call PhonesSelect the country you would like to call and enter aphone number. Now select “Call”.Add ContactWhen pressing the RED button on the remote controlwhile on the contact list, the following screen appears.This allows you to search or add users.Press the “Find” button to start a search, or press the“Cancel” button to return to the previous menu.Contacts History My Information SettingsCallMy NameMy NameFind A#My NameAdd contact Zoom Conference call Back ExitCall Phones History My Information SettingsI don’t wear a watch.I like my arms to weigh the same...67USING SkypeSettingsThe settings menu includes ‘Notification settings’, ‘Call forwarding’, ‘Privacy settings’, ‘Video settings’ and ‘Change password’.Skype MENU (CONTINUED)HistoryThis lists All calls/Voicemails/Authorization requests.By selecting ‘A ll calls,’ you can check your Incoming/outgoing/missed calls.You can check the received event list by selecting ‘Voice messages’ or ‘Contact requests’.The numbers on the right side of each item indicate the number of unchecked items.My InformationThe information menu consists of ‘My status’, ‘Change picture’, ‘My profile’ and ‘View account’.My NameMy NameContacts Call Phones My Information SettingsContacts Call Phones History SettingsContacts Call Phones History My InformationMy NameUSING Skype MAKE A VIDEO CALL TO THE CONTACTSelect a contact from your contact list.Press the “Video call” button.1Inviting people / Add people : Add to callmember.2Screen mode : Changes video window.3 C amera zoom in / out : Zooms the video in or out.4P ointing zoom : The magnified image will be sentto the other party by using “the pointing zoomfeature”. The magnified image is only one squareof the nine part grid.5S top my video : Your video disappears, and theconnected party cannot watch it either.6M ute microphone : Mutes the microphone, andthe connected party cannot hear your voice either.7End Call : Ends the call.8H old Call : Holds the call until the “Resume call”button is pressed.9C all quality information : Video quality will beaffected by downstream network conditions.Critical Low Normal1234657My NameCall Phones History My Information Settings89I don’t wear a watch.I like my arms to weigh the same...1243567OR89USING SkypeMAKE A CALL (VOICE ONLY) TO A CONTACTSelect a contact from your contact list. Press the “Call ” button.Once a contact’s phone number is registered, you can selectamong the contact’s Skype name and phone numbers.1Inviting people / Add people : Add to call member.2 Screen mode : Changes video window.3 Display dial pad / Dial pad : Opens a numerical keypad.4 Start my video : Shares your video with the connected party.5M ute microphone : Mutes your audio. The connected party can not hear your audio.6 End Call : Ends the call.7H old Call : Holds the call until the “Resume call ” button is pressed.My Name1234Call Phones History My Information Settings567I don’t wear a watch.I like my arms to weigh the same...I don’t wear a watch.I like my arms to weigh the same...OR1234567USING Skype RECEIVING A CALLWhen someone calls while you are watching TV, a messageappears on the bottom right of the screen.1Answer with video : Receive the call with video (stops the TV).2Answer : Receive the call.3Decline: Do not receive the call, and continue watching TV.AnswerMichael is callingDecline123Voice Call DeclineMichael is calling123OR1Video call : Receive the call with video.2Voice Call: Receive the call with voice.3Decline : Do not receive the call.1011USING SkypeUSING Skype (webOS Smart TV)START SkypeREGULAR REMOTE CONTROL1Press2Start Skype.MAGIC REMOTE CONTROL 1 Press2Start Skype .CREATE ACCOUNT / SIGN INCreate a new accountSign in with a Microsoft account Need help?Password Skype nameSign me in when Skype starts After selecting the Skype icon, enter your Skype name and password. Choose “Sign me in when Skype starts” to sign in automatically when the TVis switched on.USING Skype Skype MENUMain menu CONTACTSCONTACTSThis is the list of contacts in your contact list. Formore details about how to make a call, refer topages 14 and 16.Main menu CONTACTSADD CONTACTPress 'ADD CONTACT' button on the 'CONTACTS'screen.ContactsSearch by name, Skype name or e-mail address.Main menu ADD CONTACTYou can search for Skype users using the searchbar. From the search results, you can add acontact you want.ContactsCall PhonesMain menu Call PhonesSelect the country you would like to call and entera phone number. Now select ‘Call’.1213USING SkypeSkype MENU (CONTINUED)Main menu HISTORY All calls Voice Messages Contact Requests HISTORYThis lists ‘A ll calls’, ‘Voice Messages’, ‘ContactRequests’.By selecting ‘A ll calls,’ you can check your Incoming/outgoing/missed calls.You can check the received event list by selecting ‘Voice messages’ or ‘Contact requests’.The numbers on the right side of each item indicate the number of unchecked items.Main menu MY PROFILE Status Profile Mood MessageAvailable InvisibleSkype Name ********Full Name *************"I am fine."MY PROFILEThe information menu consists of ‘Status’, ‘MoodMessage’ and ‘Profile’.Main menu SETTINGS Call Forwarding Privacy Settings Video Settings Change Password Sign Out SETTINGSThe settings menu includes ‘Notification Settings’, ‘Call Forwarding’, ‘Privacy Settings’, ‘Video Settings’, ‘Change Password’ and ‘Sign Out’.USING Skype MAKE A VIDEO CALL TO THE CONTACTContactsMain menu VIEW PROFILEOnlineSkype Name*********Full name*************Birth date**/**/****Age**From your contacts list, select a person you wantto call.Press the ‘VIDEO CALL’ button.24365711ADD PEOPLE: Add to call member.2SCREEN MODE: Changes video window.3 CAMERA OFF: Y our video disappears, and the connectedparty cannot watch it either.4M IC OFF: M utes the microphone, and the connectedparty cannot hear your voice either.5E ND CALL: Ends the call.6C AMERA ZOOM IN / OUT: Zooms the video in or out.7P OINTING ZOOM: T he magnified image will be sent to the otherparty by using “the pointing zoom feature”.The magnified image is only one square ofthe nine part grid.OR24365711415USING Skype MAKE A CALL (VOICE ONLY) TO A CONTACTContacts Main menu VIEW PROFILE OnlineSkype Name *********Full name *************Birth date **/**/****Age **From your contacts list, select a person you wantto call.Press the ‘VOICE CALL’ button.2436511 A DD PEOPLE : Add to call member.2 S CREEN MODE : Changes video window.3 D IAL PAD : Opens a numerical keypad.4 C AMERA ON : Shares your video with the connected party.5 M IC OFF: M utes your audio. The connected party can not hear your audio.6 E ND CALL: Ends the call.USING Skype RECEIVING A CALL21ANSWERWhen someone calls while you are watching TV, amessage appears on the bottom of the screen.1DECLINE : D o not receive the call, and continuewatching TV.2ANSWER : T he Skype app launches and thescreen switches to the ‘IncomingCall...’ screen.321This is a screen that is displayed when you select'ANSWER'.1A nswer with video: R eceive the call with video.2A nswer with audio: R eceive the call with voice.3Decline : Do not receive the call.1617APPENDIXTROUBLESHOOTINGAPPENDIXPRODUCT SPECIFICATIONS■Contents in this manual may be changed without prior notice due to upgrade of product functions.■The specifications shown above may be altered without prior notice to improve quality.■This product follows Skype Encoding Camera Specification (SECS) 2.1.Video calls through an LG TV cannot be made using the following devices:■ASUS Skype Video Phone T ouch SV1TS■ASUS Skype Videophone T ouch SV1TW■AIGURU_SV1 Skype Video Phone*The list of devices that are not supported may be amended without prior notification.“Skype is a trademark of Skype or its related companies. Although this product has been tested and met our certification standards for audio and video quality, it is not endorsed by Skype, Skype Communications S.a.r.l. or any of their related companies.”Copyright:© 2003-2014, Skype18。
1OWNER’S MANUALDIGITAL SIGNAGE MEDIA PLAYERDIGITAL SIGNAGE MEDIA PLAYER NC1000NC2000 Please read this manual carefully before operating your set and retain it for future reference.ENGLISH2CONTENTSNC1000Specifications (4)General Specifications (4)Multi I/O Port (4)Operational Specifications (4)Included in the Box (5)Basic Components (5)Optional Items (5)Connections (6)Back Panel (6)Installation (7)In/Out Cable Connection (9)Connecting a Monitor with D-sub Cable (9)Connecting a Monitor with an HDMI Cable (12)Connecting/Disconnecting HDMI in Windows (14)Connection to Multiple Monitors (15)NC2000Specifications (16)General Specifications (16)Multi I/O port (16)Operational Specifications (16)Included in the Box (17)Basic Components (17)Connections (18)Back Panel (18)Installation (19)34Dimensions 250 mm (W) x 220 mm (H) x 45 mm (D) (only Set)Weight 1.321 kg (only Set)CPUIntel ATOM Processor 330 1.6 GHz(Dual Core), FSB 533 MHz Chip Set Nvidia MCP7A-I ONMain Memory DDR3 1066 SODIMM type 1 GB, 2 GB Secondary Storage Device SATA SSD 8 GB, 16 GB, 32 GBO/SWindows Embedded StandardGeneral SpecificationsResolution Maximum Resolution 1920 x 1080 @ 60 Hz Recommended Resolution 1920 x 1080 @ 60 Hz PowerRated VoltageAC 100-240 V~, 50 / 60 Hz, 1.2 ASound Output Wattage RMS Audio Output 10 W + 10 W (R + L) : When connected to the monitor (model name:M4224C)Operating ConditionSync (H/V)Video LED Normal Mode On/On Active On Deep Sleep Mode (Set = Off)Off/OffOff Off Operating ConditionsOperating Conditions Temperature 5 ℃ to 35 ℃Humidity 10 % to 80 %Storage ConditionsTemperature-20 ℃ to 60 ℃Humidity5 % to 95 %Operational SpecificationsMulti I/O PortSerial Port One external RS-232 Serial port USB Port Hi-Speed USB 2.0 port 480 Mbps rate (x5)LAN Port Realtek RTL8103E 10/100 Mbps Ethernet controller VGA / HDMI Nvidia MCP7A-ION integrated Graphic chipset 4-in-1 CardSecure Digital (SD) / MultiMedia Card (MMC/MMC4.0) /Memory Stick (MS/MS-Pro) / xD Memory Card PCI Express Card Slot Supported LINE OUT SupportedSPDIF(Digital Audio Out)5.1 Channel Supported (depending on source signal)Attention● P roduct specifications may change without prior notice to improveperformance.Specifi cationsN C 1000SSD8G 16G 32GDDR1GB NC1000-BAAB NC1000-CAAB NC1000-DAAB 2GB NC1000-BABB NC1000-CABB NC1000-DABB5Basic ComponentsOptional ItemsM3, L12 x 4(for attachment of Box Guide on the monitor)Included in the BoxThe NC1000 with the following components. Please check that these components have been included prior to installation.The following items are supported by the NC1000, but are not provided with the product.Please purchase optional items as needed.● HDMI cable, D-sub cable, LINE-OUT cable, fi ber optic cable, LAN cable, mouse, keyboard.NC1000Power Cable Handle x 2User Manual / Cards RS-232C Cable M3, L8 x 8(for attachment of handle)Box GuideRail x 2Attention● These illustrations may differ from your product and are subject to change.NC10006Back PanelNumber ConnectionDescriptionPower Cable In For the power cable.Power Switch Provides power to the NC1000.RS-232C OutFor the RS-232C B Wireless Modem In For a USB-type wireless modem.USB In For USB-type devices, including memory, hard disk, CD-ROM, key-board, and mouse.HDMI Out For an HDMI-compatible N Connector For a LAN cable.4 IN 1 Multi-Card Slot Accommodates memory cards for storing video or reading images. Supported cards include Secure Digital (SD), MultiMedia (MMC/MMC4.0), Memory Stick (MS/MS-Pro), and xD Memory Cards.D-sub Out For the monitor's RGB video in.OPTICAL Out For an optical cable for digital audio transfer.NC1000 Power Button Turns NC1000 on.LINE-OUT Connector For a LINE-OUT cable for analog audio transfer.PCI MINI EXPRESS Card SlotProvided for PCI Mini Express Cards.ConnectionsN C 100071Place the handle into the slots on the side of the product.2Use screws to secure the handle.3Place the rail in the slots on the side of the product.InstallationWe recommend you to use the items provided with your NC1000 and follow our instructions for integrating the product with your monitor in order to ensure the correct results.AttentionThe illustrations shown are to guide your integration and may differ from your product.Warning● Be careful of sharp edges on the rail and the handle.NC100085Attach the Box Guide to the rail slots, and press it upward.6Use screws to secure the player and the Box Guide as shown below.Connecting a Monitor with D-sub CableIn order to watch video on a monitor, you need to use a D-sub cable or an HDMI cable to connect the NC1000 to a monitor.Attention● D -sub, HDMI, LINE-OUT, OPTICAL, and LAN cables are not included with the NC1000. If the cables were not provided with your monitor, you may need to purchase them separately.● A fter all required cables are connected, configure SET ID to 1 for the first monitor connected to the NC1000. The SET ID for one of the connected monitors should be configured to 1.● To configure the SET ID, please refer to the owner’s manual for your monitor.● M onitors used with NC1000 should support LG RS-232C protocols. The brightness, resolution, sound, and other features of an LG RS-232C protocol-enabled monitor can be controlled by SuperSign Manager soft-ware.Attention● A D-sub cable connection does not include an audio signal. For audio, you need to connect a LINE-OUT or OPTICAL cable.● A SET ID is a reference number for the monitor that can be set to the user's preference. The monitor SET ID is used by the SuperSign Manager software to identify monitors.NoteNC10002Connect the D-sub port of NC1000 and RGB-IN port of the monitor with a D-sub cable. 01CN3Connect NC1000 (OUT) to the monitor (IN) with an RS-232C cable.10122Connect NC1000 to a monitor with an HDMI cable.1Connect the appropriate power cables to a monitor and NC1000 respectively.Connecting a Monitor with an HDMI Cable● The monitor to connect with NC1000 should have the HDMI in for the HDMI connection.● T o use the HDMI device, you need to activate the HDMI device in Microsoft Windows Embedded Standard, the operating system of the NC1000. The procedures for activating and deactivating HDMI devices are described below.● In and Out signals are not differentiated when using HDMI cables.HDMI connections allow digital video and audio signals to be transferred with one cable.HDMI cable connections do not require an additional audio in cable.NoteAttentionN C 1000141Click the button in the lower left of the screen.2Select Start > Control Panel > Sounds and Audio Devices > Audio.3Select Play Sounds > NVIDIA High Defi nition Audio from the list and click OK .1Click the button in the lower left of the screen.2Select Start > Control Panel > Sounds and Audio Devices > Audio.3Select Play Sounds > Realtek HD Audio output from the list and click OK .Connecting/Disconnecting HDMI in WindowsConnecting HDMIDisconnecting HDMIMove to the desktop of the monitor connected to the NC1000.Move to the desktop of the monitor connected to the NC1000.Attention● If you do not reset after disconnecting the HDMI cable from the NC1000, the sound will not work.● I n order for the sound to work properly, stop playing the content and restart the NC1000.N C 1000Connection to Multiple MonitorsEach NC1000 can accommodate up to 25 monitors for video playback. (SET ID: 1 to 25)Attention● You may want to purchase additional RS-232C cables to use several monitors together.● You cannot use multiple monitors with the HDMI cable.1516Specifi cationsDimensions 99.8 mm (W) x 183.3 mm (H) x 28.4 mm (D) (only Set)Weight 0.215 kg (only Set)CPU Intel ATOM Processor 330 1.6 GHz(Dual Core), FSB 533 MHz Chip Set Nvidia MCP7A-I ONMain Memory DDR3 1066 SODIMM type 1 GB, 2 GB Secondary Storage Device SATA SSD 8 GB, 16 GB, 32 GB O/SWindows Embedded StandardGeneral SpecificationsResolution Maximum Resolution 1920 x 1080 @ 60 Hz Recommended Resolution 1920 x 1080 @ 60 Hz PowerRated Voltage DC 12 V / 3.5 ASound Output Wattage N/AOperating ConditionSync (H/V)Video LED Normal Mode On/On Active On Deep Sleep Mode (Set = Off)Off/OffOff Off Operating ConditionsOperating Conditions Temperature 5 ℃ to 35 ℃Humidity 10 % to 80 %Storage ConditionsTemperature-20 ℃ to 60 ℃Humidity5 % to 95 %Operational SpecificationsMulti I/O portSerial Port N/AUSB Port Hi-Speed USB 2.0 port 480 Mbps rate (x3)LAN Port Realtek RTL8103E 10/100 Mbps Ethernet controller VGA / HDMI Nvidia MCP7A-ION integrated Graphic chipset 4-in-1 CardN/A PCI Express Card Slot Supported LINE OUT N/A SPDIF(Digital Audio Out)N/AAttention● P roduct specifications may change without prior notice to improve performance.N C 2000SSD8G 16G 32GDDR1GB NC2000-BAAB NC2000-CAAB NC2000-DAAB 2GB NC2000-BABB NC2000-CABB NC2000-DABBNC2000Attentionhese illustrations may differ from your product and are subject to change.1718Back PanelConnectionsNumber Connection DescriptionHDMI OutFor an HDMI-compatible N Connector For a LAN cable.USB InFor USB-type devices, including memory, hard disk, CD-ROM, key-board, and mouse.PCI MINI EXPRESS Card SlotProvided for PCI Mini Express Cards.N C 200019Installation1Remove the screw and Metal cover.2Attach the Box Guide to the rail slots, and press it upward.3Use screws to secure the player and the Box Guide as shown below.We recommend you to use the items provided with your NC2000 and follow our instructions for integrating the product with your monitor in order to ensure the correct results.AttentionThe illustrations shown are to guide your integration and may differ from your product.NC2000If card does not become fully inserted into the insertion direction.Hit by hand carefully to make fully connected.NoteMake sure to read the Important Precautions before using the product.Keep the User’s Guide(CD) in an accessible place for furture reference.The model and serial number of the SET is located on the back and one side of the SET. Record it below should you ever need service.WARNING - This is a class A product. In a domestic environment this product may cause radio interference in which case the user may be required to take adequate measures.MODEL SERIAL T emporary noise is normal when powering ON or OFF this device.20。
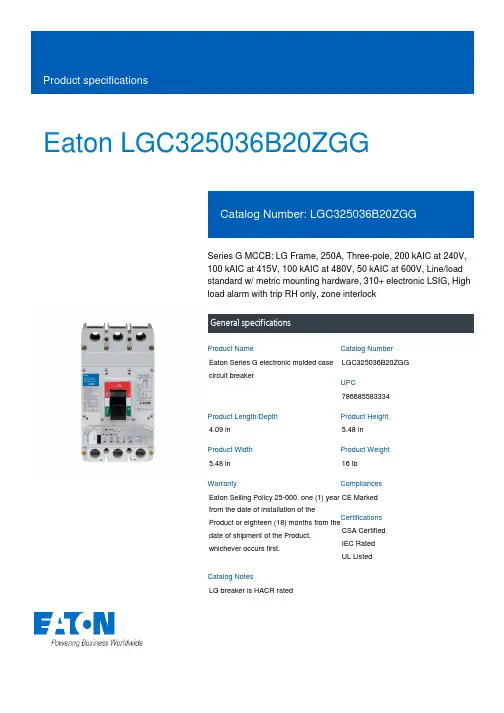
Eaton LGC325036B20ZGGSeries G MCCB: LG Frame, 250A, Three-pole, 200 kAIC at 240V, 100 kAIC at 415V, 100 kAIC at 480V, 50 kAIC at 600V, Line/load standard w/ metric mounting hardware, 310+ electronic LSIG, High load alarm with trip RH only, zone interlockGeneral specificationsEaton Series G electronic molded case circuit breakerLGC325036B20ZGG 7866855833344.09 in5.48 in 5.48 in 16 lb Eaton Selling Policy 25-000, one (1) year from the date of installation of theProduct or eighteen (18) months from thedate of shipment of the Product,whichever occurs first.CE Marked CSA CertifiedIEC RatedUL Listed LG breaker is HACR ratedProduct NameCatalog NumberUPCProduct Length/Depth Product Height Product Width Product Weight WarrantyCompliancesCertificationsCatalog Notes100 kAIC at 480 Vac 200 kAIC at 240 Vac 50 kAIC at 600 VacLG80% rated250 AThree-poleSeries GMetricComplete breakerLG50 to 60 HzComplete breakerHigh load alarmLine and loadElectronic LSIGZone selective interlock Application of Multi-Wire Terminals for Molded Case Circuit Breakers Application of Tap Rules to Molded Case Breaker TerminalsStrandAble terminals product aidComprehensive circuit protection for control panel applicationsSeries G MCCB quick selectorMulti-wire lugs product aidCurrent limiting molded case circuit breaker module product aidPower metering and monitoring with Modbus RTU product aidCurrent limiting molded case circuit breaker module for series G, JG and CL310+ MCCB product family pocket folderMotor protection circuit breakers product aidMolded case circuit breakers providing higher levels of selective coordination product aidHigh performance operating handles for Series G circuit breakers product aidPlug-in adapters for molded case circuit breakers product aidCircuit breaker motor operators product aidBreaker service centersJ-Frame 310+ and L-Frame 310+ Molded-case circuit breakersEaton's Volume 4—Circuit ProtectionMolded case circuit breakers catalogInstallation Instructions for Series G L-Frame Circuit BreakersNG and ND-Frame molded case circuit breakersMOEM MCCB product selection guideEaton Specification Sheet - LGC325036B20ZGGL-Frame 310+ Molded-case circuit breakers 100A-600AInterrupt ratingFrameRatingAmperage Rating Number of polesSeriesMounting hardwareTypeCircuit breaker type Frequency ratingCircuit breaker frame type Alarm lockoutTerminalsTrip Type Communication Application notesBrochuresCatalogsInstallation instructions Specifications and datasheetsEaton Corporation plc Eaton House30 Pembroke Road Dublin 4, Ireland © 2023 Eaton. All Rights Reserved. Eaton is a registered trademark.All other trademarks areproperty of their respectiveowners./socialmedia。

彩色转黑白半球摄像机SONY SSC-N21描述SSC-N21采用了高灵敏度的1/3英寸Exview HAD CCD II,具有优秀的灵敏度及低照度表现,配合电子彩转黑功能,可在夜间和低光环境中实现最低0.03lx照度值。
SSC-N21水平分辨率达到650TVL,可获得清晰锐利的细节图像。
同时,这款半球还搭载了索尼最新研发的经济型宽动态技术ATR Lite,在明暗对比强烈的环境中可有效提亮暗区细节。
这款半球新品可广泛适用于金融、楼宇、政府、监狱、教育、零售店等行业。
特征·650线水平清晰度·高灵敏度0.15LUX(F1.2,50IRE,彩色)·3.7×可变焦镜头·紧凑型设计·日夜转换功能,能够根据光线变化自动切换彩色或黑白模式。
·低功耗:1.5W(最大)。
·提供自定义模式。
·(ATR-Lite)自动暗光补偿功能。
·(iBLC)智能背光补偿功能。
·(ATW)自动白平衡功能。
·内同步、电源同步可选择。
·工作电压:交流24伏/直流12 伏。
·两维(2D)数字降噪技术。
信号制式PAL成像器件(水平×垂直)1/3英寸EXview HAD CCD II像素570.000像素(976×582)水平清晰度650电视线最低照度彩色:0.15Lx,黑白:0.10Lx(F1.2,50IRE)彩色:0.08Lx,黑白:0.03Lx(F1.2,30IRE)日夜转换支持(电子式)信噪比大于50dB(AGC OFF)镜头类型自动变焦镜头光学变焦 3.7×F值F1.2(广角),F2.6(望远)焦距f=2.8—10.5mm最小距离300mm水平视角99.5°-27.4°白平衡ATW(2000K-10000K),ATW-PRO(2500K-6000K)增益控制自动(开/关)自动色彩还原支持(ATR-LITE)背光补偿支持(iBLC)光圈自动信号同步内同步或电源同步数字降噪支持(20NR)水平旋转350°视频输出 1.0vp-p工作温度-10°C—+50°C电源交流24V或直流12V电源功率最大1.5W重量320g尺寸(宽×高×深)D121.6×H86.5mm电梯用迷你半球摄像机SONY SSC-N11进入描述SSC-N11采用了索尼高品质的1/3英寸SuperHAD CCD II,均具有优秀的灵敏度及低照度表现,配合电子彩转黑功能,可在夜间和低光环境中实现最低0.03lx照度值。

目录保修条例 (1)LG电子认证维修中心 (2)北京 (2)上海.........................2~3天津 (3)山东.........................3~4河北 (4)河南 (5)安徽.........................5~6浙江.........................6~7江苏.........................7~8吉林.........................8~9黑龙江. (9)内蒙古 (9)辽宁........................9~10福建.......................10~11广东.......................11~12广西.......................12~13海南.. (13)四川 (13)西藏 (13)贵州.......................13~14湖南.. (14)江西 (14)新疆 (14)陕西.......................14~15云南.. (15)宁夏 (15)甘肃 (15)青海 (15)湖北.......................15~16重庆.. (16)山西 (16)手机真伪辨别提示卡 (17)附录LG移动电话三包卡尊敬的用户:您好!为保证您的合法权益,建议您仔细阅读本提示卡,以便查验您购买的手机的真伪。
您购买的手机上应加贴尺寸为30mm x12mm的进网标志(蓝色或绿色)。
进网标志上第一行信息(由数字和“-”组成)是该型号手机的进网证号;第二行信息是该部手机的型号;第三行信息为扰码, 这个扰码是唯一的。
您可以通过以下方式查验进网标志的真伪。
(一) 网站查询登陆 网站,进入“标志验证”栏目按提示输入相关信息即可验证。
网站24小时免费服务,方便快捷,建议您使用此方式查验。
(二) 人工电话查询服务内容:查询进网标志信息和手机串号的真伪。

TMD系列光电警戒探测器俗称红外对射,主要应用于别墅院墙、小区周界、工厂仓库、矿山、油田等大型超远距离周界防范报警。
该探测器由一个发射端和一个接收端组成,发射端可发2-48光束的红外线,接收端可接收相应的2-48光束的红外线。
当高度达20cm物体穿过阻挡任意两束(可做1光束报警)红外线时,该探测器即刻输出报警信号。
目前市场上的红外对射主要有两光束和四光束两种规格,防范高度分别为10 cm和25cm,工作原理:同时遮断两光束或四光束红外线方能输出报警信号。
但由于这两种规格红外对射防范高度有限,不法份子极易攀越,故起不到真正的安全防范作用。
ZTTM-TMD系列光电警戒探测器(红外对射)优点如下:1.TMD的防范高度从21cm-248cm,红外光束从2束-48束(其他产品一般只能做到2、4光束),每光束之间的间隔从5cm-20cm不等,根据用户不同防范要求可自由选择,真正解决安全防范。
2.TMD采用的是专用红外发射管,发射的距离是实际用户所使用的的警戒距离的十倍(3C标准为6倍),故成功解决由于低温、太阳光、雨、雾、霜、雪等造成的红外线衰减而引起的误、漏报。
TMD系列警戒距离从1m-1000m可由用户根据防范要求自由选择。
3.特有防水、防震、抗低温、抗紫外线、抗氧化的外罩(只透940um的红外波,滤掉杂波)和内部沉胶防水处理及先进的光学结构及低功耗、防震设计,更增强了TMD的室外生存能力。
4.有线(含无线)传输功能,适配各种报警主机。
TMD系列的技术参数:型号:TMD-30X/100X/200X/300X/400X/500X产品外型尺寸:(20-200)X5.8X9(cm)室内警戒距离:90米----1500米室外警戒距离:30米---500米光束数:4----40工作电压:DC12V-18V工作电流:<100mA响应时间:<100ms继电器的触点容量:30V AC/DC0.5A使用环境:-50°~75°红外栅栏TMC系列光电警戒探测器,俗称红外栅栏,主要应用于住宅、办公室、商业场所的门、窗、阳台、小区周界、别墅院墙、工厂、仓库、停车场等地的防范报警。
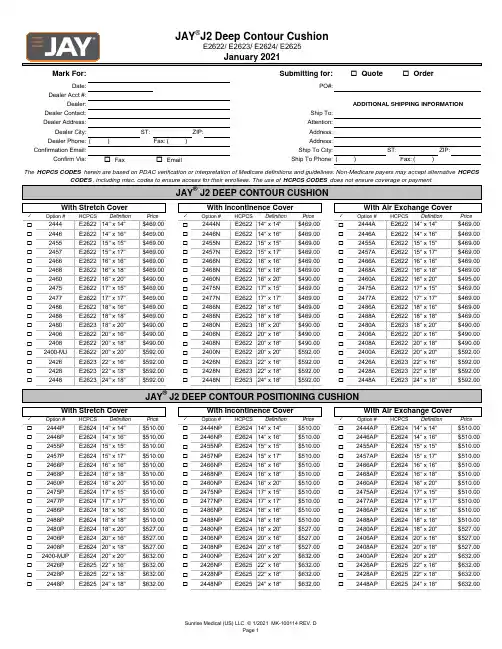
o o ST:ZIP:( )Fax:( )ST:ZIP:o o ( )Fax:( )✓✓✓o o o o o o o o o o o o o o o o o o o o o o o o o o o o o o o o o o o o o oo o o o o o o o o o o o o ooo✓✓✓o o o o o o o o o o o o o o o o o o o o o o o o o o o o o o o o o o o o o o o o o o o o o o o o o o o oooE262524" x 18"2428P E262522" x 18"$632.002428NP E262522" x 18"$632.00E262522" x 18"$632.002448PE262524" x 18"$632.002448NP20" x 20"$632.00$632.002448APE262524" x 18"$632.002400-MJP E262420" x 20"$632.002400NP E2624$632.002426P E262522" x 16"$632.002426NP $632.00E262522" x 16"$632.00E262420" x 16"E262420" x 18"2428AP E262420" x 20"2426AP E262522" x 16"$527.002408P E262420" x 18"$527.002408NP E262420" x 18"$527.002408AP 2400AP 2406P E262420" x 16"$527.002406NP E262420" x 16"$527.002406AP 18" x 20" $527.002488P E262418" x 18" $510.002488NP E262418" x 18" $510.002480P E262418" x 20" $527.002480NP E262417" x 17"$510.00$527.00E262418" x 18" $510.0018" x 20" $527.002480AP E26242477P E262417" x 17"$510.002477NP E2624$510.002486P E262418" x 16" $510.002486NP $510.00E262418" x 16" $510.00E262416" x 20"E262417" x 15"2488AP E262417" x 17"2486AP E262418" x 16" $510.002475P E262417" x 15"$510.002475NP E262417" x 15"$510.002475AP 2477AP 2460P E262416" x 20"$510.002460NP E262416" x 20"$510.002460AP 16" x 18"$510.002466P E262416" x 16"$510.002466NP E262416" x 16"$510.002468P E262416" x 18"$510.002468NP E262415" x 15"$510.00$510.00E262416" x 16"$510.0016" x 18"$510.002468AP E26242455P E262415" x 15"$510.002455NP E2624$510.002457P E262415" x 17"$510.002457NP $510.00E262415" x 17"$510.00E262414" x 14"E262414" x 16"2466AP E262415" x 15"2457AP E262415" x 17"$510.002446P E262414" x 16"$510.002446NP E262414" x 16"$510.002446AP 2455AP 2444P E262414" x 14"$510.002444NP E262414" x 14"$510.002444AP DefinitionPriceOption #HCPCSDefinitionPrice$510.00With Stretch CoverWith Incontinence CoverWith Air Exchange CoverOption #HCPCSDefinitionPriceOption #HCPCSE262324" x 18"2428E262322" x 18"$592.002428N E262322" x 18"$592.00JAY ® J2 DEEP CONTOUR POSITIONING CUSHIONE262322" x 18"$592.002448E262324" x 18"$592.002448N20" x 20"$592.00$592.002448AE262324" x 18"$592.002400-MJ E262220" x 20"$592.002400N E2622$592.002426E262322" x 16"$592.002426N $592.00E262322" x 16"$592.00E262220" x 16"E262220" x 18"2428A E262220" x 20"2426A E262322" x 16"$490.002408E262220" x 18"$490.002408N E262220" x 18"$490.002408A 2400A 2406E262220" x 16"$490.002406N E262220" x 16"$490.002406A 18" x 20" $490.002488E262218" x 18" $469.002488N E262218" x 18" $469.002480E262318" x 20" $490.002480N E262317" x 17"$469.00$490.00E262218" x 18" $469.0018" x 20" $490.002480A E26232477E262217" x 17"$469.002477N E2622$469.002486E262218" x 16" $469.002486N $469.00E262218" x 16" $469.00E262216" x 20"E262217" x 15"2488A E262217" x 17"2486A E262218" x 16" $495.002475E262217" x 15"$469.002475N E262217" x 15"$469.002475A 2477A 2460E262216" x 20"$490.002460N E262216" x 20"$490.002460A 16" x 18"$469.002466E262216" x 16"$469.002466N E262216" x 16"$469.002468E262216" x 18"$469.002468N E262215" x 15"$469.00$469.00E262216" x 16"$469.0016" x 18"$469.002468A E26222455E262215" x 15"$469.002455N E2622$469.002457E262215" x 17"$469.002457N $469.00E262215" x 17"$469.00E262214" x 14"E262214" x 16"2466A E262215" x 15"2457A E262215" x 17"$469.002446E262214" x 16"$469.002446N E262214" x 16"$469.002446A 2455A 2444E262214" x 14"$469.002444N E262214" x 14"$469.002444A DefinitionPriceOption #HCPCSDefinitionPrice$469.00With Stretch CoverWith Incontinence CoverWith Air Exchange CoverOption #HCPCSDefinitionPriceOption #HCPCSDealer Phone:Address:Confirmation Email:Ship To City:Confirm Via:Fax EmailShip To Phone:The HCPCS CODES herein are based on PDAC verification or interpretation of Medicare definitions and guidelines. Non-Medicare payers may accept alternative HCPCSCODES , including misc. codes to ensure access for their enrollees. The use of HCPCS CODES does not ensure coverage or payment.JAY ® J2 DEEP CONTOUR CUSHIONDealer:ADDITIONAL SHIPPING INFORMATIONDealer Contact:Ship To:Dealer Address:Attention:Dealer City:Address:JAY ®J2 Deep Contour CushionE2622/ E2623/ E2624/ E2625January 2021Mark For:Submitting for:Quote OrderDate:PO#:Dealer Acct #:✓✓✓o o o o o o o o o o o o o o o o o o o o o o o o o o o o o o o o o o o o o o o o o o o o o o o o o o o ooo141516171819202122232414JYW JYW JYW JYW JYW JYW 15JYWJYWJYW JYW JYW JYW JYW JYW 16JYW JYWJYW JYW JYW JYW 17JYW JYWJYW JYW JYW JYW JYW JYW JYW18JYW JYW JYW JYW JYWJYW19JYW JYW JYW JYW JYW JYW JYW JYW JYW JYW JYW20JYW JYWJYW JYWJYW JYW JYW JYW21JYW JYW JYW JYW JYW JYW JYW JYW JYW JYW JYW 22JYW JYW JYW JYW JYW JYW JYW JYW JYW JYW 23JYW JYW JYW JYW JYW JYW 24JYW JYW JYW JYW JYW JYW ===ooo 5%o 10%o 15%o 20%o 25%o 30%o 35%o 40%o o oo oo o o o o o o oo o o o o 5%o 10%o 15%o 20%o 25%o 30%o 35%o 40%o oo o 5%o 10%o 15%o 20%o 25%o 30%o 35%o 40%o o o o o Notes:oo o o o -20%OUFL Obliquity Underfill - Left SideNC NC -1"-5%-10%-15%-20%-5%-10%-15%Don't see the option you want? NO PROBLEM! Write your request below andwe can evaluate it and provide a quote.OUFR Obliquity Underfill - Right SideNC OOFL Obliquity Overfill - Left SideObliquity Fluid Volume ChangeIW Increase WidthNC OOFR Obliquity Overfill - Right SideNC +1"+2"+3"+4"RW Reduce WidthNC UF Fluid Volume UnderfillNC RLReduce LengthNC -5%-10%-15%-20%-1"OF Fluid Volume OverfillNC IL22" x 18"21.75"17.75"Increase Length NC+1"+2"+3"+4"18" x 20" 24" x 18"23.75"17.75"JAY Your Way ModificationsFluid Volume ChangeLength Change22" x 16"21.75"15.75"Standard Offering 20" x 16"19.75"15.75"JYWOffered Via Jay Your WayBottom View20" x 18"19.75"17.75"Not available20" x 20"19.75"19.75"Note: Measurement made from edge of rear and front lower edge of cushion.Ex: 2468 Y = 18"18" x 16" 17.75"15.75"Depth17" x 15"16.75"14.75"Y = Depth17" x 17"16.75"16.75"16" x 20"15.75"19.75"13.75"15.75"17.75"19.75"18" x 18" 17.75"17.75"16" x 16"Cushion Size15.75"15.75"16" x 18"15.75"17.75"15" x 15"14.75"14.75"15" x 17"14.75"16.75"D E P T HXYWidth14" x 14"13.75"13.75"X = Width14" x 16"Note: Measurement made from outside edge to outside edge of cushion.Ex: 2468 X = 16"22" x 18"$683.002428AD JAY J2 Deep Size MatrixJAY J2 Deep Measuring GuideActual Width & Depth WIDTHMeasurements made from completed cushion with covers.2428D E2623E223122" x 18"$683.002428ND E2623E223124" x 18"$709.002448ADE2623E223124" x 18"$709.002400AD E2623E223122" x 18"$683.002448DE2623E223124" x 18"$709.002448NDE2623E2231E2623E223122" x 16"2400D E2622E223120" x 20"$683.002400ND E2622E223120" x 20"$683.002426D E2623E223122" x 16"$683.002426ND $683.00E2623E223122" x 16"$683.002426AD E2622E223120" x 18"$587.00E2622E223120" x 20"$683.0020" x 18"$587.002408AD E2622E223120" x 16"$587.002406AD 2408D E2622E223120" x 18"$587.002408ND E2622E22312406D E2622E223120" x 16"$587.002406ND $587.00E2622E223120" x 16"2488D E2622E223118" x 18"$561.002488ND E2622E223118" x 20"$587.002480AD E2622E223118" x 20"$587.002480D E2622E223118" x 20"$587.002480ND E2622E223117" x 17" $561.002477AD E2622E223118" x 18"$561.0018" x 18"$561.002488AD 2477D E2622E223117" x 17" $561.002477ND E2622E2231E2622E223118" x 16"$561.002486AD E2622E223118" x 16"$561.00E2622E223117" x 17" $561.002486D E2622E223118" x 16"$561.002486ND $561.00$561.002460AD E2622E223116" x 20"E2622E223117" x 15" $561.002475D E2622E223117" x 15" $561.002475ND E2622E223117" x 15" $561.002475AD 16" x 16" $561.002466AD 2460D E2622E223116" x 20"$561.002460ND E2622E223116" x 20"2466D E2622E223116" x 16" $561.002466ND E2622E223116" x 18"$561.002468AD E2622E223116" x 18"$561.002455AD E2622E223116" x 16" $561.002468D E2622E223116" x 18"$561.002468ND E2622E2231E2622E223115" x 17" 2455D E2622E223115" x 15" $561.002455ND E2622E223115" x 15" $561.002457D E2622E223115" x 17" $561.002457ND $561.00E2622E223115" x 17" $561.002457AD E2622E223114" x 16"$561.00E2622E223115" x 15" $561.00E2622E223114" x 14"$561.002444AD E2622E223114" x 14"$561.002446D E2622E223114" x 16"$561.002446ND E2622E223114" x 16"$561.002446AD PriceOption #HCPCS Definition Price2444D E2622E223114" x 14"$561.002444ND With Stretch CoverWith Incontinence CoverWith Air Exchange CoverOption #HCPCS DefinitionPriceOption #HCPCS DefinitionJAY ® J2 DEEP COUNTOUR CUSHION WITH SOLID DROP SEATX"Y"Sunrise Medical (US) LLC. © 1/2021 MK-100114 REV. DPage 2。
重要安全说明1. 阅读说明。
- 操作本产品前应阅读所有的安全说明和操作指南。
2. 妥善保管说明。
- 安全、操作和使用说明可供以后使用。
3. 注意所有警告信息。
- 产品上和使用说明书中的所有警告信息都应该严格遵守。
4. 遵守操作说明。
- 严格遵守所有操作和使用说明。
5. 不要在靠近水的地方使用此产品。
– 例如:浴缸、洗碗池、洗碗槽或洗衣桶旁边;潮湿的地下室;游泳池旁边,等等。
6. 使用干布进行清洁。
- 进行清洁前请将设备从插座上拔下。
不要使用液体清洁剂。
7. 不要挡住任何通风孔。
按照制造商的使用说明进行安装。
- 机壳上的槽和开孔供通风之用,以确保产品能够可靠工作并防止内部过热。
请不要将此产品放置在床上、沙发上、地毯或其它类似物品上,以免堵住通风孔。
此产品不能采用内置式安装,如安装在书架或其它架子上,除非制造商的说明书中允许这样安装。
8. 不要在靠近热源如散热器、加热器、炉子或其它能够产生热量的设备(包括放大器)附近安装此设备。
目录和特点目录安全操作注意事项 . . . . . . . . . . . . 7部件名和功能 . . . . . . . . . . . . . 8-9控制 . . . . . . . . . . . . . . . . 10-12外部键 (A/D IN) (13)连接 . . . . . . . . . . . . . . . . . .14设置菜单 . . . . . . . . . . . . . . 15-16摄像机 ID 设置 (17)对焦设置 . . . . . . . . . . . . . . 18-20自动白平衡设置 . . . . . . . . . . . 21-23自动曝光设置 1 设置 ........24-26自动曝光设置 2 设置 ........27-29特殊设置 . . . . . . . . . . . . . . 30-31运动检测设置 . . . . . . . . . . . . . .32动态感知设置设置 . . . . . . . . . . . .33屏幕菜单显示 (OSD).........34-36规格 . . . . . . . . . . . . . . . . 37-38产品特点此电动变焦彩色摄像机是为监视系统专门设计的。
LG电子安防产品报价表名称型号产 品 主 要 参 数图片枪式摄像机XDI模拟摄像机-540线高清晰电子彩转黑枪机LS511P-B1 1/3" SuperHAD CCD 540TVL彩色/570TVL黑白,电子日夜转换(彩转黑)'彩色:0.0003LUX/F1.2;黑白:0.00003LUX/F1.2,信噪比:52dB (AGC关,F1.2)供电:DC12V/AC24VXDI模拟摄像机-650线高清晰电子彩转黑LS521P-B11/3" SuperHAD II CCD ,650TVL彩色/700TVL黑白,电子日夜转换(彩转黑) 彩色:0.0003LUX/F1.2;黑白:0.00003LUX/F1.2,信噪比:52dB (AGC关,F1.2)供电:DC12V/AC24VXDI模拟摄像机-650线高清晰机械式彩转黑LS921P-B 1/3" SuperHAD II CCD 650TVL彩色/700TVL黑白,机械式日夜转换(彩转黑) 彩色:0.0001LUX/F1.2;黑白:0.00001LUX/F1.2,信噪比:52dB (AGC关,F1.2)供电:DC12V/AC24VXDI模拟摄像机-540线宽动态机械式彩转黑LS923P-B 1/3" SuperHAD CCD ,540TVL彩色/570TVL黑白,机械式日夜转换(彩转黑)彩色:0.0003LUX/F1.2;黑白:0.00003LUX/F1.2,信噪比:60dB (AGC关,F1.2)供电:XDI模拟摄像机-650线高灵敏度日夜转换LSX701P-B 1/2" SuperHAD CCD 650TVL彩色/700TVL黑白,机械式日夜转换(彩转黑)彩色:0.0003LUX/F1.2;黑白:0.00003LUX/F1.2,信噪比:60dB (AGC关,F1.2)供电:DC12V/AC24V半球摄像机XDI模拟半球摄像机-宽动态机械式彩转黑LV802P-D21/3" SuperHAD CCD ,540TVL彩色/570TVL黑白,机械式日夜转换(彩转黑)'- 彩色:0.0003LUX/F1.2;黑白:0.00003LUX/F1.2,信噪比:50dB (AGC关,F1.2),供电:DC12V/AC24V;镜头:2.8-11mmXDI模拟半球摄像机-650线高清晰机械式彩转黑LV821P-DB 1/3" SuperHAD II CCD , 650TVL彩色/700TVL黑白,机械式日夜转换(彩转黑)'彩色:0.0001LUX/F1.2;黑白:0.00001LUX/F1.2信噪比:50dB (AGC关,F1.2)供电:DC12V/AC24V;镜头:2.8-11mmXDI模拟防暴半球摄像机-650线高清晰机械式彩转黑LV921P-DB 1/3" SuperHAD II CCD ,650TVL彩色/700TVL黑白, 机械式日夜转换(彩转黑) 彩色:0.0001LUX/F1.2;黑白:0.00001LUX/F1.2信噪比:50dB (AGC关,F1.2)供电:DC12V/AC24V;镜头:2.8-11mm一体化摄像机XDI模拟一体化摄像机-27倍机械式彩转黑LC701P-B 1/4" SONY EXVIEW CCD,540TVL彩色/570TVL黑白,机械式日夜转换(彩转黑) 彩色:0.003LUX/F1.2;黑白:0.0001LUX/F1.2,信噪比:50dB (AGC关,F1.2),供电:DC12V;镜头:3.25-88mmXDI模拟一体化摄像机-27倍机宽动态械式彩转黑LC703P-B 1/4" SONY EXVIEW CCD,540TVL彩色/570TVL黑白,机械式日夜转换(彩转黑) 彩色:0.003LUX/F1.2;黑白:0.0001LUX/F1.2,信噪比:50dB (AGC关,F1.2),供电:DC12V;镜头:3.25-88mmXDI模拟一体化摄像机-37倍机低照度宽动态械式彩转黑LC903P-B1/4" SONY EXVIEW CCD,540TVL彩色/570TVL黑白,机械式日夜转换(彩转黑) 彩色:0.003LUX/F1.2;黑白:0.0001LUX/F1.2,信噪比:50dB (AGC关,F1.2)供电:DC12V;镜头:3.25-129mm一体化智能球室内27倍一体化低照度宽动态智能中速球LT313PI-B1/4" SONY EXVIEW HAD CCD,540TVL彩色/570TVL黑白,机械式日夜转换(彩转黑)彩色:0.003LUX/F1.2;黑白:0.0001LUX/F1.2转速:120度/秒;预置位:128个,供电:DC12V;镜头:3.25-88mm室外27倍一体化低照度宽动态智能中速球LT313P-B1/4" SONY EXVIEW HAD CCD,540TVL彩色/570TVL黑白,机械式日夜转换(彩转黑)彩色:0.003LUX/F1.2;黑白:0.0001LUX/F1.2,转速:120度/秒;预置位:128个,供电:DC12V;镜头:3.25-88mm室内27倍一体化低照度宽动态智能高速球LT713PI-B1/4" SONY EXVIEW HAD CCD,540TVL彩色/570TVL黑白,机械式日夜转换(彩转黑) 彩色:0.003LUX/F1.2;黑白:0.0001LUX/F1.2转速:400度/秒;预置位:128个,供电:AC24V;镜头:3.25-88mm室外27倍一体化低照度宽动态智能高速球LT713P-B1/4" SONY EXVIEW HAD CCD,540TVL彩色/570TVL黑白,机械式日夜转换(彩转黑)'- 彩色:0.003LUX/F1.2;黑白:0.0001LUX/F1.2转速:400度/秒;预置位:128个,供电:AC24V;镜头:3.25-88mm室内37倍一体化低照度宽动态智能高速球LT913PI-B1/4" SONY EXVIEW HAD CCD,540TVL彩色/570TVL黑白,机械式日夜转换(彩转黑)彩色:0.003LUX/F1.2;黑白:0.0001LUX/F1.2转速:400度/秒;预置位:128个,供电:AC24V;镜头:3.25-129mm室外37倍一体化低照度宽动态智能高速球LT913P-B1/4" SONY EXVIEW HAD CCD,540TVL彩色/570TVL黑白,机械式日夜转换(彩转黑) 彩色:0.003LUX/F1.2;黑白:0.0001LUX/F1.2转速:400度/秒;预置位:128个,供电:AC24V;镜头:3.25-129mmLCDLCD监视器监视器18.5寸液晶监视器LSM185018.5英寸 16:9显示,PAL/NTSC 300cd/平方米,最佳分辨率:1366*76821.5寸液晶监视器LSM215021.5英寸 16:9显示,PAL/NTSC 300cd/平方米,最佳分辨率:1920*1080。
OWNER’S MANUALMEDICAL MONITORPlease read this manual carefully before operating your set and retain it for future reference.32HL512DCopyright 2019 LG Electronics Inc. All Rights Reserved.ENGLISH CONTENTSON CLEANING (3)LICENSE (4)OPEN SOURCE SOFTWARE NOTICE INFORMATION (4)ASSEMBLY AND PREPARING (5)USING THE MONITOR (19)USER SETTINGS (21)TROUBLESHOOTING (34)PRODUCT SPECIFICATIONS (37)23ENGLISHPlease note that this information is for proper use and safety of the equipment. The following symbols may indicate a hazardous situation in which, if not heeded, may result in serious injury or even death to the user orothers, or damage to the equipment.• Indicates warning and safety instructions. If not adhered to, it could result in death or serious injury to theuser or others.• Indicates a hazardous situation which, if not heeded, may result in minor or moderate injury to the user or others, or damage to the equipment.For users in the United States• United State federal law restricts this equipment to be used by or on the order of a physician.Indications for Use• This Medical Monitor is indicated for use in displaying radiological images for review, analysis, and diagnosis by trained medical practitioners. The display is not intended for mammography.Cybersecurity warnings and responsibilities• Firmware update should be performed through LG Electronics or its distributor.• If LG Electronics or its distributor instructs to update the firmware, update it immediately.ON CLEANINGRecommended Cleaning Chemicals• Isopropanol 70 %• Ethanol 70 %• 0.9 % NaCl solution •Biospot 500 ppmHow to Use Cleaner• Prior to cleaning, turn off the monitor and remove the power cable.• Soak a soft cloth in a recommended cleaner, then lightly rub the screen with no more than 1 N of force.• The cleaner could cause serious damage if it leaks inside the monitor while cleaning.• The display could be damaged, so only clean the parts of the monitor other than the screen's LCD panel.• Do not use benzene, thinner, acids or alkaline cleaners or other such solvents.•Cleaning guidelines for displays must only be carried out by medical professionals (Doctors or Nurses) and must not be handled by patients.ENGLISH LICENSEEach model has different licenses. Visit for more information on the license.The terms HDMI, HDMI High-Definition Multimedia Interface, HDMI trade dress and the HDMI Logos aretrademarks or registered trademarks of HDMI Licensing Administrator, Inc."DICOM® is the registered trademark of the National Electrical Manufacturers Association for its Standardspublications relating to digital communications of medical information."OPEN SOURCE SOFTWARE NOTICEINFORMATIONTo obtain the source code under GPL, LGPL, MPL, and other open source licenses, that is contained in thisproduct, please visit . In addition to the source code, all referred license terms,warranty disclaimers and copyright notices are available for download. LG Electronics will also provide opensource code to you on CD-ROM for a charge covering the cost of performing such distribution (such as thecost of media, shipping, and handling) upon email request to ******************.This offer is valid fora period of three years after our last shipment of this product. This offer is valid to anyone in receipt of thisinformation.45ENGLISHASSEMBLY AND PREPARINGProduct CompositionPlease check whether all the components are included in the box before using the product. If there are any missing components, contact the retailer where you purchased the product. Note that the product and relatedcomponents may look different from those shown here.CD (Owner's Manual / Software)/RegulatoryManual/CardsPower CordHDMI CableDisplayPort CableUSB 2.0 Cable Stand Body / Stand BaseENGLISH • Always use genuine LG components to ensure safety and product performance.• The product warranty will not cover damage or injury caused by the use of unauthorized components.• It is recommend that use the supplied components.• If you use generic cables not certified by LG, the screen may not display or there may be image noises.• Only use components listed below that meet the listed standard. Unauthorized components may causedamage to and malfunction of the product.• The AC/DC adaptors and etc. except the upper components need to be used only supplied by manufacturer.NOTE• The components may look different from those illustrated here.• Without prior notice, all product information and specifications contained in this manual are subject tochange to improve the performance of the product.• To purchase optional accessories, visit an electronics store or an online shopping site, or contact the retailerfrom which you purchased the product.• The power cord provided may differ depending upon the region.Supported SoftwareCheck the drivers and software supported by your product and refer to the manuals on the CD enclosed in theproduct package.• The [PerfectLum Serial Number] can be found in [General] > [Information].• PerfectLum calibrates the color output of the monitor using Hardware Calibration. The program supports USBcommunication, so connect your PC and monitor using a USB cable and launch the PerfectLum program.• Required and Recommended: You can download and install the latest version from the enclosed CD or fromthe LGE website ().• Optional: You can download and install the latest version from the LGE website ().67ENGLISHProduct and Button DescriptionHow to Use the Joystick ButtonYou can easily control the functions of the monitor by pressing the joystick button or moving it left/right/up/down with your finger.NOTE• The joystick button is located at the bottom of the monitor.ENGLISH Connectors89ENGLISHNOTE• This monitor supports the * feature.* : A feature that allows you to add a device to your computer without the need for physical device configuration or user intervention.ENGLISH Assembling the Stand base1• To protect the screen from scratches, cover the surface with a soft cloth.23410567• When lifting or moving the monitor, do not touch the monitor screen. The force applied to the monitor screenmay cause damage to it.NOTE• You can disassemble the stand in the reverse order of the assembly.ENGLISH Moving and Lifting the MonitorWhen moving or lifting the monitor, follow these instructions to prevent the monitor from being scratched ordamaged and to ensure safe transportation, regardless of its shape or size.• Place the monitor in the original box or packing material before attempting to move it.• Before moving or lifting the monitor, disconnect the power cord and all other cables.• Hold the bottom and side of the monitor frame firmly. Do not hold the panel itself.• When holding the monitor, the screen should face away from you to prevent it from being scratched.• When transporting the monitor, do not expose the monitor to shock or excessive vibration.•When moving the monitor, keep it upright and never turn the monitor on its side or tilt it sideways.• Avoid touching the monitor screen as much as possible.-This may result in damage to the screen or some of the pixels used to create images.• If you use the monitor panel without the stand base, its joystick button may cause the monitor to becomeunstable and fall, resulting in damage to the monitor or human injury. In addition, this may cause thejoystick button to malfunction.Installing on a Table• Lift the monitor and place it on the table in an upright position. Place the monitor at least 100 mm (3.9inches) away from the wall to ensure sufficient ventilation.• Unplug the power cord before moving or installing the monitor. There is risk of electric shock.• Make sure to use the power cord that is provided in the product package and connect it to a grounded poweroutlet.• If you need another power cord, please contact your local dealer or the nearest retail store.ENGLISHPrecautions for Connecting the Power Cord• Make sure to use the power cord that is provided in the product package. Connect the cord to a grounded power outlet.• If you need another power cord, please contact your local dealer or the nearest retail store.Adjusting the Stand Height1 Place the monitor mounted on the stand base in an upright position.2 Handle the monitor with both hands for safety.Max 110.0 mm (4.3 inches)•ENGLISH Adjusting the Angle1 Place the monitor mounted on the stand base in an upright position.2 Adjust the angle of the screen.NOTE• The angle of the screen can be adjusted forward or backward from -5° to 20° for a comfortable viewingexperience.• To avoid injury to the fingers when adjusting the screen, do not hold the lower part of the monitor’s frame asillustrated below.•Be careful not to touch or press the screen area when adjusting the angle of the monitor.Pivot FeatureThe pivot feature allows the monitor to rotate 90 degrees clockwise or counter-clockwise.• To avoid scratching the stand base, make sure that when rotating the monitor using the pivot feature, thestand does not make contact with the monitor.ENGLISH12Adjust the angle of the monitor in the direction of the arrow as shown in the figure.3ENGLISHNOTE• Auto Pivot feature of the display is not supported.• The screen can be rotated easily using the screen pivot shortcut key provided with your Windows operating system. Note that some Windows versions and some graphics card drivers may use different settings for the screen pivot key or may not support the pivot key at all.• Windows screen pivot shortcut keys-0 °: Ctrl + Alt + Up arrow key ()-90 °: Ctrl + Alt + Left arrow key ()-180 °: Ctrl + Alt + Down arrow key ()-270 °: Ctrl + Alt + Right arrow key ()• Take care when rotating the monitor if the cable is connected.• To avoid injury when rotating the display, do not place your fingers between the display and the stand base.Using the Kensington LockFor more information on installation and usage, refer to the Kensington lock owner’s manual or visit the website at .NOTE• The Kensington Lock is optional. You can obtain optional accessories from most electronics stores.ENGLISHInstalling on the WallInstall the monitor at least 100 mm (3.9 inches) away from the wall on each side of the monitor to ensure sufficient ventilation. Detailed installation instructions can be obtained from your local dealer. Please refer to the manual to install and set up a tilting wall mounting bracket.To install the monitor to a wall, attach a wall mount plate (optional) to the back of the monitor.Make sure that the wall mount plate (optional) is securely fixed to the monitor and to the wall.Installing the Wall Mount PlateThis monitor meets the specifications for the wall mount plate or other compatible devices.Wall Mount100 mm x 100 mm (3.9 inches x 3.9 inches)Standard screw M4 x L10Required screws4Wall Mount Plate (Optional)LSW149NOTE• A non-VESA standard screw may damage the product and cause the monitor to fall. LG Electronics is not liable for any accidents relating to the use of non-standard screws.• The wall mount kit includes the installation guide and all necessary parts.• The wall mounting bracket is optional. You can obtain optional accessories from your local dealer.• The length of the screw may differ for each wall mounting bracket. If you use screws longer than the standard length, it may damage the inside of the product.• For more information, please refer to the user manual for the wall mounting bracket.• Be careful not to apply too much force while mounting the wall mount plate as it may cause damage to the screen.• Remove the stand before installing the monitor on a wall mount by performing the stand attachment in reverse.ENGLISH • Disconnect the power cord first. Then move or install the monitor. There is risk of electric shock.• Installing the monitor on the ceiling or on a slanted wall may result in the monitor falling off, which could lead to injury. Use an authorized LG wall mount and contact the local dealer or qualified personnel.• To prevent injury, this apparatus must be securely attached to the wall in accordance with the installation instructions.• Applying excessive force when tightening screws may damage the monitor. Such damage is not covered by the product warranty.• Use the wall mounting bracket and screws that confirm to VESA standards. Damage caused by the use or misuse of inappropriate components is not covered by the product warranty.• When measured from the back of the monitor, the length of each installed screw must be 8 mm (0.3 inches) or less.ENGLISHUSING THE MONITOR• Illustrations in this manual may differ from the actual product.Press the joystick button, go to [Settings][Input], and then select the input option.• Do not press the screen for a prolonged time. This may cause image distortion.• Do not display a still image on the screen for a prolonged time. This may cause image retention. Use a PC screensaver if possible.• When connecting the power cord to the outlet, use a grounded (3-hole) power strip or a grounded power outlet.• The monitor may flicker when turned on in an area where the temperature is low. This is normal.• Sometimes red, green, or blue spots may appear on the screen. This is normal.Connecting to a PC• This monitor supports the * feature.* : A feature that allows you to add a device to your computer without having to reconfigure®/™ cable-High-Speed HDMI ®/™ cable with EthernetENGLISHDisplayPort ConnectionTransmits digital video and audio signals from your PC to the monitor.• HDMI transmits digital video and audio signals from your AV device to the monitor.NOTE• Using a DVI to HDMI / DP (DisplayPort) to HDMI cable may cause compatibility issues.• Use a certified cable with the HDMI logo attached. If you do not use a certified HDMI cable, the screen may not display or a connection error may occur.• Recommended HDMI cable types -High-Speed HDMI ®/™ cable-High-Speed HDMI ®/™ cable with EthernetNOTE• It is recommended you install all Windows Updates to keep your Windows up-to-date before connecting to the product for use.• Peripheral devices are sold separately.• A keyboard, mouse, or USB device can be connected to the USB port.ENGLISHENGLISHENGLISHMain Menu FeaturesMenu Settings1 To view the OSD menu, press the joystick button at the bottom of the monitor and then enter the [Settings].2 Move the joystick up/down and left/right to set the options.3 To return to the upper menu or set other menu items, move the joystick to or pressing () it.4If you want to exit the OSD menu, move the joystick tountil you exit.[Quick Settings][Input][Picture][General]NOTE• : On •: OffENGLISH [Quick Settings]ENGLISH[Input]ENGLISH[PBP]ENGLISH[Picture] NOTE• The [Picture Mode] that can be set depends on the Input signal.[Picture Mode] on SDR (Non HDR) signalENGLISH [Picture Mode] on HDR signalENGLISHENGLISHENGLISH31ENGLISH [General]32ENGLISH33ENGLISH TROUBLESHOOTINGNothing is displayed on the screen.3435ENGLISHScreen display is unstable and shaky. / Images displayed on the monitor leave shadow trails.Some features are disabled.ENGLISH4K resolution is unavailable.3637ENGLISHPRODUCT SPECIFICATIONSIn order to improve the product, specifications may change without notice.The ~ symbol means alternating current, and the symbol means direct current.ENGLISHMonitor SizeDimensions (Width x Height x Depth)With Stand718.2 x 590.0 x 231.2 (mm)28.2 x 23.2 x 9.1 (inches)Without Stand718.2 x 414.3 x 45.1 (mm)28.2 x 16.3 x 1.7 (inches) Weight With Stand7.0 (kg)15.4(lbs)Without Stand 5.6 (kg)12.3(lbs)* The Operating Mode of Power Consumption is measured with LGE test standard. (Full White pattern, Maximum resolution)* The Power Consumption level can be different by operating condition and monitor setting.3839ENGLISHSupport Mode (Preset Mode - PC)DisplayPort / HDMIENGLISH*1) For HDMI, 2) For DP4041ENGLISHSupport Mode (Video)Power indicatorSupported Graphic Card ListModelSerial No.WARNING: This equipment is compliant with Class A of CISPR 32. In a residential environment this equipment may cause radio interference.Read the user manual (CD) carefully and keep it at hand. The product label contains necessary information for after-service.Supplier’s Declaration of Conformity Trade Name LG Responsible Party LG Electronics USA, Inc.Address 111 Sylvan Avenue, North Building, Englewood Cliffs, NJ 07632E-mail ************************。
LGIT的 LED 照明PDF created with pdfFactory Pro trial version LED 商务状态发展历程( 百万美元) 2002 蓝色LED业务实绩1,600 1,2001,0002003 2005关键垫 LED 白光 LED磷8302006 XiOB 绿色LED LED MNT/nbpc 照明模块 LED 电视 BLU LED 灯具 垂直LED 50020072302008 2009`09`10`11`12PDF created with pdfFactory Pro trial version 商务范围手机应用 LCD 背光应用照明应用一般照明 装饰照明前外部灯汽车应用室内灯街道照明 机器视觉装饰灯后外部灯PDF created with pdfFactory Pro trial version 制造能力制造能力 新生产工厂Million/M 芯片 封装1200 950 850 700 6001150300200‘09‘10‘11‘12Ø 在坡州58000平方米的空间设施 Ø 从2010年下半年以后, 发光二极管的生产能力每月6.0亿PDF created with pdfFactory Pro trial version LG伊诺特LED照明业务的范围 建设垂直的接业务模型LG Innotek 已经具备了提供 LED 背光/照明的能力 提供从外延片 到照明引擎的工程阶段上的全部商品,以及更多LG Innotek LED 价值链商务 领域 价值链外延片 芯片 封装 模块儿 发动机 完成品 (房屋)) 系统 业务LED封装模块/引擎完成品系统 / 业务OEM/ODM 能力 LG Innotek 商业范围※ IP 保证PDF created with pdfFactory Pro trial version 冷白功率(瓦) 型号 0.25 W LEMWS 30N75HZ 0.2W LEWWS 56P55GZ 0.2W LEMWS 56N75HZ 0.3W LEMWS 37Q75HZ 0.5W LEWWS 59T55HZ 0.5W LEHWS 59Q75HZ 1.0W LEMWH 51W75HZ 1.0W LEMWW 35X70HZ封装的类型规格 正向电流[mm] [mA]3.0x2.0x0.8 605.4x5.0x1.6 605.4x5.0x1.6 603.5x2.8x0.7 805.6x3.0x0.9 1505.6x3.0x0.9 150 Lateral5.1x5.2x1.0 300 Lateral3.5x3.5x1.7 500芯片-Lateral Middle ChipLateral Multi ChipLateral Multi ChipLateral Lateral Middle Multi Middle ChipChipMiddle Multi ChipMiddle Multi ChipVertical Large Chip光通量[lm]16201724464195110色温[K]50005600500050005000500050005000显色指数Ra7560707560757570PDF created with pdfFactory Pro trial version 暖白功率(瓦) 型号 0.25 W 0.2W 0.3W 0.5W 1.0W 1.0WLEMWS30N80LZ LEMWS56N80LZ LEMWS37P80LZLEHWS59S80LZ LEMWH51V80LZ LEMWW35V80LZ封装的类型规格[mm] [mA] -3.0 x 2.0 x 0.8 60 Lateral Middlel Chip 145.4 x 5.0 x 1.6 60 Lateral Multi Chip 153.5 x 2.8 x 0.7 80 Lateral Middle Chip 205.6 x 3.0 x 0.9 150Middle Multi Chip5.1 x 5.2 x 1.0 300Middle Multi Chip3.5 x 3.5 x 1.7 500 Vertical Large Chip 70正向电流芯片LateralLateral光通量[lm]3880色温 显色指数[K] Ra3000 803000 803000 803000 803000 803000 80PDF created with pdfFactory Pro trial version LGIT封装研究计划PDF created with pdfFactory Pro trial version 垂直型LED芯片 制造过程LG Innotek 垂直型LED 的优点热性能优秀 à 在大电流运行提高可靠性 • 世界初次商业化把外延片贴在铁板的产品 • 热分散 跟热导率两个指数很好 制造费用很低•晶圆键合时, 不含高尚金属的过程 •低成本金属基板 •开发6“晶圆进程PDF created with pdfFactory Pro trial version qXiOBTM 的定义(外延片阶段的封装)n Zener Diode Embeddedn 硅板技术 - 设计多种多样 - 贴zener 二极管 - 热导率好 - 高精度制造 n 外延片阶段的工程 - 在低温度可以贴LED芯片 (Rth=4℃/W) - 荧光粉覆膜过程的一元化 -在外延片阶段上贴镜子Ta=25℃, IF=350mAn 性能 - 光通量达到130lm(6500K, 70Ra @ 350mA) - LG Innotek 专有的垂直LED 芯片(Radian flux超过 400mW @ 350mA)PDF created with pdfFactory Pro trial version “实现对于照明的最终解决方案”LG 伊诺特-领导下一代照明LED 照明发动机机械的接触面发热的接触面发电的接触面光度的接触面Defined by Zhaga•Light EngineLG IT 核心发动机简边设置简便替换•事业范围–从芯片到照明发动机与其间所有部分§Value Chain Coverage§Packaged LED§G e n e r a l§C u s t o m e r P o o l§Engine Solution§S p e c i a l i z e d照明+ 建筑2010Providing right solutions to LED LightingSeoul Square 20F, Namdaemunno 5-ga, Jung-gu, Seoul, 100-714, Korea.We provide right solutions to LED LightingModulA Louver600 600Seoul Square 20F, Namdaemunno 5-ga, Jung-gu, Seoul, 100-714, Korea.We provide right solutions to LED LightingSeoul Square 20F, Namdaemunno 5-ga, Jung-gu, Seoul, 100-714, Korea.We provide right solutions to LED Lighting户外(模块)灯具(模块+ 驱动程序+ 175W 路灯)光通量(lm)瓦特(W)光效(lm/W)%光效(lm/W)%810990907373§配备有各种不同的应用程序的镜头§适用于大多数户外应用的耐久性(IP66)§容易升级& 同时维修模块和夹具水平§模块功效:85lm / W 或以上(Tcase = 50℃, 无SMPS)Seoul Square 20F, Namdaemunno 5-ga, Jung-gu, Seoul, 100-714, Korea.We provide right solutions to LED Lighting10W/15W 类户外模块175W 路灯(Street Light)Seoul Square 20F, Namdaemunno 5-ga, Jung-gu, Seoul, 100-714, Korea.We provide right solutions to LED Lighting10W/15W 类户外模块120W 路灯(Street Light)Seoul Square 20F, Namdaemunno 5-ga, Jung-gu, Seoul, 100-714, Korea.We provide right solutions to LED Lighting10W/15W 类户外模组区域灯(Area Light)Seoul Square 20F, Namdaemunno 5-ga, Jung-gu, Seoul, 100-714, Korea.We provide right solutions to LED Lighting10W/15W 类户外模块草坪灯(Bollard)Seoul Square 20F, Namdaemunno 5-ga, Jung-gu, Seoul, 100-714, Korea.We provide right solutions to LED Lighting10W/15W 类户外模组投光灯(Flood Light)Seoul Square 20F, Namdaemunno 5-ga, Jung-gu, Seoul, 100-714, Korea.We provide right solutions to LED Lighting10W/15W 类户外模组High BaySeoul Square 20F, Namdaemunno 5-ga, Jung-gu, Seoul, 100-714, Korea.We provide right solutions to LED Lighting10W/15W class Outdoor ModuleRace Way_BartypeSeoul Square 20F, Namdaemunno 5-ga, Jung-gu, Seoul, 100-714, Korea.We provide right solutions to LED Lighting10W/15W class Outdoor ModuleRace Way_CylindertypeProviding right solutions to LED Lighting。