T2热敏打印机说明书
- 格式:pdf
- 大小:338.33 KB
- 文档页数:38
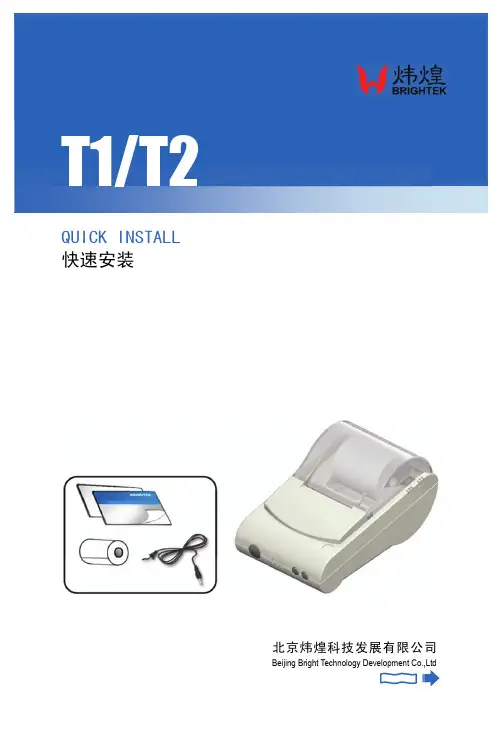
QUICK INSTALL 快速安装 北京炜煌科技发展有限公司Beijing Bright Technology Development Co.,Ltd快速安装手册●打印机各部件一览 Printer Parts Names1.纸仓盖 Paper Case Cover2.机头盖 Panel3.SEL 键 SEL Button4.LF 键 LF Button5.纸仓 Paper Case6.色带/打印头 Ribbon/ Printer head7.指示灯 Indicator Light 8.备用接口 Reserve Case 9.数据接口 Interface Connector 10.电源接口 Power Connector按钮开关的操作及指示灯打印机上电后电源指示灯保持常亮状态,状态指示灯常亮为正常待机状态,即在线,打印机可接收数据,不亮为离线状态,不能接收数据。
热敏型打印机缺纸时灯闪,不能接收数据。
SEL 键切换打印机在线离线,离线状态下LF 键为走纸键。
自检测方式打印机上电之后,按SEL 键使打印机离线(新针打和热敏型省略此步骤),按住LF 键不放,接着按下SEL 键,同时放开LF 键和SEL 键,即打出自检条。
Operation SpecificationAfter turning on the printer, the indicator light is on, shows that the printer is online, and it is ready to receive data. The light is off, shows that the printer is offline, and it can not receive data. When the light flash to show the paper is lacking, and the printer can not receive data.The SEL button can switch online or offline status. When the printer is offline, press the LF button, and the printer will feed paper.The Self TestTurn on the printer, press the SEL button to make printer offline (when use new dot matrix printing and thermal printing model, no need to refer this step), press the LF button, and don ’t release, then press the SEL button, and then release the both two buttons at the same time,and then the printer will print out the self-check scrip.快速安装手册●尺寸 SizeWH-T1/T2型尺寸 Product Size:外形尺寸:Outline Dimension: 180mm×110mm×90mm 挂孔孔距:Installation Hole Distance: 93.5mm●安装 Installation安装方法:打印机挂在设备上。
热敏打印机使用说明书Thermal Printer User Manual一、打印机自检(LF键为指示灯)Printer self test(LF key is indicator light)打印机在关机状态下,按住LF键不松手同时给打印机上电,松手,打印机会打印出自检条。
When the printer is power off,press LF key and meanwhile power on,release the key,the printer will print self test paper.二、打印机设置(LF键为指示灯)Printer setting(LF key is indicator light)打印机在关机状态下,按住LF键同时给打印机上电,停顿5秒后松手,打印机进入设置模式,并打印出设置报告,见下(按键次数对应选择设置项前面序号):When the printer is power off,press LF key and meanwhile power on,release after 5 seconds,the printer will enter intosetting mode,and it will print out setting report,see below(the number of pressing key will be equal to the below according item number):(1)退出设置模式exit setting mode(2)恢复默认配置recover default setting(3)设置打印机方向set printing direction(4)选择字符点阵choose character dots(5)选择打印机功耗choose printer power comsuption(6)设置打印浓度set printing density(7)设置串口波特率set serial baud rate(8)设置串口效验位set serial parity(9)选择HEX打印set HEX printing(以下彩色字体部分均为打印机打印出的提示,后面黑色字体部分是我们加的操作说明)(The below colorful characters are prompts for printer print out,and the black characters are operation instruction which we added)(1)退出设置模式(按1下LF键,走一小段空白行,退出设置模式)exit setting mode(Press LF key one time,and the paper feed one line,it will exitsetting mode)(2)恢复默认配置(连续按2下LF键,恢复默认设置)recover default setting(Press LF key for 2 times,and it will recover default setting)(1)返回上级设置(此时不想保存刚才设置,则按1下LF键回到设置主页)Return to last setting( If do not want to save the setting just now,then press LFkey for one time to return to setting homepage)(2)确认恢复默认设置(连续按2下LF键,打印机打印出“恢复默认设置,系统复位”的字样提示)Confirm recover default setting(Press LF key for 2 times,the printer will printout the prompt"recovery default setting,system reset")(3)设置打印机方向(连续按3下LF键,进入打印方向的设置,打印机打印出3个选项供设置)Set printing direction(Press LF key for 3 times,it will enter into setting printing direction,the printer will print out 3 items for choose)(1)返回上级设置(此时不想设置打印机方向,则按1下LF键回到设置主页)Return to last setting(If do not want to set printing direction now,then press LFkey for one time to return to setting homepage)(2)从左到右打印(连续按2下LF键,打印机打印出下面3行字)From left to right printing(Press LF key for 2 times,the printer will print out thebelow 3 lines characters:)从左到右打印From left to right printing(1)返回上级设置(此时不保存该打印方向,可按1下LF键,返回上级设置)Return to last setting(If do not want to save this printing direction,thenpress LF key for one time,then it will to return to last setting)(2)确认(若确认则连续按2下LF键回到设置主页,打印机方向设置成功) Confirm(If confirm,then press LF key for 2 times to return to settinghomepage,then setting printing direction successfully)(3)从右到左打印(连续按3下LF键,打印机打印出下面3行字)From right to left printing(Press LF key for 3 times,then the printer will printout the below 3 lines characters:)从右到左打印From right to left printing(1)返回上级设置(此时不保存该打印方向,可按1下LF键,返回上级设置)Return to last setting(If do not want to save this printing direction,thenpress LF key for one time,then it will to return to last setting)(2)确认(若确认则连续按2下LF键回到设置主页,打印机方向设置成功)Confirm(If confirm,then press LF key for 2 times to return to settinghomepage,then setting printing direction successfully)(4)选择字符点阵(连续按4下LF键,选择字符点阵,打印机会打印出3个选项供设置)Choose character dots(Press LF key for 4 times,choose character dots,the printer will print out 3 items for choose)(1)返回上级设置(此时不设置字符点阵,按1下LF键回到设置主页)Return to last setting(If do not want to set character dots now,then press LF keyfor one time to return to setting homepage)(2)选择8*16字符16*16汉字(连续按2下LF键,打印机打印出下面3行提示)Choose 8*16 character 16*16 chinese character(Press LF key for 2 times,theprinter will print out the below 3 lines prompts)选择8*16字符16*16汉字Choose 8*16 character 16*16 chinese character(1)返回上级设置(此时不保存该设置,可按1下LF键,返回上级设置)Return to last setting(If do not want to save this setting,then press LF key forone time,then it will to return to last setting)(2)确认(若确认则连续按2次LF键回到设置主页,字符点阵设置成功)Confirm(If confirm,then press LF key for 2 times to return to settinghomepage,then setting character dots successfully)(3)选择12*24字符24*24汉字(连续按3下LF键,打印机打印出下面3行提示)Choose 12*24 character 24*24 chinese character(Press LF key for 3 times,theprinter will print out the below 3 lines prompts)选择12*24字符24*24汉字Choose 12*24 character 24*24 chinese character(1)返回上级设置(此时不保存该设置,可按1下LF键,返回上级设置)Return to last setting(If do not want to save this setting,then press LF key forone time,then it will to return to last setting)(2)确认(若确认则连续按2次LF键回到设置主页,字符点阵设置成功)Confirm(If confirm,then press LF key for 2 times to return to settinghomepage,then setting character dots successfully)(5)选择打印机功耗(联系按5下LF键,选择打印机功耗,打印机会打印出6下面6个选项,请根据提示操作)Choose printer power comsuption(Press LF key for 5 times,choose printer power comsuption,the printer will print out the bleow 6 items,please operate according to the below prompts)(1)返回上级设置Return to last setting(2)I级功耗(最低)(连续按2下LF键,打印机打印出下面3行字样)I leverl power comption(the lowest) (Press LF key for 2 times,the printer will printout the below 3 lines prompts)I级功耗(最低)I leverl power comption(1)返回上级设置(此时不保存该设置,可按1下LF键,返回上级设置)Return to last setting(If do not want to save this setting,then press LF key forone time,then it will to return to last setting)(2)确认(若确认则连续按2次LF键回到设置主页,打印机功耗设置成功)Confirm(If confirm,then press LF key for 2 times to return to settinghomepage,then setting printer power comsuption successfully) (3)II级功耗(连续按3下LF键,打印机打印出下面3行字样)II leverl power comption(Press LF key for 3 times,the printer will print out thebelow 3 lines prompts)II级功耗II leverl power comption(1)返回上级设置(此时不保存该设置,可按1下LF键,返回上级设置)Return to last setting(If do not want to save this setting,then press LF key forone time,then it will to return to last setting)(2)确定(若确认则连续按2次LF键回到设置主页,打印机功耗设置成功)Confirm(If confirm,then press LF key for 2 times to return to settinghomepage,then setting printer power comsuption successfully) (4)III级功耗(连续按4下LF键,打印机打印出下面3行字样)III leverl power comption(Press LF key for 4 times,the printer will print out thebelow 3 lines prompts)III级功耗III leverl power comption(1)返回上级设置(此时不保存该设置,可按1下LF键,返回上级设置)Return to last setting(If do not want to save this setting,then press LF key forone time,then it will to return to last setting)(2)确认(若确认则连续按2次LF键回到设置主页,打印机功耗设置成功)Confirm(If confirm,then press LF key for 2 times to return to settinghomepage,then setting printer power comsuption successfully) (5)IV级功耗(连续按5下LF键,打印机打印出下面3行字样)IV leverl power comption(Press LF key for 5 times,the printer will print out thebelow 3 lines prompts)IV级功耗IV leverl power comption(3)返回上级设置(此时不保存该设置,可按1下LF键,返回上级设置)Return to last setting(If do not want to save this setting,then press LF key forone time,then it will to return to last setting)(4)确认(若确认则连续按2次LF键回到设置主页,打印机功耗设置成功)Confirm(If confirm,then press LF key for 2 times to return to settinghomepage,then setting printer power comsuption successfully) (6)V级功耗(最高)(连续按6下LF键,打印机打印出下面3行字样)V leverl power comption(the highest) (Press LF key for 6 times,the printer will printout the below 3 lines prompts)V级功耗(最高)V leverl power comption(the highest)(1)返回上级设置(此时不保存该设置,可按1下LF键,返回上级设置)Return to last setting(If do not want to save this setting,then press LF key forone time,then it will to return to last setting)(2)确认(若确认则连续按2次LF键回到设置主页,打印机功耗设置成功)Confirm(If confirm,then press LF key for 2 times to return to settinghomepage,then setting printer power comsuption successfully)(6)设置打印浓度(连续按6下LF键,开始设置打印浓度,打印机会打印出下面3个选项,请根据提示操作)Set printing density(Press LF key for 6 times,set printing density,the printer will print out the bleow 3 items,please operate according to the below prompts)(1)确认设置后返回(此时不设置浓度,按1下LF键回到设置主页)Confirm setting and return back(If do not want to set print density now,press LFkey for one time to return to setting homepage)(2)增量调整打印浓度(进入浓度设置后,连续按两2下LF键进行增量设置,打印机会打印出当前的浓度序号;若还需增加浓度,再连续按2下进行增量浓度设置,直到设置到理想浓度,按1下LF键确认设置后返回到设置主页)Increase the printing density( After entering the setting printing density mode,pressLF key for 2 times to increase the printing density,the printer will print out the number for current printer density:If still want toincrease the density,press the LF key for 2 times again to increasethe printer density,and again to the density you want. Press LF key for 1 time toconfirm the setting and return back to setting homepage)(3)减量调整打印浓度(进入浓度设置后,连续按两3下LF键进行减量设置,打印机会打印出当前的浓度序号;若还需增加浓度,再连续按3下进行减量浓度设置,直到设置到理想浓度,按1下LF键确认设置后返回到设置主页)Decrease the printing density( After entering the setting printing densitymode,press LF key for 3 times to decrease the printing density,the printer will print out the number for current printer density:If still want todecrease the density,press the LF key for 3 times again to decreasethe printer density,and again to the density you want. Press LF key for 1 time toconfirm the setting and return back to setting homepage)(7)设置串口波特率(连续按7下LF键,开始设置串口波特率,打印机会有如下8个选项,请按需要选择)Set serial baud rate(Press LF key for 7 times,set the serial baud rate,the printer will print out the below 8 items for choose)(1)返回上级设置(此时不设置串口波特率,按1下LF键回到设置主页)Return to last setting(If do not want to set serial baud rate,press LF key for onetime to return back to homepage)(2)1200bps(连续按2下LF键,打印机打印出下面字样)1200bps(Press LF key for 2 times,the printer will print out the below prompts选择1200bps Choose 1200bps(1)返回上级设置(此时不保存该设置,可按1下LF键,返回上级设置)Return to last setting(If do not want to save this setting,press LF key for onetime,then it will to return to last setting)(2)确认(若确认则连续按2次LF键回到设置主页,串口波特率设置成功)Confirm(If confirm,then press LF key for 2 times to return to settinghomepage,then setting serial baud rate successfully)(3)2400bps(连续按3下LF键,打印机打印出下面字样)2400bps(press LF key for 3 times,the printer will print out the below prompts)选择2400bps Choose 2400bps(1)返回上级设置(此时不保存该设置,可按1下LF键,返回上级设置)Return to last setting(If do not want to save this setting,press LF key for onetime,then it will return to last setting)(2)确认(若确认则连续按2次LF键回到设置主页,串口波特率设置成功)Confirm(If confirm,then press LF key for 2 times to return to settinghomepage,then setting serial baud rate successfully)(4)4800bps(连续按4下LF键,打印机打印出下面字样)4800bps(press LF key for 4 times,the printer will print out the below prompts)选择4800bps Choose 4800bps(1)返回上级设置(此时不保存该设置,可按1下LF键,返回上级设置)Return to last setting(If do not want to save this setting,press LF key for onetime,then it will return to last setting)(2)确认(若确认则连续按2次LF键回到设置主页,串口波特率设置成功)Confirm(If confirm,then press LF key for 2 times to return to settinghomepage,then setting serial baud rate successfully)(5)9600bps(连续按5下LF键,打印机打印出下面字样)9600bps(press LF key for 5 times,the printer will print out the below prompts)选择9600bps Choose 9600bps(1)返回上级设置(此时不保存该设置,可按1下LF键,返回上级设置)Return to last setting(If do not want to save this setting,press LF key for onetime,then it will return to last setting)(2)确认(若确认则连续按2次LF键回到设置主页,串口波特率设置成功)Confirm(If confirm,then press LF key for 2 times to return to settinghomepage,then setting serial baud rate successfully)(6)19200bps(连续按6下LF键,打印机打印出下面字样)19200bps(press LF key for 6 times,the printer will print out the below prompts)选择19200bps Choose 19200bps(1)返回上级设置(此时不保存该设置,可按1下LF键,返回上级设置)Return to last setting(If do not want to save this setting,press LF key for onetime,then it will return to last setting)(2)确认(若确认则连续按2次LF键回到设置主页,串口波特率设置成功)Confirm(If confirm,then press LF key for 2 times to return to settinghomepage,then setting serial baud rate successfully)(7)38400bps(连续按7下LF键,打印机打印出下面字样)38400bps(press LF key for 7 times,the printer will print out the below prompts)选择38400bps Choose 38400bps(1)返回上级设置(此时不保存该设置,可按1下LF键,返回上级设置)Return to last setting(If do not want to save this setting,press LF key for onetime,then it will return to last setting)(2)确认(若确认则连续按2次LF键回到设置主页,串口波特率设置成功)Confirm(If confirm,then press LF key for 2 times to return to settinghomepage,then setting serial baud rate successfully)(8)115200bps(连续按8下LF键,打印机打印出下面字样)115200bps(press LF key for 8 times,the printer will print out the below prompts)选择115200bps Choose 115200bps(1)返回上级设置(此时不保存该设置,可按1下LF键,返回上级设置)Return to last setting(If do not want to save this setting,press LF key for onetime,then it will return to last setting)(2)确认(若确认则连续按2次LF键回到设置主页,串口波特率设置成功)Confirm(If confirm,then press LF key for 2 times to return to settinghomepage,then setting serial baud rate successfully)(8)设置串口效验位(联系按8下LF键,打印出3个选项供设置)Set serial Parity(press LF key for 8 times,the printer will print out the below 3 items for choose)(1)返回上级设置(此时不设置串口效验位,按1下LF键回到设置主页)Return to last setting(If do not want to set serial parity,press LF key for onetime,then it will return to setting homepage)(2)无效验(连续按2下LF键,打印机打印出下面字样)No Parity(press LF key for 2 times,the printer will print out the below prompts)选择无效验Choose No Parity(1)返回上级设置(此时不保存该设置,可按1下LF键,返回上级设置)Return to last setting(If do not want to save this setting,press LF key for onetime,then it will return to last setting)(2)确认(若确认则连续按2次LF键回到设置主页,效验位设置成功)Confirm(If confirm,then press LF key for 2 times to return to settinghomepage,then setting serial parity successfully)(3)有效验(连续按3下LF键,打印机打印出下面字样)with Parity(press LF key for 3 times,the printer will print out the below prompts)选择有效验Choose with Parity(1)返回上级设置(此时不保存该设置,可按1下LF键,返回上级设置)Return to last setting(If do not want to save this setting,press LF key for onetime,then it will return to last setting)(2)确认(若确认则连续按2次LF键回到设置主页,效验位设置成功)Confirm(If confirm,then press LF key for 2 times to return to settinghomepage,then setting serial parity successfully)(9)选择HEX打印(联系按9下LF键,打印出3个选项供设置)Choose HEX printing(Press LF key for 9 times,then the printer will print out the below 3 items for choose)(1)返回上级设置(此时不选择HEX打印,按1下LF键回到设置主页)Return to last setting(If do not want to choose HEX printing,press LF key for onetime,then it will return to setting homepage)(2)正常打印(连续按2下LF键,打印机打印出下面字样)Normal printing(press LF key for 2 times,the printer will print out the belowprompts)选择正常打印Choose normal printing(1)返回上级设置(此时不保存该设置,可按1下LF键,返回上级设置)Return to last setting(If do not want to save this setting,press LF key for onetime,then it will return to last setting)(2)确认(若确认则连续按2次LF键回到设置主页,正常打印设置成功)Confirm(If confirm,then press LF key for 2 times to return to settinghomepage,then setting normal printing successfully)(3)选择HEX打印(连续按3下LF键,打印机打印出下面字样)Choose HEX printing( press LF key for 3 times,the printer will print out the below prompts)选择HEX打印Choose HEX printing(1)返回上级设置(此时不保存该设置,可按1下LF键,返回上级设置)Return to last setting(If do not want to save this setting,press LF key forone time,then it will return to last setting)(2)确认(若确认则连续按2次LF键回到设置主页,HEX打印设置成功)Confirm(If confirm,then press LF key for 2 times to return to settinghomepage,then setting HEX printing successfully)。
热敏打印机使用方法热敏打印机是一种常见的打印设备,广泛应用于商业、办公等领域。
它通过利用热敏纸和热敏打印头的原理,实现文字、图像等信息的打印。
下面将介绍热敏打印机的使用方法,以帮助用户更好地使用这一设备。
一、准备工作在使用热敏打印机之前,首先要确保设备的正常工作。
检查打印机是否连接到电源,并确认电源线插头是否牢固连接。
同时,还需要检查打印机与计算机的连接是否稳定,确保打印机可以正常与计算机进行通信。
二、安装打印纸热敏打印机使用热敏纸进行打印,因此在打印之前需要先安装打印纸。
打开打印机的纸仓盖,将打印纸按照正反方向正确放置在纸仓中,并将纸的末端拉出一段,以便后续的打印操作。
三、调整打印机设置在开始打印之前,需要根据实际需求调整打印机的一些参数设置。
这些参数可能包括打印纸的尺寸、打印质量、打印速度等。
通过打印机的控制面板或相关软件,可以进行这些设置的调整。
在调整设置时,应根据具体需求进行选择,以获得最佳的打印效果。
四、打印测试页在进行正式打印之前,建议先进行打印测试页的操作。
这样可以确保打印机的工作正常,并且可以检查打印效果是否符合预期。
通过打印测试页,可以检查打印的清晰度、对齐度等方面的问题,以便及时调整设置或进行维护。
五、进行打印操作在完成前面的准备工作后,就可以进行正式的打印操作了。
首先,需要打开要打印的文件或图片,并选择打印命令。
在打印设置中,可以选择打印的页面范围、打印份数等参数。
确认设置无误后,点击“打印”按钮即可开始打印。
六、打印维护和保养为了保证热敏打印机的长期稳定工作,需要进行定期的维护和保养。
这包括清洁打印头、清理纸仓和调整打印质量等方面的工作。
定期清洁打印头可以防止灰尘和污垢对打印质量的影响,清理纸仓可以确保打印纸的正常供给,调整打印质量可以获得更好的打印效果。
七、故障排除在使用热敏打印机过程中,可能会遇到一些故障或问题。
例如,打印机无法正常启动、打印质量不佳、打印纸卡纸等。
对于这些问题,可以参考打印机的使用手册或联系售后服务进行故障排除。
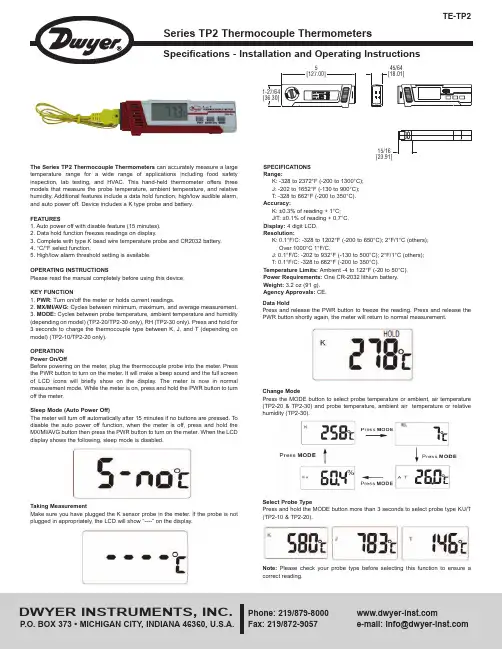
SPECIFICATIONSRange:K: -328 to 2372°F (-200 to 1300°C);J: -202 to 1652°F (-130 to 900°C);T: -328 to 662°F (-200 to 350°C).Accuracy:K: ±0.3% of reading + 1°C;J/T: ±0.1% of reading + 0.7°C.Display: 4 digit LCD.Resolution:K: 0.1°F/C: -328 to 1202°F (-200 to 650°C); 2°F/1°C (others);Over 1000°C 1°F/C.J: 0.1°F/C: -202 to 932°F (-130 to 500°C); 2°F/1°C (others);T: 0.1°F/C: -328 to 662°F (-200 to 350°C).Temperature Limits: Ambient -4 to 122°F (-20 to 50°C).Power Requirements: One CR-2032 lithium battery.Weight: 3.2 oz (91 g).Agency Approvals: CE.The Series TP2 Thermocouple Thermometerscan accurately measure a largetemperature range fora wide rangeof applications includingfood safetyinspection, lab testing, and HVAC. This hand-held thermometer offers threemodels that measure the probe temperature, ambient temperature, and relativehumidity. Additional features include a data hold function, high/low audible alarm,and auto power off. Device includes a K type probe and battery.FEATURES1. Auto power off with disable feature (15 minutes).2. Data hold function freezes readings on display.3. Complete with type K bead wire temperature probe and CR2032 battery.4. °C/°F select function.5. High/low alarm threshold setting is available.OPERATING INSTRUCTIONSPlease read the manual completely before using this device.KEY FUNCTION1. PWR: Turn on/off the meter or holds current readings.2. MX/MI/AVG:Cycles between minimum, maximum, and average measurement.3. MODE:Cycles between probe temperature, ambient temperature and humidity(depending on model) (TP2-20/TP2-30 only), RH (TP2-30 only). Press and hold for3 seconds to charge the thermocouple type between K, J, and T (depending onmodel) (TP2-10/TP2-20 only).OPERATIONPower On/OffBefore powering on the meter, plug the thermocouple probe into the meter. Pressthe PWR button to turn on the meter. It will make a beep sound and the full screenof LCD icons will briefly show on the display. The meter is now in normalmeasurement mode. While the meter is on, press and hold the PWR button to turnoff the meter.Sleep Mode (Auto Power Off)The meter will turn off automatically after 15 minutes if no buttons are pressed. Todisable the auto power off function, when the meter is off, press and hold theMX/MI/AVG button then press the PWR button to turn on the meter. When the LCDdisplay shows the following, sleep mode is disabled.Taking MeasurementMake sure you have plugged the K sensor probe in the meter. If the probe is notplugged in appropriately, the LCD will show “----” on the display.545/64Data HoldPress and release the PWR button to freeze the reading. Press and release thePWR button shortly again, the meter will return to normal measurement.Change ModePress the MODE button to select probe temperature or ambient, air temperature(TP2-20 & TP2-30) and probe temperature, ambient air temperature or relativehumidity (TP2-30).Select Probe TypePress and hold the MODE button more than 3 seconds to select probe type K/J/T(TP2-10 & TP2-20).Note: Please check your probe type before selecting this function to ensure acorrect reading.to normal measurement.Change UnitWhen the device is off press the MODE and PWR button at the same time to enter function. Press the MODE button to select °C or °F. Pressbutton again to save the unit.Alarm SettingStep 1. Hi Temp. Alarm SelectWhen the meter is off, press the MODE and PWR button at the same time. Pass Step 2. Hi Temp. Alarm SettingWhen Hi Temp. alarm is on, “Hi Set” icons with the default value 50°C (122°F) or the last setting will appear on the LCD. Keep pressing the MODE button to increase and release the button when you reachStep 3. Lo Temp. Alarm Select Step 4. Lo Temp. Alarm SettingPWR button to save Lo Temp. settings, and go back to normal measurement. Example 1 - Set Hi Temp. Alarm at 1283°CError MessagesNote: If above error messagesInstruments, Inc. for technical service.Step 1:Keep pressing the MODE button, the numbers willE-2E-3E-4E-5E-6Humidity sensor is failed.Temperature sensor is failed.Operation temperature is too high.Operation temperature is too low.Some hardware has failed.。

热敏票据打印机POS-58使用手册一、概述 (2)1、简介 (2)2、主要特点 (2)3、技术规格 (2)4、注意事项 (3)二、打印机安装 (3)1、部件清单 (3)2、打印机外型 (4)3、连接打印机 (4)3.1 串行接口型 (4)3.2 并行接口型 (5)3.3 USB接口型 (6)3.4以太网接口型 (6)4、连接钱箱 (6)三、打印机使用 (7)1、操作控制面板 (7)2、在线和离线 (7)3、进纸 (8)4、设定打印浓度 (8)5、设定打印速度 (8)6、设定波特率 (8)7、打印测试模式 (9)8、调试输出模式 (9)9、安装纸卷 (9)9、撕纸方法 (10)10、清洗打印机芯 (10)四、USB驱动程序的安装 (11)1、驱动程序的安装 (11)2、驱动程序的卸载 (12)3、系统需求 (13)五、PC工具软件使用 (13)1、工具软件的安装 (13)2、工具软件主界面 (15)六、故障排除 (15)七、ESC/POS打印控制命令 (16)1、打印命令一览表 (16)2、打印命令详解 (17)2.1 打印命令 (17)2.2 行间距设置命令 (18)2.3 字符设置命令 (18)2.4 图形打印命令 (20)2.5 钱箱控制命令 (21)2.6 按键控制命令 (22)2.7 初始化命令 (22)2.8 状态传输命令 (22)2.9 条码打印命令 (23)2.10位置和页模式命令 (25)附录1:代码页 (27)附录B:国际字符集 (29)声明此为A级产品,在生活环境中,该产品可能会造成无线电干扰,可能需要用户对其干扰采取切实可行的措施。
本公司保留对说明书修改而不通知用户的权利。
一、概述1、简介欢迎您使用POS-58行式热敏打印机。
POS-58是一款高性能的行式热敏打印机,具有打印速度快、噪声低、可靠性高等特点,可广泛用于商业POS系统、餐厅收费系统等各种需要现场打印输出的场所。
热敏打印机使用教程热敏打印机是一种常见的打印设备,广泛应用于各行各业。
它使用热敏打印头将文字、图像等内容印刷到热敏纸上,具有打印速度快、噪音小、成本低等优点。
下面是一份关于热敏打印机使用的教程,希望能对您有所帮助。
一、准备工作1. 确保热敏打印机已连接到电源并打开开关。
2. 将热敏纸装入打印机的纸仓中,注意方向要正确。
3. 连接打印机与电脑的数据线,并确保两端连接牢固。
二、安装打印驱动1. 在电脑上打开浏览器,搜索并下载热敏打印机相应的驱动程序。
2. 运行驱动程序安装包,按照提示完成驱动的安装过程。
3. 安装完成后,打开控制面板,选择“打印机与扫描仪”。
4. 点击“添加打印机或扫描仪”,选择热敏打印机,并完成添加过程。
三、设置打印参数1. 打开待打印的文档或图片文件。
2. 在打印设置中选择热敏打印机作为默认打印设备。
3. 根据需求设置打印方向、纸张类型、打印质量等参数。
4. 确认设置无误后,点击“打印”按钮即可开始打印。
四、维护与保养1. 定期清洁热敏打印头,可使用清洁液或棉签轻轻擦拭打印头表面。
2. 注意避免暴露在潮湿环境中,以免影响打印质量。
3. 当打印纸用完时,及时补充新的热敏纸,避免因缺纸而无法打印。
五、常见问题及解决方法1. 打印内容不清晰:请检查热敏打印头是否脏污,需要进行清洁。
2. 打印纸张卡住:请检查纸张是否对齐正确,打印机是否卡纸,及时清除卡纸。
3. 打印结果完全空白:请检查热敏纸是否正确安装,纸张是否用完。
4. 打印速度过慢:请确认电脑与打印机之间的数据传输是否正常,可尝试重新安装驱动。
六、注意事项1. 操作时请注意热敏打印头的安全,避免用力碰撞或触摸。
2. 使用过程中请避免将液体或其他物质溅至打印机上。
3. 使用合适的纸张,并确保纸张与打印设备兼容。
以上就是关于热敏打印机使用的教程,希望对您理解和使用热敏打印机有所帮助。
在实际操作过程中,如果遇到问题,也可参考说明书或询问厂家的技术支持。
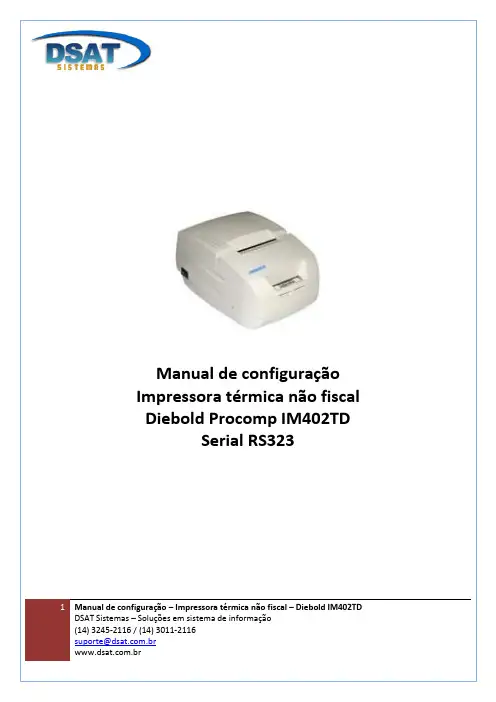
2 Manual de configuração – Impressora térmica não fiscal – Diebold IM402TDDSAT Sistemas – Soluções em sistema de informação (14) 3245-2116 / (14) 3011-21161 – Desligue a impressora no botão localizado aolado esquerdo do equipamento.2 – Pressione o botão “A vanço ” localizado na parte frontal do equipamento, e com o botão pressionado ligue o equipamento, não solte o botão até o terminoda impressão.3 – Um menu será impresso no final, no qual suas opções podem variar de uma versão para outra da impressora. Pressione o botão “Avanço” “X” vezes,onde “X” é numero correspondente ao menu“Configuração”.4 – Será impresso o numero do menu selecionado, se a opção estiver correta, pressione o botão “Avanço” e mantenha -o pressionado até que opróximo menu seja impresso.5 – Selecione o menu “Interface” pressionando 1 vezo botão “Avanço”.6 – Para confirmar a opção 1, pressione o botão “Avanço” e mantenha -o pressionado até que opróximo menu seja impresso.3 Manual de configuração – Impressora térmica não fiscal – Diebold IM402TDDSAT Sistemas – Soluções em sistema de informação (14) 3245-2116 / (14) 3011-21167 – Selecione o menu “Serial (RS323)” pressionando3 vezes o botão “Avanço”.8 – Para confirmar a opção 3, pressione o botão “Avanço” e mantenha -o pressionado até que opróximo menu seja impresso.9 – Selecione o menu “Velocidade” pressionando 2vezes o botão “Avanço”.10 – Para confirmar a opção 2, pressione o botão “Avanço” e mantenha -o pressionado até que opróximo menu seja impresso.11 – Selecione o menu “115200 bps” pressionando 5vezes o botão “Avanço”.12 – Para confirmar a opção 5, pressione o botão “Avanço” e mantenha -o pressionado até que opróximo menu seja impresso.。
Uniwell PX-6700 and PX-6750 type 03 operation Manual2004-8-31PX-6700/675003 typeOperation ManualPX-6700 2-sheet thermal printerPX-6750 1-sheet thermal printerTHE SOCKET-OUTLET SHALL BE INSTALLED NEAR THE EQUIPMENT AND SHALL BEEASILY ACCESSIBLE.LA PRISE DOIT ETRE PRES DE L'APPAREIL ET FACILE D'ACCES.Note: This equipment has been tested and found to comply with the limits for a Class B digital device, pursuantto part 15 of the FCC Rules. These limits are designed to provide reasonable protection against harmfulinterference in a residential installation. This equipment generates, uses and can radiate radio frequency energyand, if not installed and used in accordance with the instructions, may cause harmful interference to radiocommunications. However, there is no guarantee that interference will not occur in a particular installation. Ifthis equipment does cause harmful interference to radio or television reception, which can be determined byturning the equipment off and on, the user is encouraged to try to correct the interference by one or more of thefollowing measures:-- Reorient or relocate the receiving antenna.-- Increase the separation between the equipment and receiver.-- Connect the equipment into an outlet on a circuit different from that to which the receiver is connected.-- Consult the dealer or an experienced radio/TV technician for help.CONTENTSATTENTION (1)I.INTRODUCTION (2)II.INSTALLATION (3)Replacing paper rolls for 2-sheet thermal printer (4)Attentions for 2-sheet thermal printer (5)Replacing paper rolls for 1-sheet thermal printer (6)In case that the Auto-Cutter on 1-sheet thermal printer does not return (7)III.DISPLAY (8)IV.STANDARD KEY LAYOUT (9)V.KEY EXPLANATION (11)VI.OPERATION SEQUENCES (16)1.Clerk Time-in / Time-out (optional memory board required) (16)2.Clerk Sign-on / Sign-off (17)3.Clerk Interrupt System (18)4.Floating Clerk Interrupt (20)5.PLU (22)a) Manual Price Entry (23)b) Repetition (23)c) Multiplication (24)d) Split Pricing (25)e) Square Entry (Measurement Calculation) (25)f) Price Shift (26)g) Menu Shift (26)h) Link PLU (27)i) Simple Condiment PLU (28)j) PLU Modifier (29)k) Single Item (30)l) Cooking Message & PLU Supplementary Message (31)m) Sales by Weight (32)n) Simple Look Up PLU (38)6.Kitchen Printer (39)7.Media Closing (43)8.Tray Subtotal (44)9.Foreign Currency / Euro Currency (45)a) Closing Methods (45)b) Currency Exchange (46)c) Euro Currency System (46)10.Cheque Cashing / Cheque Printing (48)a) Cheque Cashing (48)b) Cheque Printing on Slip Printer (TP-620) (48)11.Tip Operation (49)a) Tip Amount Input (49)b) Change Kept As Tip (49)12.Mark-up / Mark-down (50)13.Adjustment (Automatic % on Specific Items) (51)14.Amount Plus / Amount Discount (52)st Item Correction (52)16.Void / Scroll Void (53)17.Transaction Void (56)18.Refund / Media Refund (57)19.Tax (60)20.R/A (Received on Account) (63)21.P/O (Paid Out) (63)22.No Sale (64)23.Off Compulsory (64)24.Number of People (65)25.Message (66)26.Slip Validation (TP-620 only) (67)27.Arrangement (68)28.Recall (69)29.Track System - Item Track / Amount Track (70)• Two Track Systems --- Item and Amount Track Systems can be used at the same time (70)• Two Track Number Entry Methods (71)• Clerk Track Assignment Methods (Item Track System Only) (72)• Note for Item / Amount Track System used with Clerk Interrupt System (72)• Track Operation Sequences (73)A. Item Track System (74)a) Opening a New Track & Closing Temporarily (74)b) Picking Up a Track & Closing a Track Finally (77)c) Table # Assigned to an Item Track (80)d) Track Transfer to a New Track or a Designated Track [SF-15.b=1] (82)e) Item Transfer to Item Track in Scroll Display Mode (83)f) Item Track Transfer to Amount Track (optional memory board required) (86)g) Item Track Balance Calculation (display only) (87)B. Amount Track System (optional memory board required) (88)30.Floating Item Track / Floating Amount Track (91)31.Previous Balance Plus (PB+) / Previous Balance Minus (PB-) (94)32.Ticket System (95)a) Real-Time Ticket Sample (96)b) After Closing Ticket Sample (97)c) Mixed Ticket Sample (two kinds of combined ticket) (98)d) Multiple Ticket Sample (99)e) Other Notes for Ticket (100)33.Customer File (101)a) New Customer File Making in R or SP Position (102)b) Customer File Editing in SP Position (102)c) Customer File Deleting in SP Position (102)d) Customer File Pick-Up Sequence (102)34.ESF Data Print (optional memory board required) (105)35.Cash Declaration (107)VII.TRAINING (108)VIII.PRINT CONTENTS (110)1. Journal Print Contents (110)2. Receipt / Slip Print Contents (110)3. Post-Receipt (110)IX.REPORTS (111)REPORT SEQUENCE (111)IRC REPORT SEQUENCE (115)FLASH IRC REPORTS (117)TRANSACTION REPORT SAMPLES (118)X.WARNING MESSAGES (129)XI.IRC MESSAGES (133)Notes1.The contents of this manual are subject to change without notice.2.We can not be held responsible if other products, which are not approved by us, are used foroptions or expendable supplies.This is a “Table of Contents preview” for quality assuranceThe full manual can be found at /estore/catalog/ We also offer free downloads, a free keyboard layout designer, cable diagrams, free help andsupport. : the biggest supplier of cash register and scale manuals on the net。
便携式热敏打印机用户手册山东新北洋信息技术股份有限公司声明本手册内容未经同意内容不得随意更改,山东新北洋信息技术股份有限公司(以下简称新北洋)保留在技术、零部件、软件和硬件上改善产品的权利。
用户如果需要与产品有关的进一步信息,可以与新北洋或经销商联系。
本手册的任何章节没有新北洋的书面许可不得以任何形式、通过任何手段进行复制或传送。
版权本手册于2017年印制,版权属于新北洋。
中国印制。
1.0版本。
商标新北洋使用的注册商标是。
警告、注意警告必须遵守,以免伤害人体,损坏设备。
注意给出了打印机操作的重要信息及提示。
新北洋通过下列管理体系认证ISO9001 质量管理体系认证ISO14001环境管理体系认证OHSAS18001职业健康安全管理体系认证IECQ QC 080000有害物质过程管理体系认证联系方式地址:山东省威海市高技区火炬路169号保修、咨询电话:400-618-1368、800-860-1368 传真:+86—631—5656098QQ:4006181368网址:产品通过下列安全认证:安全须知在操作使用打印机之前,请仔细阅读下面的注意事项:1.安全警告警告:不要触摸打印机的撕纸刀。
警告:打印头为发热部件,打印过程中和打印刚结束,不要触摸打印头以及周边部件。
警告:不要触摸打印头表面和连接接插件,以免因静电损坏打印头。
2.注意事项1)打印机应远离水源并避免阳光、强光和热源的直射。
2)不要在高温,湿度大以及污染严重的地方使用和保存打印机。
3)避免将打印机放在有振动和冲击的地方。
4)如果打印机表面表面结露,在露水消除之前不要打开打印机的电源。
5)将打印机的充电器连接到一个适当的接地插座上。
避免与大型电机或其它能够导致电源电压波动的设备使用同一插座。
6)如果较长时间不使用打印机,请拿出打印机的电池。
7)避免水或导电的物质(例如:金属)进入打印机内部,一旦发生,应立即拿出电池。
8)打印机不得在无纸的状态下打印,否则将严重损害打印胶辊和热敏打印头。

如何使用热敏打印机
如何使用热敏打印机
如何使用热敏打印机
热敏打印机的原理和传真很类似的,它们打印出来的文字,图像都是通过加热然后产生化学反应出来的,温度越高,反应的越快。
热敏打印机所需要的纸也叫做热敏纸,热敏纸也叫做传真纸,这个纸是加工过的,因为好一点的热敏纸是可以保存很长时间的。
热敏纸是在没有加工过的纸上涂上化学用品,比如荧光剂,双酚什么的,它的化学添加剂很多。
难怪有人说用多了容易不孕。
好的热敏纸是分为三层的。
做热敏纸难度还是有点大的,所以现在买的人也分不太清好的和坏的,要是买到不好的,严重的话还会影响到热敏打印机,会使得你又得重新去买一个新的,要是不严重的话,大多数是打印出来的小票会深一块浅一块,这时候你千万不要以为是打印机的问题,一般来说都是热敏纸惹的祸。
热敏打印机的噪音小很多,打印的也是比较快的',要是纸好的话,打印出来的文字和图像都是非常的清晰的。
买来了热敏打印机,怎么安装呢?我来介绍一下,我们要打开菜单,选择打印机和传真,接着添加打印机,系统会弹出向导,点击下一步,现在弹出来的窗口,把第一项打勾,第二项不要打,把以下端口改为LPT1,然后就是磁盘安装了,点击确定,打开我们安装好的那个文件,把文件打开,它会自动跳出“厂商文件复制来源”点击确定,接着就会跳出热敏打印机的型号,把型号点出来,点下一步,又会出现让你选择的,这次选择第二个,选择好后,点下一步,把打印机设置为默认,下一步选择不共享或共享,这个由你,再把测试页打开,就完成了。
这时候我们需要先打印一张试试看,在打印的时候会出现一个windows的测试页,点击完成后,还会跳出一个小方框,点击确定。
Ok,完成了。
M01/M02便携热敏打印机使用说明2009-08-31 北京炜煌科技发展有限公司版本控制信息版本日期拟稿和修改说明V01 2009-6-19 创建第1章 安全信息为有效、安全地使用您的打印机,请遵守以下规定。
在使用打印机前详细阅读操作指南,以掌握正确的使用方法。
将本[使用说明]放置在方便易取的位置,以便随时取出参阅和寻找问题解答。
1.1读者本手册的受众是系统软件开发人员、硬件设计人员和应用设计人员1.2关于本手册本文档分成多个章节,每个章节与主要的特性相对应。
1.3F 安全上的注意事项假如漠视下述注意内容,错误使用打印机的话,可能造成打印机损坏。
△ 注 意·如果出现卡纸情况,务必先断电,等待 10 秒钟,让机头冷却下来,才开始除掉塞纸。
·勿将本产品放置在潮湿或多尘的环境中,重压,不能堆放。
1.4F 使用上的注意事项1.4.1纸卷·必须使用符合要求的纸卷(带纸轴)。
勿选用末端被黏合在纸轴上的纸卷,否则打印机便无法正确测出纸卷末端,也可能对打印机构造成损害。
不要长时间打印数据。
第2章 操作说明2.1开机持续按住电源开关(面板左键)3秒钟,电源打开。
工作状态指示灯闪亮。
少于3秒钟电源不动作。
2.2关机在开机状态,按压电源开关(面板左键)3秒钟,电源关闭,工作状态指示灯熄灭。
少于3秒钟电源不动作。
2.3走纸按压走纸键(面板右键),按下开始进纸,放开停止进纸。
自检在关机状态下按压走纸键(面板右键),然后开机,可以打印自检2.4设置参数在关机状态下按下设置键(中间键),然后开机,可进入设置菜单,打印如下内容:1.Setup Infrared(设置红外)2.Setup 232(设置232串口)3.Print Direction(改变方向)4.Gray Adjust(改变灰度)5.Poweroff(关电源)6.Font&Codepage(选择字体或字符集)这时再按住设置键不放可听到咔哒声,当听到“咔哒”声响的次数与要选择的项目前标号数一致时松开按键,即进入该选项。
Thermal Printer User’s ManualCatalogue1 Introduction (2)1.1 Brief introduction (2)1.2 Main features (2)2 Specification (3)2.1 Specification (3)2.2 Printing material requirements (5)2.2.1 Paper parameters (5)2.2.2 Mark paper parameters (5)2.2.3 Paper using attention (5)2.3 Printing and paper cutting position (6)2.3.1 Printing position (6)2.3.2 Paper cutting position (6)3 Appearance and components (7)3.1 Appearance and components (7)3.2 Indicator and buzzer instruction (8)4 Printer installation (9)4.1 Open the package (9)4.2 Requirements of installation position (9)4.3 Connect to power adapter (9)4.4 Connect Communication cables (9)4.5 Connect to cash drawer (9)4.6 Paper roll loading (10)4.6.1 Printing paper type confirmation (10)4.6.2 Loading or change paper roll (10)4.7 DIP switch setting (12)4.8 Printing self-test page (12)4.9 Set Ethernet port IP Address. (12)5 Interface pin definitions (14)5.1 Parallel interface pin definition(DB25M) (14)5.2 USB interface pin definition(standard B type female base) (14)5.3 Power interface pin definition(MPC-3-001B) (15)5.4 Cash drawer interface pin definition(RJ11-6P6C) (15)5.5 Serial port pin definition(DB9F) (16)5.6 Ethernet interface pin definition(RJ45) (16)6 Faults handling (17)6.1 Printer does not work (17)6.2 Indicator error and buzzer warning (17)6.3 Problems when it is printing (17)6.4 Problems when cutting paper (18)6.5 Paper jam and cutter retraction troubles removal (18)1 Introduction1.1 Brief introductionCB821 is a thermal POS printer with auto-cutter. It has good printing quality, high printing speed and high stability, which is widely used in POS system, food service industry and many other fields.CB821 connects other devices via USB, Serial, Ethernet port. It offers drivers for WINDOWS and LINUX operating systems.The supported operating systems are as below:WINDOWS XPWINDOWS 7 32/64WINDOWS 8WINDOWS 10UBUNTU 12.04 32/64UBUNTU 14.04 32/64MAC OS1.2 Main features·Low noise, high-speed printing, 250mm/s·With auto-cutter·With cash drawer interface·USB, Serial, Ethernet port communication, Bluetooth optional.Long-life, high print quality, durable performance.Support mark paper and continuous paper printing.Easy paper loading design, widely used in various industries2 Specification2.1 SpecificationItem ParameterPrinting parameter Printing method Thermal printingResolution 203DPI,8 dots/mmPrinting width 72mm(576 dots)Printing speed About 250 mm/sInterfacesStandard: cash drawer / USB/ serial/ EthernetOptional Wireless Communication: BluetoothPage mode / SupportCommand set / ESC/POS compatible commandsStorageRAM RAM 8M bytes, receive buffer area 1M bytes FLASH FLASH 4M bytes, NV bitmap 256K bytescharactersChinese GB18030 24×24Words, figures ASCII 9×17,12×24User-defined SupportCode pagesOptional international character sets 45TRADITIONAL CHINESECHINESECP437 [U.S.A., Standard Europe]KatakanaCP850 [Multilingual]CP860 [Portuguese]CP863 [Canadian-French]CP865 [Nordic]WCP1251 [Cyrillic]CP866 Cyrillic #2MIK[Cyrillic /Bulgarian]CP755 [East Europe,Latvian 2]IranCP862 [Hebrew]WCP1252 Latin IWCP1253 [Greek]CP852 [Latina 2]CP858 Multilingual Latin Ⅰ+Euro)Iran IILatvianCP864 [Arabic]ISO-8859-1 [West Europe]CP737 [Greek]WCP1257 [Baltic]ThaiCP720[Arabic]CP855CP857[Turkish]WCP1250[Central Europe] CP775WCP1254[Turkish]WCP1255[Hebrew]WCP1256[Arabic]WCP1258[Vietnam]ISO-8859-2[Latin 2]ISO-8859-3[Latin 3]ISO-8859-4[Baltic]ISO-8859-5[Cyrillic]ISO-8859-6[Arabic]ISO-8859-7[Greek]ISO-8859-8[Hebrew]ISO-8859-9[Turkish]ISO-8859-15 [Latin 3] Thai2CP856Chart / Supports different density dots and images printingsSupports grating bitmap printingSupports download bitmap printing, every bitmap size should less than 256K, and the total capacity of download bitmap is 256K.Bar codes 1DUPC-A、UPC-E、EAN-8、EAN13、CODE39、ITF、CODEBAR、CODE128、CODE932D PDF417、QR CodeDetection function Sensor Paper out, cover opened, un-take out printed paper(optional)LED indicatorPower indicator Green Paper out indicator Red Error indicator RedPaper RequirementType Standard thermal receipt paper Width 79.5±0.5mmThickness 0.056~0.1mmDiameter 80mm(Max.)Physical characteristicsPaper loading Easy paper loadingPaper cutting Manual or automatically cut paper Operating condition -10℃~ 50℃,25% ~ 80%RH Storage condition ~40℃~ 70℃,≤93%RH(40℃)Outline dimension 145mm×195mm×144mm(W×L×H)Weight 1.8KgReliabilityTPH life 100kmCutter life 1,000,000 times Motor life 360,000 hoursSoftware function Driver procedure Windows(WIN7/WIN8/WIN10/Vista/XP/2000)Ubuntu 12.04 32/64, Ubuntu 14.04 32/64 MAC OS2.2 Printing material requirements2.2.1 Paper parameters1)Paper type: thermal receipt paper/thermal black mark paper2)Paper width:80±0.5 mm3)Paper roll diameter: 80 mm (Max.)4)Paper thickness:0.065 ~ 0.10mm2.2.2 Mark paper parametersBlack mark imprint position is on the front side of the receipt when using mark paper. The black mark reflectivity is no more than15%, the other parts of paper reflectivity should be more than 85%.There are not any patterns in black mark area, such as ad, and the mark size shall be satisfied with requirements as below:2.2.3 Paper using attentionNote:1)Please use good quality paper, otherwise, it will effect printing quality and even reduce printer head life.2)Don’t make the paper stick on axis.3)Paper will be fading out or reduced thermal sensitivity if it is polluted by chemical or oil, which will affectprinting effects.4)Don’t use nail or hard things to clash printing paper, otherwise, it will be fade out.5)Paper will be fading out if the environment temperature exceeds 70°C. So please take note the temperature,humidity and illumination effects.2.3 Printing and paper cutting position2.3.1 Printing positionL1-Paper storehouse’s width: 82±0.5mmL2-Effective printing width: 80mmL3-Distance between print head to paper storehouse’s left edge (fixed width): 3±0.3mmL4-Distance between print head to paper storehouse’s right edge (fixed width): 3±0.3mmL5-Left margin: Default is 4mmL6-Printing area width: it is set by commands (refer to programming manual). Default is 72mm. L7-Right margin: Default is 4mm.2.3.2 Paper cutting positionThe distance between print head to cutter: 12.5mm3 Appearance and components 3.1 Appearance and componentsFunction instruction of components1)Power switchPress “O” side to power off, press “I” side to power on.2)Power indicator(green)The indicator is on when power on, and it is off when power off.3)Error indicator (Red)Error indicator is on when it detects error. Such as: paper out, upper cover is open and cutter is stocked. 4)Paper indicator(red)Paper out indicator is on when it detects the paper is out. Please put a new paper roll to printer inside then.3.2 Indicator and buzzer instruction1)Function instruction of indicators and buzzerName Status InstructionPower indicator (Power) On Printer is power on Off Printer is power offError indicator (Error) On Printer is in error status Off Printer is in normal statusPaper out indicator (Paper)On Printer is in paper out status Off Printer is in normal statusDescription Power Indicator Error Indicator Paper Indicator Buzzer Open printer cover On On On It rings 6 times by 1.5s.Paper is enough On Off Off Silent Paper out On On On It rings 3 times by 1.5s.Note: Printer detects printer head temperature via thermal resistance. It will cut off print head powerand stop printing if print head is overheat. The print head protection temperature is 80℃.4 Printer installation4.1 Open the packagePlease make sure everything is in good status when you open the package. Otherwise, please contact to distributor in time.4.2 Requirements of installation position1)Put the printer on a stably place.2)Let the printer far away from water, fire, and sunlight.3)Avoid to put it on oscillatory and impassive place.4)Make sure to connect printer with ground safety4.3 Connect to power adapter1)Make sure the printer is power off.2)Connect power adapter’s DC output plug to the printer.3)Connect power adapter’s AC input plug to a power outlet.4)Please be careful to operate correctly when plug out the plug of power cord to avoid damage.4.4 Connect Communication cables1)Make sure the printer is power off.2)Connect communication cable to the printer’s port, and fix it as plug lag spike (or snap spring).3)Connect communication cable to the other side host.4.5 Connect to cash drawer1)Make sure the printer is power off.2)Connect cash drawer to cash drawer port behind the printer.Warning: The Voltage of cash drawer port is 24V. (It cannot connect to telephone cable.)4.6 Paper roll loading4.6.1 Printing paper type confirmationYou can load paper roll to print after connecting power adapter and communication cables. Please make sure the printing paper type before printing. The default paper type is continuous thermal receipt paper.4.6.2 Loading or change paper roll1)Power off the printer.2)Slide or press paper roll storehouse button, and then open storehouse cover.3)Draw out paper roll tap, and load paper roll as below.4)Draw out a printing paper, and leave some on the paper out month, then close the storehouse cover.Warning: Please make sure the paper roll in tense status, if not, it maybe cause paper jam or other problems.5)The status after paper loading4.7 DIP switch settingDIP switch Switch Function On Off Default 1 Cutter Forbidden Enable Off 2 Buzzer Enable Forbidden On 3 Printing density DarkLight Off 4 Multi-byte encoding Single-byte encodingmulti-byte encodingOff 5 Max. number of Printing characters in each line42 48 Off 6 Cash drawer EnableForbiddenOn 7 Baud rate options (bps)Ref. Chart 1Off 8OffChart 1:Baud rate optionsBaud rate Switch 7 Switch 8 Default9600 On Off 19200 19200 Off Off 38400 On On 115200Offon4.8 Printing self-test page1) Make sure the printer loaded paper roll correctly.2) Press down [FEED] button and hold on, then power on the printer, the printer will print a self-test page.4.9 Set Ethernet port IP Address.The printer ’s Ethernet IP address can be set directly via printer inserted web setting page. The operation steps are as below:1. Connect printer and PC in a same Ethernet LAN.2. Print a printer self-test page to get printer recent IP address (self-test page printing operation method refers to “4.8 printer self-test ” instruction):You can find the printer ’s IP address is same as 192.168.1.87 in self-test page “IP address: 192.168.1.87” 3. Set network card IP address in PC and printer IP address as different IP address in the same networksegment.(Such as 192.168.1.xxx, xxx is a number among 1 to 254);4. Please enter address “http://printer IP address ” in browse of PC after making sure that printer connects with Ethernet.(e.g.: If printer IP address is “192.168.1.87”, please enter “http://192.168.1.87”), then press Enter key,open Ethernet port setting page in browser as below:5. Click “Configure Interface” link in the left side, then enter the modified target IP and click “save” button tosave setting. Click “Reboot” button to reset printer if you want the setting to take effect.6. Enter the new IP address as the above step 4 procedure, and re-open printer Ethernet port setting web page, then click “Printer Status” link in the left side. And click “Printer Test Page” button to print self-test page, andcheck the IP Address contents in the self-test page is right or not.5 Interface pin definitionsThe printer has a cash drawer driver interface and many kinds of communication interfaces: parallel, serial (RS-232), USB and Ethernet ports. USB port and cash drawer interfaces are standard interfaces, and it has Ethernet, serial and parallel ports as optional.5.1 Parallel interface pin definition(DB25M)Number Signal Function Number Signal Function1 /STROBE Gate. Low level is10 /ACK Confirm. Low level is effectiveeffective2 DATA0Data bit is 011 BUSY Busy3 DATA1Data bit is 112 PE Paper out4 DATA2Data bit is 213 SEL Choose5 DATA3Data bit is 314 /AUTOFEED Change line automatically. Lowlevel is effective6 DATA4Data bit is 415 /ERROR Error. Low level is effective7 DATA5 Data bit is 516 /INIT Initialize. Low level is effective8 DATA6 Data bit is 617 /SELIN Choose input. Low level iseffective9 DATA7 Data bit is 718-25 GND Ground wire5.2 USB interface pin definition(standard B type female base)1)Pin definitionPin Number Signal name Typical wire color1 VBUS Red2 D- White3 D+ Green4 GND Black5.3 Power interface pin definition(MPC-3-001B)1)Pin definitionPin number Signal name1 +24V2 GND3 N.CSHELL F.G5.4 Cash drawer interface pin definition(RJ11-6P6C)1)Electrical specificationDriver voltage: DC24VDriver current: Max. 0.8A (within 510ms)Cash drawer status tests signal: “L” = 0~0.5 V ; “H” = 3~5 V2)Cash drawer interface socket uses RJ-11 6P type connector;3)Interface signal definitionPin number Signal function1 FG Printer cover2 DRAWER 1 Cash drawer 1 driver signal3 DRSW Cash drawer status detection signal4 VDR Cash drawer driver power5 DRAWER 2 Cash drawer 2 driver signal6 GND Common ground circuitNotes:1) Prohibit socket with power to pull out communication wire plug.2) Please avoid to parallel with strong power when wring communication cables av通讯线布线时应避免和强电并行;3) Communication cables use with shielded cables.5.5 Serial port pin definition(DB9F)Printer serial port is compatible with RS-232, the interface socket is DB9 female socket.User can check interface setting status via printing setting self-test page. Printer default serial interface is set as: baud rate 19200bps, 8 bit data bits, no parity,1 bit stop bit, and the handshakes method is DTR/DSR。
热敏打印机使用说明书Thermal Printer User Manual一、打印机自检(LF键为指示灯)Printer self test(LF key is indicator light)打印机在关机状态下,按住LF键不松手同时给打印机上电,松手,打印机会打印出自检条。
When the printer is power off,press LF key and meanwhile power on,release the key,the printer will print self test paper.二、打印机设置(LF键为指示灯)Printer setting(LF key is indicator light)打印机在关机状态下,按住LF键同时给打印机上电,停顿5秒后松手,打印机进入设置模式,并打印出设置报告,见下(按键次数对应选择设置项前面序号):When the printer is power off,press LF key and meanwhile power on,release after 5 seconds,the printer will enter intosetting mode,and it will print out setting report,see below(the number of pressing key will be equal to the below according item number):(1)退出设置模式exit setting mode(2)恢复默认配置recover default setting(3)设置打印机方向set printing direction(4)选择字符点阵choose character dots(5)选择打印机功耗choose printer power comsuption(6)设置打印浓度set printing density(7)设置串口波特率set serial baud rate(8)设置串口效验位set serial parity(9)选择HEX打印set HEX printing(以下彩色字体部分均为打印机打印出的提示,后面黑色字体部分是我们加的操作说明)(The below colorful characters are prompts for printer print out,and the black characters are operation instruction which we added)(1)退出设置模式(按1下LF键,走一小段空白行,退出设置模式)exit setting mode(Press LF key one time,and the paper feed one line,it will exitsetting mode)(2)恢复默认配置(连续按2下LF键,恢复默认设置)recover default setting(Press LF key for 2 times,and it will recover default setting)(1)返回上级设置(此时不想保存刚才设置,则按1下LF键回到设置主页)Return to last setting( If do not want to save the setting just now,then press LFkey for one time to return to setting homepage)(2)确认恢复默认设置(连续按2下LF键,打印机打印出“恢复默认设置,系统复位”的字样提示)Confirm recover default setting(Press LF key for 2 times,the printer will printout the prompt"recovery default setting,system reset")(3)设置打印机方向(连续按3下LF键,进入打印方向的设置,打印机打印出3个选项供设置)Set printing direction(Press LF key for 3 times,it will enter into setting printing direction,the printer will print out 3 items for choose)(1)返回上级设置(此时不想设置打印机方向,则按1下LF键回到设置主页)Return to last setting(If do not want to set printing direction now,then press LFkey for one time to return to setting homepage)(2)从左到右打印(连续按2下LF键,打印机打印出下面3行字)From left to right printing(Press LF key for 2 times,the printer will print out thebelow 3 lines characters:)从左到右打印From left to right printing(1)返回上级设置(此时不保存该打印方向,可按1下LF键,返回上级设置)Return to last setting(If do not want to save this printing direction,thenpress LF key for one time,then it will to return to last setting)(2)确认(若确认则连续按2下LF键回到设置主页,打印机方向设置成功) Confirm(If confirm,then press LF key for 2 times to return to settinghomepage,then setting printing direction successfully)(3)从右到左打印(连续按3下LF键,打印机打印出下面3行字)From right to left printing(Press LF key for 3 times,then the printer will printout the below 3 lines characters:)从右到左打印From right to left printing(1)返回上级设置(此时不保存该打印方向,可按1下LF键,返回上级设置)Return to last setting(If do not want to save this printing direction,thenpress LF key for one time,then it will to return to last setting)(2)确认(若确认则连续按2下LF键回到设置主页,打印机方向设置成功)Confirm(If confirm,then press LF key for 2 times to return to settinghomepage,then setting printing direction successfully)(4)选择字符点阵(连续按4下LF键,选择字符点阵,打印机会打印出3个选项供设置)Choose character dots(Press LF key for 4 times,choose character dots,the printer will print out 3 items for choose)(1)返回上级设置(此时不设置字符点阵,按1下LF键回到设置主页)Return to last setting(If do not want to set character dots now,then press LF keyfor one time to return to setting homepage)(2)选择8*16字符16*16汉字(连续按2下LF键,打印机打印出下面3行提示)Choose 8*16 character 16*16 chinese character(Press LF key for 2 times,theprinter will print out the below 3 lines prompts)选择8*16字符16*16汉字Choose 8*16 character 16*16 chinese character(1)返回上级设置(此时不保存该设置,可按1下LF键,返回上级设置)Return to last setting(If do not want to save this setting,then press LF key forone time,then it will to return to last setting)(2)确认(若确认则连续按2次LF键回到设置主页,字符点阵设置成功)Confirm(If confirm,then press LF key for 2 times to return to settinghomepage,then setting character dots successfully)(3)选择12*24字符24*24汉字(连续按3下LF键,打印机打印出下面3行提示)Choose 12*24 character 24*24 chinese character(Press LF key for 3 times,theprinter will print out the below 3 lines prompts)选择12*24字符24*24汉字Choose 12*24 character 24*24 chinese character(1)返回上级设置(此时不保存该设置,可按1下LF键,返回上级设置)Return to last setting(If do not want to save this setting,then press LF key forone time,then it will to return to last setting)(2)确认(若确认则连续按2次LF键回到设置主页,字符点阵设置成功)Confirm(If confirm,then press LF key for 2 times to return to settinghomepage,then setting character dots successfully)(5)选择打印机功耗(联系按5下LF键,选择打印机功耗,打印机会打印出6下面6个选项,请根据提示操作)Choose printer power comsuption(Press LF key for 5 times,choose printer power comsuption,the printer will print out the bleow 6 items,please operate according to the below prompts)(1)返回上级设置Return to last setting(2)I级功耗(最低)(连续按2下LF键,打印机打印出下面3行字样)I leverl power comption(the lowest) (Press LF key for 2 times,the printer will printout the below 3 lines prompts)I级功耗(最低)I leverl power comption(1)返回上级设置(此时不保存该设置,可按1下LF键,返回上级设置)Return to last setting(If do not want to save this setting,then press LF key forone time,then it will to return to last setting)(2)确认(若确认则连续按2次LF键回到设置主页,打印机功耗设置成功)Confirm(If confirm,then press LF key for 2 times to return to settinghomepage,then setting printer power comsuption successfully) (3)II级功耗(连续按3下LF键,打印机打印出下面3行字样)II leverl power comption(Press LF key for 3 times,the printer will print out thebelow 3 lines prompts)II级功耗II leverl power comption(1)返回上级设置(此时不保存该设置,可按1下LF键,返回上级设置)Return to last setting(If do not want to save this setting,then press LF key forone time,then it will to return to last setting)(2)确定(若确认则连续按2次LF键回到设置主页,打印机功耗设置成功)Confirm(If confirm,then press LF key for 2 times to return to settinghomepage,then setting printer power comsuption successfully) (4)III级功耗(连续按4下LF键,打印机打印出下面3行字样)III leverl power comption(Press LF key for 4 times,the printer will print out thebelow 3 lines prompts)III级功耗III leverl power comption(1)返回上级设置(此时不保存该设置,可按1下LF键,返回上级设置)Return to last setting(If do not want to save this setting,then press LF key forone time,then it will to return to last setting)(2)确认(若确认则连续按2次LF键回到设置主页,打印机功耗设置成功)Confirm(If confirm,then press LF key for 2 times to return to settinghomepage,then setting printer power comsuption successfully) (5)IV级功耗(连续按5下LF键,打印机打印出下面3行字样)IV leverl power comption(Press LF key for 5 times,the printer will print out thebelow 3 lines prompts)IV级功耗IV leverl power comption(3)返回上级设置(此时不保存该设置,可按1下LF键,返回上级设置)Return to last setting(If do not want to save this setting,then press LF key forone time,then it will to return to last setting)(4)确认(若确认则连续按2次LF键回到设置主页,打印机功耗设置成功)Confirm(If confirm,then press LF key for 2 times to return to settinghomepage,then setting printer power comsuption successfully) (6)V级功耗(最高)(连续按6下LF键,打印机打印出下面3行字样)V leverl power comption(the highest) (Press LF key for 6 times,the printer will printout the below 3 lines prompts)V级功耗(最高)V leverl power comption(the highest)(1)返回上级设置(此时不保存该设置,可按1下LF键,返回上级设置)Return to last setting(If do not want to save this setting,then press LF key forone time,then it will to return to last setting)(2)确认(若确认则连续按2次LF键回到设置主页,打印机功耗设置成功)Confirm(If confirm,then press LF key for 2 times to return to settinghomepage,then setting printer power comsuption successfully)(6)设置打印浓度(连续按6下LF键,开始设置打印浓度,打印机会打印出下面3个选项,请根据提示操作)Set printing density(Press LF key for 6 times,set printing density,the printer will print out the bleow 3 items,please operate according to the below prompts)(1)确认设置后返回(此时不设置浓度,按1下LF键回到设置主页)Confirm setting and return back(If do not want to set print density now,press LFkey for one time to return to setting homepage)(2)增量调整打印浓度(进入浓度设置后,连续按两2下LF键进行增量设置,打印机会打印出当前的浓度序号;若还需增加浓度,再连续按2下进行增量浓度设置,直到设置到理想浓度,按1下LF键确认设置后返回到设置主页)Increase the printing density( After entering the setting printing density mode,pressLF key for 2 times to increase the printing density,the printer will print out the number for current printer density:If still want toincrease the density,press the LF key for 2 times again to increasethe printer density,and again to the density you want. Press LF key for 1 time toconfirm the setting and return back to setting homepage)(3)减量调整打印浓度(进入浓度设置后,连续按两3下LF键进行减量设置,打印机会打印出当前的浓度序号;若还需增加浓度,再连续按3下进行减量浓度设置,直到设置到理想浓度,按1下LF键确认设置后返回到设置主页)Decrease the printing density( After entering the setting printing densitymode,press LF key for 3 times to decrease the printing density,the printer will print out the number for current printer density:If still want todecrease the density,press the LF key for 3 times again to decreasethe printer density,and again to the density you want. Press LF key for 1 time toconfirm the setting and return back to setting homepage)(7)设置串口波特率(连续按7下LF键,开始设置串口波特率,打印机会有如下8个选项,请按需要选择)Set serial baud rate(Press LF key for 7 times,set the serial baud rate,the printer will print out the below 8 items for choose)(1)返回上级设置(此时不设置串口波特率,按1下LF键回到设置主页)Return to last setting(If do not want to set serial baud rate,press LF key for onetime to return back to homepage)(2)1200bps(连续按2下LF键,打印机打印出下面字样)1200bps(Press LF key for 2 times,the printer will print out the below prompts选择1200bps Choose 1200bps(1)返回上级设置(此时不保存该设置,可按1下LF键,返回上级设置)Return to last setting(If do not want to save this setting,press LF key for onetime,then it will to return to last setting)(2)确认(若确认则连续按2次LF键回到设置主页,串口波特率设置成功)Confirm(If confirm,then press LF key for 2 times to return to settinghomepage,then setting serial baud rate successfully)(3)2400bps(连续按3下LF键,打印机打印出下面字样)2400bps(press LF key for 3 times,the printer will print out the below prompts)选择2400bps Choose 2400bps(1)返回上级设置(此时不保存该设置,可按1下LF键,返回上级设置)Return to last setting(If do not want to save this setting,press LF key for onetime,then it will return to last setting)(2)确认(若确认则连续按2次LF键回到设置主页,串口波特率设置成功)Confirm(If confirm,then press LF key for 2 times to return to settinghomepage,then setting serial baud rate successfully)(4)4800bps(连续按4下LF键,打印机打印出下面字样)4800bps(press LF key for 4 times,the printer will print out the below prompts)选择4800bps Choose 4800bps(1)返回上级设置(此时不保存该设置,可按1下LF键,返回上级设置)Return to last setting(If do not want to save this setting,press LF key for onetime,then it will return to last setting)(2)确认(若确认则连续按2次LF键回到设置主页,串口波特率设置成功)Confirm(If confirm,then press LF key for 2 times to return to settinghomepage,then setting serial baud rate successfully)(5)9600bps(连续按5下LF键,打印机打印出下面字样)9600bps(press LF key for 5 times,the printer will print out the below prompts)选择9600bps Choose 9600bps(1)返回上级设置(此时不保存该设置,可按1下LF键,返回上级设置)Return to last setting(If do not want to save this setting,press LF key for onetime,then it will return to last setting)(2)确认(若确认则连续按2次LF键回到设置主页,串口波特率设置成功)Confirm(If confirm,then press LF key for 2 times to return to settinghomepage,then setting serial baud rate successfully)(6)19200bps(连续按6下LF键,打印机打印出下面字样)19200bps(press LF key for 6 times,the printer will print out the below prompts)选择19200bps Choose 19200bps(1)返回上级设置(此时不保存该设置,可按1下LF键,返回上级设置)Return to last setting(If do not want to save this setting,press LF key for onetime,then it will return to last setting)(2)确认(若确认则连续按2次LF键回到设置主页,串口波特率设置成功)Confirm(If confirm,then press LF key for 2 times to return to settinghomepage,then setting serial baud rate successfully)(7)38400bps(连续按7下LF键,打印机打印出下面字样)38400bps(press LF key for 7 times,the printer will print out the below prompts)选择38400bps Choose 38400bps(1)返回上级设置(此时不保存该设置,可按1下LF键,返回上级设置)Return to last setting(If do not want to save this setting,press LF key for onetime,then it will return to last setting)(2)确认(若确认则连续按2次LF键回到设置主页,串口波特率设置成功)Confirm(If confirm,then press LF key for 2 times to return to settinghomepage,then setting serial baud rate successfully)(8)115200bps(连续按8下LF键,打印机打印出下面字样)115200bps(press LF key for 8 times,the printer will print out the below prompts)选择115200bps Choose 115200bps(1)返回上级设置(此时不保存该设置,可按1下LF键,返回上级设置)Return to last setting(If do not want to save this setting,press LF key for onetime,then it will return to last setting)(2)确认(若确认则连续按2次LF键回到设置主页,串口波特率设置成功)Confirm(If confirm,then press LF key for 2 times to return to settinghomepage,then setting serial baud rate successfully)(8)设置串口效验位(联系按8下LF键,打印出3个选项供设置)Set serial Parity(press LF key for 8 times,the printer will print out the below 3 items for choose)(1)返回上级设置(此时不设置串口效验位,按1下LF键回到设置主页)Return to last setting(If do not want to set serial parity,press LF key for onetime,then it will return to setting homepage)(2)无效验(连续按2下LF键,打印机打印出下面字样)No Parity(press LF key for 2 times,the printer will print out the below prompts)选择无效验Choose No Parity(1)返回上级设置(此时不保存该设置,可按1下LF键,返回上级设置)Return to last setting(If do not want to save this setting,press LF key for onetime,then it will return to last setting)(2)确认(若确认则连续按2次LF键回到设置主页,效验位设置成功)Confirm(If confirm,then press LF key for 2 times to return to settinghomepage,then setting serial parity successfully)(3)有效验(连续按3下LF键,打印机打印出下面字样)with Parity(press LF key for 3 times,the printer will print out the below prompts)选择有效验Choose with Parity(1)返回上级设置(此时不保存该设置,可按1下LF键,返回上级设置)Return to last setting(If do not want to save this setting,press LF key for onetime,then it will return to last setting)(2)确认(若确认则连续按2次LF键回到设置主页,效验位设置成功)Confirm(If confirm,then press LF key for 2 times to return to settinghomepage,then setting serial parity successfully)(9)选择HEX打印(联系按9下LF键,打印出3个选项供设置)Choose HEX printing(Press LF key for 9 times,then the printer will print out the below 3 items for choose)(1)返回上级设置(此时不选择HEX打印,按1下LF键回到设置主页)Return to last setting(If do not want to choose HEX printing,press LF key for onetime,then it will return to setting homepage)(2)正常打印(连续按2下LF键,打印机打印出下面字样)Normal printing(press LF key for 2 times,the printer will print out the belowprompts)选择正常打印Choose normal printing(1)返回上级设置(此时不保存该设置,可按1下LF键,返回上级设置)Return to last setting(If do not want to save this setting,press LF key for onetime,then it will return to last setting)(2)确认(若确认则连续按2次LF键回到设置主页,正常打印设置成功)Confirm(If confirm,then press LF key for 2 times to return to settinghomepage,then setting normal printing successfully)(3)选择HEX打印(连续按3下LF键,打印机打印出下面字样)Choose HEX printing( press LF key for 3 times,the printer will print out the below prompts)选择HEX打印Choose HEX printing(1)返回上级设置(此时不保存该设置,可按1下LF键,返回上级设置)Return to last setting(If do not want to save this setting,press LF key forone time,then it will return to last setting)(2)确认(若确认则连续按2次LF键回到设置主页,HEX打印设置成功)Confirm(If confirm,then press LF key for 2 times to return to settinghomepage,then setting HEX printing successfully)。
4T200 / 4T300 系列桌上型热感式/热转式条形码打印机使用手册©2016 鼎翰科技股份有限公司本手册和手册中所述的条形码打印机软件和韧体版权均归鼎翰科技股份有限公司所有。
本手册提供购买设备的操作者参考和使用,未经明确的书面许可,不得为了其他目的使用、复制。
所有其他品牌名称、产品名称或商标,利属于其他个别拥有者。
因持续产品的改进,故手册中所述的机种规格、配件、零件、设计及程序内容以实机为主,如有变更,恕不另行通知。
zenpert先擘尽力确保手册内容正确无误,但错误在所难免。
zenpert先擘保留更正任何这类错误的权利,并声明不对因此所造成的后果负责。
EN 55032, Class AEN 55024EN 60950-1This is a class A product. In a domestic environment this product may cause radio interference in which case the user may be required to take adequate measures.FCC part 15B, Class AICES-003, Class AThis equipment has been tested and found to comply with the limits for a Class A digital device, pursuant to Part 15 of the FCC Rules. These limits are designed to provide reasonable protection against harmful interference when the equipment is operated in a commercial environment.This equipment generates, uses, and can radiate radio frequency energy and, if not installed and used in accordance with the manufacturer’s instruction manual, may cause harmful interference with radio communications. Operation of this equipment in a residential area is likely to cause harmful interference, in which case you will be required to correct the interference at your own expense.This Class A digital apparatus complies with Canadian ICES-003.Cet appareil numérique de la classe A est conform à la norme NMB-003 du Canada.This device complies with Part 15 of the FCC Rules. Operation is subject to the following two conditions: (1) This device may cause harmful interference, and (2) this device must accept any interference received, including interference that may cause undesired operation.AS/NZS CISPR 32, Class AGB 4943.1GB 9254, Class AGB 17625.1此为在这种情况下,可能需要用户对干扰采取切实可行的措施。
热敏打印机使用方法一、热敏打印机简介热敏打印机是一种常见的打印设备,通过加热打印头来实现打印功能。
它广泛应用于各种场合,如商业收据、标签打印、票据打印等。
下面将详细介绍热敏打印机的使用方法。
二、连接热敏打印机1. 首先,确保热敏打印机与电脑或其他设备连接良好。
常见的连接方式有USB、串口和蓝牙等。
根据具体情况选择合适的连接方式,并将打印机与电脑或其他设备连接好。
三、安装打印机驱动程序1. 在连接完成后,需要安装相应的打印机驱动程序。
通常,打印机会随附驱动程序光盘,也可以在官方网站上下载。
将驱动程序安装到电脑上,按照提示完成安装过程。
四、设置打印机参数1. 打开电脑上的打印机设置界面,根据需要选择合适的打印机参数。
这些参数包括打印纸张大小、分辨率、打印速度等。
根据具体情况进行设置,并保存参数。
五、准备打印文件1. 打开需要打印的文件,可以是Word文档、Excel表格、图片等。
根据需要进行编辑和格式化,确保文件内容符合要求。
六、打印文件1. 在准备就绪后,点击打印按钮或选择打印菜单,打开打印设置界面。
选择热敏打印机,并设置打印份数、纸张大小等参数。
七、注意事项1. 在打印过程中,应注意纸张的放置方向和对齐。
确保纸张正确放入打印机的纸盒或进纸口,并调整对齐位置。
八、打印质量调整1. 如果打印结果不理想,可以通过调整打印机参数来改善打印质量。
例如,调整打印头的压力、清洁打印头等。
九、维护保养1. 定期清洁打印机内部和外部,避免灰尘和杂物对打印质量的影响。
同时,定期更换打印头和纸张,确保打印机的正常运作。
十、其他功能1. 除了普通打印功能,热敏打印机还具有其他功能,如自动剥离、自动切纸、打印二维码等。
根据具体需求,可以使用这些功能来提高工作效率。
十一、总结通过以上步骤,我们可以顺利地使用热敏打印机进行打印。
在操作过程中,要注意正确连接打印机、安装驱动程序、设置打印参数,并保持打印机的清洁和维护。
熟练掌握热敏打印机的使用方法,将在工作和生活中带来便利和效率提升。
炜煌热敏汉字微打使用手册- 1 - 目 录第一部分 性能指示....................................- 2 - 第二部分 操作说明....................................- 3 -第三部分 打印命令祥解 (19)第四部分 命令速查表 (35)第五部分 西文字符集1、2 (38)第一部分 性能指示1、打印方法: 直接热敏打印2、打印纸宽: 57.5±0.5mm3、打印密度: 8点/mm,384点/行4、打印头寿命: 6×10⁶字符行5、有效打印宽度: 48mm6、走纸速度: 25%的字符率的情况下为50mm/s(9V时)7、打印字符: 6*8点阵西文字符集1、2;20h—7fh间的标准ASCII码半角字符。
国标一、二级汉字(16*16点阵、24*24点阵两种,可根据需要选用不同点阵类型的打印机)8、接口形式: 并行接口串行接口 232电平或TTL电平9、操作温度: 5~50℃10、操作相对湿度: 10~80%- 2 - 炜煌热敏汉字微打使用手册11、储存温度: -20~60℃12、储存相对湿度: 10~90%13、电源: DC 5V 3A或DC 9V-24V,25W(请参考具体型号)第二部分 操作说明2.1 并行接口连接2.1.1接口与引脚定义插座引脚序号如下图所示:- 3 - - 4 - IDE 26针并行接口各引脚信号的定义如下图表所示: 平台式引信 号 方说 明 1-STB 入 数据选通触发脉冲,上升沿时读入数据 2DATA1 入 3DATA2 入 4DATA3 入 5DATA4 入 6DATA5 入 7DATA6 入 8DATA7 入 9DATA8 入 这些信号分别代表并行数据的第一至第八位信号,每个信号当其逻辑为“1”时为“高”电平,逻辑为“0”为“低”电平。
10-ACK 出 回答脉冲,“低”电平表示数据已被接受而且打印机准备好接收下一数据 11BUSY 出 “高”电平表示打印机正“忙”,不能接收数据 13SEL 出 打印机内部经电阻上拉“高”电平,表示打印机在线 15-ERR 出 打印机内部经电阻上拉“高”电平,表示无故障 14,16,17空脚 25-18 GND — 接地,逻辑“0”电平注: 1.“入”表示输入到打印机。
2.“出”表示从打印机输出。
3.信号的逻辑电平为TTL 电平。
炜煌热敏汉字微打使用手册2.1.2 并行接口引脚信号时序并口时序如下图所示:- 5 - BUSY/ACK DATA /STB 0.5μS 0.5μS 0.5μS 0.5μS0.5μS 2.1.3 并口例程单片机控制打印机时汇编例程BUSYEQU P3.2 ; 定义BUSY 信号引脚 nSTBEQU P3.7 ; 定义nSTB 信号引脚ORG 0000H- 6 - LJMP start start: MOV DPTR, #print_contentMOV R0, #9 ; 存待打印数据的字节数 main: CLR AMOVC A, @ A + DPTRLCALL PRINTBINC DPTRDJNZ R0, MAINMOV A, #0DHLCALL PRINTBSJMP $;打印结束死循环;PRINTB 子程序将累加器A 中的一字节数据发送到打印机PRINTB: JB BUSY, $; 等待打印机到空闲 MOV P1 , A ; 送数据到数据口炜煌热敏汉字微打使用手册- 7 - CLR nSTB ; 置nSTB 为低电平NOP ; 延长nSTB 信号脉冲宽度以满足时序要求nopnop SETB nSTB; 置nSTB 为高电平(此时数据将被读入打印机) RETprint_content: DB '北京炜煌'DB 0dhEND 单片机C51例程// 北京炜煌科技打印机示例程序#include <reg52.h>// Hardware configuration#define PRINTER_DATA P1// 定义打印机数据线端口 sbit BUSY = P3^2; // 定义打印机忙信号引脚- 8 - sbit nSTB = P3^7;// 定义打印机nSTB 信号引脚#define CR0x0d #define LF 0x0a void PrintByte(unsigned char byte_data);void PrintString(char* str);void PrintByteN(unsigned char* data_src,unsigned char N);void main(void){char str[] = "Printer demo";PrintString("WHKJ Printer");PrintByte(CR);while(1);}/* PrintByte()* Send a byte to printer炜煌热敏汉字微打使用手册- 9 - */#include <intrins.h>void PrintByte(unsigned char byte_data){while( BUSY == 1 ){}PRINTER_DATA = byte_data;nSTB = 0;_nop_(); // 调整nSTB 信号脉宽nSTB = 1; }/* PrintString()* Print a string which is ending with a '\0' character* To Excuted the print command a addition CR character is needed*/- 10 - void PrintString(char* str){while( *str ){PrintByte( *(str++));} }/* PrintByteN()* Print N bytes through printer* no more than 255 bytes could be printed by the function* If more than 255 bytes need printing, the type of N need changing */void PrintByteN( unsigned char* data_src, // pointer to data sourceunsigned char N) // number of data(byte) {while( N--){PrintByte(*(data_src++));} }炜煌热敏汉字微打使用手册2.2 串行接口2.2.1串行接口引脚定义本系列打印机串口为RS232或者TTL,(请参考具体打印机型号)串口引脚插座序号如下图:接口引脚定义如下表所示:引脚 信号方向说 明3 RXD 入 打印机从主计算机接收数据2 TXD 出 当使用X-ON/X-OFF握手时,打印机向上微机发送控制码8 BUSY 出 该信号高电平时,表示打印机正“忙”不能接受数据,而当该信号低电平时,表示打印机“准备好”,可以接收数据6同BUSY出 该信号为“SPACE”状态表示打印机“在线”5 GND — 信号地- 11 - 12 注: 1.“入”表示输入到打印机; 2.“出”表示从打印机输出2.2.3 串口例程单片机控制打印机时汇编例程 ; 北京炜煌串口打印机示例程序 BUSY EQUP3.0; 定义BUSY 信号引脚ORG 0000HJMP startORG 30h start: MOV DPTR, #print_content MOV R2,#77; R2保存待打印数据的字节数 LCALL SETUART; 设置串口main: CLR AMOVC A, @A+DPTR ; 读出待打印字符MOV R0, ALCALL PRINTB; 打印一个字节INC DPTR炜煌热敏汉字微打使用手册13 DJNZ R2, MAIN MOVA,#0DH LCALL PRINTBSJMP $;打印结束无限循环;PRINTB 子程序将累加器A 中的一字节数据发送到打印机 ; 待发送数据通过R0传递 PRINTB: PUSH ACCJB BUSY, $; 等待打印机到空闲JNB TI, $; 等到上一字节是否发送完,第一个字节发送前要手动置TI,见SETUART 了函数 CLR TI MOV A, R0 ; 保存待打印数据 MOV SBUF, A; 送数据到打印机POP ACCRET14 ;设置串口子程序;不使用中断, 定时器1用作波特率发生器 SETUART: MOV TMOD, #20H;设置定时器T1工作模式2MOV TH1, #0FAHMOV TL1, #0FAH; 设置波特率 9600bps @ 22.1184MHz SETB TR1 ; 启动定时器T1MOV SCON, #50H; 设置串行口工作方式为异步串行口,模式1SETB TI; 设置标志位,为发送数据作准备RET; 定义待打印数据内容 print_content: DB '北京炜煌科技微型打印机', 0DH, 'MicroPrinter demo', 0DH DB '画线工具栏',0dhDB '-------------------------'END炜煌热敏汉字微打使用手册15 单片机C51例程#include <reg52.h> #define uchar unsigned charsbit BUSY=P3^0;// 定义一个发送字节数据到串口的函数 void Print_Byte(uchar ch){ while(BUSY){ } SBUF=ch; while(!TI){ } #include <REG52.H>TI=0;}//定义发送一个数组的数据到串口的函数 void Print_Array(array,n)16 uchar array[]; int n; { int i;for(i=0;i<n;i++)Print_Byte(array[i]);}//定义一个把字符串送到串口的函数 void Print_String(uchar *str){ while(*str){ Print_Byte(*str++);}}void main(){ int i;TMOD=0x20; // 定时器1工作于方式2炜煌热敏汉字微打使用手册17 SCON=0x40; // 串口工作于方式1TH1=0xfa; //装入初值,22.1184MHZ 的晶振,9600的波特率 TL1=0xfa;PCON=0x00; //波特率无倍增TR1=1; //开启定时器1开始工作 Print_Byte(0x1C); Print_Byte(0x26);Print_String("北京炜煌科技发展有限公司"); Print_Byte(13);while(1);}2.3 按键和指示灯打印机有两个功能按键:LF 键和SET 键,2个指示灯:绿灯,红灯。