基于GridView控件仿EXCEL格式显示数据的网页制作
- 格式:doc
- 大小:109.00 KB
- 文档页数:5
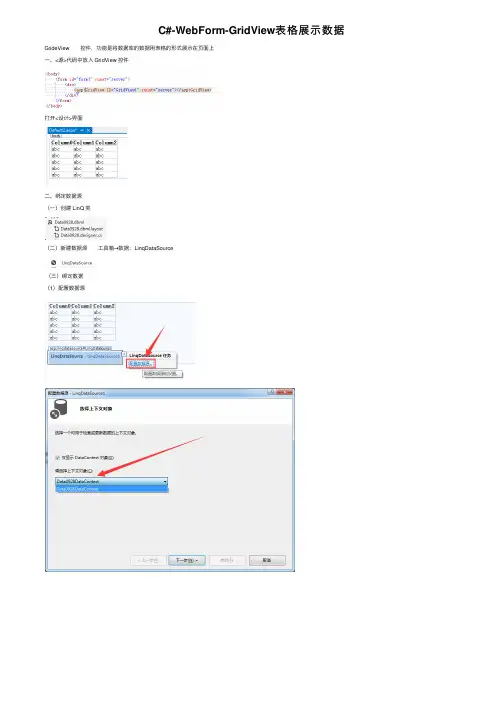
C#-WebForm-GridView表格展⽰数据GrideView 控件,功能是将数据库的数据⽤表格的形式展⽰在页⾯上⼀、<源>代码中放⼊ GridView 控件打开<设计>界⾯⼆、绑定数据源(⼀)创建 LinQ 类(⼆)新建数据源 ⼯具箱→数据:LinqDataSource(三)绑定数据(1)配置数据源(2)绑定数据效果:三、设置样式属性(1)⾃动套⽤格式(2)表格宽度(3)表格属性(4)编辑列四、设置显⽰内容(1)Sex 显⽰男⼥删除原有列,在“可⽤字段”(模板)中,在BoundField(默认模板)中添加新的Sex模板,并设置其位置属性扩展绑定数据(2)Nation 属性扩展(3)Birthday 显⽰ 格式:{0:****} —— “0”代表当前的数据,“****”代表字符串格式(4)在姓名后加“同学”两个字最终效果:五、标红预警:设置数据⾏创建的时候出发的事件——RowDataBound每⼀⾏的创建都会触发⼀次事件,包括表头和表尾⾏绑定数据时触发事件:public partial class Default2 : System.Web.UI.Page{protected void Page_Load(object sender, EventArgs e){}//⾏绑定数据时触发的事件protected void GridView1_RowDataBound(object sender, GridViewRowEventArgs e) {//数据的⾏对象绑定到基础数据对象Users(e 是绑定的数据)Users u = e.Row.DataItem as Users;//进⾏判断是否为空,因为表头和表尾是没有数据绑定的,所以为null,跳过下列事件if (u != null){//性别为男的⾏背景⾊为红⾊if (u.sex == true){e.Row.BackColor = System.Drawing.Color.Red;e.Row.ForeColor = System.Drawing.Color.White;}//民族为N003的背景⾊为黄⾊if(u.nation=="N003"){e.Row.BackColor = System.Drawing.Color.Yellow;}}}}⾏数据绑定时触发此事件效果:六、数据的增删改增加:⽤超链接打开新的⽹页删除和修改: 在数据上选中“启⽤删除”和“启⽤更新” GridView 选中“启⽤编辑”和“启⽤删除” 通过“编辑列”,添加标头并将列放在数据最后七、点击“编辑”按钮打开编辑页⾯,所有的修改项都是text编辑框,如何将性别设置单选按钮、⽣⽇设置为⽇期选择、民族为下拉列表?(1)将列转换为⾃定义模板(2)编辑⾃定义模板为控件编辑要绑定的属性绑定完数据右键结束操作(4)设置“民族”修改模板 因为之前绑定的是Users表,选择需要的是Nation表,所有需要新建数据源 绑定数据即可⼋、如何让性别显⽰男⼥头像图⽚?(1)属性扩展返回图⽚路径(2)绑定九、分页(1)属性→分页。

中GridView读取Excel数据的实现皇甫大双【摘要】在网站建设中,我们经常需要从Excel表格巾读取一些相应的信息在页面上来显示,提供给用户方便的查看,怎样实现这一功能呢?Visual Studio 2005中有诸多的用来显示数据的控件,如DataGrid、Repeater、GridView等,这些控件由于各自的特点、属性的不同,因而都有自己独特的应用领域.本文就如何使用GridView显示控件来实现从Excel表格中读取数据进行研究和实现.【期刊名称】《办公自动化(综合版)》【年(卷),期】2011(000)005【总页数】3页(P49-50,52)【关键词】;Visual Studio2005;GridView显示控件【作者】皇甫大双【作者单位】徐州机电工程高等职业学校徐州221011【正文语种】中文【中图分类】TP392一、引言众所周知Excel是微软公司开发的Office家族中的一款重要的应用软件,其强大的数据处理和分析能力,以及友好的界面受到了广大用户的喜爱。
因此在很多公司Excel已经完全成为了一种生产工具,在各个核心部门发挥着重要的作用,用户完全可以按照自己的思路来创建电子表格,并在Excel的帮助下出色的完成工作任务。
正因为如此,很多时候在我们开发的web网站和OA系统中要将Excel文件中的数据导入页面而显示出来。
本文介绍了在以VS2005为开发工具的web应用程序中,如何将Excel表格中的员工信息导入页面Gridview中显示。
二、简介是微软公司提出的用于创建动态web内容的一种强大的服务器端技术,此技术大量使用组件技术,将Web浏览器和Web服务器之间的通信完全的包装起来。
作为战略产品,不仅仅是Active Server Page(ASP)的下一个版本;它还提供了一个统一的Web开发模型,其中包括开发人员生成企业级Web应用程序所需的各种服务。
的语法在很大程度上与ASP兼容,同时它还提供一种新的编程模型和结构,可生成伸缩性和稳定性更好的应用程序,并提供更好的安全保护。

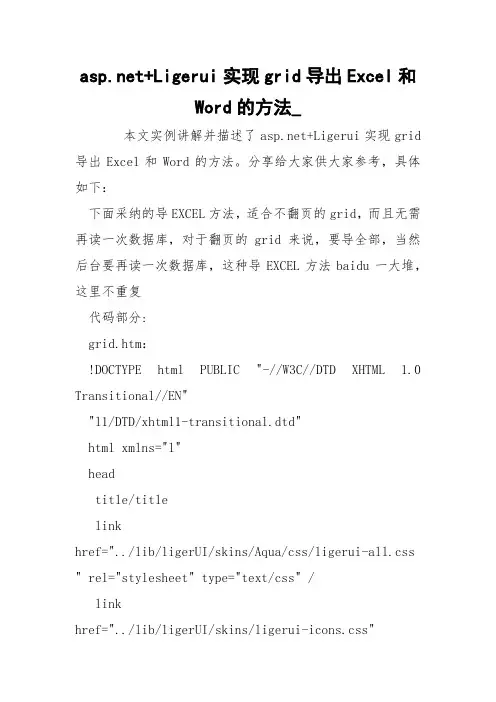
+Ligerui实现grid导出Excel和Word的方法_本文实例讲解并描述了+Ligerui实现grid 导出Excel和Word的方法。
分享给大家供大家参考,具体如下:下面采纳的导EXCEL方法,适合不翻页的grid,而且无需再读一次数据库,对于翻页的grid来说,要导全部,当然后台要再读一次数据库,这种导EXCEL方法baidu一大堆,这里不重复代码部分:grid.htm:!DOCTYPE html PUBLIC "-//W3C//DTD XHTML 1.0 Transitional//EN""l1/DTD/xhtml1-transitional.dtd"html xmlns="l"headtitle/titlelinkhref="../lib/ligerUI/skins/Aqua/css/ligerui-all.css " rel="stylesheet" type="text/css" /linkhref="../lib/ligerUI/skins/ligerui-icons.css"rel="stylesheet" type="text/css" /script src="../lib/jquery/jquery-1.3.2.min.js" type="text/javascript"/scriptscriptsrc="../lib/ligerUI/js/plugins/ligerGrid.js"type="text/javascript"/scriptscriptsrc="../lib/ligerUI/js/plugins/ligerToolBar.js"type="text/javascript"/scriptscriptsrc="../lib/ligerUI/js/plugins/ligerDialog.js"type="text/javascript"/scriptscript src="AllProductData.js" type="text/javascript"/scriptscript type="text/javascript"$(function () {$("#toptoolbar").ligerToolBar({ items: [{text: '导出Excel',id:'excel',icon:'print',click:itemclick},{text: '导出Word' ,id:'word',icon:'print',click:itemclick}]});$("#maingrid").ligerGrid({columns: [{ display: '主键', name: 'ProductID', type: 'int', totalSummary:{type: 'count'}},{ display: '产品名', name: 'ProductName', align: 'left', width: 200 },{ display: '单价', name: 'UnitPrice', align: 'right', type:'float',totalSummary:{render: function (suminf, column, cell){return 'div最大值:' + suminf.max + '/div';},align: 'left'}},{ display: '仓库数量', name: 'UnitsInStock', align: 'right', type: 'float',totalSummary:{type: 'sum'}}],dataAction: 'local',data: AllProductData, sortName: 'ProductID', showTitle: false, totalRender: f_totalRender, width: '100%', height: '100%',heightDiff:-10 });$("#pageloading").hide();});function f_totalRender(data, currentPageData) {return "总仓库数量:"+data.UnitsInStockTotal; }function itemclick(item){grid = $("#maingrid").ligerGetGridManager(); if(item.id){switch (item.id){case "excel":$.ligerDialog.open({url: "../service/print.aspx?exporttype=xls"});return;case "word":$.ligerDialog.open({url: "../service/print.aspx?exporttype=doc"});return;}}}/script/headbody style="padding:0px; overflow:hidden; height:100% "div id="toptoolbar"/divdiv id="maingrid" style="margin:0; padding:0"/div div style="display:none;"/div/body/html导出页面print.aspx%@ Page Language="C#" AutoEventWireup="true" CodeBehind="print.aspx.cs" Inherits="example" EnableEventValidation = "false" ValidateRequest="false" %htmlheadtitle/titlelinkhref="../lib/ligerUI/skins/aqua/css/ligerui-all.css " rel="stylesheet" type="text/css" /script src="../lib/jquery/jquery-1.3.2.min.js" type="text/javascript"/scriptscriptsrc="../lib/ligerUI1.1.0/js/ligerui.min.js"type="text/javascript"/scriptscript type="text/javascript"function GetQueryString(name){var reg = new RegExp("(^|)"+name+"=([^]*)(|$)"); var r= window.location.search.substr(1).match(reg);if (r!=null) return unescape(r[2]);return null; }function gethtml(g){parent.$(".l-grid-header-table",g).attr("border","1 ");parent.$(".l-grid-body-table",g).attr("border","1"); $("#hf").val(parent.$(".l-grid-header",g).html()+ //这里把表头捞出来parent.$(".l-grid-body-inner",g).html()+//表身,具体数据parent.$(".l-panel-bar-total",g).html()+"br/"+ //这是全局汇总,1.1.0版本新添加的parent.$(".l-bar-text",g).html() //这是翻页讯息);parent.$(".l-grid-header-table",g).attr("border","0 ");parent.$(".l-grid-body-table",g).attr("border","0"); //parent.$(".l-grid-header-table",g).removeAttr("bord er");//parent.$(".l-grid-body-table",g).removeAttr("border ");}function init(){if (GetQueryString("exporttype")=="xls"){document.getElementById("btnxls").click();}else{document.getElementById("btndoc").click();}setTimeout(function (){parent.$.ligerDialog.close();}, 3000);}/script/headbody style="padding:20px" onload="init()"form id="form1" runat="server"导出中...div style="visibility:hidden"asp:Button ID="btnxls" runat="server" Text="导出Excel" onclick="Button1_Click" OnClientClick="gethtml('#maingrid')"/asp:Button ID="btndoc" runat="server" Text="导出Word" onclick="Button2_Click" OnClientClick="gethtml('#maingrid')"//divasp:HiddenField ID="hf" runat="server" //form/body/htmlprint.aspx.csusing System;using System.Collections;using System.Configuration;using System.Data;using System.Web;using System.Web.Security;using System.Web.UI;using System.Web.UI.HtmlControls;using System.Web.UI.WebControls;using System.Web.UI.WebControls.WebParts;namespace service{public partial class print : System.Web.UI.Page {protected void Page_Load(object sender, EventArgs e){if (!IsPostBack){}}void exportexcel(){Response.Clear();Response.Buffer = true;Response.Charset = "utf-8";Response.AppendHeader("Content-Disposition", "attachment;filename=tmp.xls");Response.ContentEncoding = System.Text.Encoding.GetEncoding("utf-8");Response.ContentType = "application/ms-excel"; this.EnableViewState = false;System.IO.StringWriter oStringWriter = new System.IO.StringWriter();System.Web.UI.HtmlTextWriter oHtmlTextWriter = new System.Web.UI.HtmlTextWriter(oStringWriter);oHtmlTextWriter.WriteLine(hf.Value);Response.Write(oStringWriter.ToString());Response.End();}void exportword(){Response.Clear();Response.Buffer = true;Response.Charset = "utf-8";Response.AppendHeader("Content-Disposition", "attachment;filename=tmp.doc");Response.ContentEncoding = System.Text.Encoding.GetEncoding("utf-8");Response.ContentType = "application/ms-word"; this.EnableViewState = false;System.IO.StringWriter oStringWriter = new System.IO.StringWriter();System.Web.UI.HtmlTextWriter oHtmlTextWriter = new System.Web.UI.HtmlTextWriter(oStringWriter);oHtmlTextWriter.WriteLine(hf.Value);Response.Write(oStringWriter.ToString());Response.End();}protected void Button1_Click(object sender, EventArgs e){exportexcel();}protected void Button2_Click(object sender, EventArgs e){exportword();}}}原理:在点导出按钮的时候,弹一个print.aspx页面,这个页面把grid的html传给自己一个叫hf的hidden里面,然后后台response输出这个html盼望本文所述对大家程序设计有所关心。
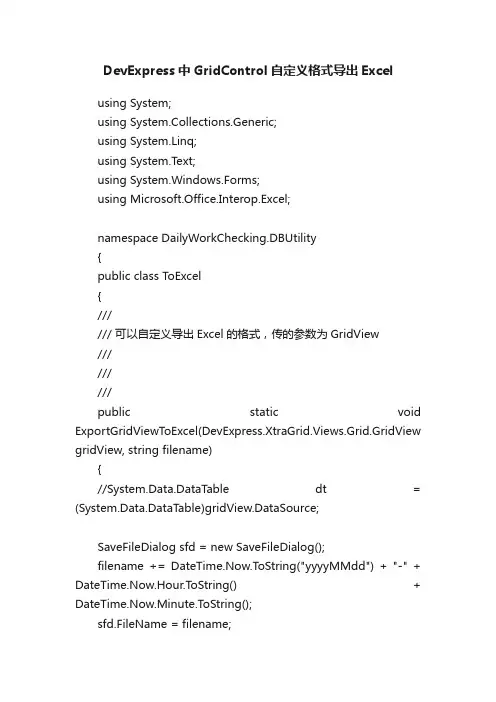
DevExpress中GridControl自定义格式导出Excelusing System;using System.Collections.Generic;using System.Linq;using System.Text;using System.Windows.Forms;using Microsoft.Office.Interop.Excel;namespace DailyWorkChecking.DBUtility{public class ToExcel{////// 可以自定义导出Excel的格式,传的参数为GridView/////////public static void ExportGridViewT oExcel(DevExpress.XtraGrid.Views.Grid.GridView gridView, string filename){//System.Data.DataTable dt = (System.Data.DataTable)gridView.DataSource;SaveFileDialog sfd = new SaveFileDialog();filename += DateTime.Now.T oString("yyyyMMdd") + "-" + DateTime.Now.Hour.ToString() + DateTime.Now.Minute.ToString();sfd.FileName = filename;sfd.Filter = "Excel files (*xls) | *.xls";sfd.RestoreDirectory = true;if (sfd.ShowDialog() == DialogResult.OK && sfd.FileName.Trim() != null){int rowIndex = 1;int colIndex = 0;int colNum = gridView.Columns.Count;System.Reflection.Missing miss = System.Reflection.Missing.Value;Microsoft.Office.Interop.Excel.Application xlapp = new Microsoft.Office.Interop.Excel.Application();xlapp.Visible = true;Microsoft.Office.Interop.Excel.Workbooks mBooks = (Microsoft.Office.Interop.Excel.Workbooks)xlapp.Workbooks;Microsoft.Office.Interop.Excel.Workbook mBook = (Microsoft.Office.Interop.Excel.Workbook)mBooks.Add(miss);Microsoft.Office.Interop.Excel.Worksheet mSheet = (Microsoft.Office.Interop.Excel.Worksheet)mBook.ActiveSheet;Microsoft.Office.Interop.Excel.Range mRange = mSheet.get_Range((object)"A1",System.Reflection.Missing.Value);//设置对齐方式mSheet.Cells.HorizontalAlignment = XlHAlign.xlHAlignCenter;//设置文字自动换行//mSheet.Cells.WrapText = true;//设置第一行高度,即标题栏((Microsoft.Office.Interop.Excel.Range)mSheet.Rows["1:1", System.Type.Missing]).RowHeight = 20;//设置数据行行高度((Microsoft.Office.Interop.Excel.Range)mSheet.Rows["2:" + gridView.RowCount + 1, System.Type.Missing]).RowHeight = 16;//设置字体大小(10号字体)mSheet.Range[mSheet.Cells[1, 1], mSheet.Cells[gridView.RowCount + 1, gridView.Columns.Count]].Font.Size = 10;//设置单元格边框Microsoft.Office.Interop.Excel.Range range1 = mSheet.Range[mSheet.Cells[1, 1], mSheet.Cells[gridView.RowCount + 1, gridView.Columns.Count]];range1.Borders.LineStyle = 1;//写标题for (int row = 1; row <= gridView.Columns.Count; row++){mSheet.Cells[1, row] = gridView.Columns[row - 1].GetTextCaption();}try{for (int i = 0; i < gridView.RowCount; i++){rowIndex++;colIndex = 0;for (int j = 0; j < gridView.Columns.Count; j++){colIndex++;mSheet.Cells[rowIndex, colIndex] = gridView.GetRowCellValue(i, gridView.Columns[j]);}}mBook.SaveAs(sfd.FileName,Microsoft.Office.Interop.Excel.XlFileFormat.xlExcel7, miss, miss, miss, miss, Microsoft.Office.Interop.Excel.XlSaveAsAccessMode.xlNoChange, miss, miss, miss, miss, miss);//return true;}catch (Exception ex){//throw new Exception(ex.Message);}finally{//mBook.Close(false, miss, miss);mBooks.Close();xlapp.Quit();System.Runtime.InteropServices.Marshal.ReleaseComObject (mRange);System.Runtime.InteropServices.Marshal.ReleaseComObject (mSheet);System.Runtime.InteropServices.Marshal.ReleaseComObject (mBook);System.Runtime.InteropServices.Marshal.ReleaseComObject (mBooks);System.Runtime.InteropServices.Marshal.ReleaseComObject (xlapp);GC.Collect();}}else{//return false;}}}}。

使⽤GridView导出Excel实现⽅法本⽂实例讲述了使⽤GridView导出Excel实现⽅法。
分享给⼤家供⼤家参考。
具体实现⽅法如下:复制代码代码如下:/// <summary>/// 将DataTable数据导出到EXCEL,调⽤该⽅法后⾃动返回可下载的⽂件流/// </summary>/// <param name="dtData">要导出的数据源</param>public static void DataTable1Excel(System.Data.DataTable dtData){System.Web.UI.WebControls.GridView gvExport = null;// 当前对话System.Web.HttpContext curContext = System.Web.HttpContext.Current;// IO⽤于导出并返回excel⽂件System.IO.StringWriter strWriter = null;System.Web.UI.HtmlTextWriter htmlWriter = null;if (dtData != null){// 设置编码和附件格式curContext.Response.ContentType = "application/vnd.ms-excel";curContext.Response.ContentEncoding = System.Text.Encoding.GetEncoding("gb2312");curContext.Response.Charset = "utf-8";// 导出excel⽂件strWriter = new System.IO.StringWriter();htmlWriter = new System.Web.UI.HtmlTextWriter(strWriter);// 为了解决gvData中可能进⾏了分页的情况,需要重新定义⼀个⽆分页的GridViewgvExport = new System.Web.UI.WebControls.GridView();gvExport.DataSource = dtData.DefaultView;gvExport.AllowPaging = false;gvExport.DataBind();// 返回客户端gvExport.RenderControl(htmlWriter);curContext.Response.Write("<meta http-equiv=\"Content-Type\" content=\"text/html; charset=gb2312\" />" + strWriter.ToString());curContext.Response.End();}}/// <summary>/// 直接输出Excel/// </summary>/// <param name="dtData"></param>public static void DataTable2Excel(System.Data.DataTable dtData){ System.Web.UI.WebControls.DataGrid dgExport = null; // 当前对话 System.Web.HttpContext curContext = System.Web.HttpContext.Current; // IO⽤于导出并返回excel⽂件 System.IO.StringWriter strWriter = null; System.Web.UI.HtmlTextWriter htmlWriter = null; if (dtData != null) { // 设置编码和附件格式 curContext.Response.ContentType = "application/vnd.ms-excel"; curContext.Response.ContentEncoding =System.Text.Encoding.UTF8; curContext.Response.Charset = ""; // 导出excel⽂件 strWriter = new System.IO.StringWriter(); htmlWriter = new System.Web.UI.HtmlTextWriter(strWriter); // 为了解决dgData中可能进⾏了分页的情况,需要重新定义⼀个⽆分页的DataGrid dgExport = new System.Web.UI.WebControls.DataGrid(); dgExport.DataSource = dtData.DefaultView; dgExport.AllowPaging = false; dgExport.DataBind(); // 返回客户端 dgExport.RenderControl(htmlWriter); curContext.Response.Write(strWriter.ToString()); curContext.Response.End(); }}希望本⽂所述对⼤家的程序设计有所帮助。

winform中DataGridView导出Excel(使⽤NPOI,速度最快的⼀种⽅法)1,在⽹上搜索到的⼀般是这种通⽤的⽅法,这个⽅法速度太慢了,代码如下private void ExportExcel(string fileName, DataGridView myDGV){string saveFileName = "";SaveFileDialog saveDialog = new SaveFileDialog();saveDialog.DefaultExt = "xls";saveDialog.Filter = "Excel⽂件|*.xls";saveDialog.FileName = fileName;saveDialog.ShowDialog();saveFileName = saveDialog.FileName;if (saveFileName.IndexOf(":") < 0) return; //被点了取消Microsoft.Office.Interop.Excel.Application xlApp = new Microsoft.Office.Interop.Excel.Application();if (xlApp == null){MessageBox.Show("⽆法创建Excel对象,可能您的机⼦未安装Excel");return;}Microsoft.Office.Interop.Excel.Workbooks workbooks = xlApp.Workbooks;Microsoft.Office.Interop.Excel.Workbook workbook = workbooks.Add(Microsoft.Office.Interop.Excel.XlWBATemplate.xlWBATWorksheet);Microsoft.Office.Interop.Excel.Worksheet worksheet = (Microsoft.Office.Interop.Excel.Worksheet)workbook.Worksheets[1];//取得sheet1//写⼊标题for (int i = 0; i < myDGV.ColumnCount; i++){worksheet.Cells[1, i + 1] = myDGV.Columns[i].HeaderText;}//写⼊数值for (int r = 0; r < myDGV.Rows.Count; r++){for (int i = 0; i < myDGV.ColumnCount; i++){worksheet.Cells[r + 2, i + 1] = myDGV.Rows[r].Cells[i].Value;}System.Windows.Forms.Application.DoEvents();}worksheet.Columns.EntireColumn.AutoFit();//列宽⾃适应if (saveFileName != ""){try{workbook.Saved = true;workbook.SaveCopyAs(saveFileName);}catch (Exception ex){MessageBox.Show("导出⽂件时出错,⽂件可能正被打开!\n" + ex.Message);}}xlApp.Quit();GC.Collect();//强⾏销毁MessageBox.Show("⽂件: " + fileName + ".xls 保存成功", "信息提⽰", MessageBoxButtons.OK, rmation);}2,最近研究了半天,使⽤NOPI的⽅法真是的太快了,秒存的感觉【2.1】使⽤:private void btn_export_Click(object sender, EventArgs e){try{ExcelHelper.ExportToExcel(this.dgv_data);new FrmConfirmSingle("⽇志导出", "⽇志记录导出成功") { TopMost = true }.ShowDialog();}catch (Exception exception){new FrmConfirmSingle("⽇志导出", "⽇志记录导出失败:"+exception.Message) { TopMost = true }.ShowDialog();}} 【2.2】主要代码如下:/// <summary>/// 由DataGridView导出Excel/// </summary>/// <param name="grid"></param>/// <param name="sheetName"></param>/// <param name="filePath"></param>/// <returns></returns>public static string ExportToExcel(DataGridView grid, string sheetName = "result", string filePath = null){if (grid.Rows.Count <= 0) return null;if (string.IsNullOrEmpty(filePath)){filePath = GetSaveFilePath();}IWorkbook workbook = CreateWorkbook(isCompatible);ICellStyle cellStyle = GetCellStyle(workbook);ISheet sheet = workbook.CreateSheet(sheetName);IRow headerRow = sheet.CreateRow(0);for (int i = 0; i < grid.Columns.Count; i++){ICell cell = headerRow.CreateCell(i);cell.SetCellValue(grid.Columns[i].Name);cell.CellStyle = cellStyle;}int rowIndex = 1;foreach (DataGridViewRow row in grid.Rows){IRow dataRow = sheet.CreateRow(rowIndex);for (int n = 0; n < grid.Columns.Count; n++){dataRow.CreateCell(n).SetCellValue((row.Cells[n].Value ?? "").ToString());}rowIndex++;}AutoColumnWidth(sheet, stCellNum - 1);FileStream fs = new FileStream(filePath, FileMode.OpenOrCreate, FileAccess.ReadWrite);workbook.Write(fs);fs.Dispose();sheet = null;headerRow = null;workbook = null;MessageBox.Show("⽂件: " + filePath + ".xls 保存成功", "信息提⽰", MessageBoxButtons.OK, rmation); return filePath;} 【2.3】下⾯是我整理的通⽤EXCEL的帮助类,⾮常的实⽤using System;using System.Collections.Generic;using System.Linq;using System.Text;using System.IO;using System.Data;using System.Windows.Forms;using erModel;using erModel;using erModel;using System.Collections;using pilerServices;/** 须在项⽬中添加引⽤ NPOI.dll NPOI.OOXML.dll NPOI.OPenXml4Net.dll*/namespace AutomaticStoreMotionDal{public static class ExcelHelper{/// <summary>/// 获取要保存的⽂件名称(含完整路径)/// </summary>/// <returns></returns>public static string GetSaveFilePath(){SaveFileDialog saveFileDig = new SaveFileDialog();saveFileDig.Filter = "Excel Office97-2003(*.xls)|*.xls|Excel Office2007及以上(*.xlsx)|*.xlsx";saveFileDig.FileName = DateTime.Now.ToString("yyyyMMddHHmmss");saveFileDig.FilterIndex = 0;saveFileDig.OverwritePrompt = true;string dir = Environment.GetFolderPath(Environment.SpecialFolder.DesktopDirectory);//获取当前系统桌⾯路径saveFileDig.InitialDirectory = dir;string filePath = null;if (saveFileDig.ShowDialog() == DialogResult.OK){filePath = saveFileDig.FileName;}return filePath;}/// <summary>/// 打开⽂件对话框,并返回⽂件的路径/// </summary>/// <returns></returns>public static string GetOpenFilePath(){//创建对话框的对象ofd.Multiselect = true;//设置对话框的初始⽬录ofd.InitialDirectory = @"C:\Users\Administrator\Desktop";//设置对话框打开⽂件的类型ofd.Filter = "Excel⽂件(.xls)|*.xls|Excel⽂件(.xlsx)|*.xlsx";//展⽰对话框ofd.ShowDialog();//获得在打开对话框中选中的⽂件的路径string filePath = ofd.FileName;//全路径return filePath;}/// <summary>/// 判断Excel⽂件是否为兼容模式(.xls)/// </summary>/// <param name="filePath"></param>/// <returns></returns>public static bool GetIsCompatible(string filePath){return filePath.EndsWith(".xls", StringComparison.OrdinalIgnoreCase);}/// <summary>/// 创建⼯作薄/// </summary>/// <param name="isCompatible">true就是.xls</param>/// <returns></returns>public static IWorkbook CreateWorkbook(bool isCompatible){if (isCompatible){return new HSSFWorkbook();}else{return new XSSFWorkbook();}}/// <summary>/// 创建⼯作薄(依据⽂件流)/// </summary>/// <param name="isCompatible"></param>/// <param name="stream"></param>/// <returns></returns>public static IWorkbook CreateWorkbook(bool isCompatible, Stream stream) {if (isCompatible){return new HSSFWorkbook(stream);}else{return new XSSFWorkbook(stream);}}#region 传⼊⼀个⽂件路径,返回⼀个IWorkbook对象/// <summary>/// 传⼊⼀个⽂件路径,返回⼀个IWorkbook对象/// </summary>/// <param name="filepath"></param>/// <returns></returns>public static IWorkbook CreateWorkbook(string filepath){IWorkbook workbook = null;bool isCompatible = ExcelHelper.GetIsCompatible(filepath);using (FileStream fs = File.Open(filepath, FileMode.Open,FileAccess.Read, FileShare.ReadWrite)){//把xls⽂件读⼊workbook变量⾥,之后就可以关闭了workbook = ExcelHelper.CreateWorkbook(isCompatible, fs);fs.Close();}return workbook;}#endregion#region 打开⼀个excel⽂件,设置单元格的值,再保存⽂件/// <summary>/// 打开⼀个excel⽂件,设置单元格的值,再保存⽂件/// </summary>/// <param name="ExcelPath"></param>/// <param name="sheetname"></param>/// <param name="column"></param>public static bool SetCellValue(String ExcelPath, String sheetname, int column, int row, String value) {bool returnb = false;try{IWorkbook wk = null;bool isCompatible = ExcelHelper.GetIsCompatible(ExcelPath);using (FileStream fs = File.Open(ExcelPath, FileMode.Open,FileAccess.Read, FileShare.ReadWrite)){//把xls⽂件读⼊workbook变量⾥,之后就可以关闭了wk = ExcelHelper.CreateWorkbook(isCompatible, fs);fs.Close();}//把xls⽂件读⼊workbook变量⾥,之后就可以关闭了//ISheet sheet = wk.GetSheet(sheetname);ISheet sheet = wk.GetSheetAt(0);ICell cell = sheet.GetRow(row).GetCell(column);cell.SetCellValue(value);using (FileStream fileStream = File.Open(ExcelPath,FileMode.OpenOrCreate, FileAccess.ReadWrite)){wk.Write(fileStream);fileStream.Close();}returnb = true;}catch (Exception){returnb = false;throw;}return returnb;}#endregion#region 打开⼀个⽂件,读取excel⽂件某个单元格的值(多少⾏,多少列)/// <summary>/// 打开⼀个⽂件,读取excel⽂件某个单元格的值(多少⾏,多少列)/// </summary>/// <param name="ExcelPath"></param>/// <param name="sheetname"></param>/// <param name="column"></param>/// <param name="row"></param>/// <returns></returns>public static String GetCellValue(string ExcelPath, String sheetname, int column, int row){String returnStr = null;try{IWorkbook wk = null;bool isCompatible = ExcelHelper.GetIsCompatible(ExcelPath);using (FileStream fs = File.Open(ExcelPath, FileMode.Open,FileAccess.Read, FileShare.ReadWrite)){//把xls⽂件读⼊workbook变量⾥,之后就可以关闭了wk = ExcelHelper.CreateWorkbook(isCompatible, fs);fs.Close();}//把xls⽂件读⼊workbook变量⾥,之后就可以关闭了//ISheet sheet = wk.GetSheet(sheetname);ISheet sheet = wk.GetSheetAt(0);ICell cell = sheet.GetRow(row).GetCell(column);returnStr = cell.ToString();}catch (Exception){returnStr = "Exception";throw;}return returnStr;}#endregion#region 打开⼀个⽂件,删除多少⾏以后的数据(是删除,不是清空数据)/// <summary>/// 打开⼀个⽂件,删除多少⾏以后的数据(是删除,不是清空数据)/// </summary>/// <param name="fileMatchPath"></param>/// <param name="rowIndex">从多少⾏后开始删除</param>public static void DelRowsData(string fileMatchPath, int startRowIndex){IWorkbook wk = null;bool isCompatible = ExcelHelper.GetIsCompatible(fileMatchPath);using (FileStream fs = File.Open(fileMatchPath, FileMode.Open,FileAccess.Read, FileShare.ReadWrite)){//把xls⽂件读⼊workbook变量⾥,之后就可以关闭了ISheet sheet = wk.GetSheetAt(0);for (int i = startRowIndex; i <= stRowNum; i++){if (sheet.GetRow(i) == null){i++;continue;}sheet.RemoveRow(sheet.GetRow(i));}//转为字节数组MemoryStream stream = new MemoryStream();wk.Write(stream);var buf = stream.ToArray();//保存为Excel⽂件这种⽅式能保存.xls和.xlsx⽂件using (FileStream fs = new FileStream(fileMatchPath, FileMode.Create, FileAccess.Write)){fs.Write(buf, 0, buf.Length);fs.Flush();}}#endregion/// <summary>/// 创建表格头单元格/// </summary>/// <param name="sheet"></param>/// <returns></returns>private static ICellStyle GetCellStyle(IWorkbook workbook){ICellStyle style = workbook.CreateCellStyle();style.FillPattern = FillPattern.SolidForeground;style.FillForegroundColor = NPOI.HSSF.Util.HSSFColor.Grey25Percent.Index;return style;}/// <summary>/// 遍历打印⼆维数组/// </summary>/// <param name="array"></param>public static void PrintTwoArrayTest(object[,] array){Console.WriteLine("============测试打印⼆维数组==============");int row = array.GetLength(0);int column = array.GetLength(1);for (int r = 0; r < row; r++){for (int c = 0; c < column; c++){if (array[r, c] != null){string value = array[r, c].ToString();Console.Write($"{value} |");}}Console.WriteLine();}}/// <summary>/// 传⼊2个⼆维数组,进⾏条件匹配替换,返回替换后的⼀个⼆维数组/// </summary>/// <param name="refArray">参考的数组</param>/// <param name="matchArray">带替换的数组</param>/// <param name="refColumn01">参考列1</param>/// <param name="refColumn02">参考列2</param>/// <param name="refColTarget01">被复制的值的列1</param>/// <param name="matchColumn01">带替换的参考列1</param>/// <param name="matchColumn02">带替换的参考列2</param>/// <param name="matchColTarget01">带粘贴的值的列1</param>/// <returns></returns>public static string[,] GetMatchArray(string[,] refArray, string[,] matchArray, int refColumn01, int refColumn02, int refColTarget01, int matchColumn01, int matchColumn02, int matchColTarget01) {Console.WriteLine("============遍历2个⼆维数,匹配替换==============");int row = refArray.GetLength(0);int column = matchArray.GetLength(1);int row02 = matchArray.GetLength(0);int iMatch = 0;for (int r = 0; r < row; r++){string value01 = refArray[r, refColumn01];//第1列的数据string value02 = refArray[r, refColumn02];//第2列的数据if (value01 != null && value02 != null){if (value01.Length > 0 | value02.Length > 0){for (int r02 = 0; r02 < row02; r02++){{matchArray[r02, matchColTarget01] = refArray[r, refColTarget01];iMatch++;Console.WriteLine($"匹配了{iMatch}次");}}}}}return matchArray;}/// <summary>/// 传⼊2个数组,根据相同条件匹配,吧ref的⽬标写⼊match中/// </summary>/// <param name="refArray">参考的数组</param>/// <param name="matchArray">带替换的数组</param>/// <param name="refColumn01"></param>/// <param name="refColTarget01"></param>/// <param name="matchColumn01"></param>/// <param name="matchColTarget01"></param>/// <returns></returns>public static string[,] GetMatchArray(string[,] refArray, string[,] matchArray, int refColumn01, int refColTarget01, int matchColumn01, int matchColTarget01) {Console.WriteLine("============遍历2个⼆维数,匹配替换==============");int row = refArray.GetLength(0);int column = matchArray.GetLength(1);int row02 = matchArray.GetLength(0);int iMatch = 0;for (int r = 0; r < row; r++){string value01 = string.Empty;value01 = refArray[r, refColumn01];//遍历第⼀个数组第1列的数据//value01 = value01.Trim();if (value01 != null){if (value01.Length > 0){for (int r02 = 0; r02 < row02; r02++){string match01 = string.Empty;match01 = matchArray[r02, matchColumn01];//遍历第⼀个数组第1列的数据//match01 = match01.Trim();if (value01 == match01){matchArray[r02, matchColTarget01] = refArray[r, refColTarget01];iMatch++;Console.WriteLine($"匹配了{iMatch}次");}}}}}return matchArray;}/// <summary>/// 遍历⼀个数组,如果第⼆列的数值⼤于等于第⼀列的数值,替换字符串/// </summary>/// <param name="matchArray"></param>/// <param name="refColumn01"></param>/// <param name="refColumn02"></param>/// <param name="sValue"></param>/// <returns></returns>public static string[,] GetMatchArray(string[,] matchArray, int refColumn01, int refColumn02, string sValue){Console.WriteLine("============遍历2个⼆维数,匹配替换==============");int row = matchArray.GetLength(0);int column = matchArray.GetLength(1);int iMatch = 0;for (int r = 0; r < row; r++){string value01 = matchArray[r, refColumn01];//第1列的数据string value02 = matchArray[r, refColumn02];//第2列的数据try{int i01 = Convert.ToInt32(value01);int i02 = Convert.ToInt32(value02);if (i01 >= i02){matchArray[r, refColumn02] = sValue + $"(数量:{value02})";}}catch{}}return matchArray;}#region 打开excel⽂件,获取某⼀⾏的数据/// <param name="filepath">⽂件全路径</param>/// <param name="iRow">哪⼀⾏的数据</param>/// <param name="sheet_Number">哪⼀个sheet表</param>/// <returns></returns>public static ArrayList GetRowData(string filepath, int sheet_Number, int iRow){ArrayList arrayList = new ArrayList();bool isCompatible = ExcelHelper.GetIsCompatible(filepath);using (FileStream fsRead = File.OpenRead(filepath)){IWorkbook workbook = ExcelHelper.CreateWorkbook(isCompatible, fsRead);ISheet sheet = workbook.GetSheetAt(sheet_Number - 1);IRow currentRow = sheet.GetRow(iRow - 1);for (int c = 0; c < stCellNum; c++){//获取每个单元格(r⾏c列的数据)ICell cell = currentRow.GetCell(c);//获取单元格的内容string value = string.Empty;if (cell != null){value = cell.ToString(); //如果单元格为空,这⾥会报错的arrayList.Add(value);}}return arrayList;}}#endregion/// <summary>/// 打开excel⽂件,根据某⼀⾏的数据,根据字符串内容,返回这个字符串所在的列的索引/// </summary>/// <param name="filepath"></param>/// <param name="iRow"></param>/// <param name="sheet_Number">从1开始的</param>/// <param name="s1">注意字符串的顺序</param>/// <param name="s2"></param>/// <param name="s3"></param>/// <returns></returnsspublic static ArrayList GetDataIndexs(string filepath, int sheet_Number, int iRow, string s1, string s2, string s3) {ArrayList arrayList = new ArrayList();bool isCompatible = ExcelHelper.GetIsCompatible(filepath);using (FileStream fsRead = File.OpenRead(filepath)){IWorkbook workbook = ExcelHelper.CreateWorkbook(isCompatible, fsRead);ISheet sheet = workbook.GetSheetAt(sheet_Number - 1);IRow currentRow = sheet.GetRow(iRow - 1);for (int c = 0; c < stCellNum; c++){//获取每个单元格(r⾏c列的数据)ICell cell = currentRow.GetCell(c);//获取单元格的内容string value = string.Empty;if (cell != null){value = cell.ToString(); //如果单元格为空,这⾥会报错的if (value == s1 | value == s2 || value == s3){arrayList.Add(c);}}}Console.WriteLine("==========测试打印索引值============");foreach (var a in arrayList){Console.WriteLine($"{a} |");}return arrayList;}}/// <summary>/// 打开excel⽂件,根据某⼀⾏的字符串,然后这个字符串所在列的索引/// </summary>/// <param name="filepath"></param>/// <param name="sheet_Number"></param>/// <param name="iRow"></param>/// <param name="sValue"></param>/// <returns></returns>public static int GetDataIndex(string filepath, int sheet_Number, int iRow, string sValue){int i = 0;bool isCompatible = ExcelHelper.GetIsCompatible(filepath);using (FileStream fsRead = File.OpenRead(filepath)){IWorkbook workbook = ExcelHelper.CreateWorkbook(isCompatible, fsRead);ISheet sheet = workbook.GetSheetAt(sheet_Number - 1);IRow currentRow = sheet.GetRow(iRow - 1);for (int c = 0; c < stCellNum; c++){//获取每个单元格(r⾏c列的数据)ICell cell = currentRow.GetCell(c);value = cell.ToString(); //如果单元格为空,这⾥会报错的if (value == sValue){i = c;}}}}return i;}/// <summary>/// 打开⼀个⽂件,把第⼏⾏的数据取出来,返回⼀个字典单元格的值:列的索引/// </summary>/// <param name="filepath"></param>/// <param name="sheet_Number">第⼏张⼯作表(从1开始)</param>/// <param name="iRow">第⼏⾏(从1开始)</param>/// <returns></returns>public static Dictionary<string, int> GetDataDictionary(string filepath, int sheet_Number, int iRow){Dictionary<string, int> DataDict = new Dictionary<string, int>();bool isCompatible = ExcelHelper.GetIsCompatible(filepath);using (FileStream fsRead = File.OpenRead(filepath)){IWorkbook workbook = ExcelHelper.CreateWorkbook(isCompatible, fsRead);ISheet sheet = workbook.GetSheetAt(sheet_Number - 1);IRow currentRow = sheet.GetRow(iRow - 1);for (int c = 0; c < stCellNum; c++){//获取每个单元格(r⾏c列的数据)ICell cell = currentRow.GetCell(c);//获取单元格的内容string value = string.Empty;if (cell != null){value = cell.ToString(); //如果单元格为空,这⾥会报错的if (!DataDict.ContainsKey(value)){if (value == "*预计交货⽇期" | value == "预计交货⽇期"){value = "*预计交货⽇期";}DataDict.Add(value, c);}else{if (filepath.Contains("销售订单")) //销售订单模板的第⼆个备注填写收货地址{if (value == "备注") //如果有两个备注{//DataDict.Add("采购员", c);DataDict.Add("收货地址", c);}}}}}//Console.WriteLine("================开始遍历字典===============");//foreach (KeyValuePair<string, int> kv in DataDict)//通过KeyValuePair遍历元素//{// Console.WriteLine($"Key:{kv.Key},Value:{kv.Value}");//}return DataDict;}}/// <summary>/// 打开⼀个⽂件,根据第⼏张表第⼏⾏的中的两个字符,返回值:⼀个字典/// </summary>/// <param name="filepath"></param>/// <param name="sheet_Number"></param>/// <param name="strColumnKey"></param>/// <param name="strColumnValue"></param>/// <returns></returns>public static Dictionary<string, string> GetDataDictionary(string filepath, int sheet_Number, int iRow, string strColumnKey, string strColumnValue) {Dictionary<string, int> dic = GetDataDictionary(filepath, 1, iRow);int iColumnKey = dic[strColumnKey];int iColumnValue = dic[strColumnValue];Dictionary<string, string> DataDict = new Dictionary<string, string>();bool isCompatible = ExcelHelper.GetIsCompatible(filepath);using (FileStream fsRead = File.OpenRead(filepath)){IWorkbook workbook = ExcelHelper.CreateWorkbook(isCompatible, fsRead);ISheet sheet = workbook.GetSheetAt(sheet_Number - 1);for (int i = 0; i <= stRowNum; i++)ICell cellKey = rowdata.GetCell(iColumnKey);//如果rowdata是null,这⾥报错ICell cellValue = rowdata.GetCell(iColumnValue);if (cellKey != null && cellValue != null){if (!DataDict.ContainsKey(cellKey.ToString())){string strCellKey = cellKey.ToString();string strCellValue = cellValue.ToString();DataDict.Add(strCellKey, strCellValue);}}}}return DataDict;}}/// <summary>/// ⾃适应列宽/// </summary>/// <param name="sheet"></param>/// <param name="cols"></param>public static void AutoColumnWidth(ISheet sheet, int cols){for (int col = 0; col <= cols; col++){sheet.AutoSizeColumn(col);//⾃适应宽度,但是其实还是⽐实际⽂本要宽int columnWidth = sheet.GetColumnWidth(col) / 256;//获取当前列宽度for (int rowIndex = 1; rowIndex <= stRowNum; rowIndex++){IRow row = sheet.GetRow(rowIndex);ICell cell = row.GetCell(col);if (cell != null){int contextLength = Encoding.UTF8.GetBytes(cell.ToString()).Length;//获取当前单元格的内容宽度 columnWidth = columnWidth < contextLength ? contextLength : columnWidth;}}sheet.SetColumnWidth(col, columnWidth * 200);//经过测试200⽐较合适。

在web中js实现类似excel的表格控件Execl功能⾮常强⼤,内置的很多函数或公式可以⼤⼤提⾼对数据的加⼯处理能⼒。
那么在web中有没有类似的控件呢?经过⼀番搜寻,发现handsontable具备了基本的excel功能⽀持公式,同时能对数据进⾏实时编辑。
另外⽀持拖动复制、Ctrl+C 、Ctrl+V 等等。
在浏览器⽀持⽅⾯,它⽀持以下的浏览器: IE7+, FF, Chrome, Safari, Opera。
⾸先引⼊相关库⽂件,公式⽀持不包含在handsontable.full.js中,需要单独引⼊:<script src="http://handsontable.github.io/handsontable-ruleJS/lib/jquery/jquery-1.10.2.js"></script><script src="http://handsontable.github.io/handsontable-ruleJS/lib/handsontable/handsontable.full.js"></script><link rel="stylesheet" media="screen" href="http://handsontable.github.io/handsontable-ruleJS/lib/handsontable/handsontable.full.css"><script src="http://handsontable.github.io/handsontable-ruleJS/lib/RuleJS/lib/lodash/lodash.js"></script><script src="http://handsontable.github.io/handsontable-ruleJS/lib/RuleJS/lib/underscore.string/underscore.string.js"></script><script src="http://handsontable.github.io/handsontable-ruleJS/lib/RuleJS/lib/moment/moment.js"></script><script src="http://handsontable.github.io/handsontable-ruleJS/lib/RuleJS/lib/numeral/numeral.js"></script><script src="http://handsontable.github.io/handsontable-ruleJS/lib/RuleJS/lib/numericjs/numeric.js"></script><script src="http://handsontable.github.io/handsontable-ruleJS/lib/RuleJS/lib/js-md5/md5.js"></script><script src="http://handsontable.github.io/handsontable-ruleJS/lib/RuleJS/lib/jstat/jstat.js"></script><script src="http://handsontable.github.io/handsontable-ruleJS/lib/RuleJS/lib/formulajs/formula.js"></script><script src="http://handsontable.github.io/handsontable-ruleJS/lib/RuleJS/js/parser.js"></script><script src="http://handsontable.github.io/handsontable-ruleJS/lib/RuleJS/js/ruleJS.js"></script><script src="http://handsontable.github.io/handsontable-ruleJS/lib/handsontable/handsontable.formula.js"></script>在HTML中放置⼀个Div容器来存放handsontable控件:<body><div id="handsontable-code"></div></body>在javascript代码中,⾸先获取div容器,然后创建表格控件:<script type="text/javascript">$(document).ready(function () {var data1 = [['=$B$2', "Maserati", "Mazda", "return 1+2;", 'return DataAccess.getScalar("select top 1 name from Cloud_Users where cellPhone=158********");', "=A$1"], [2009, 0, 2941, 4303, 354, 5814],[2010, 5, 2905, 2867, '=SUM(A4,2,3)', '=$B1'],[2011, 4, 2517, 4822, 552, 6127],[2012, '=SUM(A2:A5)', '=SUM(B5,E3)', '=A2/B2', 12, 4151]];function negativeValueRenderer(instance, td, row, col, prop, value, cellProperties) {Handsontable.renderers.TextRenderer.apply(this, arguments);var escaped = Handsontable.helper.stringify(value),newvalue;if (escaped.indexOf('return') === 0) {//计算列为只读//cellProperties.readOnly = true;td.style.background = '#EEE';newvalue = document.createElement('span');$.ajax({//提交数据的类型 POST GETtype: "POST",//提交的⽹址url: "/services/CSEngine.ashx",//提交的数据data: { code: value, code2: escaped },//返回数据的格式datatype: "html",//"xml", "html", "script", "json", "jsonp", "text".//在请求之前调⽤的函数//beforeSend: function () { $("#msg").html("logining"); },//成功返回之后调⽤的函数success: function (data) {// $("#msg").html(decodeURI(data));newvalue.innerHTML = decodeURI(data);},//调⽤执⾏后调⽤的函数complete: function (XMLHttpRequest, textStatus) {//alert(XMLHttpRequest.responseText);// alert(textStatus);//HideLoading();},//调⽤出错执⾏的函数error: function () {//请求出错处理// alert('error')}});Handsontable.Dom.addEvent(newvalue, 'mousedown', function (e) {e.preventDefault(); // prevent selection quirk});Handsontable.Dom.empty(td);td.appendChild(newvalue);}// if row contains negative numberif (parseInt(value, 10) < 0) {// add class "negative"td.className = 'negative';}}//类似excel进⾏拖放,公式会变var container1 = $('#handsontable-code');Handsontable.renderers.registerRenderer('negativeValueRenderer', negativeValueRenderer);container1.handsontable({data: data1,minSpareRows: 1,colHeaders: true,rowHeaders: true,contextMenu: true,manualColumnResize: true,formulas: true,cells: function (row, col, prop) {var cellProperties = {};var escaped = Handsontable.helper.stringify(this.instance.getData()[row][col]);if (escaped.indexOf('return')===0) {cellProperties.renderer = "negativeValueRenderer";}return cellProperties;}});});</script>其中 =SUM(B5,E3)的公式是RuleJs提供的,return 1+2是⾃⼰实现的C#代码脚本,需要单击解析:public class CSEngine : IHttpHandler {private static int count = 0;public void ProcessRequest (HttpContext context) {context.Response.ContentType = "text/plain";try{count++;string ret = "";string code = context.Request["code"].ToString();if (string.IsNullOrEmpty(code)){ret = "参数错误";}else{ScriptOptions options = ScriptOptions.Default.AddReferences(Assembly.GetAssembly(typeof(DBServices.DataAccess)))//.AddImports("System.Data")//.AddImports("System.Data.SqlClient").AddImports("DBServices");var state = CSharpScript.RunAsync(code, options).Result.ReturnValue;ret = state.ToString();state = null;options = null;}Console.WriteLine(count);context.Response.Write(ret);}catch(Exception ex){//errorConsole.WriteLine(count);}}public bool IsReusable {get {return false;}}}运⾏代码,如下:以上就是本⽂的全部内容,希望对⼤家的学习有所帮助,也希望⼤家多多⽀持。

excel表格中的数据用gridview显示(导入与导出)在 2.0中,如何用gridview显示来自建立好的EXCEL文件的内容呢,其实是很简单的,下面给出简单代码片断protected void Page_Load(object sender, EventArgs e){OleDbConnection DBConnection = newOleDbConnection("Provider=Microsoft.Jet.OLEDB.4.0;" + "Data Source=" +Server.MapPath("~/App_Data/demo1.xls") + ";" + "ExtendedProperties=\"Excel 8.0;HDR=Yes\"");DBConnection.Open();string SQLString = "SELECT * FROM [Sheet1$]";OleDbCommand DBCommand = new OleDbCommand(SQLString, DBConnection);IDataReader DBReader = DBCommand.ExecuteReader();GridView1.DataSource = DBReader;GridView1.DataBind();DBReader.Close();DBConnection.Close();}其中,把demo1.xls放在app_data目录下,这里用select * from [Sheet1$]来将sheet1的内容取出来。
2............................把Excel文件中的数据读入到DataGrid中使用Excel文件做为DataGrid的数据源是非常简单的,一旦数据被装载进来,就可以把数据再保存进SQL Server或XML中。

C#如何读取Excel表格数据并显示到GridView控件2008/05/06 00:36近日,有个项目,需要用 Web 形式将 Excel 表格中的数据导入到数据库中,为了简化问题的解决,现在先将表中数据导入到 GridView 控件上.代码如下:protected void Button1_Click(object sender, EventArgs e)...{string filepath=FileUpload1.PostedFile.FileName;ReadExcel(filepath, gdBom);}public void ReadExcel(string sExcelFile,GridView dgBom)...{DataTable ExcelTable;DataSet ds = new DataSet();//Excel的连接OleDbConnection objConn = newOleDbConnection("Provider=Microsoft.Jet.OLEDB.4.0;Data Source=" + sExcelFile + ";" + "Extended Properties=Excel 8.0;");objConn.Open();DataTable schemaTable =objConn.GetOleDbSchemaTable(System.Data.OleDb.OleDbSchemaGuid.Tables, null);string tableName = schemaTable.Rows[0][2].ToString().Trim();//获取 Excel 的表名,默认值是sheet1string strSql = "select * from [" + tableName + "]";OleDbCommand objCmd = new OleDbCommand(strSql, objConn);OleDbDataAdapter myData = new OleDbDataAdapter(strSql, objConn);myData.Fill(ds, tableName);//填充数据dgBom.DataSource =ds;dgBom.DataBind();objConn.Close();ExcelTable = ds.Tables[tableName];int iColums = ExcelTable.Columns.Count;//列数int iRows = ExcelTable.Rows.Count;//行数//定义二维数组存储 Excel 表中读取的数据string[,] storedata = new string[iRows, iColums];for(int i=0;i<ExcelTable.Rows.Count;i++)for (int j = 0; j < ExcelTable.Columns.Count; j++)...{//将Excel表中的数据存储到数组storedata[i, j] = ExcelTable.Rows[i][j].ToString();}int excelBom = 0;//记录表中有用信息的行数,有用信息是指除去表的标题和表的栏目,本例中表的用用信息是从第三行开始//确定有用的行数for (int k = 2; k < ExcelTable.Rows.Count; k++)if (storedata[k, 1] != "")excelBom++;if (excelBom == 0)...{Response.Write("<script language=javascript>alert('您导入的表格不合格式!')</script>");}else...{//LoadDataToDataBase(storedata,excelBom)//该函数主要负责将 storedata 中有用的数据写入到数据库中,在此不是问题的关键省略}}运行效果如下图:选择BOM表的路径,点确定后类别:c#| | 添加到搜藏 | 分享到i贴吧 | 浏览(1391) | 评论 (7)上一篇:验证文件上传有效类型的正则表达...下一篇:C#数值结果表(格式化字符串)相关文章:•sun:将gridview控件中数据以指•怎样将Gridview控件的内容导出定...为...•类型"GridView"的控件必须放在...•用户控件上的GridView如何导入,...•使用Gridview空间导出到Excel,Gr...•的GridView控件中的数据...• 2.0,C#----利用GridView...•扩展GridView 控件—支持Excel ...•GridView 不使用数据源控件,导出...•VB,C# GridView导出到excel,data...更多>>使用C#读取Word表格数据读取Word表格数据的方法1//将读取Word表格封装与方法中。

gridview --导出execl 方法及身份证号灯数据类型被转换为数字导致数据错误。
及导出数据方法。
绍:将GridView的内容导出到Excel是很普通的应用,在很多网站上都有使用。
有各种不同的技术来实现GridView导出到Excel中,主要是看应用程序的具体情况。
在本文中我将演示一些你会觉得有用的技巧。
从GridView导出到Excel(基础代码)让我们从基础的导出方法开始。
首先,我们需要用一些数据填充GridView。
我创建了一个自定义的数据表,它包含了多个字段。
你可以在下面的截图中看到。
现在,下一步的任务是使用数据库中的数据来填充GridView。
试一试下面的代码,它使用DataSet来填充GridView。
1private void BindData()2{34SqlConnection myConnection = newSqlConnection("Server=localhost;Database=School;Trusted_Connection=true");56SqlDataAdapter ad = new SqlDataAdapter("SELECT * FROM Users", myConnection);78DataSet ds = new DataSet();910ad.Fill(ds);1112gvUsers.DataSource = ds;1314gvUsers.DataBind();1516}1718所以GridView现在已经填充了数据。
接下去的任务就是将GridView导出到Excel。
你可以在button的click事件中使用下面的代码。
1Response.ClearContent();23Response.AddHeader("content-disposition", "attachment; filename=MyExcelFile.xls");45Response.ContentType = "application/excel";67StringWriter sw = new StringWriter();89HtmlTextWriter htw = new HtmlTextWriter(sw);1011gvUsers.RenderControl(htw);1213Response.Write(sw.ToString());1415Response.End();16你同时还要重载VerifyRenderingInServerForm方法。
C#如何读取Excel表格数据并显示到GridView控件2008/05/06 00:36近日,有个项目,需要用 Web 形式将 Excel 表格中的数据导入到数据库中,为了简化问题的解决,现在先将表中数据导入到 GridView 控件上.代码如下:protected void Button1_Click(object sender, EventArgs e)...{string filepath=FileUpload1.PostedFile.FileName;ReadExcel(filepath, gdBom);}public void ReadExcel(string sExcelFile,GridView dgBom)...{DataTable ExcelTable;DataSet ds = new DataSet();//Excel的连接OleDbConnection objConn = newOleDbConnection("Provider=Microsoft.Jet.OLEDB.4.0;Data Source=" + sExcelFile + ";" + "Extended Properties=Excel 8.0;");objConn.Open();DataTable schemaTable =objConn.GetOleDbSchemaTable(System.Data.OleDb.OleDbSchemaGuid.Tables, null);string tableName =schemaTable.Rows[0][2].ToString().Trim();//获取 Excel 的表名,默认值是sheet1string strSql = "select * from [" + tableName + "]";OleDbCommand objCmd = new OleDbCommand(strSql, objConn);OleDbDataAdapter myData = new OleDbDataAdapter(strSql, objConn);myData.Fill(ds, tableName);//填充数据dgBom.DataSource =ds;dgBom.DataBind();objConn.Close();ExcelTable = ds.Tables[tableName];int iColums = ExcelTable.Columns.Count;//列数int iRows = ExcelTable.Rows.Count;//行数//定义二维数组存储 Excel 表中读取的数据string[,] storedata = new string[iRows, iColums];for(int i=0;i<ExcelTable.Rows.Count;i++)for (int j = 0; j < ExcelTable.Columns.Count; j++)...{//将Excel表中的数据存储到数组storedata[i, j] =ExcelTable.Rows[i][j].ToString();}int excelBom = 0;//记录表中有用信息的行数,有用信息是指除去表的标题和表的栏目,本例中表的用用信息是从第三行开始//确定有用的行数for (int k = 2; k < ExcelTable.Rows.Count; k++)if (storedata[k, 1] != "")excelBom++;if (excelBom == 0)...{Response.Write("<scriptlanguage=javascript>alert('您导入的表格不合格式!')</script>");}else...{//LoadDataToDataBase(storedata,excelBom)//该函数主要负责将 storedata 中有用的数据写入到数据库中,在此不是问题的关键省略}}运行效果如下图:选择BOM表的路径,点确定后类别:c#| | 添加到搜藏 | 分享到i贴吧 | 浏览(1391) | 评论(7)上一篇:验证文件上传有效类型的正则表达...下一篇:C#数值结果表(格式化字符串)相关文章:•sun:将gridview控件中数据以指定...•怎样将Gridview控件的内容导出为...•类型"GridView"的控件必须放在...•用户控件上的GridView如何导入,...•使用Gridview空间导出到Excel,Gr...•的GridView控件中的数据...• 2.0,C#----利用GridView...•扩展GridView 控件—支持Excel ...•GridView 不使用数据源控件,导出...•VB,C# GridView导出到excel,data...更多>>使用C#读取Word表格数据读取Word表格数据的方法1//将读取Word表格封装与方法中。
GridView导出Excel的方法以及导出后文件怎样变成文本的形式GridView导出Excel的方法一、带有复选框的导出excel文件protected void dc_Click(object sender, EventArgs e){Export("application/ms-excel", "预订已通过人员.xls");}//"预订已通过人员.xls"为excel文件的表头private void Export(string FileType, string FileName){Response.ContentEncoding = System.Text.Encoding.UTF7;Response.Clear();Response.Buffer = false;Response.Charset = "GB2312";Response.AppendHeader("Content-Disposition","attachment;filename=exl.xls");Response.ContentEncoding =System.Text.Encoding.GetEncoding("GB2312");Response.ContentType = "application/ms-excel";Response.Write("content=\\"text/html; charset=GB2312\\">");this.EnableViewState = false;//转换为table 表格HtmlTable ht = new HtmlTable();ht.Border = 1;HtmlTableRow htrt = new HtmlTableRow();HtmlTableCell htct = new HtmlTableCell();htct.ColSpan = 15;htct.Align = "center";htct.InnerHtml = "预订已通过人员";htrt.Cells.Add(htct);ht.Rows.Add(htrt);HtmlTableRow htrh = new HtmlTableRow();string[] strArray = { "ID", "领取ID", "工号", "姓名", "性别", "部门", "工种", "状态", "领取类型", "代领人", "物品", "预订时间","审核时间", "数量", "物品型号","接收人签字" };for (int i = 0; i < 16; i++){HtmlTableCell htc = new HtmlTableCell();htc.InnerHtml = "" + strArray[i] + "";htrh.Cells.Add(htc);}ht.Rows.Add(htrh);for (int i = 0; i < GV_ypck.Rows.Count; i++)//取行{HtmlTableRow htr = null;for (int j = 0; j < 17; j++)//取列{if (j == 0){CheckBox cb4this =(CheckBox)GV_ypck.Rows[i].Cells[0].FindControl("CheckBox1 ");if (!cb4this.Enabled || !cb4this.Checked){break;//取消取列elsehtr = new HtmlTableRow();}else if (j >= 1 && j <= 16){HtmlTableCell htc = new HtmlTableCell();htc.InnerT ext =(GV_ypck.Rows[i].Cells[j].Text.Trim() == " " ? "" :GV_ypck.Rows[i].Cells[j].Text.Trim());htr.Cells.Add(htc);}}if (htr != null && htr.Cells.Count > 0){ht.Rows.Add(htr);}}System.IO.StringWriter oStringWriter = newSystem.IO.StringWriter();HtmlTextWriter oHtmlTextWriter = newHtmlTextWriter(oStringWriter);//ht.Attributes.Add("style", "vnd.ms-excel.numberformat:@"); ht.RenderControl(oHtmlTextWriter);Response.Write(oStringWriter.ToString());Response.End();}//未将GridView放到runat="server"里public override void VerifyRenderingInServerForm(Control control) {二、不带复选框的导出excel文件//在gridview绑定时进行设置导出的excel文件为文本形式//ydwp.DataSource = dt;//ydwp.Attributes.Add("style", "vnd.ms-excel.numberformat:@");//ydwp.DataBind();// 导出列表信息到Excelprotected void dc_Click(object sender, EventArgs e){Export("application/ms-excel", "已领取人员表.xls");}private void Export(string FileType, string FileName){ydwp.AllowPaging = false;Response.Charset = "GB2312";Response.ContentEncoding = System.Text.Encoding.UTF7;Response.Clear();Response.Buffer = false;Response.Charset = "GB2312";Response.AppendHeader("Content-Disposition","attachment;filename=exl.xls");Response.ContentEncoding =System.Text.Encoding.GetEncoding("GB2312");Response.ContentType = "application/ms-excel";Response.Write("");//this.EnableViewState = false;System.IO.StringWriter oStringWriter = newSystem.IO.StringWriter();HtmlTextWriter oHtmlTextWriter = newHtmlTextWriter(oStringWriter);ydwp.RenderControl(oHtmlTextWriter);Response.Write(oStringWriter.ToString());Response.End();}//注:三、在导出的excel文件中往往需要将excel文件设置为文本的形式需要在方法或者绑定gridview中加.Attributes.Add("style", "vnd.ms-excel.numberformat:@");。
[C1]仿Excel实现(C1FlexGrid)⼀分析阶段根据 Excel 表格区域的划分,如下图,基本上以4⾏*3列的框架搭建;第⼀⾏为列头区域 ==> C1FlexGrid.ColumnHeaders第⼆⾏为单元格区域 ==> C1FlexGrid.Cells第三⾏为列尾区域 ==> C1FlexGrid.ColumnFooters第四⾏为横向滚动条区域,在 Excel ⾥还有⼯作簿页签等;第⼀列为⾏头区域 ==> C1FlexGrid.RowHeaders第⼆列为单元格区域第三列为纵向滚动条区域;在 CFlexGrid ⾥还有 BottomLeftCells,TopLeftCells 两个区域,楼主做了⼀个 Demo,然后把各个区域⽤背景⾊标识区域,如下图:⼆扩展 C1FlexGrid 框架在 Silverlight 中新建⼀个模版化控件,将该模版化控件继承于 C1FlexGrid,并在构造函数中默认初始化50⾏10列;代码如下:public class SLFlexGridExt : C1FlexGrid{/// <summary>/// 构造函数/// </summary>public SLFlexGridExt(){this.DefaultStyleKey = typeof(SLFlexGridExt)// 默认添加50⾏10列for (int i = 0; i < 50; i++){Rows.Add(new Row())}for (int c = 0; c < 10; c++){Columns.Add(new Column())}}}View Code接着在⾃动⽣成的 Themes/Generic.xaml 中对该模版化控件进⾏样式设置;<!-- style for main control --><Style TargetType="local:SLFlexGridExt"><!-- properties --><Setter Property="FontFamily"Value="Arial"/><Setter Property="Background"Value="Transparent"/><Setter Property="RowBackground"Value="{StaticResource _RowBackground}"/><Setter Property="AlternatingRowBackground"Value="{StaticResource _AlternatingRowBackground}"/><Setter Property="HeaderGridLinesBrush"Value="{StaticResource _HeaderGridLinesBrush}"/><Setter Property="GridLinesBrush"Value="{StaticResource _GridLinesBrush}"/><Setter Property="FrozenLinesBrush"Value="{StaticResource _FrozenLinesBrush}"/><Setter Property="GroupRowBackground"Value="{StaticResource _GroupRowBackground}"/><Setter Property="CursorBackground"Value="{StaticResource _CursorBackground}"/><Setter Property="SelectionBackground"Value="{StaticResource _SelectionBackground}"/><Setter Property="RowHeaderBackground"Value="{StaticResource _RowHeaderBackground}"/><Setter Property="ColumnHeaderBackground"Value="{StaticResource _ColumnHeaderBackground}"/><Setter Property="TopLeftCellBackground"Value="{StaticResource _TopLeftCellBackground}"/><Setter Property="BottomRightCellBackground"Value="{StaticResource _BottomRightCellBackground}"/><!-- Excel behavior by default --><Setter Property="AllowDragging"Value="None"/><Setter Property="AllowSorting"Value="False"/><Setter Property="AllowResizing"Value="Both"/><Setter Property="ShowMarquee"Value="True"/><Setter Property="GridLinesVisibility"Value="All"/><Setter Property="ClipboardCopyMode"Value="ExcludeHeader"/><Setter Property="ClipboardPasteMode"Value="ExcludeHeader"/><Setter Property="KeyActionTab"Value="MoveAcross"/><Setter Property="AreRowGroupHeadersFrozen"Value="False"/><Setter Property="Template"><Setter.Value><ControlTemplate TargetType="local:SLFlexGridExt"><Border Background="{TemplateBinding Background}"BorderBrush="{TemplateBinding BorderBrush}"BorderThickness="{TemplateBinding BorderThickness}"><Grid x:Name="_root"><Grid.RowDefinitions><RowDefinition Height="Auto"/><RowDefinition Height="*"/><RowDefinition Height="Auto"/><RowDefinition Height="Auto"/></Grid.RowDefinitions><Grid.ColumnDefinitions><ColumnDefinition Width="Auto"/><ColumnDefinition Width="*"/><ColumnDefinition Width="Auto"/></Grid.ColumnDefinitions><!-- vertical scrollbar --><ScrollBar x:Name="_sbV"Orientation="Vertical"Grid.Column="2"Grid.RowSpan="2"/><!-- horizontal scrollbar --><ScrollBar x:Name="_sbH"Orientation="Horizontal"Grid.Row="3"Grid.ColumnSpan="3"/></Grid></Border></ControlTemplate></Setter.Value></Setter></Style>View Code这样以后就可以在其他界⾯⾥添加该扩展的 C1FlexGrid 控件,先添加该扩展控件所在命名空间:xmlns:my="clr-namespace:Memento.SLFlexGrid;assembly=SLFlexGrid"然后添加该控件<my:SLFlexGridExt x:Name="flex"Grid.Row="2"Margin="0 4 0 0"/>即可,预览效果如下图:现在还是跟未扩展前的 C1FlexGrid 差不多,接下来就要像 Excel 那样,在左下⾓加⼊切换⼯作簿的两个按钮,和⼯作簿页签的 TabControl,以及添加新⼯作簿的按钮,只要在之前扩展的基础上,修改 Themes/Generic.xaml,定义想要的样式布局即可:<Grid x:Name="_tabHolder"Grid.Row="3"Grid.ColumnSpan="2"Background="DarkGray"><Grid.ColumnDefinitions><ColumnDefinition/><ColumnDefinition Width="Auto"/><ColumnDefinition/></Grid.ColumnDefinitions><Grid><Grid.ColumnDefinitions><ColumnDefinition Width="auto"/><ColumnDefinition/></Grid.ColumnDefinitions><StackPanel x:Name="_spButtonPanel"Orientation="Horizontal"><Button Height="20"Width="20"/><RepeatButton Height="20"Width="20"/><RepeatButton Height="20"Width="20"/><Button Height="20"Width="20"/></StackPanel><c1:C1TabControl x:Name="_tabs"Grid.Column="1"FontSize="12"Padding="0"Margin="0 -1 0 0"IsTabStop="False"TabItemShape="Sloped"TabStripPlacement="Bottom"TabStripOverlap="8"/> </Grid><!-- horizontal scrollbar --><ScrollBar x:Name="_sbH"Orientation="Horizontal"Grid.Column="2"/></Grid>View Code效果如下图,这⾥楼主是按照 ComponentOne 官⽹提供的 ExcelBook.5Demo ⾥的样式设计的,现在还未加上⼯作簿,所以中间是空⽩部分,左边的按钮可在后期定义为⼯作簿的切换,还有⼀个新增⼯作簿,看⼼情实现吧。
GridView导出Excel的超好例子其实网上有很多关于Excel的例子,但是不是很好,他们的代码没有很全,读的起来还很晦涩。
经过这几天的摸索,终于可以完成我想要导出报表Excel的效果了。
下面是我的效果图。
一.前台的页面图GridView的第一页的内容GridView第二页的内容:大家可能遇到这种情况,就是这个时候导出Excel的时候,打开Excel的时候发现GridView的第二页的内容却没有导出到Excel表里面。
其实解决这种情况,很简单,只要在导出之前,把Gridview的设置分页设置为Flase就行了。
下面是我导出Gridview里面的全部内容,打开Excel表如下:这就可以导出全部的GridView里面的内容了,包括了GridView 的第一页和第二页的内容。
二、实现的代码1.前台的代码:<div style=" margin:20px;"><asp:GridView ID="gvRecord" runat="server" AllowPaging="True" CellPadding="3"AutoGenerateColumns="False" BorderColor="White"BorderStyle="Ridge" BorderWidth="2px" BackColor="White" CellSpacing="1"GridLines="None" onprerender="gvRecord_PreRender"onpageindexchanged="gvRecord_PageIndexChanged"onpageindexchanging="gvRecord_PageIndexChanging" > <PagerSettings FirstPageText="Home Page" LastPageText="Last Page"NextPageText="Next" PreviousPageText="Previous" /><RowStyle ForeColor="Black" BackColor="#E5F1FF" HorizontalAlign="Center" /><Columns><asp:TemplateField HeaderText="Extension"><ItemTemplate><asp:Label ID="Label1" runat="server" Text='<%# Bind("Extn") %>'></asp:Label></ItemTemplate><ItemStyle Width="200px" /></asp:TemplateField><asp:TemplateField HeaderText="Wake up time"><ItemTemplate><asp:Label ID="Label2" runat="server" Text='<%# Bind("CallTime") %>'></asp:Label></ItemTemplate><ItemStyle Width="300px" /></asp:TemplateField><asp:TemplateField HeaderText="Status"><ItemTemplate><asp:Label ID="Label3" runat="server" Text='<%# getResult(Eval("Status").ToString()) %>'></asp:Label> </ItemTemplate><ItemStyle Width="250px" /></asp:TemplateField><asp:TemplateField HeaderText="Call number"><ItemTemplate><asp:Label ID="Label4" runat="server" Text='<%# Bind("callcount") %>'></asp:Label></ItemTemplate><ItemStyle Width="150px" /></asp:TemplateField></Columns><FooterStyle BackColor="#C6C3C6" ForeColor="Black" /> <PagerStyle BackColor="#C6C3C6" ForeColor="Black" HorizontalAlign="Right" /><SelectedRowStyle BackColor="#9471DE" Font-Bold="True" ForeColor="White" /><HeaderStyle BackColor="#C9E2FF" Font-Bold="True"ForeColor="#000000" /></asp:GridView><p><asp:Button ID="btnExcel" CssClass="button" runat="server" Text="Statements "onclick="btnExcel_Click" /></p></div>2.后台代码如下:using System;using System.Collections;using System.Configuration;using System.Data;using System.Linq;using System.Web;using System.Web.Security;using System.Web.UI;using System.Web.UI.HtmlControls;using System.Web.UI.WebControls;using System.Web.UI.WebControls.WebParts;using System.Xml.Linq;using Model;using DAL;using System.Collections.Generic;using System.IO;public partial class _3C_CallManager_CallRecord : System.Web.UI.Page{int selectFlag = 0;protected void Page_Load(object sender, EventArgs e) {if (!IsPostBack){bind();}}public string getResult(string str){if (str == "0")return "Haven't called";if (str == "1")return "check-out";if (str == "2")return "success";if (str == "3")return "fail";if (str == "4")return "dealing";if (str == "5")return "Artificial wake";elsereturn "unkown";}public void bind() {selectFlag = 0;gvRecord.DataSource = VgCallService.GetInfo(); gvRecord.DataBind();}protected void btnExcel_Click(object sender, EventArgs e) {DateTime dt = System.DateTime.Now;string str = dt.ToString("yyyyMMddhhmmss");str = str + ".xls";gvRecord.AllowPaging = false;if (selectFlag == 0)bind();if (selectFlag == 1)selectBind();GridViewToExcel(gvRecord, "application/ms-excel", str);// Export(gvRecord, "application/ms-excel", str);}/// <summary>/// 将网格数据导出到Excel/// </summary>/// <param name="ctrl">网格名称(如GridView1)</param> /// <param name="FileType">要导出的文件类型(Excel:application/ms-excel)</param>/// <param name="FileName">要保存的文件名</param>public static void GridViewToExcel(Control ctrl, string FileType, string FileName){HttpContext.Current.Response.Charset = "GB2312";HttpContext.Current.Response.ContentEncoding = System.Text.Encoding.UTF8;//注意编码HttpContext.Current.Response.AppendHeader("Content-Disposition","attachment;filename=" + HttpUtility.UrlEncode(FileName, System.Text.Encoding.UTF8).ToString());HttpContext.Current.Response.ContentType = FileType;//image/JPEG;text/HTML;image/GIF;vnd.ms-excel/mswordctrl.Page.EnableViewState = false;StringWriter tw = new StringWriter();HtmlTextWriter hw = new HtmlTextWriter(tw);ctrl.RenderControl(hw);HttpContext.Current.Response.Write(tw.ToString());HttpContext.Current.Response.End();}/// <summary>/// ReLoad this VerifyRenderingInServerForm is neccessary /// </summary>/// <param name="control"></param>public override void VerifyRenderingInServerForm(Control control){}protected void gvRecord_PreRender(object sender, EventArgs e){if(selectFlag==0)bind();}protected void gvRecord_PageIndexChanged(object sender, EventArgs e){}protected void gvRecord_PageIndexChanging(object sender, GridViewPageEventArgs e){this.gvRecord.PageIndex = e.NewPageIndex;bind();}}注意问题说明:1)前台页面<%@ Page Language="C#" EnableEventValidation="false"AutoEventWireup="true" CodeFile="CallRecord.aspx.cs"Inherits="_3C_CallManager_CallRecord" %>注意添加EnableEventValidation="false",要不然会报错的。
基于GridView控件仿EXCEL格式显示数据的网页制作谭东清海南职业技术学院海南海口570216摘要:本文通过一个实用的网页实例,深入探讨的GridView控件模仿EXCEL格式显示数据的网页制作思路与实现过程,介绍了GridView控件在冻结窗格、合并单元格、自动编号和自定义分页控件等功能的编程技巧。
关键词GridView、冻结窗格、合并单元格、自动编号imitation EXCEL format data Webpage making based on GridView controltan dong qingHainan College of V ocation and Technique Hainan Haikou 570216Abstract:In this paper, by a practical example Webpage, in-depth study GridView controls to imitate EXCEL format data Webpage making ideas and implementation process, introduces the GridView control in the freeze panes, merge cells, the automatic numbering and custom paging controls functional programming skills. Keywords:GridView control, freeze panes, merge cells, Automatic numbering1 引言GridView是中功能强大的数据绑定控件,它可以让用户按照自己的需要控制数据的显示格式,除了控件自身提供的排序、更新和删除数据缓存等功能外,还可以通过手动编码的形式实现GridVeiw控件的高级数据绑定。
为了更好的推进顶岗实习工作,实现对顶岗实习的有效管理,我根据经济管理学院的要求开发了一个顶岗实习管理系统,通过该系统实现对学生的顶岗实习的各项数据收集、统计和分析,提高了学生顶岗实习管理的质量。
下面通过该系统中的学生实习报告查阅页面,深入解析使用GridView控件仿EXCEL格式呈现数据的方法与实现,对的开发者具有一定的参考价值。
2 网页效果本文制作的查阅学生实习报告的网页效果如图1所示,网页浏览效果类似于EXCEL的冻结窗格功能,即将报告列表的左边两列固定,剩下的右边列内容通过滚动条移动查看,点击翻页时,数据序号自动按顺序递增编号,每一次报告标题都合并了相关的数据单元格,使得数据结构清晰,查阅非常方便。
图1 网页实例3 设计思路要实现以上网页数据浏览的功能,需求对GridView控件应用有比较深入的了解,本实例的设计思路如下:(1).类似EXCEL的冻结窗格功能是通过两个GridView控件来实现的。
(2).为了提高代码的重用性和易用性,网页采用了编写代码的方式将数据库数据绑定到GridView控件。
(3).为了增强GridView控件的分页功能和能更方便的通过样式美化分页按钮,网页使用了第三方分页控件AspNetPager。
该控件相对来说使用简单,不需要编写复杂的分页代码,而且功能齐全。
(4).通过TableHeaderCell类实现合并单元格的编程技巧。
(5).由于默认的GridView控件显示信息时无法给绑定的数据行自动编号,所以给GridView控件添加一个模板列,在该模板列插入一个Lable控件,通过代码编程给Lable控件赋值实现数据行自动编号。
4 技术实现4.1 页面设计在xueshengbaogao.aspx网页文件中,主要的网页设计对象是GridView控件和自定义分布控件。
首先添加两个GridView控件,一个控件显示“序号和姓名”两列,另一个控件显示剩余的列数据。
将两个GridView控件分别放在两个<div>标签中。
通过设置GridView控件的大小和给这两个<div>标签设置相应的样式,即可实现“序号和姓名”两列数据位置固定,其它的列可通过滚动条查看的效果。
两个<div>标签的样式设置如下:#xsbb_left {float: left;width: 100px;margin-right:0px}#xsbb_right {overflow: auto; float: left;width: 920px; margin-left:0px}然后添加自定义分页控件。
如果分页控件事先已添加到控件选项卡,则从控件选项卡将分页控件图标拖放到GridView控件下面,将网页切换到源代码视图,把新添加的分页控件代码修改成如下代码,再设置样式,即可得到很美观的分页按钮效果。
<webdiyer:aspnetpager id="AspNetPager1"runat="server"horizontalalign="Center"CssClass="anpager" CurrentPageButtonClass="cpb"onpagechanged="AspNetPager1_PageChanged"FirstPageText="首页"LastPageText="尾页"NextPageText="下一页"PrevPageText="上一页"RecordCount="228"width="100%"UrlPaging="True"> </webdiyer:aspnetpager>4.2 分页数据绑定在xueshengbaogao.aspx.cs代码文件中,为了增强GridView控件的分页功能,使用了AspNetPager自定义分页控件与之配合使用,因此在给GridView控件绑定数据时需要用到PagedDataSource 类。
PagedDataSource 类封装了允许数据源控件执行分页操作的属性。
在数据绑定过程中,DataSet数据源首先将数据赋给PagedDataSource,然后再由PagedDataSource将数据赋给GridView控件,PagedDataSource对象充当一个数据中转站。
数据绑定主要代码如下所示:string ChaXun_str = Session["BaoGao_ChaXun"].ToString();DataSet MyDataNum = DbHelperSql.GetDataSet(ChaXun_str);int totalNum = MyDataNum.Tables[0].Rows.Count;PagedDataSource pds = new PagedDataSource();pds.AllowPaging = true;pds.CurrentPageIndex = AspNetPager1.CurrentPageIndex - 1;DataSet MyData1 = DbHelperSql.GetDataSet(ChaXun_str);pds.DataSource = MyData1.Tables[0].DefaultView;AspNetPager1.RecordCount = totalNum;本页面数据读取主要是根据班级列表控件的值作为参数进行查询,将查询语句先赋值给Session["BaoGao_ChaXun"]变量再赋给字符串变量ChaXun_str,然后再在方法中传递变量,如DbHelperSql.GetDataSet(ChaXun_str),其目的是避免翻页时,查询语句参数值(如班级列表控件的值)发生变化而使得查询到的数据不正确。
另外,使用AspNetPager自定义分页控件,代码中还需要有AspNetPager1_PageChanged(object src, EventArgs e)这个方法,否则程序就会报错。
4.3 合并单元格对于模仿Excel格式显示网页信息的其中一个主要表现就是对GridView控件的头部进行了合并单元格和单元格背景颜色设置,这个功能是通过GridView_RowCreated()事件编程实现的。
从图2上来看,报告信息表头由2行组成,其中第一行每一次报告的单元格是合并了3个小的单元格,而且单元格之间的颜色交替变换。
两个GridView控件创建头部的方法相似,这里以GridView2_RowCreated( )为例讲讲学生报告信息表头的创建方法。
图2 报告信息表头在GridView2_RowCreated( )事件中首先使用switch ( )函数的case语句判断如果是创建GridView控件的标题行,则创建一个单元格集合tcHeader。
即“TableCellCollection tcHeader = e.Row.Cells;”语句。
然后再用2个for循环语句生成头部单元格。
第1个for循环语句条件是从n=0开始到6结束,共7个单元格,存放7次报告的标题,即本实例网页共显示学生提交的报告数是7次。
if函数中的条件n%2==0是为了判定新增加的单元格的奇偶数,以便给他们设置不同的背景颜色。
当条件n=6时是第一行的最后一个单元格,需要另外单独设置行结束标签,即给该单元格设置有别于其它单元格的属性,语句是tcHeader[n].Text = "总结报告</th></tr><tr>",因此嵌套一个if函数判断如果是第一行第6个单元格,则设置该单元格Text属性为"总结报告</th></tr><tr>"。
另外由于单元格集合tcHeader的第一个单元格是从tcHeader[0]开始的,但报告标题的序号是用“第1、2……次报告”表示的,所以用一个变量m来表示报告序号,其中m=n+1,相关语句是tcHeader[n].Text = "第" + m + "次报告"。
第2个for函数的语句是生成第二行的单元格,i从7开始是因为接着第一行的第6个单元格继续的。
第二行共21个单元格,每3个一组,因此该for函数的条件设置为“i = 7; i <= 27; i=i+3 ”,每3组的文本属性相同,背景颜色设置为交替变换的颜色。