格力网络分销管理系统客户端使用手册
- 格式:docx
- 大小:82.24 KB
- 文档页数:4


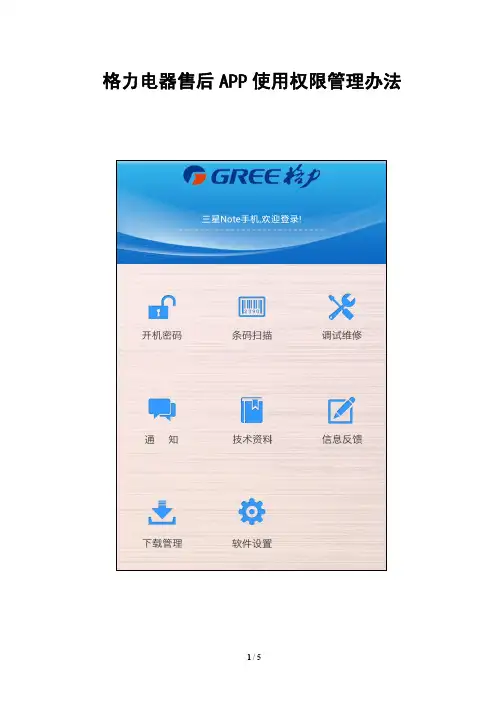
格力电器售后APP使用权限管理办法1 总则1.1 目的为加强对格力商用售后APP(也称掌上通,下简称APP)系统的监督管理,更好服务于APP相关使用单位特制订本办法。
1.2 管理对象销售公司注册使用APP系统的相关人员;本年度签约的经销商、签约的安装单位、签约的售后服务网点的注册使用APP系统的相关人员。
1.3 组织架构1.4 职责和权限1.4.1 格力电器商用技术服务部负责APP系统的全面管理,包括权限管理、对违规使用人员实施考核等;1.4.2 销售公司负责对签约经销商、签约安装网点、签约售后服务网点以及销售公司技术和维修人员的管理,跟进相关人员的变化情况,负责向格力电器商用技术服务部申请注册和注销APP系统的使用权限;1.4.3 签约经销商、签约安装网点、签约售后服务网点负责本单位相关人员的管理,负责向所属销售公司反馈APP系统使用人员的变化情况;1.4.4 销售公司技术、维修人员有使用APP系统的全部权限;1.4.5 签约经销商和签约安装网点的安装调试人员有使用APP系统获取开机密码、条码扫描和信息反馈的权限;1.4.6 签约售后服务网点的售后维修人员有使用APP系统除获取开机密码以外的所有权限。
2 售后APP系统帐号信息的管理2.1 格力电器商用技术服务部负责所有人员帐号信息的备案管理和更新;2.2 各销售公司负责销售公司相关人员以及所属区域签约经销商、签约安装单位、签约售后服务网点的所有人员帐号信息的备案管理和更新,并对其信息的准确性负责;2.3 各销售公司必须指定一名APP帐号管理专人负责和格力电器商用技术服务部进行对接联系;2.4 所有注册使用APP系统的人员信息必须按《格力售后APP管理系统使用权限开通申请表》填写完整和规范,否则不予注册。
3 售后APP系统权限的注册和注销3.1 注册3.1.1 注册条件满足以下条件之一的可以申请注册:1)销售公司相关技术、维修人员;2)签约经销商的安装调试人员;3)签约安装网点的安装调试人员;4)签约售后服务网点的售后维修人员。

用户操作说明书一. 前言欢迎使用我们的产品。
本文档将向您提供详细的用户操作说明,以帮助您充分了解并正确使用该产品。
请在使用之前仔细阅读本手册,并按照要求进行操作。
二. 产品介绍本产品是一款功能强大的XXXX(产品名称),它具有以下特点:1. 特点1:XXX2. 特点2:XXX3. 特点3:XXX三. 系统要求在开始使用本产品之前,请确保您的设备符合以下最低系统要求:1. 操作系统:XXX(例如:Windows 7及以上版本,或iOS 10及以上版本)2. 内存:XXX(例如:2GB及以上)3. 存储空间:XXX(例如:至少100MB可用空间)四. 安装与卸载1. 安装步骤:步骤1:XXX步骤2:XXX步骤3:XXX2. 卸载步骤:步骤1:XXX步骤2:XXX步骤3:XXX请注意:在卸载产品前,务必备份您的数据,以免造成数据丢失。
五. 用户登录与注册1. 用户登录:步骤1:打开产品应用程序步骤2:点击“登录”按钮步骤3:输入您的用户名和密码步骤4:点击“登录”按钮,完成用户登录2. 用户注册:步骤1:打开产品应用程序步骤2:点击“注册”按钮步骤3:填写您的个人信息步骤4:点击“注册”按钮,完成用户注册六. 主要功能操作1. 功能1:步骤1:XXX步骤3:XXX 2. 功能2:步骤1:XXX 步骤2:XXX 步骤3:XXX 3. 功能3:步骤1:XXX 步骤2:XXX 步骤3:XXX七. 设置与个性化1. 设置选项:步骤1:XXX 步骤2:XXX2. 个性化操作:步骤1:XXX步骤2:XXX步骤3:XXX八. 常见问题解答在使用过程中,您可能会遇到一些常见问题。
以下是一些常见问题和解答:1. 问题1:XXX解答:XXX2. 问题2:XXX解答:XXX3. 问题3:XXX解答:XXX九. 联系我们如果您在使用过程中遇到了问题或有任何反馈意见,请随时联系我们的客服团队。
我们将竭诚为您提供支持和帮助。
联系方式:电话:XXX-XXXXXXX在线客服:XXX(工作时间:周一至周五,上午9点至下午5点)十. 结束语感谢您使用我们的产品。

XX系统用户使用说明书共1册第1册共6页XX有限公司二〇一五年六月目录1前言 (1)1.1编写目的 (1)1.2适用对象 (1)1.3通用操作说明 (1)2系统运行环境需求 (1)2.1硬件环境 (1)3系统功能介绍 (2)3.1登录系统 (2)3.2主界面 (3)3.3个人办公 (3)3.3.1 通知通知 (3)4常有问题以及解决方法 (3)4.1系统登录失败问题 (3)4.2信息填写不为空问题 (3)4.3系统界面显示问题 (4)1前言1.1 编写目的本文档旨在对《 X 管理系统》软件功能进行描述,帮助用户掌握该系统的使用方法。
1.2 适用对象本文档适用于 XX 公司内部软件操作人员。
1.3 通用操作说明【盘问】按钮:依照盘问条件盘问吻合条件的信息。
【保存】按钮:保存输入的信息。
【清空】按钮:清空输入的数据。
【导出数据】按钮:导出已选择的文件或数据。
【关闭】按钮:关闭当前弹出窗口,若当前信息被更正但未执行【保存】操作,更正的信息未被保存。
2系统运行环境需求2.1 硬件环境硬件运行环境包括服务器硬件环境、客户端计算机硬件配置环境,详见下表。
表 2.1-1客户端计算机软硬件配置环境配置硬件规格要求办理器双核 2.0G 以上内存512M 以上硬盘80G 以上显示器方正 22’英寸;分辨率:1920*1080 ;显示比率: 150%最正确阅读器: IE9;支持: IE9/10/11( 需要设置兼容模式);显示阅读器比率: 100%表2.1-2服务器端计算机软硬件配置环境配置硬件规格要求办理器双核 2.0G 以上内存2G 以上硬盘150G 以上操作系统Windows Server 2008数据库SQL Server 2008表 2.1-3外面接口表序号接口设备接口种类1打印机USB3系统功能介绍《XX 系统》主若是为XX 公司内部供应完满的电子平台支持,包XX 、系统管理等模块,实现工作的全方向管理。

{分销管理}分销操作操作说明目录一、系统登录4二、用户管理72.1用户档案管理72.2用户设置92.3分类权限方案维护102.4用户货主权限管理12三、系统设置133.1重新登录143.2退出系统143.3修改密码14四、主档维护154.1所在地维护164.2商品分类174.3供应商档案维护194.4品牌214.5商品档案维护224.6POS档案维护254.7收银员档案维护26五、新商品维护275.1新商品录入285.2新商品审核315.3新商品查询325.4新商品清单32六、补货订单系统336.1订单录入346.2采购总监审核376.3总经理审核386.4订单打印396.5订单实数录入406.6到货确认单打印416.7订单状态查询426.8提示订货确认42七、供应商退货437.1退货录入447.2退货审批467.3退货单打印477.4退货实数录入487.5退货出库单打印497.6退货单查询50八、寄售管理518.1寄售结算数据统计528.2寄售结算确认538.3寄售结算成本统计548.4寄售结算单通知558.5寄售结算查询56九、大类盘点579.1大类盘点表打印589.2大类盘点实数录入599.3大类盘点历史查询609.4大类盘点差异表61十、日常报表查询6210.1实时库存查询6310.2月进销存统计表6310.3月成本转结表6410.4商品日销售报表6510.5经销供应商结算报表66 十一、商品调拨6711.1调拨录入6811.2调拨审核7011.3调拨打印7111.4调拨查询72十二、商品变价7312.1档案价格变更录入7412.2期间进价变更7512.3变价计划打印7612.4变价查询77十三、促销变价7813.1礼篮/套餐计划维护7913.2礼篮套餐商品维护8113.3特价商品计划8213.4满赠计划83十四、物流配送8414.1发货85一、系统登录图1-1●用户双击可执行程序启动服务器选项界面,选择服务器点(如果有版本更新)击确认,程序更新完成后进入登录界面图1-2●用户进入“登录”界面,输入用户名按键【回车】按钮显示用户名称,选择登录部门后输入密码后点击【登录】按钮登录主界面备注:系统管理员默认登录部门为:全国总部,登录主界面显示管理员权限模块;门店用户登录显示门店权限模块;总部非管理员用户登录显示总部用户权限模块图1-3●系统管理员登录后系统菜单显示管理员的权限模块,以上图中图红圈所示,主要有:用户设置、系统设置图1-4●总部用户登录后系统菜单显示相应权限模块,主要有:主档维护、新商品维护、补货订单系统、供应商退货、寄售管理、大类盘点、日常报表查询、商品调拨、商品变价、系统设置、促销变价共11个模块图1-5●门店用户登录后系统菜单显示相应权限模块,主要有:主档维护、补货订单系统、供应商退货、寄售管理、大类盘点、日常报表查询、商品调拨、商品变价、物流配送、系统设置共10个模块二、用户管理图2-1●点击红圈中所示的“用户管理”按钮,列出用户管理的子功能,包括:用户档案管理、用户设置、分类权限方案维护、用户组权限维护共4个子模块。


分销商使用手册(最新版)一、简介分销商使用手册主要针对分销商的操作流程进行详细说明,帮助分销商更好地理解平台操作规则和功能使用方法,提高工作效率。
二、登录与注册•注册新账号:–访问官方网站–点击“注册”按钮–输入必要信息并提交申请•登录账号:–输入账号和密码–点击“登录”按钮三、功能介绍•商品管理:–查看平台上发布的商品信息–添加新商品或修改已有商品信息–设置商品价格和库存•订单管理:–查看用户下单情况–处理订单、发货和退款•佣金结算:–查看销售佣金情况–申请佣金结算•数据统计:–查看销售数据和趋势–分析销售情况并制定营销策略四、操作步骤1. 商品管理•添加新商品:1.点击“添加商品”按钮2.填写商品名称、价格、描述等信息3.确认商品信息并提交•修改商品信息:1.在商品列表中找到需要修改的商品2.点击“编辑”按钮3.修改商品信息并保存2. 订单管理•查看订单:1.进入订单管理页面2.查看订单详情、支付状态等信息•处理订单:1.确认订单2.发货并填写快递信息3.更新订单状态3. 佣金结算•查看佣金情况:1.进入佣金管理页面2.查看累计佣金和未结算佣金情况•申请结算:1.点击“申请结算”按钮2.填写结算方式和金额3.提交结算申请五、注意事项•保护账号安全,不要泄漏密码•遵守平台规则,合理经营•定期备份重要数据,避免信息丢失以上为分销商使用手册的相关内容,希望能帮助分销商顺利进行业务操作。
如有任何疑问,请咨询客服人员。


{分销管理}分销系统后台使用操作期间开放和关闭A.9302期间开放选择公司点开始时间,排序找到要开放的期间时间:例如,现打开5月期间,选择打开项,打开顺序先销售—库存—应付—资金---总帐,注意这五项都要开放。
点打开期间点”是”这样期间就会自动打开,期间最多只能打开两个月份。
如果不打开当月期间是不能在系统上做调拔单,出库单,入库单等,所以各加盟商应在当月月底打开下月期间,如:当前是6月,那在6月29号至6月30号打开7月份的期间。
B、9302期间结帐结帐先应注意。
当月份的业务单据是否做完(如:调拔单,出库单,入库单等)一但结帐,将不能在做结帐月份的单据!所以应在每月15号前弄清上月份的全部帐务在结帐,例如:现时间是2月份,就应在2月15号结1月份期间的帐。
选择公司点开始时间,排序找到要结帐的期间时间:例如,现结帐1月期间,选择结帐项,结帐顺序先销售—库存—应付—资金---总帐,注意这五项都要结帐。
点期间结帐-后台调度点”是”设定时间为:19:30:00(注意:当结帐下一个选项时时间就要调整比前一个时间晚10分钟,例如:结库存时间就要调整为19:40:00,结应付时时间就要调整为19:50。
以此类推!)点“执行”点“确定”即可此时系统将自动定时转入后台结帐,当北京时间为你设定好的时间后,系统自动结帐。
2、5119盘点录入注意:各加盟商门店盘点前两天通知分公司仓库不排单,不发货,以免造成时间差,系统库存和盘点数不一样。
每月盘点后,必须在系统上做单。
先制作一张盘点的电子表格。
例如这里要注意,配件的码数都以S码计算。
点“新单”选择盘点日期(哪天盘点选哪天日期)业务类型选择”全盘”仓库选择盘点的店。
选择完后点”保存”打开制作好的盘点电子表格选择“文件”,”另存为”保存类型选择“CSV(逗号分隔)选择“保存”打开逗号分隔的盘点表格把表格里的中文,空行都删除。
只留下货号,总量,码数的数量在B列插入空列。
保存,关闭打开系统,点导入EXCEL数据选择做制作好的逗号分隔的电子表格。

三级分销系统的用法一、登录注册1. 打开三级分销系统网页,点击登录或注册按钮。
2. 如果已经有账户,请输入正确的用户名和密码进行登录。
3. 如果没有账户,请点击注册按钮进行账户注册。
按照页面提示,填写必要的信息,并保持所填写的信息准确和完整。
二、个人中心1. 登录成功后,进入个人中心页面。
2. 在个人中心页面中,可以查看个人的个人信息、佣金统计、下级代理等相关信息。
三、推广活动1. 在个人中心页面,点击推广活动菜单,可以查看当前进行中的推广活动。
2. 可以复制推广链接,将其粘贴发送给其他人,邀请他们成为下级代理。
3. 佣金将根据下级代理的推广销售情况进行计算,并在个人中心页面的佣金统计中显示。
四、下级代理管理1. 在个人中心页面,点击下级代理菜单,可以查看自己的下级代理相关信息。
2. 可以查看下级代理的用户名、注册时间、推广销售情况等。
3. 可以根据需要对下级代理进行编辑、删除等操作。
五、佣金结算1. 在个人中心页面,点击佣金结算菜单,可以查看个人的佣金结算记录和当前可提现的金额。
2. 如果已经达到最低提现金额,可以点击提现按钮进行提现操作。
3. 提现申请将进入审核流程,待审核通过后,佣金将转入指定的提现账户。
六、系统设置1. 在个人中心页面,点击系统设置菜单,可以进行相关系统设置操作。
2. 可以修改个人账户相关信息,例如头像、手机号等。
3. 可以修改登录密码,确保账户安全。
七、注意事项1. 请勿使用他人的账户进行操作,确保账户安全。
2. 请勿捏造虚假销售情况,否则将面临相关法律责任。
3. 在推广活动中请遵守相关规定,禁止违规行为。
4. 如遇到任何问题,请及时联系系统管理员寻求解决办法。
以上是三级分销系统的基本使用说明,希望能帮助您更好地使用该系统。
如有其他问题,请联系管理员进行咨询。
格力空调手机操作方法
格力空调可以通过手机APP进行远程操作。
以下是具体步骤:
1. 下载并安装“格力云”APP,登录账号。
如果是新用户需要进行注册。
2. 确认手机和空调处于同一局域网内,打开“格力云”APP。
3. 点击“添加设备”,选择空调类型,输入空调的信息(例如空调名称、型号、MAC地址等)。
4. 进行联网设置。
按照提示,通过手机连接到空调的热点,并输入空调的Wi-Fi 密码。
5. 连接成功后,可以在APP上看到空调的相关信息,包括温度设置、模式选择、风速、定时开关机等。
6. 单击相应的图标进行操作,调整空调参数。
7. 操作完成后,退出APP即可。
请注意,以上步骤仅供参考,实际操作可能会有所不同。
具体操作请参照空调说明书或联系售后服务。
格力网络分销管理系统客户端使用手册切记:图片中的网址仅供参考,添加受信任站点时切记不要输错,务必和分销网址一模一样!!!1、系统准备1.1 进入windows系统,在桌面上找到蓝色的IE图标1.2进入IE主界面,地址栏输入:登录XX格力公司或代理121.28.49.37:6788登录XX格力营销公司221.192.224.99:67881.3、第一次进入系统,将出现提示:1.4、打开使用前准备出现的界面:1.5、具体修改项目:1.5.1、临时文件设置1.5.2、添加受信任站点1.5.3、下载后安装系统控件1.6、安装完成后,退出系统,重新登陆1.7、登陆系统界面:1.8、系统主界面:重要提示:2、业务处理:2.1、业务系统菜单2.1.1商品价格查询2.1.2到货签收查看:(库房已发货显示为已签收,公司已开单库房未发货显示为未签收)2.1.3销售订单录入:(★重点业务★)*模糊录入、关键字录入技巧:2.1.4销售订单录入完成:2.1.5销售订单修改、查询2.1.6销售订单删除:2.2、工程特价机批复菜单:(★重点业务★)2.2.1特价机申请录入界面:2.2.2、特价机申请修改、删除:2.2.3、工程报价单查询界面,了解你的特价机申请批复状态:3、业务数据查询:3.1、业务查询菜单3.1.1、订单状态查询:3.1.2、待发货收据查询:3.1.2、已发货数据查询:3.1.3、业务正常打款、货款使用情况查询:(★重点业务★)3.1.4、格力各种销售类型提货数量、金额查询:(★重点业务★)3.1.5、工程押差、补差资金查询:(★重点业务★)4、工具菜单:谢谢!。
GREE+ APP AND UNIVERSAL WIFI INSTALLATION AND OPERATION MANUALTable of ContentsSmartphone Controls . . . . . . . . . . . . . . . . . . . . . . . . . . . . . 2-5 Startup and Operations . . . . . . . . . . . . . . . . . . . . . . . . . . . 6-9Special Function Group . . . . . . . . . . . . . . . . . . . . . . . . . 10-29Troubleshooting . . . . . . . . . . . . . . . . . . . . . . . . . . . . . . . . . . 30Thank you for choosing a Gree WIFI compatible system.Managing your comfort has never been easier, thanks to the highly advanced WIFI control capabilities built into your Gree system . With the intuitive, easy-to-use GREE+ smartphone app, you can control your Gree Heat Pump and Air Conditioner – all from your phone .You can feel confident in your selection because the same pride incraftsmanship and engineering knowledge that goes into millions of other Gree installed products worldwide has gone into the Universal WIFI system and GREE+ app . Please read this operation manual carefully before use and retain it for future reference .For the ultimate in convenience, selected Gree Heat Pump and Air Conditioner models feature a built-in intelligent WIFI capability and GREE+ SmartPhone app . This allows you to operate the unit through your smartphone anywhere a WIFI network can be found . The GREE+ app is compatible with devices using standard Android or iOS operating systems .Operating System Requirements for your smartphone:iOS System supports iOS 7 .0 and above .Android System supports Android 4 .0 and above .Adding the GREE+ app to your phone.STEP 1.SELECT AND DOWNLOAD ThE GREE+ app.Scan QR code at right to open the GREE+ app selection page .From the GREE+ app selection page, choose either the Apple Store for iOS or Google Play Store for Android Operating Systems to download the GREE+ app to your phone .STEP 2.ADD ThE APP TO YOUR PhONE.Download the GREE+ app directly to your phone from the Apple Store or Google Play Store . When the GREE+ app hassuccessfully downloaded to your phone, C lOSE the Apple Store or Google Play Store app .Control the comfort – with your smartphone!Get GREE + AppApple Store Operating System Selection PageGoogle Play StoreThe "GREE+" App can connect an unlimited number of Gree WiFi enabled products.STEP 1.TURN ON ThE UNIT’S WIFI INTERFACE.Remote Controls with a “WIFI” button: turn ON the Gree system . Press and hold the “WIFI” button for 10 seconds until the unit beeps for the second time and the WIFI icon appears on the display . Repeat the procedure to turn WIFI mode OFF .Remote controls without a “WIFI” button: press and hold both the “Mode” and “Turbo” buttons for 10 seconds until the unit beeps for the second time and the WIFI icon appears on the display . Repeat the procedure to turn WIFI mode OFF .Registering your Gree unit on the Gree Universal WIFI System.Remote with WIFI buttonRemote without WIFI buttonSTEP 2.LAUNCh ThE GREE+ APP ON YOUR SMARTPhONE.locate the GREE+ icon on your phone . Tap the icon to launch the app .STEP 3.SIGN UP FOR GREE UNIVERSAL WIFI ACCESS. The GREE+ login screen will be displayed .For first-time users, select the “Sign Up” button to create an account and register your Gree unit on the Gree Universal WIFI System . On the Sign Up screen, you should -Create a User Name -Enter your email address -Create a password-Select region (i .e ., North America)Then tap “Sign Up” button .For future reference , record the user name, email address and password used to set up your account .User Name: _________________________________________________________________________________ Email Address: _______________________________________________________________________________Password: ___________________________________________________________________________________login Screen 1st Time Sign Up ScreenSTEP 6.RETURNING TO ThE hOME SCREEN.Tap the back “<” button to return to the My Home screen . Your Gree unit will be displayed on the My Home screen . Turn your Gree unit “ON” and “OFF” by tapping thecircle button .For a full screen display, tap the Gree unit display .STEP 4.ADD YOUR WIFI NETWORk TO ThE GREE+ APP.This is the local WIFI network the Gree unit will be connected to and communicating through . From the My Home screen, tap the “+” button to add your WIFI network . Select your home or office WIFI network and enter the WIFI network password . If you want GREE+ to remember your network password, check the box (optional) .Tap the “Search for Device” button .STEP 5.ADD YOUR GREE UNIT TO ThE GREE+ APP.GREE+ will search your WIFI network for Gree units .When a Gree unit is found, it will automatically be registered on the Gree Universal WIFI system . GREE+ will display the device name (ex ., AC5bcf) of your Gree unit .WIFI Network ScreenRegistration ConfirmationScreenUnit “OFF” My Home Screen Unit “ON” Full ScreenUnit “ON” My Home ScreenSettings ScreenCustomize the GREE+ app on your smartphone.STEP 1.SETTINGSTap the “Settings” button to open the settings screen . From the settings screen, you can customize the Gree unitname, lock the device and check your version of Firmware .STEP 2.CUSTOMIzESet a custom name for your Gree unit for easy and quick identification (ex ., living Room, Den, Bedroom) . To change thedevice name, tap on the current device name and then type in a new name .STEP 3.TURN ON/OFF PRIVACY LOCk MODE.Privacy lock Mode prevents unauthorized access to the unit controls and prevents unauthorized users from tampering with system settings . Turn lock on and off by sliding the Device lock button to the right or left to lock or unlock .STEP 4.RETURN TO FULL SCREEN DISPLAY. Tap the “Save” button .STEP 5.RETURN TO MY hOME SCREEN.Tap the “<” button to return to this screen .Home ScreenSingle Unit ScreenAdd up to four Gree units to the GREE+ app on your smartphone.Repeat the “Registering your Gree unit on the Gree Universal WIFI System” section above for each new device .72°F68°FMultiple Units Screen72°F68°FADJUST TEMPERATURE SETTINGR oom temperature setting can be adjusted between 61°F to 86°F by scrolling to the room temperature icon right or left on the smartphone display .Cool ModeTemperature SettingOPERATING MODESelect “Auto”, “Cool”, “Dry”, “Fan” or “Heat” by sliding the mode icon right or left on the smartphone display .The modes will be displayed as follows:See Remote Controller instructions for detailed operation ofthese modes .Heat ModeFAN MODESF an mode can be adjusted by sliding the fan icon right or left on the smartphone screen . The fan modes will be displayed as follows:See Remote Controller instructions for detailed operation .Fan Mode ScreensFAhRENhEIT °F/CELSIUS °C SCREENI nitially, the GREE+ app will display temperatures in °F .To switch the display to °C, tap the °F icon on the smartphone Screen .Repeat the procedure to switch the display back to °F .Fahrenheit °F/Celcius °C ScreenOPEN SPECIAL FUNCTIONSThe GREE+ app has multiple special functions to improve yourcomfort, save time and lower energy usage . Tap the “Function”icon to open the Special Function window .VENTILATET his function is not included with your system .Ventilate ModeX-FAN MODEW hen operating in humid areas, the unit has a DRY COIl functioncalled X-Fan . This function will allow the indoor fan to run for apre-determined amount of time after the unit is turned off (coolingor dry modes) to ensure that additional moisture is removed from coil . Turn the X-Fan feature ON by tapping the “Function”button and then the “X-Fan” button . Tap again to turn OFF .X-Fan ModeSpecial FunctionsThis function is not included with your system .Health ModeUNIT DISPLAY LIGhT ON/OFFTurn the indoor unit display ON by tapping the “Function”button and then the “light” button . Tap again to turn it back OFF .Unit Screen Control Energy Saving Mode FREEzE GUARD (46°F hEATING)F reeze Guard mode (or vacation mode) will automaticallymaintain room temperature above 46°F . Turn Freeze Guard ONand OFF by tapping the “Function” button and then the “46°F”heating button . Freeze Guard can only be activated in heat mode .Freeze Guard ModeENERGY SAVING MODEE nergy Saving mode will automatically select the optimal compressorand fan speeds to allow for energy savings while operating in Coolingor Heating modes . The compressor and fan will automatically slowdown as the room temperature reaches the set point . Turn the EnergySaving ON and OFF by tapping the “Function” button and thenthe “SE” button .$Unit Screen OFF Unit Screen ONVERTICAL SWING LOUVERSTurn the Vertical (Up & Down) Swing louvers ON and OFF by tapping the “Function”button and then the “Vertical Swing louver” button .T o adjust the discharge air direction, tap on the Up & Down button under the icon to bring upthe Swing louver Setting screen . Then, tap the desired vertical air discharge direction .NOTE: Multiple air directions can be selected by sliding across the screen icons .Vertical Swing louvershORIzONTAL SWING LOUVERSTurn the Horizontal (left & Right) Swing louvers ON and OFF bytapping the “Function” button and then the “Horizonal Swing louver” button .T o adjust the discharge air direction, tap the left & Right button under the icon to bring upthe Swing louver Setting screen . Then, tap the desired horizonal air discharge direction .NOTE: Multiple air directions can be selected by sliding across the screen icons .Horizontal Swing louversS leep mode will automatically adjust room temperature during yoursleep time .This slight change in temperature will not affect yourcomfort level due to the natural effects that sleeping has on the body,but it will save on energy consumption and lower your electric bill .For more information, see Sleep Modes in the remote controllerinstructions .Turn Sleep Mode ON and OFF by tapping the “Function”button and then the “Sleep” ButtonSleep ModeSLEEP MODE SETTINGST he Gree unit contains between 1 to 4 different Sleep mode functions depending on the model .To select a Sleep Mode, tap the “Sleep” title under the Sleep icon to open the Sleep Setting screen .F rom the Sleep Setting screen, you can select a desired sleep function .You can select the Expert, Nap, Tradition or DIY Sleep functions by tapping the buttons at the bottom of the screen .Sleep Setting ScreenEXPERT SLEEP MODEExpert Sleep Mode Screen NAP SLEEP MODENap Sleep Mode ScreenTRADITION SLEEP MODETradition Sleep Mode Screen DIY SLEEP MODEDIY Sleep Mode ScreenTIMER MODET imer mode will automatically turn the unit ON or OFF on a selected day and time to save on energy consumption and lower your electric bill .P rogram Timer Mode by tapping the “Function” button and then the “Timer” button .This will bring up the Preset list screen .The Preset list will be empty the first time using Timer Mode .Afterwards, this screen will be a quick reference to the daily Timer program .To create a Timer program, tap the “Plus Sign” button at the bottom of the screen to launch the Add Preset screen .NeedImaGeI n the Add Preset screen, the unit can be programmed to turn ON and OFF on specific days of the week and time of day .S elect the specific days of the week the unit will turn ON or OFF by tapping the buttons at the bottom of the screen .S elect the specific time of day the unit will turn ON or OFF by scrolling the Hour and Minute screen UP and DOWN .T o have the unit turn ON at the programmed time, tap the “ON” button or tap the “OFF” button for the unit to turn OFF .T hen tap the “Save” button to save the program and return to the Preset list screen .T he Preset list will list the new program . The optional ON/OFF slide button allows you to activate or deactivate your program .T ap the “+” button to add another program period or tap the back “<” button to return to the full screen .NeedImaGehUMIDIFY MODEHumidify mode will automatically control the humidity in the room . Turn Humidify Mode ON and OFF by tapping the “Function” button and then the “Humidify” button .hUMIDIFY MODE SETTINGT o set a humidity level, tap the “Humidify” title under the Humidify icon to open the Humidify Setting screen . From the Humidify Setting screen, you can select a humidify function . You can select the Intelligent, Continuous, or Manual Humidifying functions by tapping the buttons at the bottom of the screen .Humidify Mode ScreenHumidify Setting ScreenIntelligenthumidifyingINTELLIGENT hUMIDIFYINGCONTINUOUS hUMIDIFYING MANUAL hUMIDIFYING Manual Humidifying Mode ScreenContinuous Humidifying Mode ScreenIntelligent Humidifying Mode ScreenT ap the Back “<” button to return to the full screen .Intelligent humidifying Intelligent humidifying IntelligenthumidifyingINDOOR NOISE MODEI ndoor Noise Mode will automatically control the unit noise in the room .Turn Indoor Noise Mode ON and OFF by tapping the “Function” button and then the “Indoor Noise” button .Indoor Noise Mode ScreenINDOOR NOISE MODE SETTINGT o set an indoor noise level, tap the “Indoor Noise” title under the Indoor Noise iconto open the Indoor Noise Setting display .Indoor NoiseIndoor Noise Setting ScreenF rom the Indoor Noise Setting screen, the Indoor Noise Function can be turned ON and OFF by sliding the ON/OFF button right or left .With the Indoor Noise function ON, the Indoor Noise level can be set by sliding Noise level scale to the desire level .Indoor Noise Indoor NoiseIndoor Noise Setting ScreenT ap the Back “<” button to return to the full screen .AREA FANA rea fan mode allows you to customize the unit airflow in the room to greater overall comfort .Turn Area Fan Noise Mode ON and OFF by tapping the “Function” button and then the “Area Fan” button .Area Fan Mode ScreenAREA FAN SETTINGT o customize the indoor air flow, tap the “Area Fan” title under the Area Fan icon toopen the Area Fan Setting display .Area Fan Setting ScreenF irst, turn Area Fan ON by sliding the “Area Fan” button on the right and a person icon will appearon the screen .N ext, configure the room airflow sliding the person icon to the approximate main living area in the room .Then, slide the unit right or left to the approximate mounting location on the wall .This will direct unit airflow to the specific area in the room .T o avoid unit airflow directly at the main living area in the room, slide the “No BlOW Person” button to the right .This will direct the airflow around the specific area .Tap the Back “<” button to return to the full screen .PURITYT his function is not included with your system .SAVE GUIDET his function is not included with your system .Purity ModeSave Guide ModehELP AND UPDATES Scan the QR Code for “Help” and updates to the GREE+ app .COMMON NETWORk SETTING PRObLEMSIf WIFI control fails, check the following items one by one: • Make sure electrical power is turned on to the outdoor and indoor units . • Make sure WIFI function is turned ON as normal TO RESET WIFI MODULEIf the remote controller has a “WIFI” button, press until the unit emits a beep sound . WIFI module is successfully reset . If the remote does not have a WIFI button, press “MODE” and “TURBO” buttons simultaneously . When the unit emits a beep sound, WIFI module is successfully reset .Scan for Help TROUbLEShOOTING 30For more information, visit .Specifications are subject to change without notice .Manufacturer reserves the right to discontinue, or change at any time, specificationsor designs without notice or without incurring obligations . Apple, Android, Google Play and all other trademarked materials referenced herein, are the property of their respective owners . ©2017 .All rights reserved . Cat .No .GREE_WIFI APP_INSTALL & OPER_053119。
格力网络分销管理系统
客户端使用手册
切记:图片中的网址仅供参考,添加受信任站点时切记不要输错,务必和分销网址一模一样!!!
1、系统准备
1.1进入windows系统,在桌面上找到蓝色的IE图标
1.2进入IE主界面,
地址栏输入:
登录石家庄格力公司或代理
登录保定格力营销公司http://221.:6788
1.3、第一次进入系统,将出现提示:
1.4、打开使用前准备出现的界面:
1.5、具体修改项目:
1.5.1、临时文件设置
1.5.2、添加受信任站点
1.5.3、下载后安装系统控件
1.6、安装完成后,退出系统,重新登陆
1.7、登陆系统界面:
1.8、系统主界面:
重要提示:
2、业务处理:
2.1、业务系统菜单
2.1.1商品价格查询
2.1.2到货签收查看:(库房已发货显示为已签收,公司已开单库房未发货显示为未签收)2.1.3销售订单录入:(★重点业务★)
*模糊录入、关键字录入技巧:
2.1.4销售订单录入完成:
2.1.5销售订单修改、查询
2.1.6销售订单删除:
2.2、工程特价机批复菜单:(★重点业务★)
2.2.1特价机申请录入界面:
2.2.2、特价机申请修改、删除:
2.2.3、工程报价单查询界面,了解你的特价机申请批复状态:
3、业务数据查询:
3.1、业务查询菜单
3.1.1、订单状态查询:
3.1.2、待发货收据查询:
3.1.2、已发货数据查询:
3.1.3、业务正常打款、货款使用情况查询:(★重点业务★)
3.1.4、格力各种销售类型提货数量、金额查询:(★重点业务★)3.1.5、工程押差、补差资金查询:(★重点业务★)
4、工具菜单:
谢谢!。