SUNFLOWER爆水神器
- 格式:doc
- 大小:1.83 MB
- 文档页数:4

UdieToo汉化版详细使用教程UdieToo汉化版预览:UdieToo教程方案一1。
首先进入你的人物,把view菜单下item store调出,view菜单里还有其它选项意义和atma差不多,各位自己看吧。
2。
从item store里拿出一个small charm。
3。
右键选edit item,调出物品属性编辑页。
4。
首先把这个小福改成“超强的”,这样才能让它拥有魔法属性(普通白色的物品不能拥有魔法属性,否则存档出错;不改成篮色,黄色是因为这两种颜色的物品一般都有等级限制,不能让1级bb拿)。
改为“超强”的方法是鼠标点一下下面蓝色的0100,然后上面就显示quanlity和2。
点那个2即为编辑。
5。
把2改为3(1=劣质的,2=普通白色,3=超强的,4=蓝色的。
等等)6。
改为3以后,代码会错误,小福上显示红字terminate not found(每个物品都必须在结尾处有连续9个1作为terminate),没关系,按delete properties就可以修正。
7。
下面该给物品添加属性,从右面选取吧。
8。
刷到左面物品上.9。
大多属性都不用改+多少,因为刷上就已经是最大了,但是有些属性还是要改的(如光环,必须改光环类型--技能代码--因为默认代码是511,一个根本不存在的技能),每个属性都有9位的属性代码(下图红框部分),和若干位的数值代码(下图绿框部分,数值代码有可能有多段,比如光环这个属性全部是:属性代码-技能代码-技能等级)。
补充说明:1。
help菜单下的dd都很有用,可以帮助你查看技能代码、怪物代码等等2。
在刷属性时千万不能刷错,没有“删除属性”这项,一旦刷错,只能delete properties 重来了。
3。
右面有些属性后面带nv后缀的表示并不在游戏里显示出来,但起作用。
还有一些没有上面绿框部分的是玻璃渣还没编辑好呢,刷上也不起作用4.一个电脑只能用一个99级,不能同时存两个-----------暗黑破坏神3PK网 --------------------UdieToo教程方案二1、打开。
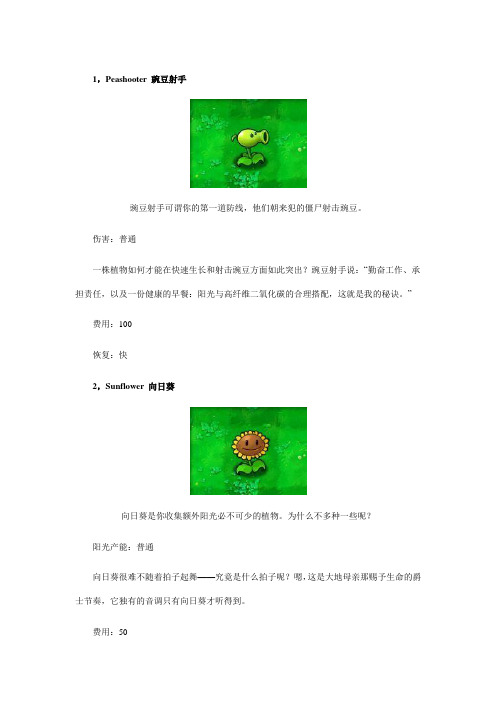
1,Peashooter 豌豆射手豌豆射手可谓你的第一道防线,他们朝来犯的僵尸射击豌豆。
伤害:普通一株植物如何才能在快速生长和射击豌豆方面如此突出?豌豆射手说:“勤奋工作、承担责任,以及一份健康的早餐:阳光与高纤维二氧化碳的合理搭配,这就是我的秘诀。
”费用:100恢复:快2,Sunflower 向日葵向日葵是你收集额外阳光必不可少的植物。
为什么不多种一些呢?阳光产能:普通向日葵很难不随着拍子起舞——究竟是什么拍子呢?嗯,这是大地母亲那赐予生命的爵士节奏,它独有的音调只有向日葵才听得到。
费用:503,樱桃炸弹樱桃炸弹能够炸飞一片区域内的所有僵尸。
他们的引线很短,所以,把他们种在离僵尸近一些的位置吧。
伤害:极大范围:中型区域内的所有僵尸用途:单个使用,即刻生效“我要爆了!”,樱桃一号说。
“不!我们还是慢慢引燃吧”,他的兄弟,樱桃二号道。
稍适争吵,这两个家伙决定即刻引爆。
费用:150恢复:非常慢4.墙果墙果具备坚硬的外壳,你可以使用他们来保护其他植物。
“人们问我,长时间地被僵尸啃来啃去是什么感觉。
”墙果说,“他们不了解的是,由于触觉不发达,我能够感受到的只是轻微的刺痛——就像有人给你做背部按摩一样。
”费用:50恢复:慢腾腾5.土豆地雷土豆地雷能够给予敌人致命一击,不过在此之前,他们需要武装一下自己。
你应当把他们种在僵尸的前面——以便他们在接触僵尸时起爆。
伤害:极大范围:小型区域内的所有僵尸用途:单个使用,具有激活延迟有些人说土豆地雷很懒,他总是把事情留到最后一刻才动手。
对于此类言论,土豆地雷不予理睬——他正忙着操心如何赚钱的事。
费用:25恢复:慢6.雪花豌豆雪花豌豆发射的冰冻豌豆不仅能够伤害僵尸,还能够放慢他们的步伐。
伤害:普通,减速僵尸人们总是说雪花豌豆十分“酷”,或者多么“冷静”,或者非常“冷淡”之类的,雪花豌豆只是瞥一眼——他其实全都听到了。
费用:175恢复:快7.食人花(咀嚼者)食人花能够一口吞掉僵尸,但当他们咀嚼时,自己很容易受到攻击。

有趣的科学小实验:自动抽水浇花简易装置小实验给花浇水也挺麻烦是吧?浇水多了或记不得浇水了,花都会长得不好哟!那么,喜欢养花的同学就跟我们来制作一个自动浇花装置吧!它能实现自动供水、自动抽水浇花呢!这是我们在参加学校科技小组时的一个小发明一个小创意。
制作特简单的,就用身边最简单的废弃材料和工具就行了,这可是变废为宝哟!快快行动吧!自动抽水浇花简易装置制作材料:较大的食用油瓶底1个,升饮料瓶1个,直径约1厘米塑料管1根,布片或旧毛巾1条。
自动抽水浇花简易装置制作方法:第1步:取一段塑料管,长度与饮料瓶同高(约40厘米)。
第2步:用烧红的铁丝在饮料瓶的*底部的瓶壁上钻两个孔,一个较小的孔当作出水孔,另一个要大一点,与塑料管口一般大。
第3步:孔钻好后将塑料管插入饮料瓶中当作通气管,塑料管要插到瓶顶上去接近瓶口。
第4步:将食用油瓶从底部约6厘米高的地方剪下来,当作底盘储水盆。
第5步:将布片或毛巾剪成长约40厘米宽约10厘米的长方形。
自动浇花装置就制作好了(装置如图1)。
装配和使用方法:第1步:将底盘储水盆装半盆水放于种有花的花盆旁边,储水盆要比花盆的盆口略低一点点。
第2步:打开饮料瓶盖,一只手按住进气口和出水孔,到水龙头上接满水后,迅速盖紧瓶盖。
第3步:将装满水的饮料瓶立于储水盆中。
第4步:把毛巾(或布片)的一头浸入储水盆中,另一头放在花盘里贴在土壤上(如图2所示)。
科学原理:根据水的毛细现象,毛巾(或布片)不断地从储水盆里吸水,缓慢地上升并使整块毛巾湿润,然后去湿润花盆里的土壤。
雨天,毛巾的水量足、土壤湿润不抢毛巾上的水,毛巾减缓抽水或不抽水;晴天,土壤干燥,快速从毛巾上吸水,毛巾抽水快,达到自动浇花的目的。
还可以通过调节毛巾的粗细来调节抽水的快慢实现自动浇花。
当储水盆里水多的时,水淹没了进气管的管口,空气进不了饮料瓶,饮料瓶里的水也就出不来;当储水盆里的水慢慢地减少(被毛巾抽干),一旦露出了进气口,空气就会从进气管进入饮料瓶,水即刻从饮料瓶里流出,储水盆里的水涨高了又淹没了进气口,瓶里的水又出不来了。

a Look Solutions product Compact low fog generator to be used with high pressure bottlesThe Cryo-Fog High Pressure is a powerful low fog generator with 2300 Watt.All build into a compact flightcase (67 x 51 x 30 cm), the Cryo-Fog High Pressure contents a low temperature fog machine, a fan as well as a cooling chamber with space next to the fog generator to held a 5 ltr can of fluid.Liquid CO2 is used to cool down the fog. Thus, the machine produces thick low fog which distributes equally.The machine is powerful enough to fill even big stages with low fog within a short time.The liquid CO2 is delivered from a high pressure bottle with siphon, which is connected to the machine via a tube (sup-plied with the machine).The bottles can be rented from companies which sell carbon dioxide.The intelligent technology ensures that the fogging process will not start before the cooling chamber has reached the right temperature. As a result, no …warm“ fog - which will go upwards - can escape from the machine.The Cryo-Fog High Pressure benefits from its compact size, the low weight, the powerful output, the low noise and easy operation.Features• Fine adjustments of the pumpDigital technology ensures fine adjustments of the pump. The output can be adjusted in steps of 1% from 0 - 99%. Thus, any desired effect can be produced.Also the fan can be adjusted separately from 0 - 99% if the machine is controlled via DMX. If controlled via analog or stand alone the fan runs on a pre-programmed level.• DMX 512 as standardThe Cryo-Fog High Pressure can be controlled via DMX 512. The machine needs three following channels on the desk. Thus, the pump, fan and cooling can be adjusted separa-tely. Therefore the fog output, distribution of the fog and the temperature respectively the height of the fog can be adjusted.The DMX start address can be adjusted and saved via the control panel. It will be saved even if the machine is discon-nected from the mains.If the Cryo-Fog High Pressure is controlled via DMX, the ma-chine can also be used as a normal fog generator.The machine can also be controlled with analogue (0 - 10V) via a desk or the XLR-remote (option). The fogging process starts automatically as soon as the cooling chamber is cold enough. The fan runs on a pre-programmed level.A stand-alone-mode is also possible. The pump level can be adjusted directly at the machine, the fan runs on the pre-programmed level. After pushing the start button shortly, the fogging process starts as soon as the cooling chamber is cold enough.• LED-DisplayThe control panel with LED-display and simple symbols al-lows easy operation.FluidThe Cryo-Fog High Pressure needs a special fluid.compact & powerfulmade in Germanyequal and thick low fogTechnical dataDimensionsAdvantages• Fog generator, fan and cooling chamber built into a compact flightcase• DMX 512 as standard, analogue (0 - 10 V) and stand-alone-mode• Output adjustable in steps of 1%• Pump, fan and cooling adjustable seperately when controlled via DMX, therefore high flexibility • Can be used as a normal fog machine if controlled via DMX• Fogging process starts only if the cooling chamber is cold enough • Powerful output • Continuous output • Made in GermanyAccessories• XLR-remote for analogue control。
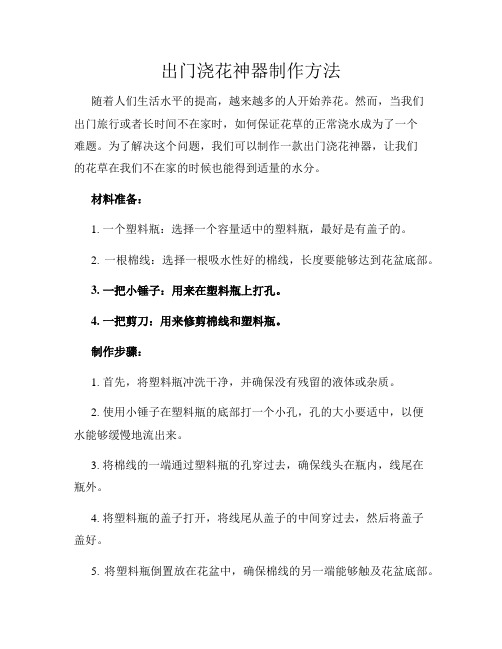
出门浇花神器制作方法随着人们生活水平的提高,越来越多的人开始养花。
然而,当我们出门旅行或者长时间不在家时,如何保证花草的正常浇水成为了一个难题。
为了解决这个问题,我们可以制作一款出门浇花神器,让我们的花草在我们不在家的时候也能得到适量的水分。
材料准备:1. 一个塑料瓶:选择一个容量适中的塑料瓶,最好是有盖子的。
2. 一根棉线:选择一根吸水性好的棉线,长度要能够达到花盆底部。
3. 一把小锤子:用来在塑料瓶上打孔。
4. 一把剪刀:用来修剪棉线和塑料瓶。
制作步骤:1. 首先,将塑料瓶冲洗干净,并确保没有残留的液体或杂质。
2. 使用小锤子在塑料瓶的底部打一个小孔,孔的大小要适中,以便水能够缓慢地流出来。
3. 将棉线的一端通过塑料瓶的孔穿过去,确保线头在瓶内,线尾在瓶外。
4. 将塑料瓶的盖子打开,将线尾从盖子的中间穿过去,然后将盖子盖好。
5. 将塑料瓶倒置放在花盆中,确保棉线的另一端能够触及花盆底部。
6. 使用剪刀修剪棉线的长度,使其能够达到花盆底部,但不要太长,以免浇水过多。
7. 确保花盆周围没有其他物品,以免影响水分的流动。
8. 最后,将花盆放置在适当的位置,确保阳光和空气的充足。
使用方法:1. 在出门前,将花盆中的土壤浇透水,确保花草的根部充分吸水。
2. 将制作好的出门浇花神器放置在花盆中,确保棉线的一端触及花盆底部。
3. 出门后,神器会自动释放适量的水分到花盆中,保持花草的湿润。
4. 当回家后,检查花盆中的水分情况,如果需要,可以手动给花草浇水。
这款出门浇花神器的制作方法简单易行,成本低廉,可以帮助我们解决出门时花草浇水的问题。
但需要注意的是,神器只能提供一定的水分,不能长时间替代人工浇水。
因此,在长时间不在家时,最好请人帮忙或者选择自动浇水设备来保证花草的生长。
希望这个制作方法能够帮助到喜爱养花的朋友们,让我们的花草在我们不在家的时候也能得到照顾。

[CrateRules]CrateMaximum=255 箱子数值不超过255CrateMinimum=1 箱子数值不低于1CrateRadius=3.0 箱子里的属性提升可以给3单位长内的人CrateRegen=3 每3分钟随机产生箱子SilverCrate=HealBase 单人游戏中可以产生的箱子类型SoloCrateMoney=5000 单人游戏中钱箱的钱数UnitCrateType=none 产生单位的箱子可以产生任何没有CreatGoddie=no的单位WoodCrate=Money 木箱中的东西?WaterCrate=Money 水箱中的东西?HealCrateSound=HealCrate获取生命(+血)箱子的声音WoodCrateImg=CRA TE 木箱的形态CrateImg=CRATE 箱子的形态WaterCrateImg=WCRATE 水中箱子的形态FreeMCV=yes 能随机产生基地车地图触发箱子码(捡箱子)升级14 补血2 核弹12 坦克1 矿石15 钱0/6 隐身3 小爆4大爆5 毒爆16 开地图8 黑屏7 加强9/13 速度10 瞬间动11EligibleForDelayKill=yes 建筑是油桶DeathWeapon=BarrelExplosion 油桶武器Explosion=BRRLEXP2----------油桶动画Warhead=OilExplosionWHAnim=RING1 气波动画IvanWarhead=IvanWH 疯狂伊万炸弹弹头IvanDamage=450 疯狂伊万炸弹伤害IvanTimedDelay=450 疯狂伊万炸弹延迟时间CanDetonateTimeBomb=no 是否能手动引爆炸弹CanDetonateDeathBomb=no 是否能手动引爆装于自己部队上的炸弹NukeSilo=true填true或false。
这个代码指定建筑是否为核弹井。
浇花神器简单制作方法
嘿,朋友们!今天我要给大家分享一个超棒的浇花神器简单制作方法哦!
首先,准备一个大的塑料瓶,最好是那种比较硬的材质。
然后在瓶盖上钻一个小孔,孔的大小要适中,不能太大也不能太小哦。
接下来,把瓶子装满水,拧紧瓶盖。
这里要注意啦!钻孔的时候一定要小心,别伤到手呀!而且孔的大小要合适,太大了水一下子就流光了,太小了又出不来水,这可就麻烦啦。
另外,装水的时候别装太满,不然拿起来的时候容易洒出来哦。
在制作过程中,安全性可是很重要的呢!只要我们小心操作,就不会有什么问题啦。
而且这个浇花神器很稳定呀,不会轻易翻倒或者出什么意外。
这个浇花神器的应用场景那可多了去啦!无论是在家里的阳台上,还是在户外的小花园里,都能派上用场呢!它的优势也很明显呀,简单易做,成本又低,还能很好地控制浇水量,不会一下子浇太多把花给淹了。
我就有过实际的应用案例哦!有一次我出门旅游了好几天,就用这个浇花神器给我的花浇水,回来的时候花长得可好了,完全没有因为我不在而受影响,这效果简直太棒啦!
哇塞,这个浇花神器真的是太好用啦!大家赶紧动手做起来吧!。
浇花神器的制作方法嘿,朋友们!今天咱来聊聊怎么自己动手做个超厉害的浇花神器呀!你想想看,平常浇花是不是有时候会觉得不太方便呀?水要么洒得到处都是,要么浇得不够均匀。
要是有个专门的神器,那可就太棒啦!咱先准备材料哈。
找个大点儿的饮料瓶,这就是咱神器的主体啦。
再弄根长长的吸管,要那种软软的可以弯曲的哦。
还有呢,一小段橡皮筋。
把饮料瓶洗干净,装满水。
然后把吸管插进去,尽量插深一点哦。
接着用橡皮筋把吸管固定在瓶口,可别让它乱跑。
嘿,你看这像不像一个简易版的“花洒”呀!现在,咱们就可以拿着它去浇花啦。
把吸管那头对准花盆,轻轻挤压瓶子,水就会顺着吸管流出来啦。
你可以根据需要调整挤压的力度,这样就能控制水流的大小啦,是不是很神奇?这就好比咱平时吃饭用筷子,简单的两根小木棍,就能帮我们把美味的食物送到嘴里。
咱这个浇花神器也是一样,看着简简单单,但是超级实用呀!而且哦,你还可以给它升级一下呢。
比如在吸管的末端再绑上一块小纱布,这样水就会更均匀地洒出来啦,就像给花来了一场温柔的细雨滋润。
或者你还可以发挥创意,给饮料瓶做个漂亮的装饰,让它变得独一无二。
就好像给它穿上了一件特别的衣服,让它在浇花的时候也能成为一道亮丽的风景线。
哎呀呀,自己动手做个浇花神器,多有意思呀!既省钱又实用,还能让我们感受到动手的乐趣。
这可比直接去买个现成的有意思多啦,对吧?以后再浇花的时候,就可以拿着咱自己做的神器,骄傲地说:“看,这是我做的!”那种感觉,啧啧,肯定很棒!所以呀,别再犹豫啦,赶紧动手试试吧!让你的花花草草们也能享受一下这个特别的浇花待遇。
相信我,你一定会爱上这个自己做的浇花神器的!。
Outdoor Water Solutions, Inc. Small Backyard Windmill™Installation ManualCustomer Service: 1-866-471-1614Website: Thank you for purchasing an Outdoor Water Solutions Backyard Windmill™. We designedthis traditional style windmill with the same great engineering as our full-size aerationwindmills.The following is the complete manual for the assembly of the OWS Backyard Windmill™,company contact information, and a copy of our 1-Year Workmanship and parts Warranty.CAUTION1. DO NOT climb the tower. The head can turn without warning and is very dangerous. DO NOT use thetower cross members as steps, as they cannot support your weight. The recommended method to service the windmill is to lay the tower on its side.2. DO NOT attempt to repair or service the windmill on a very windy day. It is too unpredictable anddangerous, and you could easily be injured. Even in low winds, be very careful when servicing. Be certain that the blade is securely tied before beginning any work.3. ALWAYS teach children about the dangers of the windmill and keep them away from it.4. Keep your distance from the windmill in thunder, strong winds, and lightning storms.IGNORING THESE SAFETY WARNINGSCAN RESULT IN SERIOUS INJURY OR DEATHPackage Contents:Ensure that all components are included prior to beginning assembly.Figure 1:157⁄8TOWER SETUP INSTRUCTIONSIMPORTANT NOTES:• Unless directed otherwise, do not completely tighten any bolts until your tower is fully assembled.• When connecting leg sections, always ensure that the lower leg section is behind the top leg section.• There are two different styles of tower leg. The legs with the holes punched in one side are for the topsection; these holes are used to install the decorative maintenance platform.1. Assemble each of the cross brace support “X” sections for the bottom sections for all four sides, as shown in Figure1. This includes the cross brace tensioning systems. The cross brace tensioning system consists of two (2) 6mmnuts, one (1) 8mm x 12mm bolts, one (1) eye bolt, one (1) 8mm flange nut, and one (1) L-bracket. The cross brace tensioning systems are to be installed on the 24” cross braces only. When installing the cross brace tensioning “L”bracket, try to position all of them at the same height on each of the eye bolts; this will simplify the squaring process later. Refer to Figure 3 for further detail on installing the cross brace tensioning systems on the 24” cross braces.2. Begin the tower at the very top. Take the four tower top legs and fasten them to the tower cone with the eight6mm x 12mm bolts, 6mm washers, and 6mm nuts, ensuring that the holes in the tower top legs are toward the top of the tower and are across from each other (see Figure 2). If this is not done, the entire top section will need to be taken apart and reassembled, in order to install the decorative maintenance platform. Completely tighten all of these bolts.TIP: From this point on, it will be simplest to assemble the tower while it is laying on its side. Assemble ona soft surface (e.g., lawn, cardboard, drop cloth, etc.) to prevent scratching.3. Install the lower section of each side using two 6mm x 20mm bolts, two legs, one middle section cross brace“X” (assembled in Step 1 above) and one 12” cross member. These parts should be attached to the top legs inthe order just described, from outside to inside. One nut can then be placed onto each of the two bolts — do not completely tighten yet. Repeat this process for all four sides. Refer to Figure 1 and Figure 3 for assemblyinstructions.TIP: Start with the side that is on the ground, then complete the vertical sides, then the top side. Whenworking on the sides that are not on the ground, the 21½” cross members can be installed temporarily,using eight 6mm x 20mm bolts and nuts, to provide support and stability (see Figure 1).4. Begin attaching the 21 1/2” cross members using the 6mm x 20mm bolts. Install the anchor brackets as part of thisstep. The anchor brackets should be installed first (see Figure 4), then the leg, then the 27 1/4” cross brace or the 24” cross brace with it’s attached L-bracket, then the 21 1/2” cross member.5. Insert the 6mm x 25mm bolt through the anchor bracket (see Figure 4) but do not tighten until the tower is erectedin its final position and the stakes are driven through the clamps.6. Square up the lower section by adjusting the cross brace tensioners in the lower section. When all cross bracesare tightened, turn the nut above the L-bracket so that it is tight to the L-bracket on each of the four sides.You have now completed assembling the tower of your Backyard Ornamental Windmill.WINDMILL HEAD INSTALLATIONIMPORTANT NOTES:• When installing the tail arm, it is very important to ensure that one end butts up against the fan supportshaft welded inside the head connection bracket and the other end is flush with the back of the tail finbracket. If this is not done, the windmill may not track the wind properly.• Ensure that all bolts are completely tightened throughout the head assembly.Figure 5:Tail Fin27” FanTail Fin Bracket (reverse side)Tail ArmBracketPivot TubeSupportShaftFigure 6:Figure 10:Pivot TubeWasher Plastic Tower 1. Install the tail fin onto the tail arm with the tail fin bracket and four6mm x 12mm bolts and nuts, and eight washers, as shown in Figure 6.IMPORTANT: Make sure that the end of the tail arm isflush with back of the bracket.2. Insert the other end of the tail arm into the head connection bracket, until it butts up against the welded fan support shaft. Once the tail arm is inserted completely, use one of the 6mm x 32mm bolts and nuts to clamp the tail arm into place, as shown in Figure 5. Tighten the bolt fully, to ensure that the tail arm cannot come out.IMPORTANT: Make sure that the end of the tail arm buttsup against the fan support.3. Insert the pivot tube into the head connection bracket, so that the pivot tube is between the three remaining holes in the head connection bracket, as shown in Figure 5. Insert three remaining 6mm x 32mm bolts through the holes and completely tighten the bolts.!!It can be a challenge to get the two set screws adequately tightened, especially in areas prone to higher winds. There -fore we are including a pushnut fastener to help secure the windmill head to the windmill shaft. We strongly recom-mend using this locking fastener as well as locking in the two set screws on the bearing collar to secure the windmill head.4. Slide rear bearing nest and bearing onto shaft. Lock bearing into place exactly 5/16” of an inch from the end of the shaft as measured to the front of the bearing. Securely tighten the 2 set screws on the rear of the bearing. They need to really bite into the shaft to keep the windmill head secure. Using pliers to turn the allen wrench will help. See Figure 7.5. Set the windmill head on top of the bearing and push the locking pushnut fastener down on the shaft to seat. It needs to slide all the way down to the bear-ing. It might help to use a hammer and flat headed screwdriver to push the washer onto the windmill shaft. See Figure 86. Now install the front bearing Hub to the windmill head and the back bearing nest. Tighten the three bolts andnuts securely and your good to go. See Figure 97. Insert the pivot tube through the pivot tube washer, then into the plastic tower, as shown in Figure 10.Figure 7:Figure 8:Figure 9:WINDMILL ANCHOR INSTALLATIONIMPORTANT NOTE:• Outdoor Water Solutions Windmills™ will not determine soil and wind conditions for any windmill installation. Therefore, these conditions must be determined by the customer. Anchoring of the windmill tower is very important. It is the customer’s responsibility to adequately anchor the tower. Outdoor Water Solutions, Inc.supplies a basic anchoring kit with each unit. However, in certain circumstances — such as light soil conditions and high-to-extreme wind areas — it may be necessary to utilize other anchoring techniques. Concrete piling, concrete pads, or screw-in anchors are some examples. The customer is responsible to anchor the windmill adequately, or consult the appropriate people to do so.• Read through this entire procedure prior to beginning.1. Choose an area in your yard (approximately 3’ x 3’) that is level, or close to level.2. Stand the assembled windmill up on the location you have selected for installation.3. Drive the stakes into the ground through the anchor brackets. Make sure to leave the stake clamps at approximately the same height, to simplify the leveling process.4. Level the windmill as follows:a. Starting with the highest leg, drive the stake until it is ¼” above the stake clamp, as shown in Figure 11. Tighten the 6mm x 25mm bolt in the stake clamp, to secure the leg to the stake.b. Moving in a clockwise direction, move the stake clamp on the next leg to the top of the stake, leaving ¼” above the stake. Tighten the 6mm x 25mm bolt in the stake clamp, to secure the leg to the stake. Drive the stake into the ground until the leg is level with the last secured leg.c. Repeat ‘b.’ above, until the tower base is level.Congratulations! You have successfully installedYour Outdoor Water Solutions Small Backyard Windmill ™Please contact us at 1-866-471-1614 or 1-479-756-1614 to order parts or for assistance in any step along the way. We have also developed an aeration conversion kit that will convert your new Backyard Windmill™ into a functioning aeration windmill.Keep in mind that a Backyard Windmill™ is a great gift, and is available in a variety of colors, along with our galvanized steel options.If you are interested in more information, call today or visit us on the Web at: Figure 11The Outdoor Water Solutions One-Year Limited WarrantyWarranty covers all Outdoor Water Solutions Windmill™ products for a period of one year from Date of Purchase, against defects in workmanship or material. The conditions of the Warranty and the extent of the responsibilitiesof Outdoor Water Solutions, Inc.™ under this Warranty are as follows.1. Outdoor Water Solutions, Inc.™ will repair or replace any part or material deemed to be defective byOutdoor Water Solutions, Inc.™ due to quality and/or workmanship, within a one-year period from the initial purchase date;2. Product returned for Warranty must be returned to the address specified by the Manufacturer, freightprepaid, and any warranty product sent to the customer will be sent freight prepaid;3. Warranty does not apply to product which has been subject to abuse, neglect, accident, or incorrectinstallation;4. Warrantly does not apply to damage resulting from severe weather factors;* Private Insurance Coverage is recommended *5. If parts other than genuine Outdoor Water Solutions™ parts are utilized for repair or attached to an OutdoorWater Solutions Windmill™ system, warranty coverage may be void;6. Proof of Date of Purchase is required for warranty service. Since the customer is responsible for assembly,setup, and installation, please follow instructions carefully, to ensure the validity of warranty claims;7. If you have any warranty concerns, please contact Outdoor Water Solutions, Inc.™ at 1-866-471-1614 or1-479-756-1614.Safety Precautions1. Do Not attempt any service or repairs to the windmill with the blade turning, or in any high wind situations;2. Ensuring that the blade assembly is secured (even in low winds) when servicing or repairing the windmill isrequired. (A gust of wind can suddenly cause the windmill head to turn at any time and cause a potentially dangerous situation for the person trying to do the repair);3. Do Not allow children to play on or near the windmill;4. Avoid being near the windmill during thunderstorms.Return Materials Authorization• A return materials authorization (RMA) number must be obtained prior to returning any product for awarranty concern.• You can call the OWS warranty department at the following numbers: 1-866-471-1614 or 1-479-756-1614.• We request that all returns be accompanied by a Return Materials Authorization (RMA) to help us track allwarranty projects and to ensure that your job is handled in a timely manner and that all freight costs arecovered by OWS. Unauthorized return shipments could result in return of product and freight costs notbeing covered.Outdoor Water Solutions, Inc.™ recommends that, for future reference,you keep this Installation Manual, along with your proof ofpurchase and a photo of the windmill in a convenient location.Date of Purchase: ____________________________。
NO. 1Peashooter豌豆射手No. 25耐久:300攻击:20射程:正前方一整行射击间隔:1.4秒价格:100阳光冷却时间:7.5秒可栽种于草地/睡莲/花盆特性:每次攻击射出一发豌豆No. 26 No. 2Sunflower向日葵耐久:300生产间隔:24秒价格:50阳光冷却时间:7.5秒可栽种于草地/睡莲/花盆特性:每24秒生产一个中型阳光(25阳光值)No. 3CherryBomb樱桃炸弹耐久:300攻击:1800No. 27范围:以自身为圆心爆炸半径约1.5格的圆准备时间:1秒价格:150阳光冷却时间:50秒可栽种于草地/睡莲/花盆特性:范围大杀伤力爆破No. 4Wall-nut坚果耐久:4000No. 28临界点:0损伤点1:int(MAXHP*2/3)损伤点2:int(MAXHP*1/3)价格:50阳光冷却时间:30秒可栽种于草地/睡莲/花盆特性:以高耐久阻挡僵尸前行注:int为取整(只取整数而非四舍五入)这里的损伤点不给出具体值是因为坚果的损伤点随最大HP变动修改坚果的最大血量后坚果的两个损伤点也随之按比例变动No. 29(这一点将在版块三的僵尸损伤点/临界点中详细说明)在这里,以正常游戏中4000耐久的标准血量坚果来计算,其DP1和DP2分别为2666和1333,之后凡标注int(MAXHP*n1/n2)的,请各位自行计算No. 5PotatoMine土豆地雷耐久:300攻击:1800破土时间:15秒(从安放到开始破土)准备时间:1秒价格:25阳光冷却时间:30秒No. 30可栽种于草地/花盆特性:单行小范围群体杀伤No. 6SnowPea雪花豌豆耐久:300攻击:20射程:正前方一整行射击间隔:1.4秒价格:175阳光No. 31冷却时间:7.5秒可栽种于草地/睡莲/花盆特性:每次攻击发射一颗冰豌豆命中目标后附带冰减速效果持续10秒(被减速目标移动/攻击速度减半)No. 7Chomper咀嚼者耐久:300攻击:40范围:正前方约1.5格咀嚼时间:42秒(从咬进嘴里到完全吞下)价格:150阳光No. 32冷却时间:7.5秒可栽种于草地/睡莲/花盆特性:吞下所有自己可以吞下的僵尸No. 8Repeater双发豌豆耐久:300攻击:20射程:正前方一整行射击间隔:1.4秒价格:200阳光冷却时间:7.5秒No. 33可栽种于草地/睡莲/花盆特性:每次攻击射出两发豌豆No. 9Puff-shroom烟雾蘑菇耐久:300攻击:20射程:正前方约3格No. 34射击间隔:1.4秒价格:0阳光冷却时间:7.5秒可栽种于草地/睡莲/花盆特性:每次攻击喷出一枚烟雾弹特性:白天会睡觉No. 10Sun-shroom阳光蘑菇耐久:300生产间隔:24秒No. 35成长时间:120秒(从种植到成长为成体)价格:25阳光冷却时间:7.5秒可栽种于草地/睡莲/花盆特性:幼体每24秒生产一次小型阳光(15阳光值)成长为成体后每24秒生产一次中型阳光(25阳光值)成长不重置产阳光时间特性:白天会睡觉注:关于成长不重置产阳光时间成体阳光蘑菇仍延续幼体的产阳光间隔和时间(比如幼体还有5秒产阳光此时成长长大后的成体不会重新读24秒再产阳光而是延续了幼体的数据5秒后即生产中型阳光)No. 11Fume-shroom烟雾喷菇No. 36耐久:300攻击:20射程:正前方约4格射击间隔:1.4秒价格:75阳光冷却时间:7.5秒可栽种于草地/睡莲/花盆特性:每次攻击喷出一道烟雾柱(穿透效果)特性:白天会睡觉No. 37 No. 12GraveBuster墓碑破坏者耐久:300吞噬时间:4.5秒(从安放到移除墓碑)价格:75阳光冷却时间:7.5秒只可种植于墓碑上特性:移除墓碑恢复可种植草地No. 38 No. 13Hypno-Shroom催眠蘑菇耐久:300价格:75阳光冷却时间:30秒可栽种于草地/睡莲/花盆特性:催眠吃下自己的一只僵尸使之为己方作战特性:白天会睡觉注:催眠效果为强制往右而非变换方向故不存在矿工吃了会掉头进屋的问题No. 14Ice-shroom冰蘑菇耐久:300攻击:20范围:全屏No. 39准备时间:1秒价格:75阳光冷却时间:50秒可栽种于草地/睡莲/花盆特性:自身炸裂对全屏僵尸造成20伤害冻结所有可冻结目标动作4秒之后持续冰减速15秒特性:白天会睡觉No. 15Doom-shroom末日蘑菇耐久:300攻击:1800No. 40范围:自身为圆心爆炸半径约3.5格的圆准备时间:1秒价格:125阳光冷却时间:50秒可栽种于草地/睡莲/花盆特性:爆炸后会在原地留下一个爆炸坑坑内无所栽种任何植物特性:白天会睡觉No. 16LilyPad睡莲No. 41耐久:300价格:25阳光冷却时间:7.5秒只可栽种于水面特性:栽种于水面之后可在睡莲上种植植物No. 17Squash倭瓜耐久:300No. 42攻击:1800范围:身后极小范围及正前方约1.5格价格:50阳光冷却时间:30秒可栽种于草地/睡莲/花盆特性:瞄准目标并砸下去伤害落点内的全部目标No. 18Threepeater三联装豌豆耐久:300攻击:20范围:自身行连同上下两行正前方三整行No. 43攻击间隔:1.4秒价格:325阳光冷却时间:7.5秒可栽种于草地/睡莲/花盆特性:每次攻击同时在三行各发射一发豌豆No. 19TangleKlep缠绕海带耐久:300范围:自身左右的小范围价格:25阳光冷却时间:30秒No. 44只可种植于水面特性:将靠近自己的单体僵尸拉入水底No. 20Jalapeno墨西哥辣椒耐久:300攻击:1800范围:自身所在行准备时间:1秒价格:125阳光冷却时间:50秒No. 45可栽种于草地/睡莲/花盆特性:直线大杀伤力爆破No. 21Spikeweed棘草(地刺)耐久:300攻击:20范围:自身格攻击间隔:1秒价格:100阳光冷却时间:7.5秒No. 46只可种植于于草地特性:不会被僵尸啃食对于行走在自己身上的僵尸造成伤害特性:对车系僵尸有着特殊的杀伤效果注:所谓的地刺不会被僵尸啃食是指正常游戏情况下(修改器可实现)No. 22Torchwood火炬木耐久:300价格:175阳光冷却时间:7.5秒可栽种于草地/睡莲/花盆特性:过火将经过自身的普通豌豆变为火豌豆(火豌豆单发伤害40命中目标后小范围溅射溅射伤害13)特性:消冰将经过自身的冰豌豆变为普通豌豆移除冰属性特性:小范围开雾火炬木的开雾范围约上下左右各一格的十字区域No. 47 No. 23Tall-nut高坚果耐久:8000临界点:0损伤点1:int(MAXHP*2/3)(正常游戏中为5333)损伤点2:int(MAXHP*1/3)(正常游戏中为2666)价格:125阳光冷却时间:30秒可栽种于草地/睡莲/花盆特性:以高耐久阻挡僵尸前行特性:身材高大可以阻挡某些特殊僵尸跳过No. 48 No. 24Sea-shroom海蘑菇耐久:300攻击:20射程:正前方约3格攻击间隔:1.4秒价格:0阳光冷却时间:30秒只可种植于水面NO. 49特性:每次攻击喷出一枚烟雾弹特性:白天会睡觉Plantern灯笼草耐久:300价格:25阳光冷却时间:30秒可栽种于草地/睡莲/花盆特性:大范围开雾灯笼草开雾范围以自身为中心水平方向7格竖直方向5格的矩形区域去除掉四个角Cactus仙人掌耐久:300攻击:20射程:正前方一整行攻击间隔:1.4秒价格:125阳光冷却时间:7.5秒可栽种于草地/睡莲/花盆特性:每次攻击发射一枚尖刺特性:优先攻击气球Blover三叶草耐久:300准备时间:0.5秒价格:100阳光冷却时间:7.5秒可栽种于草地/睡莲/花盆特性:可以吹走浓雾(驱雾时间24秒24秒后雾气重新向左蔓延)和气球僵尸特性:若被僵尸啃咬会跳过准备时间立即完成吹风SplitPea分裂豌豆耐久:300攻击:20射程:自身所在行攻击间隔:1.4秒价格:125阳光冷却时间:7.5秒可栽种于草地/睡莲/花盆特性:正面每次攻击发射一发豌豆背面每次攻击发射两发豌豆(正反攻击节奏同步)注:早期版本存在一个BUG当分裂豌豆攻击背面僵尸时正面若出现僵尸此时正面的头也会每次发射双发在后期发布的游戏版本中已修正Starfruit杨桃耐久:300攻击:20范围:正后正上正下前斜上和前斜下五个方向无距离限制攻击间隔:1.4秒价格:125阳光冷却时间:7.5秒可栽种于草地/睡莲/花盆特性:每次攻击向自身五个角所延伸的方向同时发射各一枚五角星南瓜损伤点1:int(MAXHP*2/3)(正常游戏中为2666)损伤点2:int(MAXHP*1/3)(正常游戏中为1333)价格:125阳光冷却时间:30秒可栽种于草地/睡莲/花盆(以及香蒲)特性:高耐久套在植物上以保护植物免受僵尸攻击南瓜的两个损伤状态Magnet-shroom磁体蘑菇耐久:300范围:自身为圆心磁力半径约3格的圆再吸收时间:15秒价格:100阳光冷却时间:7.5秒可栽种于草地/睡莲/花盆特性:在磁力范围内吸取单体僵尸的铁制饰物特性:白天会睡觉Cabbage-pult卷心菜投手耐久:300攻击:40射程:正前方一整行攻击间隔:2.9秒价格:100阳光冷却时间:7.5秒可栽种于草地/睡莲/花盆特性:每次攻击投掷一颗卷心菜注:投掷无视屋面斜度(豌豆杨桃等直线射击则会被屋面斜坡阻挡)FlowerPot花盆耐久:300价格:25阳光冷却时间:7.5秒可栽种于草地/屋面特性:栽种后可在花盆内种植植物Kernel-pult玉米投手耐久:300攻击:20(玉米粒)/40(黄油)射程:正前方一整行攻击间隔:2.9秒价格:100阳光冷却时间:7.5秒可栽种于草地/睡莲/花盆特性:每次攻击投掷一颗玉米粒一定几率投掷黄油(黄油击中目标后定身停止目标所有动作定身持续4秒)CoffeeBean咖啡豆耐久:300吞服时间:1秒价格:75阳光冷却时间:7.5秒只可种植于睡眠中的蘑菇上特性:唤醒蘑菇类植物注:吞服下咖啡豆后植物有一个弹起并复原的动作(动作持续0.7秒)完成此动作植物才真正被唤醒Gralic大蒜耐久:400损伤点1:int(MAXHP*2/3)(正常游戏中为266)损伤点2:int(MAXHP*1/3)(正常游戏中为133)价格:50阳光冷却时间:7.5秒可栽种于草地/睡莲/花盆特性:强制使啃食过自己的僵尸改道至相邻的一行UmbrellaLeaf莴苣耐久:300价格:100阳光冷却时间:7.5秒可栽种于草地/睡莲/花盆特性:保护自身为中心3*3格内的植物不被蹦极跳僵尸偷取不被篮球攻击Marigold金盏花耐久:300生产间隔:24秒价格:50阳光冷却时间:30秒可栽种于草地/睡莲/花盆特性:每24秒生产一个银币或金币注:金盏花是否生产钱币与栽种局和最后一flag(旗子)有关规律如下:A.本局栽种的金盏花在本局最后一flag之后仍能生产一段时间然后冻结生产(此时间段远大于强制刷怪时间故SurvivalEndless中不会看到停产现象而优先进入下一局)B.非本局栽种的金盏花在本局最后一flag之后立即冻结生产C.在本局最后一flag之后栽种的金盏花固定生产2-3个金币然后冻结生产所有的冻结生产都只表现在当前局(实为冻结了生产剩余时间)进入下一局后所有金盏花生产剩余时间解冻沿用之前的数据恢复生产每局lastflag过后的金盏花均遵从上述三条规律Melon-pult西瓜投手耐久:300攻击:80(西瓜弹)/26(溅射)射程:正前方一整行攻击间隔:2.9秒价格:300阳光冷却时间:7.5秒可栽种于草地/睡莲/花盆特性:每次攻击投掷一颗西瓜命中目标后碎裂对周围造成溅射伤害溅射范围约为1*3格的矩形GatlingPea加特林豌豆耐久:300攻击:20射程:正前方一整行攻击间隔:1.4秒价格:250阳光冷却时间:50秒只可用于升级Repeater双发豌豆特性:每次攻击射出四发豌豆注:所有的升级卡升级后将重置植物属性TwinSunflower双子向日葵耐久:300生产间隔:24秒价格:150阳光冷却时间:50秒只可用于升级Sunflower向日葵特性:每24秒生产两个中型阳光Gloom-shroom忧郁蘑菇耐久:300攻击:20范围:自身为中心喷射范围约3*3格攻击间隔:1.9秒价格:150阳光冷却时间:50秒只可用于升级Fume-shroom烟雾喷菇特性:每次攻击向全方位喷射四次烟雾(穿透效果)特性:白天会睡觉Cattail香蒲耐久:300攻击:20范围:覆盖全屏攻击间隔:1.4秒价格:225阳光冷却时间:50秒只可用于升级LilyPad睡莲特性:每次攻击发射两枚尖刺(两次可分别瞄准不同目标)具有制导性特性:优先攻击离自身最近的目标最优先气球WinterMelon"冬"瓜冰西瓜耐久:300攻击:80(冰瓜弹)/26(溅射)射程:正前方一整行攻击间隔:2.9秒价格:200阳光冷却时间:50秒只可用于升级Melon-pult西瓜投手特性:每次攻击投掷一颗冰西瓜命中目标后碎裂对周围造成溅射伤害溅射范围同西瓜投手附带冰减速效果持续10秒GlodMagnet吸金磁耐久:300范围:全屏吸金再吸取时间:6秒价格:50阳光冷却时间:50秒只可用于升级Magnet-shroom磁体蘑菇特性:吸取全屏幕的钱币(包括银币/金币/钻石)每次最多吸取5个注:吸金磁并非蘑菇类故白天不用睡觉可直接由睡眠状态的磁体蘑菇升级无需再使用咖啡豆唤醒Spikerock尖刺石(地刺王)耐久:450临界点:1损伤点1:301损伤点2:151攻击:20攻击间隔:1秒价格:125阳光冷却时间:50秒只可用于升级Spikeweed棘草(地刺)特性:不会被僵尸啃食对于行走在自己身上的僵尸进行攻击每次攻击戳刺两次特性:对车系僵尸有着特殊的杀伤效果特性:免疫敲击/碾压所附带的秒杀效果地刺王的两个损伤状态CobCannon玉米加农炮耐久:300攻击:1800范围:以炮弹落点为中心爆炸半径约为1.5格的圆攻击间隔:35秒(从释放准心到装填完毕)价格:500阳光冷却时间:50秒只可用于升级Kernel-pult玉米投手需要同行相邻的玉米投手两个特性:手动发射在选定区域内落下一枚玉米炮弹爆炸范围内大威力杀伤Imitater模仿者耐久:300变身时间:3.2秒价格:等同被模仿卡片价格冷却时间:等同被模仿卡片冷却时间特性:模仿植物变身完成后重置所有属性为所模仿植物无法模仿八张紫卡升级植物无法模仿自身胆小蘑菇耐久:300攻击:20射程:正前方一整行射击间隔:1.4秒价格:25阳光冷却时间:7.5秒可栽种于草地/睡莲/花盆特性:当以自身半径1.5格的圆内有僵尸时停止射击 白天睡觉。
폭수신기爆水神器
SUNFLOWER
品牌介绍
爆水神器SUNFLOWER蕴含低分子量的优质纳米级胶原蛋白肽(婴儿肽)营养成分,体积更小,更易吸收,及时补充肌肤流失的胶原蛋白,提升肌肤的紧实度和滋润度,同时配合脂质水分存储系统,持续为干燥肌肤补水保湿,令肌肤长效保持水润丰盈,持续亮泽,精细修复各个部位的弹力质感。
爆水神器SUNFLOWER是韩国DDHOARFROST株式会社(KOREA DD HOARFROST CO., LIMITED)2013年全新主打的一款高品质的补水产品。
韩国DDHOARFROST株式社持续以来,一直采用研发、生产、推广、营销、服务为一体的品牌运作模式,从源头到终端,从细节到整体,竭力把关每个程序的运作和品质的控制、励志让亚洲年轻女性的容颜清爽白嫩,再造18岁容颜,充分绽放东方年轻女性美丽自信的魅力。
爆水神器SUNFLOWER独创了“3秒液化、精准补水、密集保湿”的护肤理念,采用纯天然的植物精华配方,富含细胞呼吸、复苏所必须的肽成分,刺激皮肤胶原蛋白生成,有效抑制肌肤老化;抗氧化剂抵御
环境中自由基对皮肤的侵袭,重塑肌肤防护屏障;质感细腻,丝般顺滑,吸收快速,在皮肤表面留下一层轻薄透气的保护层,使肌肤晶莹剔透,让你一整天都光滑水嫩。
品牌标志
用“气质优雅的高贵女神”和“SUNFLOWER”的英
文字母构成。
简单而不失时尚,时尚中又混合着当下流行元素。
适合肤质:所有肤质,尤其干性皮肤
功能:补水、美白、保湿、均衡肤色、紧致肌肤
使用方法:洁肤、爽肤后,取适量均匀涂抹于脸部及颈部肌肤,轻轻按摩至吸收
产品成分:去离子水、尿囊素、透明质酸、海藻精华、乳化剂、维他命E、硅氧烷、硅油微乳、氨基酸、硅弹性体、角鲨烷、VB5等多种保湿及修复性活性成份
产品功效
1、清爽保湿,水润净透24小时。
能够激活表层肌肤,修复肌肤天然锁水保护膜,令肌肤一整天都感觉到清爽水润。
2、强效美白,补水保湿。
采用独特的小分子,结合先进的包覆技术,将美白保湿精华送达肌肤底层,由内而外改善肌肤暗黄,干燥,令你的肌肤如婴儿般白嫩。
3、均衡肤色,紧致肌肤。
防止角质化的生成,保障肌肤对活性碳的正常吸收状态;对表皮角质层中受损的细胞进行修复,加速肌肤的自我代谢过程。
温馨提示
秋季是皮肤容易出现过敏症状的季节,天然成分的补水保湿霜虽然过敏率虽然相对较
低,但不能保证所有肌肤都适用,特别是敏感性肌肤。
在第一次使用前,应该先做过敏测试,方法很简单,在手腕或耳朵背部涂少量面膜,30分钟后,如果皮肤没有感到有红、肿、痒、痛得感觉,就可以继续使用了。