燃气鱼丸炉使用说明书 (英文)
- 格式:doc
- 大小:32.50 KB
- 文档页数:2
Warranty CardMiddle East Gas Ovenuser's GuideMLP Middle East barbecue pits series is all-stainless steel body shell, advanced technology and high-frequency infrared burner ignition simple manual operation. There are fashionable, reasonable structure, convenient operation, less land area and other features, it is the preferred gas stove oven.Second, transport and storage:During transport, the product should be handled with care, not upside down to prevent severe vibration, packaged products are generally not long-term outdoor storage, should put a well-ventilated, non-corrosive gases warehouse requires temporary storage, you should good rain measures. Third, the installation and use of environmental considerations:1, the product should be on a stable, non-combustible material away from the left and right sides of 20mm or more, the back should be more than10mm away from the incombustible material.2, gas type and supply voltage of the device must be consistent with the provisions of the product nameplate, power supply voltage fluctuations of ± 10%.3, the use of gas stoves should be dedicated liquefied petroleum gas cylinders hose and reliable connection, liquefied petroleum gas cylinders should use low pressure valve, pressure valve or prohibit the use of high-pressure valve. Prevent damage to the burners and piping, ensure safe use. 4, from the liquefied petroleum gas cylinders and stoves should be greater than 3 meters.5. The leak occurs, immediately turn off the gas valve, open windows, enhanced ventilation, do not open, and the ignition off the power, to be repaired before use.6, after use, closed well furnace Zhi.7. Do not place flammable items (such as towels, etc.) on the furnace, itmay cause burning fire accident..Fourth, the method of operation:1, first need to grill food inserted on the shaft of food, power, powerindicator light, start point guns, guns will point near the burner. If you beatthe fire, the operation is repeated until the ignition. Furnace temperature begins to rise, barbecue food into the state.2, switch Front 90 °, maximum fire; greater than 90 ° or smaller than 90 ° fire gradually decreases until it is closed.3, the spindle (rotation axis) is the rotation of food, can be easily lifted upand out food and cleaning installation, toggle button to switch to the "1",the spindle is rotated with the rotation of the spindle grill was.Five, Cleaning and maintenance:1, in the cleaning and maintenance should be cut off power to preventaccidents.2, a day after working with available non-corrosive cleaning agent wettowel to clean the surface of the furnace and the power outlet surface, prohibited direct wash water.Accessories: a manualWarranty cardNote: This furnace using a low pressure valves, non-use, high-pressure valve。

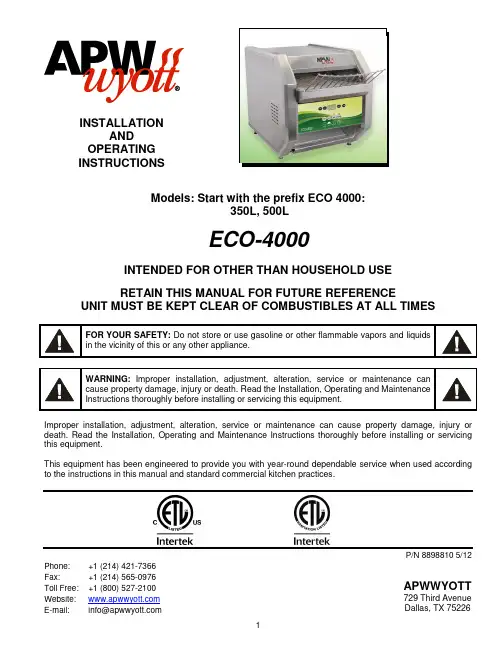
INSTALLATIONAND OPERATING INSTRUCTIONSModels: Start with the prefix ECO 4000:350L, 500LECO-4000INTENDED FOR OTHER THAN HOUSEHOLD USERETAIN THIS MANUAL FOR FUTURE REFERENCEUNIT MUST BE KEPT CLEAR OF COMBUSTIBLES AT ALL TIMESFOR YOUR SAFETY: Do not store or use gasoline or other flammable vapors and liquids in the vicinity of this or any other appliance.WARNING: Improper installation, adjustment, alteration, service or maintenance can cause property damage, injury or death. Read the Installation, Operating and Maintenance Instructions thoroughly before installing or servicing this equipment.Improper installation, adjustment, alteration, service or maintenance can cause property damage, injury or death. Read the Installation, Operating and Maintenance Instructions thoroughly before installing or servicing this equipment.This equipment has been engineered to provide you with year-round dependable service when used according to the instructions in this manual and standard commercial kitchen practices.P/N 8898810 5/12Phone: +1 (214) 421-7366 Fax:+1 (214) 565-0976 Toll Free: +1 (800) 527-2100 Website: E-mail:*****************APWWYOTT729 Third Avenue Dallas, TX 75226IMPORTANT FOR FUTURE REFERENCEPlease complete this information and retain this manual for the life of the equipment. ForWarranty Service and/or Parts, this information is required.Model Number Serial Number Date PurchasedTABLE OF CONTENTSSECTION ITEM PAGE SECTION ITEM PAGE1 Owner’s Information2 7 Cleaning 52 Safety Information 2 8 Troubleshooting 63 Safety Signs and Messages 3 9 Preventative Maintenance 64 Specifications 3 10 Wiring Diagrams75 Installation Instructions 4 11 Parts Lists & Exploded Views86 Operation 5 12 Warranty 12WARNING: In Europe, appliance must be connected by an earthing cable to all other unitsin the complete installation and thence to an independent earth connection in compliancewith EN 60335-1 and/or local codes.WARNING:An earthing cable must connect the appliance to all other units in thecomplete installation and from there to an independent earth connection.1) OWNER’S INFORMATIONGeneral Information:1. Always clean equipment thoroughly before first use. (See general cleaning instructions).2. Check rating label for your model designation and electrical rating.3. For best results, use stainless steel counter tops.General Operation Instructions:1. All food-service equipment should be operated by trained personnel.2. Do not allow your customers to come in contact with any surface labeled "CAUTION HOT".3. Never touch quartz or steel heaters.Warranty Information:Reliability Backed By APW Wyott’s Warranty:All APW Wyott Toaster Ovens are backed by a one year parts and labor warranty, including On-SiteService calls within 50 miles of authorized service technicians.Service Information:Service Hotline (800) 733-22032) SAFETY INFORMATIONAPW Wyott equipment is designed, built, and sold for commercial use and should be operated by trained personnel only. Clearly post all CAUTIONS, WARNINGS and OPERATING INSTRUCTIONS near each unit to insure proper operation and to reduce the chance of personal injury and/or equipment damage. This product is used for the cooking, defrosting or re-thermalization of food products only.Always disconnect power before servicing the unit. Surfaces will remain hot after power has been turned off. Allow unit to cool before cleaning or servicing. Never clean the unit by immersing it in water. The unit is not protected against water jets; DO NOT CLEAN THE TOASTER OVEN WITH A WATER JET. Always clean equipment properly before first use.3) Safety Signs and MessagesThe following Safety signs and messages are placed in this manual to provide instructions and identify specific areas where potential hazards exist and special precautions should be taken. Know and understand the meaning of these instructions, signs, and messages. Damage to the equipment, death or serious injury to you or other persons may result if these messages are not followed.This message indicates an imminently hazardous situation which, ifnot avoided, will result in death or serious injury.This message indicates a potentially hazardous situation, which, ifnot avoided, could result in death or serious injury.This message indicates a potentially hazardous situation, which, ifnot avoided, may result in minor or moderate injury. It may also beused to alert against unsafe practices.This message is used when special information, instructions oridentification are required relating to procedures, equipment, tools,capacities and other special data.4) SPECIFICATIONSECO 4000 (OR QST)VOLTS WATTS PHMODELECO 4000 -350L 120 1700 1ECO 4000 -500L 208 2800 1ECO 4000 -500L 240 2800 1Power Cord:Six (6) foot, 3 wire grounded cord. If the supply cord is damaged, the manufacturer, or an authorized service agent, must replace it in order to avoid a hazard and warranty. Please contact the factory by calling the 800 # located on the unit.Shipping Weight:ECO 4000-350L ECO 4000-500L54 Lbs (24.5 kg) 54 Lbs (24.5 kg)5) INSTALLATION INSTRUCTIONSIf the carton appears damaged, or damage is discovered once the carton is opened, stop immediately and contact the freight company to file a damage claim.CAUTION: The ECO TOASTER Oven is shipped assembled except for installation of thecrumb tray assembly. Please remove all supports and packaging materials beforeoperating the unit. Failure to remove all packaging materials may lead to a fire and / ordamage to the appliance.1. Remove all external packaging that is protecting top portion of unit2. Remove unit from shipping container while in the upright position. The unit can be lifted out of the cartonby grasping under the back side and the conveyor of the appliance. Please remove the plastic bag.3. Remove all internal packaging to the unit, if present.4. Visually inspect all external and internal portions of unit for damage. Important: Inspect the Quartzelements located inside the oven tunnel after removal of packing material. To inspect the quartz elements, use a small mirror held under and over each element to detect cracks. Important: The quartz elements are fragile and will break under stress. Do not twist, pull, push, or otherwise subject the quartz elements to stress.5. Wipe down the exterior of the unit using a damp cloth with warm water. Do not use abrasive pads orcleaners as they will damage the stainless steel surface.NOTE: DO NOT USE CLEANERS OF ANY KIND ON THE QUARTZ HEATERS.Note: Ambient Conditions - Make sure that the operating location is in an area where the ambienttemperature is held constant (minimum 70°F). Please avoid areas such as near exhaust fans and airconditioning ducts.Warning! Operating environmentEnsure that operation location is at a reasonable distance from combustible walls and materialsotherwise combustion or discoloration could occur. Do not cover the rear inlets or the side inlets andoutlets. Restricting or covering the air inlets and outlets may cause the unit to overheat and WILLvoid your warranty.Caution! Operating environmentPlace unit on a stable, level counter at a convenient height for use. Turn the adjustable feet so thatunit is level to counter top. The top of the unit is not intended for use a shelf. Materials placed thereare at risk for fire.6. Before plugging unit into wall, make sure that the power switch located on the back of “E” models and onthe Front of the “L” model is in the off position.7. Warning!Ensure no hands, tools or parts or other unintended items are located on the conveyor asinjury will result when unit is turned on.8. Plug unit into grounded electrical outlet with correct voltage, and plug configuration.Warning! Using any receptacle that is not designed to match the attached cord and plug MAY cause personal injury and WILL void your warranty. Please attach the ECO-4000, to an individual branch circuit.6) OPERATION1. The controls that operate the belt conveyor speed and the heaters are located on the front of the unit.2. The On/Off switch is used to turn the unit on or off. Once the unit is turned on the conveyor will automaticallyrun. Warning: Ensure no hands, tools or parts are located on the conveyor as injury will result when unit is turned on.3. Note: Before moving the On / Off switch to the "On" position, please read the following statements:4. A. CAUTION! HOT SURFACES! The exterior metal surfaces of the unit will get hot enough to cause burns.Avoid touching these surfaces to prevent injury.B. WARNING! SEVERE BURN HAZARD QUARTZ HEATERS. The quartz heaters or metal heaterslocated in the top of the unit operate at very high temperatures. DO NOT TOUCH HEATERS AFTER UNIT IS TURNED ON.5. This oven has 2 heating zones, 1 above the conveyor, and one beneath the conveyor.Operation Instructions for 350L and 500L1. Turn the Power Switch on located on the rear of the unit. When the unit is “ON”, the conveyorbelt will move.2. Use the “TOP HEAT” and “BOTTOM HEAT” knobs to adjust to the desired temperature andachieve the toasting pattern. Knobs can be turned to an “OFF” position, turning off the heat in afull run mode. In “E-SAVE” mode, the elements (even if “OFF”) will cycle to keep cavitytemperature up.3. Use the conveyor speed control to get the desired toast quality – “DARK” will run the conveyorslower and “LIGHT” will run the conveyor faster.7) CLEANINGInsure the appliance has been turned off and has had sufficient time for all surfaces to cool down before cleaning. Use only mild soap and water to clean this appliance. Appliance cleaning should be performed daily. NOTE: DO NOT USE ABRASIVE CLEANING SOLUTIONS ON THIS APPLIANCE.Daily Cleaning•NEVER DIRECTLY SPRAY THE TOASTER WITH CLEANING CHEMICALS, SOLUTIONS, OR WATER.ALWAYS APPLY CLEANING SOLUTIONS TO A CLEANING TOWEL OR CLOTH.•Remove the crumb pans and wipe out debris with a damp rag and mild soap solution.•Using a damp rag with mild soap and water, wipe down the exterior surfaces of the appliance.•Using a damp rag with mild soap solution, wipe down all areas of the conveyor. DO NOT ATTEMPT TO CLEAN THE QUARTZ OR METAL HEATERS.•When units are in the stacked configuration, it is still necessary to clean between the units. Using a damp rag with mild soap and water, wipe down the tops and undersides of all units. Ensure there are no foreign objects between the units that could catch fire.8) Using a damp rag with mild soap and water, wipe the surfaces of thestacking spacers on all four corners.9) TROUBLESHOOTINGAlways ask and check the following:Not getting power:1. Is the unit connected to a live power source of the proper voltage?2. Check the rating label. Is the unit connected to the correct power source?3. Check the circuit breaker.4. Is power switch "ON"?5. If the above checks out, and you still have problems, call your local service agent.Conveyor not working:1. Please refer to "Not getting power" section.2. Check belt for obstructions. Belt may be jammed.3. Note: At slower settings the conveyor moves very slow and may appear stalled, which is not the case.4. If the above checks out, and you still have problems, call your local service agent.Food not cooking properly:1. Please refer to "Not getting power" section.2. Is the controller and speed control adjusted to the desired setting? (See Product Key Programmingsection to check button parameters)3. If the above checks out, and you still have problems, call your local service agent.10) PREVENTATIVE MAINTENANCE SCHEDULE•Please follow the cleaning section for the daily preventative maintenance schedule.•DO NOT USE ABRASIVES OR CLEANING SOLUTIONS ON THIS APPLIANCE.•Routinely check before every operation that adequate distance is allowed between fans and anything that would possibly allow foreign debris or substances to be taken in by inlet fan.•Clean fan guards on a daily basis to ensure proper inlet cooling to electrical components and efficient hot air exhaust.•On a daily basis make sure side walls of tunnel oven remain clean to assist in maintaining even cooking around product. Be careful not to bump or hit the quartz or metal heaters when wiping down.•Ensure belt is properly tensioned as to prevent slippage or binding, which causes strain on motor.•DO NOT ATTEMPT TO MAINTENANCE, SERVICE, OR CLEAN THE QUARTZ OR METAL HEATERS.NOTES:11。
Operation Manual To The Gas OvenModel: EQ-4 EQ-6EQ-8 EQ-10A.SpecificationsB.Installation and cautions1.Install the machine in the ventilated place.2.Don’t use any other gas as fuel.3.Cut off the gas after using.4.Cut off the gas if there is gas leaking out, then open the windowsto ventilate. Don’t turn on or off any fires before it is reparired.C.Operation1.Check whether the oven is connected to tank gas whether it isfirmly connected before using.2.Turn to the valve of the tank gas, press the switch in the front ofthe oven, turn it anti-clockwise slowly until you hear a sound of “ding”, then hand off, Watch whether it is lighted through the hole. If it is not used for a long time or it is the first time to use,maybe it is not easy to light a fire, because there is air in the pipe, repeat the above steps until it is lighted.3.After using, turn the switch clockwise in the front of the burneruntil you hear “DING”, and fasten the gas vavle.4.When the switch in the front of the burner is turn to an angle of90º, the fire is strongest, when it is over 90º, the fire gets weaker.。
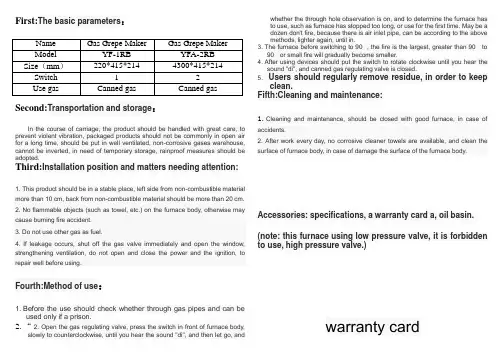
First:The basic parameters:Second:Transportation and storage:In the course of carriage, the product should be handled with great care, to prevent violent vibration, packaged products should not be commonly in open air for a long time, should be put in well ventilated, non-corrosive gases warehouse, cannot be inverted, in need of temporary storage, rainproof measures should be adopted.Third:Installation position and matters needing attention:1. This product should be in a stable place, left side from non-combustible material more than 10 cm, back from non-combustible material should be more than 20 cm.2. No flammable objects (such as towel, etc.) on the furnace body, otherwise may cause burning fire accident.3. Do not use other gas as fuel.4. If leakage occurs, shut off the gas valve immediately and open the window, strengthening ventilation, do not open and close the power and the ignition, to repair well before using.Fourth:Method of use:1. Before the use should check whether through gas pipes and can beused only if a prison.2.“ 2. Open the gas regulating valve, press the switch in front of furnace body,slowly to counterclockwise, until you hear the sound "di", and then let go, andwhether the through hole observation is on, and to determine the furnace has to use, such as furnace has stopped too long, or use for the first time. May be a dozen don't fire, because there is air inlet pipe, can be according to the above methods, lighter again, until in.3. The furnace before switching to 90 °, the fire is the largest, greater than 90 ° to90 ° or small fire will gradually become smaller.4. After using devices should put the switch to rotate clockwise until you hear thesound "di", and canned gas regulating valve is closed.5. Users should regularly remove residue, in order to keepclean.Fifth:Cleaning and maintenance:1.Cleaning and maintenance, should be closed with good furnace, in case of accidents.2. After work every day, no corrosive cleaner towels are available, and clean the surface of furnace body, in case of damage the surface of the furnace body.Accessories: specifications, a warranty card a, oil basin.(note: this furnace using low pressure valve, it is forbidden to use, high pressure valve.)warranty cardGas Crepe Makeroperating manual。
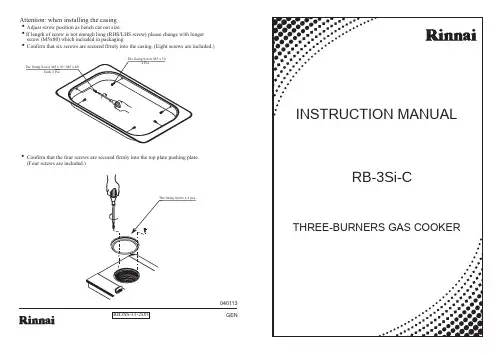
Attention: when installing the casing• Adjust screw position as bench cut out size.• If length of screw is not enough long (RHS/LHS screw) please change with longer screw (M5x80) which included in packaging•Confirm that six screws are secured firmly into the casing. (Eight screws are included.)•Confirm that the four screws are secured firmly into the top plate pushing plate. (Four screws are included.)RB3SS-31-2x01The fixing Screw M5 x 304 PcsThe fixing Screw M5 x 30 / M5 x 80Each 2 PcsThe fixing Screw x 4 pcs.040113GENTHREE-BURNERS GAS COOKERINSTRUCTION MANUALRB-3Si-CComponents and FeaturesTrouble Shooting Manual for Rinnai RB-3Si Built-in HobMaintenance•Wipe the tempered glass with a soft damp cloth and mild detergent • Wash the Pan Support and Burner Covers in warm water and detergent.Components and parts namesIn order to obtain the best results and to maintain your Rinnai Built-In Hob in the best condition, please read the instruction carefully.FAULTCAUSE1. No Ignition Spark electrode is wet, especially in high humidity season Dry the electrode with clean tissue or dry cloth.2. Flame cannot be heldIncorrect turning of gas control knob.Push and turn the gas control knob anti-clockwise until a ‘click’ sound is heard. Hold for a few seconds until flame is ignited.4. Yellow flameAccumulated grease and dirt on the burner.Wash the burner in warm water with detergent. Leave it to dry; then place it back in the correct position.3.No main flame Gas Regulator has been turned off Open gas regulator completely REMEDYStainless Top PlateCasingKnob Pan Support HPan Support MDrip Pan H Burner CoverTop Plate Pushing PlateDrip Pan S S Burner CoverInstallation1. Pan SupportFit Pan Support Legs into Top Plate.(Fig.2)2. Drip PanFit drip pan into burner correctly, without any gap.(see Fig.3)3. Installation of Gas HoseOperating Instruction Ignition•Install the built-in hob in well ventilated area and keep away from any combustible or inflammable object i.e. paper, oil, etc.•If the built-in hob is to be installed near any combustible surrounding i.e. wooden walls, wooden shelves, etc, there should be a distance of more than 15cm (6 in) away from the surrounding combustible. If the surrounding materials are fireproof, the clearance is not required.•Place the built-in hob on a stable and level surface• This built in hob is to be used for cooking purposes only. Do not use it to dry towel, clothes or any other materials over it.• Make sure that the following parts are fitted properly before use.• A specific rubber hose for built-in hob must be used .•The rubber hose must not be bent during installation and must be of an appropriate length ( less than 2m).•During installation, make sure that the rubber hose does not come into contact with the body of the built-in hob pass through the bottom part of the built-in hob to prevent melting of the hose.• Place the securing ring over the rubber hose and connect the rubber hose to the coupler below therear side of the built-in hob till the marked red line. Then secure the rubber hose in position with the securing ring (For LP Gas). • The connection must be performed by a qualified person according to the relevant standards (For LPGas). For Town Gas / Natural Gas, the task must be executed by a qualified licensed technician.•Do not use any other gas except for the ones indicated on the specification label of the built-in hob.•LPG is the abbreviation for Liquefied Petroleum Gas, while TG is Town Gas supplied through pipelines.•For liquefied petroleum gas, please use conventional household low pressure regulators. The standard pressure for LPG gas is 280 mm H O that for TG gas is 100 mm H O.• Do not increase the gas pressure• Never turn the LPG gas container upside down or subject to high temperatures or direct sunlight.•Conversion of built-in hob from one gas type to another must be performed by a qualified technicianas major components need to be replaced.221. Depress the control knob to about 2 mm and turn to the left (counter clock-wise) to the “ON” position.2.When the control knob is being turned for ignition, sparks are generated to ignite the burning device, accompanied by clicking sound.4. Precaution gas(Fig.3)XFig. 2G APCut-Out Hole SizeSpecification1. The tempered glass and stainless top plate is beautiful and stylish.2.The enamel pan supports are durable and will not deform, making it stable for your cooking vessels.3. The automatic continuous ignition device will ensure a 100% ignition rate.4.Each built-in hob is equipped with a safety valve which will cut off the gas supply automatically if the flame is accidentally extinguished (For SV model only).FeaturesGas Type Gas Consumption per hour Respective gas consumption (kW)Main RHS / LHS Gas Connecting Tube3.552.503.721.35L.P.G (30 mbar)Nozzle/injector size 3.600.90Ø9.5 mm gas specific rubber hose ½ In Thread (male)Ø9.5 mm gas specific rubber hoseT.G. (18 mbar)Nozzle/injector size N.G. (30 mbar)Nozzle/injector sizeSmall Center 1.401.501.400.831.450.6065725~840435~480550How to Handle Safety Device and Change Battery1. If the flame is extinguished during operation, the Flame Failure Safety Device will automatically cut off the gas within second.If you notice that the flame has been extinguished, please turn the knob to “OFF” position.2. The Safety Sensor is delicate, please do not use stiff brushes or rough cleaning pads when cleaning.•Aeration is preset at factory during assembly; please do not attempt to adjust it.•Battery Box is located at bottom of right front (Size C, 1.5V x 1) (Fig.5).Open the cabinet door, and change the battery.1.After use, turn the control knob right to the “OFF” position, and the flame will be extinguished.2.Make sure that the control knob is fully turned to the “OFF”position, lest there would be a danger of gas leakage.3. After extinguishing the flame, do not touch the conductive parts of the hobs as they remain at very high temperatures.4. There may be a slight hissing sound after the flames is extinguished.5. If the built-in-hob is not in use, turn off the main gas supply to avoid gas leakage or unnecessary accidents.Flame ExtinguishingFig. 5Gas InletFront Side”C” Size Battery(1.5Vx1)3. Do not release the control knob for 2-5 seconds after the sparks have ignited the burner to activate the safety device. Otherwise, the ignition will fail.4.In the event of the burner flames being accidentally extinguished , turn off the burner control and do not attempt to re-ignite the burner for at least 1 min.The device shall not be operated for more than 15 seconds. If the burner has not lit up after 15 seconds, stop operating the built-in hob and open the compartment door and/or wait for at least 1 minute before attempting to ignite the burner again.5. Flame can be adjusted between “MAX”, “MED”and “MIN” position, please adjust flame slowly. As shown by Fig. 4:Off Max flameMed flame Min flame6. Do not clean the top of the sensor with a hard brush, as it may damage the sensor.R0 ~ R110Fig. 4Product Net Weight Model IgnitionOverall Dimension Cut out hole sizeBuilt-in Hob RB-3Si 13.5 kg 9 mm x 510 mm 9 x 870 mm 435~480 mm x 725~840 mmR0 mm ~ R110 mmContinuous Ignition “C” Size Battery (1.5V x 1)Burners 280 mmMax MainMin 120 mmDiameters of pan which may be used on cooker* Maximum weight for each burners 20 kg.。
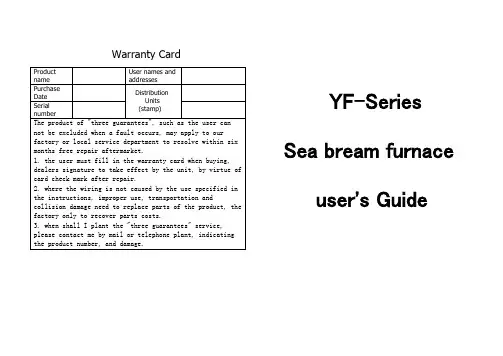
Warranty CardYF-SeriesSea bream furnaceuser's GuideWarning: This product uses low-pressure canned liquefied petroleum gas, the use of high and medium pressure liquefied petroleum gas is strictly prohibited, if any illegal operation, the company is not responsible for any accidents.Note: If you need to use pipeline gas, please inform the factory, factory installed before use.This product absorbs the advantages of similar products at home and abroad to improve technology, fast heat, fashionable and reasonable structure, easy operation, stainless steel shaft structure, electronic ignition.First, the basic parameters:Second, the installation precautions:This product is installed in a well-ventilated, well-balanced area.Do not put flammable objects near the product to avoid fire accident. Close the valve after use. If you find a leak, can not be ignited, you should immediately stop using it, to be repaired, before use.Third, the use of the environmentAmbient temperature can not exceed 50 degrees Celsius.Fourth, the use of methods1, connect the gas pipeline, and check whether firm.2, open the gas control valve, lightly press the lighter left-handed ignition, such as the ignition process, there is no point, according to the above method can be lit again to point.3, the use of closed temperature control igniter valve.Fifth, transport and storageIn the transport process, to prevent violent vibration, the collision of each inversion. Store in a well-ventilated warehouse with air-dried and non-corrosive gases.Sixth, cleaning and maintenance1, should stop burning when cleaning.2, use non-corrosive cleaning agent to clean the surface.Warning: Do not use water injection ignition temperature control device.。
产品名称用户姓名用户地址购买日期出产编号出库确认(盖章)服务承诺:1、客户所订购产品自厂家发货时间起计算,整机质保4个月,4个月内有质量问题厂家负责,超出4个月,收取相应费用。
2、用户在购买时填写保修卡。
3、凡是没有按说明书规定接线,使用不当,运输碰撞等造成损坏,需要更换零部件的产品,本厂只收零件费。
4、需要维修产品时,请电话联系本公司,并说明产品型号和损坏情况,以便向您提供售后服务。
一、安装注意事项1、必须使用和产品相符的交流电源。
2、线路、电表及空气开关必须符合产品的负载要求。
3、产品必须安装可靠的地线并保证接地可靠。
4、使用前应检查接线有无松动或损坏,如果发现异常,为了避免危险,必须由制造商的维修人员或类似的专职人员进行检查维修。
二、产品名称电压/频率功率(W) 尺寸(mm)单头电热鱼丸炉220V/50Hz 1500 265*450*190双头电热鱼丸炉220V/50Hz 3000 470*450*190三头电热鱼丸炉220V/50Hz 4500 660*450*190体参数以购买产品实物为准。
三、电气原理图1、必须使用和产品相符的交流电源。
2、线路、电表及空气开关必须符合产品的负载要求。
3、产品必须安装可靠的地线并保证接地可靠。
4、使用前应检查接线有无松动或损坏,如果发现异常,为了避免危险,必须由制造商的维修人员或类似的专职人员进行检查维修。
四、产品介绍板加长超厚,增长型多回路电热管技术,发热更快、更均匀、能耗比高,精准温控系统配合发热管确保发热效果持续更长,令温度稳定控制在您手中。
粗耐热国标3C认证电源线,采用耐热绝缘表皮,让产品使用寿命更长且安全。
五、使用说明1、合上电源开关,红色指示灯亮,此时电源已供至产品,只要顺时针方向旋转温控开关,把所需的温度值对准白点的位置,绿灯亮,表示发热管开始工作,扒板上的油开始升温。
当油温升至设置的温度时,绿灯熄灭,红色指示灯继续亮,发热管停止工作,当油温低于设置温度10度以下S,重复上述的动作,如此反复循环,以保证油温在设定的温度范围内恒温。
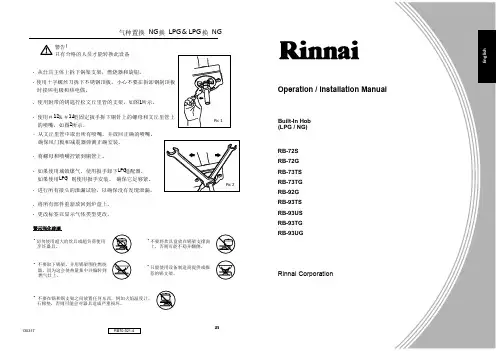
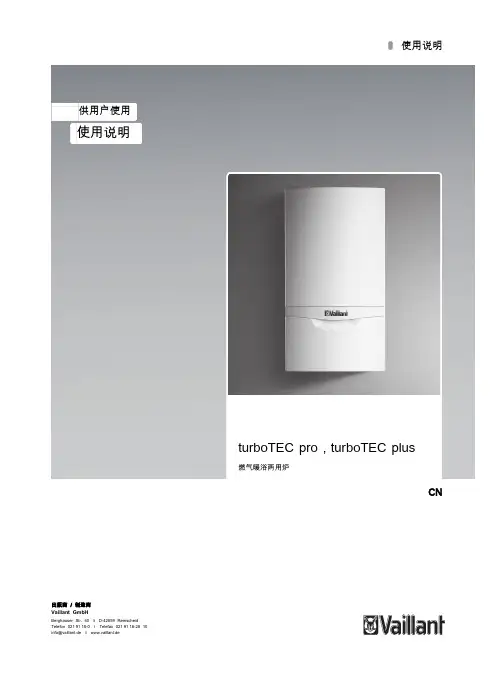
Operation / Installation ManualBuilt-In Hob (LPG / NG)RB-72S RB-72G RB-73TS RB-73TG RB-92G RB-93TS RB-93US RB-93TG RB-93UGRinnai CorporationE n g l i s h252741警告!只有合格的人员才能转换此设备. 从灶具主体上拆下锅架支架,燃烧器和旋钮。
. 使用十字螺丝刀拆下不锈钢顶板。
小心不要在拆卸钢制顶板 时损坏电极和热电偶。
. 使用附带的钥匙拧松文丘里管的支架,如图1所示。
. 使用#12&#14型固定扳手拆下铜针上的螺母和文丘里管上 的喷嘴,如图2所示。
. 从文丘里管中取出所有喷嘴,并放回正确的喷嘴。
确保风门板和减震器弹簧正确安装。
. 将螺母和喷嘴拧紧到铜管上。
. 如果使用城镇煤气,使用扳手卸下LPG 适配器, 如果使用LPG ,则使用扳手安装。
确保它足够紧。
. 进行所有接头的泄漏试验,以确保没有发现泄漏。
. 将所有部件重新放回到炉盘上。
. 更改标签以显示气体类型更改。
Pic 2Pic 1气种置换NG 换LPG & LPG 换NGRB70-021-4130317• 切勿使用超大的炊具或超负荷使用 烹饪器具。
• 不要取下锅架,并用锅架围住燃烧 器,因为这会使热量集中并偏转到 燃气灶上。
• 不要在锅和锅支架之间放置任何东西,例如火焰温度计, 石棉垫,否则可能会对器具造成严重损坏。
• 不要将炊具盘放在锅架支撑面 上,否则可能不稳并翻侧。
• 只能使用设备制造商提供或推 荐的锅支架。
警示强化玻璃ContentGuide to Appliances RB-72S / RB-72G / RB-73TS / RB-73TG / RB-92G / RB-93TS Guide to Appliances RB-93TG / RB-93US / RB-93UGGuide to the AppliancesSpecificationSafety InstructionsUsing for the first timeInstallation GuideOperationSuitable PansCleaning and CareTrouble Shooting GuideRinnai Customer Care CentersConversion from NG to LPG & LPG to NGCaution For the Tempered Glass 123468913151619202121Rinnai Customer Care CentersChina |中国Guangzhou Rinnai Gas & ElectricRoom 2805, No.31 Jianghe Building,Tianshou Road, Guangzhou, China广州林内燃具电器有限公司中国广州天河区天寿路31号江河大厦2805室Tel 电话: (86) 20 3821 7976Email 邮箱:*******************.cnURL 网址: IndonesiaCustomer Care of PT. Rinnai IndonesiaJl. Raya Pejuangan No.21,Komp. Ruko Sastra Graha No.11 -13Jakarta 11530Tel:(62************(Customercare)*************(SMS Center)E mail :**************************URL : www.rinnai.co.idMacau |澳門Rinnai Appliance Service CenterEdificio Industrial, 3andar F.A da Zona Macau林內爐具服務中心澳門青洲跨境工業大廈3樓F座Phone電話 :+853 2852-7799Fax 傳真 : +853 2827-0572URL 网址: /moPhilippinesMitsui Industia Corporation10 Buenaventura St., Cor MacArthurHighway, Dalandan Valenzuela City,PhilippinesTel : (63) 2 292 9177 / 292 9179Fax : (63) 2 292 8187SingaporeRinnai Holdings (Pacific) Pte Ltd 61 Ubi Road 1#02-20 & 21Oxley BizhubSin gap ore 408727Tel : (65) 6748 9478 Fax : (65) 6745 9240Email:********************:www.rinnai.sgThailand | ประเทศไทยRinnai (Thailand) Co., Ltd. / Lucky Flame Co., Ltd.61/1 Soi Kingkaew 9, Kingkaew Rd.Racha Thewa, Bangphli, Samutprakarn 10540,Thailandเลขที่ 61/1 ซอยก่่งแกว9 ถนนก่่งแกประเทศไทย10540Tel : (66) 2 3124330 -40Email:*********************.thURL : www.luckyflame.co.thVietnam | Việt NamRong Viet Commerce Company Limited120 3/2 Street, Ward 12, District 10,Ho Chi Minh City, VietnamCông Ty TNHH Th ngươM i ạRôồn g Vi t ệ120 Đngườ3/2, Ph ngườ12, Qu nậ10,TP. H ôồChí Minh, Vi t ệNamTel : (84) 8 3862 3409 Fax : (84) 8 5404 1964Email:************************URL : www. 40MalaysiaRinnai (M) Sdn BhdD2-3-G & D2-3-1, BlockD2, Pusat PerdaganganDana 1, Jalan PJU 1A/46, 47301 Petaling Jaya,Selangor Darul Ehsan, Malaysia.Tel: (60) 3 7832 0037 / 7832 0038 / 7832 0039Fax: (60) 3 7832 0036 Toll Free : 1800-88-3180Email:***********************.myURL: .myGuide to the AppliancesRB-72SRB-73TS1SmallBurnerLeft Control Right ControlBig BurnerBig BurnerBig Burner Big BurnerBig BurnerRB-72GLeft Control Right ControlExtra Small BurnerLeft Control Right ControlRear RightControlLeft Control Right ControlRear RightControlBig Burner Extra Small BurnerRB-73TGSmallBurnerRB-92GBig Burner Big BurnerLeft Control Right ControlLeft Control Right ControlRear RightControlBig Burner Small BurnerRB-93TSMediumBurner常见问题与解决方法问题可能导致的原因解决方法无点火(DC)自动点火功能不工作燃烧器火焰不均匀。
GAS GRILL YF-01JY SERIALINSTRUCTION MANUALYF-01JY04-A YF-01JY05-A YF-01JY06-AYF-01JY04-B YF-01JY05-B YF-01JY06-B(Pic. per 4 burners+1 side burner)SAFETY INSTRUCTIONS1. Read the instruction manual carefully before use and keep it forfuture reference. Failure to comply with the instructions can result in death, serious injury or property damage.2. For outdoor use ONLY! Do not use indoors.3. Do not use below ground level.4. The accesible parts can get very hot. Keep small children, elderly people and animals away from the gas grill. Grill glove is adviced.5. Do not move the product while it is alight.6. Turn off the gas supply at the gas cylinder when the grill is not inuse or after use.7. Any modification of the product, misuse or failure to follow theinstructions may be dangerous and will void the warrenty.8. Check your gas grill anually for leaks. Check whether the hoseconnections are tight and leak test them each time you reconnect the gas cylinder.9. Do not use the gas grill within 1 meter of combustible materialsor surfaces.10. LP gas cylinders should not be placed directly underneath the grill.11. Open the hook of the grill before lighting.12. Do not leave the grill unateended when it is lit.13. Be careful when opening the hook, as the hot steam inside isreleased upon opening.14. Do not cover the grill untill it has completely cooled down.15. Do not use aerosols near the grill.16. Do not store or use petrol or other flammable vapours or liquids in the vicinity of this gas grill or any other appliance.17. If you smell gas, turn off the gas supply at the gas cylinder;extinguish any open flame; open the hood. If still have it, stop use.1PART LIST2AssemblyNote: Please do not tight the screws and nuts till all assembly steps completed.GHF1. Assemble the LH and RH frame (5&6) to bottom shelf (7)with 4pcs M5 screws (B).39BB2. Assemble the back shelf (9) to the frames with 4 pcs M5 screws (B).48BB3. Assemble the front beam (8) to the front of frames with 4pcs M5 screws (B).564. Assemble the 4pcs wheels (10&11) to the end of frame legs. Note: the 2pcs wheels with break (10) are always in the same side.101011115. The body (1) is slided into the frame legs with 8 pcs pre-assembled M5 screws (See detailed pic.). Tight screws after body slided into position.Thermometer (23) is fixed to the lid by its own screw.Note: make sure the 8pcs screws are pre-assembled before sliding.7B146. LH side shelf (14) is asssembled to the body with 6 pcs M5 screws (B).87. RH side burner shelf (15) is asssembled to the body with 6 pcs M5 screws (B).Note: RH side burner shelf for B serial.916A8. Side burner rotary switch base (16),side burner front plate and side burner valve (inside shelf front plate) are assembled together with 2pcs M4 countersunk screws (A).No need for this step for A serial.10A189-1. Side burner (18) is assembled into the side burner shelf with 2 pcs M4 screws (A). Insert the tubeto valve connector.No need this step for A serial.119-2. One end of ignition (19) is assembled to the side bunrer shelf with 1 pc M4 screw (A) and 1pc M4 nut (D). The other end is assembled to the valve connector.No need this step for A serial.12NOT ICEIn order to succeed in lighting the side burner, make sure the ignition needle's head is directed at one of side burner's gas hole.13201710. Decorated knob (17) is assembled to side burner’s front plate. Grate (20) is putted on side burner shelf, with 3 longer legs into the holes.No need this step for A serial.14A1511. Handles (13) are assembled to front doors (12) with 4pcs M4 screws (A). Totally 2 pcs doors.1312CE12. Doors are assembled to frames’ front legs with top and bottom pins (C&E).1623413. Warming grid (2), cooking grids (3) and heat tents (4) are fixed into the body.172114. Oil cup (21) is assembled to the oil pan.Tight all screws before useAssembly completed18。
组装——第9页感谢您购买WEBER 烤炉。
请花几分钟时间在 上在线注册您的产品,为其提供保护。
72016ZH - CHINESE02/01/18在操作燃气烤炉前,请务必阅读本使用手册。
m 危险如果您闻到燃气味:1) 关闭烤炉的燃气供应。
2) 熄灭任何明火。
3) 打开烤炉盖。
4) 如果仍能闻到燃气味,请远离烤炉并立即致电燃气供应商或 消防局。
燃气泄漏可能引发火灾或爆炸,造成严重的身体伤害、死亡或 产损失。
m 警告1) 请勿在本烤炉或任何其他烤炉附近存放或使用汽油,或者其 他易燃液体或气体。
2) 不得将未连接使用的燃气罐存放在本烤炉或任何其他烤炉 附近。
m 警告:在操作烤炉前,请认真执行本使用手册中的所有燃气泄漏检查步骤。
即使烤炉是由经销商组装的,也请执行这些步骤。
m 警告:请勿在未事先阅读本使用手册中“燃烧炉点火”部分的情况下为本烤炉点火。
仅供户外使用。
安装人员须知: 必须将这些说明留给用户,用户应保留这些说明以供日后参考。
烤炉使用手册LPG警告:m烤炉组装不当可能引发危险。
请认真遵循组装说明。
m请勿在零部件未全部安装到位的情况下使用本烤炉。
必须按照组装说明正确组装烤炉。
m您的 WEBER燃气烤炉切不可让儿童 使用。
烤炉的可接触部件可能会很烫。
请让小孩、老人和宠物远离运行中的烤炉。
m请小心谨慎地使用您的 WEBER燃气 烤炉。
烹调或清洁期间烤炉温度很高,切勿使其处于无人看管的状态,切勿在使用过程中移动烤炉。
m请勿在您的WEBER燃气烤炉中使用木炭、煤球或火山石。
m在给烤炉点火或烹制食物时,切勿俯身于开盖的烤炉上。
m在烤炉发烫或开盖时,切勿将手或手指放在烹调箱的前沿。
m使用时,整个烹调箱都会发烫。
请勿 触碰。
m在烤炉工作期间,无论何种情况都不应尝试断开燃气调节器或任何燃气接头。
m操作烤炉时,请务必戴上防烫烧烤手套或烤箱手套。
m 请遵循适用于您的燃气烤炉类型的调节器连接说明。
m如果燃烧炉在烤炉工作时熄灭,请关闭所有燃气阀。
Rotary gas oven user's GuideWelcome to our products!First, the characteristics:1, AC50Hz 220V power supply, transformer rectifier is DC3V. 2, automatic temperature control, electronic ignition pulse. 3, using two pairs of metal mesh infrared heating gas heating, no open flame, long life.4, the high combustion thermal efficiency is lower than the cost of electricity.5, the number of motor revolutions 10-12 turn / min (DC) Second, the technical parameters:Model: EF-268Dimensions: 1010X780X800The use of gas: LPG, natural gas, coke oven gas.Ignition pressure: 2800-3000PaThermal power: 9KWAdjustable temperature: 0 ~ 390 ℃Third, the use1, the prepared chicken or grilled food on the need to bake the cage, power 220V ~ 50Hz, power indicator light.2, open the gas valve, pressing the ignition switch, ignition pulse to ignite two burners to normal combustion webs started to become red, such as abnormal combustion, alarm alarm, the "beep" sound, should re-open the ignition switch to normal combustion.3. Open the rotary switch grilled cage begins to turn. 4, the thermostat adjusted to 260 ℃ ~ 380 ℃, adjust the temperature according to the situation grilled smoked grilled chicken and grilled food to the desired state.5, each time not more than 15 kg.Fourth, note:1, the device mainly uses liquefied petroleum gas, such as other gas species shall promptly inform the Company.2, or a long time after use, please leave off the gas source. 3, when cleaning to cut off power and gas supply.4, the equipment and the burner is prohibited washed with water and beat.Fifth, transport and storage1 transport, non-volatility and fierce beating, collision.2, should be stored in cool and dry warehouse, prohibited outdoor rainforest hot sun, a short time to be open storage, protection measures must be used to protect myself.。
StarManufacturing International Inc.10 Sunnen DriveSt. Louis, M O 63143Phone: (314) 781-2777 Fax: (314) 781-3636Installation and Operating Instructions Instructions d’installationet d’opérationSTAR-MAX GAS CHARBROILERMODELS6015CBB-LP, 6024CBB-LP,6036CBB-LP, 6048CBB-LP,6115RCBB-LP, 6124RCBB-LP,6136RCBB-LP, and 6148RCBB-LPBARBECUE A GAZ STAR-MAXMODELES6015CBB-LP, 6024CBB-LP,6036CBB-LP, 6048CBB-LP,6115RCBB-LP, 6124RCBB-LP,6136RCBB-LP, et 6148RCBB-LP2M-Z5137 Rev. - 12/21/01GENERAL INSTALLATION DATACAUTIONThis equipment is designed and sold for commercial use only by personnel trained and experienced in its operation and is not sold for consumer use in and around the home nor for use directly by the general public in food service locations. For equipment to be used by the general public, please contact the factory.The Star-Max series gas charbroiler is equipped for the type of gas indicated on the nameplate mounted on the front panel. All units are shipped from the factory for use with natural gas. The unit can easily be converted for use with propane gas: see propane gas.-IMPORTANT-INSTALLATION: INSTALL IN NON-COMBUSTIBLE LOCATIONS ONLY! Clearance from non-combustible construction must be 6" from back and sides.The installation of the Appliance mustconform to the NATIONAL FUEL GAS CODE "ANSI Z223.1 - LATEST EDITION" AND ALL LOCAL GAS COMPANY RULES ANDREGULATIONS.IN CANADA INSTALLATION SHALL BE INACCORDANCE WITH THE CURRENT CAN/ CGA-B149.1 NATURAL GAS INSTALLATION CODE OR CAN/CGA-B149.2 PROPANE INSTALLATION CODE AND LOCALCODES WHERE APPLICABLE.FOR YOUR SAFETYDO NOT STORE OR USE GASOLINE OR OTHER FLAMMABLE VAPORS AND LIQUIDS IN THE VICINITY OF THIS OR ANY OTHER APPLIANCE. KEEP THE APPLIANCE AREA CLEAR AND FREE FROM COMBUSTIBLES. This appliance, its pressure regulator and its individual shutoff valve must be disconnected from the gas supply piping system during any pressure testing of that system at test pressures in excess of 1/2 PSIG. This appliance and its pressure regulator must be isolated from the gas supply piping system by closing its individual manual shutoff valve during any pressure testing of the gas supply piping system at test pressures equal to or less than 1/2 PSIG. For your protection, we recommend a qualified installing agency install this appliance. They should be familiar with gas installations and your local gas requirements. In any case, your gas company should be called to approve the final installation. In addition, there should be posted, in a prominent location, detailed instructions to be followed in the event the operator smells gas. Obtain the instructions from the local gas supplier.LEVELING UNITThis charbroiler is supplied with 4 feet which must be screwed into the body. Level unit by adjusting the (4) feet which have an adjustment of 1-3/4" for accurate and perfect line-up with other units. CAUTION: DO NOT INSTALL WITHOUT ATTACHING FEET - DO NOT REMOVE FEET. GAS INPUT TO CHARBROILER:Models 6015CBB and 6115RCBB 35,000 BTU/HT, PROP Models 6024CBB and 6124RCBB 70,000 BTU/HR, PROP35,000 BTU/HR/BURNER, PROPModels 6036CBB and 6136RCBB 105,000 BTU/HR, PROP 35,000 BTU/HR/BURNER, PROPModels 6048CBB and 6148RCBB 140,000 BTU/HR, PROP 35,000 BTU/HR/BURNER, PROPWARNING: Improper installation, adjustment, alteration, service or maintenance can cause property damage, injury or death. Read the installation, operating and maintenance instructions thoroughly before installing or servicing the equipment.GAS PIPINGGas piping shall be of such size and so installed as to provide a supply of gas sufficient to meet the full gas input of the appliance. If the appliance is to be connected to existing piping, it shall be checked to determine if it has adequate capacity. Joint compound (pipe dope) shall be used sparingly and only on the male threads of the pipe joints. Such compounds shall be resistant to the action of L.P. gases. WARNING: Any loose dirt or metal particles which are allowed to enter the gas lines on this appliance will damage the valve and affect its operation. When installing this appliance, all pipe and fittings must be free from all internal loose dirt.GAS PRESSURE REGULATORA convertible pressure regulator is provided with each charbroiler. It should be connected to the inlet pipe at the rear of the unit. The gas supply is then connected to it. It is shipped set for 10" water column manifold pressure for use with propane gas. Allow 6" clearance from back of unit to wall for servicing and installation. CONNECTING GAS SUPPLY LINEThe gas inlet of the charbroiler is sealed at the factory to prevent entry of dirt. Do not remove this seal until the actual connection is made to the gas supply line.MANUAL SHUT OFF VALVEA manual shut off valve should be installed upstream from the manifold and within six feet of the charbroiler.CHECKING FOR GAS LEAKSSoap and water solution or other material acceptable for the purpose, shall be used in locating gas leakage. Matches, candle flame or other sources of ignition shall not be used for this purpose. Check entire piping system for leaks. PILOT LIGHTING INSTRUCTIONSThe charbroiler is equipped with standing pilots, and should be lit immediately after the gas is turned on.1.Turn off main valve to unit and wait 5 minutesto clear gas.2.Turn off all knobs and pilot valves.3.Turn on main valve and light all pilots.4.Turn burner knobs to desired setting.5.To turn burners off, turn knobs off. SHUTTING DOW N INSTRUCTIONS1.Turn the burner valve knobs to the off positionto turn burners off.PILOT LIGHT REGULATIONThe pilot lights on this broiler have been turned off at the factory. Adjust pilot light flames as small as possible, but high enough to light burner immediately when burner valve is turned on high. BURNER OPERATIONTo ignite burners, turn burner valve knob to "HI" position. Each burner is controlled by an individual high-low, on-off valve. An infinite number of broiling temperatures may be obtained by turning the burner valve knob to any position between high and low.BURNER ADJUSTMENT1.Turn burner valve knob to "HI" position.2.Slowly decrease openings of air shutters togive a soft blue flame having luminous tips,then slowly increase openings to a point where the yellow tips disappear and a hard blue flame is obtained.EXHAUST CANOPYOpen hearth broilers inherently create a good deal of heat and smoke and should be installed under an efficient exhaust hood with flame proof filters. A vertical distance of not less than 48" shall be provided between the top of the appliance and filters or any other combustible material.AIR SUPPLYProvisions for adequate air supply must be provided.OPERATING INSTRUCTIONS LIGHTINGWhen broiler is first lit, it will smoke until the preservation oils and impurities are burned off. BROILINGTurn valves on and pre-heat unit on "HI" before attempting to broil. You will have to experiment with the grill settings and the valve settings for your particular meat products. We recommend that you set the grate at the full tilt position to start with. This position allows the grease to run down the grate into the grease tray, reducing flare ups. Check water pans frequently and add a sufficient amount of water when necessary. Hot water vapors rising from the water pans and through the combustion chamber helps reduce flare ups. Exercise care when using your broiler. TILTING THE GRATERaise or lower the grate to the next step by lifting the grate at the back of the charbroiler where the grate rests. Use potholders or gloves to reposition.CAUTION CHARBROILERS ARE HOT! NEVER ATTEMPT TO CHANGE THE GRILL POSITION WHILE MEAT PRODUCTS ARE COOKING. FLARE UPS CAN OCCUR UNEXPECTEDLY. TURN OFF CHARBROILER, AND ALLOW THE CHARBROILER TO COOL.DO NOT PUT MORE THAN 5 LB. LAVA ROCK PER EACH BURNER ADJUSTING HEAT PATTERNIt is possible through this arrangement to have a high heat or searing section, while having a low heat finishing or holding section. For the searing operation, set the valves for the section at a position of "HI" or close to it. For holding or finishing, set the valves closer to the "LOW" position on the dial. You select the heat pattern you like, and set the valves accordingly. CLEANINGClean regularly. Remove grate section to sink for washing. Brush out carboned particles. Remove and wash water pan. Wipe exterior surfaces with detergent and a cloth. A non-abrasive cleaner can be used on caked areas.WATER PANThe water pan is located at the bottom of the unit, and is easily removed from the front of the unit. Water should be added to the water pan and replaced as necessary. The water pan helps prevent flare ups and catches grease.AIR INTAKES IN BOTTOMAir for combustion enters from the bottom of the unit. Do not obstruct this area. MAINTENANCE AND REPAIRSContact the factory or one of its representatives or a local service company for service or maintenance if required.RETAIN THIS MANUAL FOR FUTURE REFERENCE Part No. 2M-Z5137Rev. - 12/21/01Star Manufacturing International, Inc.。
一、The basic parameters:
二、Transportation and storage:
In the course of carriage, the product should be handled with great care, to prevent violent vibration, packaged products should not be commonly in open air for a long time, should be put in well ventilated, non-corrosive gases warehouse, cannot be inverted, in need of temporary storage, rainproof measures should be adopted.
三、Installation position and matters needing attention:
1. This product should be in a stable place, left side from non-combustible material more than 10 cm, back from non-combustible material should be more than 20 cm.
2. No flammable objects (such as towel, etc.) on the furnace body, otherwise may cause burning fire accident.
3. Do not use other gas as fuel.
4. If leakage occurs, shut off the gas valve immediately and open the window, strengthening ventilation, do not open and close the power and the ignition, to repair well before using.
四、Method of use:
1. Before the use should check whether through gas pipes and can be
used only if a prison.
2.“ 2. Open the gas regulating valve, press the switch in front of furnace body,
slowly to counterclockwise, until you hear the sound "di", and then let go, and whether the through hole observation is on, and to determine the furnace has to use, such as furnace has stopped too long, or use for the first time. May be a dozen don't fire, because there is air inlet pipe, can be according to the above methods, lighter again, until in.
3. The furnace before switching to 90 °, the fire is the largest, greater than 90 ° to
90 ° or small fire will gradually become smaller.
4. After using devices should put the switch to rotate clockwise until you hear the
sound "di", and canned gas regulating valve is closed.
5. Users should regularly remove residue, in order to keep
clean.
五、Cleaning and maintenance:
1.Cleaning and maintenance, should be closed with good furnace, in case of accidents.
2. After work every day, no corrosive cleaner towels are available, and clean the surface of furnace body, in case of damage the surface of the furnace body.
Accessories: specifications, a warranty card a, oil basin.
(note: this furnace using low pressure valve, it is forbidden to use, high pressure valve.)
warranty card
Gas Fish Ball Machine
operating manual。