索尼收音机SW77使用说明书(中文版)详解
- 格式:pdf
- 大小:474.78 KB
- 文档页数:46
SONYICF-SW77全波段数字调谐收音机中文使用说明书(转帖)SONY ICF-SW77中文使用说明一、简单存一个正在使用的频率:二、用“PAGE”上下键选择“页”。
按“ENTER”键不放,按“S1”(或S2……S5)存入该频率;三、二、存台的全部步骤:四、假设正在使用VOA 11825kHz 17:00-22:001、使用这个频率,按“EDIT”键;2、起始时间“start time”闪烁,按“1、7、0、0”,按“EXE”;3、终止时间“end time”闪烁,按“2、2、0、0”,按“EXE”;4、按“MEMORY FREQ/METER BAND STEP/CURSOR”左右键选择指针位置;5、旋转“DIAL TUNE/JOG”直到字母“V”出现;6、再反复4、5步骤,选择字母“V”后面的位置设置字母“O”和“A”,最后按“EXE”7、选择一个空的储存位置,比如PAGE_4的S2。
用“PAGE”上下键翻到“PAGE_4”,按“ENTER”键不放,按“S2”。
如果要存入VOA的其它频率,可跳过4、5、6;如果不需要起始/终止时间,可跳过2、3;五、删除一个频率:假设删除上面存进去的频率1、调出该已储存的频率,按“EDIT”;2、按“TIMER CHECK/ERASE”键不放,收音机发出一“嘟”声,按“S2”一次,该频率即删除。
3、如果按“TIMER CHECK/ERASE”键不放,连续按“S2”,“S2”里面的另一个频率即被删除。
4、按“EDIT”回复到正常使用状态。
SONY SW77操作说明书(中文版)ICF-SW77根据不同的频率范围和其它的变化有几种不同的机型,以适应不同国家的管制。
主要区别在下表中表示,请根据每一个值来检查你的机器类型,AM(LW/MW/SW)和FM 的频率范围在你的收音机的顶部面板上。
不论是以下的哪一种机型,操作程序步骤是完全一样的,不同点将用文字描述清楚。
机型频率范围SSB接收FMLMMWSW176.0-108MHz150—----29999.9kHz可以287.5-108MHz150—----29999.9kHz可以387.5-108MHz150-285kHZ531—--26100kHz不可以487.5-108MHz150-285kHZ531-1602kHz3850-26100kHz可以警告为了防止火灾和触电的危险,不要将本机暴露在雨中或潮湿的环境中。
病黛玉我与SONY ICF SW77三两事一篇令第一次见到SW77的图片是在03年在德生网站的中外收音机历史回顾展览室里,第一眼就被它典雅的外观俘获了,第一次知道了收音机居然可以做的这么漂亮这么现代,也彻底改变了收音机在我心里古老低档的老印象。
很快,从德生网站就链接到了广播爱好者网站和论坛,在这里,仿佛游荡的灵魂一下子找到了寄托,在宿舍、在学校机房往往一泡就是几小时,丝毫不知疲倦。
慢慢的了解到,SW77发布于1991年,是当时热销的ICF-2001D(2010)的升级版,技术升级主要集中在实现更高程度的智能化,但也简化了接收波段,去除了航空波段。
SW77也是当前阶段SONY公司主打的顶级收音机,拥有第一流的接收性能和强大而人性化的功能,是一台价值4800元昂贵收音机,同时也是一台已经风靡全球13年的畅销机型。
4800元对当时一个家庭条件一般又基本没有经济收入的学生来说,无疑是一个巨大的数字,购买一台全新的SW77是一个只有在梦里才能实现的愿望。
虽然如此,曾经还是尝试在网上多次地搜寻出售SW77的商家,奇怪的是,论坛上多位高人提供的信息显示SW77是在04年停产的,但在2003年以后国内就很少出现全新的SW77了,仅有的一些也只存在于国内少数几个市场和卖场里,也许是限于当时国内对这类高档产品的极小需求量吧。
在2003年的时候,因为全新机器还在售,二手出让价一般都不高,刚刚购入不久成色基本全新的全套机器想要卖到4000几乎都是不可能的,偶尔还有两三千元成色很好的走宝机。
既然没有办法购买全新的机器,那么找一台成色不错的二手也是一个不错的选择,03年底论坛上一位山东的朋友联系我,表示有一台整体85成新1*号缺少后支撑板的裸机准备出手,底价是1500元,询问我是否有兴趣。
可惜,因为信任度的问题,最终并没有拿下这台SW77,这也是我在拥有现在这台SW77之前距离它最近的一次。
在这之后不久,毕业、就业、辞职、考研、上研,一件件事接踵而来,人生的轨迹也一次次地随着境遇的不同的改变,生活的压力也让自己不能再安静地呆在自己的小圈圈里。

甚高频说明书一注意事项二外观描述三基本操作四扫描操作五双看/三看六DSC操作七设置模式八安装说明一注意事项1. 不要将收发器连接到交流电源插座上,这可能会造成触电或造成火灾的危害2. 未得到公司明确批准,请不要变更或修改本装置3. 决不要把收发器连接到超过16V的直流电源或使用反向极性4. 不要切断直流插头和保险丝座的直流电源线5. 切勿将收发器放在有可能会妨碍船只正常运行或导致人身伤害的地方6. 将收发器放在至少离船只的导航罗盘3.3英尺的地方7. 不要在-20℃以下或60℃以上的地方放置和使用收发器,也不要放在阳光直射的地方。
例如:甲板。
8. 在清洗时避免使用化学剂如汽油或酒精,因为他们可能会损坏对讲机表面9. 随着长时间的运行,收发器的后面板会越来越热;请将收发器放在一个安全的地方,以避免儿童意外使用10. 没有天线时不要发送和接受信息,这样会损坏对讲机。
二外观描述(一)前面板1.频道上翻/下翻键(1)选择工作频道,设置模式设置等;(2)同时按住[SCAN]键,可以调整液晶频亮度和背光;(3)当另两个被按住的时候,按顺序选择三个频道组中的一个;(4)打开电源时,按住这两个键来激活AquaQuake功能2. 电源/音量调节旋转打开和关闭收发器的电源和调整无线电级别3.静噪控制旋转设置静噪级别4. 频道16/呼叫频道键(1)按键选择频道16(2)按住一秒选择呼叫频道(3)当选择呼叫频道时,按住3秒进入呼叫频道编程状态(4)当按住[CH/WX]时,进入频道评论编程状态(5)推动移动光标向前(6)当电源打开时,按键进入设置模式5. 频道/天气预报频道键(1)选择和切换正常频道和天气频道(2)按住一秒,来启动双看或三看(3)当任一被激活,按键停止双看或三看(4)按键向后移动光标6. 扫描键(1)按键启动或停止正常或优先扫描(2)按住一秒,设置或清除显示频道作为标记频道(3)当按住麦克风上的[HI/LO]键3秒,以清除选定频道组中的标记频道7. 遇险呼救键按住5秒会发送一个求救电话8.DSC/位置键(1)按键进入DSC菜单(2)按住1秒,全球定位系统接收机会显示当前位置(二)麦克风1. PTT开关按住发送,松开接收2. 频道上翻/下翻键(1)按任意键来改变操作频道,设置模式设置等;(2)当喜欢的频道功能开启时,按下任何键,按顺序在选定的频道组中挑选喜爱的频道3. 发射功率键(1)推动切换功率的高低(2)当按住[HI/LO]键时,打开电源,切换麦克风锁定功能(三)功能显示1. 频道组指标说明是否美国“U”,国际“I”或加拿大“C”频道在使用2. 读出频道号(1)表示选定操作频道编号(2)在设置模式,表明选定的条件3. 发送指标发送时显示4. 指示器忙碌接受信号时或静噪开启时出现5. 呼叫频道指示器选择呼叫频道时出现6. 低电源指示灯当电源过低时出现7. 天气频道指示器(1)“WX”:当选定天气频道时出现(2)“WX ALT”:当天气警报功能使用时出现,收到提示音时闪烁8. DSC指示灯(1)“DSC”:当收到来电时出现(2)“POS REPL Y”:当收到位置报告答复电话或位置回复电话时出现9. 频道评论指示器(1)如果编程,频道评论就会显示(2)“LOW BATTERY”:当你的电池电压下降到直流10.8V或以下时滚动(3)“SC”:当优先扫描时出现;“SCAN”:正常浏览时闪烁(4)“DW”:双看时闪烁;“TW”:三看时闪烁10. 标记频道指示器当一个标记频道被选择时出现11. 双重指示器当选择双重频道时显示12. 全球定位系统指示器(1)当收到有效的位置数据时显示(2)当收到无效的位置数据时闪烁(3)当没有连接到GPS接收器时消失三基本操作(一)频道161. 频道16是遇险和安全频道;它是用于建立与一个站初次接触和应急通信;当待机时,你必须监控频道16(1)按[16]键随时选择频道16(2)按[CH/WX]返回状态,然后再选择频道16,或按[▲]或[▼]来选择工作频道(二)频道91. 每个正常频道组有一个单独的休闲使用呼叫频道;在三看过程中,呼叫频道被监控,呼叫频道可编程,每个频道组可以用来存储您最经常使用的频道,以便快速找回。
索尼收音机SW77连接外部设备方法(中文版)索尼SW77是一款高质量的收音机,不仅具有内置的AM和FM调谐功能,还可连接各种外部设备。
本文档将向您介绍如何连接外部设备到索尼SW77收音机。
设备要求在连接外部设备之前,请确保您具备以下设备:1. 索尼SW77收音机2. 目标外部设备(例如音乐播放器、手机等)3. 适配器(如果需要)连接步骤按照以下步骤连接您的外部设备:1. 确保索尼SW77收音机已处于关闭状态。
2. 查找并确定索尼SW77收音机上的外部设备接口。
通常,这个接口是一个标记为"Ext Input"或"Line In"的插孔。
3. 检查您的外部设备是否具有与索尼SW77的接口兼容的输出端口。
如果没有,您可能需要使用适配器来进行连接。
适配器应根据外部设备的输出端口类型进行选择。
4. 如果您需要使用适配器,请将适配器插入您的外部设备。
5. 将外部设备的输出端口与索尼SW77收音机的外部设备接口连接。
确保插头完全插入插孔,以确保良好的连接。
6. 打开索尼SW77收音机,然后选择相应的输入源(通常可以使用收音机上的一个开关或按钮)。
确保您选择正确的输入源,以便从外部设备播放音频。
7. 调整音量以达到适当的音质。
注意事项以下是连接外部设备时需要注意的一些事项:1. 在连接或断开设备时,请确保索尼SW77收音机处于关闭状态,以避免可能的电流冲击。
2. 当您使用适配器时,选择适配器类型和插头类型与输入输出端口的兼容性非常重要。
如果您不确定,请参考设备的说明书或咨询相关专业人士。
3. 在连接外部设备之前,可以将音量设置到较低水平,以避免突然出现的高音量可能对听力造成的伤害。
4. 在连接外部设备时,确保插头完全插入插孔,以确保稳定的音频传输和良好的音质。
请按照以上连接步骤和注意事项,您就可以成功地将外部设备连接到索尼SW77收音机。
如果您遇到任何问题,请参考设备的说明书或咨询索尼客服部门的帮助。
SONY钟控收音机的常用功能键和使用说明大沙头RADIO1.什么是NAP功能,NAP功能就是在按下此键后,机器会以此时间为计时起点,并按照您按下NAP 功能上所显示的数字为时间间隔闹钟。
比如,当前时间为12。
01分,您按下NAP功能键为10,刚等到12。
11分时,机器就会闹铃了。
一般这个NAP功能是可以多种选择的的,如10。
20。
30。
60。
OFF,机器可循环显示。
其实用性,比如你在中午想睡60分钟,就不需要再设开机时间了,只需按下NAP键,选择60分钟,机器就会在60分钟后自动打开将你闹醒。
2.什么是SNOOZESNOOZE功能,SNOOZE功能是一个非常实用的设计,比如你设早上7。
00开机,但是到了7。
00开机后,你还想再睡一小会儿,你就可以按下此键,机器将被关闭,如果是数调收音机,会显示一个数字,机器过了这个时间数后,机器就会打开。
如果是手调式的钟控机,按下此键,机器一样会被关闭,机器过8分钟后就会自动打开,这点设计有点类似于诺基亚手机的闹钟功能。
3.什么是SLEEP OFF功能SLEEP OFF睡眠关机功能,当你按下此键后,机器就会按你所设定的时间自动关机,即使你睡着了,机器也会自动关机。
睡眠定时关机的时间设定方法如下:一般有二种方式,一般的数调型SLEEP键下都预存有10。
20。
30。
60。
120,SLEEP OFF这些常用的睡眠时间,你可以按下SLEEP 键依次选择。
对于一些手调的机型,睡眠关机时间是可以从1分----1小时59分钟任意选择的。
具体操作方法如下:同时按下SLEEP,CLOCK与H,或M三个键设定睡眠关机时间。
4.CLOCK键。
CLOCK键就是时钟键,对于SONY钟控机来说,一般的操作方法是按下此键后,显示时间就会依次显示日历,小时,和分钟。
配合“+,—”键即可设置好主时间。
一般的操作方法有两种,第一种是按下CLOCK键后,利用“+,—”和CLOCK键依次设好小时和分钟,每二种是用CLOCK键与“+,—”同时按下,这时系统时钟会飞速计数,等到计数到你要的时间时松开CLOCK键就,这时就可以获得你想要的系统当前时间了。

快速入门指南如何安装附带的软件如何使用播放器1将播放器连接在电脑上。
2 在电脑上按照以下顺序进行选择。
选择 [开始] - [我的电脑] 或 [计算机] - [WALKMAN] -[Storage Media]。
3 双击 [Setup.exe]。
将出现安装向导。
当您执行 [Setup.exe] 时,[Setup.exe] 和存储在播放器的[Storage Media] 文件夹中的 [Install] 将被复制到您的电脑中作为备份,且 WALKMAN Guide 和 Content Transfer 将安装到您的电脑上。
4 请按照屏幕上的指示进行操作。
执行 [Setup.exe] 之后,WALKMAN Guide 快捷方式将出现在电脑桌面上。
将播放器连接到电脑后,当附带软件安装完毕时,将自动启动Content Transfer。
5 双击桌面上的 (WALKMAN Guide)启动WALKMAN Guide。
有关传送音乐等操作的详细说明,请参阅 WALKMAN Guide 中的用户手册。
©2010 Sony Corporation Printed in Malaysia 2010/9中国大陆地区的用户使用产品前请仔细阅读本使用说明书,并请妥善保管数码音频/视频播放器(彩色液晶显示屏/内置收音功能)附件检查包装内的附件。
耳机(1)耳塞(S、L 尺寸)(1)USB 连接线(1)连接装置(1)将播放器连接到支架(不提供)等时使用音频输入连接线(1)飞机上专用插头转接器(单/双)(1)快速入门指南(本说明书)软件此软件存储在播放器的内置闪存中,其内容如下:Content TransferWALKMAN Guide用户手册等有关如何安装的详情,请参阅“如何安装附带的软件(内含用户手册)”。
对电池充电当播放器连接至正在运行的电脑时,播放器的电池处于充电状态。
也可以连接适用本型号的 Sony USB 充电交流电源适配器(另购)对电池进行充电。
FEATURESContinuous Tuning permits reception of Cancel Button allows you to instantly more stations than ever before without change incorrect information keyed into any break on LW, MW or SW bands. the microprocessor.Fast response, Three Color LCD Band Select Buttons offer instantindicates station frequency in large easy- selection of any desired frequencyto- read numbers, including dual time, bandwidth on SW.Memory location, signal strength andbattery life. Tuning Speed Selector Switch permitsyou to tune stations at either a fast or Direct Access Keypad permits instant slow speed.tuning of any desired frequency from87.5 to 108MHz on the FM band and Adjustable Sleep Timer allowsfrom 150 to 29,999 KHz on the A M band. you to fall asleep to music or otherprogramming.Fifty-Four Memory Pre-sets offerinstant access to your favorite stations on Standby Mode turns on the radioLW,MW,FM and SW. automatically at a pre-set time either bybuzzer or radio program.Supplemental Tuning Controls allowfor maximum clarity of the selected Stereo Headphone Jack permitsfrequency. reception of FM multiplex stereo broad- casts.Dual Time Setting allows you to pre-setyour local time and UTC wORLD Time, or Folding Stand allows you to position the any two time zones with instant recall. radio either vertically or at an angle whilemaintaining stability.Scanning Circuit permits you to checkvarious frequencies on a certain band-width and lock on to it at random.CONTROL LOCATIONS1. T elescopic antenna 12. Meter Select Button2. Sleep Timer 13. Band Selectors3. Time Set 14. Numeric & Bandwidth Buttons4. Dual Time Button 15. Cancel Button5. Dual Time Set 16. Enter Command Button6. LCD Display 17. Memory Entry Button7. Power On/Off Button 18. External Antenna Jack8. Rotary Tuning Knob 19. DX/Local Switch [AM Sensitivity]9. Manual Tuning/Auto Scan Buttons [] 20. FM Stereo/Mono Mode Selector [V] A M Narrow/Wide Mode Selector 10. Standby Button 21. Stereo Headphone Jack23. 9K H z /10K H z S t e p S w i t c h24. H i g h /L o w To n e S w i t c h25. Vo l u m e C o n t r o l26. T u n i n g S p e e d C o n t r o l27. L o c k S w i t c h28. A l a r m S e t S e l e c t o r 29. F o l d i n g S t a n d30. B a c k -u p B a t t e r y C o m p a r t m e n t31. M a i n R a d i o B a t t e r y C o m p a r t m e n t2429CHOOSING A POWER SUPPLY You can operate the receiver using: Six A lkaline AA Batteries.Household A C [With optional A C adaptor] 12 Volt DC A utomobile Battery [With optional DC adaptor]USING BATTERIES 1. Press latch marked OPEN on bothbattery ompartment covers in hedirection of the arrow and lift off cover.2. Insert 4 AA batteries in the Radio compartment and 2AA batteries in the Back-up compartment. Be sure to position them as illustrated on the back of the radio, and on top of the lift-outribbons for easy removal.3. Replace both battery compartmentcovers over their respective compartments and press down until you hear it snap closedUSING HOUSE CURRENT [AC]The receive may be power by A Ccurrent using the AC adaptor (not included). Insert the small barrel shaped plug into thejack on the side of the radio marked DCIN 6V.Plug the other end of the adaptorinto a standard household outlet. WheneverAC is used, the batteries are automatically disconnected.PRELIMINARY SETTINGS SETTING THE CLOCKThe time is displayed in the 24 hour mode since most shortwave stations operate according to Greenwich Mean Time. Thisis the standard that is used throughout the world.SETTING DUAL TIMEA second time zone can be programmed into this unit such as your home time if you are traveling, or Greenwich Mean Time for instant access to short-wave broadcasts or the local time where ever you may be.BAND SELECTIONBAND FREQUENCY RANGE PROGRAM TYPE FM 87.5~108 Mhz Standard FMLW 150~519 Khz LongwaveMW 520~1710 KHz Standard AMSW 1.711~29.999 Mhz SW/13 Sub-BandsTUNING MODE ADJUSTING THE ANTENNA Locate the band you want to listen to in the following chart and adjust the antenna asYou may select any frequency using four different turning methods:Direct turningManual TuningScan TurningMemory TuningDIRECT TUNINGExample: To tune 100.70 Mhz on the FM band, follow this procedure:MANUAL TUNING16SCAN TUNINGUse scan tuning to quickly locate a station or to monitor several stations within a specific band.18MEMORY TUNINGYou may store up to eighteen different frequencies on the SW/FM bands and up to nine different frequencies on each of the other bands for instant selection of your favorite stations.Storing a FrequencyRECALLING A FREQUENCY20CLOCK RADIO OPERATION With this receiver you can fall asleep toyour favorite station by pressing the SLEEP button, or wake you to the morning news,or an alarm buzzer. Make the following settings with the POWER off!Setting the AlarmMISCELLANEOUS CONTROLSIn addition to standard tuning methods described previously, use the following controls for special operations.This switch adjusts the receiver's sensitivity.When you listen to a strong station and the signal is slightly distorted, set the switch to the LOCAL position for best reception. For normal or weak stations, set the switch to the DX position for maximum sensitivity.To reduce interference from adjacent stations, set this switch to the NARROW position and the interference will be suppressed. For maximum selectivity, leave the switch in the WIDE position.AM SENSITIVITY : DISTANCE/LOCAL SELECTTIVITY SWITCH AM: NARROW/WIDE SELECTIVITY SWITCHWhile not a control, you may consider using HEADPHONES to obtain the best audio clarity when listening to SW. Since many SW stations broadcast only marginal signals, using HEADPHONES will enable you to distinguish between the signal and the noise usually encountered at night. Be sure that the HEADPHONES terminate in a 1/8 inch plug, which is inserted into the HEADPHONE jack located on the left side of the radio, marked with the symbol .When the HEADPHONES are plugged in,the speaker is muted.Because the radio is capable of receiving FM multiplex stereo, the HEADPHONES should be stereo capable so that yourlistening enjoyment will be enhanced. When listening to stereo FM, be sure that the FM: STEREO/MONO switch is set to the STEREO position. This switch is located on the lift-hand side of the radio, just abovethe HEADPHONE jack.HEADPHONE USE23AM SENSDX LOCALUsing the LOCK switch preventsunauthorized operation of the radio and will also prevent the station you are listening to from being changed. When the LOCKthe POWER button ant TUNING controls are completely disabled. If the radio is on when the LOCK switch is moved to its upposition, you will not be able to turn it off. If the radio is off, with the LOCK not be able to turn it on. This will also prevent it from being turned on by accident, when packed in a suitcase or attache case. T o release the LOCK switch, simply move the switch down.To obtain optimum performance from this unit,especially when listening to SW an external antenna should be used to the EXTERNAL AN-TENNA A DAPTER and then plugged into the EXTERNAL ANTENNA jack located on the left side of the radio.Located on the right side of the unit, just beneath the ROTARY TUNING knob is a switch marked, MW STEP: 9K/10K. This switch selects the incremental frequency STEPS for the MW band, depending upon your geographic location. In the USA, 10K STEPS are used, so the switch should be set to its lowest position. In other parts of the world where they use 9K STEPS, move the switch to the uppermost position.LOCK SWITCH USEEXTERNAL ANTENNA USEMW STEP SELECTOR SWITCH24AM SENSDX LOCALEXT 9K 10KMW STEPCAR E AN D MAINTENANCE Thi s receiver is an exampl e of superior desig n and craftsmanship.The following suggestion swill help you care for the receiver so tha t you can enjoy it for yearsKeep theproduc t dry.If it doe s get wet,wipe it dry immediatel y.Liquids might containminerals that can corrod e the electronic circuits.Use and store the produc t only in normaltemperatur e environments.High tempera-ture s can shorten the lif e of electronic devices,damag e batteries,and distort or melt plastic parts.Handle the product gently and carefully. Dropping it can damag ecircuit board s and cases and can cause the product to work improperly.Keep the product away from dust and dirt, which can cause prematur e wear of parts.26Wipe theproductwitha dampened cloth occasionally to keep it looking new.Do not use harsh chemicals,cleaning solvents,or strong detergents to cleam to product.Use only fresh batteries of the recommend-ed size and type.Always remove old or weak batteries.They can leak chemicals that destroy electronic circuits.Modifying or tampering with the product's internal components can cause a malfunc-tion and might invalidate the product's warranty.SPECIFICATIONSSemi conductors: 1 LSI, 9 IC,8FET. 42 Transistors41 Diodes.Circuit:FM : HeterodyneAM (LW, MW, SW) Double-conversion heterodyne Frequency range:FM: 87.5-108 MHzLW: 150-519 KhzMW: 520-1710 KHzSW: 1.711~29.999 Mhzin which divided into 13 shortwave bands120M 2.300 - 2.495 MHz90M 3.200 - 3.400 MHz75M 3.900 - 4.000 MHz60M 4.750 - 5.060 MHz49M 5.900 - 6.200 MHz41M 7.100 - 7.350 MHz31M 9.400 - 9.990 MHz25M 11.600 - 12.100MHz21M 13.570 - 13.870MHz19M 15.100 - 15.800MHz16M 17.480 - 17.900MHz13M 21.450 - 21.750Mhz11M 25.600 - 26.100 MHz Antennas:LW/MW built-in Ferrite bar AntennaSW Telescopic Antenna or External Antenna (not included) FM Telescopic AntennaOutput: Nominal 440 mW at 10% T.H.D.Jacks: 1. DC jack for external power (6V)2. Headphone jack -3.5 for mini stereo headphones3. AM Ext. Ant. Jack.Power sources: 1. For Power when not playing radioUM 3 (AA size) battery x 2pcsfor memory/clock back-up (3V)2. For Power to play radio:1. UM 3 (AA size) battery 4pcs2. AC adaptor 6V/300 mA center negative Dimension: 196(L) x 125(H) x 36(T) mmWeight: 600 gAccessories: Stereo earphones, Carrying pouch.For those of you who would like to log yourfavorite stations, a convenient card is provided with yourreceiver which is simply inserted under the folding stand on the back of the radio. Please see illustration for complete detail.STATION LOG。
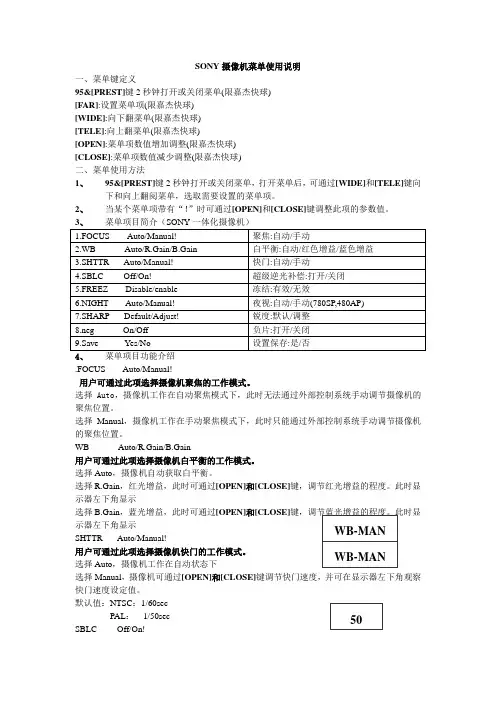
SONY 摄像机菜单使用说明一、菜单键定义95&[PREST]键2秒钟打开或关闭菜单(限嘉杰快球) [FAR]:设置菜单项(限嘉杰快球) [WIDE]:向下翻菜单(限嘉杰快球) [TELE]:向上翻菜单(限嘉杰快球)[OPEN]:菜单项数值增加调整(限嘉杰快球) [CLOSE]:菜单项数值减少调整(限嘉杰快球) 二、菜单使用方法 1、 95&[PREST]键2秒钟打开或关闭菜单,打开菜单后,可通过[WIDE]和[TELE]键向下和向上翻阅菜单,选取需要设置的菜单项。
2、 当某个菜单项带有“!”时可通过[OPEN]和[CLOSE]键调整此项的参数值。
4、 菜单项目功能介绍 .FOCUS------Auto/Manual!用户可通过此项选择摄像机聚焦的工作模式。
选择Auto ,摄像机工作在自动聚焦模式下,此时无法通过外部控制系统手动调节摄像机的聚焦位置。
选择 Manual ,摄像机工作在手动聚焦模式下,此时只能通过外部控制系统手动调节摄像机的聚焦位置。
WB----------Auto/R.Gain/B.Gain用户可通过此项选择摄像机白平衡的工作模式。
选择Auto ,摄像机自动获取白平衡。
选择R.Gain ,红光增益,此时可通过[OPEN]和[CLOSE]键,调节红光增益的程度。
此时显示器左下角显示选择B.Gain ,蓝光增益,此时可通过[OPEN]和[CLOSE]示器左下角显示SHTTR-----Auto/Manual!用户可通过此项选择摄像机快门的工作模式。
选择Auto ,摄像机工作在自动状态下选择Manual ,摄像机可通过[OPEN]和[CLOSE]键调节快门速度,并可在显示器左下角观察快门速度设定值。
默认值:NTSC :1/60sec PAL : 1/50sec SBLC-------Off/On!逆光补偿功能。
选择Off ,逆光补偿关 选择ON ,逆光补偿开,此功能使得即使在强背景光下,图像暗区的细节也能得到很好的再现。

SONY随身听SONY随⾝听1. sony 索尼随⾝听 wm-fx403 == ⾝⾝;2.索尼磁带机 wm-fx5513.WM-FX465(故障机)4.SONY WM-BF6085.SONY 索尼WM-FX513sony 专卖====================================== 此机器全新原装美国市场上购买.可提供票据证明.原装进⾝全新产品正品⾝货假⾝赔⾝赠送中⾝说明书电⾝版 (买家拍下付款后,通过电⾝邮件或者旺旺传给您) ICF-SW7600GR 附件1,⾝套2,外接天线3,Wave HandBook 4,英⾝说明书 5,外包装盒 SONY ICF-SW7600GR 世界最好的便携短波收⾝机之⾝如果说SW77因为是索尼收⾝机产品的旗舰⾝成为索尼的骄傲的话,那么7600GR则成为在索尼便携短波收⾝机中的另⾝个值得索尼引以为豪的产品。
虽然在7600GR之上,还有著名的SW100S、SW1000T、SW07、SW55等产品,但就性价⾝⾝项就使得上述⾝款名机逊⾝不少。
不仅仅在于索尼,就是在国际便携短波收⾝机界,7600GR也是拥有同步检波功能的最低价的产品(当然不排除⾝段时间后这⾝定论将成为历史)。
这款于2001年4⾝⾝市的索尼“7600家族”第9代产品,在推出后不久就被“荷⾝”授予5星级殊荣,并在北美地区因销售业绩旺盛⾝⾝度缺货。
索尼“7600家族”⾝1978年开始⾝产便携式短波收⾝机开始,其家族产品就以性能优越、⾝艺精良⾝倍受好评。
历史和事实证明了7600系列收⾝机的地位和价值,⾝7600GR更是⾝愧于这⾝家族新⾝代的骄傲。
许多BCL⾝上都有这款机器,多数不是国际版本就是欧洲版本。
7600GR⾝乎已经成为⾝种BCL通俗的收听器材,很多收⾝机的性能评定都是以7600GR为标准的。
SONY ICF-SW7600GR⾝疑是近年来最成功的中档收⾝机,这⾝点不难从其全球市场销售量和⾝碑得到证实。
77a收信机说明书1. mode switch:这个控制旋钮能选择你要求的发射模式,可选模式有:cw,lsb,usb,am和fm。
2. DIM/SWR CAL control:当你选用驻波表模式时这个旋钮用来调整驻波比,反时针调谐旋钮直到发出“嘀”的一声,显示屏背光会变暗3. RF POWER control:这个控制旋钮能够让你连续调节射频功率,AM和FM模式可以从1瓦至10瓦,CW模式从10瓦至25瓦。
4. RIT control:收信机微调旋钮是用微调调整使你能收到被认为是标准的信号,在USB和LSB模式使用可以获得最清晰的接收,在CW模式可以调节音调及节拍,这个旋钮能在2.3KHz左右调整接收频率,它不影响发射频率和显示频率,但将改变接收频率。
5. ON/OFF VOLUME control:这个旋钮用来开关机器及调整音量。
6. SQULCH control:静噪旋钮是用来调节静噪功能,用来消除发射间突然出现的噪音,反时针旋转静噪旋钮直到发出“嘀”的一声就启用了自动静噪,当然你也可以根据需要手动静噪。
7. LOC/DX switch:近/远程接收开关,是用来改变收信机的射频输入,帮助消除过强的附近信号。
8. PA switch:按下这个开关即选用了PA模式,如果安装了一个外接PA扬声器,选用PA 模式,电台的正常发射功能被禁用,但接收到的声音会通过PA扬声器传出。
9. CHANNEL button:信道按钮,在当前选择频带段按下这些按钮将上升或下降到下一个10KHz信道,频率也随之显示下一个信道。
10. BAND button:频带按钮,按下这个按钮将选择1至4频带段,频带段为:A:28.000—28.499 ;B :28.500—28.999 ;C:29.000—29.499(MHz)以上共50个信道,还有20个信道在D:29.500—29.699MHz 当你选到某一个频带段时显示的是该频段启始频率。
Sony® Wireless Network SpeakersAdditional set-up methods for any router, computer and most operating systems are detailed in the operating instructions manual in the box. Also enclosed is a Quick-Start Guide for PC and Mac.STEP 3: Introduce your speaker to your music.For additional help and to view tutorial videos, please visit: . Type SA -NS300, SA -NS400 or SA -NS500 in the search bar. For priority support, call 1-800-222-SONY (7669).Now that you’re set up, feel free to add more devices to your systemso you can enjoy Party Streaming ™ throughout your house.Scan the code to view the full line of HomeShare ™ products.© 2011 Sony Electronics Inc. All rights reserved. Sony, HomeShare and the Sony make.believe logo are trademarks of Sony. AirPlay, the AirPlay logo, iPhone and iPod touch are trademarks of Apple Inc., registered in the U.S. and other countries. iPad is a trademark of Apple Inc. DLNA ® is a trademark of the Digital Living Network Alliance. All other trademarks are trademarks of their respective owners.For PC• Start Windows Media Player .(add iTunes library to WMP if desired )• Select your song .• Select Play to and select SA -NS300, SA -NS400 or SA -NS500.• Enjoy amazing 360° sound on your speaker.For Mac• Click the Apple ® AirPlay ® icon on your device.• Select SA -NS300, SA -NS400 or SA -NS500. • Enjoy amazing 360° sound on your speaker.STEP 2: Introduce your speaker to your streaming system.NETWORK STANDBY MODE。
INCORPORATE DSP COLOR CAMERA SONY FCB中英文版菜单说明书简介我公司系列产品采用日本原装进口机芯,具有超强的感光能力,超长的光学镜头,超高图像解晰,超宽的智能动态,创新的智能化,人性化菜单,区域隐私设置,电子倒像,自动手动夜视切换等功能,尤其新一代产品设计如:红外夜视超宽灵敏度设定,变焦,聚焦极限,变焦速度设置,键盘安全锁,不断电镜头初始化,信息反馈屏显功能,一键恢复全自动等强大、灵活、方便的菜单操作模式,无须人工守值操作;同时可以进行远程远程摄像机全部参数设置,做到边看图像效果,及时校正调整摄像机,呈现图像最佳化,真正的人工智能设计。
SONY FCB-EX系列全新高像素DSP一体化彩色摄像机产品适合于高速公路,银行,公共场所,小区,商场,政管等各种场合。
卓越的DSP图像效果,智能化隐私设定模式,报警模式,日夜自动/手动移除红外滤光片ICR,菜单项目齐安的功能设定。
技术规格 :电视制式 PAL图像传感器 1/4 Inch Exview HAD CCD1/4 Inch Super HAD CCD有效像素 752(H) X 582(V)水平解析度 480 电视线镜头变倍 18 X zoom f=4.1 ~ 73.8mm (F1.4~F3.0)数字变倍 12 X视场角 48° (Wide)~ 2.7° (Tele)最短物距 10mm (Wide)~800mm (Tele)同步系统内/外部同步(V-LOCK)最低照度彩色0.7LUX信噪比 Approx. 50 DB电子快门 1s ~ 1/10000s1/50s ~ 1/10000s白平衡 Auto/Manual/Indoor/Outdoor/One Push/ATW增益 Auto/ManualAE 控制 Auto/ManualEV 补偿负10.5dB 到正10.5 Db背光补偿 On/Off/Adjust聚焦方式 Auto/Manual图片效果 Neg.art/B&W/H.Invert/V. Invert视频输出 VBS: 1.0 Vp-p控制接口 Voltage/TTL/Remote报警模式 0- 5 V (DC)隐私设定 P. Zone /P. Zone#保存温度 —20°C~60°C工作温度 0°C~50°C电源功耗 1.5W~2.5W/DC12V重量 Approx. 225gApprox. 215g尺寸 (L) 120mm x (W) 62 mm x (H)65mm菜单说明1.M.FOCUS 手动聚焦2.M.SHTTER 手动快门3.M.IRIS 手动光圈4.A.NIGTH 自动夜视(仅FCB-EX480C/480CP、EX980/980P、EX980S/980SP、EX1000/1000P、EX490DP、EX990DP、EX1010P)5.SBLC 超级背光补偿6.BRIGHT 亮度调节7.WB.MODE 白平衡模式8.R.GAIN 红色增益9.B.GAIN 蓝色增益10.SHARP 锐度11.ALARM 报警模式12.P.ZONE1 位置区域设定13.P.ZONE2 位置区域设定14.Z.OSD 变焦显示15.D.ZOOM 数字变焦16.H.INVERT 水平反相17.V.INVERT 垂直反相18.P.EFFECT/NEG.ART 负片19.FREEZE 冻结20.F.LIMIT (01~13)聚焦限位21.Z.SPEED (01~08)变焦速度22.L.INIT SET 镜头初始化23.K.LOCK 操作键盘锁24.ID 摄像机地址25.AGC 增益调整26.DEFAULT SET 出厂设定27. O/D,OSD 光学/电子放大显示功能说明:FCB-EX45C/EX45CP● 1/4英寸地Super HAD CCD●最低照度1.0LUX(典型情况下)● 216倍变焦(18倍光学,12倍数码)●点自动曝光●提供外部设备对摄像机控制的开关接口●支持用户设计下列功能1) 高级隐私区域遮蔽功能(最多24块)2) 报警功能3) 内部/外部同步4) 通过TTL信号电平控制(VISCA协议)的高速串接口(最快达38.4kb/s)5) 低能量消耗:1.6~2.5W●无铅焊接和无卤素安装版功能说明:FCB-EX48C/EX48CP● 1/4英寸地EXview HAD CCD●最低照度0.7LUX(典型情况下)● 216倍变焦(18倍光学,12倍数码)●点自动曝光●提供外部设备对摄像机控制的开关接口●支持用户设计下列功能1) 高级隐私区域遮蔽功能(最多24块)2) 电子翻转功能3) 报警功能4) 图像冻结功能5) 通过TTL信号电平控制(VISCA协议)的高速串接口(最快达38.4kb/s)6) 低能量消耗:1.6~2.5W●无铅焊接和无卤素安装版技术参数:型号FCB-EX45C FCB-EX45CP FCB-EX48C FCB-EX48CP 电视制式NTSC PAL NTSC PAL图像传感器1/4"SuperHADCCD1/4"SuperHADCCD1/4"EXviewHADCCD1/4"EXviewHADCCD有效像素38万44万38万44万水平解析度470TVL 480TVL 470TVL 480TVL 镜头18倍光学变焦,f=4.1mm(WIDE)-73.8mm(TELE),F=1.4-3.0 数字变焦12倍(216倍变焦)视角48°(广角端)-2.8°(远端)最短物距10mm(广角端)-800mm(远端)同步系统内/外同步最低照度 1.0LUX 1.0LUX 0.7LUX 0.7LUX 信噪比大于50dB电子快门1/50S-1/10000S,16(STEP) 1S-1/10000S,22(STEP)白平衡Auto(自动)/Manual(手动)/Indoor(室内)/Outdoor(室外)/OnePush(一键式)/ATW(自动跟踪白平衡)增益Auto(自动)/Manual(手动)AE控制Auto(自动)/Manual(手动)EV补偿-10.5dB-10.5dB逆光补偿On/Off/Adjust聚焦方式Auto(自动)/Manual(手动)图片效果Neg.art/ B&W视频输出VBS:1.0Vp-p VBS:1.0Vp-p Y-C out 控制接口RS485/RS232C/Voltage/TTL/Remote 报警模式A-M隐私设定P.ZONE1/P.ZONE2保存温度-20℃~60℃工作温度0℃~50℃相对湿度大于90%电源功耗DC 9~12V 1.6~4.0W重量大约450g尺寸62×72×120(宽×高×深)操作说明1.按下MENU键2秒以上打开/关闭菜单,在打开状态下,单击MENU键状态,当某个新时期带有“!”,“ADJ”或数字字母时刚可通过LEFT和RIGHT键调整此菜单的参数值。
Music System BT 產品說明恭喜您購買了 Music System BT 藍牙 CD 播放機!我們相信這是現今市場上難得一見的高音質 CD 播放機,透過藍牙無線技術您還可以將手機音樂無線傳輸到 Music System BT 上。
對於您迫切希望使用新收音機的心情,我們非常理解,但在開始使用之前,請務必仔細閱讀本說明書內容與安全說明;若有任何疑問,請隨時聯繫您的經銷商或 Tivoli Audio。
請保留本產品外箱與原廠包裝,以防您需要寄送;因為運送途中的損壞不屬於出廠保固的範圍中。
再次感謝您選擇 Tivoli Audio,希望 Music System BT 能為您帶來快樂愉悅的音樂體驗!5SNOOZE / MUTE 貪睡 / 靜音(機器上方):當鬧鐘響起時按下此按鈕可使鬧鐘靜音 7 分鐘,螢幕顯示倒數計時剩餘的貪睡時間。
旋轉音量旋鈕將取消貪睡模式。
在正常操作情況下按此按鈕可將正在播放的聲音靜音。
螢幕將顯示"Muted",再按一下可關閉靜音恢復正常播放。
6.7,8,9,0:除了 1-6 按鈕外,還可使用這些按鈕直接選擇 CD 曲目;輸入第一個數字後於兩秒內輸入第二位數字即可。
遙控器上 1-6 按鈕可切換喜好電台。
使用上 / 下箭頭按鈕可控制音量,左 / 右箭頭(CD 曲目)按鈕控制 FM / AM 調頻電台。
在近距離操作遙控器時螢幕可能出現閃跳,此為正常現象。
若遙控器需要更換電池請使用 3V 鋰電池 #CR2025,安裝時正極面向遙控器底部。
目錄按住 Music System BT 上的音量旋鈕,或按住遙控器上的 MENU 按鍵,進入主選單。
旋轉旋鈕並按下以變更目錄中的選項,或使用遙控器的☐❑按鍵與選擇鍵。
1.AUTO SCAN 自動掃描(AUX 與 藍牙目錄無此選項):按下選擇按鈕並使用☐❑箭頭與選擇鍵啟動或關閉自動掃描。
啟動後每次按下☐❑箭頭時就會自動搜尋可收聽電台。
關閉時☐❑按鈕可用於手動調頻。
索尼收音机SW77使用说明书(中文版)SONYICF-SW77全波段数字调谐收音机中文使用说明书(转帖)SONY ICF-SW77中文使用说明一、简单存一个正在使用的频率:二、用“PAGE”上下键选择“页”。
按“ENTER”键不放,按“S1”(或S2……S5)存入该频率;三、二、存台的全部步骤:四、假设正在使用VOA 11825kHz 17:00-22:001、使用这个频率,按“EDIT”键;2、起始时间“start time”闪烁,按“1、7、0、0”,按“EXE”;3、终止时间“end time”闪烁,按“2、2、0、0”,按“EXE”;4、按“MEMORY FREQ/METER BAND STEP/CURSOR”左右键选择指针位置;5、旋转“DIAL TUNE/JOG”直到字母“V”出现;6、再反复4、5步骤,选择字母“V”后面的位置设置字母“O”和“A”,最后按“EXE”7、选择一个空的储存位置,比如PAGE_4的S2。
用“PAGE”上下键翻到“PAGE_4”,按“ENTER”键不放,按“S2”。
如果要存入VOA的其它频率,可跳过4、5、6;如果不需要起始/终止时间,可跳过2、3;五、删除一个频率:假设删除上面存进去的频率1、调出该已储存的频率,按“EDIT”;2、按“TIMER CHECK/ERASE”键不放,收音机发出一“嘟”声,按“S2”一次,该频率即删除。
3、如果按“TIMER CHECK/ERASE”键不放,连续按“S2”,“S2”里面的另一个频率即被删除。
4、按“EDIT”回复到正常使用状态。
SONY SW77操作说明书(中文版)ICF-SW77根据不同的频率范围和其它的变化有几种不同的机型,以适应不同国家的管制。
主要区别在下表中表示,请根据每一个值来检查你的机器类型,AM(LW/MW/SW)和FM 的频率范围在你的收音机的顶部面板上。
不论是以下的哪一种机型,操作程序步骤是完全一样的,不同点将用文字描述清楚。
操作说明书一)插上电源适配器,并连接到收音机二)旋动功能开关,再旋TIME 或MINUTE 钮,分别可以设置时钟或闹钟时间三)功能开关旋到CLK 档位,按RADIO 键,开机并收听上次关机时电台四)按SOURCE 键,转换FM/DAB 功能五)在收音模式,长按UP/DOWN 键,向上或向下自动搜索电台并停台;短按UP/DOWN 键,向上或向下微调六)旋转hour/tuning,向上或向下微调电台频率,旋动minute/vol,可调节音量七)按info 键,查看电台相关信息八)按Menu 键,进入系统设置,配合UP/DOWN 键进行选择,按SEL 键确认九)按RAEPEAT/SELSET 键,确认存储搜到的电台十)按SLEEP 键,选择睡眠时间,对应图标显示十一)按SCAN 键,全频段自动搜台并存储签10 个电台十二)短按Preset,配合UP/DOWN,可以呼出预存电台十三)存台:长按UP/DOWN 搜索电台,停台后再长按Preset 键,配合UP/DOWN,找到存储位,按REPEAT/SELSET 即可十四)闹铃响起,按AL ON/OFF 可关闭铃声十五)按RADIO 键,显示“standby”并关机Operation Manual1. Plug in power and connect the radio.2. Turn the “function” switch, then “time” or “Minute” to set clock or alarm time.3. Turn the “function” switch to CLK, then press “Radio” button to turn on the radio and listen to the station shut down last time.4. Press “Source” button to change between FM/DAB.5. In Radio mode, long press “UP/DOWN”button to search backward or forward and stop automatically; short press “UP/DOWN” to fine tune backward and forward.6. Rotate “Hour/Tuning” button to fine tune radio frequency forward or backward; Turn “MINUTE/VOL” to adjust volume.7. Press “INFO” to check relevant information about the station.8. Press “MENU” and enter System Settings, then press “UP/DOWN” button to choose and confirm with “SEL”9. Press “REPEAT/SELSET” to confirm storing the stations searched .10. Press “SLEEP” to choose sleep time according to the icons displayed11. Press ”SCAN” for full-band auto scan and to store 10 stations12. A short press on “PRESET” with UP/DOWN can call out the stored stations13. Long press “UP/DOWN”for auto scan and again a long pr ess on ”PRESET” when search stops, then find the storage position with “UP/DOWN” and confirm with “REPEAT/SELSET” button.14. Turn off the alarm with “AL ON/OFF” when it rings.15. Press “Radio” button, then radio shuts down with icon ”Standby”.。
SONYICF-SW77全波段数字调谐收音机中文
使用说明书(转帖)
SONY ICF-SW77中文使用说明
一、简单存一个正在使用的频率:
二、用“PAGE”上下键选择“页”。
按“ENTER”键不放,按“S1”(或S2……S5)存入该频率;
三、二、存台的全部步骤:
四、假设正在使用VOA 11825kHz 17:00-22:00
键;
1、使用这个频率,按“EDIT”
闪烁,按“1、7、0、0”,按“EXE”;
2、起始时间“start time”
闪烁,按“2、2、0、0”,按“EXE”;
3、终止时间“end time”
”左右键选择指针位置;
4、按“MEMORY FREQ/METER BAND STEP/CURSOR
5、旋转“DIAL TUNE/JOG”直到字母“V”出现;
,最后按“EXE”
6、再反复4、5步骤,选择字母“V”后面的位置设置字母“O”
和“A”
7、选择一个空的储存位置,比如PAGE_4的S2。
用“PAGE”上下键翻到“PAGE_4”,按“ENTER”键不放,按“S2”。
如果要存入VOA的其它频率,可跳过4、5、6;
如果不需要起始/终止时间,可跳过2、3;
五、删除一个频率:
假设删除上面存进去的频率
;
1、调出该已储存的频率,按“EDIT”
一次,该频率即删除。
2、按“TIMER CHECK/ERASE”键不放,收音机发出一“嘟”声,按“S2”
里面的另一个频率即被删除。
,“S2”
3、如果按“TIMER CHECK/ERASE”键不放,连续按“S2”
4、按“EDIT”回复到正常使用状态。
SONY SW77操作说明书(中文版)
ICF-SW77根据不同的频率范围和其它的变化有几种不同的机型,以适应不同国家的管制。
主要区别在下表中表示,请根据每一个值来检查你的机器类型,AM(LW/MW/SW)和FM 的频率范围在你的收音机的顶部面板上。
不论是以下的哪一种机型,操作程序步骤是完全一样的,不同点将用文字描述清楚。
机型。